LOG IN
REGISTER
Forums
Technical Discussion
Stock XJ Cherokee Tech. All XJ Non-modified/stock questions go here
Modified XJ Cherokee Tech
MJ Comanche Tech. Stock & Modified.
KL Cherokee Tech
Modified Grand Cherokee Tech. All ZJ,WJ & WK aftermarket tech goes here
Stock Grand Cherokee Tech. All ZJ/WJ/WK Non-modified/stock questions go here!
Fabrication & builders section.
Jeep Builds
Aftermarket electrical systems
Jeep JK Model Discussion
Other Vehicles. Other Jeep models & cars and trucks of other makes
Technical Write-Up/How To Section
General
Introductions
Cherokee Chat
Cherokee of the Month
Wheeling Neighborhoods
Pacific Northwest
Pacific Southwest
Northern Rockies
Four Corners
Midwest
South Central
Great Lakes
Southeast
North Atlantic
Mid Atlantic
International
Wheeling Discussion
Trail Reports
Land Use Forum
Buy, Sell, Trade
Non-Cherokee Parts
Vendor Showcase
Vehicles
Axles/Tires/Wheels
Engines/Tranny/T-Case
Suspension/Steering
Accessories
Part Outs
Miscellaneous
Wanted
CF Announcements & Suggestions
Announcements
CF Suggestions & Questions
Test Section
Marketplace
Vendor Directory
Become a Vendor
Member Marketplace
Vendor Marketplace
New Posts
Tools
Car Payment Calculator
Tire Rim Calculator
Vin Decoder
Recalls
Technical Service Bulletins (TSBs)
Members List
Live Feed
How-Tos
Gallery
View Dark Mode
Please register or login to enable Dark Mode.
Log In
Register
Threads
Google
Threads
Posts
Advanced
Dark Mode
Please register or login to enable Dark Mode.
Log In
Forgot your Password?
By logging into your account, you agree to our
Terms of Use
and
Privacy Policy
, and to the use of cookies as described therein.
or
Login with Google
Login with Facebook
Recent
Commented
Albums
My Pictures
Travis Mudrich's Photos
View Profile
Sort:
Commented
Most Recent
Most Comments
Albums
Photos
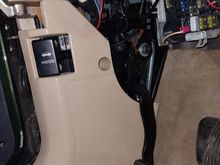
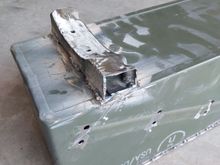
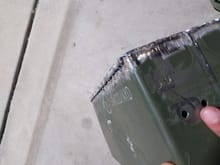
I made a patch panel from scrap plastic and plastic welded it into place.
0
2024/06/29 16:24:21
Travis Mud
0
2024/06/29 16:10:59
Travis Mud
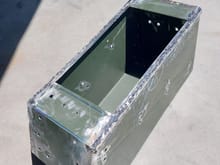
I wrapped it in sound deadening foam since the metal was flimsly enough to echo if you tapped on it. Using an ammo can is still plenty strong especially considering that i reenforced the opening lip, but it was still a little noisy.
0
2024/06/29 16:10:52
Travis Mud
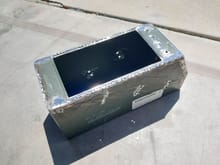
I didnt take any pictures, but I filled in the holes where i drilled out the spot welds. From there, I sanded tho whole thing and sprayed it with self etching rust prevention paint. After that, I sprayed the inside with truckbed liner.
0
2024/06/29 16:10:45
Travis Mud
0
2024/06/17 19:14:31
Travis Mud
0
2024/06/16 18:02:14
Travis Mud
0
2024/06/16 18:02:06
Travis Mud
0
2024/06/16 18:01:16
Travis Mud
0
2024/06/16 17:56:51
Travis Mud
She's fully bolted in!
0
2024/06/16 13:16:10
Travis Mud
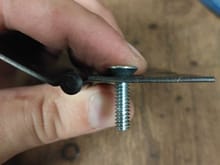
Front machine screws.
0
2024/06/16 13:16:04
Travis Mud
Rear bolts installed
0
2024/06/16 13:15:57
Travis Mud
Front rivnuts.
0
2024/06/16 13:15:50
Travis Mud
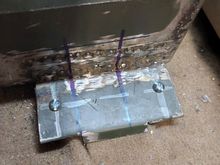
Rear rivnuts. Previous set pulled through the floorboard so I had to do another two in a piece of sheet metal and weld it in from the bottom.
0
2024/06/16 13:15:41
Travis Mud
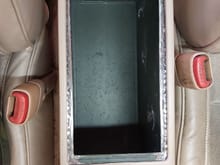
It doesn't seat against the ammo can in the middle only on the raised sides. I thought about adding a spacer or fully welding it together but once I got here, I think the idea was overkill for the amount of work. This should hold plenty.
0
2024/06/09 09:45:40
Travis Mud
Here, I capped in the sides.
0
2024/06/09 09:45:34
Travis Mud
Lined up the mounting holes to the trans tunnel, laid the ammo can ontop aligning with the new front bracket, and marked where the rear bracket is supposed to sit. Got it tacked together to test fitted it, and burned it permanently.
0
2024/06/09 09:45:28
Travis Mud
This is what the top looks like.
0
2024/06/09 09:45:21
Travis Mud
Ground the one side to match the curvature of the trans tunnel.
0
2024/06/09 09:45:15
Travis Mud
Tack welded it together.
0
2024/06/09 09:45:09
Travis Mud
Cut the lid to match.
0
2024/06/09 09:45:02
Travis Mud
I used the side edge of a lid to an ammo can. The was already bent and one side was the right length.
0
2024/06/09 09:44:54
Travis Mud
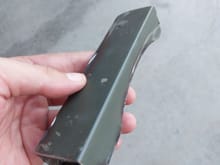
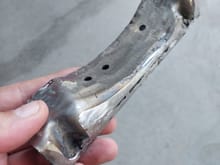
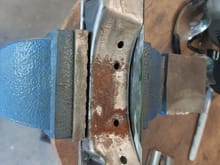
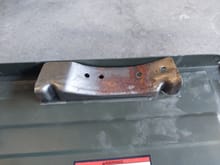
Sorry I didn't take a picture before I cut the OEM rear bracket, but if youre following them I am sure you know what it looks like. No real math here, i eyeballed it and cut it level with the middle.
0
2024/06/09 09:44:46
Travis Mud
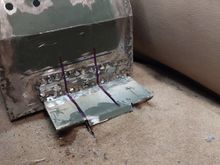
Here you can see how it all fits together. The sharpie lines is where I plan on adding gussets since it's relatively thin sheet metal.
0
2024/06/02 10:12:26
Travis Mud
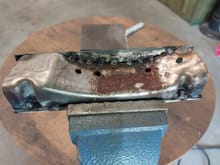
The welds aint pretty but it's attached!
0
2024/06/02 10:12:19
Travis Mud
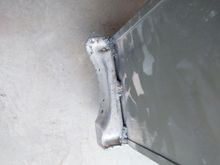
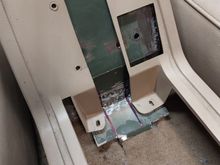
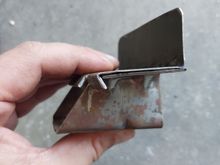
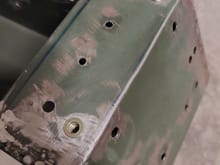
This is how the two mate together. The bent tabs in front locate the ammo can to the Jeep to prevent misalignment or wobbling.
0
2024/06/02 10:12:12
Travis Mud
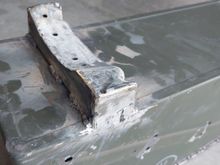
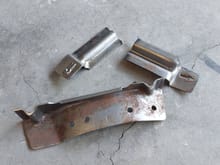
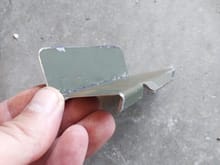
This is the corrosponding bracket I made for the front of the ammo can using scraps from ammo can Mk1 🤣
0
2024/06/02 10:12:05
Travis Mud
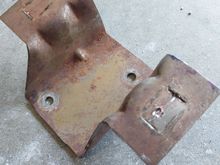
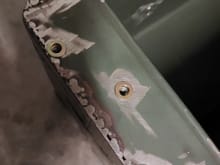
This is the OEM mounting bracket. It had slits cut into it and a sheet metal screw went inside. I bent the tabs back and tac welded the backside. Next time i work on this, i am going to add rivnuts here instead.
0
2024/06/02 10:11:59
Travis Mud
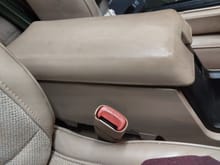
Now the lid closes.
0
2024/06/01 20:53:38
Travis Mud
It's not perfect but it works. I may even do the lid side later.
0
2024/06/01 20:53:32
Travis Mud
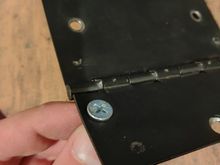
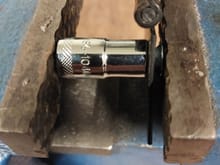
...And countersunk it using the bolt as a die.
0
2024/06/01 20:53:25
Travis Mud
So I threw the hinge into the vise with a socket on the backside...
0
2024/06/01 20:53:18
Travis Mud
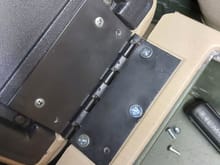
The lid wouldn't seat all the way down because i was using regular machine screws. So I bought some countersunk ones and they still protruded.
0
2024/06/01 20:53:10
Travis Mud
Rear rivnuts for the armrest hinge
0
2024/06/01 20:53:02
Travis Mud
Drilled and popped some rivnuts into the front. This is where the black plastic insert will bolt to
0
2024/06/01 20:52:54
Travis Mud
0
2024/04/24 19:12:36
Travis Mud
And front lip for the black insert to attach to.
0
2024/04/24 19:12:30
Travis Mud
Rear lip attached for the console lid to mount to
0
2024/04/24 19:12:24
Travis Mud
I added an extra piece of material on the outside to help fill in the internal space of the plastic. This would be advoided if I had made the box from scratch and formed it entirely to rhe center console but instead I am halfways forming the center console around the box.
0
2024/04/24 19:12:17
Travis Mud
0
2024/04/24 19:12:10
Travis Mud
First
Page
2 of 21
Last
Go To
Page
1
2
3
4
5
6
7
...
21
2 of 21
Go To
GO
Go to page
of 21
pages
1
2
3
4
5
6
7
...
21