Jeep Cherokee Forum
  • LOG IN
  • REGISTER
  • Forums
    • Technical Discussion
      • Stock XJ Cherokee Tech. All XJ Non-modified/stock questions go here
      • Modified XJ Cherokee Tech
      • MJ Comanche Tech. Stock & Modified.
      • KL Cherokee Tech
      • Modified Grand Cherokee Tech. All ZJ,WJ & WK aftermarket tech goes here
      • Stock Grand Cherokee Tech. All ZJ/WJ/WK Non-modified/stock questions go here!
      • Fabrication & builders section.
      • Jeep Builds
      • Aftermarket electrical systems
      • Jeep JK Model Discussion
      • Other Vehicles. Other Jeep models & cars and trucks of other makes
      • Technical Write-Up/How To Section
    • General
      • Introductions
      • Cherokee Chat
      • Cherokee of the Month
    • Wheeling Neighborhoods
      • Pacific Northwest
      • Pacific Southwest
      • Northern Rockies
      • Four Corners
      • Midwest
      • South Central
      • Great Lakes
      • Southeast
      • North Atlantic
      • Mid Atlantic
      • International
    • Wheeling Discussion
      • Trail Reports
      • Land Use Forum
    • Buy, Sell, Trade
      • Non-Cherokee Parts
      • Vendor Showcase
      • Vehicles
      • Axles/Tires/Wheels
      • Engines/Tranny/T-Case
      • Suspension/Steering
      • Accessories
      • Part Outs
      • Miscellaneous
      • Wanted
    • CF Announcements & Suggestions
      • Announcements
      • CF Suggestions & Questions
      • Test Section
  • Marketplace
    • Vendor Directory
    • Become a Vendor
    • Member Marketplace
    • Vendor Marketplace
  • New Posts
  • Tools
    • Car Payment Calculator
    • Tire Rim Calculator
    • Vin Decoder
    • Recalls
    • Technical Service Bulletins (TSBs)
    • Members List
    • Live Feed
  • How-Tos
  • Gallery
  • View Dark Mode
    • Please register or login to enable Dark Mode.
  • Log In
  • Register
Jeep Cherokee Forum
    • Threads
      • Advanced
Dark Mode

Please register or login to enable Dark Mode.

Log In

Forgot your Password?

By logging into your account, you agree to our Terms of Use and Privacy Policy, and to the use of cookies as described therein.
or
 
  • Recent
  • Commented
  • Albums
  • My Pictures

Travis Mudrich's Photos

View Profile
Sort:
Commented
  • Most Recent
  • Most Comments
  • Albums
  • Photos
The two wire harness mounts caused some interference
0 2022/08/25 11:11:41 Travis Mud
0 2022/08/24 11:06:23 Travis Mud
Since I am doing the delete, I used the old detent to plug this hole. As minor as it may be, this is two fold: i dont have to buy a new bolt, and i have a spare detent.
0 2022/08/24 11:06:15 Travis Mud
This is the stock WJ shift sensor. Because I am using the factort XJ one, I am installing it into the AMG housing. This is another reason why I swapped out the shift sector for the J case one. I mean they were exactly the same apart from the back end, but its just unnecessary weight. Easier transfer case shifts and better gas milages if you wanna call it that 😆
0 2022/08/24 11:06:07 Travis Mud
0 2022/08/24 11:03:20 Travis Mud
I also snapped a couple photos of the inside cleareances before I siliconed it together.
0 2022/08/24 11:03:12 Travis Mud
The drain plugs are annodosed aluminum with a built in magnet. The aluminum plug is nice because its easier to replace the plug than a transfer case housing.
0 2022/08/24 11:03:04 Travis Mud
A closer view
A closer view
0 2022/08/24 11:02:57 Travis Mud
I got the drail plugs and sight glass installed.
0 2022/08/24 11:02:46 Travis Mud
0 2022/08/22 14:32:49 Travis Mud
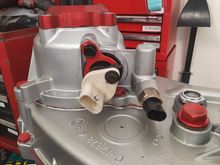
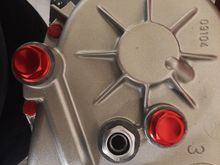
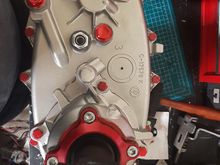
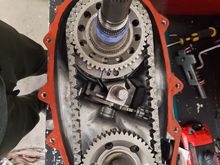
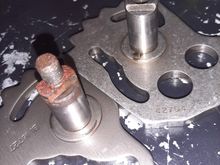
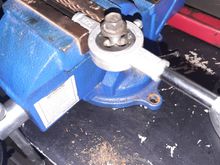
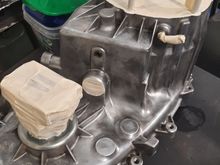
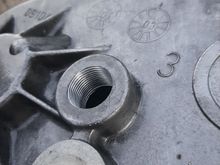
Permatex instructions say to wait 90 minutes before applying torque. When I smeared it on all yhe surfaces with my finger, I made sure to go kinda light around the bolt holes. Like I said, silicone is just the keep the fluid in. So after 90 minutes I backed all the bolts out, cleaned whaterlver silicone residue off, applied Harbor Freight brand medium strength thread locker, and torqued to spec.
0 2022/08/22 14:32:41 Travis Mud
Speedo collar put back on the mainshaft that Tom Woods graciously cut for me 😁😁
0 2022/08/22 14:30:39 Travis Mud
This is the silicone I chose to go with in case if anyone is wondering. I guess this is a chance for the internet to argue 😅
0 2022/08/22 14:30:30 Travis Mud
After cleaning with brake cleaner, I put a thin layer of silicone on the mating surface and spread it with my finger. After separating two transfer cases, I have a fear of breaking cast aluminum thats held together with an ungodly amount of glue. This stuff doesnt hold it all together, thats what the bolts are for, silicone is to keep the fluid inside 🤣
0 2022/08/22 14:26:21 Travis Mud
I got the mainshaft and chain thrown back in and snap ringed back in place. (I goofed up here and put the blue speedo gear on before the oil pump)
0 2022/08/22 14:25:46 Travis Mud
0 2022/08/22 14:21:57 Travis Mud
I got the mainshaft and chain thrown back in and snap ringed back in place. (I goofed up here and put the blue speedo gear on before the oil pump)
0 2022/08/22 14:21:49 Travis Mud
0 2022/08/22 14:20:44 Travis Mud
0 2022/08/22 14:14:47 Travis Mud
0 2022/08/22 14:14:39 Travis Mud
This is a better representaion of the how the J case shift assembly interacts with the AMG housing.
0 2022/08/21 20:11:53 Travis Mud
I've got nearly the whole front half of the case together.
0 2022/08/21 20:11:46 Travis Mud
The left shift fork assembly is for HD case. The right one for the J case has the groove cut out of it is for the XJ indicator switch. I will be using the 242J shift sector and shift for assembly to communicate with my XJ dash lights, which is part of the reason for the 242AMG rear bearing housing. (Because I am using the factory XJ indicator switch I will have to do a WJ switch delete, more on that later)
0 2022/08/21 20:11:40 Travis Mud
They are exactly the same when it comes to the detent notches and grooves for the shift forkes. The only difference is the HD one had two large holes and has more materiel on the one side. This extra material is used for the WJ shift indicator.
0 2022/08/21 20:11:33 Travis Mud
Here are the shift sectors. The one that takes a bolt to attach the shifting linkage is the HD, and a nut is the J case.
0 2022/08/21 20:11:26 Travis Mud
This is the 242 rebuild torque spec in the 1996 XJ FSM. I'm rebuilding a 242 from a WJ from a different year, but im sure the torque specs are the same.
0 2022/08/21 19:59:20 Travis Mud
I also died all of the bolts for the same reason.
0 2022/08/21 19:59:12 Travis Mud
I tapped all holes on the transfer case to get rid of any residual silicone.
0 2022/08/21 19:59:04 Travis Mud
Facebook marketplace for $25.00
0 2022/08/11 17:24:35 Travis Mud
Jeepcabales.com for $80.00
0 2022/08/11 17:24:31 Travis Mud
0 2022/08/11 10:28:49 Travis Mud
0 2022/08/11 07:25:58 Travis Mud
I'd say its coming out quite nice.
0 2022/08/09 14:51:09 Travis Mud
I started prepping the front half of the case to be painted.
0 2022/08/09 14:47:51 Travis Mud
I started the painting process on the rear half of the case.
0 2022/08/09 14:47:43 Travis Mud
Thats where i filled it in. This eventually got sanded down.
0 2022/08/09 14:44:41 Travis Mud
The HMMWV housing got some self etching primer
0 2022/08/09 14:44:33 Travis Mud
Perfect. One step closer to the final result.
0 2022/08/08 17:47:46 Travis Mud
BOOM!
BOOM!
0 2022/08/08 17:47:39 Travis Mud
Tapping is pretty straight forward. I am cutting into aluminum so I'm not worried. I know a lot of people will disagree with me, but my tap and die set is probably one of my most favorite tools!
0 2022/08/08 17:47:34 Travis Mud
First
Page
11 of 21
Last
Go To
Page
  • 1
  • ...
  • 9
  • 10
  • 11
  • 12
  • 13
  • ...
  • 21
11 of 21
Go To GO
Go to page of 21 pages
  • 1
  • ...
  • 9
  • 10
  • 11
  • 12
  • 13
  • ...
  • 21

Top
Jeep Cherokee Forum
  • Contact Us
  • FAQ
  • Archive
  • Advertising
  • Cookie Policy
  • Privacy Statement
  • Terms of Service
  • Your Privacy Choices
  • Manage Preferences

© 2026 MH Sub I, LLC dba Internet Brands


When you click on links to various merchants on this site and make a purchase, this can result in this site earning a commission. Affiliate programs and affiliations include, but are not limited to, the eBay Partner Network.