
Black Phoenix


Member
Joined: Jun 2012
Posts: 224
Likes: 0
From: Missouri
Year: 1996
Model: Cherokee
Engine: 4.0L I6 MPI "Power Tech HO" (High Output)
Just read through entire build for first time and makes me jealous on the amount of skill you have and the access to the tools you do! Can't wait to see what's next :-)
Thread Starter
CF Veteran

Joined: Jan 2013
Posts: 19,219
Likes: 45
From: west chester, pa
Year: 1999
Engine: 4.0
thanks!
thanks!
Thread Starter
CF Veteran
Joined: Jan 2013
Posts: 19,219
Likes: 45
From: west chester, pa
Year: 1999
Engine: 4.0
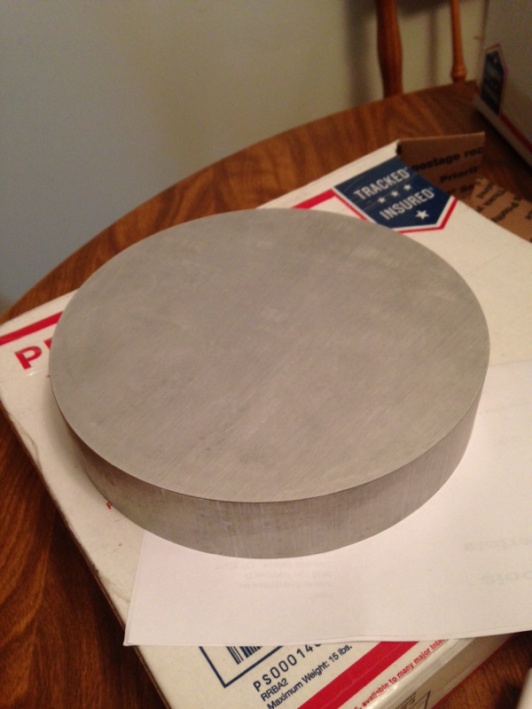
So during the week, the material for the clocking ring I need for the doubler arrived.

Then I used the bandsaw at work to saw the thickness in half so I can make two clocking rings.

The speedometer gear I ordered from Rockridge 4wd arrived. It's 39 tooth count.

And this morning I grabbed the opportunity to go ahead and relocate the rear shock upper mounts to inside the cargo area.
Took the shocks off, poked a hole with 1/4 drill and then started drilling from the inside with a hole saw.

This probably is for temporary until I eventually build a cage with integrated shock hoops.
I forgot to take a picture of the finished crossbar, but I will take one when I have the time.
The travel is much improved. The shocks has total of 10" travel, I decided on 3.5" up travel with 6.5" down travel.
I decided to go to my flexing field and do some more test runs.


The rear shocks doesn't bottom out anymore, which is good. I still have about 3 inch of down travel left with the rear tire fully stuffed, so I guess I gotta make some rear bumpstops to help that out. It look like about 1" left on the up travel with tire stuffed.
The front shocks had roughly 2.5 inch of up travel left (it's hard to tell with the boot on it). And there's about 1.5" left between the bumpstops on front axle, so I think I'm good for front. Not sure on how much downtravel I have left for the front because the coils got little loose (I could shake it). So I wasn't sure if I should leave it be or add limiting straps. Would I even need any?
The little portion of front bumper that went rear wards need to be trimmed to match the front fenders because the tires was rubbing on it. It probably is the reason why I wasn't able to flex some more up in the fender well.


Thread Starter
CF Veteran
Joined: Jan 2013
Posts: 19,219
Likes: 45
From: west chester, pa
Year: 1999
Engine: 4.0
Originally Posted by unidentifiedbomb
Looks awesome. How has bumpstopping the front been?

No, I don't lick fish.


Joined: Mar 2011
Posts: 11,169
Likes: 26
From: Northern Kentucky
Year: 1999
Model: Cherokee (XJ)
Engine: 4.0
this would be more like it...

Thread Starter
CF Veteran
Joined: Jan 2013
Posts: 19,219
Likes: 45
From: west chester, pa
Year: 1999
Engine: 4.0
Thread Starter
CF Veteran
Joined: Jan 2013
Posts: 19,219
Likes: 45
From: west chester, pa
Year: 1999
Engine: 4.0
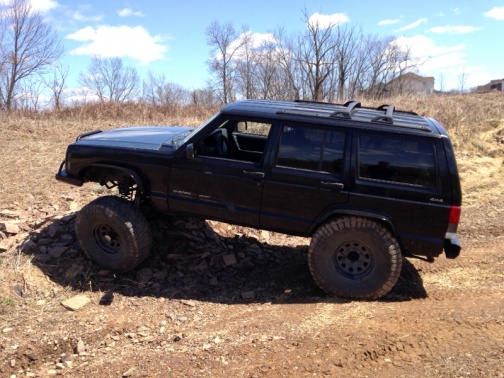
So life and the "other jeep" kept me busy but I was able to do some little things here and there on the crawler lately. I had to get it ready for a Rausch Creek Trip this Saturday for a day of wheeling, it would be the first time I get to wheel it since the axle swap. Can't wait to see how it ll perform. Unfortunately I didn't get to finish my onboard air system so my front locker is pretty much useless lol.
Anyway I ll try to post up all pictures of the stuff I have done to the jeep so far but they won't be in chronical offer through
Anyway I ll try to post up all pictures of the stuff I have done to the jeep so far but they won't be in chronical offer through
Thread Starter
CF Veteran
Joined: Jan 2013
Posts: 19,219
Likes: 45
From: west chester, pa
Year: 1999
Engine: 4.0
I had to shorten my front driveshaft because the front dana 44 pinion is longer than the dana 30... Only needed to cut appx one inch off.
Took the double Cardan off, used the cutting disc and ground down the weld at the end, and popped out the stub, measured where I wanted to cut and cut the tube, welded the stub back on the shaft and painted it yellow.
Crap it look like I never took a picture of it... Oh well I ll try my best later
Next, I had the Down n Dirty quarter armor, I decided it would be an embarrassment if I installed it on the jeep because the welds looked like it was done by a 10 year old and the panels were to small so I traded it for a ford 8.8, then promptly sold it for 200 bucks, then I put in an order to Ares Fab for a set of their armor. I think it's a good design
Attachment 273811
Painted them black

Sprayed some rubber undercoating on the back side of the armor

Installed them on the jeep. I like it


Thread Starter
CF Veteran
Joined: Jan 2013
Posts: 19,219
Likes: 45
From: west chester, pa
Year: 1999
Engine: 4.0
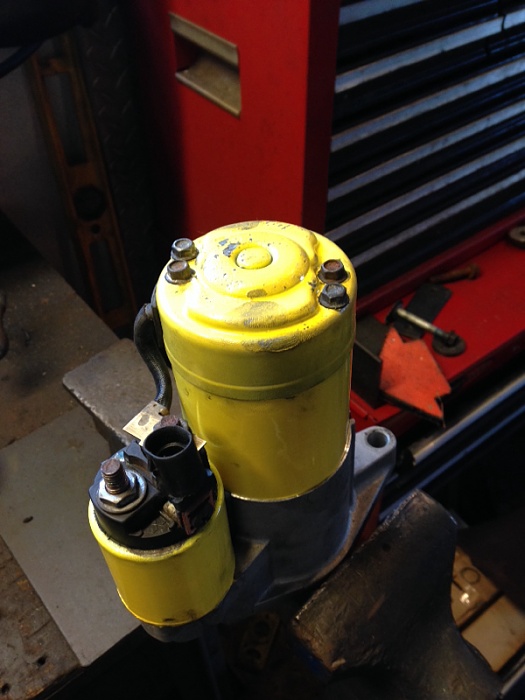
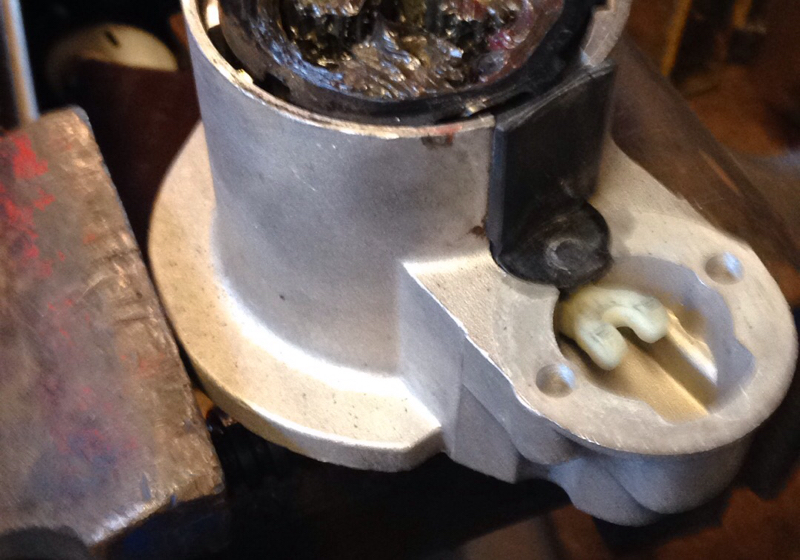
One day a month ago, my fiancee's WJ's starter crapped out, and I didn't want her to spend money and get new one, I simply donated the one from my crawler so she can go to work....
I had a spare starter that had a bad solenoid on the shelf....
I took apart her starter and found that the brushes were completely gone on one side and the copper on the armature were melted.
The solenoid was good so I decided to combine both into a good starter.


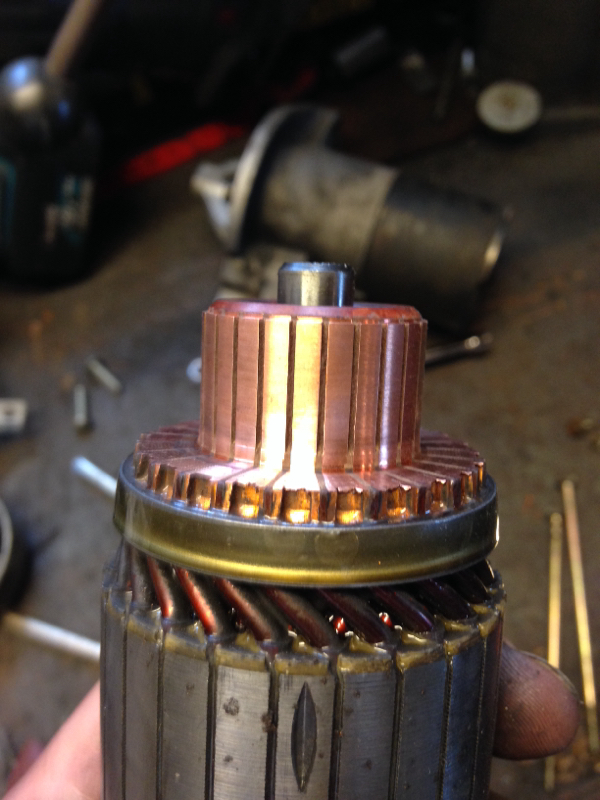
While I had the good armature out, I wanted to polish the copper on it

Cleaned the good starter body and painted it

Greased the planetaries on the motor and look at how good the brushes are on the good starter.


I had a spare starter that had a bad solenoid on the shelf....
I took apart her starter and found that the brushes were completely gone on one side and the copper on the armature were melted.
The solenoid was good so I decided to combine both into a good starter.


While I had the good armature out, I wanted to polish the copper on it
Cleaned the good starter body and painted it

Greased the planetaries on the motor and look at how good the brushes are on the good starter.


Thread Starter
CF Veteran
Joined: Jan 2013
Posts: 19,219
Likes: 45
From: west chester, pa
Year: 1999
Engine: 4.0
As some of u know I was building a doubler, I wanted to upgrade the planetary gear to a 6 pinion instead of 3 pinion... I was at the junkyard walking around, I knew I needed to find a 241 t case from a Chevy or a dodge. I don't even want to pull a t case out of trucks so I was looking for one that somebody left on the ground, I came upon a Chevy 241 that was in the bed of the truck.ci didn't bring tools with me but I was too impatient to go back and get tools, and I didn't want to buy the whole thing when I just needed the planetaries and the shaft....
I decided to beat on it with a brake rotor lol and cracked the case open

Do t worry I beat on it so,d more after that picture and managed to yank the shaft out, then pulled the planetaries.

I decided to beat on it with a brake rotor lol and cracked the case open

Do t worry I beat on it so,d more after that picture and managed to yank the shaft out, then pulled the planetaries.
