When you click on links to various merchants on this site and make a purchase, this can result in this site earning a commission. Affiliate programs and affiliations include, but are not limited to, the eBay Partner Network.
So the Jeep is done inside. Not that you can tell. I added a little fake wood grain trim that I picked up awhile back. Thanks to USN_JeepXJ posting the part number I put those little rubber bumpers in the console lid. Definitely helps with the movement. Dorman 45393 or at Napa BK665-1478. I could not get them in though without trimming the part that is countersunk. I finally got around to soaking the emergency brake adjustment in PB Blaster and covering with Fluid Film since the power washing underneath. I keep it like that all the time.
I stayed up pretty late last night and replaced both busted motor mounts, rad hoses, serpentine belt, did a full tune up, and changed the oil. Noticed when I got it that the cooling system needed flushed from the previous owner putting water in, which I thought was slightly suspect, but oh well, filled it up with water to flush it out today, and surprise!! I have a blown head gasket(or a cracked head) it was blowing steam out of the overflow bottle about 3 minutes after getting it going. So I�ve been doing a little research on getting the right gasket, and doing it right. Gonna be fun, and much easier than my Subaru 😂😂.
I stayed up pretty late last night and replaced both busted motor mounts, rad hoses, serpentine belt, did a full tune up, and changed the oil. Noticed when I got it that the cooling system needed flushed from the previous owner putting water in, which I thought was slightly suspect, but oh well, filled it up with water to flush it out today, and surprise!! I have a blown head gasket(or a cracked head) it was blowing steam out of the overflow bottle about 3 minutes after getting it going. So I�ve been doing a little research on getting the right gasket, and doing it right. Gonna be fun, and much easier than my Subaru 😂😂.
You'd know if you had a cracked head pretty easily... check the oil. If you've got coolant mixed in it... then I'd say yep.
Found out this morning after compression test...either blown head gasket or cracked head...... . if head , Im thinking about a referb ...
I kind of knew going in on this that it had motor.problems....After I got it running, I got my hopes up.... But--. 140,90,120,90,70,130 ...I cant believe it runs as well as it does..
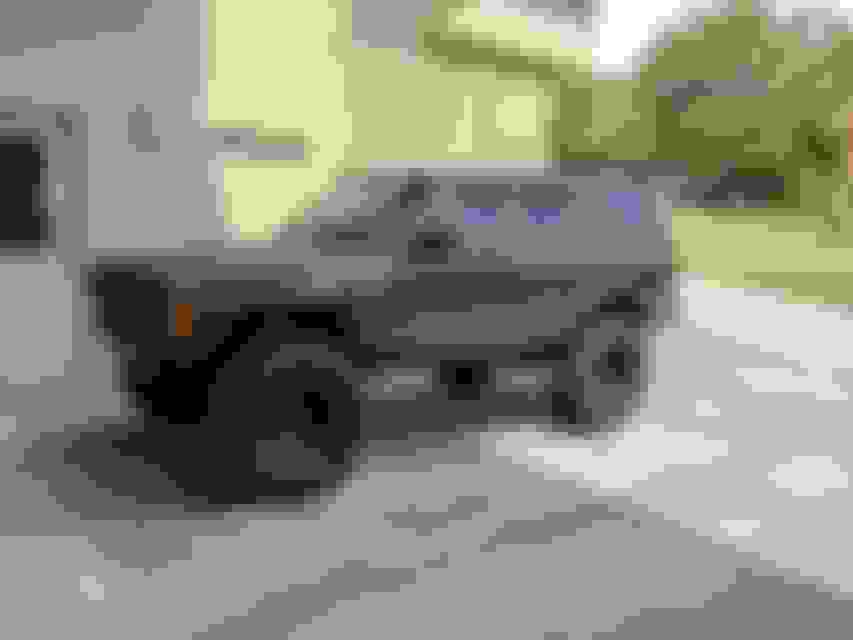
So today I want to detail the outside. Now realize I don't have a clue. Usually do it by hand. Mostly Turtle Wax stuff. Rubbing compound on the rougher spots here and there. Like behind the door handles where you finger nails scratch it up. Polishing compound every where else. Mother's Back To Black for the trim and whatnot. Finish with some wax. RainX the windows. It is a Jeep not some classic car. The Mother's Clay bar kit was on sale so I decided to give it a try. Probably will only be a one time thing even if I do like it. Remember Jeep not classic car. Well I decided to invest in some power tools. Picked up the HF Dual action polisher to use with the Meguire's Ultimate Compound that a fellow forum member recommended. Grabbed all the pads and whatnot just to have. Thinking I will use the polishing one with the Meguire's. I also picked up a 3" dual action polisher to use with the Back To Black. I am tired of the stuff running down the side of the Jeep. My hands are not what they used to be so I am hoping a little bit more buffing might tone that down. If that doesn't work out, machine does look like a piece of crap, I bought the stuff to attach to my drill to hopefully achieve what I am trying to do. Still going to hit the more problem areas with the rubbing compound by hand. Then apply the wax with the HF tool.
I tried to research how to do this properly. Internet is full of stuff but everybody has their own way. I gleaned as much as I could, set up a plan of attack, and it is what it is. LOL.
Yes, Ralph, the amount of info on detailing can be overwhelming, but, I'll share a couple tips:
Use the least aggressive pad & product combo it takes to achieve the results you want. This prevents you from doing an area twice. For example, if you are trying to remove fine swirls, don't use rubbing compound and/or a coarse pad or wool.
Apply the product to small sections (2'x2'), work it through 3-4 passes with overlap and remove. Dried product is tough to remove so, small sections prevent creating more work.
For compounds, use higher speeds (5-6). For waxes, use
lower speeds (1-2).
Clay the windows. Yes, the windows. It is amazing how much foreign material/environmental fallout gets embedded in auto glass and claying is a great way to remove it.
Good luck.
p.s. I know you're not looking to achieve show-quality results but I thought I'd share a black GMC truck I did for a friend several years ago and the results I achieved. Black is alot of work and I don't do anyone's vehicles but my own but is beautiful when done:
The specks are just dust.
Last edited by 4WD4EVER; Apr 22, 2018 at 09:31 AM.
Reason: Added info
So today I want to detail the outside. Now realize I don't have a clue. Usually do it by hand. Mostly Turtle Wax stuff. Rubbing compound on the rougher spots here and there. Like behind the door handles where you finger nails scratch it up. Polishing compound every where else. Mother's Back To Black for the trim and whatnot. Finish with some wax. RainX the windows. It is a Jeep not some classic car. The Mother's Clay bar kit was on sale so I decided to give it a try. Probably will only be a one time thing even if I do like it. Remember Jeep not classic car. Well I decided to invest in some power tools. Picked up the HF Dual action polisher to use with the Meguire's Ultimate Compound that a fellow forum member recommended. Grabbed all the pads and whatnot just to have. Thinking I will use the polishing one with the Meguire's. I also picked up a 3" dual action polisher to use with the Back To Black. I am tired of the stuff running down the side of the Jeep. My hands are not what they used to be so I am hoping a little bit more buffing might tone that down. If that doesn't work out, machine does look like a piece of crap, I bought the stuff to attach to my drill to hopefully achieve what I am trying to do. Still going to hit the more problem areas with the rubbing compound by hand. Then apply the wax with the HF tool.
I tried to research how to do this properly. Internet is full of stuff but everybody has their own way. I gleaned as much as I could, set up a plan of attack, and it is what it is. LOL.
I've been detailing professionally for 12+ years, it's definitely not easy - lots of elbow grease.
What are you having issues with as far as the D/A (dual-action) polisher? The Harbor Freight one I have heard is fairly good actually - just take it apart and re-pack it with good quality grease at some point. Youtube has tons of videos how to do that
In regards to proper polishing technique, it looks like you have 3 pads - orange, blue and black (in order of most to least aggressive). The black pad should have zero cut and would be for wax/sealant at the end.
On most cars "start with the least aggressive pad" but on an XJ - just go for an orange pad out of the gate.
Priming the pad is very important, or else you will have spots with more/less compound on the pad and will polish unevenly. Prime the pad by putting 4-5 pea sized dots of product on, and rubbing it in with your finger. I will then mist the pad with some quick detail spray to help keep things lubed up. Detail spray can be spritzed on the pad to increase the working time of the compound/polish.
Work the polish in at speed 1-2 initially, then increase to speed 3-5, then continue to polish until it starts to become clear. Repeat with the blue pad and your finishing polish, then wipe down the panel with Isopropyl Alcohol and throw some wax on there.
Watch some youtube videos, it will give you a visual overview of the technique. It's not difficult, just labor intensive.
Because your XJ has probably never been polished - the pads are going to "load" up with paint very quickly. You can clean the pads with degreaser, a soft brush, and water but they can't be that wet when you are polishing or it will add too much lubrication to the surface and the polish wont cut properly.
My favorite method is to polish the panel, let the pad dry for a few minutes, and turning it on to speed 1-2 and using either a fingernail brush or an air compressor to clean the dried compound/paint off the pad. Then sometimes I will grab a damp microfiber and scub the face of the pad down if there are any clumps left.
EDIT:
My go to combo for heavy oxidation is M105 on a microfiber cutting pad, and M205 on a White or Green pad. Then I will either finish with Collinite 845 or Klasse AIO (lots of fillers, hides any remaining scratches) topped with 845.
Last edited by investinwaffles; Apr 22, 2018 at 11:10 AM.
Yes, Ralph, the amount of info on detailing can be overwhelming, but, I'll share a couple tips:
Use the least aggressive pad & product combo it takes to achieve the results you want. This prevents you from doing an area twice. For example, if you are trying to remove fine swirls, don't use rubbing compound and/or a coarse pad or wool.:
With the Meguire's I am going to use the HF Polishing (blue) pad.
Originally Posted by 4WD4EVER
Apply the product to small sections (2'x2'), work it through 3-4 passes with overlap and remove. Dried product is tough to remove so, small sections prevent creating more work.
For compounds, use higher speeds (5-6). For waxes, use
lower speeds (1-2).:
Thank you for that info. I just plugged it in and was kinda wondering what speeds to use. 6 is the highest.
Originally Posted by 4WD4EVER
Clay the windows. Yes, the windows. It is amazing how much foreign material/environmental fallout gets embedded in auto glass and claying is a great way to remove it.:
I uesd the RainX stuff once. After seeing a car show when they were showing, I think, the Mother's stuff. Was like $60. RainX was more like $12. It did a good job. Problem was it does not hold. I hardly drive and after a short period of time using the baggie trick I could feel the particulates on the windshield. When I first did it it was baby bottom smooth using the baggie trick. So I blew that off. Maybe next time if there is a next time for claying.
Originally Posted by 4WD4EVER
Good luck.:
It will be what it will be but thank you for the advice.
I removed my side moulding this morning, looks a lot better than it did. Then I washed it and I think I am going to throw a coat of wax on it because the last few posts inspired me