LOG IN
REGISTER
Forums
Technical Discussion
Stock XJ Cherokee Tech. All XJ Non-modified/stock questions go here
Modified XJ Cherokee Tech
MJ Comanche Tech. Stock & Modified.
KL Cherokee Tech
Modified Grand Cherokee Tech. All ZJ,WJ & WK aftermarket tech goes here
Stock Grand Cherokee Tech. All ZJ/WJ/WK Non-modified/stock questions go here!
Fabrication & builders section.
Jeep Builds
Aftermarket electrical systems
Jeep JK Model Discussion
Other Vehicles. Other Jeep models & cars and trucks of other makes
Technical Write-Up/How To Section
General
Introductions
Cherokee Chat
Cherokee of the Month
Wheeling Neighborhoods
Pacific Northwest
Pacific Southwest
Northern Rockies
Four Corners
Midwest
South Central
Great Lakes
Southeast
North Atlantic
Mid Atlantic
International
Wheeling Discussion
Trail Reports
Land Use Forum
Buy, Sell, Trade
Non-Cherokee Parts
Vendor Showcase
Vehicles
Axles/Tires/Wheels
Engines/Tranny/T-Case
Suspension/Steering
Accessories
Part Outs
Miscellaneous
Wanted
CF Announcements & Suggestions
Announcements
CF Suggestions & Questions
Test Section
Marketplace
Vendor Directory
Become a Vendor
Member Marketplace
Vendor Marketplace
New Posts
Tools
Car Payment Calculator
Tire Rim Calculator
Vin Decoder
Recalls
Technical Service Bulletins (TSBs)
Members List
Live Feed
How-Tos
Gallery
View Dark Mode
Please register or login to enable Dark Mode.
Log In
Register
Threads
Google
Threads
Posts
Advanced
Dark Mode
Please register or login to enable Dark Mode.
Log In
Forgot your Password?
By logging into your account, you agree to our
Terms of Use
and
Privacy Policy
, and to the use of cookies as described therein.
or
Login with Google
Login with Facebook
Recent
Commented
Albums
My Pictures
Baddad's Photos
View Profile
Sort:
Most Recent
Most Recent
Most Comments
Albums
Photos
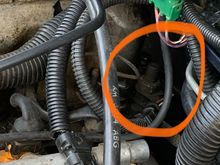
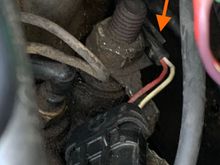
This is from Cruisers site. The factory apparently knew there’d be an issue if the wire got to hot !
0
2020/05/15 01:49:47
Baddad
0
2020/05/15 01:49:43
Baddad
0
2020/05/15 01:49:40
Baddad
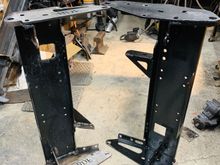
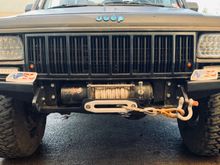
Tucks in nice and tight! Puts the winch 1.5” further back than the original design.
0
2020/03/10 17:29:11
Baddad
If you decide to change out bumpers later, I’ve still incorporated dring mounts on this new version. It is also setup to bolt on tow hooks onto the bottom of the winch plate.
0
2020/03/10 17:29:03
Baddad
0
2020/03/10 17:28:56
Baddad
0
2020/03/10 17:28:44
Baddad
0
2020/02/29 18:38:44
Baddad
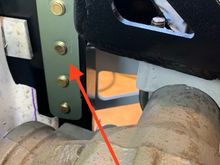
Sector Shaft bearing brace now available! Added to the box housing brace I believe this will be the strongest setup available. Upgrade offered for new orders and anyone who’s already bought one. $75 for this upgrade.
0
2020/02/21 16:56:49
Baddad
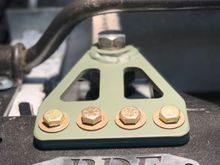
Threaded plate with 4 1/2” fine thread grade 8 bolts!
0
2020/02/21 16:56:40
Baddad
Bearing inserted.
0
2020/02/21 16:56:36
Baddad
How they stack on the box.
0
2020/02/21 16:56:30
Baddad
I utilize Synergy Mfg nuts and bearings that they use for their JK sector shaft brace. These parts are designed for abuse.
0
2020/02/21 16:56:25
Baddad
0
2020/02/03 09:59:10
Baddad
Pure beef now!
0
2020/02/03 09:59:00
Baddad
0
2020/02/03 09:58:51
Baddad
Now just install, torque down and put the cotter key in. Done.
0
2020/01/21 00:37:56
Baddad
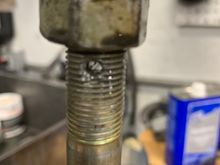
Then cleanup and chamfer the end. Use the spare nut to clean up the threads again.
0
2020/01/21 00:33:53
Baddad
Like this.
0
2020/01/21 00:33:46
Baddad
Use the nut as a guide to cut the bolt square.
0
2020/01/21 00:33:39
Baddad
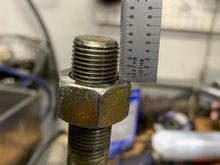
Next reinstall the extra nut to the length that you want to cut off the extra bolt length. I go about a 1/4” away from the hole.
0
2020/01/21 00:33:32
Baddad
0
2020/01/21 00:28:39
Baddad
Now is a good time to spin your castle nut on and make sure the hole aligns properly thru the bolt.
0
2020/01/21 00:28:31
Baddad
Next put the bolt in the vise again, use some lube and run the nut up and down several times to clean up the threads.
0
2020/01/21 00:28:24
Baddad
I like to use a countersink bit to taper the holes. Makes cotter key installation easier and eliminates a sharp edge/failure point for the cotter key.
0
2020/01/21 00:20:42
Baddad
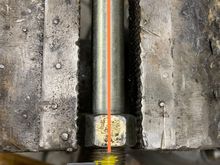
Move over to the drill press. Clamp the bolt in the drill press clamp. Notice how the flats of the bolt and nut create a flat surface to help center the hole thru the bolt. I drilled these to 5/32” for 1/8” diameter cotter keys. Us a sharp bit and go slowly. If the bit is dull or you rush, the hole will wander off center.
0
2020/01/21 00:20:34
Baddad
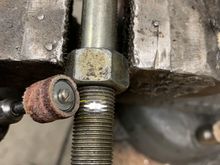
Use a dremel to create a flat spot where you want the hole.
0
2020/01/21 00:18:21
Baddad
Center punch the hole location.
0
2020/01/21 00:18:12
Baddad
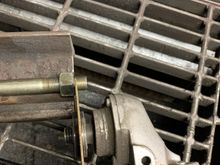
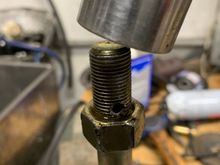
Move over to the beach vise. Thread a spare nut past where the hole will end up. Align the bolt so that the hole will be inline with a flat on the bolt head hex. This is important for drilling, you’ll see why.
0
2020/01/21 00:14:14
Baddad
0
2020/01/21 00:09:04
Baddad
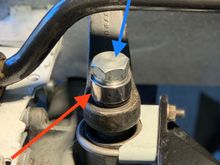
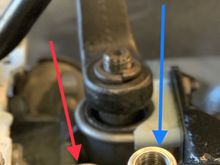
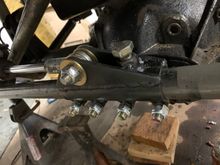
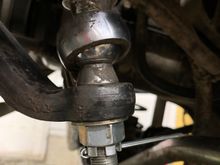
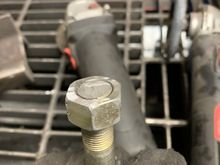
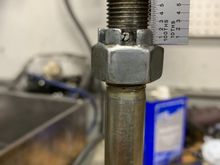
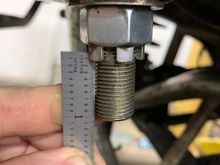
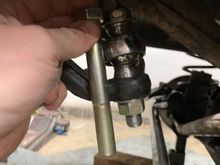
One of the most critical aspects of bolt strength is having as much of the shank of the bolt as possible carry the load. This shank is just about perfect for my pitman Heim joint.
0
2020/01/20 23:35:23
Baddad
0
2020/01/05 19:59:08
Baddad
0
2020/01/05 19:59:00
Baddad
On the pre-‘97 Cherokee’s you’ll need to trim the fender here to fit the Ares Fab bumpers.
0
2020/01/05 19:58:52
Baddad
0
2020/01/05 19:57:27
Baddad
So here’s an update. Up on Santiam Pass, first trail, this happen 🤪. I think I snagged it on a rock which stressed it, then when I tried to turn, the hydro ram finished it! Oh well, not bad for a $15 Rock Auto special 😂
0
2019/06/20 07:51:52
Baddad
Here’s a better picture of how the steering box is “boxed” into place resulting in a very strong mount!
0
2019/06/12 00:25:06
Baddad
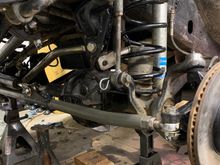
Here’s a picture of the steering box brace. Not only does this brace the sector shaft area, but also boxes in with the side plate that the 3 steering box bolts go thru!
0
2019/06/12 00:16:10
Baddad
This install has a custom made tube bumper.
0
2019/06/12 00:07:51
Baddad
Another install with a custom tube bumper.
0
2019/06/12 00:04:26
Baddad
First
Page
1 of 10
Last
Go To
Page
1
2
3
4
5
6
7
...
10
1 of 10
Go To
GO
Go to page
of 10
pages
1
2
3
4
5
6
7
...
10