LOG IN
REGISTER
Forums
Technical Discussion
Stock XJ Cherokee Tech. All XJ Non-modified/stock questions go here
Modified XJ Cherokee Tech
MJ Comanche Tech. Stock & Modified.
KL Cherokee Tech
Modified Grand Cherokee Tech. All ZJ,WJ & WK aftermarket tech goes here
Stock Grand Cherokee Tech. All ZJ/WJ/WK Non-modified/stock questions go here!
Fabrication & builders section.
Jeep Builds
Aftermarket electrical systems
Jeep JK Model Discussion
Other Vehicles. Other Jeep models & cars and trucks of other makes
Technical Write-Up/How To Section
General
Introductions
Cherokee Chat
Cherokee of the Month
Wheeling Neighborhoods
Pacific Northwest
Pacific Southwest
Northern Rockies
Four Corners
Midwest
South Central
Great Lakes
Southeast
North Atlantic
Mid Atlantic
International
Wheeling Discussion
Trail Reports
Land Use Forum
Buy, Sell, Trade
Non-Cherokee Parts
Vendor Showcase
Vehicles
Axles/Tires/Wheels
Engines/Tranny/T-Case
Suspension/Steering
Accessories
Part Outs
Miscellaneous
Wanted
CF Announcements & Suggestions
Announcements
CF Suggestions & Questions
Test Section
Marketplace
Vendor Directory
Become a Vendor
Member Marketplace
Vendor Marketplace
New Posts
Tools
Car Payment Calculator
Tire Rim Calculator
Vin Decoder
Recalls
Technical Service Bulletins (TSBs)
Members List
Live Feed
How-Tos
Gallery
View Dark Mode
Please register or login to enable Dark Mode.
Log In
Register
Threads
Google
Threads
Posts
Advanced
Dark Mode
Please register or login to enable Dark Mode.
Log In
Forgot your Password?
By logging into your account, you agree to our
Terms of Use
and
Privacy Policy
, and to the use of cookies as described therein.
or
Login with Google
Login with Facebook
Recent
Commented
Albums
My Pictures
Baddad's Photos
View Profile
Sort:
Most Recent
Most Recent
Most Comments
Albums
Photos
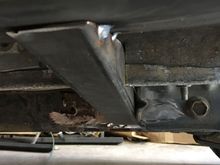
Put it back into position, checked the fit about 20 times, then welded it to the frame stiffeners.
0
2018/05/06 19:04:47
Baddad
Before I weld it on, I wanted to get some paint on the hard to reach areas. I was careful to mask off where I need to weld.
0
2018/05/06 18:59:59
Baddad
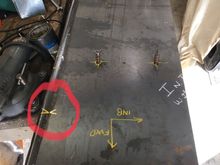
Made some index marks after I drilled and installed clecos to hold it in position when I install it on the Jeep. I also marked the other side of the plate to drill 1” holes that’ll line up with the middle supports to plug weld them.
0
2018/05/03 19:20:39
Baddad
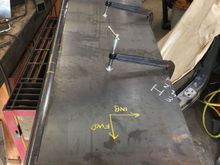
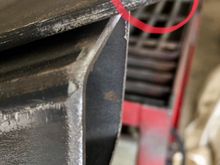
I left about a 1/4” overhang on the inboard side. There is a angled area on the frame that this will contact to make welding easier and provide better support.
0
2018/05/03 19:20:37
Baddad
Then position the plate where you want it. My plate is 48” x 15”, 3/16” thick.
0
2018/05/03 19:20:35
Baddad
Grind the welds smooth where the plate lies.
0
2018/05/03 19:20:32
Baddad
On the outboard side of the plate I beveled the edge so it would fit better.
0
2018/05/03 19:20:28
Baddad
All welded up 👍
0
2018/05/03 19:14:46
Baddad
Then lotsa welding 😋
0
2018/05/03 19:14:43
Baddad
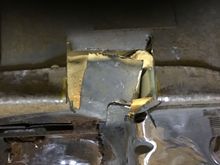
I used small chunks of 1x1 to fill in and support in this area.
0
2018/05/03 19:14:39
Baddad
I added these 1x1 supports for 2 reasons. It’ll help support the plate in this vulnerable area and it’ll keep the tie ins in proper position while being welded.
0
2018/05/03 19:14:37
Baddad
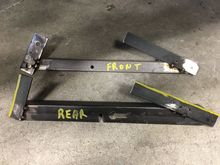
Front floor board
0
2018/05/03 19:11:22
Baddad
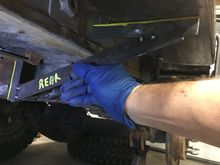
Rear floor board
0
2018/05/03 19:11:18
Baddad
All tacked into position. Only tack weld to the 2x6, not the frame. That way you can finish weld on the bench.
0
2018/05/03 19:11:15
Baddad
Cleans up a bit easier 👍
0
2018/05/03 18:39:41
Baddad
Then make your connecting cut. The piece of the seam that’s bent out will the be only held on with one spot weld. Pry that piece off and I just leave primer to clean off!
0
2018/05/03 18:39:38
Baddad
Clean it off above this seam area.
0
2018/05/03 18:39:35
Baddad
Scraping and cleaning the seam sealer is a pain! I found a trick to save a little time.
0
2018/05/03 18:39:31
Baddad
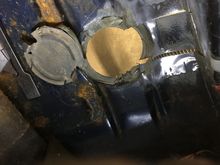
Marked and cut like the rear but ran square into the factory knock out hole in the floor! Glued in with seam sealer 🙄. Have to figure that out when I seal up the floor.
0
2018/05/03 18:29:55
Baddad
Measured from the rear tie in 48” , the length of my plate for the boat side, forward to locate the forward tie in.
0
2018/05/03 18:29:52
Baddad
Got the first tie in tacked on.
0
2018/05/03 18:29:49
Baddad
Ran outta steam tonight! These “flaps” will get welded to the tie ins later.
0
2018/05/03 00:42:26
Baddad
Like this.
0
2018/05/03 00:42:23
Baddad
Try the tie in, cut and fold some more till it fits.
0
2018/05/03 00:42:20
Baddad
Start bending up the floor...
0
2018/05/03 00:42:17
Baddad
Now cut across the first two cuts.
0
2018/05/03 00:42:14
Baddad
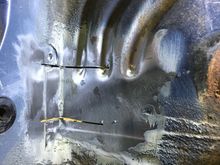
It’s easier to clean off now before ya start bending stuff up.
0
2018/05/03 00:42:10
Baddad
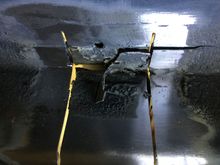
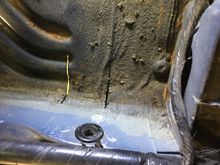
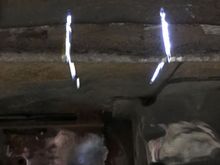
This is what it looks like inside. Look at all that seam sealer 😮
0
2018/05/03 00:42:06
Baddad
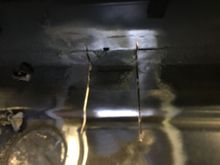
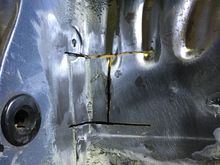
First cut. Don’t go crazy on length of cut, yet.
0
2018/05/03 00:42:02
Baddad
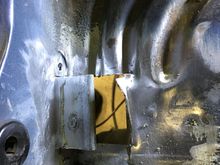
Clean off the spring bracket so ya don’t forget to do it later. I’ll be welding the tiein to this bracket to strengthen it to 👍
0
2018/05/03 00:41:58
Baddad
Start at the rear mount. Hold the tie in against the spring mount bracket, then mark the floor.
0
2018/05/03 00:41:54
Baddad
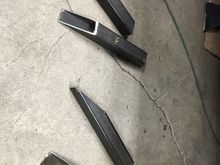
4 frame tie ins 👍
0
2018/05/03 00:34:09
Baddad
And your ready to cut!
0
2018/05/03 00:34:05
Baddad
Connect the two sides...
0
2018/05/03 00:34:01
Baddad
Simply set it on the tubing, mark it...
0
2018/05/03 00:33:57
Baddad
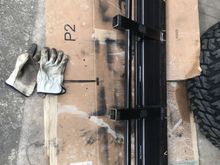
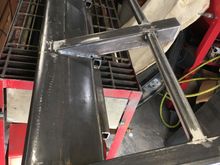
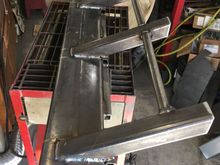
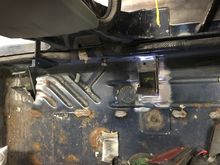
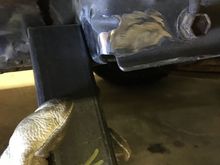
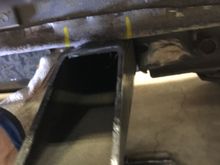
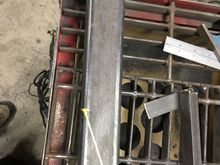
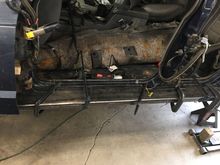
Here’s how they sit on the Jeep. I’m going to run 4 supports. The front 2 and rear 2 are a little different angles because of the frame shape.
0
2018/05/03 00:30:39
Baddad
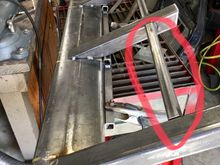
Made up these tools to mark and cut the 2x2 tube I’ll be running for frame tie ins. Just used some scrap angle and strap. Clamped them in position then welded them.
0
2018/05/03 00:26:00
Baddad
Fold that sucker up, hammer time 😋
0
2018/05/03 00:22:43
Baddad
Remember that lip left from cutting behind the seam?
0
2018/05/03 00:22:42
Baddad
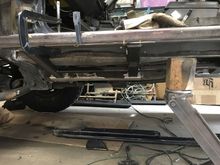
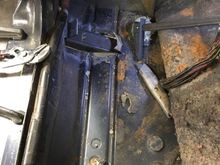
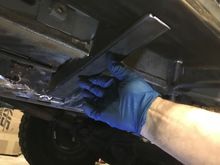
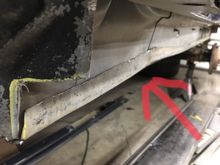
All clamped into position and ready to start fabbing up the braces to the frame stiffeners. Look close and you’ll see why I cut the door sill 1 1/4” out from the door seal seam. That way it’ll help cover the seam between the 2x6 and 1x1 tubes. I’m hoping to install the sill covers if I have enough room when I’m done 🤞
0
2018/04/30 16:48:54
Baddad
First
Page
7 of 10
Last
Go To
Page
1
...
4
5
6
7
8
9
10
7 of 10
Go To
GO
Go to page
of 10
pages
1
...
4
5
6
7
8
9
10