LOG IN
REGISTER
Forums
Technical Discussion
Stock XJ Cherokee Tech. All XJ Non-modified/stock questions go here
Modified XJ Cherokee Tech
MJ Comanche Tech. Stock & Modified.
KL Cherokee Tech
Modified Grand Cherokee Tech. All ZJ,WJ & WK aftermarket tech goes here
Stock Grand Cherokee Tech. All ZJ/WJ/WK Non-modified/stock questions go here!
Fabrication & builders section.
Jeep Builds
Aftermarket electrical systems
Jeep JK Model Discussion
Other Vehicles. Other Jeep models & cars and trucks of other makes
Technical Write-Up/How To Section
General
Introductions
Cherokee Chat
Cherokee of the Month
Wheeling Neighborhoods
Pacific Northwest
Pacific Southwest
Northern Rockies
Four Corners
Midwest
South Central
Great Lakes
Southeast
North Atlantic
Mid Atlantic
International
Wheeling Discussion
Trail Reports
Land Use Forum
Buy, Sell, Trade
Non-Cherokee Parts
Vendor Showcase
Vehicles
Axles/Tires/Wheels
Engines/Tranny/T-Case
Suspension/Steering
Accessories
Part Outs
Miscellaneous
Wanted
CF Announcements & Suggestions
Announcements
CF Suggestions & Questions
Test Section
Marketplace
Vendor Directory
Become a Vendor
Member Marketplace
Vendor Marketplace
New Posts
Tools
Car Payment Calculator
Tire Rim Calculator
Vin Decoder
Recalls
Technical Service Bulletins (TSBs)
Members List
Live Feed
How-Tos
Gallery
View Dark Mode
Please register or login to enable Dark Mode.
Log In
Register
Threads
Google
Threads
Posts
Advanced
Dark Mode
Please register or login to enable Dark Mode.
Log In
Forgot your Password?
By logging into your account, you agree to our
Terms of Use
and
Privacy Policy
, and to the use of cookies as described therein.
or
Login with Google
Login with Facebook
Recent
Commented
Albums
My Pictures
My Post Pictures
mikecorrell
December 11, 2017
840
0
Sort:
Default
Default
Most Recent
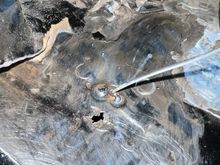
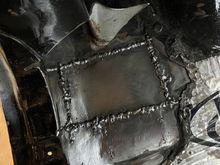
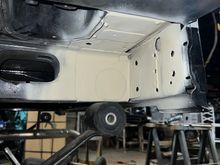
Tacked up
0
2024/03/09 16:54:11
mikecorrel
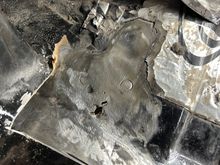
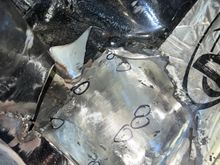
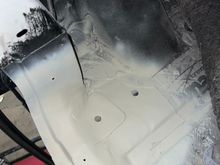
Bottom view
0
2024/03/09 16:54:16
mikecorrel
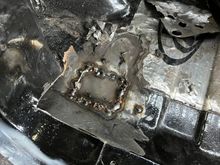
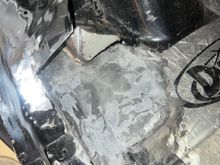
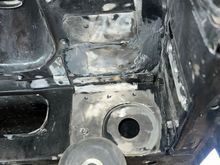
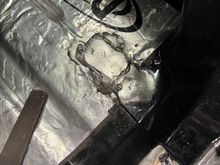
Found some rust under this seam. Not sure how I missed this initially but I started tackling it. Some spots were pretty weak so I made a patch.
0
2024/03/10 16:03:26
mikecorrel
Cleaned up
0
2024/03/10 16:03:35
mikecorrel
Plugging the other hole
0
2024/03/10 16:03:42
mikecorrel
0
2024/03/10 16:03:51
mikecorrel
0
2024/03/10 16:04:16
mikecorrel
0
2024/03/10 16:04:26
mikecorrel
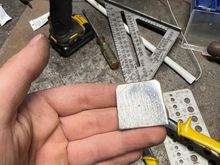
For this patch I used the “cut and butt” method. A patch is lapped over the damaged area and tacked in, then the edges are cut, pressed in flush and tacked a little at a time until the entire piece is flush.
0
2024/03/10 16:04:34
mikecorrel
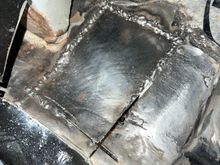
Tacked in flush
0
2024/03/10 16:04:43
mikecorrel
First run with the flap wheel
0
2024/03/10 16:04:54
mikecorrel
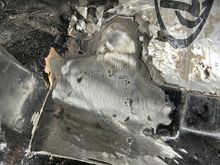
After filling and flap wheeling again. I have a few more pores to fill before this is complete.
0
2024/03/10 16:05:02
mikecorrel
0
2024/03/10 16:05:11
mikecorrel
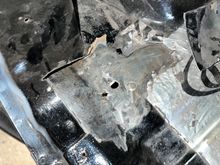
The old damaged area needs to be cut out and smoothed from the bottom
0
2024/03/10 16:05:17
mikecorrel
0
2024/03/17 16:00:29
mikecorrel
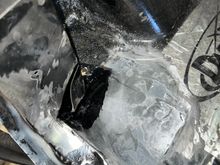
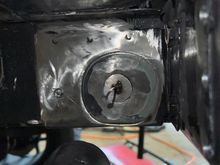
Pretty ugly welds. It really is tough to get enough heat to penetrate deep enough without blowing through.
0
2024/03/17 16:00:39
mikecorrel
I put a light underneath the panel to find and mark pinholes to be filled after grinding down the initial stitches.
0
2024/03/17 16:00:48
mikecorrel
Bottom view of the new patch
0
2024/03/17 16:00:56
mikecorrel
I get to a certain point where filling tiny pinholes and grinding the welds back down gets redundant. Once I stop seeing light through the pores, I fill them with epoxy. I did this on the floor pan as well. Maybe one day I’ll be a good enough welder to never need any filler!
0
2024/03/17 16:01:04
mikecorrel
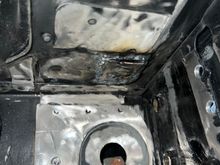
Bottom view with a skim coat of epoxy. Once this cures, it’ll be sanded and I’ll shoot primer over all the bare metal.
0
2024/03/17 16:01:12
mikecorrel
0
2024/03/17 16:35:16
mikecorrel
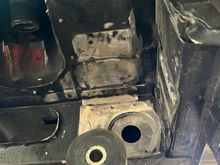
Inside areas treated with POR15
0
2024/03/24 16:21:51
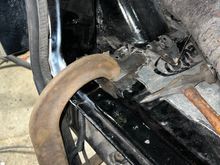
mikecorrel
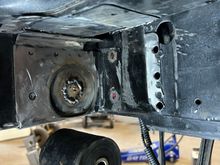
After fabbing up a replacement piece for this lapped vertical support. I was not happy with the porosity I ended up with but it’s covered with epoxy here. Once this and the epoxy on the underside is sanded, I’ll finally get to test fitting those shackle brackets.
0
2024/03/24 16:22:01
mikecorrel
The larger diameter rotabroach cutters in my kit make a nice starting piece for the round plugs I’ve been doing.
0
2024/03/29 19:27:10
mikecorrel
After trimming and filing, I’ve got three plugs for this side.
0
2024/03/29 19:27:20
mikecorrel
Filled and ground down
0
2024/03/29 19:27:32
mikecorrel
I decided to experiment with a larger scale round plug for my frame rail.
0
2024/03/29 19:27:43
mikecorrel
Perfect fit
0
2024/03/29 19:28:01
mikecorrel
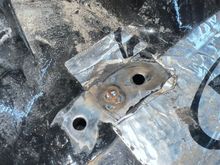
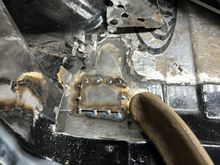
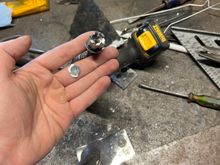
The stock nut-serts for the rear bumper had to be lopped off to fit the shackle bracket
0
2024/03/29 19:28:12
mikecorrel
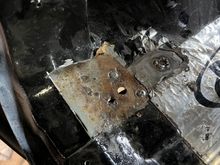
After grinding down the ugly tack welds and cleaning up the floor patch from the bottom
0
2024/03/29 19:28:24
mikecorrel
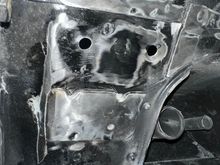
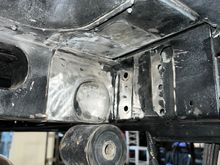
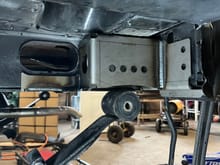
Bracket test fit
0
2024/03/29 19:28:30
mikecorrel
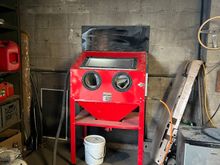
Snagged a Harbor Freight blast cabinet for cheap on marketplace. This is such an upgrade for blasting small parts.
0
2024/04/08 19:22:37
mikecorrel
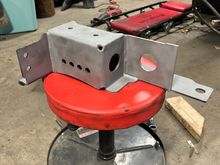
Freshly blasted shackle bracket
0
2024/04/08 19:22:43
mikecorrel
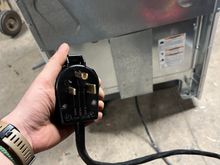
Swapped the cable plug to a NEMA 6-50 with 8 gauge wire.
0
2024/04/08 19:22:51
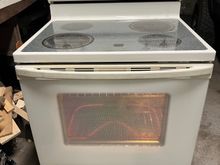
mikecorrel
Got this old oven from my aunt. This is going to be my powder coating over! I made a cable for it to work on my welder receptacle.
0
2024/04/08 19:22:58
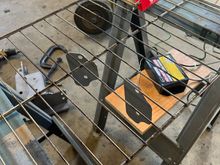
mikecorrel
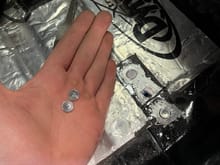
These floor reinforcement plates came with my shackle brackets. They’ll be covered by the carpet and needed a finish, so they were the perfect candidates to try out my powder coating setup.
0
2024/04/08 19:23:04
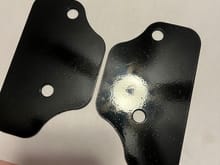
mikecorrel
Hard to see the results in the photo, but not awful. Some orange peel was to be expected. These have a black base coat and were top coated with copper metal flake clear coat. Most of the copper flake stuck to the inside of my powder bottle instead of spraying onto my parts.
0
2024/04/08 19:23:09
mikecorrel
Raptor primer can for the bare metal spots on the Jeep. I love this primer but I’m not buying it in a can again. It sucks. The can clogged and stopped spraying halfway through my second coat. I tried another nozzle from a different can and got primer all over the place. Very hard to control the spray. I’ve got probably 3/4 of the can left but can’t really use the rest of it.
0
2024/04/08 19:23:14
mikecorrel
0
2024/04/08 19:23:22
mikecorrel
I’m glad this patched section is done. I do wish I could’ve a better job without the need for epoxy filler. I think the lesson here is to not worry about grinding all the welds down on the inside. Even with periodically cooling it with compressed air, grinding puts so much heat stress into the metal that it gets super weak.
0
2024/04/08 19:23:28
mikecorrel
First
Page
20 of 21
Last
Go To
Page
1
...
15
16
17
18
19
20
21
20 of 21
Go To
GO
Go to page
of 21
pages
1
...
15
16
17
18
19
20
21