
Introducing H.D. Offroad Relocation Brackets v2.0 - the install!

Thread Starter
☠ CF Sheriff ☠

Joined: Nov 2009
Posts: 15,197
Likes: 18
From: Aberdeen, MD
Year: 1995
Model: Cherokee
Engine: 4.0L HO I-6, 703 Injectors, Brown Dog Super Engine Mounts
On behalf of H.D. Offroad Engineering, I'd like to introduce their Shackle Relocation Brackets - Revision 2. The original design was a weld-in bracket that required some "massaging" of the stock shackle box to fit. But no more! Version 2.0 is a 100% bolt in application. (available at http://www.hdoffroadengineering.com)
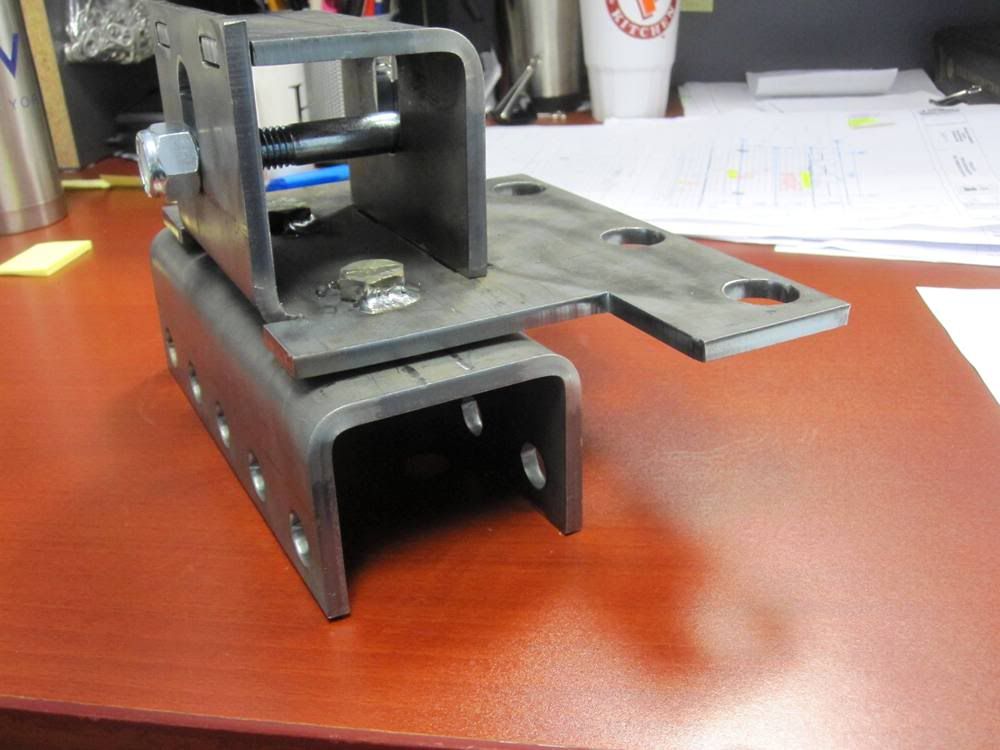
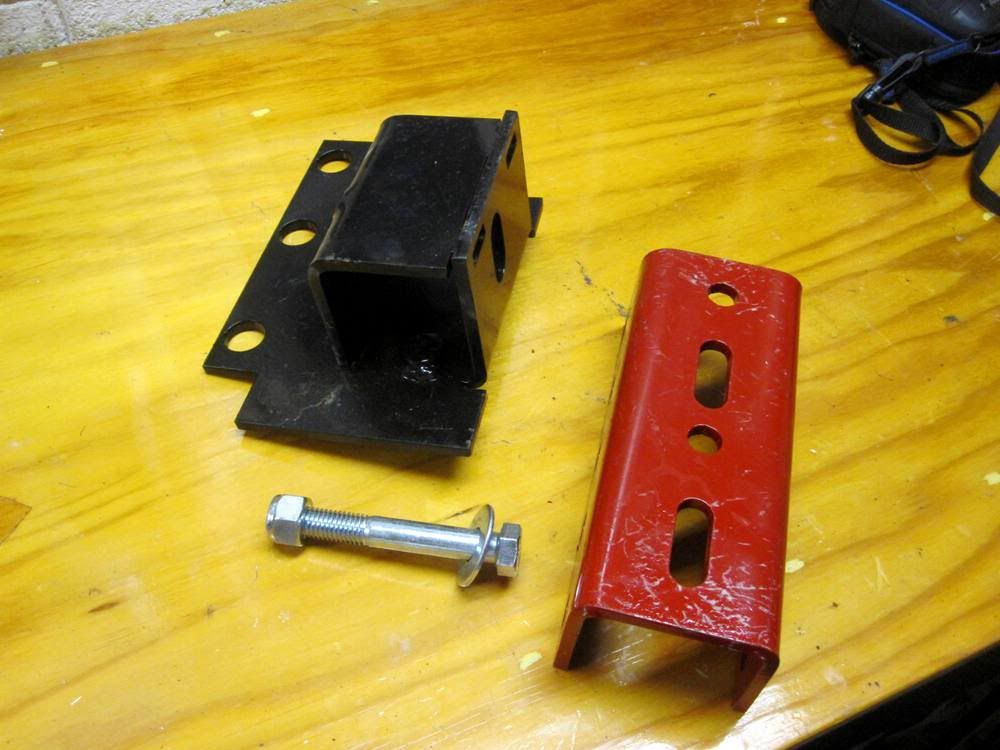
The brackets are 1/4" plate steel, fabbed and weldeded in the good 'ol USA. And man are these brackets BEEFY. Complemented with 1/2" grade 8 hardware (included), these brackets utilize the stock shackle attachment bolt, as well as 3 of the bolts into the frame where a trailer hitch or gas tank skid would attach (these bolts are not included due to variances in bolt sizes used by different manufacturers). This results in a much stronger attachment to the body of the vehicle. Also new to this design is an adjustability slot at the shackle bolt. This allows the relocation bracket to be installed OVER a trailer hitch and/or gas tank skid, eliminating the need to drop these components to install the brackets.
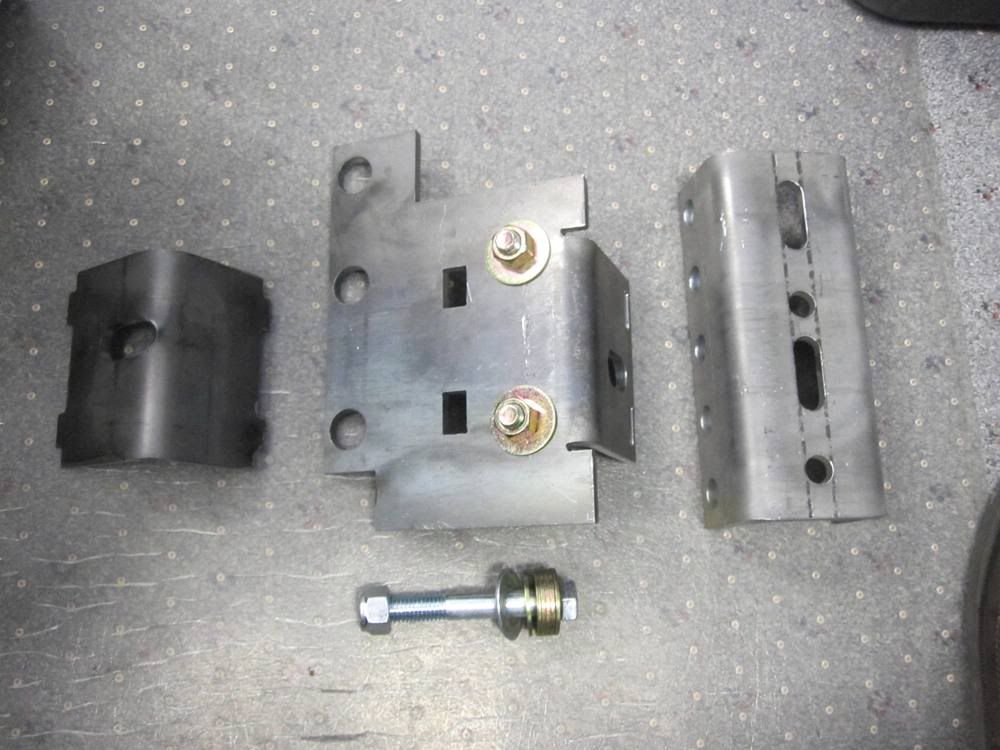
So, what you get is enough to do both sides: Includes bolt in bracket w/ welded studs, anti crush bracket, shackle bracket, new shackle bolt, and grade 8 washers for the frame bolts (if required). One side is shown below.
Enough of the introduction, onto the dirty part - the install.
Before I start i need to recommend something, especially if you've never removed your shackle bolts before... PB BLASTER... And lots of it. I started blasting mine every night since I ordered these brackets until I installed them last night. That's about a week's worth. You WILL thank me for this. Make sure to try and get some penetrating oil into the internal part of the bushing where the bolt slides though, as well as into the frame rail where the captive nut and other end of the bolt are.
So what will you need?
- Jack stands, wood blocks, CMU blocks, etc - anything stong enough to keep the jeep from falling on your head while fighting with the shackle bolts
- Wheel chocks
- Floor jack
- A good 1/2" breaker bar - mine is 18" long
- a good quality 21MM socket - I like impact sockets for hard wrenching.
- PB Blaster or other penetrating oil of your choice (Note: WD-40 is not a penetrating oil...nuff said)
- Saftey goggle to prevent the inevitable rain of rust and dirt from blinding you
- Energy Beverage, Beer, or other refreshment of your choice- Normal socket set, metric and standard for misc. bolts
- Torque Wrench (preferred)

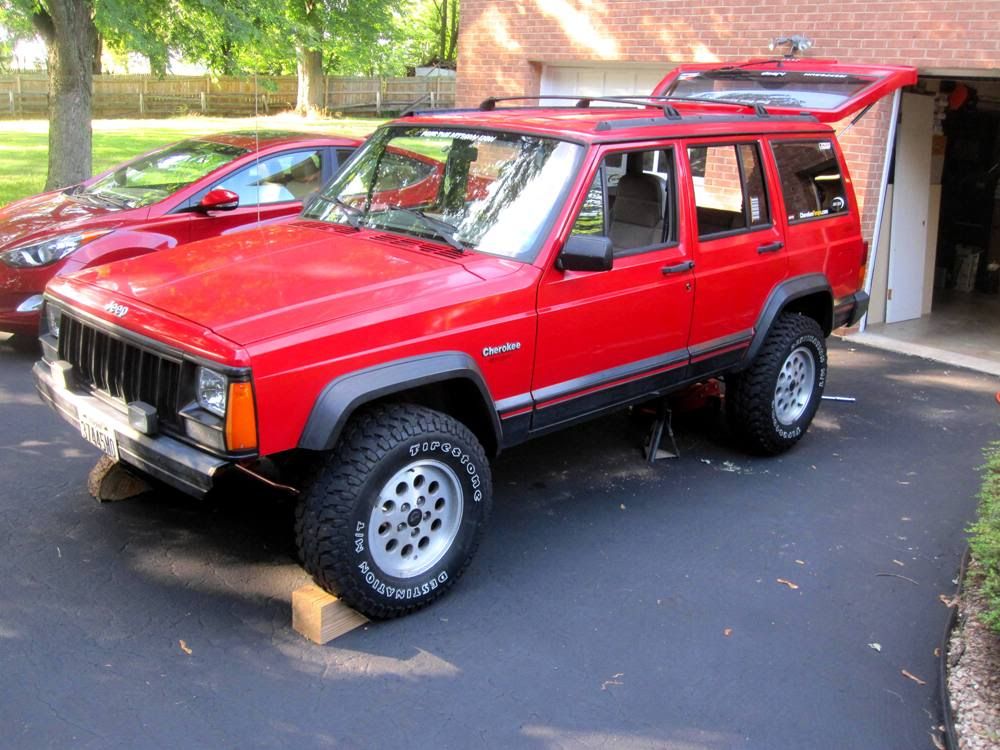
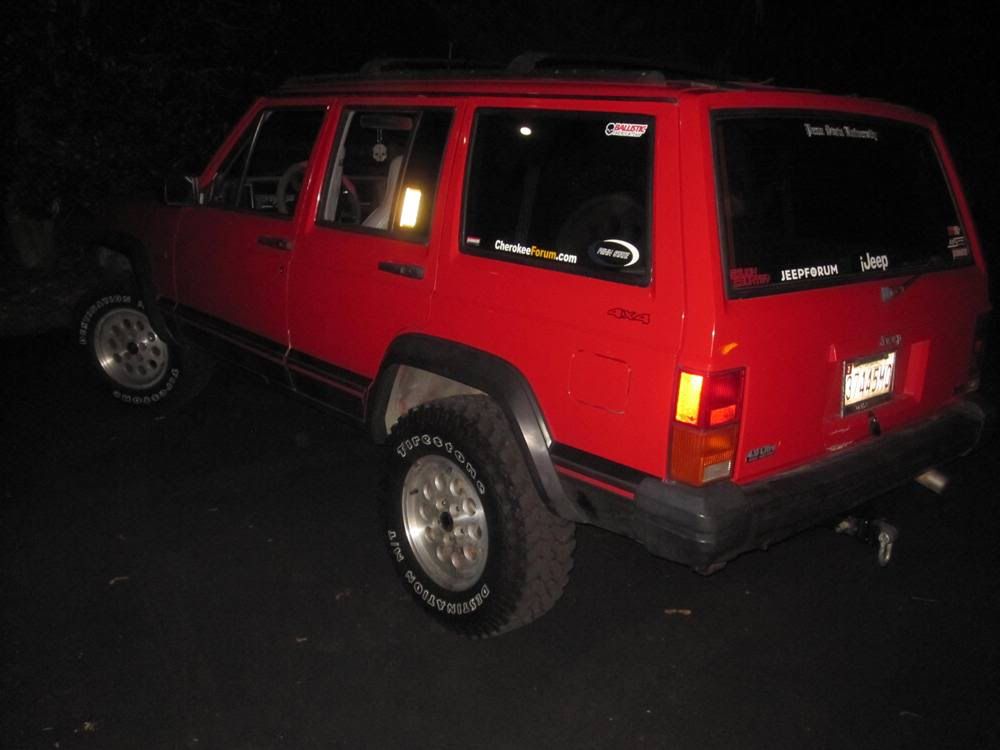
Ok, so here is our candidate for the day - My 1995 XJ Sport with 245,000 miles on the stock suspension...this should be interesting.Before I started the rear end was 1.5" lower than it was supposed to be thanks to the sagging rear springs.
STEP 1: Apply the parking brake, put your wheel chocks in front of the front wheels, and start jacking. You need to lift the rear high enough to have the rear tires hanging off the ground by at least 2-3" with the rear axle unsupported. Install the jack stands at whatever height gets you to this point. Jack stands should be placed where the front leaf spring bolt is located.
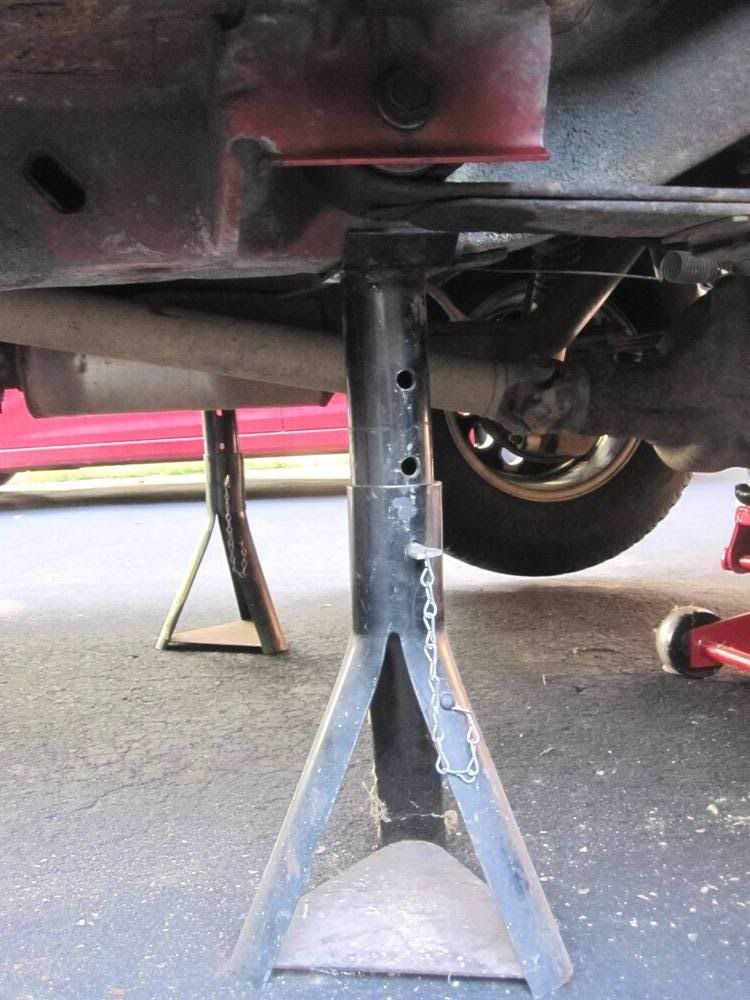
STEP 2: Support the rear differential with the floor jack just enough to take the weight off the shocks.
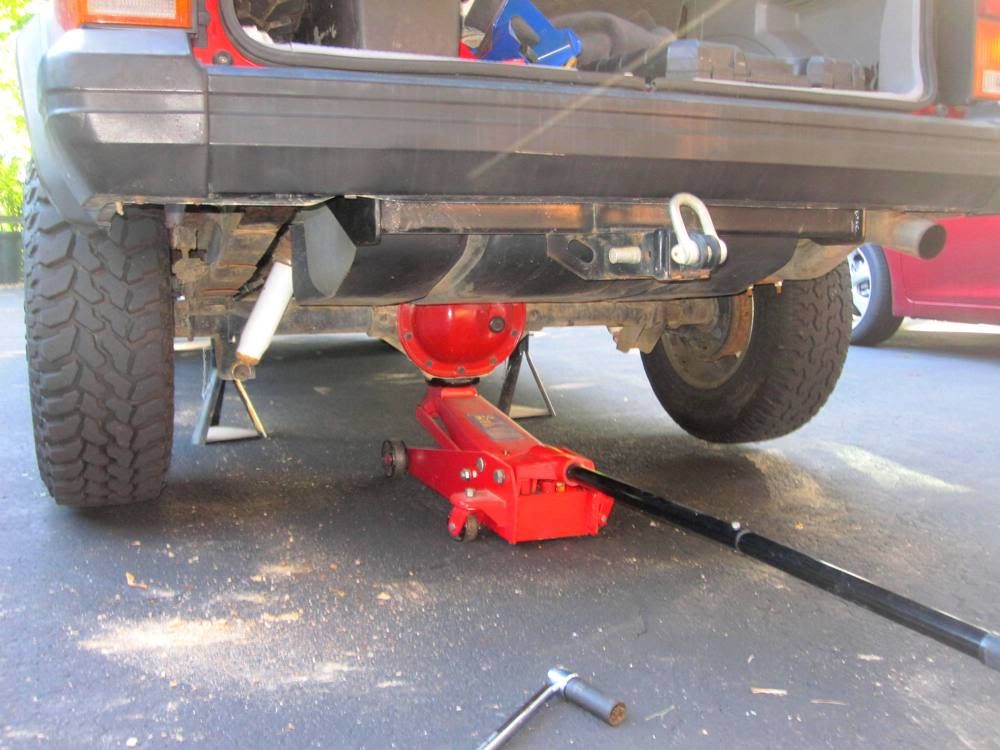
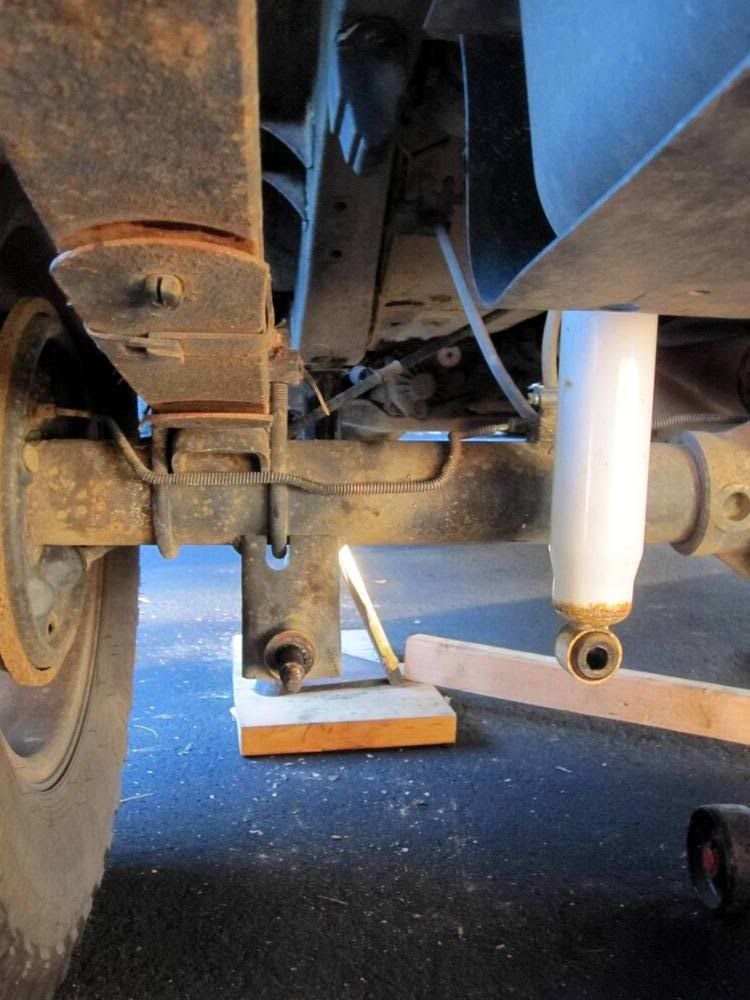
STEP 3: If your shocks are short like my current ones were, they will not allow the rear axle to droop all the way. In this case you will need to unbolt the bottom your shocks.
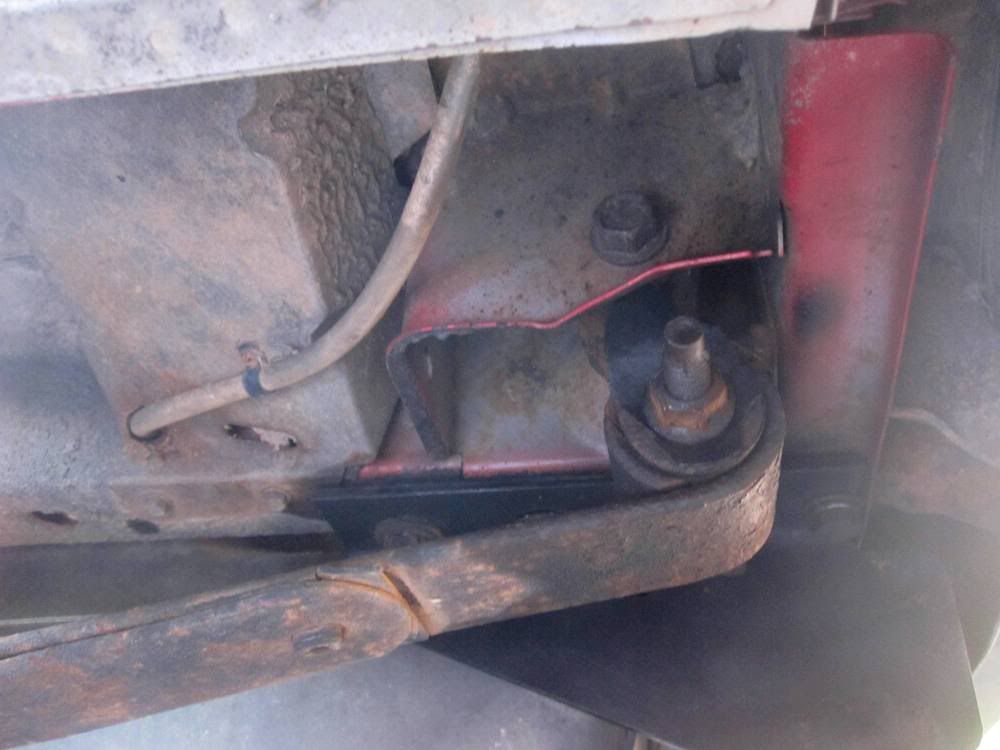
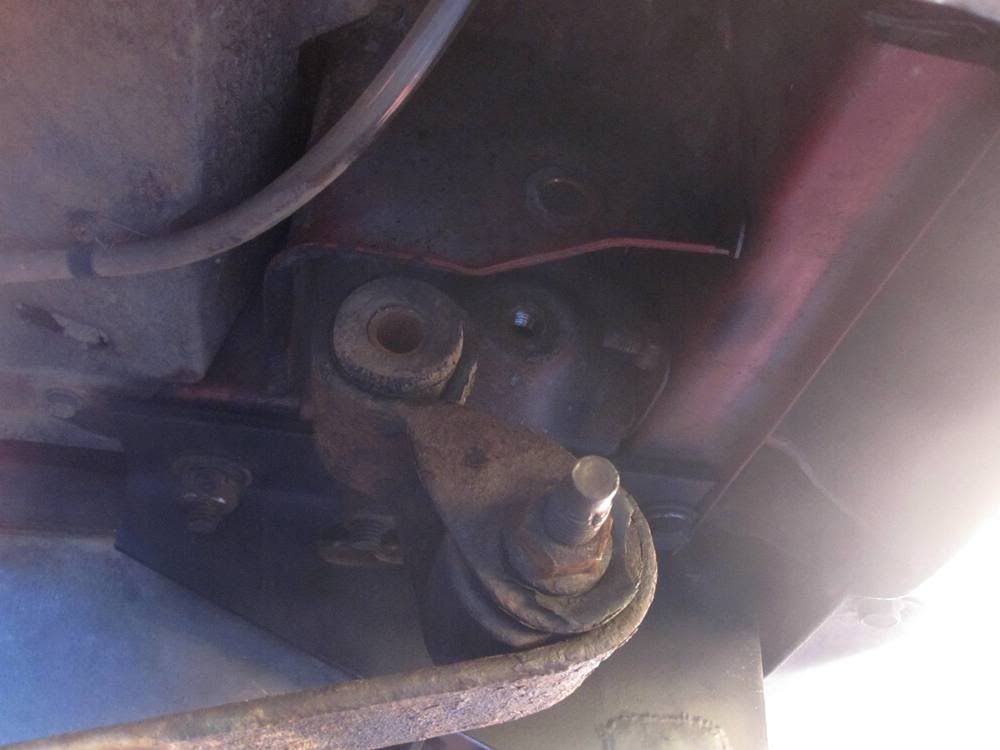
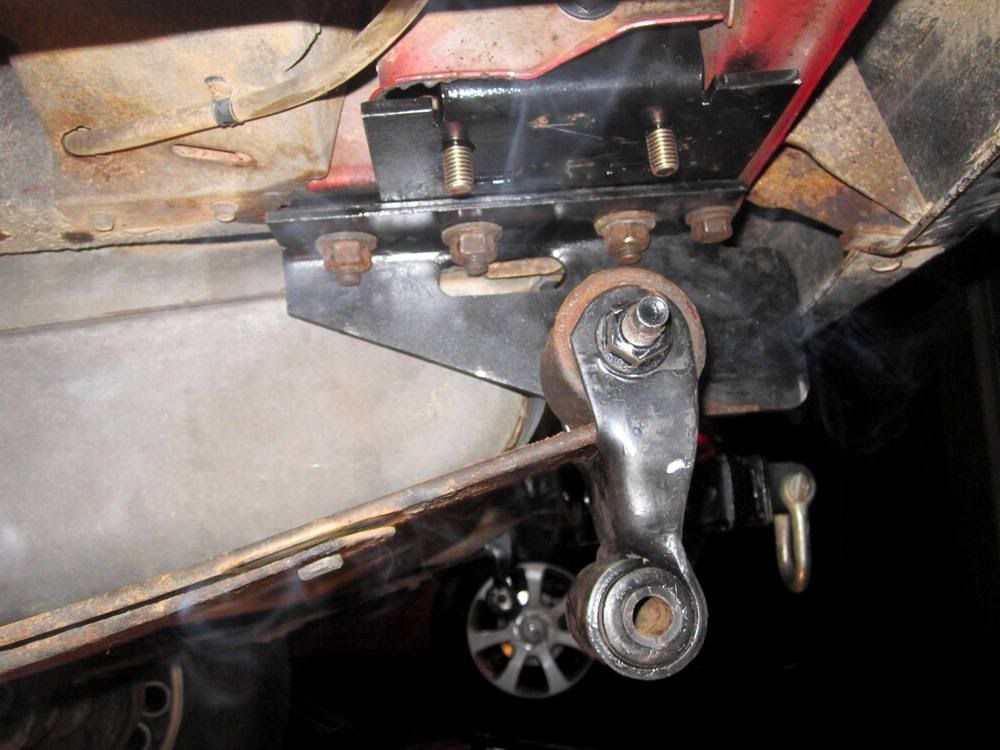
STEP 4: Get torquing! Here's what you'll be looking at if you're still stock:
The bolts are very tight and will almost certainly be a pain to remove (this is where the PB Blaster treatment is key). Many people have reported issues with either a) the captive nut inside the frame breaking loose and spinning or b) the steel sleeve inside the shackle bushing being rust welded to the bolt and simply spinning when the bolt is turned, preventing extraction. The solutions for these problems have been covered extensively so I won't go into that here. It turned out for me that neither of these occurred thanks to my preparation (PB Blaster..remember? I can't stress this enough). When you are turning out the bolts, you will almost certainly have the bolts start to "squeal" or "chatter". This is due to rust clogging the bolt threads. The fix is very simple - rotate the bolt back in and out until the noise stops - this clears the threads and allows you to go further. Take your time with this step. Each bolt took me about 20 minutes to remove using this method and they came out perfectly usable and undamaged.
VICTORY!
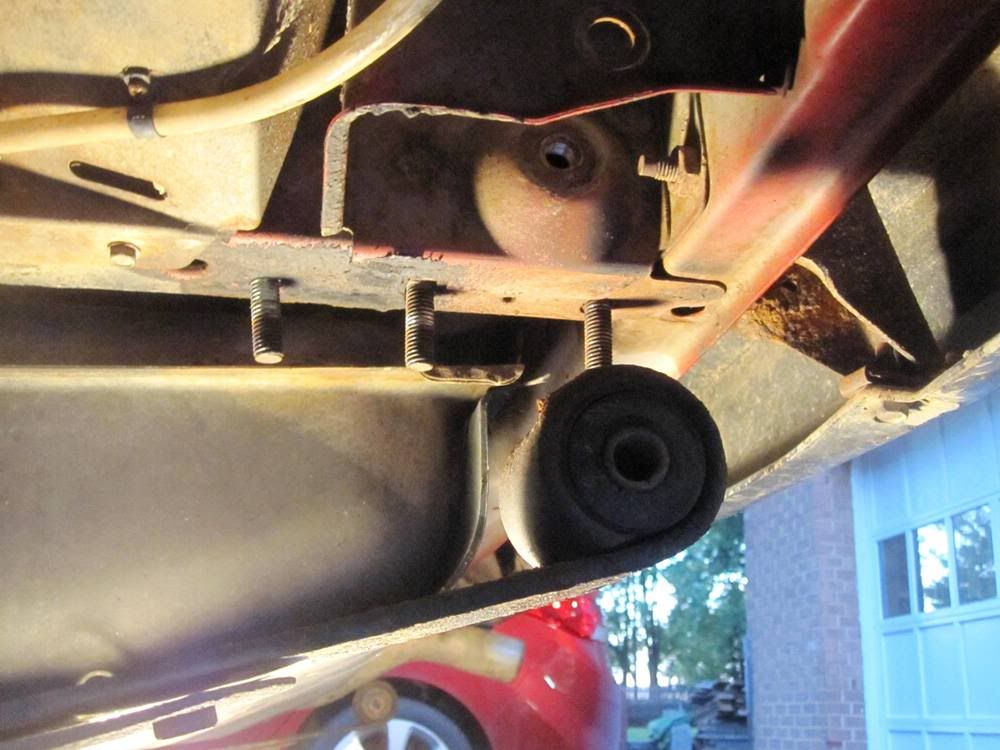
STEP 5: Now because my shackle and bushing were in such poor shape, I decided to replace them at the same time, so I unbolted those as well. If you are not replacing your shackles, you need to at least loosen the bolt holding the shackle to the spring. I also wanted the minimum amount of lift out of these brackets as possible due to my future plans, so i needed to install them tight to the underside of the framerail. Therefore I also removed my trailer hitch. It's not necessary to do so because of the adjustability of the brackets. Installing over the hitch brackets/gas tank skid will simply give you more lift. I just chose to. So now you're staring at this:
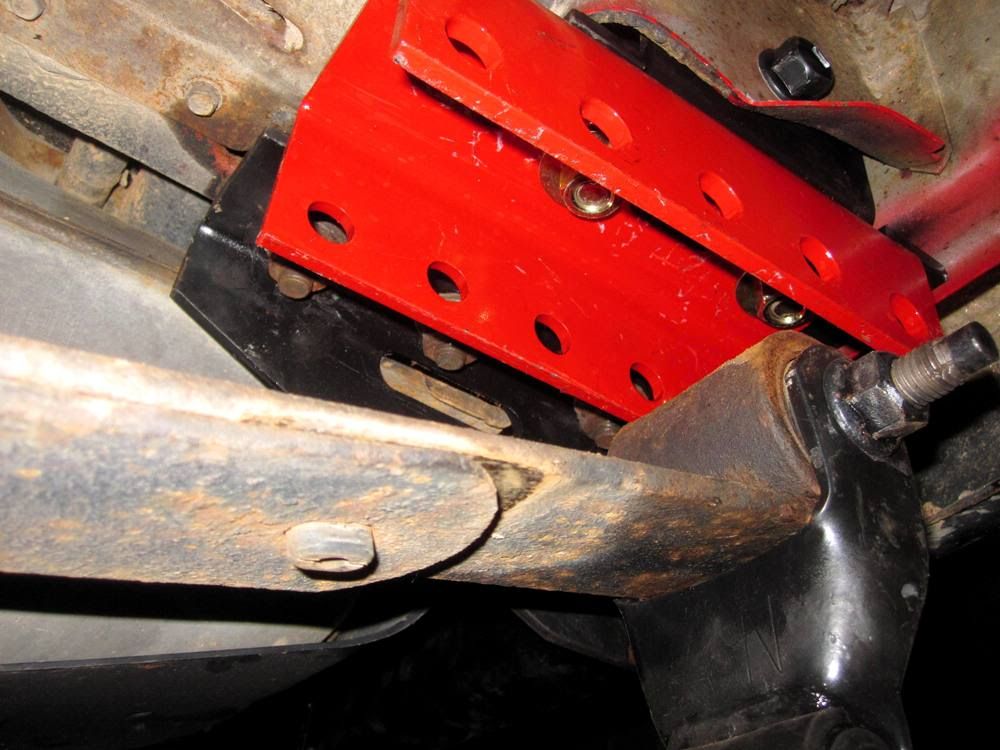
STEP 6: Now the fun part begins - The Installation! The parts you get from H.D. Offroad come as plain unpainted steel. You definitely should paint these parts before installing them to prevent them from rusting away. I had painted mine a few days prior so they were ready to go. I'm digging the two tone paint job. The crush bracket simply slides into the slots in the main bracket.
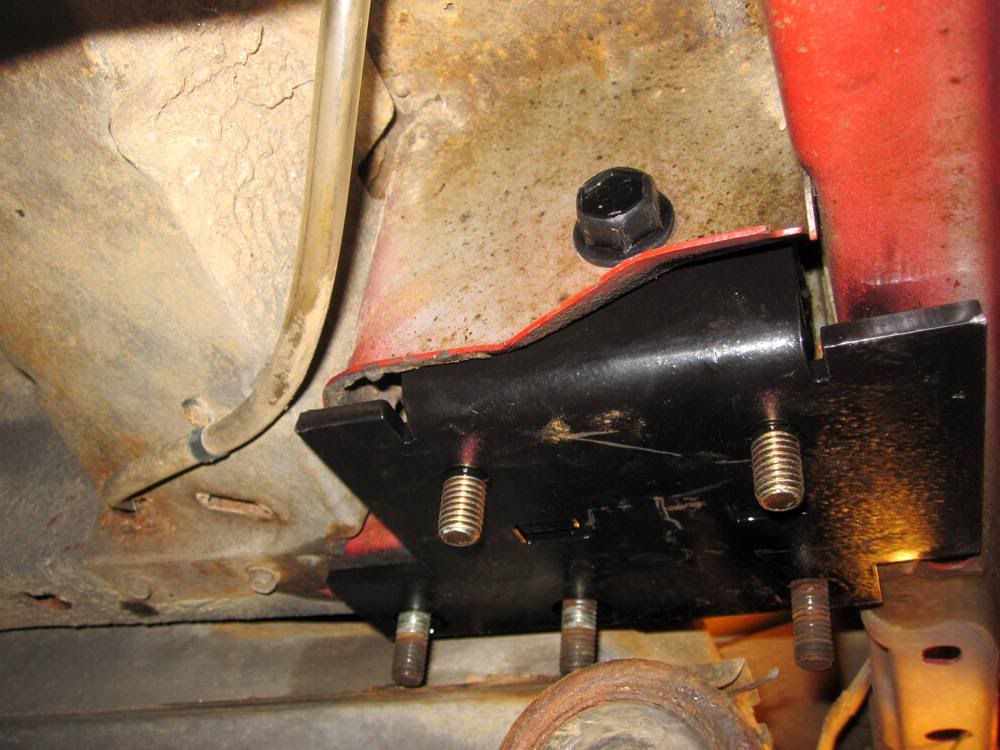
Now to get them into the stock shackle boxes, I had to pry out the side of the box a little bit. This is because the H.D. Offroad kit is meant to have a very tight fit, which is necessary to have a good solid mounting point - after all, the entire back of the jeep is supported by this spot (as well as the front leaf support). After a bit a coaxing the bracket slid right in. All the holes lined up perfectly with those in the frame. After it's in place, reinstall the stock shackle bolt (don't tighten all the way yet).Repeat on the other side.
Step 7: Reinstall the trailer hitch/gas tank (if applicable) and the nuts/bolts that hold it on though the holes in the new relocation brackets. If you don't have a trailer hitch or gas tank skid, you will need to purchase nuts (or preferrably a nut strip made for trailer hitch installation) and bolts. The relocation hit comes with washers for this purpose. I did not need to use them.Torque the bolts to manufacturer's specifications. For my bolts this was 80 ft-lb. After these bolts are torqued down, now you can tighten the stock shackle bolt to 109 ft-lb.
At this time I also installed my new shackles. I used ones off a Dodge Durango (1" longer than stock). They required a little bit of work to get them to work however - I had to grind down the metal sleeve a bit, bend in the ears a bit, and enlarge the holes in the sleeve and ears a smidge, but they fit great after that. Do not tighten the shackle bolt yet.
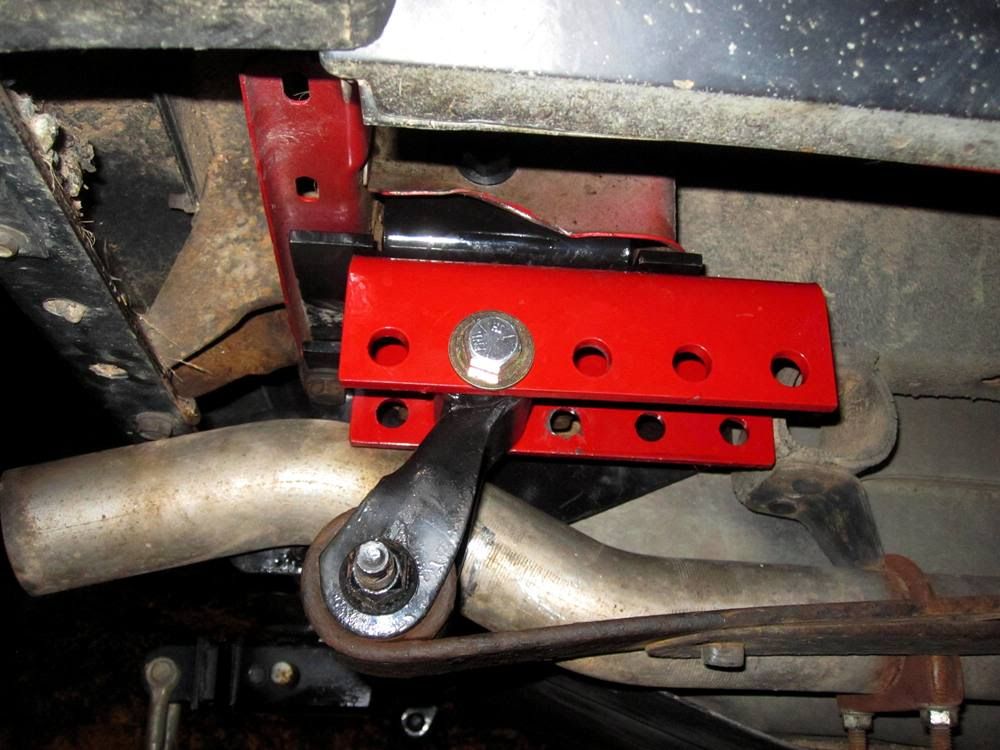
Step 8: Install the shackle adjustment brackets with the suppied nuts and washers. For most applications, use the standard round holes, with the longer end towards the front of the jeep. Torque to 80 ft-lb.
Step 9: Reinstall the shackle using the new supplied bolt with two washers and the nylock nut. This takes a bit of trial and error as to where to attach it. Start with the middle hole. Raise the rear axle until the wheels are where they would be at ride height, and check the shackle angle. The ideal angle is about 45 degrees towards the rear under normal driving with the full weight on the springs. Adjust the attachment location as necessary to achieve the desired position. Do not tighten the bolt down yet.
Step 10: Reinstall the shocks (if disconnected), remove the jack stands, and set the rear of the jeep back on the ground. Once this is done, you can tighten the shackle to spring bolts and shackle to bracket bolts to 80 ft-lb.
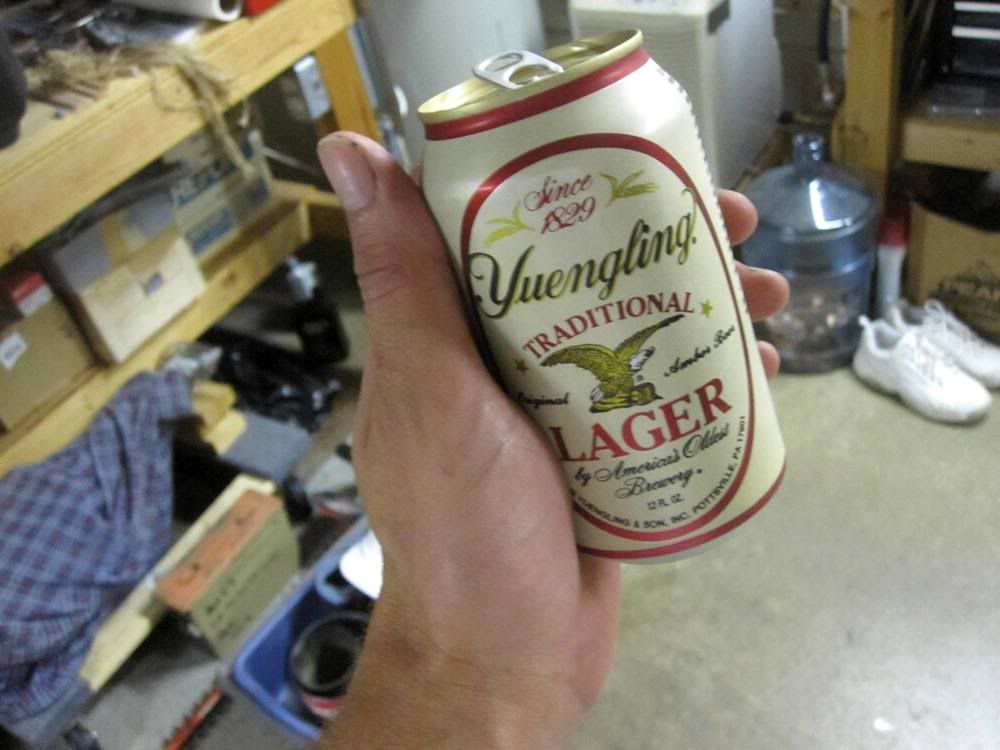
Step 11: Grab one of these because you're done! (or if you're not of age, grab a nice Mountain Dew)
THE RESULTS:
With the shackle box and my longer shackles, I ended up with a little over 1.5" of lift, bringing me just above where I should have been stock before my leaf springs sagged. If you were to reuse the stock shackles, the minimum amount of lift built into these brackets is about 5/8" (measured at the center of the axle). On the ride to work today I noticed a significant improvement in ride quality, even with the aging springs. Additional flex that comes from these will be a future test.
All in all - HIGHLY recommended mod. Brian at H.D. Offroad is a great guy to work with, and always answered any question I had by email in under an hour. And quality is top notch. Can't ask for much more than that!
The brackets are 1/4" plate steel, fabbed and weldeded in the good 'ol USA. And man are these brackets BEEFY. Complemented with 1/2" grade 8 hardware (included), these brackets utilize the stock shackle attachment bolt, as well as 3 of the bolts into the frame where a trailer hitch or gas tank skid would attach (these bolts are not included due to variances in bolt sizes used by different manufacturers). This results in a much stronger attachment to the body of the vehicle. Also new to this design is an adjustability slot at the shackle bolt. This allows the relocation bracket to be installed OVER a trailer hitch and/or gas tank skid, eliminating the need to drop these components to install the brackets.
So, what you get is enough to do both sides: Includes bolt in bracket w/ welded studs, anti crush bracket, shackle bracket, new shackle bolt, and grade 8 washers for the frame bolts (if required). One side is shown below.
Enough of the introduction, onto the dirty part - the install.
Before I start i need to recommend something, especially if you've never removed your shackle bolts before... PB BLASTER... And lots of it. I started blasting mine every night since I ordered these brackets until I installed them last night. That's about a week's worth. You WILL thank me for this. Make sure to try and get some penetrating oil into the internal part of the bushing where the bolt slides though, as well as into the frame rail where the captive nut and other end of the bolt are.
So what will you need?
- Jack stands, wood blocks, CMU blocks, etc - anything stong enough to keep the jeep from falling on your head while fighting with the shackle bolts
- Wheel chocks
- Floor jack
- A good 1/2" breaker bar - mine is 18" long
- a good quality 21MM socket - I like impact sockets for hard wrenching.
- PB Blaster or other penetrating oil of your choice (Note: WD-40 is not a penetrating oil...nuff said)
- Saftey goggle to prevent the inevitable rain of rust and dirt from blinding you
- Energy Beverage, Beer, or other refreshment of your choice- Normal socket set, metric and standard for misc. bolts
- Torque Wrench (preferred)
Ok, so here is our candidate for the day - My 1995 XJ Sport with 245,000 miles on the stock suspension...this should be interesting.Before I started the rear end was 1.5" lower than it was supposed to be thanks to the sagging rear springs.
STEP 1: Apply the parking brake, put your wheel chocks in front of the front wheels, and start jacking. You need to lift the rear high enough to have the rear tires hanging off the ground by at least 2-3" with the rear axle unsupported. Install the jack stands at whatever height gets you to this point. Jack stands should be placed where the front leaf spring bolt is located.
STEP 2: Support the rear differential with the floor jack just enough to take the weight off the shocks.
STEP 3: If your shocks are short like my current ones were, they will not allow the rear axle to droop all the way. In this case you will need to unbolt the bottom your shocks.
STEP 4: Get torquing! Here's what you'll be looking at if you're still stock:
The bolts are very tight and will almost certainly be a pain to remove (this is where the PB Blaster treatment is key). Many people have reported issues with either a) the captive nut inside the frame breaking loose and spinning or b) the steel sleeve inside the shackle bushing being rust welded to the bolt and simply spinning when the bolt is turned, preventing extraction. The solutions for these problems have been covered extensively so I won't go into that here. It turned out for me that neither of these occurred thanks to my preparation (PB Blaster..remember? I can't stress this enough). When you are turning out the bolts, you will almost certainly have the bolts start to "squeal" or "chatter". This is due to rust clogging the bolt threads. The fix is very simple - rotate the bolt back in and out until the noise stops - this clears the threads and allows you to go further. Take your time with this step. Each bolt took me about 20 minutes to remove using this method and they came out perfectly usable and undamaged.
VICTORY!
STEP 5: Now because my shackle and bushing were in such poor shape, I decided to replace them at the same time, so I unbolted those as well. If you are not replacing your shackles, you need to at least loosen the bolt holding the shackle to the spring. I also wanted the minimum amount of lift out of these brackets as possible due to my future plans, so i needed to install them tight to the underside of the framerail. Therefore I also removed my trailer hitch. It's not necessary to do so because of the adjustability of the brackets. Installing over the hitch brackets/gas tank skid will simply give you more lift. I just chose to. So now you're staring at this:
STEP 6: Now the fun part begins - The Installation! The parts you get from H.D. Offroad come as plain unpainted steel. You definitely should paint these parts before installing them to prevent them from rusting away. I had painted mine a few days prior so they were ready to go. I'm digging the two tone paint job. The crush bracket simply slides into the slots in the main bracket.
Now to get them into the stock shackle boxes, I had to pry out the side of the box a little bit. This is because the H.D. Offroad kit is meant to have a very tight fit, which is necessary to have a good solid mounting point - after all, the entire back of the jeep is supported by this spot (as well as the front leaf support). After a bit a coaxing the bracket slid right in. All the holes lined up perfectly with those in the frame. After it's in place, reinstall the stock shackle bolt (don't tighten all the way yet).Repeat on the other side.
Step 7: Reinstall the trailer hitch/gas tank (if applicable) and the nuts/bolts that hold it on though the holes in the new relocation brackets. If you don't have a trailer hitch or gas tank skid, you will need to purchase nuts (or preferrably a nut strip made for trailer hitch installation) and bolts. The relocation hit comes with washers for this purpose. I did not need to use them.Torque the bolts to manufacturer's specifications. For my bolts this was 80 ft-lb. After these bolts are torqued down, now you can tighten the stock shackle bolt to 109 ft-lb.
At this time I also installed my new shackles. I used ones off a Dodge Durango (1" longer than stock). They required a little bit of work to get them to work however - I had to grind down the metal sleeve a bit, bend in the ears a bit, and enlarge the holes in the sleeve and ears a smidge, but they fit great after that. Do not tighten the shackle bolt yet.
Step 8: Install the shackle adjustment brackets with the suppied nuts and washers. For most applications, use the standard round holes, with the longer end towards the front of the jeep. Torque to 80 ft-lb.
Step 9: Reinstall the shackle using the new supplied bolt with two washers and the nylock nut. This takes a bit of trial and error as to where to attach it. Start with the middle hole. Raise the rear axle until the wheels are where they would be at ride height, and check the shackle angle. The ideal angle is about 45 degrees towards the rear under normal driving with the full weight on the springs. Adjust the attachment location as necessary to achieve the desired position. Do not tighten the bolt down yet.
Step 10: Reinstall the shocks (if disconnected), remove the jack stands, and set the rear of the jeep back on the ground. Once this is done, you can tighten the shackle to spring bolts and shackle to bracket bolts to 80 ft-lb.
Step 11: Grab one of these because you're done! (or if you're not of age, grab a nice Mountain Dew)
THE RESULTS:
With the shackle box and my longer shackles, I ended up with a little over 1.5" of lift, bringing me just above where I should have been stock before my leaf springs sagged. If you were to reuse the stock shackles, the minimum amount of lift built into these brackets is about 5/8" (measured at the center of the axle). On the ride to work today I noticed a significant improvement in ride quality, even with the aging springs. Additional flex that comes from these will be a future test.
All in all - HIGHLY recommended mod. Brian at H.D. Offroad is a great guy to work with, and always answered any question I had by email in under an hour. And quality is top notch. Can't ask for much more than that!
Thread Starter
☠ CF Sheriff ☠
Joined: Nov 2009
Posts: 15,197
Likes: 18
From: Aberdeen, MD
Year: 1995
Model: Cherokee
Engine: 4.0L HO I-6, 703 Injectors, Brown Dog Super Engine Mounts
Bump...Another update
Words cannot express how much I love these. My spine no longer compresses going over bumps!
Words cannot express how much I love these. My spine no longer compresses going over bumps!
Honorary Moderator
Joined: Mar 2010
Posts: 8,135
Likes: 16
From: Gilbert AZ/Las Cruces NM
Year: 1996
Model: Cherokee
Engine: 4.0 upgraded
sweet. so it looks like they copied RC in the 100% bolt on.
i have the RC brackets and love them! shackle relocation was the best idea ever haha
i have the RC brackets and love them! shackle relocation was the best idea ever haha
Thread Starter
☠ CF Sheriff ☠
Joined: Nov 2009
Posts: 15,197
Likes: 18
From: Aberdeen, MD
Year: 1995
Model: Cherokee
Engine: 4.0L HO I-6, 703 Injectors, Brown Dog Super Engine Mounts
yea i considered the RC ones as well. They have a good product also, but I liked the fact that these bolted to the unibody frame as well as the shackle box. Extra security and strength for piece of mind. These are far more adjustable as well.


Honorary Moderator
Joined: Mar 2010
Posts: 8,135
Likes: 16
From: Gilbert AZ/Las Cruces NM
Year: 1996
Model: Cherokee
Engine: 4.0 upgraded
front rear is the exact same.... you just flip the bottom box around if need be exactilly like the HDE box.
up down is not a factor considering on where it mounts to. they sit at the exact same height when installed. the reason you have the adjustable bolt hole on your main box is to give a little leeway incase you had a trailer hitch or skid plate or something of that nature.
once installed they sit the exact same....
I did alot of research between the 2, I ended up winning the RC brakets in a contest on here tho. and i like RC customer service.
but you may slice your apple vertically i may like mine cut in rings, either way we still have apple slices in the end...
Trending Topics

Honorary Moderator
Joined: Mar 2010
Posts: 8,135
Likes: 16
From: Gilbert AZ/Las Cruces NM
Year: 1996
Model: Cherokee
Engine: 4.0 upgraded
nice write up however ours are very similar
https://www.cherokeeforum.com/f51/rc...rackets-89893/
altho i have a different taste in beer.
https://www.cherokeeforum.com/f51/rc...rackets-89893/
altho i have a different taste in beer.

Banned
Joined: Oct 2009
Posts: 775
Likes: 0
I'm glad this came back up. Are there any negative or side effects to having this kind of product?
I'm currently at a 4.5" lift. I want to go up another inch. So I'm trying to figure the ways of doing so. I was thinking originally to buy a fresh set of leafs and the JKS shackles and that'll put me at my 5.5". But if you get better angle with these, w/o compromising anything. I may consider this.
I'm currently at a 4.5" lift. I want to go up another inch. So I'm trying to figure the ways of doing so. I was thinking originally to buy a fresh set of leafs and the JKS shackles and that'll put me at my 5.5". But if you get better angle with these, w/o compromising anything. I may consider this.
Thread Starter
☠ CF Sheriff ☠
Joined: Nov 2009
Posts: 15,197
Likes: 18
From: Aberdeen, MD
Year: 1995
Model: Cherokee
Engine: 4.0L HO I-6, 703 Injectors, Brown Dog Super Engine Mounts
I'm glad this came back up. Are there any negative or side effects to having this kind of product?
I'm currently at a 4.5" lift. I want to go up another inch. So I'm trying to figure the ways of doing so. I was thinking originally to buy a fresh set of leafs and the JKS shackles and that'll put me at my 5.5". But if you get better angle with these, w/o compromising anything. I may consider this.
I'm currently at a 4.5" lift. I want to go up another inch. So I'm trying to figure the ways of doing so. I was thinking originally to buy a fresh set of leafs and the JKS shackles and that'll put me at my 5.5". But if you get better angle with these, w/o compromising anything. I may consider this.
Banned
Joined: Oct 2009
Posts: 775
Likes: 0
If I'm trying to achieve the 40-50 degree shackle angle with these. What amount of height/lift could I expect?
I'm also guessing that with these installed with roughly a 40-50 degree shackle angle. This would take some arch out of the leafs?
I'm also guessing that with these installed with roughly a 40-50 degree shackle angle. This would take some arch out of the leafs?
