
What did you do to your Cherokee today?

CF Veteran
Joined: Apr 2008
Posts: 2,096
Likes: 2
From: West Virginia
Year: 1996
Model: Cherokee
Engine: 2.5L I-4
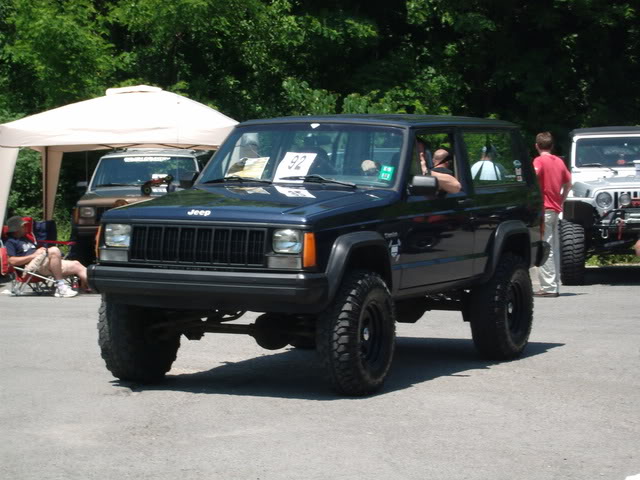
Not today, but last Saturday. - Installed new header panel, new grille, new headlights, new parking lights, new corner lights, new bezels, new bumper and new end caps. Also straightened the sub-frame.
I don't have any before pics (no camera), but basically the grille was shattered, the header panel had a crack to the left of the Jeep badge and was held on by two bolts - 4 others being ripped out of the front clip. Driver's side parking and corner lights were shattered, bezel was busted, headlight was droopy, and the bumper was about six inches behind the grille. It was all held together with twine to keep the header panel from catching a crosswind and ripping all the way off. That's what happens when you go toe-to-toe with a Dogde Ram 2500.
But, after catching a good deal off a guy on my local forum on the header panel (same color ), grille, headlights, corner lights, bezels and one parking light, I did a little junkyard diving for the other parking light, a bumper and two end caps. A little rattle can made everything match, and I was good as new. All in all, I had $80 in a new front end.
The next day (photo by jonb8):
I don't have any before pics (no camera), but basically the grille was shattered, the header panel had a crack to the left of the Jeep badge and was held on by two bolts - 4 others being ripped out of the front clip. Driver's side parking and corner lights were shattered, bezel was busted, headlight was droopy, and the bumper was about six inches behind the grille. It was all held together with twine to keep the header panel from catching a crosswind and ripping all the way off. That's what happens when you go toe-to-toe with a Dogde Ram 2500.
But, after catching a good deal off a guy on my local forum on the header panel (same color
), grille, headlights, corner lights, bezels and one parking light, I did a little junkyard diving for the other parking light, a bumper and two end caps. A little rattle can made everything match, and I was good as new. All in all, I had $80 in a new front end. The next day (photo by jonb8):
CF Veteran
Joined: Apr 2008
Posts: 2,096
Likes: 2
From: West Virginia
Year: 1996
Model: Cherokee
Engine: 2.5L I-4
No trophies for me, just some shootin' of the breeze with about 140 other Jeepers.  The Jeeps that did win were pretty sharp, though. Especially the Classic category.
And yeah, I did it all the day before the show. Nothing like waiting 'till the last minute.
The Jeeps that did win were pretty sharp, though. Especially the Classic category. And yeah, I did it all the day before the show. Nothing like waiting 'till the last minute.
Renix Super Guru
Joined: Mar 2008
Posts: 24,653
Likes: 19
From: In yourz postez fissin jurr spelinzs
Year: 1990XJ/1989MJ
Model: Comanche
Engine: 4.0L Renix
NO doing it at the show and trying to get it done before the judges get to your junk is real last minute. Helped a buddy put underhood insulation on his 55 Chevy at the car show about a month ago.
CF Veteran
Joined: Apr 2008
Posts: 2,096
Likes: 2
From: West Virginia
Year: 1996
Model: Cherokee
Engine: 2.5L I-4
That IS last minute! You always see that stuff at car shows, though. Heck, just washing the Jeep was more than a lot of folks did. Mud helps hide the trail damage. 
Junior Member
Joined: Jun 2008
Posts: 79
Likes: 1
Year: 1988 (all of them)
Model: Cherokee
Engine: 4.0, 4.6, and wore-out 4.0
Late last night: Rolled it. The only damage to the XJ is the roof rail on the driver's side is krunkled up now (at least it matches the rest of her). Oh, and now the windshield has a couple of leaks.
Renix Super Guru
Joined: Mar 2008
Posts: 24,653
Likes: 19
From: In yourz postez fissin jurr spelinzs
Year: 1990XJ/1989MJ
Model: Comanche
Engine: 4.0L Renix


CF Veteran
Joined: Apr 2008
Posts: 1,052
Likes: 2
From: Lakewood, Colorado
Year: 1990 2dr base
Model: Cherokee
Engine: 4.0L
After pulling my exhaust pipe, I started to track down the new noise I have up front. It looks like I busted one of the u-joint cups for the right front axle. Now it rattles. At least it held together long enough to get me home.
It's starting to become an expensive weekend. But it was fun.


It's starting to become an expensive weekend. But it was fun.
CF Veteran
Joined: Apr 2008
Posts: 7,661
Likes: 15
From: Smiths Station, Al
Year: 87
Model: Wagoneer
Engine: 4.0 I6
Finished up the Rear Leaf springs. These were a PIA
You all saw my problems just getting the Leafs off well. Once I cut each side of the bolt it dropped right out. I had to replace the U-bolts due to one breaking also. I noticed the U-bolts plates were bent up also so i went to pull-a-part and picked some more up. Leafs wentin with no problem. Ofcourse the Shocks were a different story.
I posted earlier that all 4 broke UGH. Well I attempted to extract them. I drilled two of them out completly threw. They had to be rust welded cause i bent all my extractors. 2 craftsmen and 2 snap-on. Snap-on wasnt mine i borrowed those from work but after all that frustration I finally did what i didnt wan to do...
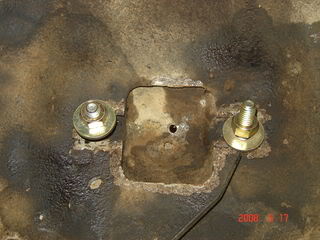
Cutting threw my beautiful Rhino-Lined Floor
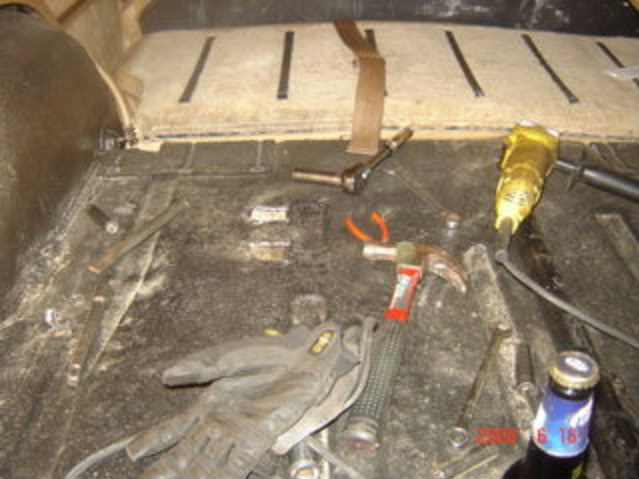
I drilled a Pilot hole in the middle of each shock to find them on the other side
And then went to cutting
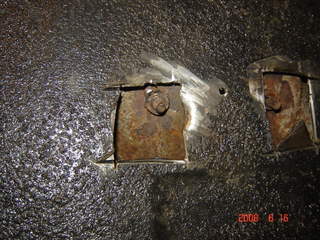
I cut two of the bolts out initially and was burning up dremel wheels so fast I did realize that if I just stuck a 15mm on there I could snap them off until the last two.
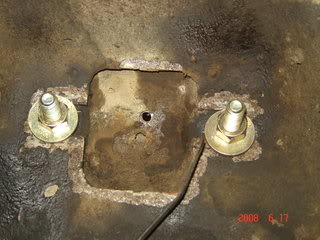
I Installed new 1/2 bolts threw the holes with washers
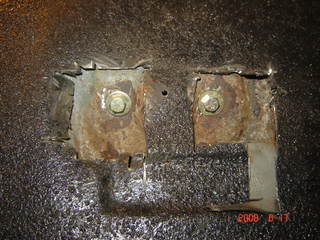
Tightened a nut and washer to the other side to serve as a permanent stud so i can fix the floor.
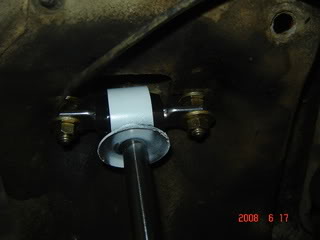
Installed shock. Now I should just be able to hold the top nut and loosen the bottom to change out if needed. I have a feeling the top bolt will still loosen so I may see if a shop will throw a weld on it for me.
Well now i got the rear complete. Put the wheel back on and this is how she is sitting

Started front also tonight. Removed the sway bar and broke the LCA's loose. Will start removing springs tomorrow.
You all saw my problems just getting the Leafs off well. Once I cut each side of the bolt it dropped right out. I had to replace the U-bolts due to one breaking also. I noticed the U-bolts plates were bent up also so i went to pull-a-part and picked some more up. Leafs wentin with no problem. Ofcourse the Shocks were a different story.
I posted earlier that all 4 broke UGH. Well I attempted to extract them. I drilled two of them out completly threw. They had to be rust welded cause i bent all my extractors. 2 craftsmen and 2 snap-on. Snap-on wasnt mine i borrowed those from work but after all that frustration I finally did what i didnt wan to do...
Cutting threw my beautiful Rhino-Lined Floor
I drilled a Pilot hole in the middle of each shock to find them on the other side
And then went to cutting
I cut two of the bolts out initially and was burning up dremel wheels so fast I did realize that if I just stuck a 15mm on there I could snap them off until the last two.
I Installed new 1/2 bolts threw the holes with washers
Tightened a nut and washer to the other side to serve as a permanent stud so i can fix the floor.
Installed shock. Now I should just be able to hold the top nut and loosen the bottom to change out if needed. I have a feeling the top bolt will still loosen so I may see if a shop will throw a weld on it for me.
Well now i got the rear complete. Put the wheel back on and this is how she is sitting
Started front also tonight. Removed the sway bar and broke the LCA's loose. Will start removing springs tomorrow.