
The Homebrew Jeep Mod Thread


Newbie
Joined: Nov 2012
Posts: 8
Likes: 0
From: Ohio
Year: 2000
Model: Cherokee
Engine: 4.0 L V6
I thought about cutting out the plastic, but decided to try this first. Im happy I did because the mesh is basically on top of the plastic bars. I think it will hold its form better in case I catch a rock or anything.
CF Veteran
Joined: Apr 2011
Posts: 4,825
Likes: 2
From: Indianapolis
Year: '99 and '91
Model: Cherokee
i just used black wire from the hardware store. put them on like twistie ties through the back to hold the mesh in place.
I thought about cutting out the plastic, but decided to try this first. Im happy I did because the mesh is basically on top of the plastic bars. I think it will hold its form better in case I catch a rock or anything.
Junior Member
Joined: Dec 2012
Posts: 85
Likes: 0
From: Ohio
Year: 1998
Model: Cherokee
Engine: I6
CF Veteran
Joined: May 2010
Posts: 3,405
Likes: 2
From: Fort Collins, CO
Year: 1996
Engine: 4.0L HO
I do not. but there are a million write ups on various forums and there is no single specific way to build it. mine is fairly basic though, just intake filter, oiler, compressor, oil separator, pressure switch and a connect for a hose.

Junior Member
Joined: Oct 2011
Posts: 31
Likes: 0
Year: 1991
Model: Cherokee
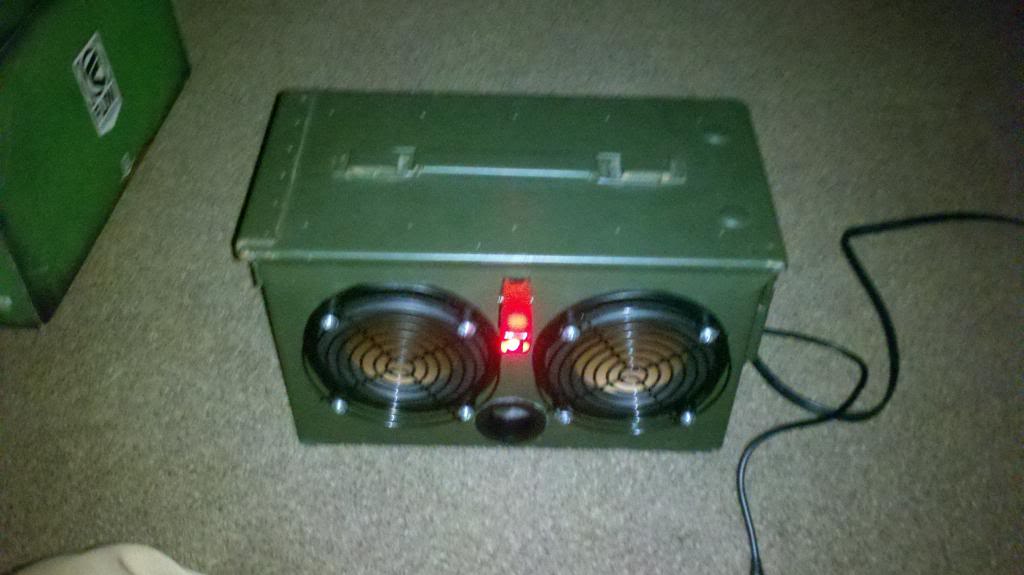
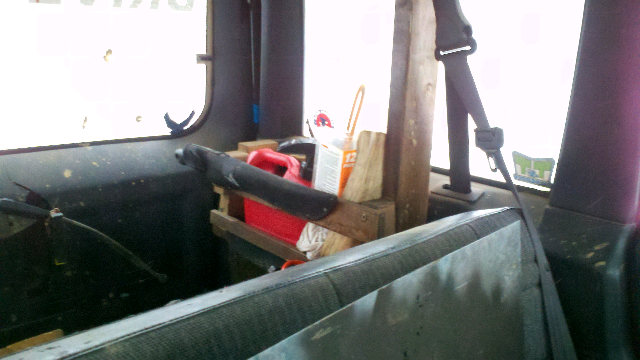
Finished the first part of my new dash. Bedliner on all the dash and flat black one the sides and frame work. Also installed a hook up for my iPhone so I can play my music since I have no stereo deck.
CF Veteran

Joined: Sep 2011
Posts: 1,874
Likes: 1
From: new mexico
Year: 88
Engine: 4.0
It looks like it wood but could be from the texture of the bedliner. Either way I like it.
Seasoned Member
Joined: Feb 2010
Posts: 341
Likes: 0
From: Owens Cross Roads, AL
Model: Cherokee
Wood or not, I think it is an interesting concept for sure. What kind of screws did you use? and are the screws going directly into body metal? I am trying to visualize how this is working.
Junior Member
Joined: Oct 2011
Posts: 31
Likes: 0
Year: 1991
Model: Cherokee
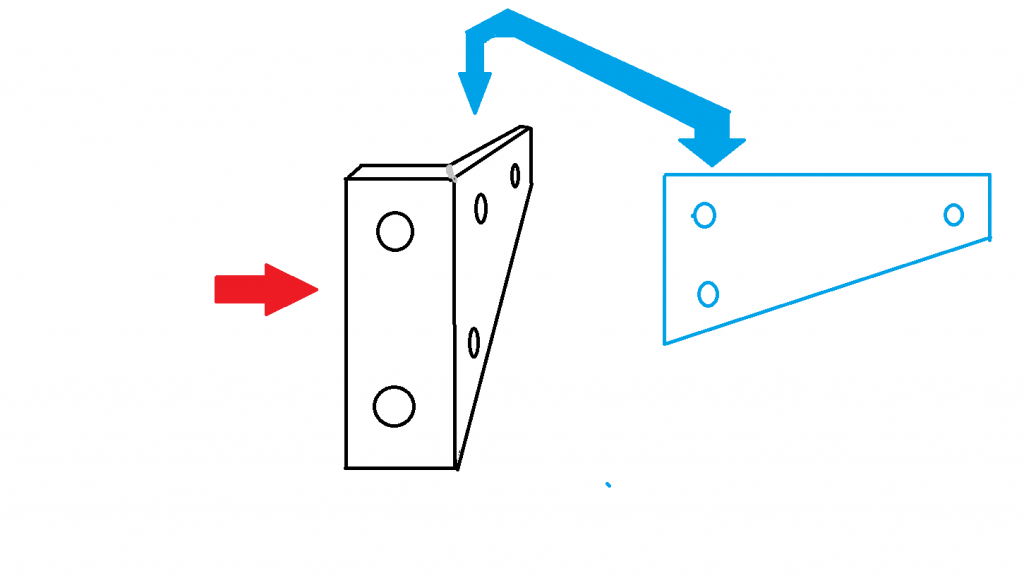
I did a 1" angle frame work and then skinned it with 22 GA. The fasteners are #8x32 stainless steel cap heads which are threaded into the angle. The only thing that is wood are the speaker mounts. I did that because I am not sure if that is a permanent spot for them yet.
CF Veteran
Joined: Aug 2012
Posts: 1,592
Likes: 0
From: oregon
Year: 1993
Model: Cherokee
Engine: 4.0 ho 99 intake ps pump 1" tb spacer 62mm bored tb eletric fans and more
CF Veteran
Joined: Feb 2012
Posts: 1,424
Likes: 4
From: Boone, NC
Year: 1998
Model: Cherokee
Engine: 4.0L
Also, I like your garage tennis ball stopper haha

Junior Member
Joined: Jul 2012
Posts: 44
Likes: 1
Year: 98
Model: Cherokee
Engine: v6 ha ha ha
i used a miller mig welder and propane cutting torch for most of this.
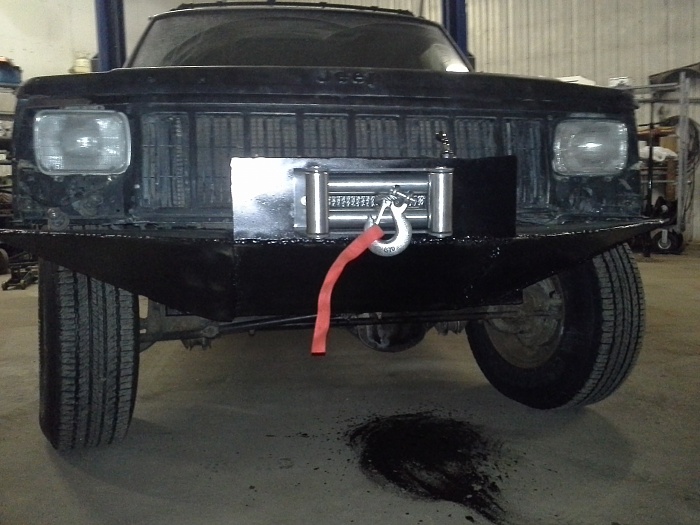
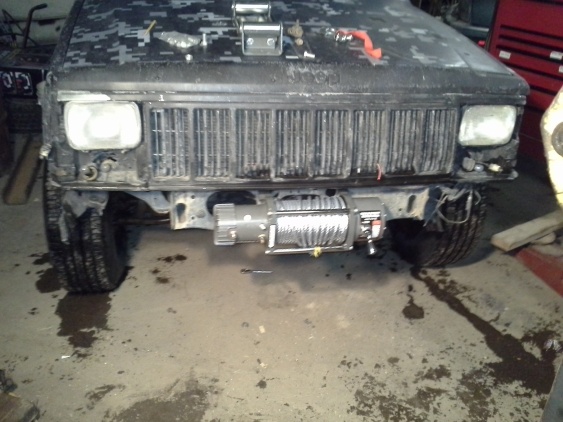
First i pulled off the stock bumper and bolted my winch to the stock spot and pondered. then i took it off and laughed at the stock mount. then i cut it off except the top part that helps mount the radiator. took off the grill and stuff.

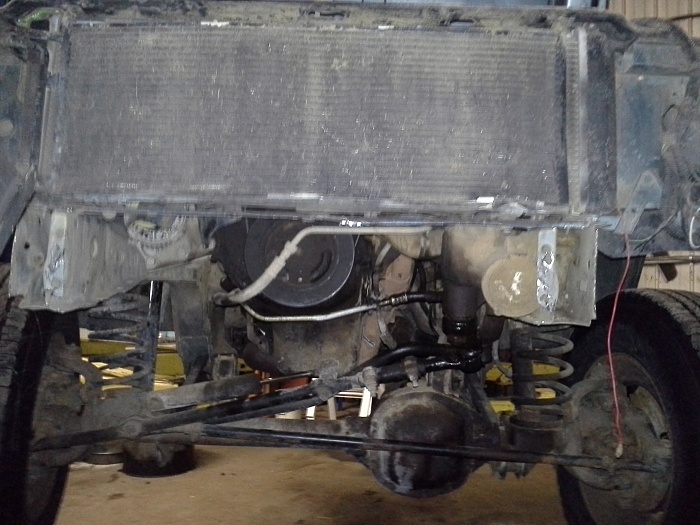
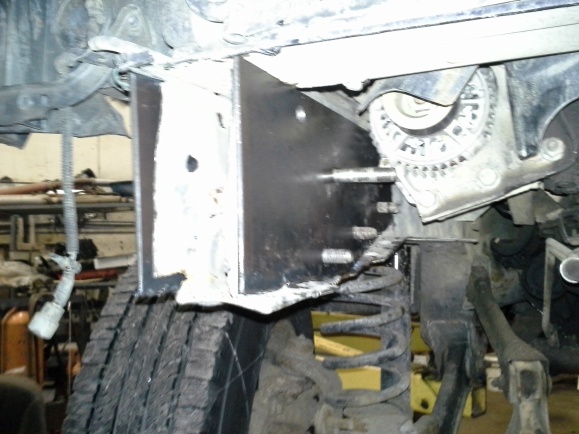
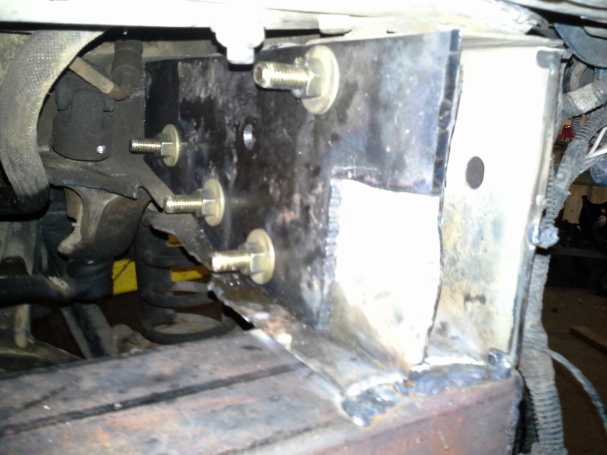
when i got it all apart i found more fun damage to the uniframe. I used a BFH to straighten it out the best i could and made some plates to reinforce both parts of the frame and to be part of the frame. I used a piece of card board a sharpie and a hammer to make the outline for the four plates. i cut the edges off by holding the board up on one side and using the sharpie to outline it on the opposite. then i kept it there and used a small hammer to pound the holes into it so i could have an exact copy of it to make my plates. i cut a square notch in the inner driver side because the steering gear box.
next i cut a 2x4 steel tube to reinforce my new subframe it was about 33 inches. welded that up. cut the holes in the plates for grade 8 bolts to go through tightened them up and welded them in place and the 2x4. then i cut a plate to go infront of all that and welded that is 3/16 hardened steel.


for the winch base plate i used 1/4 steel and added four 3/16 triangle peices as gussets. from there i welded that all up to the front mount because i dont plan on ever taking this off and if i ever have to i will use a cutting torch or plasma cutter. then i bolted the winch on and welded the front bash plate on. i cut out triangular pieces and welded it out to finish it towards the fenders. finally i cut a plate out for the fair lead welded that up. since i can only post five pics heres the final product.
First i pulled off the stock bumper and bolted my winch to the stock spot and pondered. then i took it off and laughed at the stock mount. then i cut it off except the top part that helps mount the radiator. took off the grill and stuff.

when i got it all apart i found more fun damage to the uniframe. I used a BFH to straighten it out the best i could and made some plates to reinforce both parts of the frame and to be part of the frame. I used a piece of card board a sharpie and a hammer to make the outline for the four plates. i cut the edges off by holding the board up on one side and using the sharpie to outline it on the opposite. then i kept it there and used a small hammer to pound the holes into it so i could have an exact copy of it to make my plates. i cut a square notch in the inner driver side because the steering gear box.
next i cut a 2x4 steel tube to reinforce my new subframe it was about 33 inches. welded that up. cut the holes in the plates for grade 8 bolts to go through tightened them up and welded them in place and the 2x4. then i cut a plate to go infront of all that and welded that is 3/16 hardened steel.
for the winch base plate i used 1/4 steel and added four 3/16 triangle peices as gussets. from there i welded that all up to the front mount because i dont plan on ever taking this off and if i ever have to i will use a cutting torch or plasma cutter. then i bolted the winch on and welded the front bash plate on. i cut out triangular pieces and welded it out to finish it towards the fenders. finally i cut a plate out for the fair lead welded that up. since i can only post five pics heres the final product.
