
XJ makeover, One tons and 40's.


Thread Starter
Former Sponsor
Joined: May 2010
Posts: 2,181
Likes: 0
From: meriden Ct
Year: 2000
Model: Cherokee
Engine: 4.0
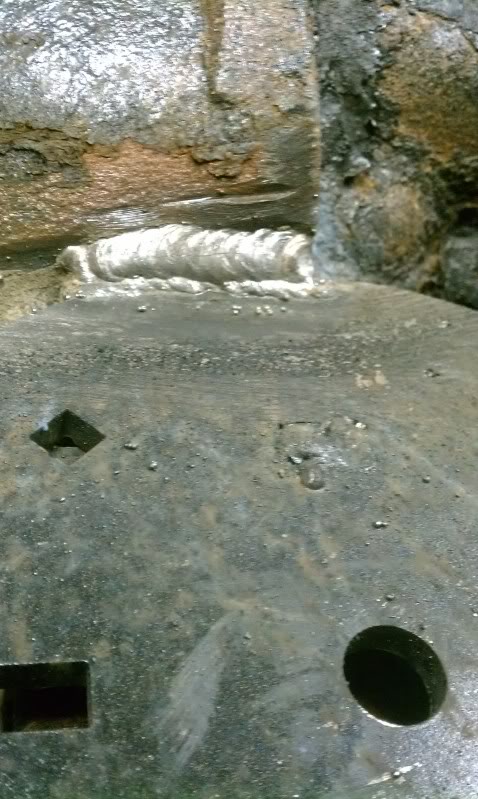
Thanks man, Im not too impressed with how they look but I guess thats what you get for using flux core wire.
Im using a northern tool 135A 110v mig with harbor freight .030" flux core wire. Nothing special. the machine works great, and I would recommend it to anyone looking for a good 110v unit.
I welded the carrier at work with our 250v miller. Those look good.
Im using a northern tool 135A 110v mig with harbor freight .030" flux core wire. Nothing special. the machine works great, and I would recommend it to anyone looking for a good 110v unit.
I welded the carrier at work with our 250v miller. Those look good.
CF Veteran
Joined: Mar 2010
Posts: 6,685
Likes: 6
From: Jacksonville, FL
Year: 92
Model: Cherokee
Engine: 4.0
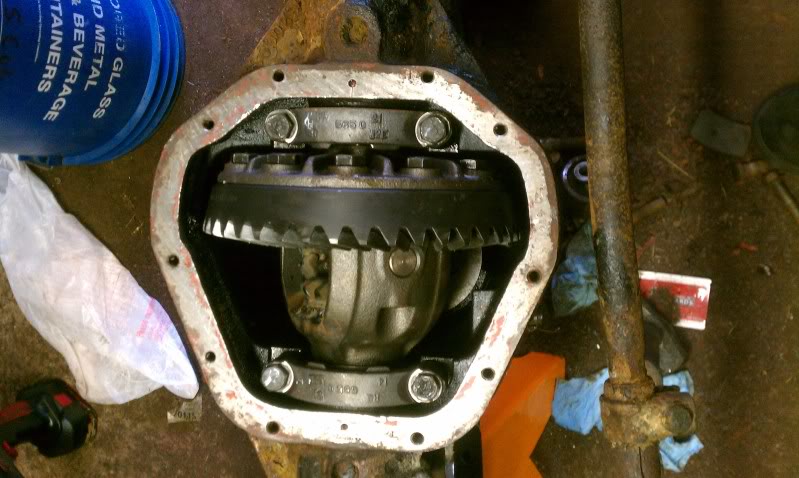
We got the front end back in the garage for final welding and gearing. AAAAAANNNNDDDDD I picked up my new favorite tool, this thing is going to make gearing SOOOO much easier. You can never beat having the right tool. Tried it out on the 60 carrier bearing that got damaged and it zipped it right off.


Banned
Joined: Oct 2009
Posts: 2,231
Likes: 1
From: West Springfield, MA
Year: 1999
Model: Cherokee
Engine: 4.0
Thanks man, Im not too impressed with how they look but I guess thats what you get for using flux core wire.
Im using a northern tool 135A 110v mig with harbor freight .030" flux core wire. Nothing special. the machine works great, and I would recommend it to anyone looking for a good 110v unit.
I welded the carrier at work with our 250v miller. Those look good.
Im using a northern tool 135A 110v mig with harbor freight .030" flux core wire. Nothing special. the machine works great, and I would recommend it to anyone looking for a good 110v unit.
I welded the carrier at work with our 250v miller. Those look good.
CF Veteran
Joined: Jul 2011
Posts: 4,521
Likes: 1
From: JOCO
Year: 1999
Engine: 4.0 Inline 6
Originally Posted by ct67_72
Thanks man, Im not too impressed with how they look but I guess thats what you get for using flux core wire.
Im using a northern tool 135A 110v mig with harbor freight .030" flux core wire. Nothing special. the machine works great, and I would recommend it to anyone looking for a good 110v unit.
I welded the carrier at work with our 250v miller. Those look good.
Im using a northern tool 135A 110v mig with harbor freight .030" flux core wire. Nothing special. the machine works great, and I would recommend it to anyone looking for a good 110v unit.
I welded the carrier at work with our 250v miller. Those look good.
Looks good though.
Thread Starter
Former Sponsor
Joined: May 2010
Posts: 2,181
Likes: 0
From: meriden Ct
Year: 2000
Model: Cherokee
Engine: 4.0
I use a 110 Lincoln with .35 Firepower? Flux core. Its the stuff Napa carries. Does pretty good with a clean surface. I get good penetration up to 1/4". For that or 3/16 i turn the speed down very slow, and crank the heat. I let the steel get very hot while i burn it in. Doesn't splash as much that way either.
Looks good though.
Looks good though.
i dont mind the harbor freight wire at all either. Although if I get really picky about how it looks Ill bring it to work and burn it in with the Miller.
CF Veteran
Joined: Jul 2011
Posts: 4,521
Likes: 1
From: JOCO
Year: 1999
Engine: 4.0 Inline 6
Originally Posted by ct67_72
.035" actually draws more amperage, with a lower amperage 110v .030" is better, and should get better penetration.
i dont mind the harbor freight wire at all either. Although if I get really picky about how it looks Ill bring it to work and burn it in with the Miller.
i dont mind the harbor freight wire at all either. Although if I get really picky about how it looks Ill bring it to work and burn it in with the Miller.
Thread Starter
Former Sponsor
Joined: May 2010
Posts: 2,181
Likes: 0
From: meriden Ct
Year: 2000
Model: Cherokee
Engine: 4.0
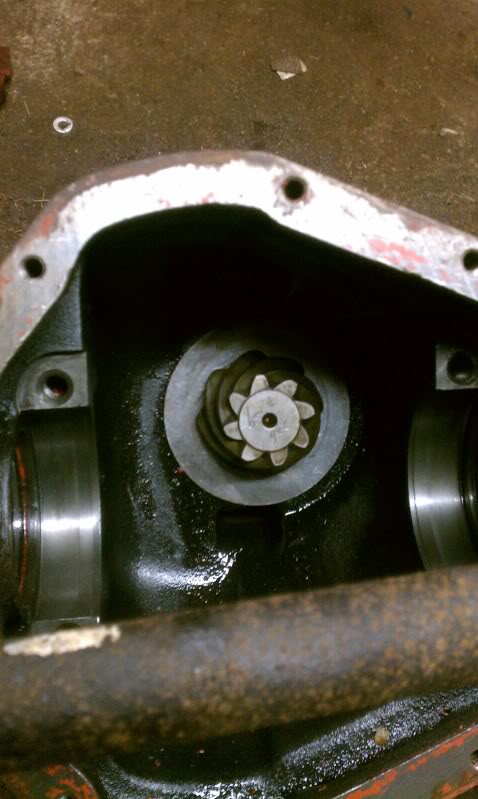
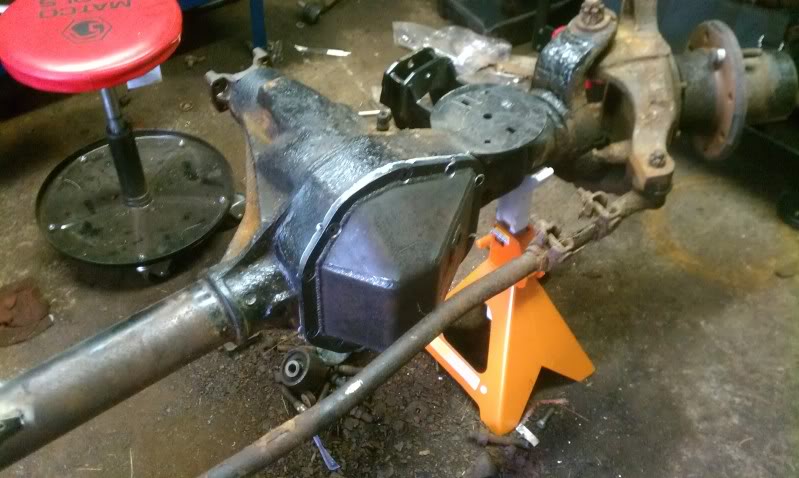
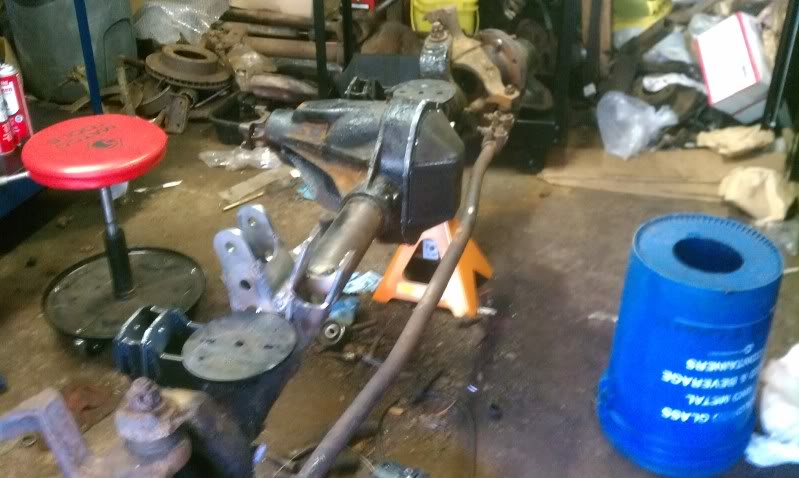
I got the pinion bearing on the new pinion, got it in the housing and preload set. I need to pick up a carrier bearing and race and then I can get the carrier in.
I also final welded all the brackets, I had a few spots I wanted to go back to. I added another gusset just to make sure it was completely overkill lol.

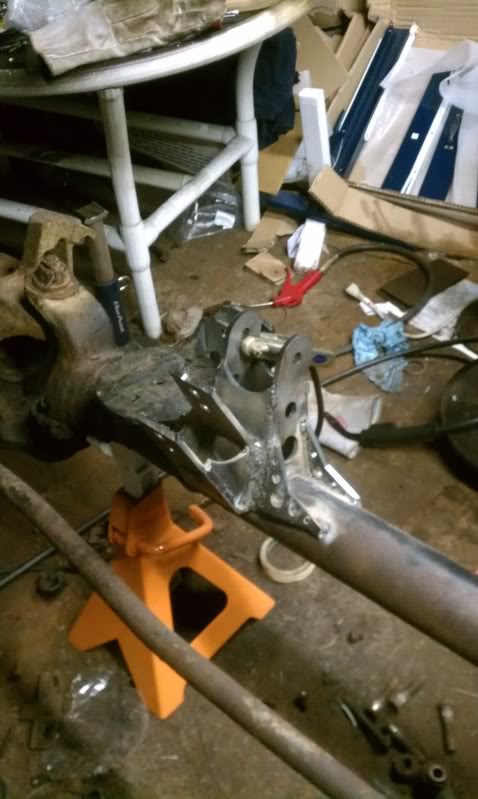


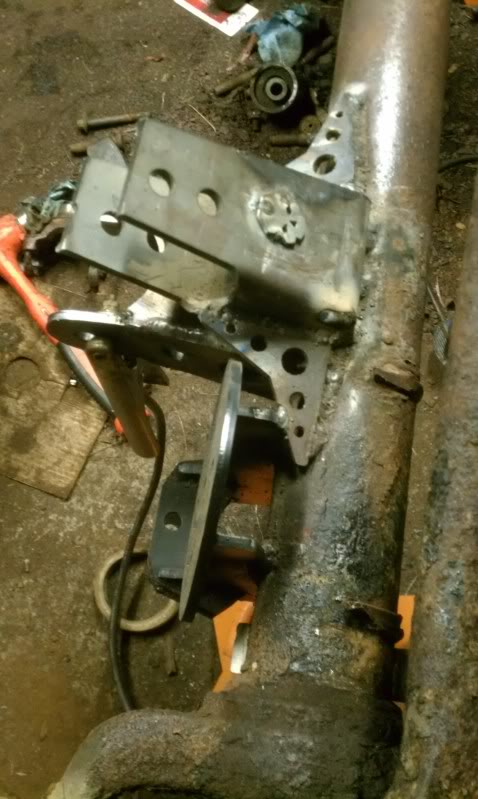
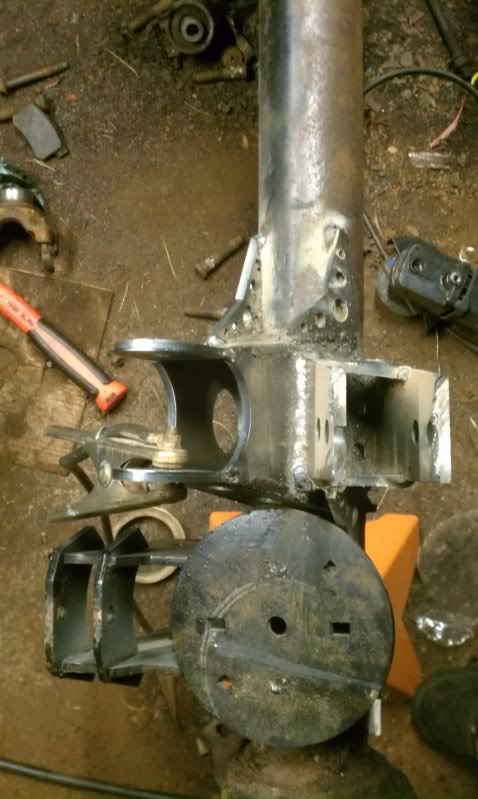
I also final welded all the brackets, I had a few spots I wanted to go back to. I added another gusset just to make sure it was completely overkill lol.
Thread Starter
Former Sponsor
Joined: May 2010
Posts: 2,181
Likes: 0
From: meriden Ct
Year: 2000
Model: Cherokee
Engine: 4.0
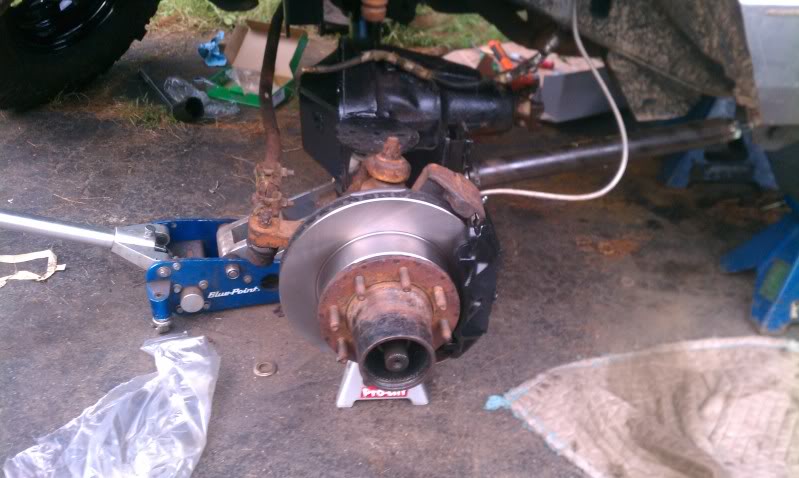
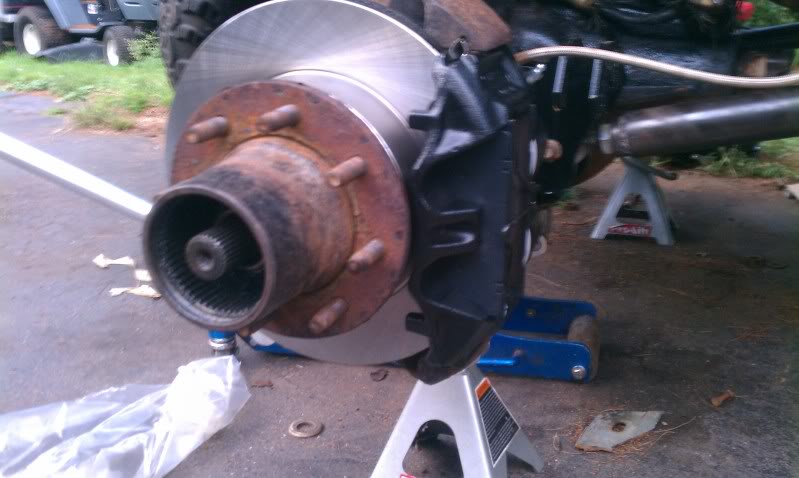
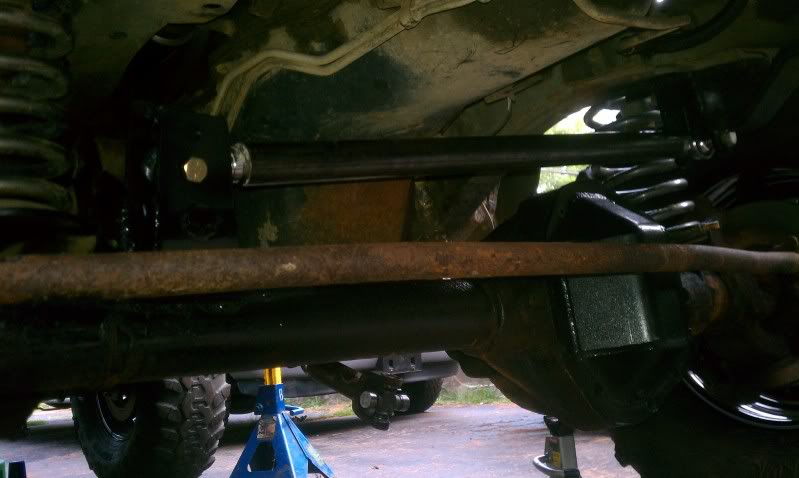
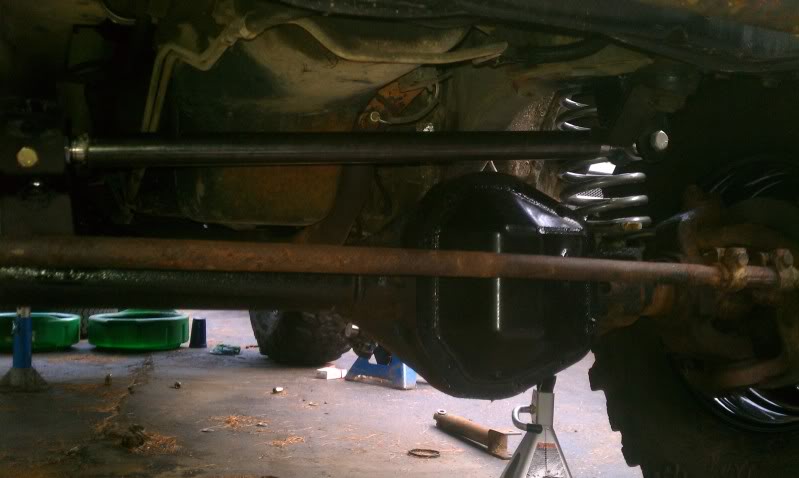
I REALLY got some work done today. Thanks to Bill and my friend Tyler we got the axle geared, got the cover on, got it back under the jeep painted, pun new spindle seals in and got the axles and spindles on, put new rotors on the hubs and got the hubs mounted, got the calipers on and the lines on, drilled all the brackets for the 5/8" bolts the heims take, measured the driveshaft, and some other things Im sure. If I had my DOM I could have done the track bar and had it back down on its own weight.


ride height
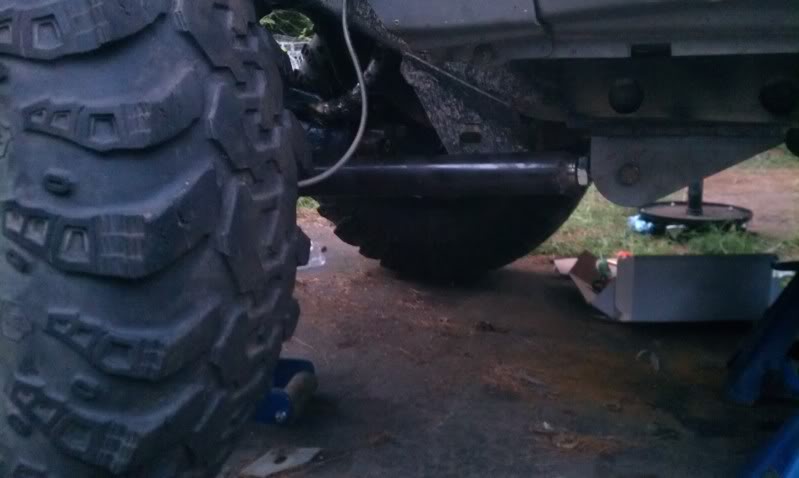
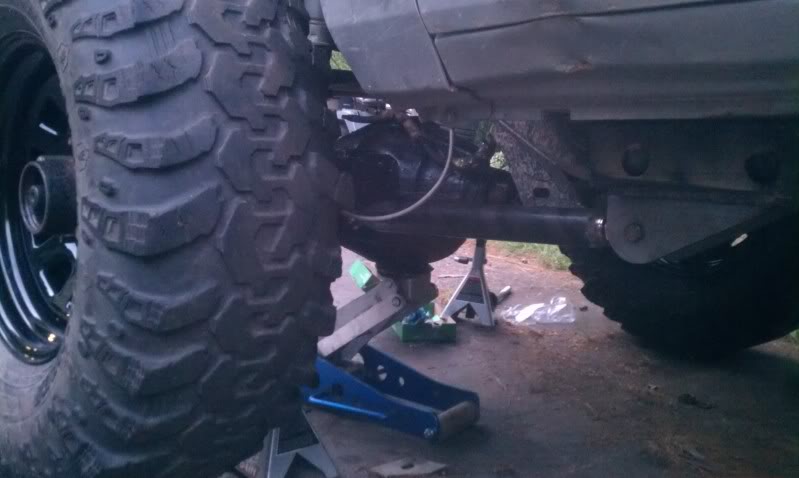
ride height
Thread Starter
Former Sponsor
Joined: May 2010
Posts: 2,181
Likes: 0
From: meriden Ct
Year: 2000
Model: Cherokee
Engine: 4.0
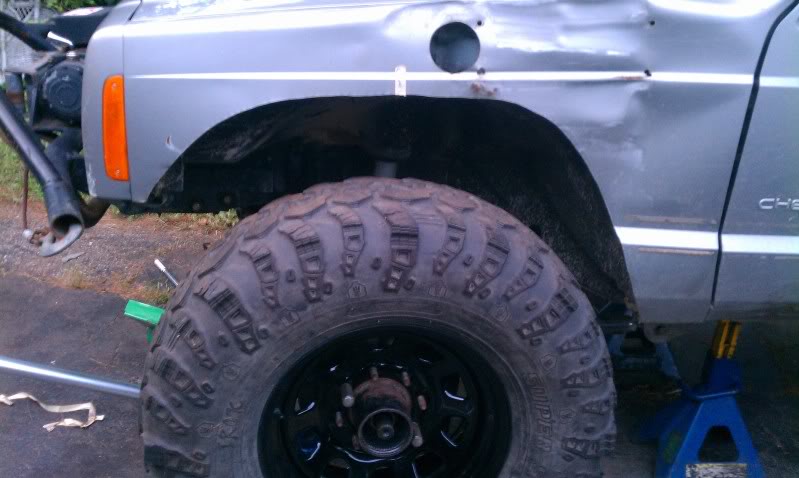
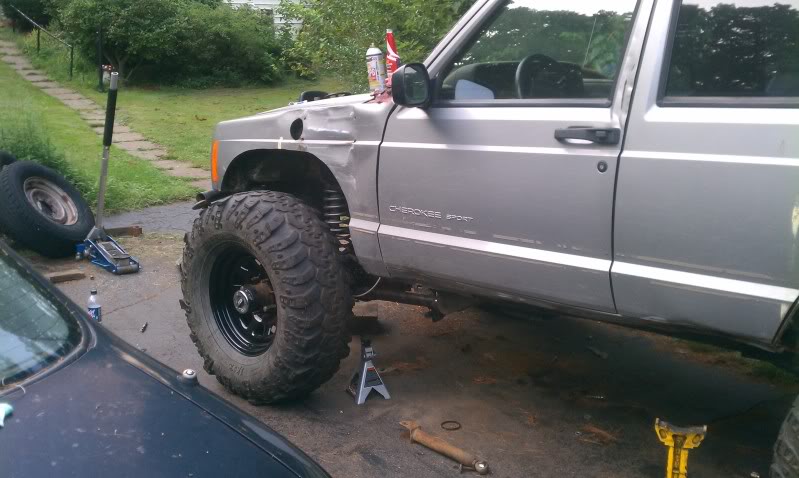
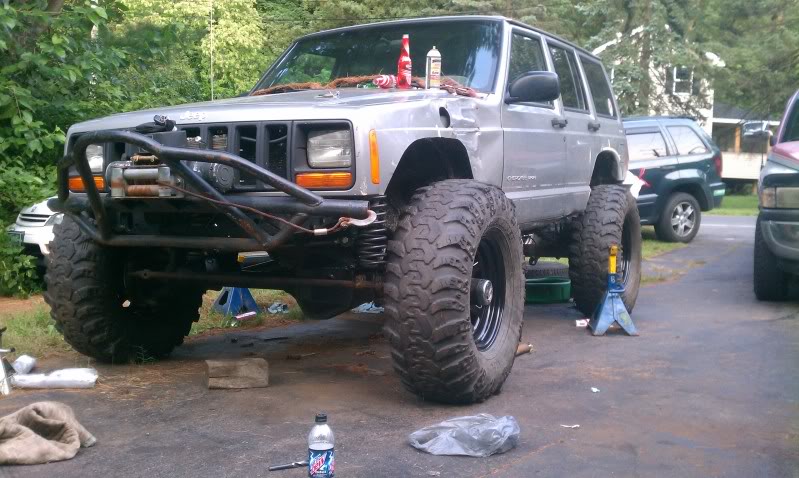
Didnt do much today but I can say that the front end its self is done.
I think this makes it official.


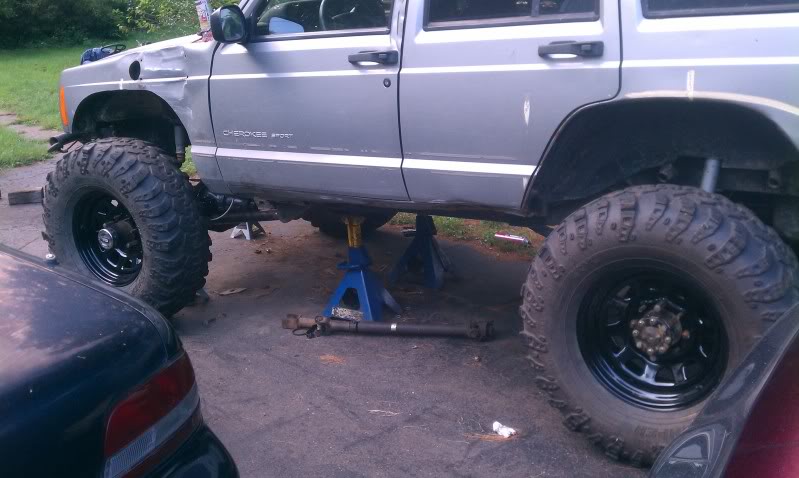
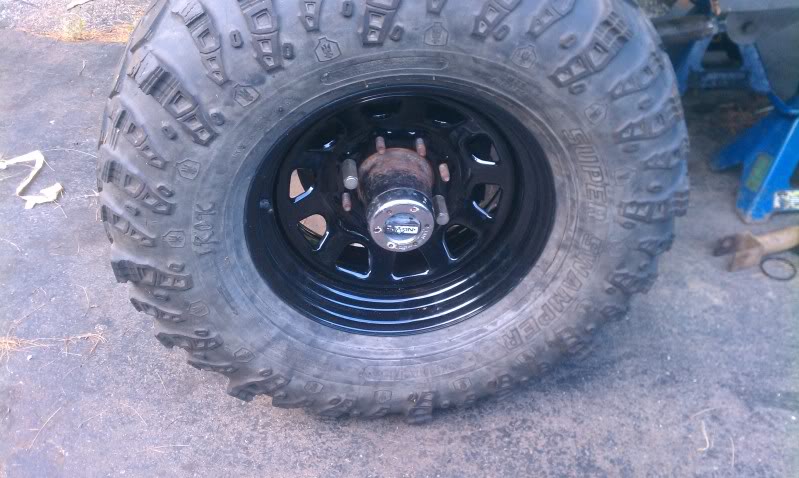
I have to say, nothing makes an XJ look more bad *** than seeing 8 lug wheels, full float shafts and locking hubs.
I think this makes it official.
I have to say, nothing makes an XJ look more bad *** than seeing 8 lug wheels, full float shafts and locking hubs.
Thread Starter
Former Sponsor
Joined: May 2010
Posts: 2,181
Likes: 0
From: meriden Ct
Year: 2000
Model: Cherokee
Engine: 4.0
I only had about an hour last night to get stuff done between mowing the lawn and going to the gym, but I did manage to take my stock driveshaft, remove the slip spline end, take the aftermarket shaft I have thats bent (supposedly Tom woods) and remove the larger diameter, longer travel slip from it and compare. The shaft diameter and wall thickness was the same so i got to work, I measured the difference and how much I needed it shortened and ended up with this
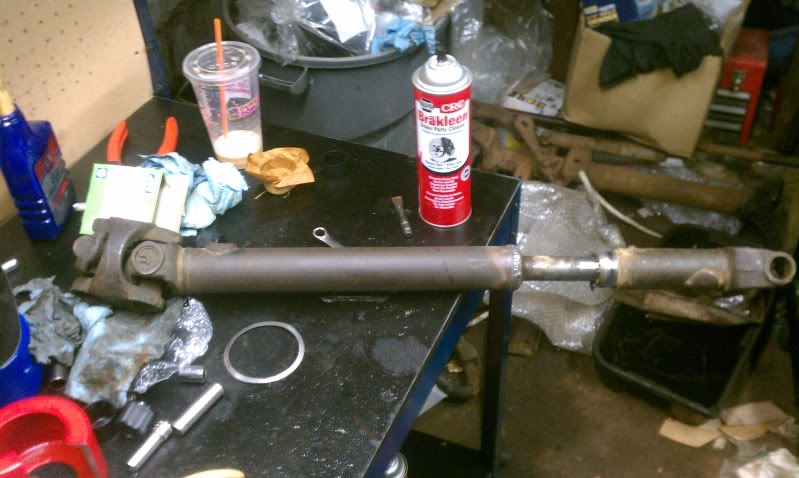
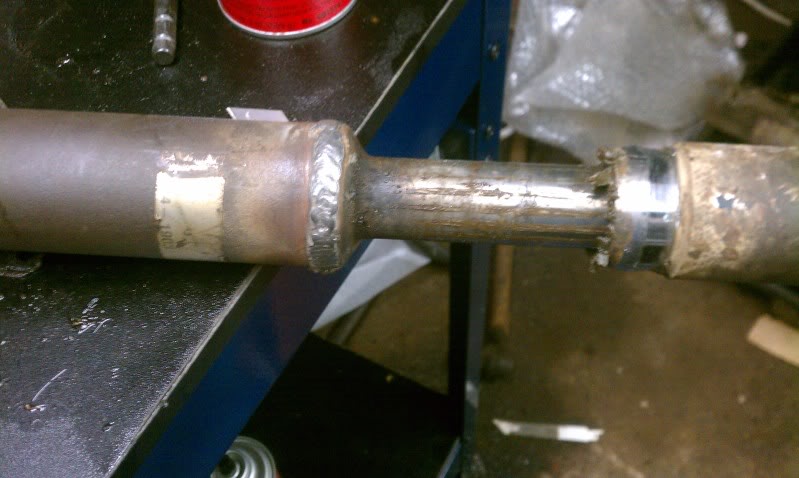
I also have a 1330/1310 conversion joint to install. I just have to pop in the pinion seal and then I can install the shaft and see how she fits.
I also have a 1330/1310 conversion joint to install. I just have to pop in the pinion seal and then I can install the shaft and see how she fits.
Thread Starter
Former Sponsor
Joined: May 2010
Posts: 2,181
Likes: 0
From: meriden Ct
Year: 2000
Model: Cherokee
Engine: 4.0
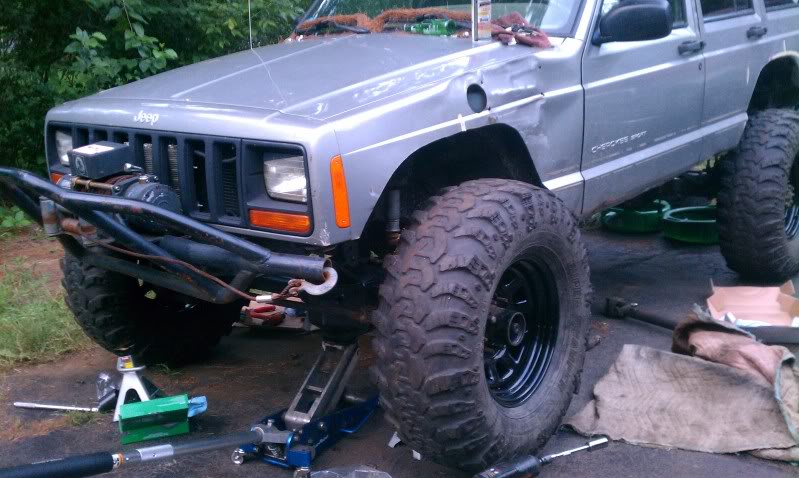
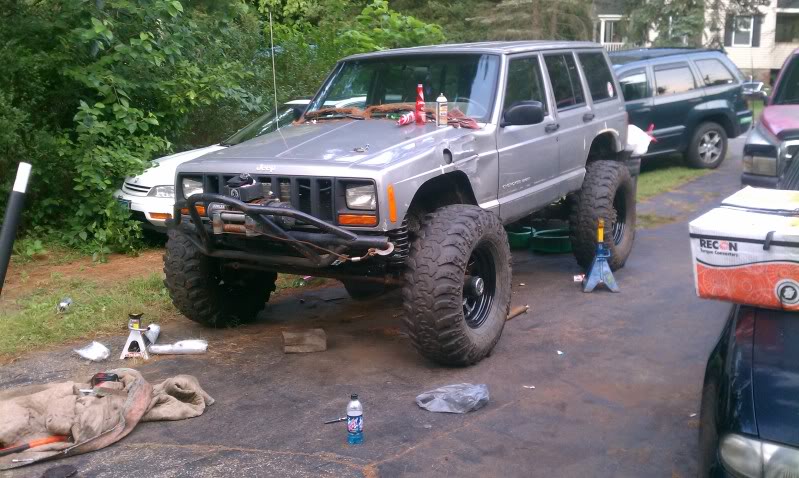
Got a little bit done. Track bar is built and mostly in, my 5/8 drill got dull and I need to sharpen it and finish drilling holes. I got the front springs installed and got the jeep down on all fours. It definitely sits lower in the front by about an inch, but with the wide stance, it actually looks really mean. I may go up a bit in the front, because space is kind of at a premium also. Its tight up there.
Oh, got the front shaft in too. The yoke I used ended up being a 1350 so I used a 1310/1350 conversion joint and u bolts. Driveshaft fits perfect and has a ton of slip. I just need another heim for the upper link to get the castor and pinion angle set.
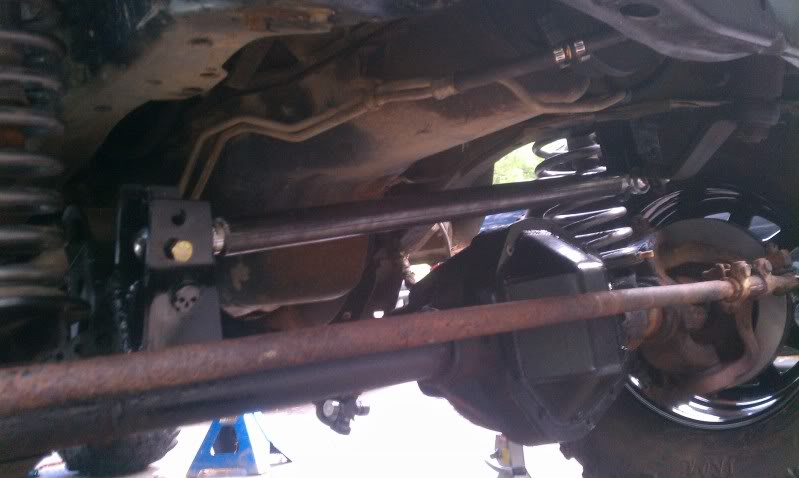
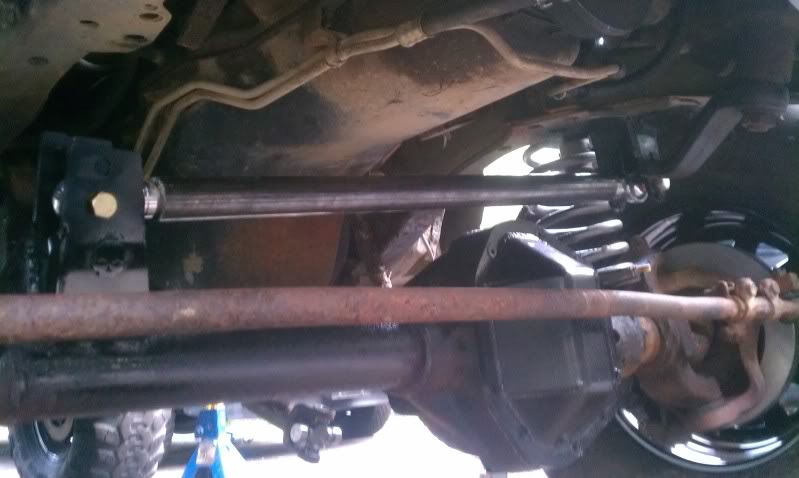
Oh, got the front shaft in too. The yoke I used ended up being a 1350 so I used a 1310/1350 conversion joint and u bolts. Driveshaft fits perfect and has a ton of slip. I just need another heim for the upper link to get the castor and pinion angle set.
Thread Starter
Former Sponsor
Joined: May 2010
Posts: 2,181
Likes: 0
From: meriden Ct
Year: 2000
Model: Cherokee
Engine: 4.0
Thanks man, its getting close. I ordered 32 new lugnuts today. other than that the list is;
Seal rear diff cover and fill
Fill front diff
Weld heim into axle side upper and set pinion angle
Get hardware for steering/trackbar and lower links and bolt in.
Build steering and drill pitman arm and knuckles/install.
Install front shocks.
Install rear brake hoses and run hard line to rear brake hose
Find fill plug for front diff cover.
Front bumpstops need to be lengthened 3" gonna cut them and weld in a piece of tube
Weld a 4" piece of pipe on lower coil bucket as spring retainer.
I think thats it. Its all small stuff at this point. Hopefully Ill be wheeling soon