When you click on links to various merchants on this site and make a purchase, this can result in this site earning a commission. Affiliate programs and affiliations include, but are not limited to, the eBay Partner Network.
Thanks guys! Ahh yeah, extension cords can be a pain. Basically you want the thickest extension cord you can find! Lol. I've used a 13 amp cord with mine already and it's fine for light sheet metal work but thicker stuff...forget it
a pain? It's a fire hazard and very dangerous. Never ever use extension cords that isn't rated for the welder, even though if you were welding on the lowest settings. Please don't do it again
a pain? It's a fire hazard and very dangerous. Never ever use extension cords that isn't rated for the welder, even though if you were welding on the lowest settings. Please don't do it again
Ok, I'll make sure to always use about 5x 50ft 13a extension cords chained together from now on.
Well, it's been about a month, so how about some updates?
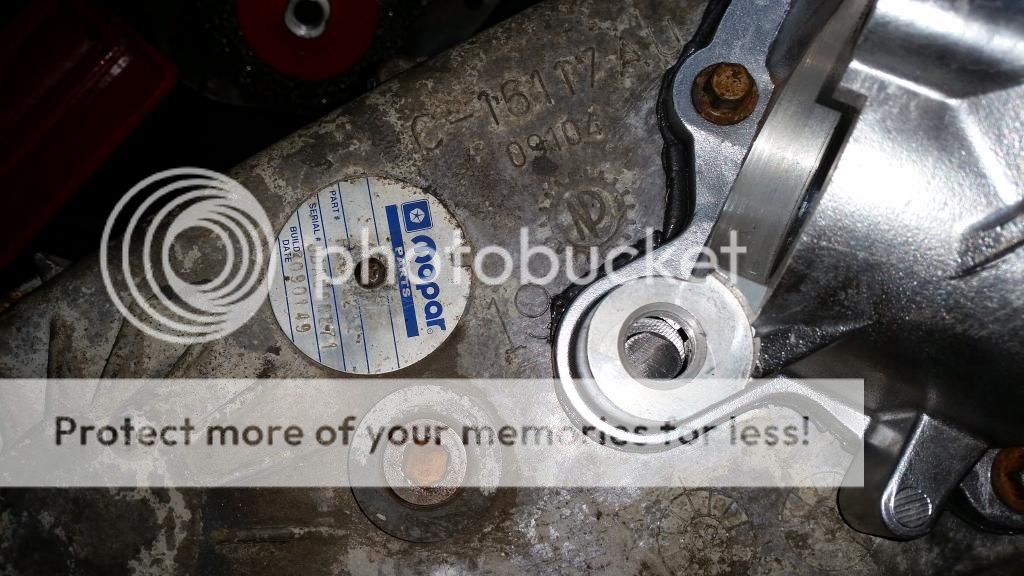
Finally, after over a year, I got my 231 transfer case woes figured out. As many suggested, I had to trim down the shift fork rod. I blame this on Rugged Ridge's crapping casting of their SYE. The area of the housing where it mounts does not line up with the shift fork.
I ended up trimming about 1/4" off of the fork rod.
Here you can see just how bad the output housing lines up with the shift fork.
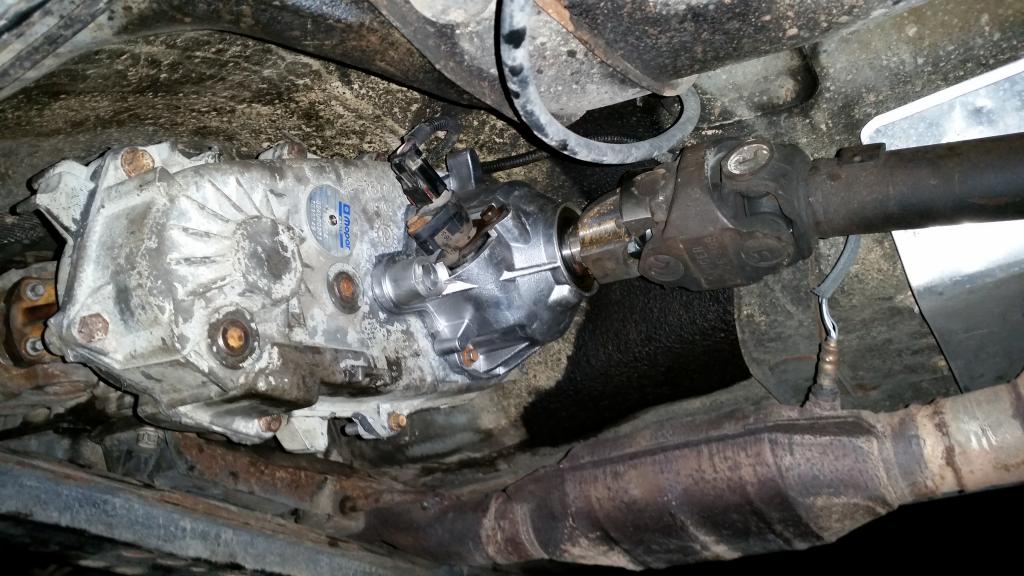
After all that, it shifts perfectly through all gears. I'm a happy camper! Went to a buddy's house to install. We had the 242 out and the 231 in in probably 2.5 hours. Pretty easy job.
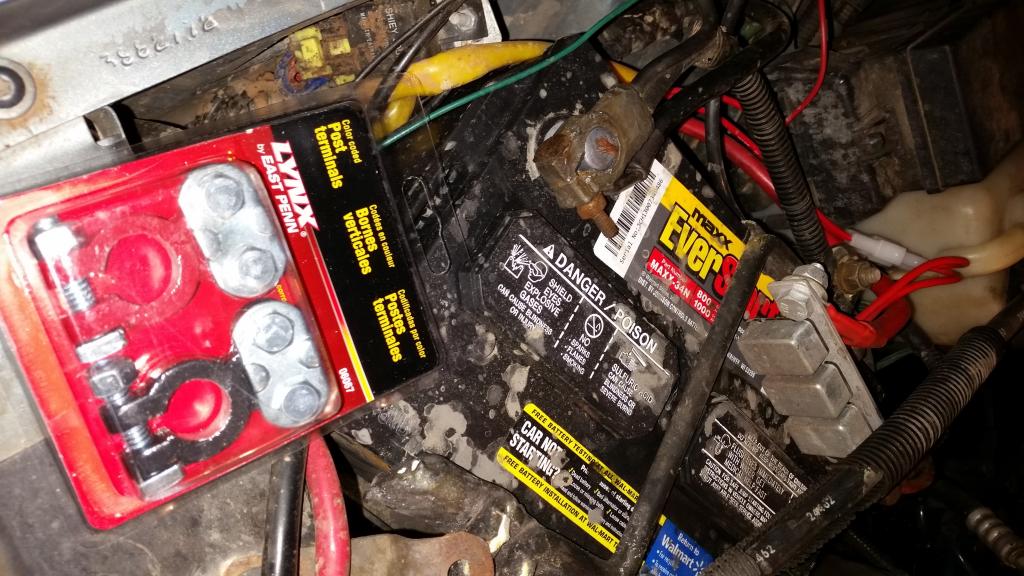
Next up, my rig was sorely overdue for some fresh battery terminals. Occasionally I'd lose all power when trying to start, due to a loose/corroded terminal connection.
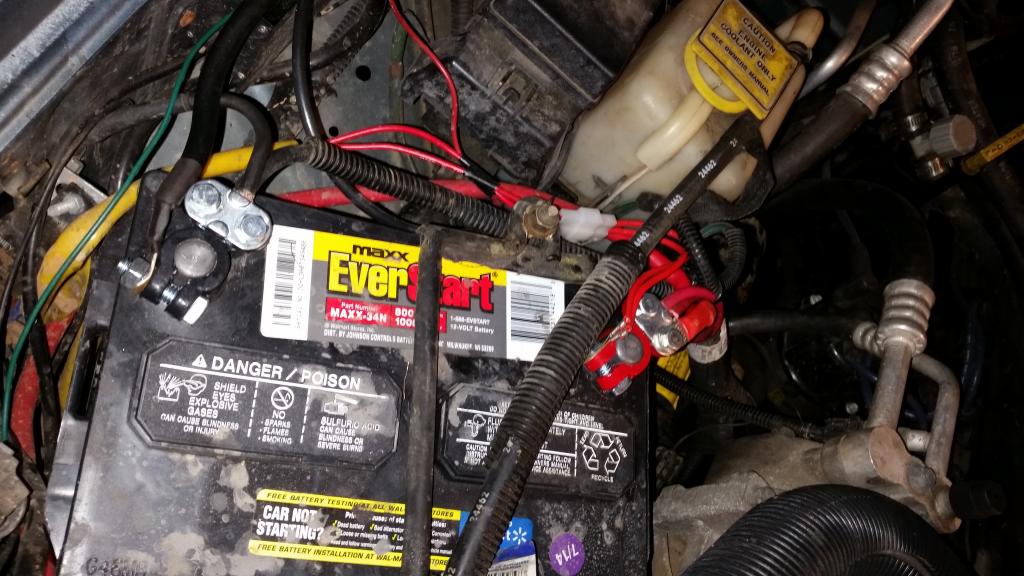
Much better. I eventually want to get all new wiring for the battery, because you'd be amazed at how corroded the copper strands can get down inside the insulation with this cheap terminal setup.
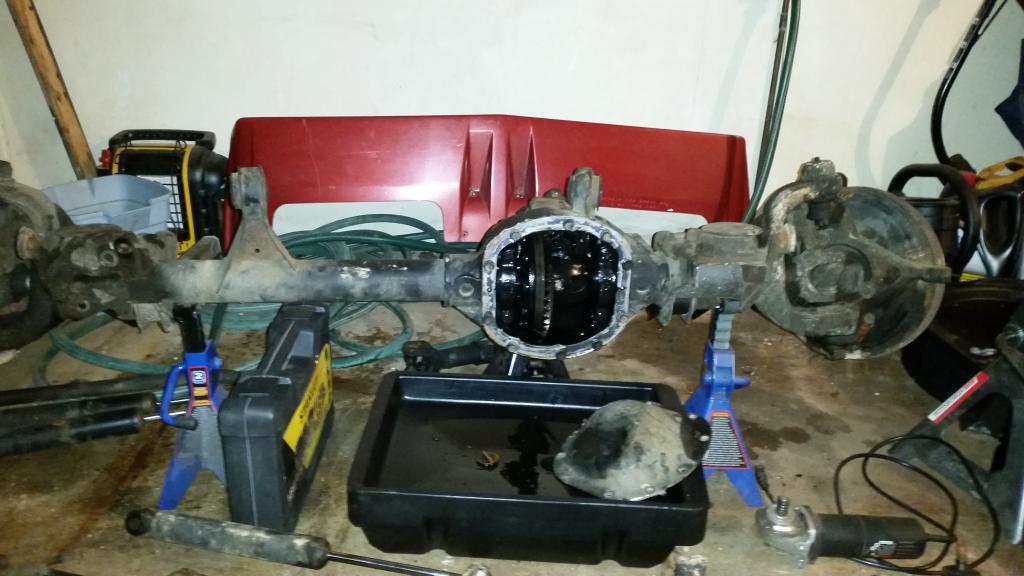
Other projects going on...here is the D30 I picked up from a junkyard that I'm rebuilding. It's getting all new Spicer U-joints and balljoints, that custom diff cover I'm working on, inner axle seals & Alloy USA outer seals, Timken hubs, and of course new brakes. I'm still collecting parts.
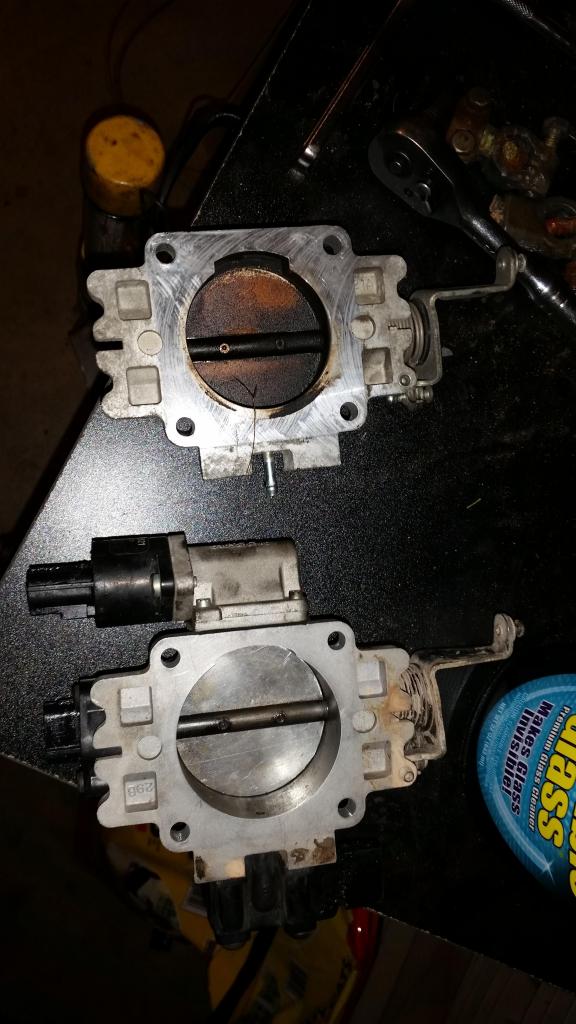
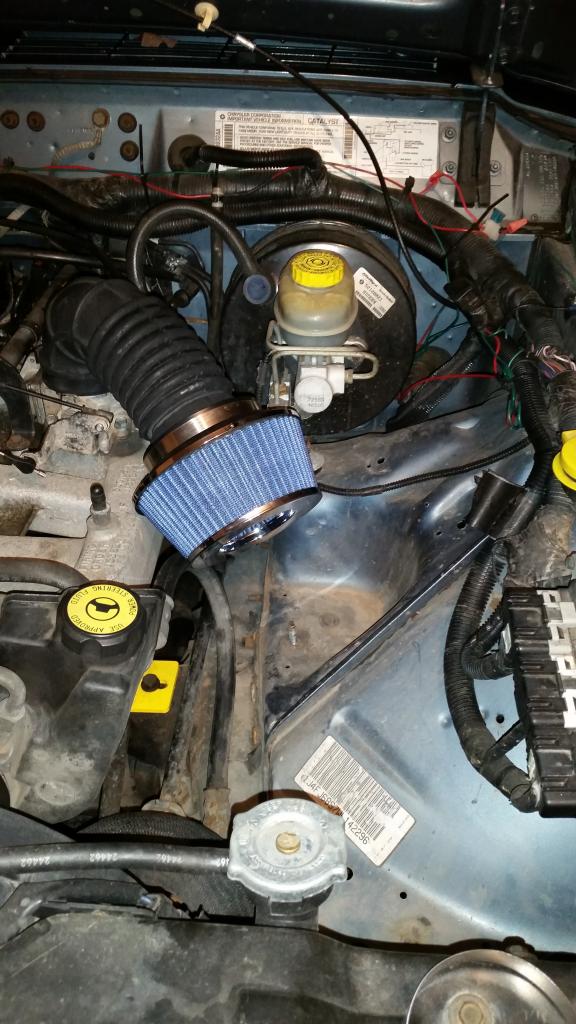
That axle came with full steering that I swapped with a local guy for a 62mm bored out throttle body. Quite a deal, so I thought! Well, ended up not working so well on my rig. My TPS kept flipping out and eventually I bought a new one from Napa. Today, I removed the bored out throttle body and put the stock back on because I didn't want to deal with it anymore. I also put one of these shorty filters on, mainly because I want to do a dual battery setup. So that's another new project coming down the pipeline. I sure do have the space for it now.
62mm on bottom.
I'm looking forward to fabbing up a custom battery tray for my dual battery project. But for now, I need to wrap up some other things going on...
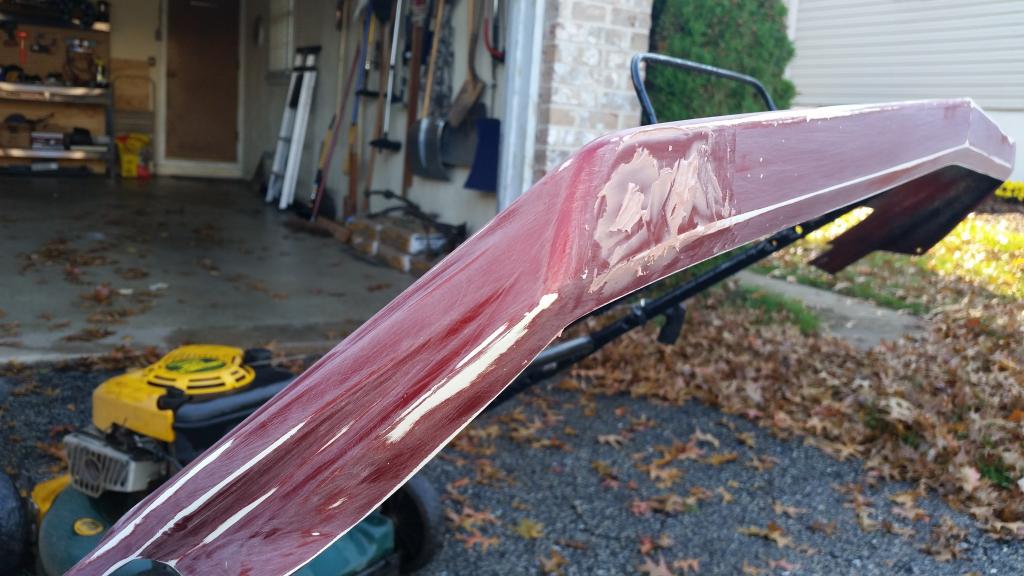
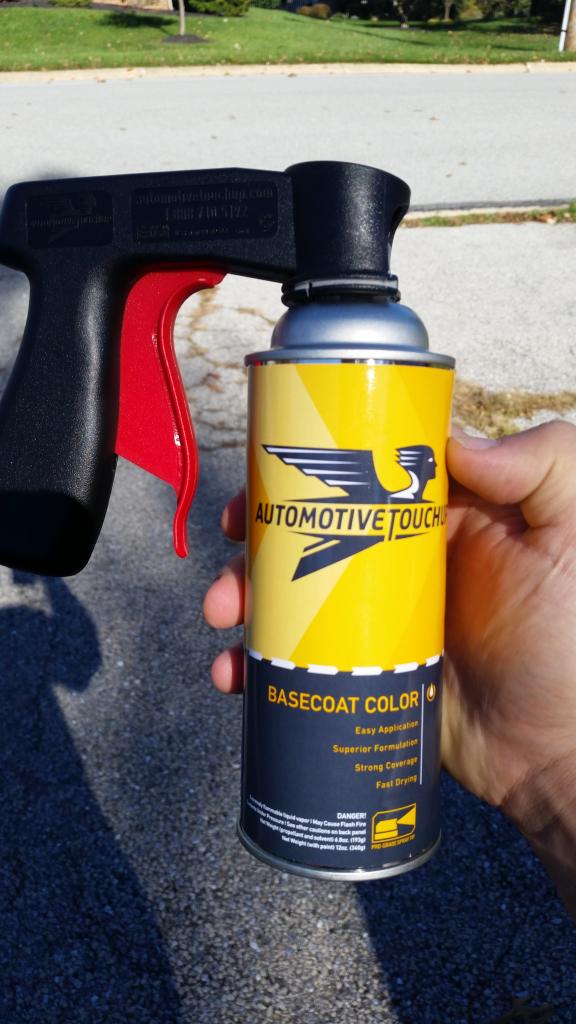
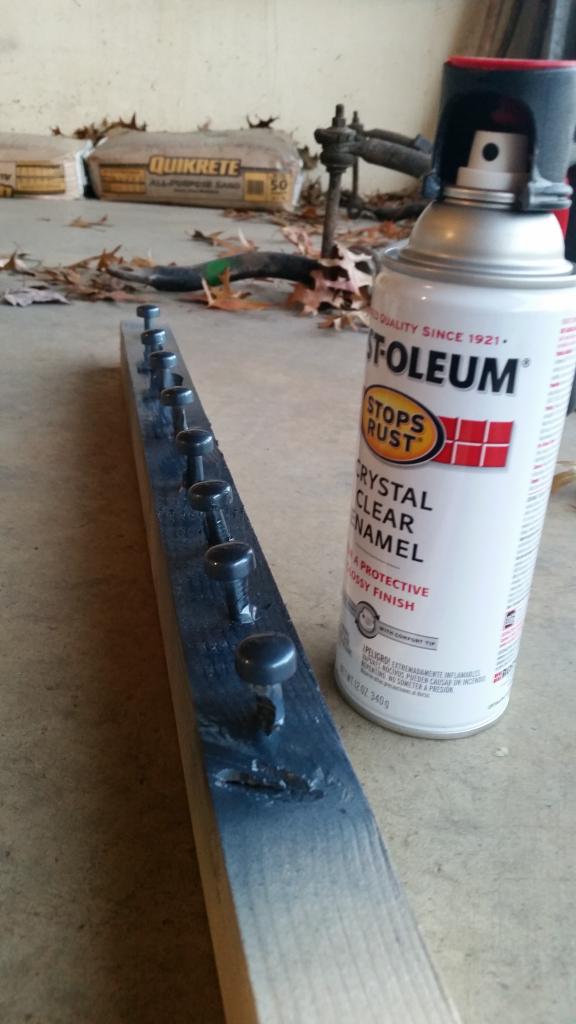
This past weekend's project: painting the sun visor. I'm really hoping for a good color match! I got quoted $280 for a local body shop to do this...no way I was gonna have multiple hundreds tied up into this thing.
Supplies:
x2 spray cans of Automotive Touch-Up PQ7 Gunmetal Pearl basecoat
x1 spray can of ATU sandable primer
x1 variety pack of wet sandpaper 320-1500 grit
x2 spray cans of Rustoleum Crystsal Clear Enamel
x1 water hose!
x1 container of Bondo
x1 Spray can gun attachment (makes it so much easier on the hand!)
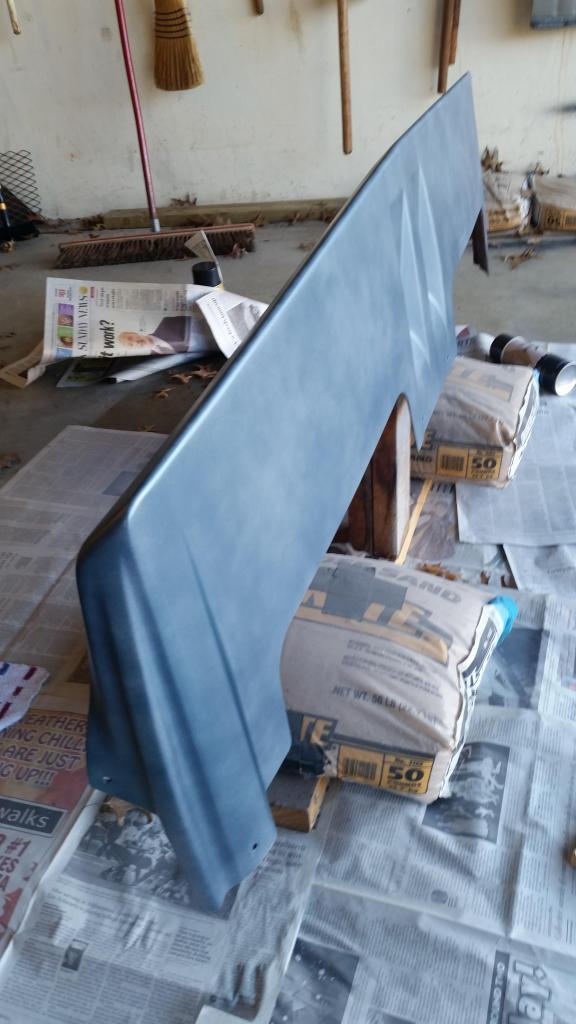
I started off by wet sanding. Ready for some Bondo then.
I needed the Bondo to patch the two little holes on the passenger side from where the original Lund logo was. Didn't come with the visor, so patch it is. There was also a scratch on the top to fill.
Then more sanding, and ready for primer! I did two coats before I was comfortable with it. After it's dry, some more wetsanding of the primer with 600 grit.
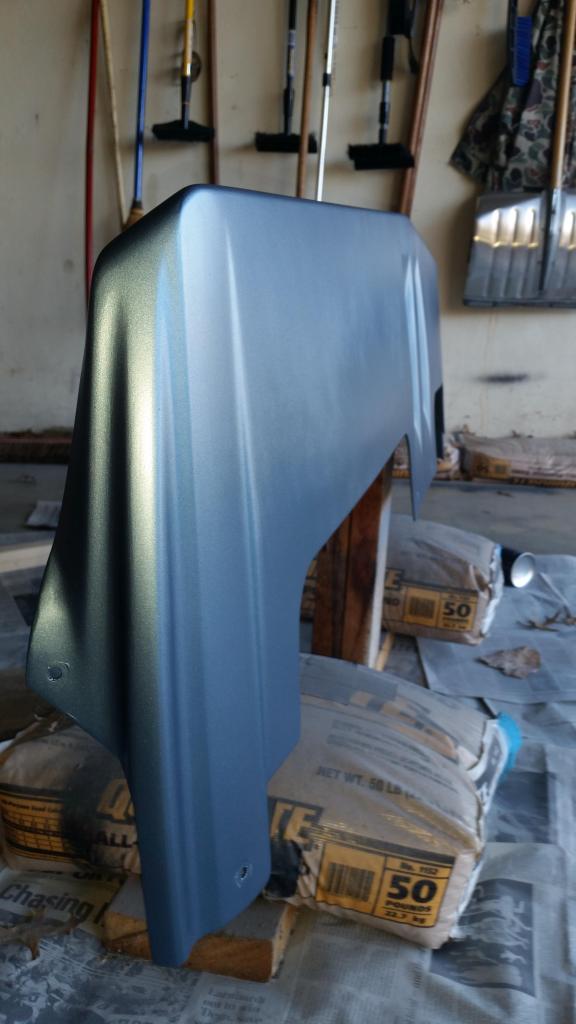
Ready for first coat of basecoat. Here's my spraying jig.
After the first coat.
The instructions on the can said to spray lighter coats for pearl or metallic-type paints, so it took me about 5 coats for total coverage. Looks pretty good here.
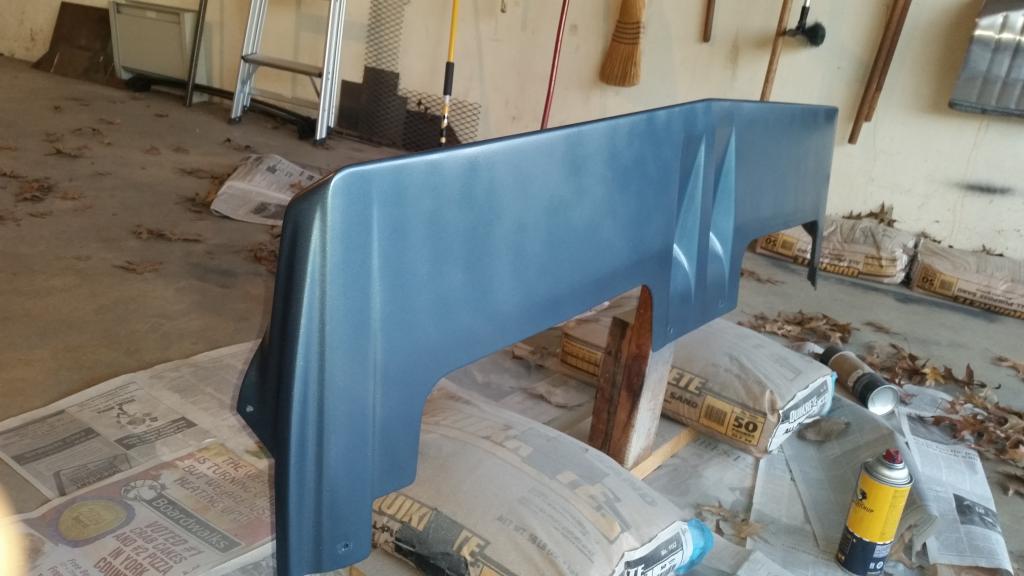
This is the most current pic I have, I believe after 2 coats of clear. It got two more after this.
And can't forget the caps.
When I get home from work today, I'm going to decide if I should attempt to wet-sand the clear coat with fine sandpaper. I've never done it before and not sure if it's good to do with the rattle can stuff. If any paint experts out there can chime in, I'm all ears!
I kinda wish I could use a sun visor.... I like the way they look. I sit so high up in the jeep already though, sometimes I have to hunch down to see the traffic lights.
I kinda wish I could use a sun visor.... I like the way they look. I sit so high up in the jeep already though, sometimes I have to hunch down to see the traffic lights.
I have never had a problem with it since I've installed it. Which reminded me...I never posted a finished pic.
Nice build! Now lets see it flexed out haha. You should either put back the stock air box or go with a cowl design by the way, you're just sucking in hot air.
Nice build! Now lets see it flexed out haha. You should either put back the stock air box or go with a cowl design by the way, you're just sucking in hot air.
Thanks! Lol, it doesn't flex as much as I would like it to at this point. No immediate plans for suspension upgrades. Also, I'm planning to ditch that little filter. It might be why my gas mileage hasn't been the greatest lately... I want to do the Spectre, but I'm not sure it will clear my hood vents...I need to find some measurements and figure that out. I want to keep that spot open in my engine bay for dual batteries.
I haven't updated in a while but got quite a few things to post...I will post an update here soon!
Thanks! Lol, it doesn't flex as much as I would like it to at this point. No immediate plans for suspension upgrades. Also, I'm planning to ditch that little filter. It might be why my gas mileage hasn't been the greatest lately... I want to do the Spectre, but I'm not sure it will clear my hood vents...I need to find some measurements and figure that out. I want to keep that spot open in my engine bay for dual batteries. I haven't updated in a while but got quite a few things to post...I will post an update here soon!
Does it not flex due to the tires or shackles? Zone is not known for giving out great shackle angles. If it's that I would look into some HD offroad no lift relocators if you don't want to go up anymore.
Does it not flex due to the tires or shackles? Zone is not known for giving out great shackle angles. If it's that I would look into some HD offroad no lift relocators if you don't want to go up anymore.
Mostly because of the tires & how I have it bumpstopped. I have stock shackles as well. I have coil spacers and 1.5" shackles to bump to 4.5", but I'm not sure I want to "spring" for that just yet. I'd need new shocks--those are also limiting my downtravel. I have looked in to SRB's, but I am so hesitant to mess with the rear unirail area/nut strips again....such a pain with my current setup lol
Mostly because of the tires & how I have it bumpstopped. I have stock shackles as well. I have coil spacers and 1.5" shackles to bump to 4.5", but I'm not sure I want to "spring" for that just yet. I'd need new shocks--those are also limiting my downtravel. I have looked in to SRB's, but I am so hesitant to mess with the rear unirail area/nut strips again....such a pain with my current setup lol
I always think that if you take it off once, it'll come out easier the next time. You're at 3" now? I'm looking to run 33s with Napier flares on my 4" and feel that that'll give me just as much flex room as I am now with stock flares and 31s. Don't know if you need to go a whole 1.5" up, maybe just an 1". Every 1" counts so women say.
I always think that if you take it off once, it'll come out easier the next time. You're at 3" now? I'm looking to run 33s with Napier flares on my 4" and feel that that'll give me just as much flex room as I am now with stock flares and 31s. Don't know if you need to go a whole 1.5" up, maybe just an 1". Every 1" counts so women say.
Lol! Yep, 3" on 33s. I would really like to bump it just an inch. I think if I went any more than that, I'd be itching for 35s.
Alright everyone, update time! let's see, where did I leave off? The visor, right! Well, after taking the holidays off & some extra time while my girlfriend was home from New York, not much was going on. I'll try and keep things in order.
I installed a thermal bypass valve for my trans cooler. Afterwards, I had eventually learned that these seem to only work best in conjunction with the rad heat exchanger. I still have it bypassed--but have not had any troubles this winter with my trans, it will get up to around 120-140 degrees no problem.
Also in preparation for a wheeling trip, I had installed a front ZJ shaft for the rear since it is a bit longer. No pics of that...but on the same night, I had to do something about my shift linkage since installing the 231. In a hurry, I had ordered the Boostwerks kit. It works fairly well, although 4-lo can be a pain sometimes. May tweak it some more in the future.
I've also been working on a HPD30 that I've had for a little while now. I welded some 3/16" plates on the LCA brackets for extra strength and protection.
I have some Antique Satin Chassis Saver to paint the axle with, also need to get back to work on the custom diff cover I'm working on for it.
That's all I have time for right now...lots more to come later!