
Project CHIOBA

Thread Starter
CF Veteran
Joined: Dec 2012
Posts: 4,169
Likes: 6
From: York, PA
Year: 1998
Model: Cherokee
Engine: 4.0
Project C.H.I.O.B.A.
"Cherokee Has It's Own Bank Account"
Hey guys, well, finally got around to throwing my build together.I couldn't think of a clever name really, mainly just a project name for the build thread. But I thought I should point out I do actually have a savings account devoted to Cherokee funding, and yes, it is mostly empty.
 Please be patient in advance for my detail and probably many pictures that are to follow. Also forgive the large pictures, I had trouble resizing them with Photobucket (too lazy to use Photoshop!
  ) I�m a very detailed oriented person and plan to get this job done right.
Anywho, a little background. I entered the off-road scene when I got a 1999 Ford Ranger back in 2008. Body lifted it, and threw some 33's on there and it was one mean machine for being mostly stock.
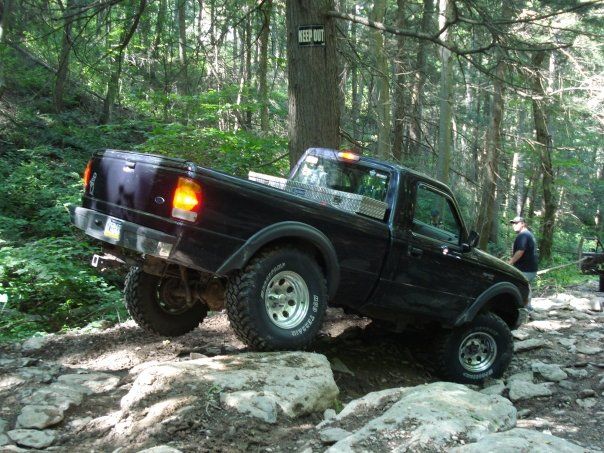
I had her for 4 years until the frame rotted out so badly, I decided I needed a new project. One with lots of aftermarket support--and I've always liked the Cherokee and know quite a few people around my area who are into the scene as well.
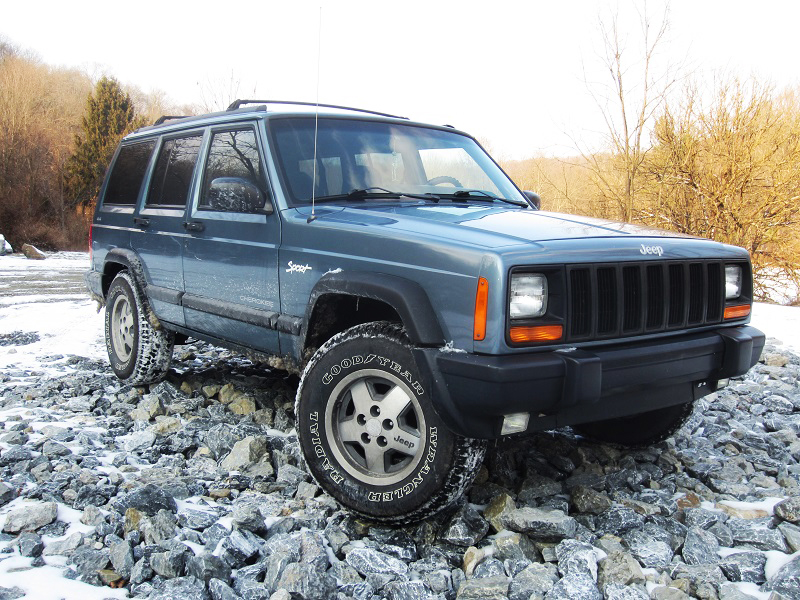
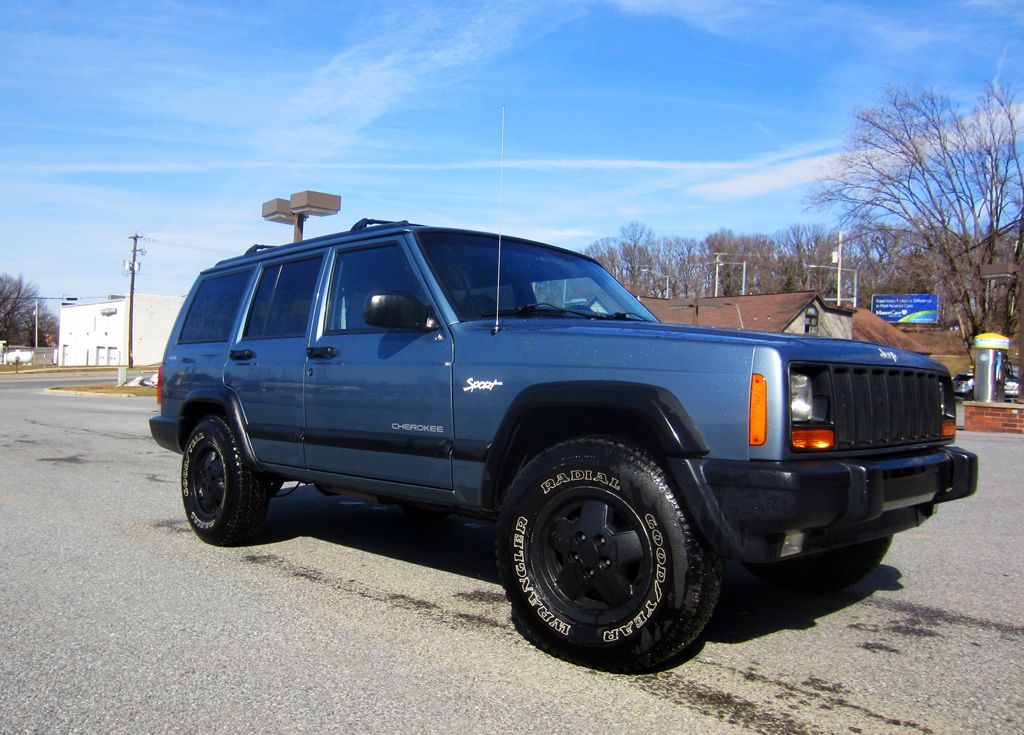
Enter the stock 1998 Cherokee Sport, picked up after Christmas of 2012. Equipped with AW4, NP242 transfer case, HP D30 and Chrysler 8.25 rear, stock 3.55 gearing and all with 159,000 on the clock.
Current plans for her:
I traded the Ranger straight up for her plus about 2 extra grand. I probably got burned on the deal a little considering the shape she was in when I took her off the lot. She had no heat, needed a new radiator, a broken drivers� seat and busted up center console bracket, needed a good tune up, and had a leaky freeze plug which led to my first foray into major mechanical repair on a vehicle.- Rusty�s Longarm Kit
- RE 4.5� Coils + 1.75� Spacers
- Rusty�s 4.5� Leafs + 1.5� Teraflex Shackles
- 15x8 Pro Comp Series 7069 Flat Black Wheels with 3.75� BS
- 35x12.5x15 Mud Terrains (haven�t decided yet)
- Bushwacker Flat Flares
- IRO Hack-n-Tap SYE
- Nates4x4 Slimline Winch Bumper
- Superwinch LP8500 Winch
- Rear Disc Brake Conversion
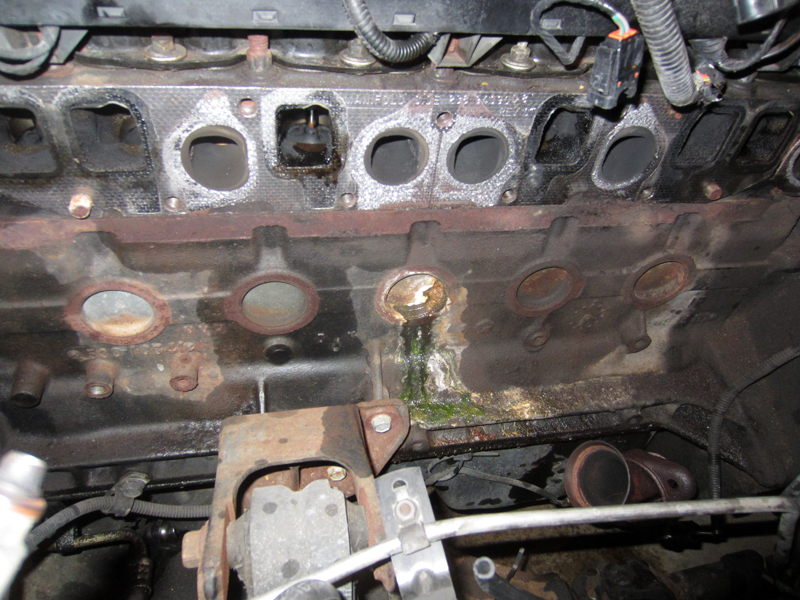
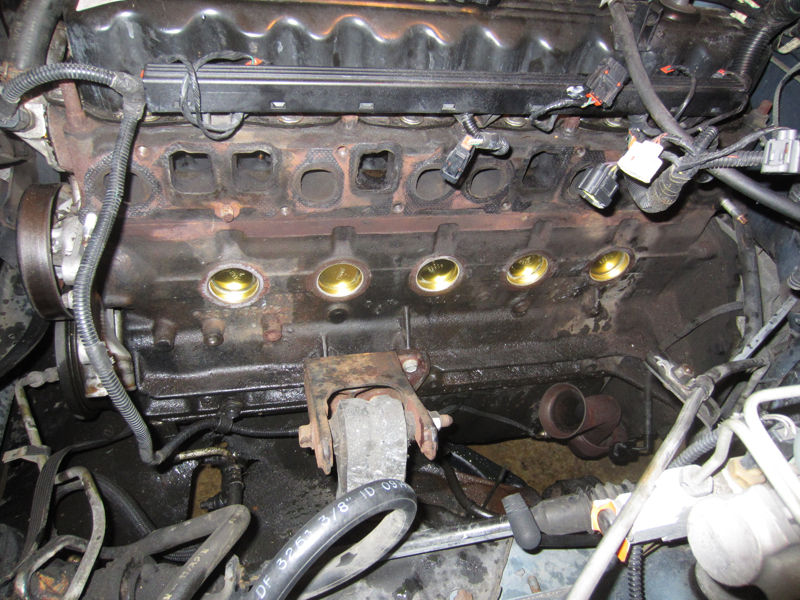
That definitely had to be fixed. So, I ordered brass plugs, but the force required to hammer them in made my confidence level thin as I felt I may have knocked a crack in one or two of them, and pushed one in too far. Put it all together, and it starts leaking right away. Had to tear it down all again. Got a set of steel plugs, thinking heck, the original ones lasted this long. They were hammered in a lot easier too. But then one horrible day, one of them blew out on me a few days later. I ended up driving about 2 miles without any coolant after that happened, and thought I blew the engine good. Fixed her again, 3rd time�s a charm. Much to my surprise she runs mostly perfectly now. Back to brass plugs. Haven�t had a problem since! I�ve also done new cap, rotor, plugs, wires and air filter in this process.
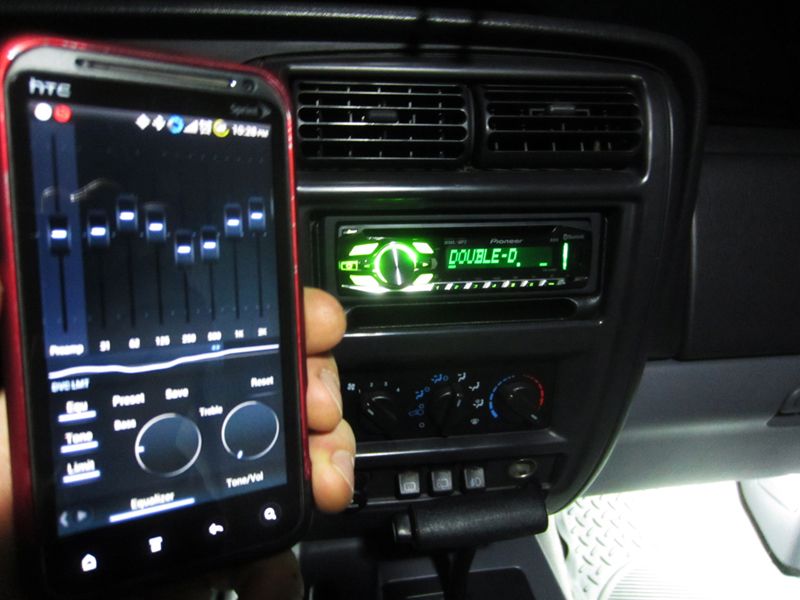
Now, onto the mods since I finally got her running again. I started off with putting in a nice Pioneer CD player, model 6400BT. It supports Bluetooth, which is pretty awesome for a nerd like me. I stream music from my phone using app PowerAmp for Android to my stereo in the Jeep and it works like a charm. By far the easiest head unit install I�ve ever done�literally only took me about 15 minutes. I spent way more time configuring the thing for the right sounds and colors.
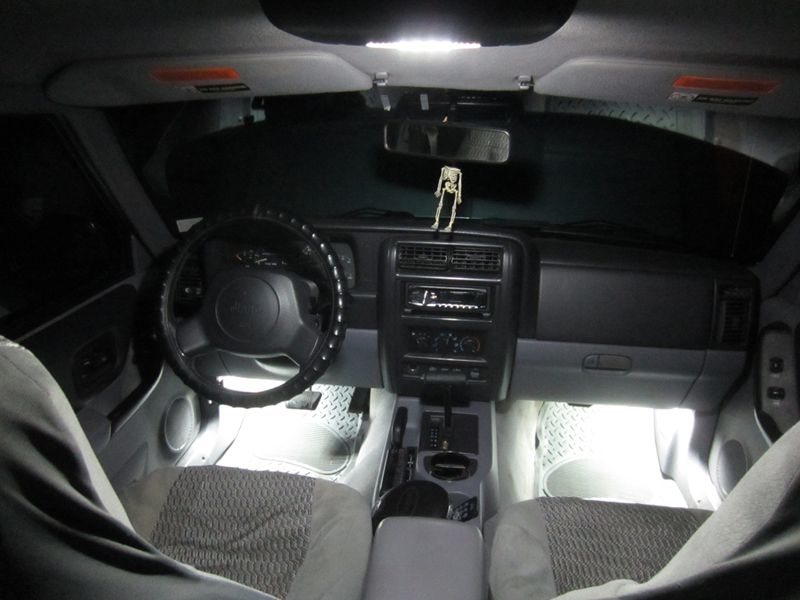
That same week, I had a strong craving for a LED conversion of the interior lighting. Got it done with SuperBrightLED modules. See my signature for a link to my thread on the details of that mod.
Lots more to add, stay tuned kids!
Last edited by PocketsEmpty; Dec 2, 2013 at 11:39 AM.
Thread Starter
CF Veteran
Joined: Dec 2012
Posts: 4,169
Likes: 6
From: York, PA
Year: 1998
Model: Cherokee
Engine: 4.0
Thanks guys! Continued on...
Well, back to work. Stay tuned for more fixes and info on my winch and bumper!
So, after my initial tune-up I discovered a little oil in the air box. Not much, but enough to bug me. It prompted me to do this mod which I�ve seen quite a few others do. Just a few parts readily available at Advance Auto.
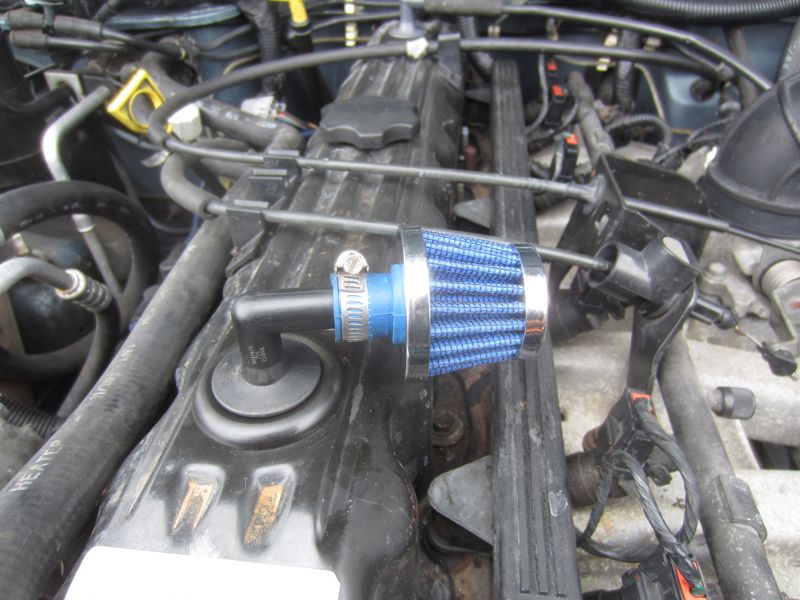
I know it�s not a true fix for whatever might be causing it, but I haven�t seen a drop of oil since, even in this little filter. Is it possible that suction from the airbox could have pulled some oil through? Hmm. Anywho, onto other things..
My XJ had an awful rattle at idle/sitting at red lights when I first got it. After some research I was quick to discover that the transfer case linkage was to blame. After more research I�ve realized how clumsy the factory setup is, and set out to reform mine. With the help of Froelich Suspension Technology�s �Simplify your 231!� kit, I was able to get it somewhat working, but this is a very different animal for the 242, and requires extending the shifter lever. Way more on that in this thread. Anywho, here�s the ghetto-fabulous mess I ended up with. This works temporarily but more refinements are coming soon for this setup to get the throw right, which is much shortened now as shown in the diagram below.
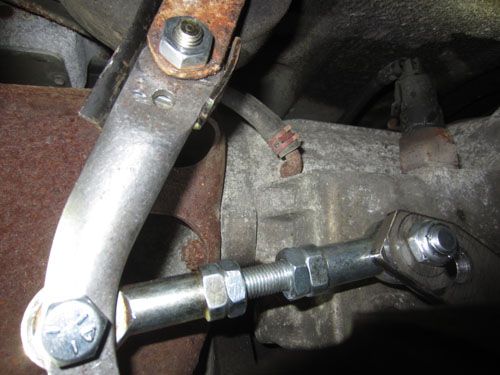
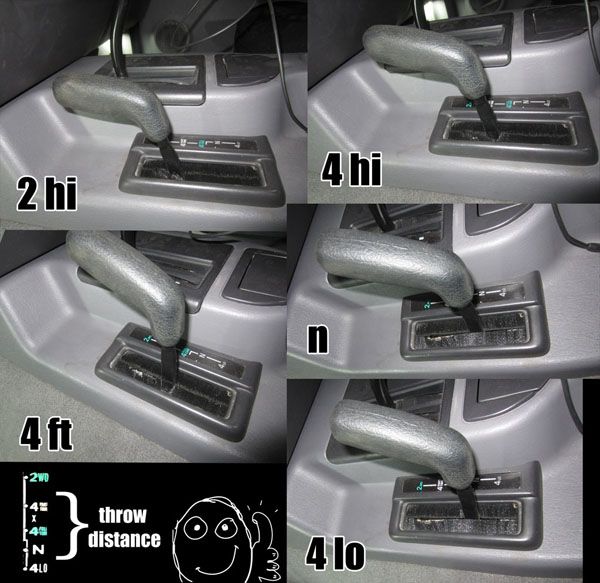
I�ll be glad to have that sorted out, with the help of HudsonN who I want to give a shout to for making a more refined and functional extension for the shifter. See the thread above for more on that.
I know it�s not a true fix for whatever might be causing it, but I haven�t seen a drop of oil since, even in this little filter. Is it possible that suction from the airbox could have pulled some oil through? Hmm. Anywho, onto other things..
My XJ had an awful rattle at idle/sitting at red lights when I first got it. After some research I was quick to discover that the transfer case linkage was to blame. After more research I�ve realized how clumsy the factory setup is, and set out to reform mine. With the help of Froelich Suspension Technology�s �Simplify your 231!� kit, I was able to get it somewhat working, but this is a very different animal for the 242, and requires extending the shifter lever. Way more on that in this thread. Anywho, here�s the ghetto-fabulous mess I ended up with. This works temporarily but more refinements are coming soon for this setup to get the throw right, which is much shortened now as shown in the diagram below.
I�ll be glad to have that sorted out, with the help of HudsonN who I want to give a shout to for making a more refined and functional extension for the shifter. See the thread above for more on that.
Well, back to work. Stay tuned for more fixes and info on my winch and bumper!
Thread Starter
CF Veteran
Joined: Dec 2012
Posts: 4,169
Likes: 6
From: York, PA
Year: 1998
Model: Cherokee
Engine: 4.0
I'll try and get those up tonight. My lift, well, I'm hoping to have it done sometime this summer, I'm trying to wait until I have my 35's and new wheels ready to go on it afterwards, so I can measure for the proper shock length. But that's pretty expensive and I'm moving into a more expensive apartment. I'm hoping to pick up a part time job, but we'll see what happens.
CF Veteran
Joined: Oct 2012
Posts: 2,314
Likes: 3
From: Canton, GA
Year: 1996
Model: Cherokee
Engine: 4.0
I'll try and get those up tonight. My lift, well, I'm hoping to have it done sometime this summer, I'm trying to wait until I have my 35's and new wheels ready to go on it afterwards, so I can measure for the proper shock length. But that's pretty expensive and I'm moving into a more expensive apartment. I'm hoping to pick up a part time job, but we'll see what happens.
Trending Topics
Thread Starter
CF Veteran
Joined: Dec 2012
Posts: 4,169
Likes: 6
From: York, PA
Year: 1998
Model: Cherokee
Engine: 4.0
I decided to plasti-dip my wheels for a different look. Turned out pretty decent. It�s still holding up great too after about 3 months.
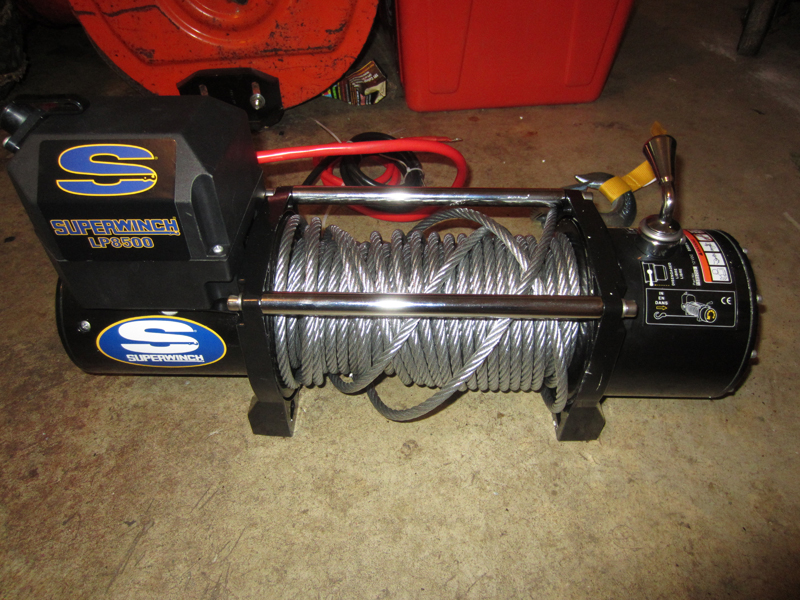
Shortly after, I received my tax refund money, which was basically already spent before I even got it! I ordered my Superwinch LP8500 on 4wd.com while they were running a 20% off everything tax special.
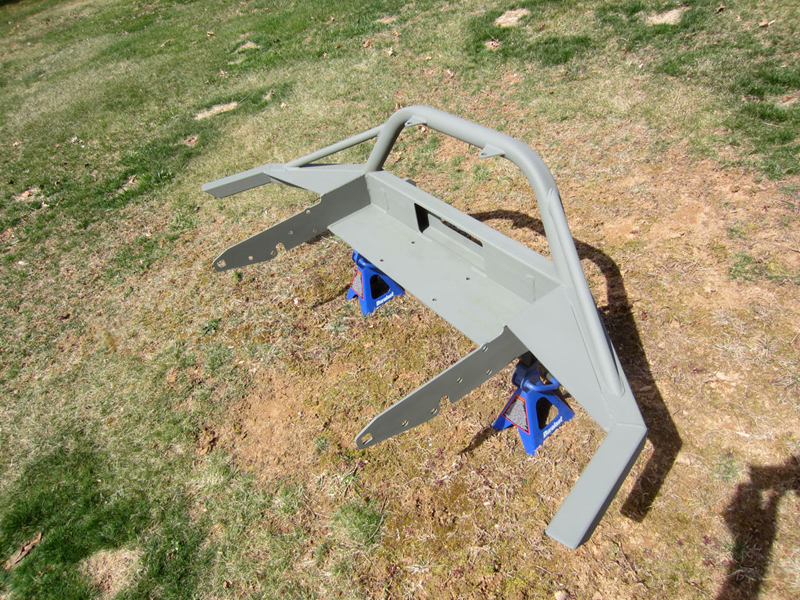
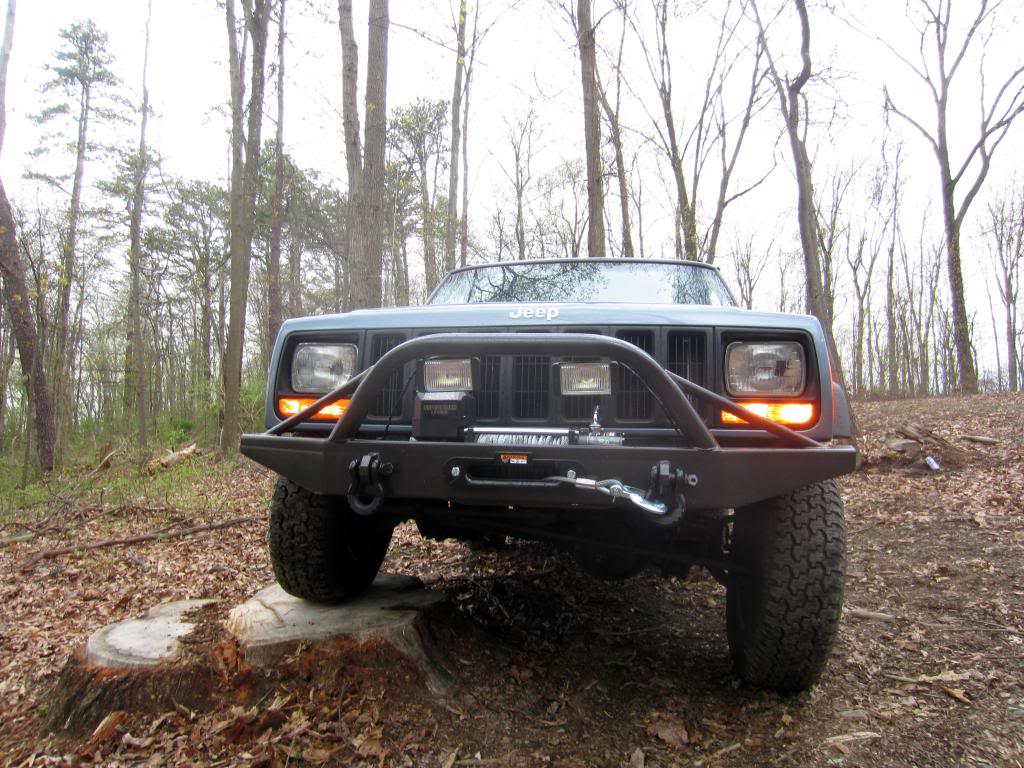
I also ordered my Buswhacker Flat Flares, which are still sitting in the box until I�m moved into my new place, so no pics of that yet. I am a long way from it at this point. With the remainder of the tax refund, I went with Nates4x4 Slimline Winch Bumper. Hit it with Rustoleum self-etching primer, probably about 3 coats.
Now while I was waiting for the paint to dry and cure over the period of about 4 days, I decided to change out my windshield washer fluid pumps. The old ones..

And the new
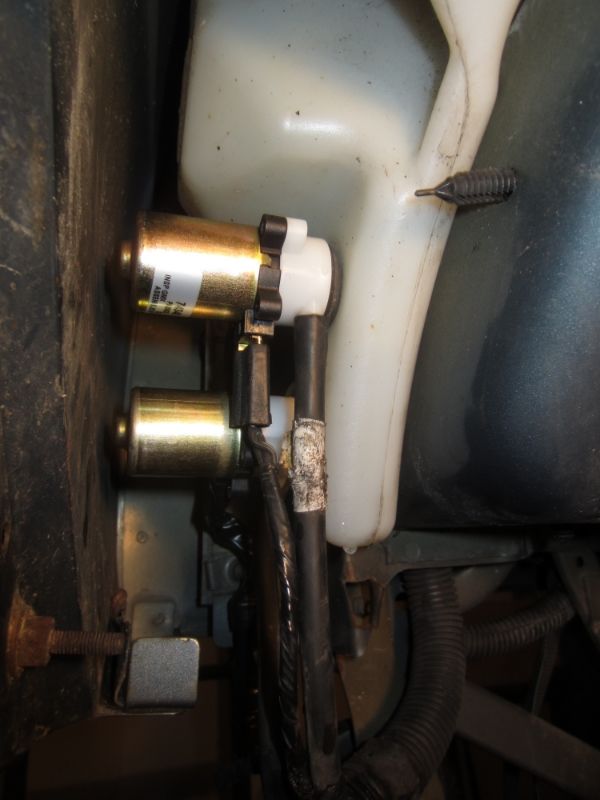
Since the time of this writing however, the rear has suddenly stopped working. I think the switch may be the culprit.
Back to the bumper--I used Rustoleum Hammered rattle can paint. It turned out pretty well. I already have a few spots to touch up, mostly from installing this bumper entirely by myself with the help of some wood blocks and a jack. Also, not pictured, I had to relocate the vacuum canister from under the factory original bumper. I fastened that to the wiring harness in front of the A/C canister, holding and working well so far. I should probably relocate the horns too. Anyone have thoughts on that?
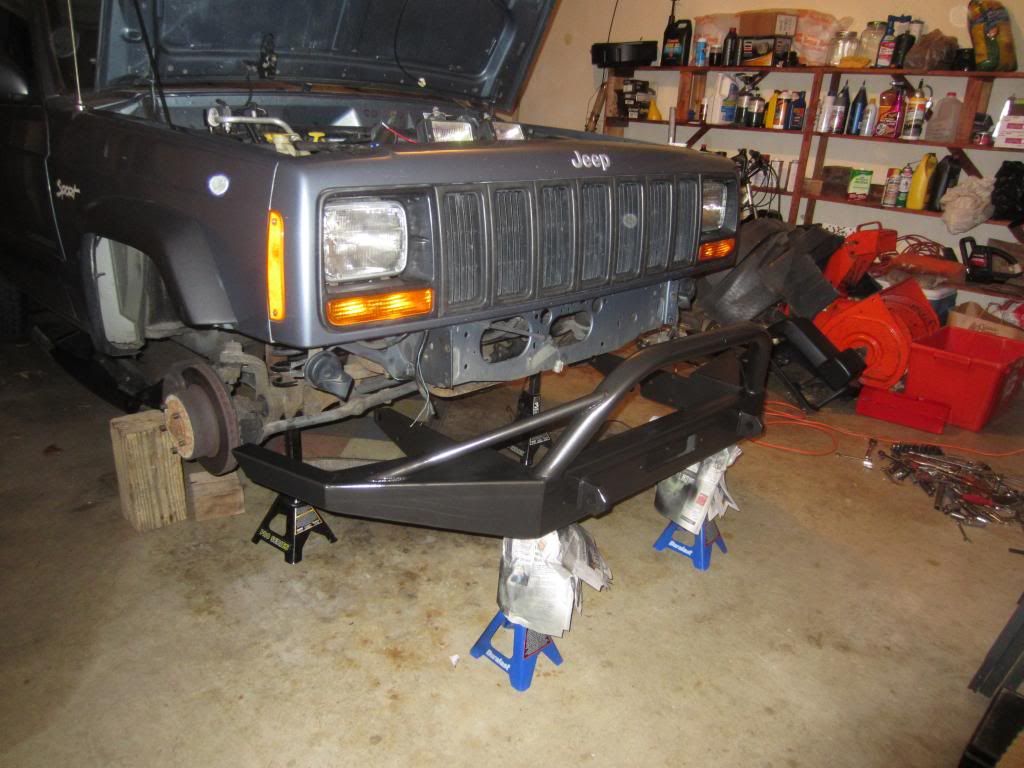
And the result:
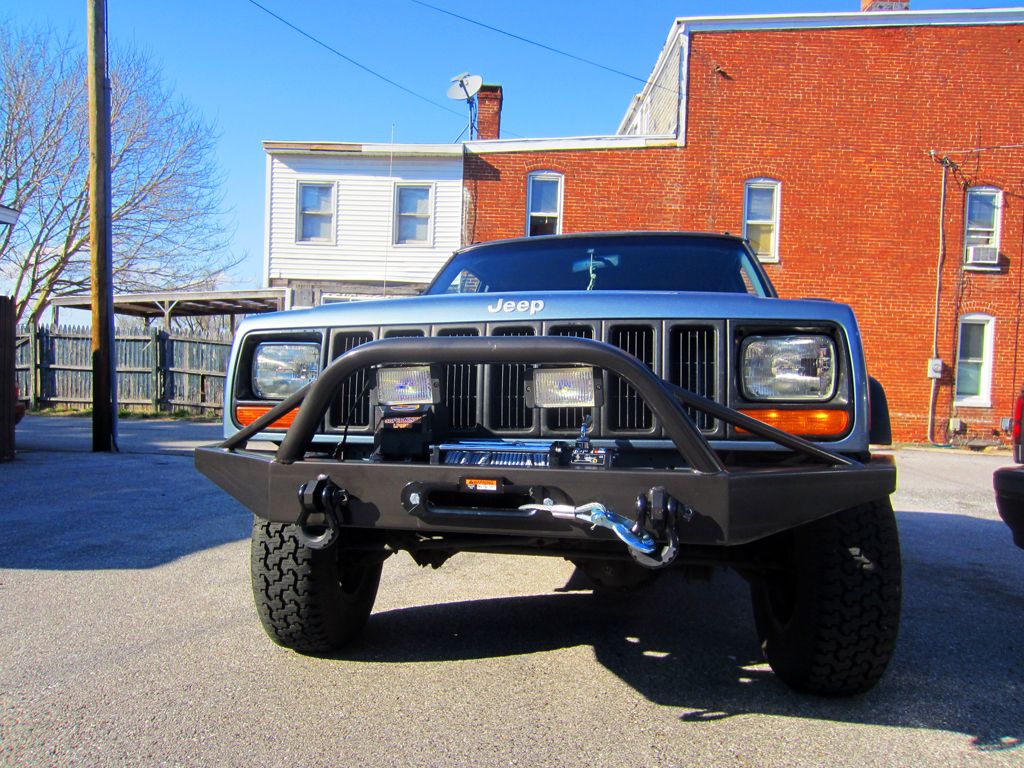
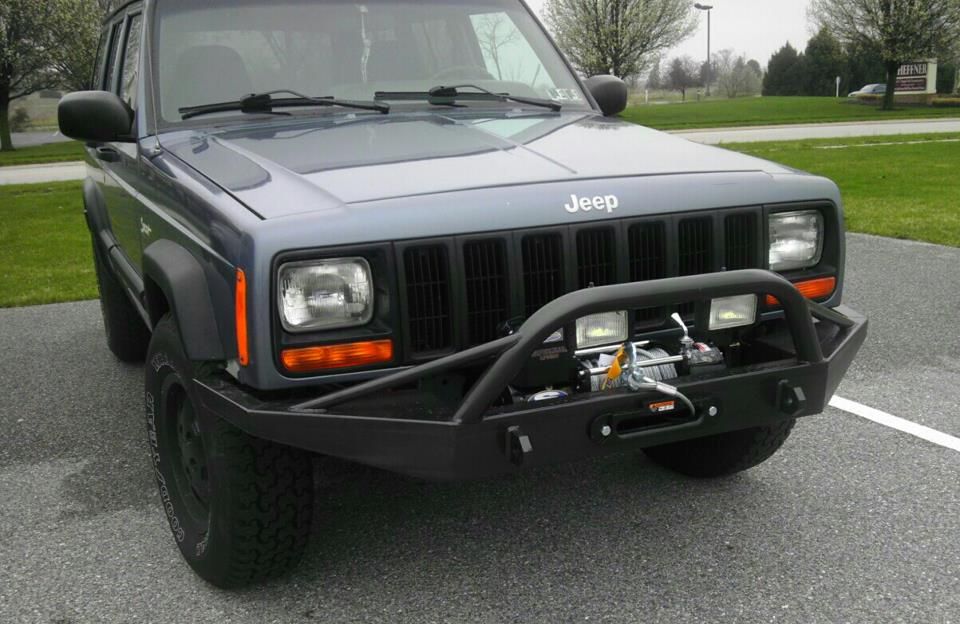
Doing what I can with stock suspension and p235 Goodyear Wranglers!
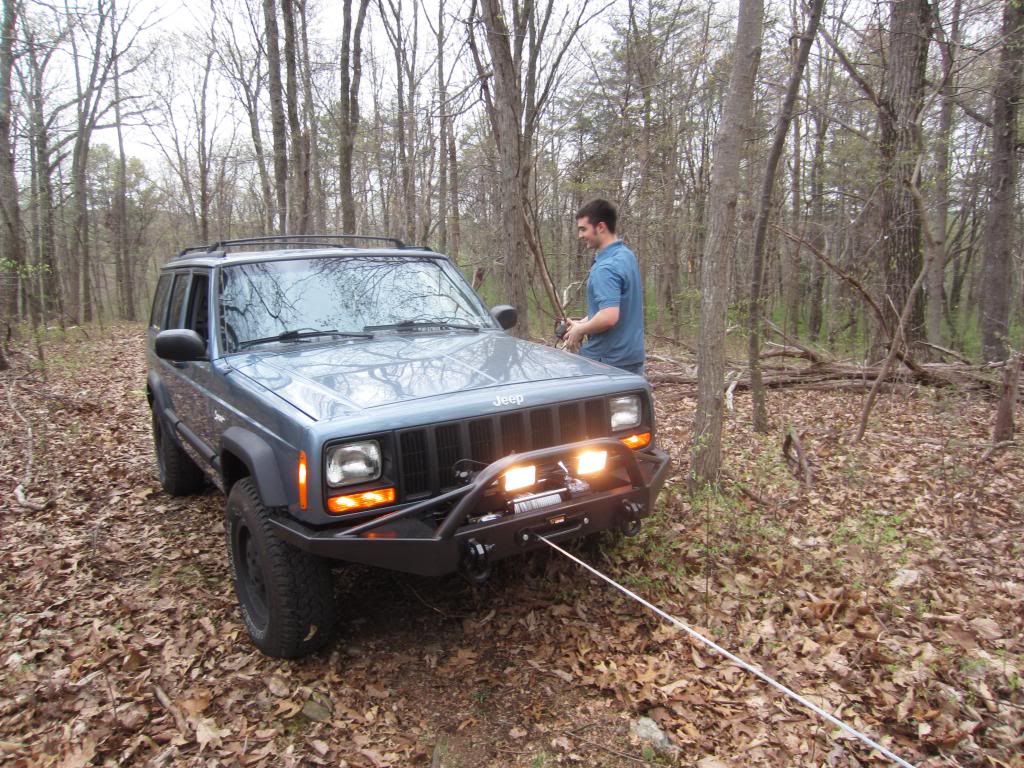
Last weekend I had the opportunity to play around with my winch a little bit. Nothing crazy, just unspooled it and got it around a tree and respooled by pulling the weight of the vehicle. Instructions said that it recommended that. Seems it will work great, although it is noisy and slow, lol
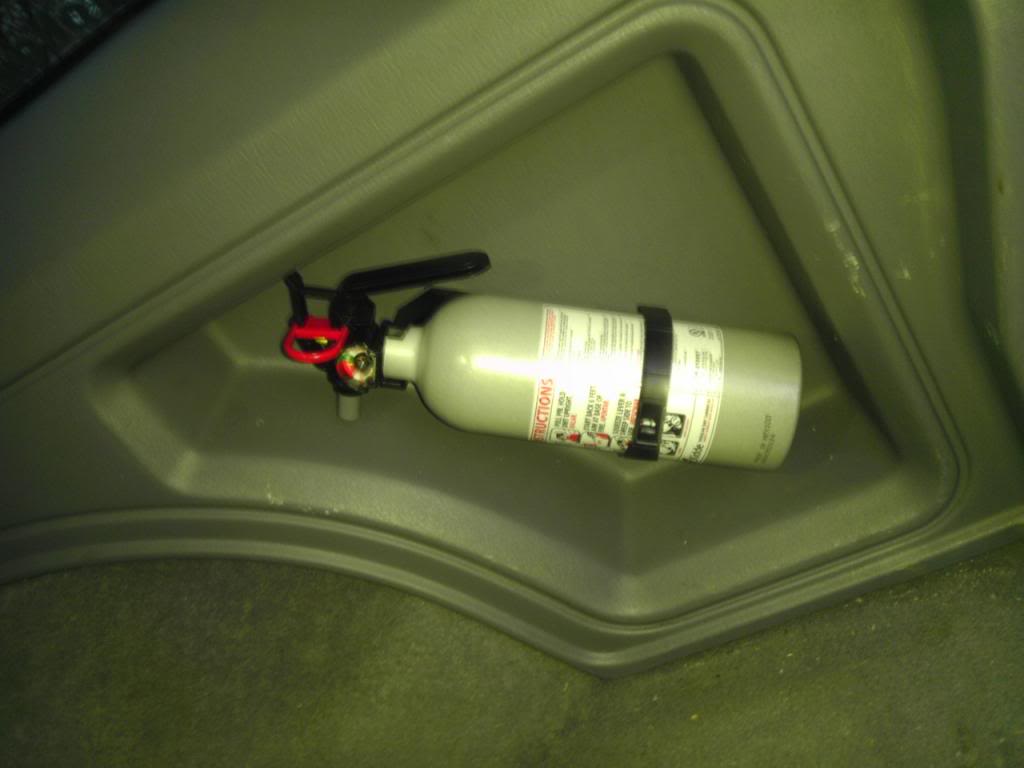
Here we have a $17 Wal-Mart fire extinguisher for cheap insurance. I'm thinking about putting another one up front somewhere, hopefully a more compact one that doesnt take up too much space.
Shortly after, I received my tax refund money, which was basically already spent before I even got it!
I ordered my Superwinch LP8500 on 4wd.com while they were running a 20% off everything tax special.I also ordered my Buswhacker Flat Flares, which are still sitting in the box until I�m moved into my new place, so no pics of that yet. I am a long way from it at this point. With the remainder of the tax refund, I went with Nates4x4 Slimline Winch Bumper. Hit it with Rustoleum self-etching primer, probably about 3 coats.
Now while I was waiting for the paint to dry and cure over the period of about 4 days, I decided to change out my windshield washer fluid pumps. The old ones..
And the new
Since the time of this writing however, the rear has suddenly stopped working. I think the switch may be the culprit.
Back to the bumper--I used Rustoleum Hammered rattle can paint. It turned out pretty well. I already have a few spots to touch up, mostly from installing this bumper entirely by myself with the help of some wood blocks and a jack. Also, not pictured, I had to relocate the vacuum canister from under the factory original bumper. I fastened that to the wiring harness in front of the A/C canister, holding and working well so far. I should probably relocate the horns too. Anyone have thoughts on that?
And the result:
Doing what I can with stock suspension and p235 Goodyear Wranglers!
Last weekend I had the opportunity to play around with my winch a little bit. Nothing crazy, just unspooled it and got it around a tree and respooled by pulling the weight of the vehicle. Instructions said that it recommended that. Seems it will work great, although it is noisy and slow, lol
Here we have a $17 Wal-Mart fire extinguisher for cheap insurance. I'm thinking about putting another one up front somewhere, hopefully a more compact one that doesnt take up too much space.
I think I've about covered it for now. Much more to come, rear disc conversion and rust repair projects coming up next.

Thread Starter
CF Veteran
Joined: Dec 2012
Posts: 4,169
Likes: 6
From: York, PA
Year: 1998
Model: Cherokee
Engine: 4.0
I forgot to mention that my sway bar was clunking against the carriage bolt on my new front bumper. So I got rid of it for now. Just need to get those dang pressed-in torx bolts out. Drives much better without it!
End links and bushings were all shot anyways. I'm going to wire-wheel it and refinish it with Chassis Saver eventually for reinstallation once my lift is done and I have my quick discos.

End links and bushings were all shot anyways. I'm going to wire-wheel it and refinish it with Chassis Saver eventually for reinstallation once my lift is done and I have my quick discos.
CF Veteran
Joined: Apr 2011
Posts: 14,553
Likes: 1
From: Carrollton, GA
Year: 1994
Model: Cherokee
Engine: Inline 6 4.0L High Output
I forgot to mention that my sway bar was clunking against the carriage bolt on my new front bumper. So I got rid of it for now. Just need to get those dang pressed-in torx bolts out. Drives much better without it!
End links and bushings were all shot anyways. I'm going to wire-wheel it and refinish it with Chassis Saver eventually for reinstallation once my lift is done and I have my quick discos.
End links and bushings were all shot anyways. I'm going to wire-wheel it and refinish it with Chassis Saver eventually for reinstallation once my lift is done and I have my quick discos.
Thread Starter
CF Veteran
Joined: Dec 2012
Posts: 4,169
Likes: 6
From: York, PA
Year: 1998
Model: Cherokee
Engine: 4.0
A lot of people around here are saying it's required for inspection. but I removed it from my old Ranger when I busted the links, and it always passed without it. I'll play it by ear.
CF Veteran
Joined: Apr 2011
Posts: 14,553
Likes: 1
From: Carrollton, GA
Year: 1994
Model: Cherokee
Engine: Inline 6 4.0L High Output
Having inspections must suck. Lucky we don't have them here, by the time we do that or emissions, my Jeep will be too old... I hope.
Thread Starter
CF Veteran
Joined: Dec 2012
Posts: 4,169
Likes: 6
From: York, PA
Year: 1998
Model: Cherokee
Engine: 4.0
It's stupid. My DD, a 1990 Mazda 626LX, is still required for emissions testing because of how frequently I drive it. In PA, you can be emissions exempt if you drive under 5k miles a year. My jeep will likely be exempt come next inspection. I'll be sweating for that one because I'll have a ton of mods and changes done by then.