
1996 2 Door Build

Thread Starter
Member
Joined: Aug 2013
Posts: 202
Likes: 0
Year: 1996
Model: Cherokee
Engine: 4.0 I6
Received the lower shifter boot, small transmission shift boot and the oil seal for the lower shifter assembly. Couldn't handle all the hot air and smell coming through the shifter area and around the console. Good thing I replaced because the stock pieces were literally falling apart! No more unwanted heat now!


If anyone is looking for the lower shift boot I used the one for the Tj wrangler. Some people say you have to drill holes but all mine lined up perfectly like it was made to go there. Install is easy and took all of about an hour.


If anyone is looking for the lower shift boot I used the one for the Tj wrangler. Some people say you have to drill holes but all mine lined up perfectly like it was made to go there. Install is easy and took all of about an hour.
Seasoned Member
Joined: Nov 2011
Posts: 375
Likes: 3
From: Louisville KY area
Year: 1998
Model: Cherokee
Engine: 4.0
Today I literally pulled one of the stock cargo rings out of the floor by hand.. So I replaced with something more stout.
Attachment 218054
Attachment 218054
Thread Starter
Member
Joined: Aug 2013
Posts: 202
Likes: 0
Year: 1996
Model: Cherokee
Engine: 4.0 I6
Last night I got around to installing the control arm drop brackets (pita) and the shackle relocation boxes.
A couple before shots of what the angles were:


The hardware (ordered the relocation boxes in black, they came in blue.. Not a HUGE deal):


After, the new angles:


Caster is at about 4* and the pinion angle is dead on, I may lower the pinion angle about 1.5* depending upon the handling characteristics.
With the SRB's I netted 1/2" of lift at the shackle angle pictured (about 52*), the hole one further up actually put me at 1/4" lower than I was prior.
Sorry for the crumby photo quality.
Thread Starter
Member
Joined: Aug 2013
Posts: 202
Likes: 0
Year: 1996
Model: Cherokee
Engine: 4.0 I6
You should do it!
Thread Starter
Member
Joined: Aug 2013
Posts: 202
Likes: 0
Year: 1996
Model: Cherokee
Engine: 4.0 I6
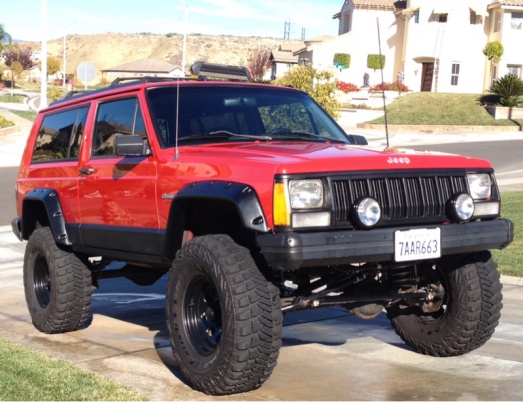
My brown dog motor mounts should come in the mail tomorrow, but received the Napier flares on Friday so got around to the install this afternoon.
Finished up both the front flares and one of the rear, the other rear flare I'll finish tomorrow. Here's a few pics I snapped while I still had light, the rear I finished up a bit late to get a good picture though..


Finished up both the front flares and one of the rear, the other rear flare I'll finish tomorrow. Here's a few pics I snapped while I still had light, the rear I finished up a bit late to get a good picture though..


Thread Starter
Member
Joined: Aug 2013
Posts: 202
Likes: 0
Year: 1996
Model: Cherokee
Engine: 4.0 I6
Also lowered the front pinion about 1.5� to improve my caster angle. Feels a lot more stable.. Love the HPd30, it's a lot more lenient, as far as angles go, compared to the LPd30 I had in my Tj.
Thread Starter
Member
Joined: Aug 2013
Posts: 202
Likes: 0
Year: 1996
Model: Cherokee
Engine: 4.0 I6

No, I don't lick fish.


Joined: Mar 2011
Posts: 11,169
Likes: 26
From: Northern Kentucky
Year: 1999
Model: Cherokee (XJ)
Engine: 4.0
Haha.... yeah, I want 35's and don't have lift or flares at all  In due time.
Flares look great! I have the same mounts waiting to go in. Just waiting for a day off.
In due time.Finished the install of the flares, little poser shot:
Attachment 224678
Also, the brown dog mounts came in!
Attachment 224679
Attachment 224678
Also, the brown dog mounts came in!
Attachment 224679
Thread Starter
Member
Joined: Aug 2013
Posts: 202
Likes: 0
Year: 1996
Model: Cherokee
Engine: 4.0 I6
Thanks man!
The flares are awesome, I may end up getting some bead locks soon so I'll probably end up going with a 3.5" backspacing vs. the 4" I have now. Right now the rear tires are almost flush (about 1/2" out at the most)
The flares are awesome, I may end up getting some bead locks soon so I'll probably end up going with a 3.5" backspacing vs. the 4" I have now. Right now the rear tires are almost flush (about 1/2" out at the most)