I just installed an overhead console in my 2000 Cherokee Sport, so I thought I would give some info on how it went for me. I started with a overhead console from another 2000 cherokee, and the wiring harness. My Cherokee sport already came with keyless entry, so to get the new keyless entry to work I could have reprogrammed the new unit, or simpler and cheaper option is to simply swap the existing keyless entry receiver into the new overhead unit.
The keyless entry system is located in the dome light housing, to remove the housing simply pop the plastic light cover off, and remove the two screws holding it up. You can simply pull it down, and disconnect the harness which is plugged into the keyless unit. The keyless unit is held into the light housing with two really small philips screws, so you will need a small philips to get it out.
To get the keyless unit out of the new overhead console, you will need to remove the 4 hex (star) screws per side at the back of the overhead console, and the part holding the unit in can be removed, - there are two small tabs on either side of the console that screws came out of that need to be pushed in slightly for the part holding the keyless unit to drop out, once it drops out you will have access to the two little screws that hold it to the overhead unit, remove those, and replace with the one from your existing keyless unit.
Once the unit was ready to install, first step I took in installing the overhead unit is removing the old wiring harness. First remove the side kick pannel cover, you will need to remove two philips screws at the front of the bottom door trim, as well as one 11mm nut that is behind the fuse pannel door. I simply pulled up slightly on the door trim and pulled the kick pannel out slightly and wiggled it forward and it came out.
The new overhead wiring harness has a small and a large plug, you will find the small plug, plugged directly into the fuse pannel area the large plug is plugged into a harness - mine was not plugged directly into the fuse pannel. What I did is unplugged both, and then plugged my new harness in, and checked that everything worked on the new overhead console.
The next step is to remove pillar side molding - The easiest way to get the side molding off is to first loosen the far right glove box cover, - there is a screw on the side, you will have to use a stubby philips to remove it, then there are three more screws that you can access when then glove box door is open.
Once that is loose, you will need to remove both passenger side roof hand holds, one in the front and the other in the rear seat. They are both held on with hex (star) bolt. You should then remove your sun visors, I fully removed the passenger side, remove the 3 screws holding it up, and unclip the wiring harness. I removed the 3 screws holding the drivers side but did not remove the harness, - just leave it hanging there.
To get the pillar molding off, you will have to pull out, it is simply held in with clips, and to get it out of the area where it fits under the glove box you will have to fiddle with it a little bit, wiggling it back and forth and it will come off. You will see the wiring harness running up the pillar.
I first pulled out the old harness - To get the harness out from behind the glove box area, of course first make sure its disconnected, then you will need to push in on the connector clips, so they fit through the slot and pull the harness out from behind the glove box area.
At this point I stated to install the new harness as well, push in on the clips of the new harness and feed them through the slot into the area under the glove box. The harness is held into the side pillar with push in clips, simply use a flat head to pop them out, follow the old harness up, and install the new harness right where the old one went.
I pulled the headliner down slightly and was able to remove the old harness from the front of the roof, as well install the new one. You will need to feed the pink/black wires and plug for the visor light through the hole in the roof and back through the second hole where the old one came out of. (takes a bit of fiddling to get the new clip through).
For the drivers side visor light wiring, instead of pulling the headliner down all the way I simply clipped the old harness, and spliced in the new harness, - pink and black wires. It was a lot easier than running the new wires all the way across.
You can then completely pull the old wiring harness out.
I then slid the new wiring harness clip (looks exactly the same as the clip you pulled out of your old dome light) through the hole where the dome light came use to be attached.
You then need to install the rear overhead console bracket. Unlike some of the earlier model overhead consoles, the 2000 console only has one bracket, the front of the console is held in place by the two screws that hold in the sun visor clips.
To measure where to cut the headliner, I simply held the overhead console up, marked the unit with chalk, and marked where the bracket should go and cut with an exacto knife. You will see a cross member, and two rivets, drill out those two rivets, - that is where the new bracket will attach to. The two rivets hold up the old dome light bracket as well, simply remove that bracket, its not needed anymore. I attached the new bracket with 1/2" 10 self tapping screws.
You will notice that the overhead console also has a lip at the very back that slides under the headliner as well, you will need to make the hole long enough so it can slide back under the headliner, I simply cut a second hole, and actually had to fit the overhead a couple of times, cutting back till it was the right size.
You will also have to cut a small second hole in the headliner near the front, for the second plug of the wiring harness to slip through. I put mine about 9-10" back from the top of the windshield. plug the new harness plugs into the overhead console, slide the overhead unit in place by sliding it back from the front, line the front up with visor screw holes, install the screws, and whalla! you have a new overhead console! Just plug in the two wiring harness clips in kick pannel area, and re-install all the stuff you took off, and you are done!
Hope this helps anyone who is thinking of installing a overhead console in a 00-01 xj, it is a fairly easy install, it just takes a little while to take all the molding off, run the wires and cut the headliner correctly.
Pic 1 - Screw Holes, bottom door molding
Pic 2 11mm nut behind fuse door
Pic 3 Large overhead console plug
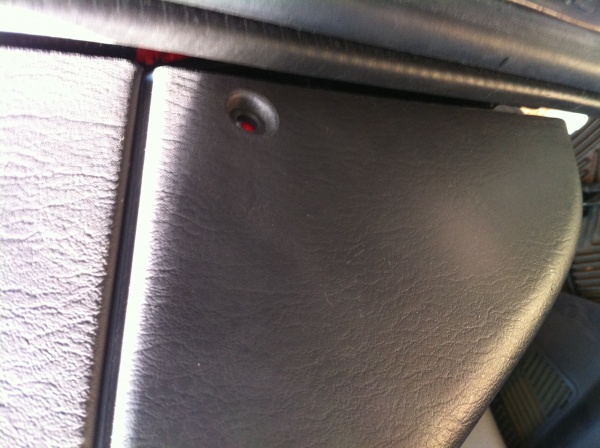
Pic 4 Glovebox side screw
Pic 5 Overhead handle hex screw
The keyless entry system is located in the dome light housing, to remove the housing simply pop the plastic light cover off, and remove the two screws holding it up. You can simply pull it down, and disconnect the harness which is plugged into the keyless unit. The keyless unit is held into the light housing with two really small philips screws, so you will need a small philips to get it out.
To get the keyless unit out of the new overhead console, you will need to remove the 4 hex (star) screws per side at the back of the overhead console, and the part holding the unit in can be removed, - there are two small tabs on either side of the console that screws came out of that need to be pushed in slightly for the part holding the keyless unit to drop out, once it drops out you will have access to the two little screws that hold it to the overhead unit, remove those, and replace with the one from your existing keyless unit.
Once the unit was ready to install, first step I took in installing the overhead unit is removing the old wiring harness. First remove the side kick pannel cover, you will need to remove two philips screws at the front of the bottom door trim, as well as one 11mm nut that is behind the fuse pannel door. I simply pulled up slightly on the door trim and pulled the kick pannel out slightly and wiggled it forward and it came out.
The new overhead wiring harness has a small and a large plug, you will find the small plug, plugged directly into the fuse pannel area the large plug is plugged into a harness - mine was not plugged directly into the fuse pannel. What I did is unplugged both, and then plugged my new harness in, and checked that everything worked on the new overhead console.
The next step is to remove pillar side molding - The easiest way to get the side molding off is to first loosen the far right glove box cover, - there is a screw on the side, you will have to use a stubby philips to remove it, then there are three more screws that you can access when then glove box door is open.
Once that is loose, you will need to remove both passenger side roof hand holds, one in the front and the other in the rear seat. They are both held on with hex (star) bolt. You should then remove your sun visors, I fully removed the passenger side, remove the 3 screws holding it up, and unclip the wiring harness. I removed the 3 screws holding the drivers side but did not remove the harness, - just leave it hanging there.
To get the pillar molding off, you will have to pull out, it is simply held in with clips, and to get it out of the area where it fits under the glove box you will have to fiddle with it a little bit, wiggling it back and forth and it will come off. You will see the wiring harness running up the pillar.
I first pulled out the old harness - To get the harness out from behind the glove box area, of course first make sure its disconnected, then you will need to push in on the connector clips, so they fit through the slot and pull the harness out from behind the glove box area.
At this point I stated to install the new harness as well, push in on the clips of the new harness and feed them through the slot into the area under the glove box. The harness is held into the side pillar with push in clips, simply use a flat head to pop them out, follow the old harness up, and install the new harness right where the old one went.
I pulled the headliner down slightly and was able to remove the old harness from the front of the roof, as well install the new one. You will need to feed the pink/black wires and plug for the visor light through the hole in the roof and back through the second hole where the old one came out of. (takes a bit of fiddling to get the new clip through).
For the drivers side visor light wiring, instead of pulling the headliner down all the way I simply clipped the old harness, and spliced in the new harness, - pink and black wires. It was a lot easier than running the new wires all the way across.
You can then completely pull the old wiring harness out.
I then slid the new wiring harness clip (looks exactly the same as the clip you pulled out of your old dome light) through the hole where the dome light came use to be attached.
You then need to install the rear overhead console bracket. Unlike some of the earlier model overhead consoles, the 2000 console only has one bracket, the front of the console is held in place by the two screws that hold in the sun visor clips.
To measure where to cut the headliner, I simply held the overhead console up, marked the unit with chalk, and marked where the bracket should go and cut with an exacto knife. You will see a cross member, and two rivets, drill out those two rivets, - that is where the new bracket will attach to. The two rivets hold up the old dome light bracket as well, simply remove that bracket, its not needed anymore. I attached the new bracket with 1/2" 10 self tapping screws.
You will notice that the overhead console also has a lip at the very back that slides under the headliner as well, you will need to make the hole long enough so it can slide back under the headliner, I simply cut a second hole, and actually had to fit the overhead a couple of times, cutting back till it was the right size.
You will also have to cut a small second hole in the headliner near the front, for the second plug of the wiring harness to slip through. I put mine about 9-10" back from the top of the windshield. plug the new harness plugs into the overhead console, slide the overhead unit in place by sliding it back from the front, line the front up with visor screw holes, install the screws, and whalla! you have a new overhead console! Just plug in the two wiring harness clips in kick pannel area, and re-install all the stuff you took off, and you are done!
Hope this helps anyone who is thinking of installing a overhead console in a 00-01 xj, it is a fairly easy install, it just takes a little while to take all the molding off, run the wires and cut the headliner correctly.
Pic 1 - Screw Holes, bottom door molding
Pic 2 11mm nut behind fuse door
Pic 3 Large overhead console plug
Pic 4 Glovebox side screw
Pic 5 Overhead handle hex screw