
Hot Ignition switch

Thread Starter
Senior Member
Joined: Jul 2011
Posts: 516
Likes: 0
From: New Cumberland, PA
Year: 1995
Model: Cherokee
Engine: 4.0 I6
when i run my a/c, and or fan. my ignition switch gets scolding hot to the point it started melting wire casings close to it. i think its a blower motor going bad but could it be something else? because the blower motor seems fine. it works on all functions and shows no weakness that i know of. thx again guys and or girls
Thread Starter
Senior Member
Joined: Jul 2011
Posts: 516
Likes: 0
From: New Cumberland, PA
Year: 1995
Model: Cherokee
Engine: 4.0 I6
its been a while but i finally got around to replacing the blower motor and resistor. brand new parts working amazingly. but my ignition switch is still getting hot? when we replaced it all we looked behind the controls and the fan speed control switch and the connector going to it were showed evidence of getting hot to the point of melting the connector a bit. my father and i are both confused as to whats causing this. wouldn't a fuse blow? 
CF Veteran
Joined: Sep 2011
Posts: 4,172
Likes: 4
From: Riviera, Texas
Year: 1998 Sport
Model: Cherokee
Engine: 4.0
If you're not blowing fuses or nothing is shorting out. You may just have some loose connections. Loose connections can and will cause the connections to over heat and melt. Hope this is some help.
Thread Starter
Senior Member
Joined: Jul 2011
Posts: 516
Likes: 0
From: New Cumberland, PA
Year: 1995
Model: Cherokee
Engine: 4.0 I6
the only loose connection i can think of is the ignition switch any time the steering column is tilted up, just had to fix that today, (lost the radio cause i tilted it up), but that's back in and tight. other than that everything should be tight. i checked the fuses today and the 5 amp fuse that is for illuminating the radio and temp control had a 7.5amp in so i switched that. but i doubt that was the problem.
Thread Starter
Senior Member
Joined: Jul 2011
Posts: 516
Likes: 0
From: New Cumberland, PA
Year: 1995
Model: Cherokee
Engine: 4.0 I6
probably never lol. just started working the problem. if the ground is bad wouldn't the components just not work? ( i am electrically dumb)
Trending Topics
::CF Moderator::
Joined: Aug 2011
Posts: 43,971
Likes: 1,579
From: Prescott, Az
Year: 1990
Model: Cherokee (XJ)
Engine: 4.0
the ignition switch was corroded but we cleaned it up pretty good, but it comes loose with any tilt adjustment of the steering wheel.
probably never lol. just started working the problem. if the ground is bad wouldn't the components just not work? ( i am electrically dumb)
probably never lol. just started working the problem. if the ground is bad wouldn't the components just not work? ( i am electrically dumb)
As for grounds, a POOR ground can create heat in a circuit that has a lot of amperage while allowing another circuit with low amperage to function without creating heat.
Thread Starter
Senior Member
Joined: Jul 2011
Posts: 516
Likes: 0
From: New Cumberland, PA
Year: 1995
Model: Cherokee
Engine: 4.0 I6
The ignition switch doesn't move with the tilt mechanism so I'm having trouble seeing how it's contributing to the problem. The actual single connection/wire has to fit snugly on the switch terminal.
As for grounds, a POOR ground can create heat in a circuit that has a lot of amperage while allowing another circuit with low amperage to function without creating heat.
As for grounds, a POOR ground can create heat in a circuit that has a lot of amperage while allowing another circuit with low amperage to function without creating heat.
i ordered a new blower motor control switch. so after i get it and replace it. ill check the grounds. any ideas where the grounds for that are?
::CF Moderator::
Joined: Aug 2011
Posts: 43,971
Likes: 1,579
From: Prescott, Az
Year: 1990
Model: Cherokee (XJ)
Engine: 4.0
well i dont know but i do know one time i was sitting in traffic and i adjusted the wheel and the jeep shut off. just two nights ago after fixing the motor and such i tilted it up and the radio stopped working. the harness connected to the ignition switch seems very tight.
i ordered a new blower motor control switch. so after i get it and replace it. ill check the grounds. any ideas where the grounds for that are?
i ordered a new blower motor control switch. so after i get it and replace it. ill check the grounds. any ideas where the grounds for that are?
Just do all your grounds
Thread Starter
Senior Member
Joined: Jul 2011
Posts: 516
Likes: 0
From: New Cumberland, PA
Year: 1995
Model: Cherokee
Engine: 4.0 I6
so i was trying to refresh the grounds and i started with :  anndd while trying to remove the bolt it pulled through the firewall.
  . and now its raining. bad luck i suppose.
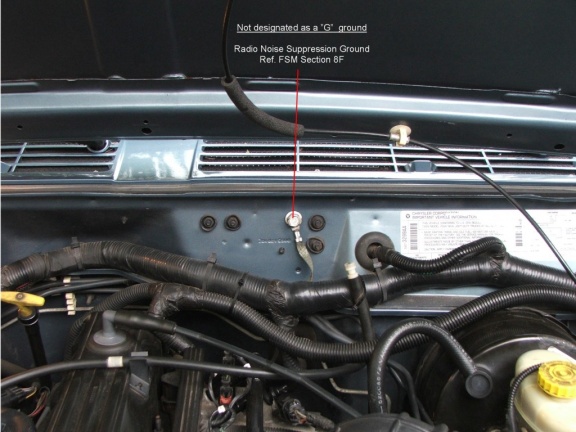 anndd while trying to remove the bolt it pulled through the firewall. . and now its raining. bad luck i suppose.
::CF Moderator::
Joined: Aug 2011
Posts: 43,971
Likes: 1,579
From: Prescott, Az
Year: 1990
Model: Cherokee (XJ)
Engine: 4.0
Never heard of that ever.
Just add a ground from the dipstick tube stud over to the 8mm stud below the passenger side upper shock mount. It's better anyway.
Renix Ground Refreshing
The Renix era XJs and MJs were built with an under-engineered grounding system for the engine/transmission electronics. One problem in particular involves the multiple ground connection at the engine dipstick tube stud. A poor ground here can cause a multitude of driveabililty issues, wasted time, and wasted money replacing unnecessary components.
The components grounding at the dipstick tube stud are:
Distributor Sync Sensor, TCU main ground, TCU "Shift Point Logic", Ignition control Module, Injectors, ECU main ground which other engine sensors ground through, Oxygen sensor, Knock Sensor, Cruise Control, and Transmission Sync signal. All extremely important stuff.
The factory was aware of the issues with this ground point and addressed it by suggesting the following:
Remove the nut holding the wire terminals to the stud. Verify that the stud is indeed tightened securely into the block. Scrape any and all paint from the stud’s mounting surface where the wires will attach. Must be clean, shiny and free of any oil, grease, or paint.
Inspect the wire terminals. Check to see that none of the terminals are crimped over wire insulation instead of bare wire. Be sure the crimps are tight. It wouldn’t hurt to re-crimp them just as a matter of course. Sand and polish the wire terminals until clean and shiny on both sides. Reinstall all the wires to the stud and tighten the nut down securely.
While you’re in that general area, locate the battery negative cable which is fastened to the engine block just forward of the dipstick stud. Remove the bolt, scrape the block to bare metal, clean and polish the cable terminal, and reattach securely.
Another area where the grounding system on Renix era Jeeps was lacking is the engine to chassis ground. There is a braided cable from the back of the cylinder head that also attaches to the driver’s side of the firewall. This cable is undersized for it’s intended use and subject to corrosion and poor connections at each end.
First off, remove the cable end from the firewall using a 15mm wrench or socket. Scrape the paint off down to bare metal and clean the wire terminal. Reattach securely.
Remove the other end of the cable from the rear of the head using a 3’4" socket. Clean all the oil, paint and crud from the stud. Clean the wire terminal of the cable and reattach securely.
A suggestion regarding the braided cable:
I prefer to add a #4 Gauge cable from the firewall to a bolt on the rear of the intake manifold, either to a heat shield bolt or fuel rail bolt. A cable about 18" long with a 3/8" lug on each end works great and you can get one at any parts store already made up. Napa has them as part number 781116.
A further improvement to the grounding system can be made using a #4 cable, about 10" long with 3/8" terminals at each end. Attach one end of this cable to the negative battery bolt and the other end under the closest 10mm headed bolt on the radiator support just forward of the battery. Napa part number 781115.
If you want to upgrade your grounds and battery cables in general, contact Jon at www.kelleyswip.com. He makes an incredible cable upgrade for a very reasonable price.
Revised 11-28-2011
Thread Starter
Senior Member
Joined: Jul 2011
Posts: 516
Likes: 0
From: New Cumberland, PA
Year: 1995
Model: Cherokee
Engine: 4.0 I6
i guess the bolt was welded to the back and i broke the welds trying to remove it. now what? im at a bit of a loss idk where to go from here. guess i gotta make a new ground.


::CF Moderator::
Joined: Aug 2011
Posts: 43,971
Likes: 1,579
From: Prescott, Az
Year: 1990
Model: Cherokee (XJ)
Engine: 4.0
Run a cable, at least a #4, from the dipstick tube stud to tehe8mm stud on the passenger side inner fender well just below the upper shock mount and call it good.

