Jeep Grand Cherokee 1993-2004: Steering Diagnostic Guide
Here's how to diagnose your steering issues to get you and your vehicle communicating on good terms again.
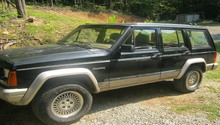
This article applies to the Jeep Grand Cherokee WJ/ZJ (1993-2004).
There are three main points at which you connect with your vehicle. The first one of them is with your butt in the seat of your vehicle. This is how you feel the motion of what your vehicle is doing. The second is with your feet and it is at the pedals. Your feet are required for applying power and slowing the momentum of your vehicle. If you've ever taken a racing classes, they will also refer to this collectively as weight transfer. Also, if you drive a manual your left foot is responsible for the clutch, which falls under applying power. The third is with your hands and is connected through the steering wheel. Your hands along with the connection of the steering wheel are responsible for getting your vehicle to travel in the direction you want to go and for any change of direction that should come up while piloting your vehicle. All three of these connections are equally and extremely important to the successful operation of your vehicle. If one of them is not functioning correctly, then the vehicle as a whole is not functioning correctly.
In this article we will specifically talk about common problems with the steering system and certain corrective actions that could take care of these common problems.
It will help to keep in mind that there are certain steering problems that are caused by areas of the suspension system, so some of the corrective actions might involve fixing parts of the suspension.

Materials Needed
- Tire pressure gauge
- Flashlight
- Jack and jack stands
- Shop manual
Step 1 – Vehicle pulls to one side
1. Tire Pressure is Uneven
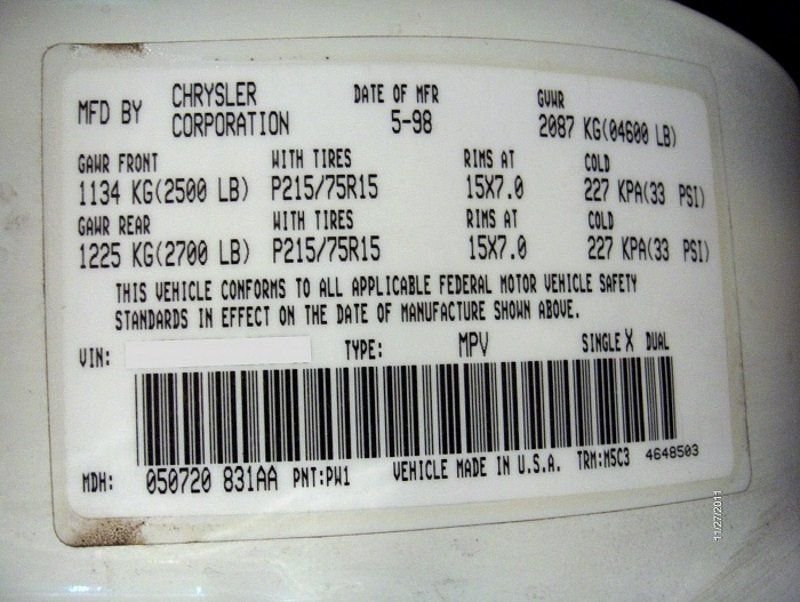
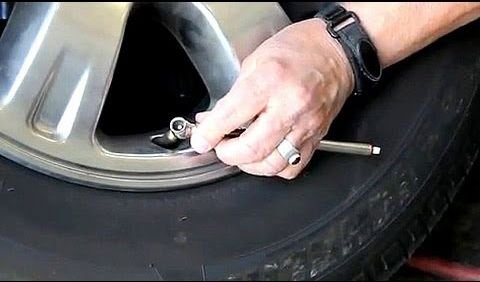
Using a tire pressure gauge, check the pressure in the tires and make sure they are all equal. Printed on the tire or on a label (usually located inside the driver door jam) will be the recommended air pressure for the tires. Remember that the label in the door jamb will have the recommendation for the tires that the vehicle came with from the factory. So if you have changed them to a different tire, it is best to go with what is on the tire. A good average air pressure for most tires is 35 psi.
2. Front End in Need of Alignment
An alignment shop will be the best place to take your vehicle if you are under any suspicion that it might require one. They have special equipment that they can use to check and see if your vehicle is within the alignment specs that it should be.
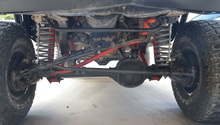
3. Excessive Wear in Suspension or Steering Components
Take a look at the suspension and steering components. If you notice any signs of wear, broken or torn rubber boots, leaking grease from joints or anything along those lines, it could be a sign that you have worn suspension or steering components. Also, if you do take your vehicle for an alignment, they will be able to tell if these components are excessively worn also.
4. Front Brakes Dragging
A dragging front brake caliper can cause your vehicle to pull to one side due to the fact that it will be unevenly slowing one of the wheels down at a different rate than the other. A way to check this is to raise the vehicle so the front wheels are not touching the ground. Rotate the each front wheel by hand. If you feel noticeable resistance when you are doing this, then it is very possible that you have a dragging front brake.
Step 2 – Shimmy, shake, or vibration
Either one of these issues can possibly happen at different speeds, so you will want to note at what speed it is occurring and also the intensity.
1. Tire or Wheel Out of Balance
The best way to tell if your tire or wheel is out of balance is to have a tire shop put in on a balancing machine. That will give you an accurate and exact reading of whether it is or not. One way you might be able to tell is look at the wheel and see if any of the balance weights look like they might have recently fallen off. If you see a very clean spot that looks like it's the shape of a balance weight, this might be a good indication. Even if one hasn't fallen off and your tires have a good amount of miles on them it could be time for a fresh balance. As the rubber wears down, it causes the tire to go out of balance requiring it to be re-balanced.

2. Loose, Worn Wheel Bearings
The best way to see if you have a worn wheel bearing is to elevate the vehicle so the wheels are not touching the ground. Grab each wheel and try to move it side to side, up, and down by hand. If you feel excessive movement while doing this it is possible you have a loose wheel bearing. You can also spin it by hand and if you hear a horrible grinding noise this is also a good sign you have a worn wheel bearing.
3. Shock Absorbers and/or Suspension Components Worn or Damaged
If you look at your shock absorbers and you see fluid coming from the body of the shock absorber, you probably have a worn or damaged shock absorber. Another way to tell is if you hit bumps on the road and still feel the vehicle continue to bounce after hitting them; you more than likely have a worn shock absorber.
Step 3 – Excessively stiff steering
1. Lack of Fluid in Power Steering Fluid Reservoir
If there is a lack of fluid in the power steering reservoir, this means that the pump does not have enough fluid to operate correctly, which will cause your power steering system to not be functioning correctly. Check the fluid level in the reservoir and add as needed. Also, remember that you must put the correct type of fluid in the reservoir of your power steering pump. Failure to put the correct fluid in will cause the pump to malfunction.

2. Incorrect Tire Pressures
Just as in Step 1, check to make sure that all the pressures in each tire are what they need to be and are all the same. Most of the time, stiff steering will be caused by the pressure in the tire being too low.
3. Lack of Lubrication at Steering Joints
There are numerous grease fittings located on certain steering joints of the steering system. These fittings are called Zerk fittings. If you located one of these fittings, then look around it and it looks like the grease has come out, it is most likely time to either add new grease or replace the joint. In order to add grease to the joint through the Zerk fitting, you will need a grease gun with the correct attachment.

Figure 5. Zerk fitting on the bottom of the ball joint allows joint to be lubricated. 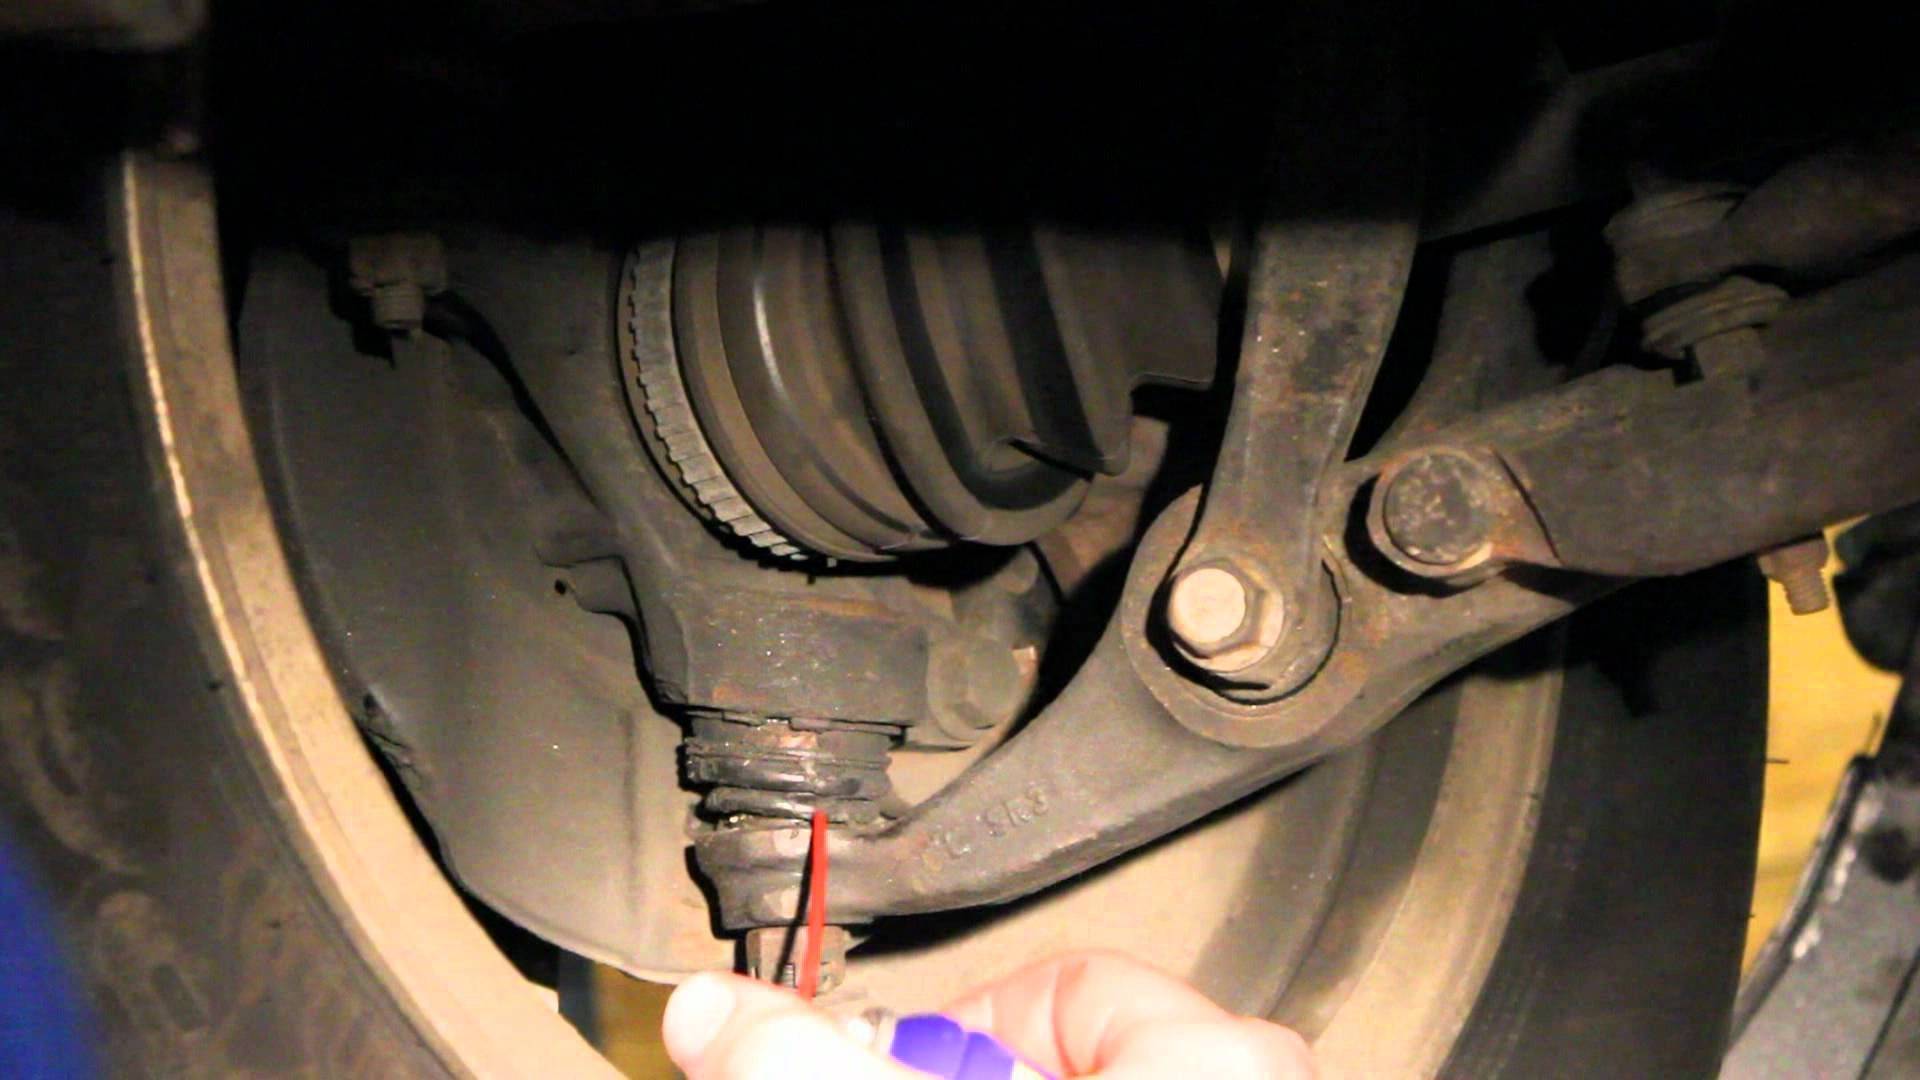
Figure 6. Ball joint being greased.
4. Lack of Power Assistance (Go to Step 5)
This can be a number of things, and if this is your problem, then refer to Step 5.
Step 4 – Excessive play in steering
1. Loose Front Wheel Bearings
Just as in the above step. The best way to check for loose front wheel bearings is to elevate the vehicle so the front wheels are not touching the ground. Grab each wheel by hand and try to move it up or down and left or right. If you can move it at all by hand, it could be a very good indication that you have a loose front wheel bearing.
2. Excessive Wear in Suspension or Steering Components
Check all of the joints for wear. A lack of lubrication could have caused them to excessively wear so look for signs of ejected grease from suspension joints. Also, if you can move any of the joints by hand, this is also a good indication of wear.
3. Steering Gearbox Damaged
The steering linkages on these vehicles are actuated by a steering gearbox. It is located on the driver side frame rail. After the steering wheel, the steering shaft travels down into the engine compartment and splines into a steering gearbox. This gearbox then transmits that to an arm, which actuates the steering linkages and moves the wheels left or right. If this gearbox becomes damaged in any way, it can cause excessive play in the steering.
Step 5 – Lack of power assistance
1. Steering Pump Drivebelt Faulty or Not Adjusted Properly
A worn belt can become faulty and slide on the pulleys, causing them not to operate the accessories correctly. Inspect the belt and make sure that it is not dried and cracked. Also, check the tension on the belt as this can have an effect on the proper operation of accessories. If the belt seems excessively loose, it should probably be adjusted. Some models have an automatic tensioner, which can also wear out over time and could require replacement. Other models have the tension adjusted by a pivot on the power steering pump. There is a bolt, which you can turn, located next to the pump to add or relieve tension on the belt.
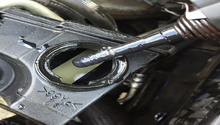
2. Fluid Level Low
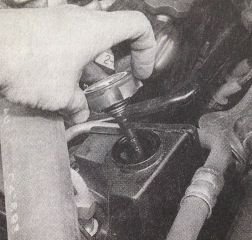
The level of fluid is extremely important in the operation of the power steering system. Without the correct amount of fluid, the pump will not operate correctly and will eventually fail. Check the fluid level and add as necessary. Again, remember that it is very important what type of fluid you add to the pump and must be the correct type of fluid for that pump. The fluid level can be checked using the dipstick similar to the one below.
3. Hoses or Lines Restricted
There are rubber lines that are part of the power steering system. While not common, there have been instances where these lines have become pinched or even cut over time. This will allow the fluid in the system to leak out, causing the power steering system not to function correctly. Unfortunately, if this happens, the rubber line must be replaced as it is not usually a good idea to repair it.
4. Air in Power Steering System
If air enters your power steering system, it will have to be bled just as if air got into your brake system. The process to do this is not the same, though. It is actually much easier. First elevate the vehicle so the front wheels are not touching the ground. Then remove the cap on the power steering reservoir. Top off the fluid. With the vehicle running, move the wheels from left to right a few times. If there was any air in the system, it should have escaped during this time. Check the fluid level again. It could be possible that there is more air in the system and it would need to be bled again; if this is the case, you can perform another bleed of the system. If you have to do it more than three times, it is possible that there is an air leak somewhere in the power steering system.
Step 6 – Excessive tire wear
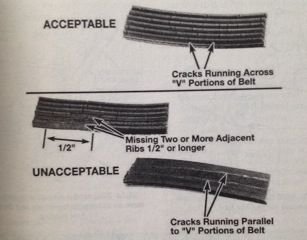
Tire wear is a good way to read how well your vehicle is traveling down the road. By determining where the tire is wearing excessively, you can then more easily determine what the problem might be. There are four categories that you can use to help you out when looking at tire wear. Here are the four types and some possibilities plus a chart to help you get an idea of what tire wear looks like.
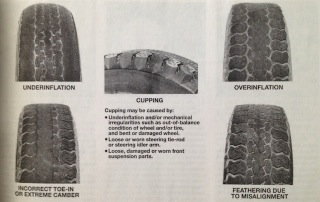
1. Tire Wear Not Specific to One Area
- Incorrect tire pressures
- Tires out of balance
- Wheel damaged
- Suspension or steering components excessively worn
2. Tire Wear on Outside Edge
- Inflation pressures incorrect (under-inflation)
- Front end alignment incorrect
3. Tire Wear on Inside Edge
- Inflation pressures incorrect (over-inflation)
- Front end alignment incorrect
- Loose or damaged steering components
4. Tire Wear in One Place
- Tires out of balance
- Damaged or buckled wheel
- Defective tire
Related Discussions
- Loose Steering - CherokeeForum.com
- Steering Stabilizer - CherokeeForum.com
- Wandering - Loose Steering - CherokeeForum.com
- Best Type of Power Steering Fluid - CherokeeForum.com
- Power Steering Fluid Leak - CherokeeForum.com