Jeep Cherokee and Jeep Grand Cherokee 1984-2004: Tires Diagnostic Guide
Diagnosing what's causing your tire issues can help you save a lot of money by helping you identify early warning signs that can lead to having to buy a new set of tires.
This article applies to the Jeep Cherokee and Jeep Grand Cherokee (1984-2004).
Keeping your tires in good shape is critical to both getting where you need to go and being safe on the way there. By knowing the early warning signs of an issue with your tire can save you from either getting in an accident or having to purchase a new set of tires. This is because once a tire starts to wear unevenly, it needs to be replaced. It's highly unlikely to ever get it to wear properly again and one bad tire will make the vehicle unpredictable, eventually translating that uneven wear to the rest.

Materials Needed
- Grease gun and necessary attachments
- Spray bottle with soapy water
Step 1 – Check for uneven tire wear
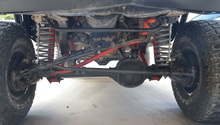
Steering and suspension components may be worn out, resulting in abnormal tire wear.
Poorly worn tires will cause the vehicle to tramline excessively, pull to one side while driving, or cause vibrations at speed.
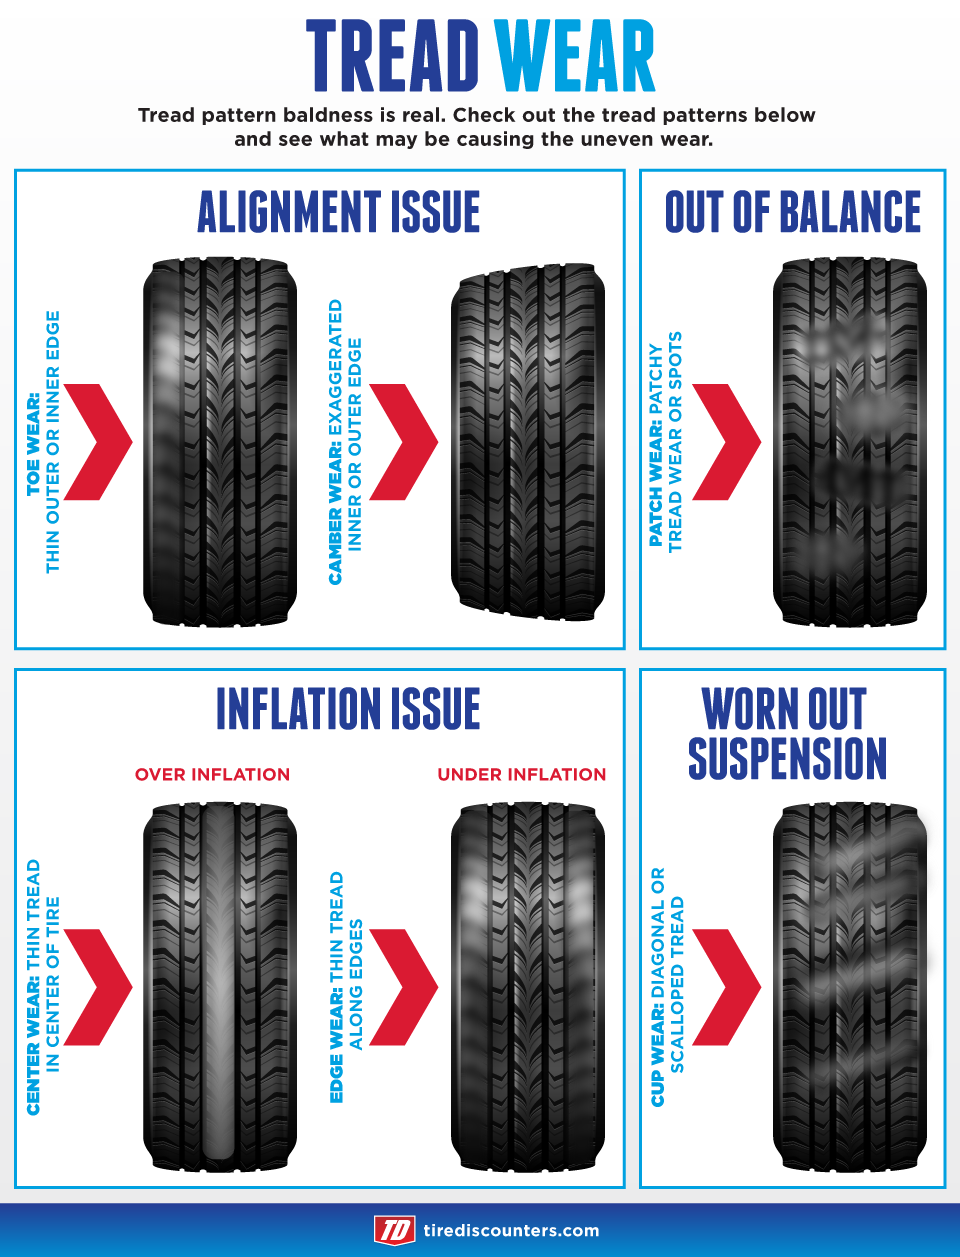
There are many different ways your tire can wear, and each way helps to indicate what is causing it to wear that way. The two most common causes of uneven tread wear are a bad alignment and improperly inflated tires. Now, alignments do go out over time just from normal driving, but worn out steering and suspension components can help them go out a lot quicker.
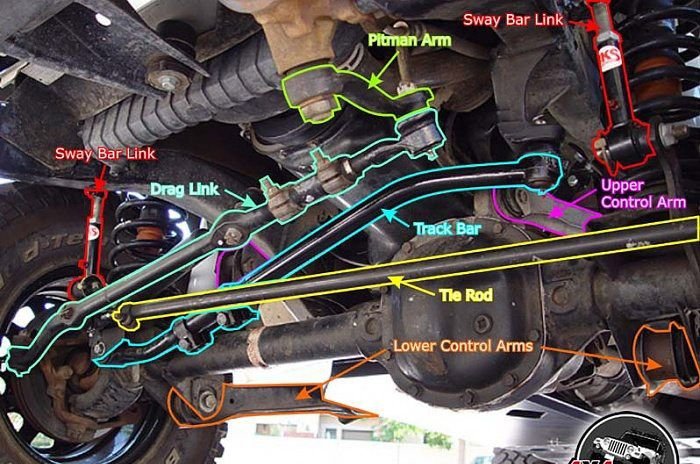
Every component highlighted above is part of either the steering or suspension that can have an affect on the alignment. In addition, extremely worn out coil springs can mess up the alignment, but this is usually a very gradual process and routine alignments would keep this in check.
Step 2 – Is car pulling in one side
The alignment may be out of whack.
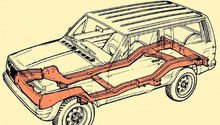
The two main causes of pulling in one direction is the need for an alignment or a bent suspension component. It's important to keep in mind that during normal driving your vehicle will have the tendency to pull to the right on roads with crowns, due to driving at a slight angle. However, any pulling out of the ordinary should be diagnosed quickly because once the tires start to wear from the pull, it's almost impossible to get them to wear normally again. This is why getting regular alignments and alignments after replacing the tires or any steering as well as suspension component is crucial. For those who go off-roading a lot, a bent knuckle or axle tube can also cause it to pull to one direction.
Step 3 – Check for squealing or squeaking
Squealing
Tire squeal when turning, for the most part, is completely normal. When you turn, each tire needs to rotate at different speeds and depending on the type of surface you are on, this can translate into a squealing sound. The best place you can hear this is in a parking garage because the enclosed area as well as the type of concrete makes the perfect combination to amplify this sound. If you're noticing a squeal driving in places you've never heard it before, you may have a problem then. The biggest cause here is the toe being out on the tire, causing it to ride at weird angles and a simple alignment can fix it.
Squeaking
- A squeaking sound that matches the rotation of the tire is usually a wheel bearing or a U-joint on the axle.
- A squeaking sound that's more rapid than the rotation of the tire is usually a U-joint on the axle or the CV axle.
- Squeaking when going over bumps is usually coil springs or a steering component that needs to be greased.
- Squeaking at random times or when it's wet out is usually a dried out bushing.
Step 4 – Check tire pressure
There's a handful of things that can cause a tire to loose pressure, and luckily they can all be diagnosed with a spray bottle filled with soapy water. By spraying around the wheel and tire, any air escaping will cause the soapy water to bubble up. The areas you want to spray are:
- Tire tread to look for punctures or cracks.
- Tire sidewall to look for cuts.
- Valve stems to see if they are not seating properly or are dry rotted.
- Around where the wheel meets the tire to see if a bead isn't seating properly.
- On the wheel to see if it has any cracks.

Related Discussions
- Tire Problems - CherokeeForum.com
- Pulling Left and Right - CherokeeForum.com
- Tire Bucking When Turning - CherokeeForum.com
- Unusual Tire Wear - CherokeeForum.com
- Do I Need Tie Rod or New Track Bar - CherokeeForum.com