

Tomorrow we will know if it's gonna be an early spring or not.
if the groundhog says it's an early spring. $20 off my cable sets for until February 14th.
If he's scared of his own shadow. $10 off!
Gotta email me at meanlemons@gmail.com for that to happen.
if the groundhog says it's an early spring. $20 off my cable sets for until February 14th.
If he's scared of his own shadow. $10 off!
Gotta email me at meanlemons@gmail.com for that to happen.
Junior Member
Wanted to give a shout out to Neal (XJwonders) on these cables. I just installed the 2 gauge set on my 2000 XJ and it was a piece of cake with the diagram Neal sent. I swapped everything out in under an hour. Everything in the kit is very high quality. I have no doubt these cables will outlast the Jeep. My XJ cranks quicker and I get better output from my headlights (which I had already been running an upgraded wiring harness on). I weighed the option of trying to build my own set to save some money, but I don't have the proper tools to make a product this nice. Would recommend this upgrade to anyone.
CF Veteran
Quote:
Want a picture of my battery cables to go with this? HahaOriginally Posted by XJwonders
Get yours ASAP before it fall apart on you!
Quote:
Yes pleaseOriginally Posted by SatiricalHen
Want a picture of my battery cables to go with this? Haha
Quote:
Yes several timesOriginally Posted by billyv
have you ever shipped to Canada?
Newbie
cool. thanks for the reply.
jeep is completely electrically powerless right now. battery test good so I have to figure out where the problem is and its way to cold to work on.
thanks again
jeep is completely electrically powerless right now. battery test good so I have to figure out where the problem is and its way to cold to work on.
thanks again
Quote:
jeep is completely electrically powerless right now. battery test good so I have to figure out where the problem is and its way to cold to work on.
thanks again
No problem. I'm here when u need meOriginally Posted by billyv
cool. thanks for the reply.jeep is completely electrically powerless right now. battery test good so I have to figure out where the problem is and its way to cold to work on.
thanks again
I would like to make cables for 2.1L, 2.5L, 2.8L, 3.4L, and any other unusual engines (v8 swaps, etc).
hit me up for a discount if you get me measurements for your Jeep.
as for 4.0L owners, there will be a discount for the tax season soon.
Neal
hit me up for a discount if you get me measurements for your Jeep.
as for 4.0L owners, there will be a discount for the tax season soon.
Neal
Seasoned Member
A Review (From My Build Thread):
So, battery cable upgrade time!
To be 100% upfront, I bartered some LED stuff for a 2AWG set.
It took me a few hours to get it all in place, as I'm a bit attentive to making routing as clean as possible without the cable touching things, firmly secured, etc.
My "review"
Pros:
- Great Crimps
- Great cable
- Comes with everything needed (mostly)
Cons:
- Was shipped two negative battery terminals
- In some areas, I would have made the cable different (lengths wise)
- The cable lug end meant for the alternator, didn't fit my stock stud or the new Alternators stud (had to drill it out).
I'll add some pictures:
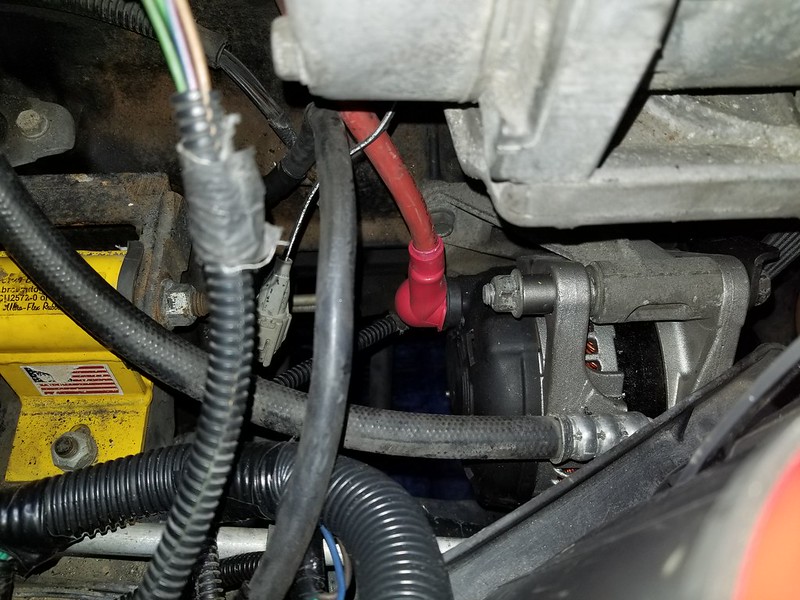
Connected to the alternator, I added a rubber wire boot (I've got a bunch of spare electrical stuff). The stock plastic cover wouldn't fit on the 2AWG. I had to drill out the lug to fit on the alternator stud.
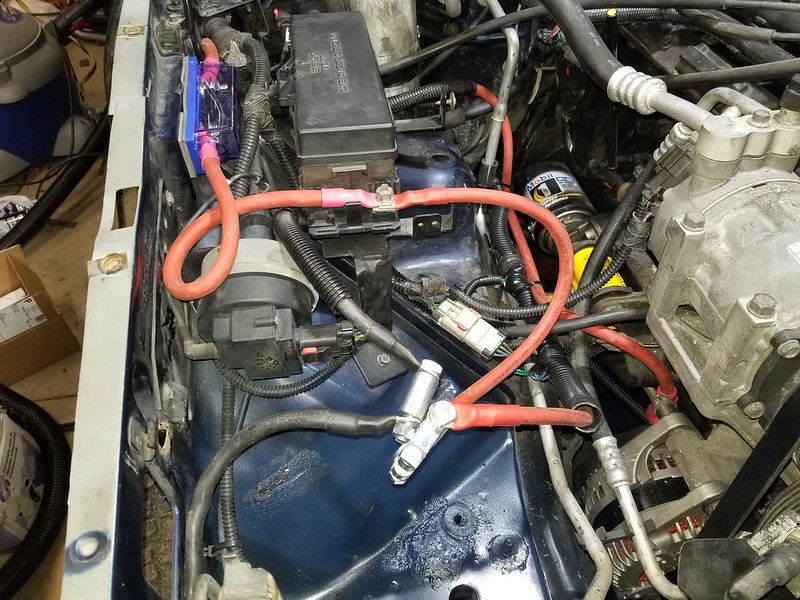
Final routing. Not the "most" ideal as I'd have it laid out, but it will work just fine.
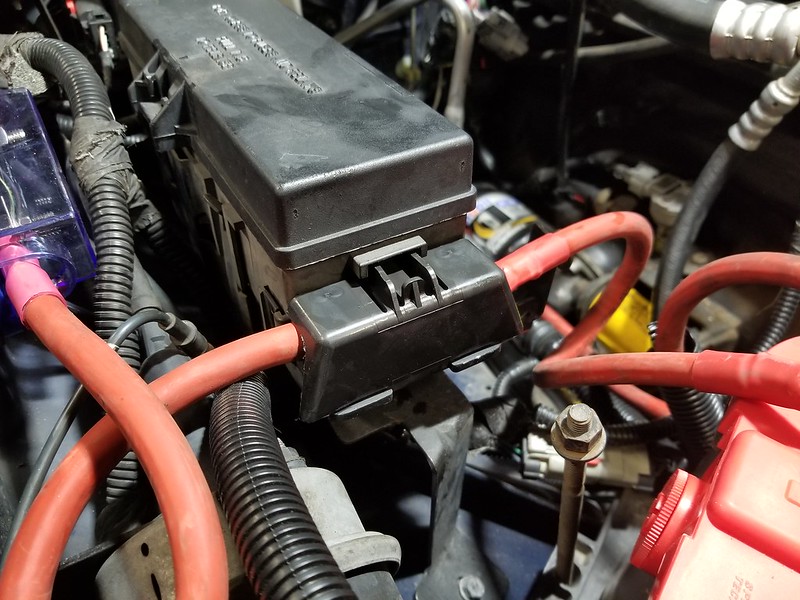
I drilled and mounted the fuse holder along the fenderwell.
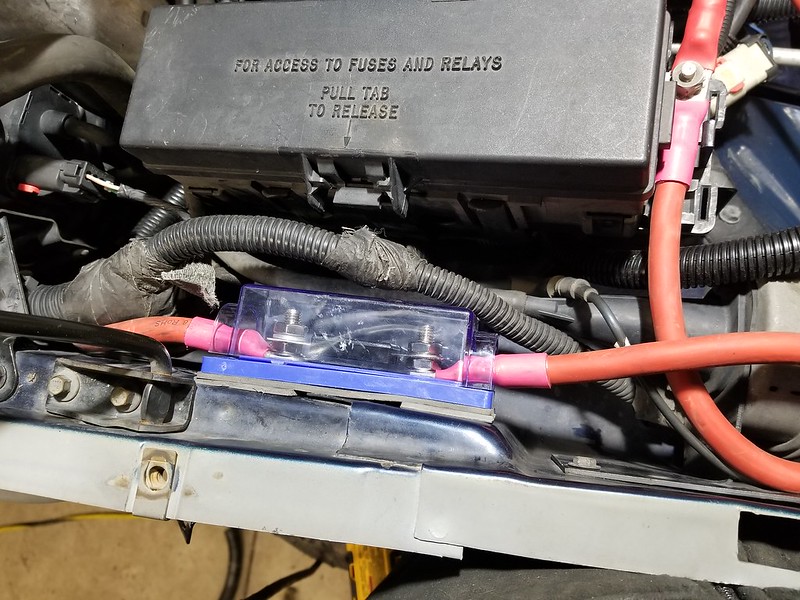
I used some MLV underneath it for a couple reasons:
- The plastic plugs on the bottom of the stud terminals kept falling off, this this will prevent an unwanted grounding of the terminals on the fender.
- As the fender is not fully flat, it allows some cushion and vibration dampening to the fuse holder box.
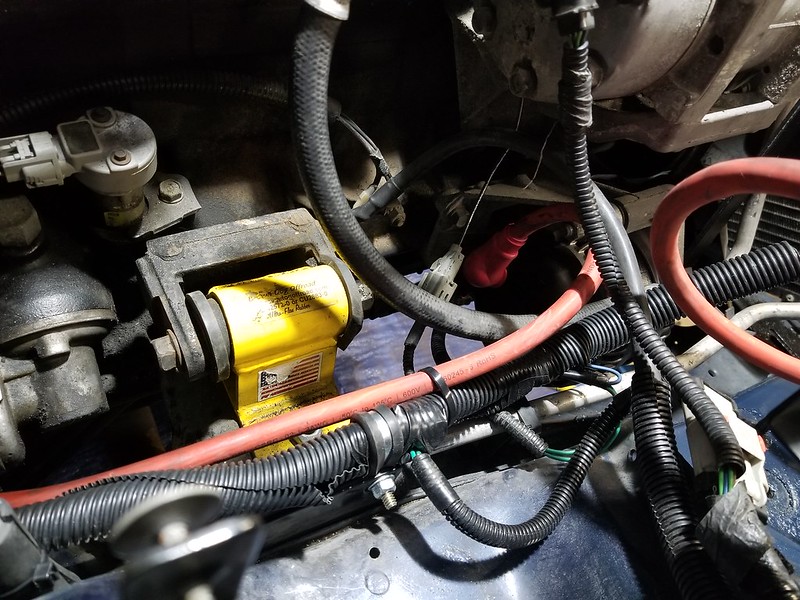
Line to the Alternator (red), and line to the starter (inside wire sheath). I affixed the starter cable inside some new plastic sheathing, and then mounted it with a rubber lined clamp to an existing hole there. I zip tied the alternator cable to that plastic sheathing, as well the the A/C line (with some hose spiced around the A/C line as a barrier/protection from rubbing).

On my buggy, all lines like these were sheathed in Fire Sleeve. I was going to do that on these as well since I a bunch extra, but didn't end up doing it. I might in the future, as electrical and electrical caused fires...are no joke.
Cover trimmed and reinstalled:
Some of the main cable changed I would have made, were cables that went from the battery, to the PDC, and from the Fuse to the PDC. I would have made these much shorter jumpers, as you can see in the last picture they're kind of "twirled". Once again, this is just personal preference.
However, I do realize this added length allows for some flexibility in mounting locations, since it's more made as a "one size fits all".
I was going to cut the wires and make them shorter, but realized all my lugs were sizes other than 2AWG, and I didn't feel like running to the store to get some.
Also, not pictured is the new block ground, from the engine to the fire wall.
The thicker 2AWG wire definitely makes routing a bit harder, since it doesn't bend as easy, thus tight turns aren't possible.
That being said, it's what I had planned on making, and it's a well built kit.
I would definitely recommend the kit to anyone else
So, battery cable upgrade time!
To be 100% upfront, I bartered some LED stuff for a 2AWG set.
It took me a few hours to get it all in place, as I'm a bit attentive to making routing as clean as possible without the cable touching things, firmly secured, etc.
My "review"
Pros:
- Great Crimps
- Great cable
- Comes with everything needed (mostly)
Cons:
- Was shipped two negative battery terminals
- In some areas, I would have made the cable different (lengths wise)
- The cable lug end meant for the alternator, didn't fit my stock stud or the new Alternators stud (had to drill it out).
I'll add some pictures:
Connected to the alternator, I added a rubber wire boot (I've got a bunch of spare electrical stuff). The stock plastic cover wouldn't fit on the 2AWG. I had to drill out the lug to fit on the alternator stud.
Final routing. Not the "most" ideal as I'd have it laid out, but it will work just fine.
I drilled and mounted the fuse holder along the fenderwell.
I used some MLV underneath it for a couple reasons:
- The plastic plugs on the bottom of the stud terminals kept falling off, this this will prevent an unwanted grounding of the terminals on the fender.
- As the fender is not fully flat, it allows some cushion and vibration dampening to the fuse holder box.
Line to the Alternator (red), and line to the starter (inside wire sheath). I affixed the starter cable inside some new plastic sheathing, and then mounted it with a rubber lined clamp to an existing hole there. I zip tied the alternator cable to that plastic sheathing, as well the the A/C line (with some hose spiced around the A/C line as a barrier/protection from rubbing).
On my buggy, all lines like these were sheathed in Fire Sleeve. I was going to do that on these as well since I a bunch extra, but didn't end up doing it. I might in the future, as electrical and electrical caused fires...are no joke.
Cover trimmed and reinstalled:
Some of the main cable changed I would have made, were cables that went from the battery, to the PDC, and from the Fuse to the PDC. I would have made these much shorter jumpers, as you can see in the last picture they're kind of "twirled". Once again, this is just personal preference.
However, I do realize this added length allows for some flexibility in mounting locations, since it's more made as a "one size fits all".
I was going to cut the wires and make them shorter, but realized all my lugs were sizes other than 2AWG, and I didn't feel like running to the store to get some.
Also, not pictured is the new block ground, from the engine to the fire wall.
The thicker 2AWG wire definitely makes routing a bit harder, since it doesn't bend as easy, thus tight turns aren't possible.
That being said, it's what I had planned on making, and it's a well built kit.
I would definitely recommend the kit to anyone else
Thank you for your review!
I would like to note that I did indeed made a couple of changes...
I shortened the jumper from the battery to the PDC.
I don't use ANL fuseholding blocks anymore. I now use mega-fuse blocks. (Much more sturdier construction and the studs that holds the fuses are now epoxied in place instead of sealed with those little buttons that keep falling off).
Other lengths have been tweaked a bit also.
Again. Thank you for your review. This is what I wanted to hear from customers.
Neal
A customer wanted purple cables and they didn't make them so I came up with a solution...
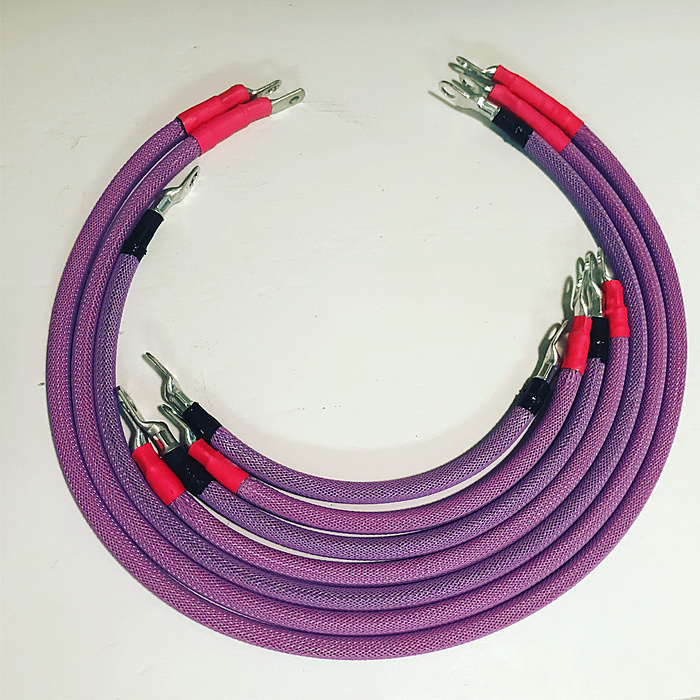
It came out nice, if I'd say so myself

It came out nice, if I'd say so myself


Quote:
Attachment 401696
It came out nice, if I'd say so myself
Is that a blue webbing over red cable?Originally Posted by XJwonders
A customer wanted purple cables and they didn't make them so I came up with a solution...Attachment 401696
It came out nice, if I'd say so myself