When you click on links to various merchants on this site and make a purchase, this can result in this site earning a commission. Affiliate programs and affiliations include, but are not limited to, the eBay Partner Network.
Same thing happened to me and mine spent it's life in the south. Must be a pain point. I just did the cut and fold and got a new bumper. Napier makes cut and fold flares too.
I'm not interested in the cut-n-fold. I've never needed the extra clearance it provides and I don't care for the look. I'm probably going to try welding in new sheet metal and then coating the inside and outside with POR15 or similar.
I did the cut and fold mostly. I left part on the rear and welded new quarters on. So it looks stock but got rid of the drop and dead space behind the quarter. My 98 had the cut and cold done and I never got behind the look myself.
With the addition of current and future aftermarket accessories, I needed a good way to power them all and still have a factory look. So, I built my own wiring harness and plugged it into the switches and a new relay/fuse box.
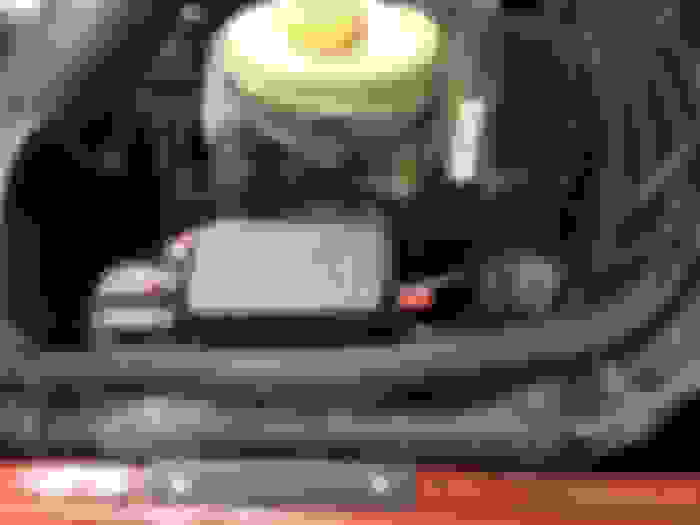
A mounting bracket was then fabricated so the relay box would mount securely inside the engine bay.
The RTMR was mounted and labeled (sneak peak of what's to come!).
One branch of the harness went up the A-pillar and then split.
One part went to my OHC...
The other part went through the roof and down the rack channel.
One part came out towards the front and the other towards the rear.
My new Auxbeam LED light bar.
And a set of matching rear floods. All exterior connectors are weather-proof. All I have to do is unplug two connectors and then then roof rack is free to come off.
Next up was to add the switches. Some went in my OHC so I had to make some holes.
I went with Toyota-style push button switches for the lights.
The ashtray was replaced with a 3D-printed bezel and I now have in-cab winch controls. The other switch is a placeholder for either when I actually figure out a way to electronically have a higher idle or for something else.
And let there be light!
The third switch in the OHC goes to my trailer harness where I wired up some reverse light. So much better now.
This was definitely a fun project for me and very time-consuming. All-in-all, I'm pleased with how it turned out.
I bought new front upper bump stops and decided to go with the Crown Automotive ones. Bad mistake. We went wheeling on the 4th and it turns out those bump stops disintegrate under pressure and then the tire tears up the fender and flare. Thankfully it's not terrible, but I do need to fix this little body damage and put the flare back on...and buy new bump stops...
Just bought a 1998 Cherokee Sport yesterday, and your build is inspiring! This is basically what I want mine to look like. Mine is even a 5-speed, with almost everything replaced except the shocks. I have no idea what I'm doing as my mechanical knowledge is limited up to oil changes and brakes. This thread looks like it will help a lot.
Before winter came last year, I put seat warmers in our other car. I was pleased with how easy they were to install and were quite warm, so I decided to put them in the XJ. Sorry, no pictures during installation. I got them off ebay and used them all winter long. I wish I had known about these kits years ago.
Build progress has been slow, but after a long time in the running with the parts sitting in the garage for 1-2 years, I finally did the rear disc brake conversion.
I've also been working on a rear bumper/tire carrier for the last two years whenever my buddy and I have schedules that align since I'm using his metal workshop. I'm hoping to get that project done this summer.