
Project Danger Cart

Thread Starter
☠ CF Sheriff ☠

Joined: Nov 2009
Posts: 15,197
Likes: 18
From: Aberdeen, MD
Year: 1995
Model: Cherokee
Engine: 4.0L HO I-6, 703 Injectors, Brown Dog Super Engine Mounts
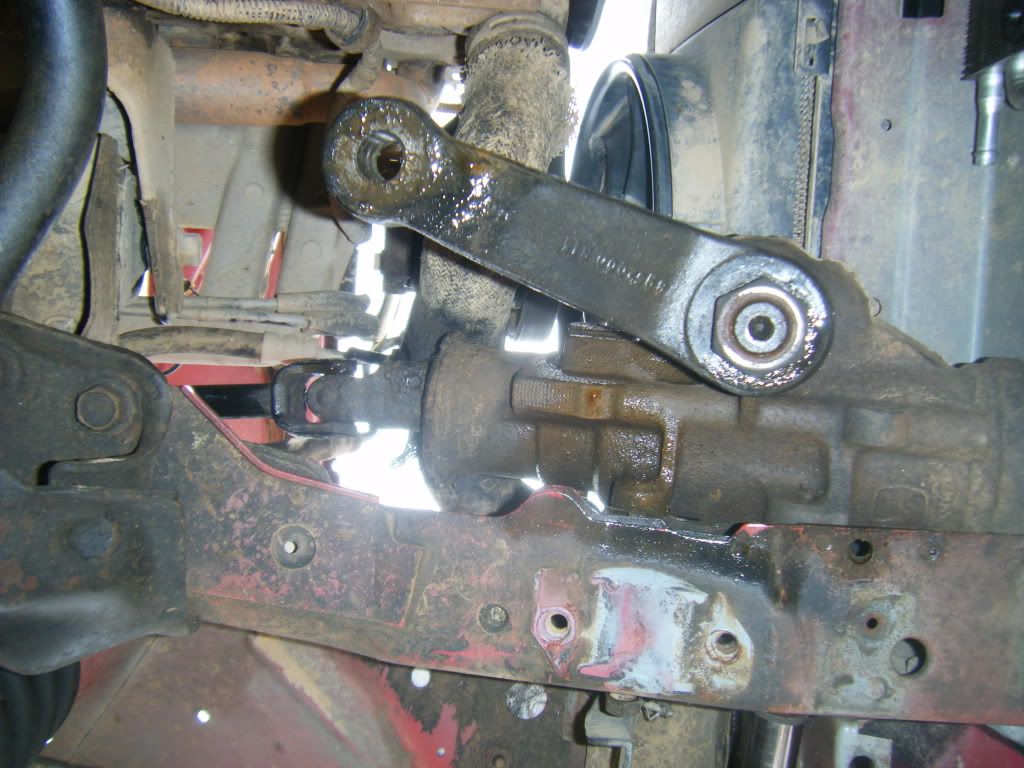
sooo...yeah. Blown steering boxes are no fun. I drove 2 hours home with no power steering. Filled it up the next day and surprisingly it worked! Very slow leak however - had to add fluid almost every day and the pump was NOT happy about it. I priced up reman steering boxes online, but didn't like the cost impact. I had picked up a v8 ZJ tie rod a few weeks earlier, so I figured it was the best time to do a full steering overhaul (minus the pump, which I hoped would be still good even after the stress the blown box had put on it.)
So the plan -
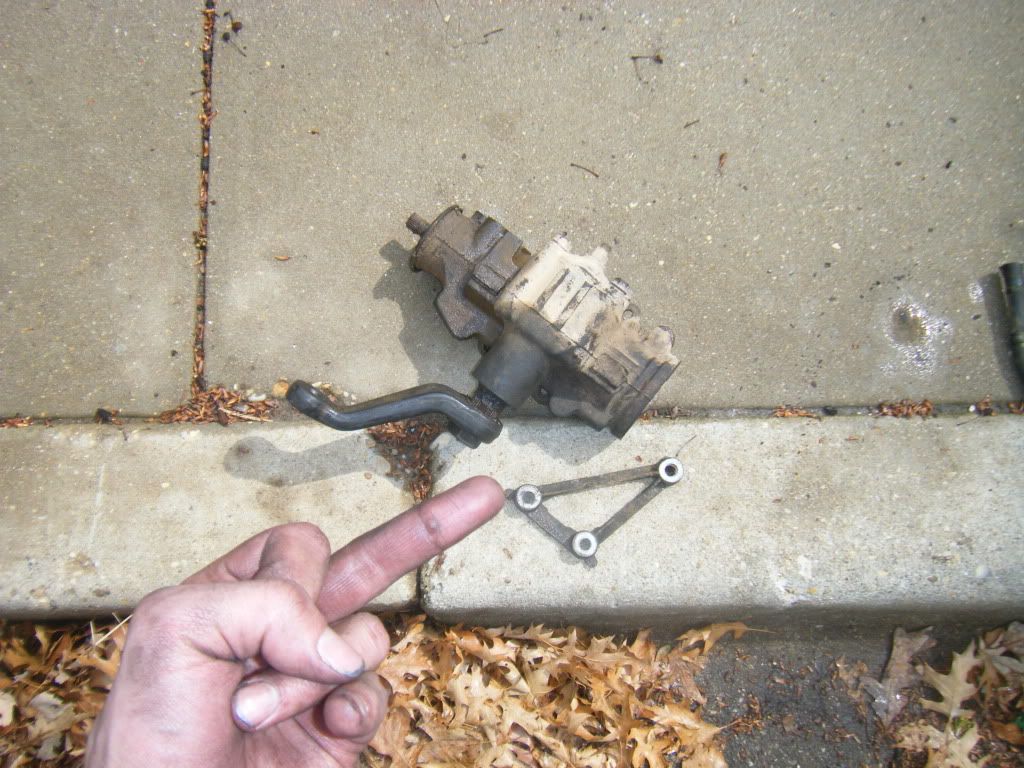
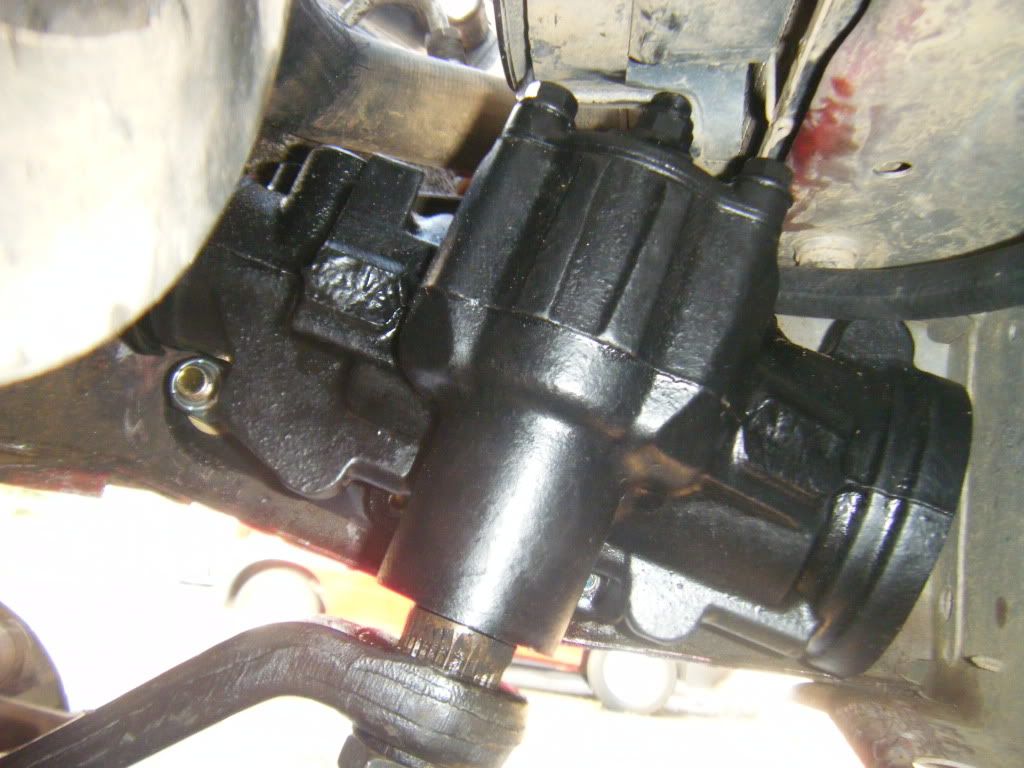
Steering box from a 98/99 V8 Dodge Durango 4x4 - same mounting pattern as a XJ box, but with a bigger (stronger) cylinder.
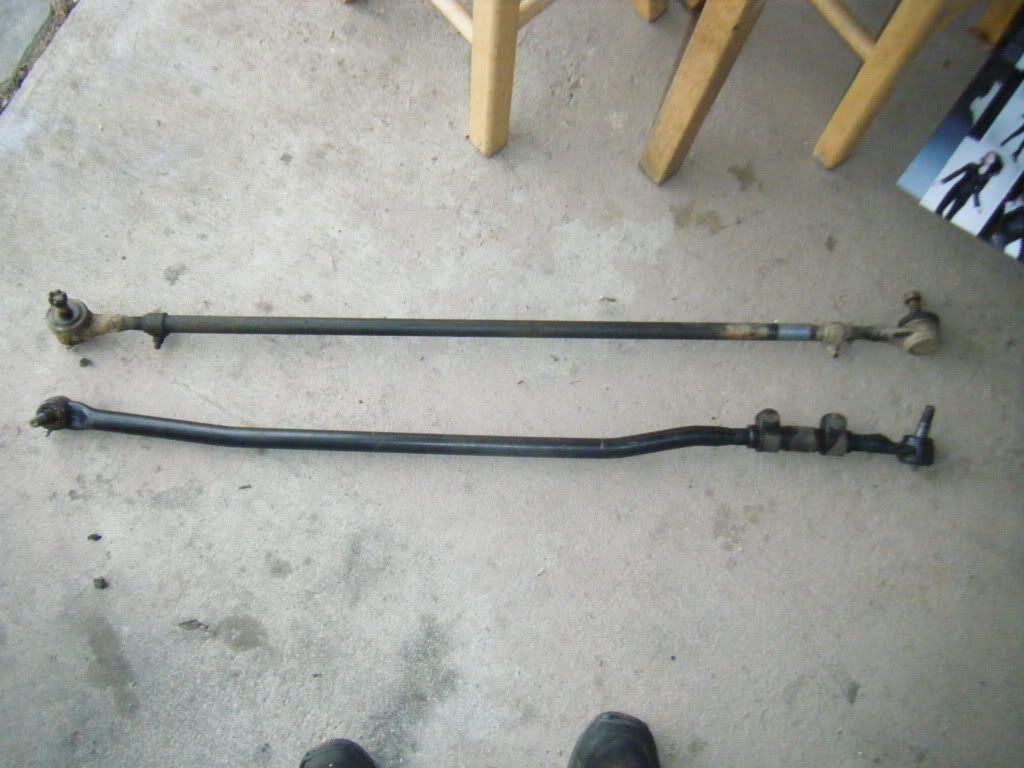
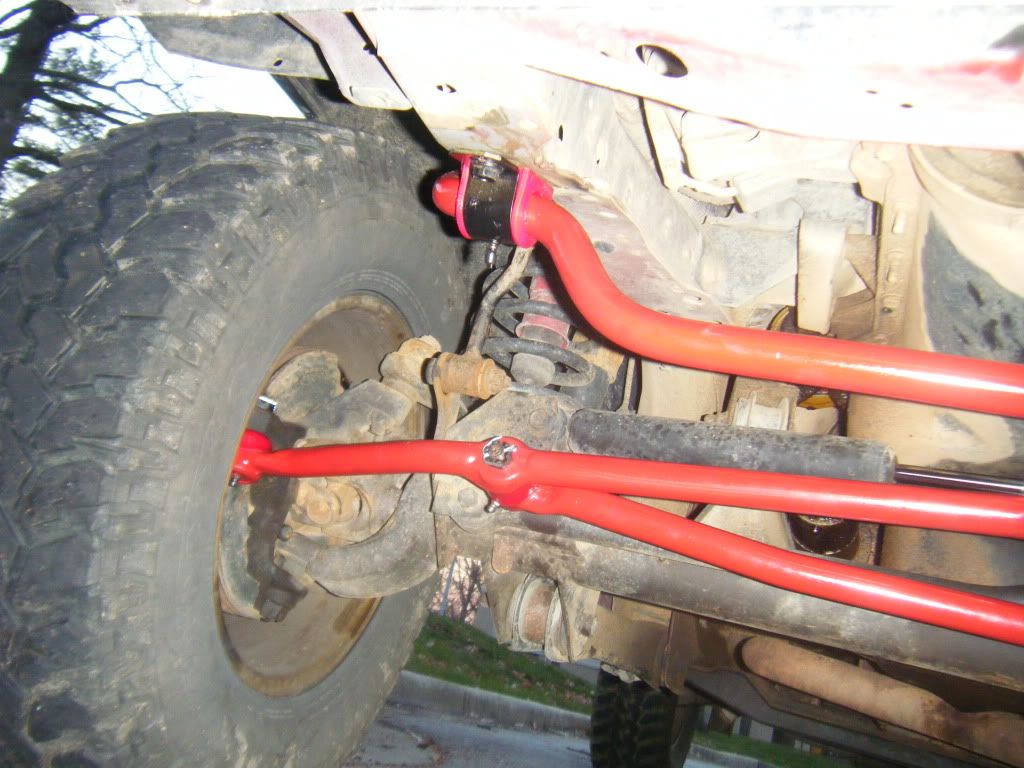
V8 ZJ Tie rod - a full 1/4" larger diameter than the stock XJ bar. and solid instead of tubular.
Energy Suspension poly bushings and boots all around (tie rods and sway bar)
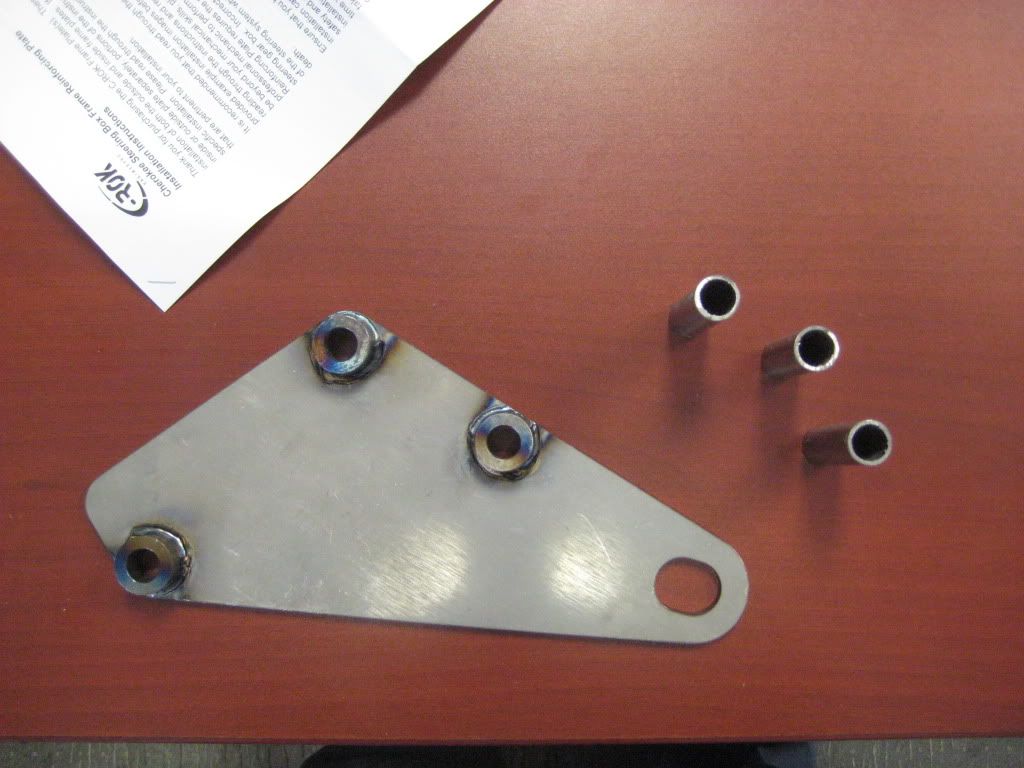
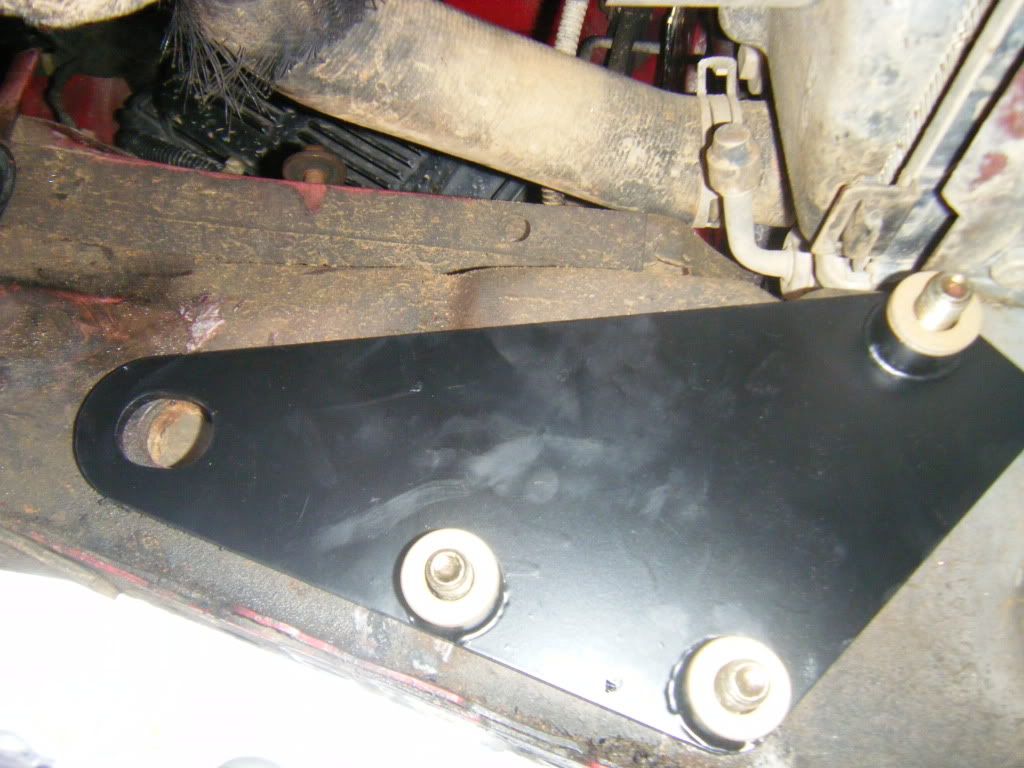
C-ROK inner spacer / reinforcement plate
Add a 7/8" bolt to the spacer plate though the frame tow hole
full cleaning, sanding and painting
Grade 8 Bolt upgrades
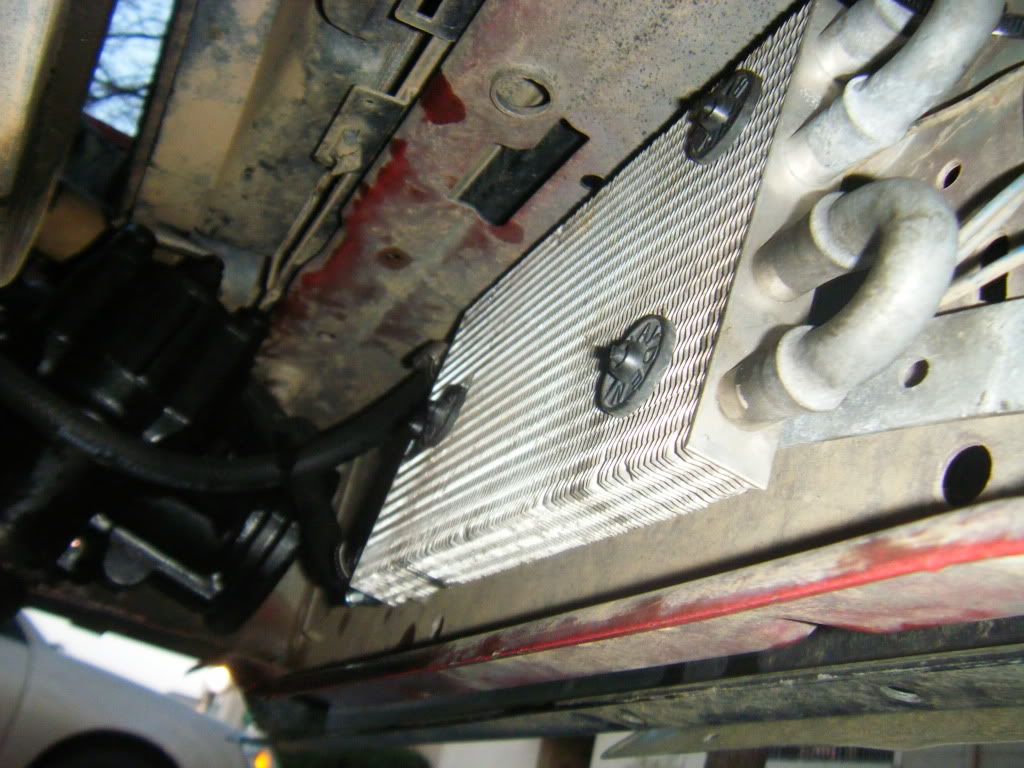
Power Steering Cooler
Full Writeup and afterthoughts can be found here: https://www.cherokeeforum.com/f67/du...houghts-84046/
C-ROK plate - VERY beefy!
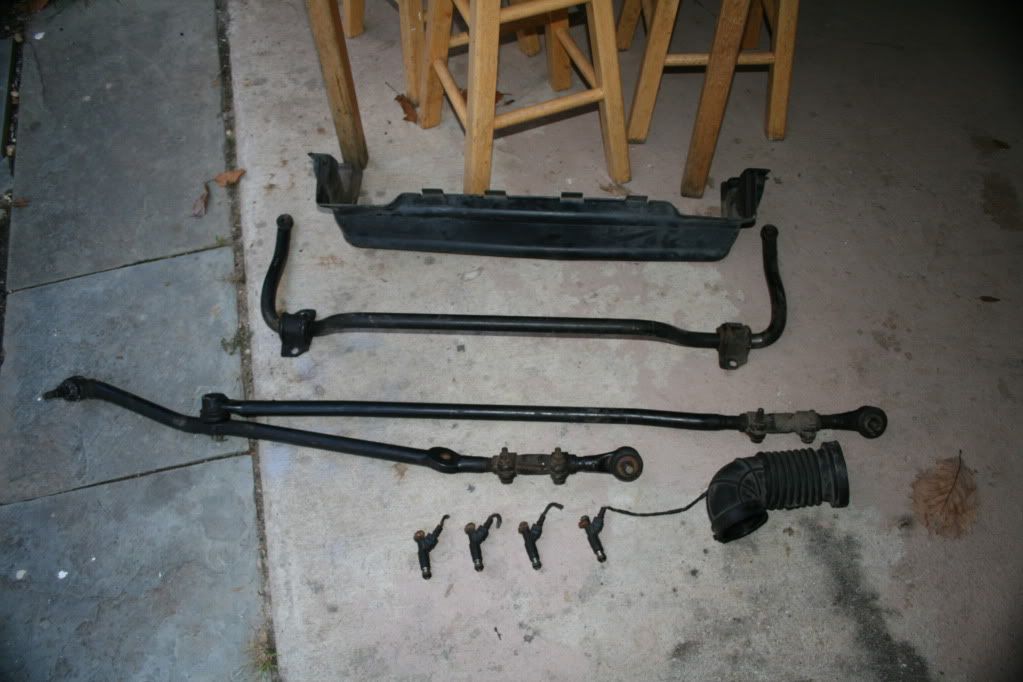
Junkyard components:
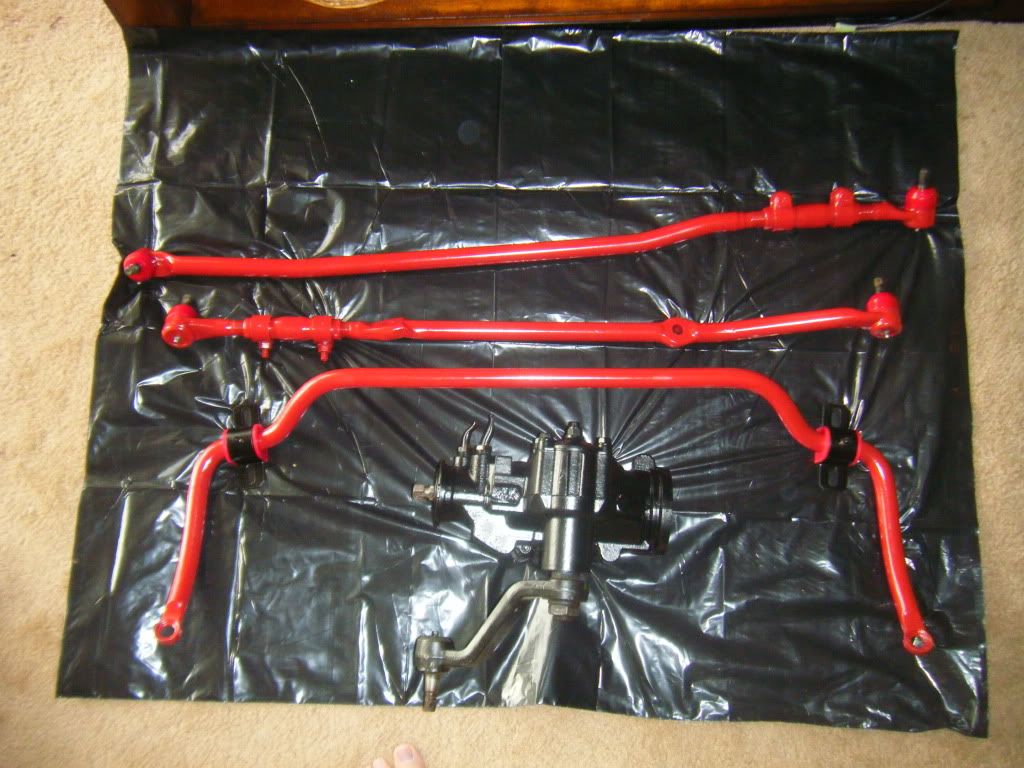
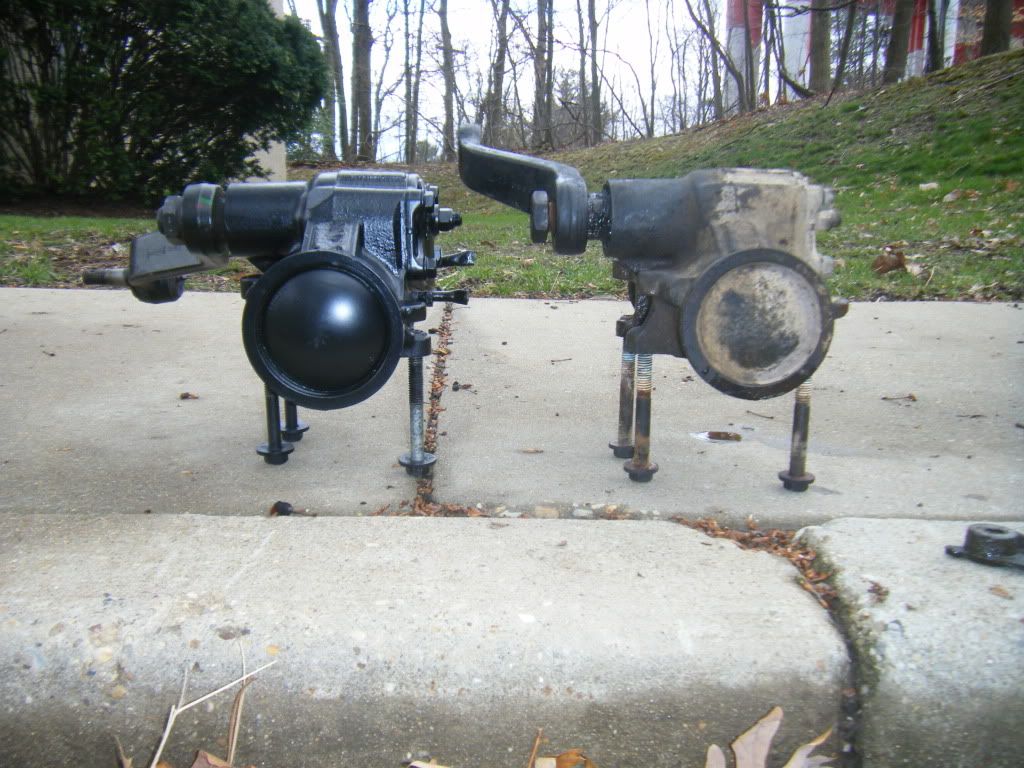
Shiny:
That's a big difference!
Well that looks...moist
That sucked:
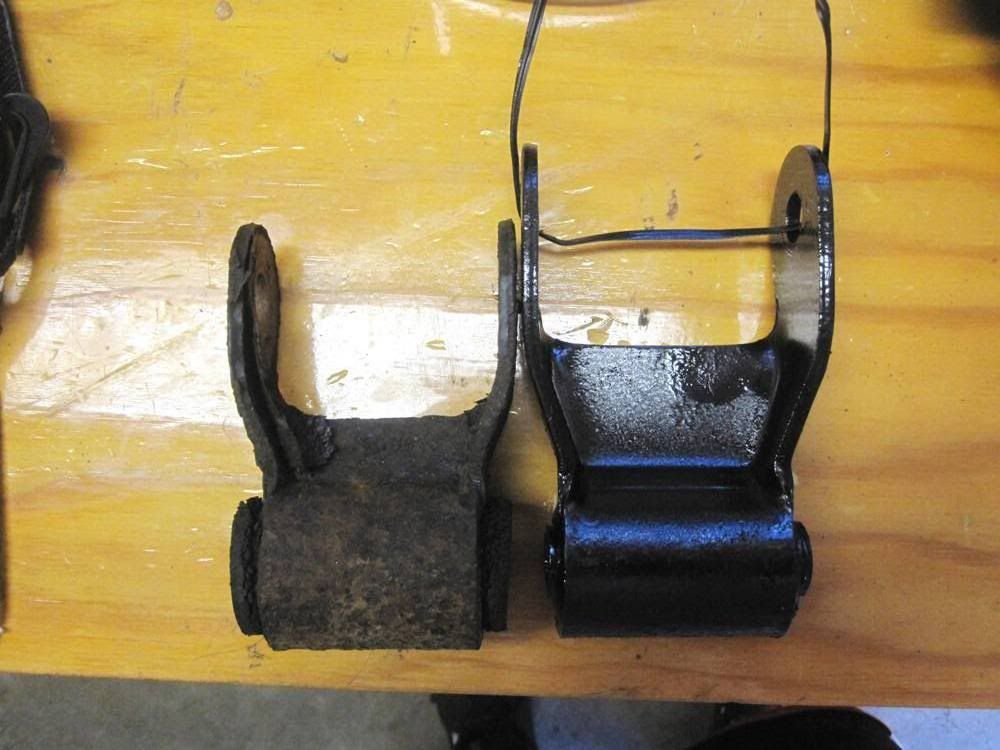
New vs Old: noticeably bigger and therefore sexier in jeep speak:
Well that just looks...wrong

here we go - plate and position adjustment washers
Box in! connecting the steering shaft to the box on my back, while holding it up with one hand was NOT fun...
Power Steering Cooler mounted and plumbed up
All done:
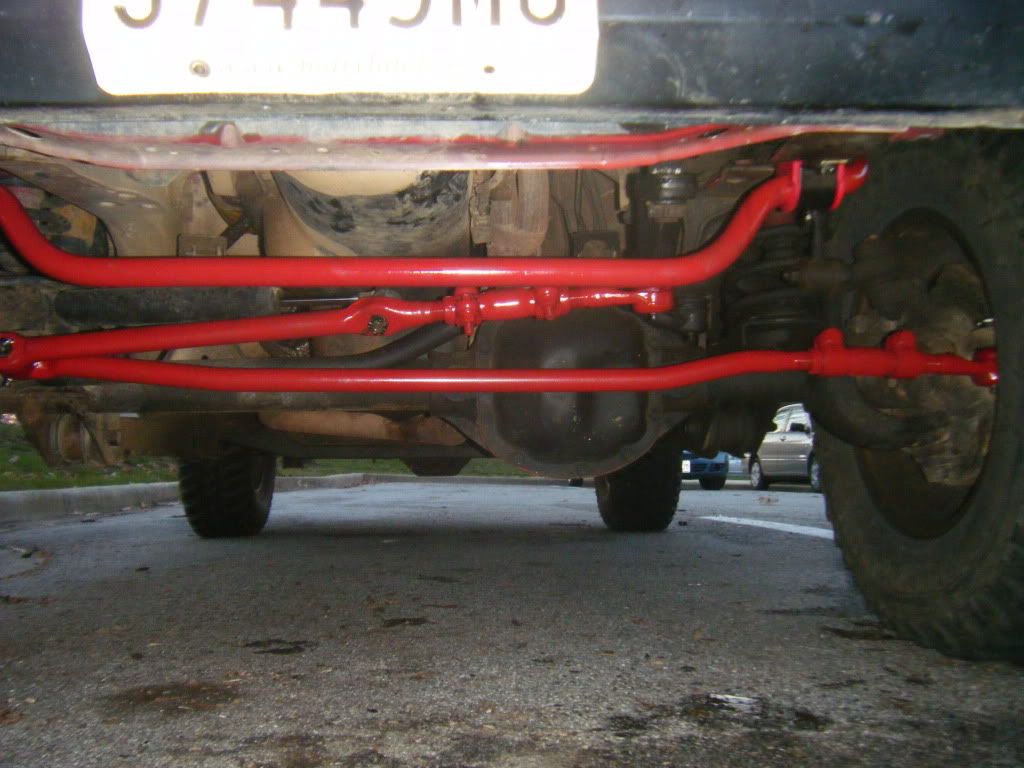
Soooo much better - can turn the wheels with my pinkie!
So the plan -
Steering box from a 98/99 V8 Dodge Durango 4x4 - same mounting pattern as a XJ box, but with a bigger (stronger) cylinder.
V8 ZJ Tie rod - a full 1/4" larger diameter than the stock XJ bar. and solid instead of tubular.
Energy Suspension poly bushings and boots all around (tie rods and sway bar)
C-ROK inner spacer / reinforcement plate
Add a 7/8" bolt to the spacer plate though the frame tow hole
full cleaning, sanding and painting
Grade 8 Bolt upgrades
Power Steering Cooler
Full Writeup and afterthoughts can be found here: https://www.cherokeeforum.com/f67/du...houghts-84046/
C-ROK plate - VERY beefy!
Junkyard components:
Shiny:
That's a big difference!
Well that looks...moist
That sucked:
New vs Old: noticeably bigger and therefore sexier in jeep speak:
Well that just looks...wrong
here we go - plate and position adjustment washers
Box in! connecting the steering shaft to the box on my back, while holding it up with one hand was NOT fun...
Power Steering Cooler mounted and plumbed up
All done:
Soooo much better - can turn the wheels with my pinkie!
Thread Starter
☠ CF Sheriff ☠
Joined: Nov 2009
Posts: 15,197
Likes: 18
From: Aberdeen, MD
Year: 1995
Model: Cherokee
Engine: 4.0L HO I-6, 703 Injectors, Brown Dog Super Engine Mounts
Had an issue with my headlights flashing on and off - tracked it back to an overloaded switch due to my h4 headlight upgrade.
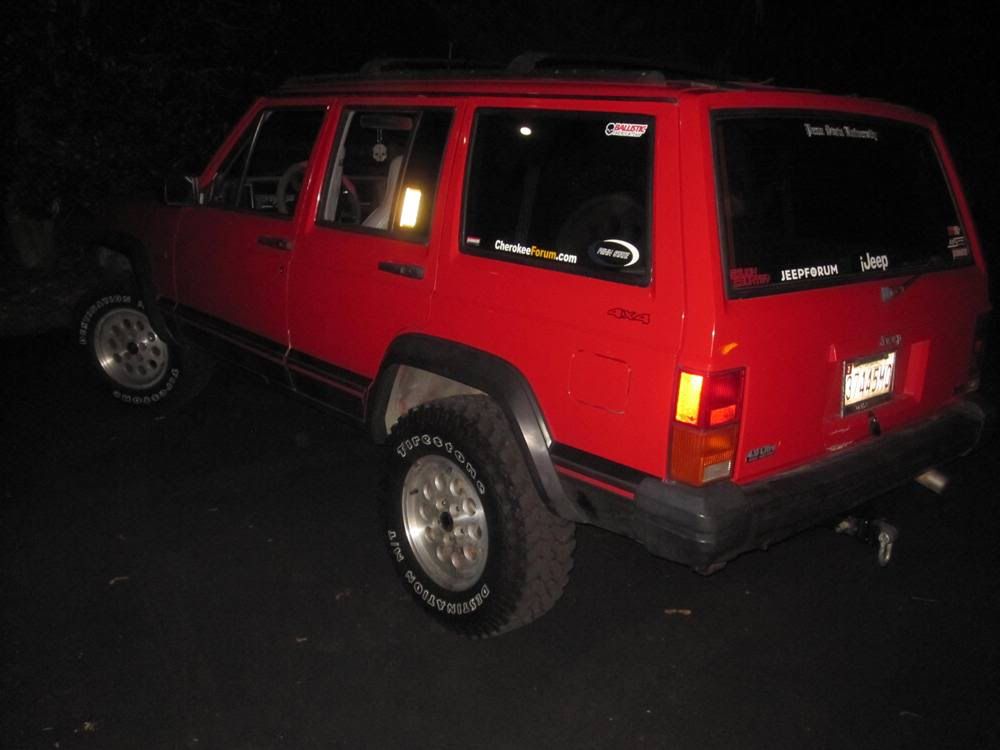
Time for a wiring upgrade! Ordered a harness and relays from eAutoworks.com. Difference was (literally) night and day. Never new my headlights were supposed to be that bright!
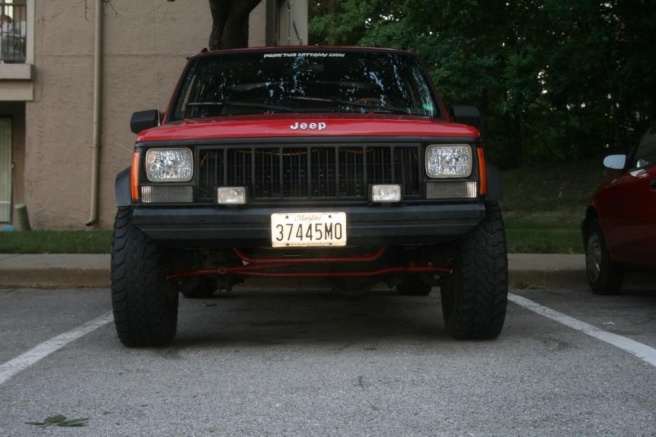
Also installed a set of 1.5" wheel spacers I picked up from a guy on JeepForum - Love the stance!
You can see the yellow wiring harness and the spaced out wheels in this picture:

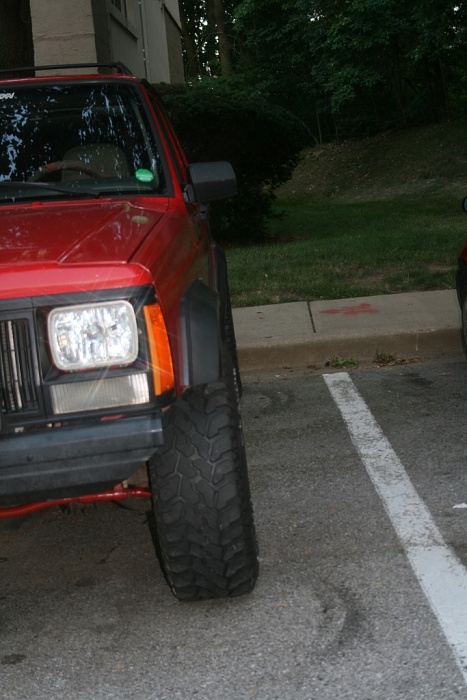
Time for a wiring upgrade! Ordered a harness and relays from eAutoworks.com. Difference was (literally) night and day. Never new my headlights were supposed to be that bright!
Also installed a set of 1.5" wheel spacers I picked up from a guy on JeepForum - Love the stance!
You can see the yellow wiring harness and the spaced out wheels in this picture:

Last edited by dukie564; Nov 6, 2014 at 03:16 PM.

Thread Starter
☠ CF Sheriff ☠
Joined: Nov 2009
Posts: 15,197
Likes: 18
From: Aberdeen, MD
Year: 1995
Model: Cherokee
Engine: 4.0L HO I-6, 703 Injectors, Brown Dog Super Engine Mounts
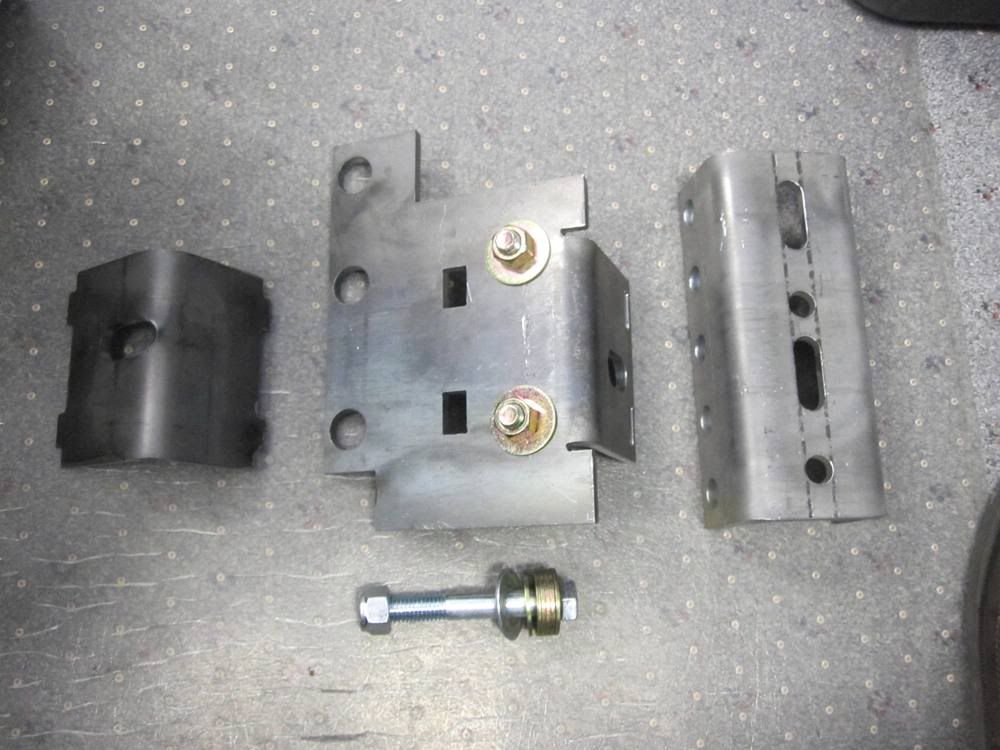
New issue arose after installing the spacers - my rear tires would hit the flares over big dips due to my inverted rear spring setup (not intentional). I had been thinking for a while while planning out my lift that I was going to install shackle relocation boxes in the rear end. I had been eyeing H.D. Offroad's kit - buy they had always been a weld in solution. Well it just so happened that I was in this quandary about what to do about the rear end hitting when Brian at H.D. Offroad announced the release of their bracket version 2.0 - BOLT IN! They were on a special too where all I had to do for a partial refund of $40 was to post a review/writeup on a few jeep sites. WOOHOO!
Full Review/Install writeup HERE: https://www.cherokeeforum.com/f67/in...install-96539/
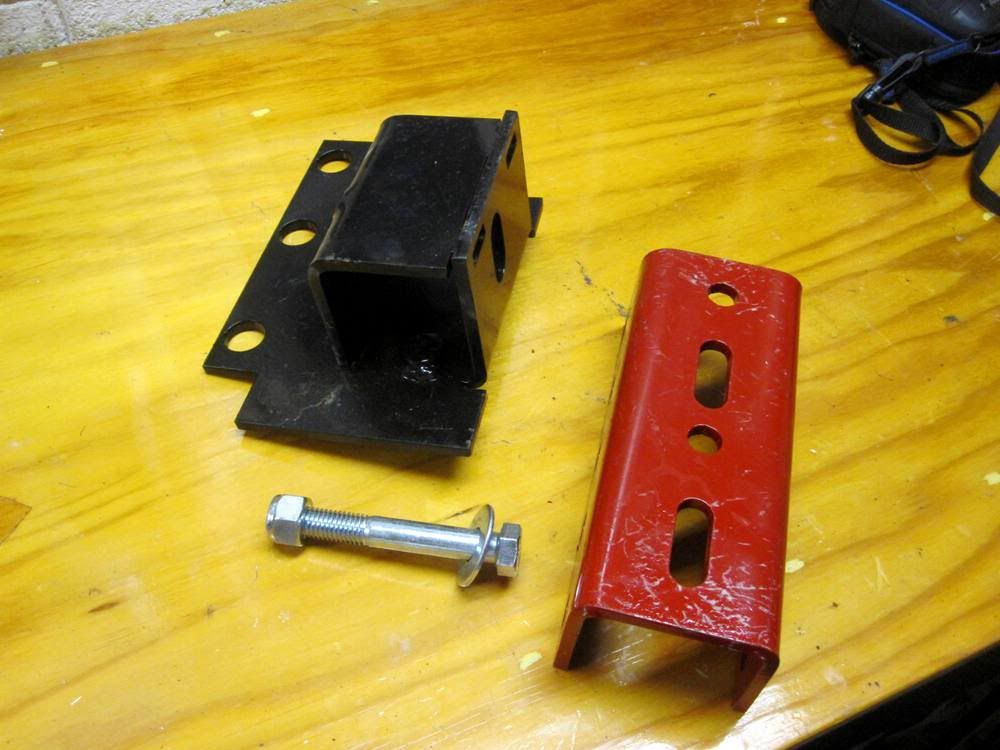
Jumped on it:
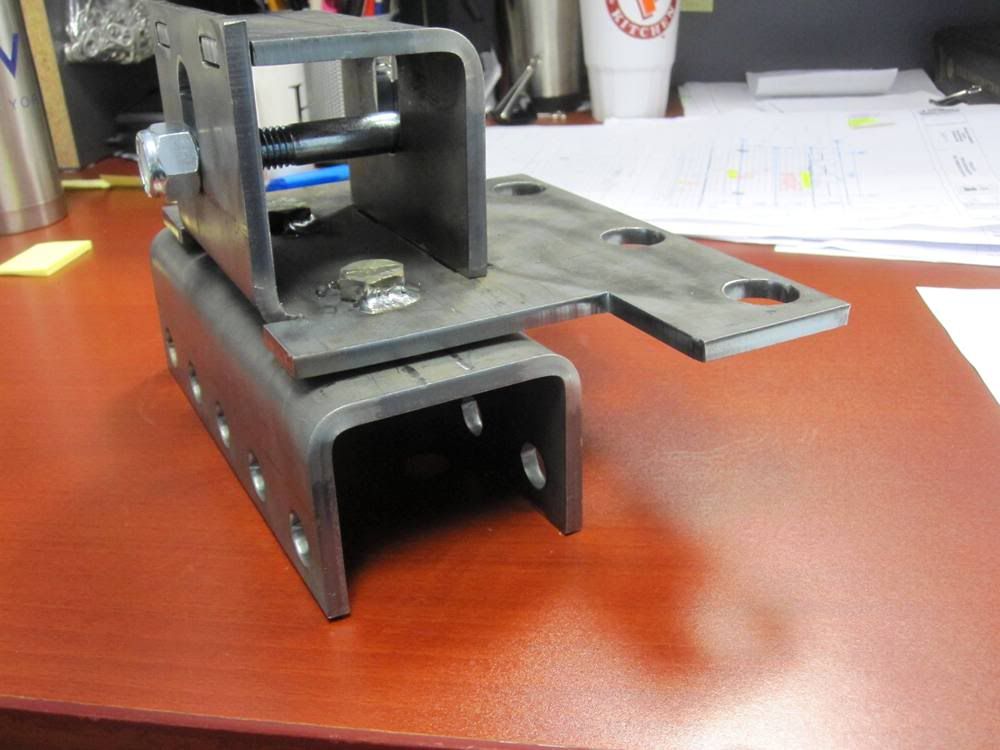
There's a bracket that bolts though the stock shackle bolt, and using the 4 bolts that hold up a hitch or gas tank skid plate. I already had a hitch I had previously installed when we moved to tow a uhaul, so it was cake. The brackets can be installed over a hitch and the fuel skid if you desire, but I chose to mount these as close to the frame as possible for max clearance and least lift from the brackets (5/8" min built into the brackets if using stock shackles). The other bracket then gets bolted to the top piece and the shackle goes though whichever hole optimizes your rear shackle angle for your setup. The bracket can also be reversed for wheelbase stretches.
I had shackles of the leaf springs I had picked up off a Dodge Dakota for my bastard pack lift springs. Turns out they were 1" longer than stock - exactly what I wanted so the shackle wouldn't hit the brackets under full compression, and to give me the 1.5" total lift I wanted out of the combination.
I'm sensing a theme developing here...
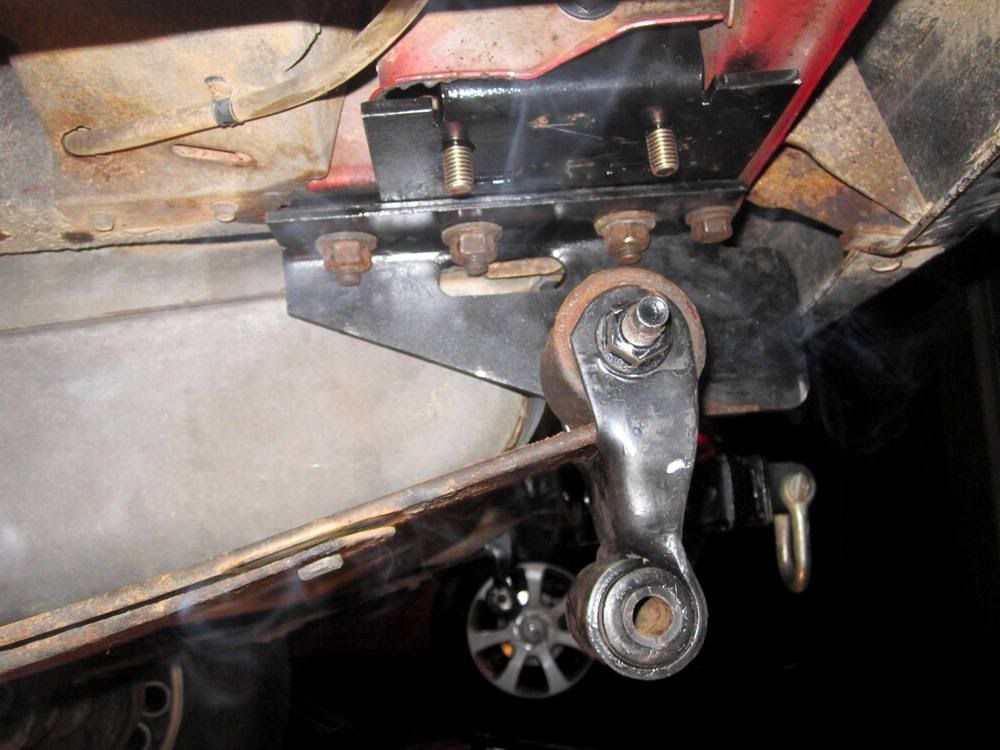
Top Bracket installed, and hitch reinstalled
All done and adjusted - PERFECT! (well...except for my leaf springs...)
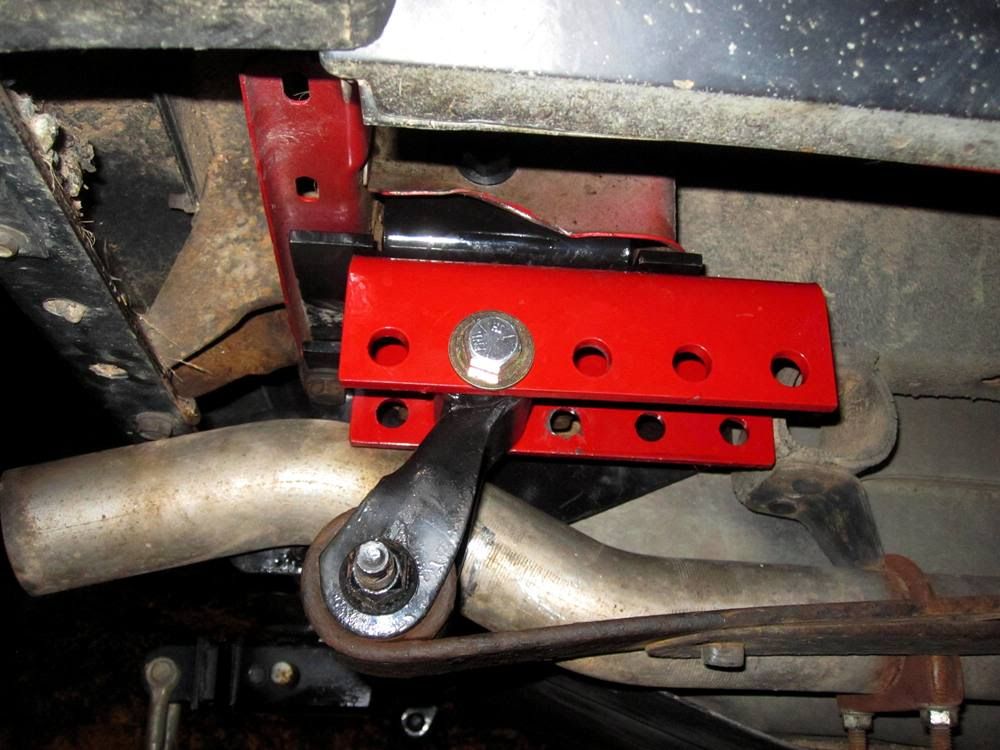
MUCH better - Bonus: Rides like a caddy - my spine loves these
Full Review/Install writeup HERE: https://www.cherokeeforum.com/f67/in...install-96539/
Jumped on it:
There's a bracket that bolts though the stock shackle bolt, and using the 4 bolts that hold up a hitch or gas tank skid plate. I already had a hitch I had previously installed when we moved to tow a uhaul, so it was cake. The brackets can be installed over a hitch and the fuel skid if you desire, but I chose to mount these as close to the frame as possible for max clearance and least lift from the brackets (5/8" min built into the brackets if using stock shackles). The other bracket then gets bolted to the top piece and the shackle goes though whichever hole optimizes your rear shackle angle for your setup. The bracket can also be reversed for wheelbase stretches.
I had shackles of the leaf springs I had picked up off a Dodge Dakota for my bastard pack lift springs. Turns out they were 1" longer than stock - exactly what I wanted so the shackle wouldn't hit the brackets under full compression, and to give me the 1.5" total lift I wanted out of the combination.
I'm sensing a theme developing here...
Top Bracket installed, and hitch reinstalled
All done and adjusted - PERFECT! (well...except for my leaf springs...)
MUCH better - Bonus: Rides like a caddy - my spine loves these
Thread Starter
☠ CF Sheriff ☠
Joined: Nov 2009
Posts: 15,197
Likes: 18
From: Aberdeen, MD
Year: 1995
Model: Cherokee
Engine: 4.0L HO I-6, 703 Injectors, Brown Dog Super Engine Mounts
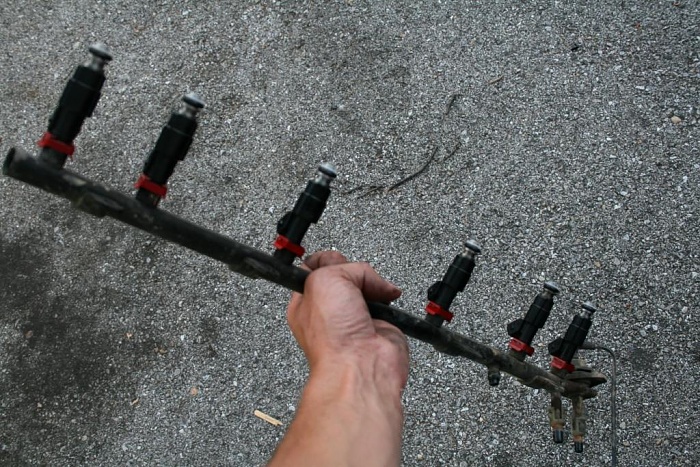
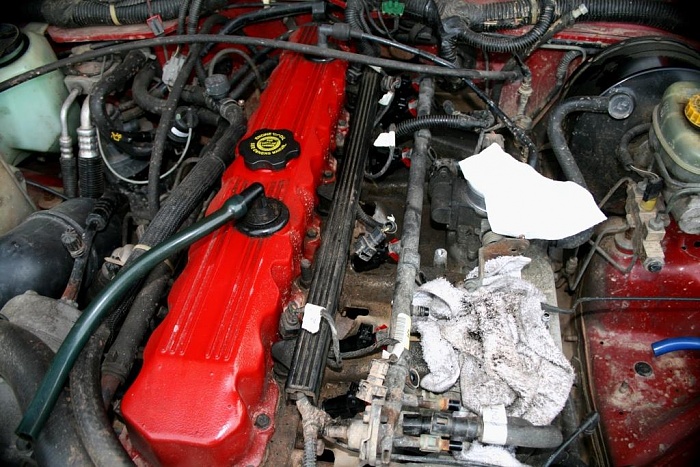
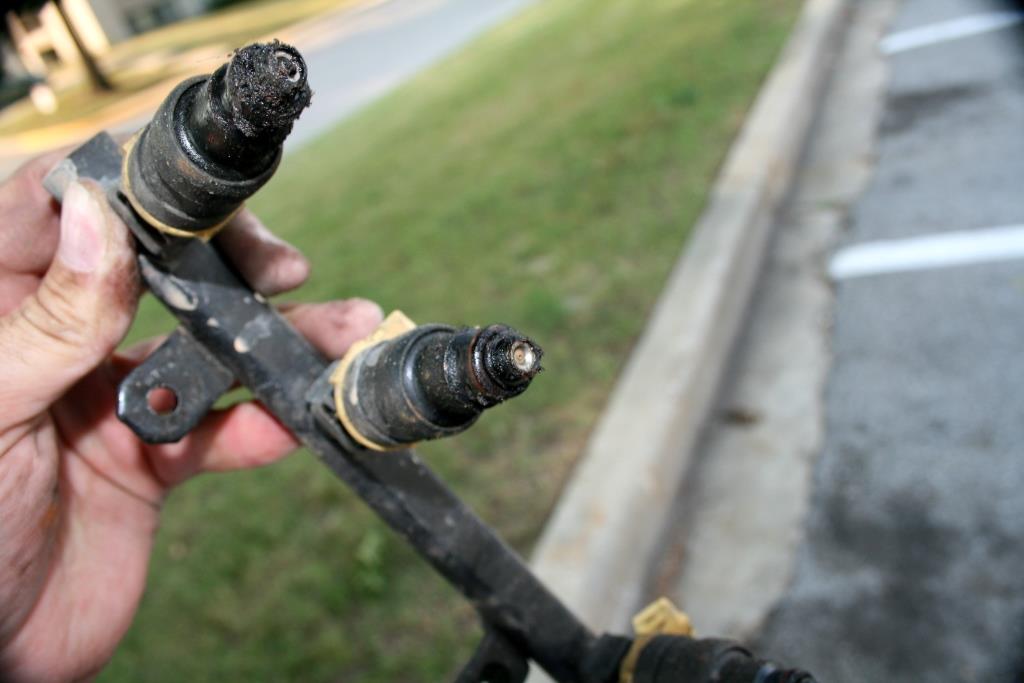
Also around the same time, I was debating installing 703 injectors out of a Dodge Neon. These are about the same size as the stock XJ injectors, but had 4 spray holes instead of one. Better atomization of the fuel for better throttle response and (maybe) better mpgs. Mainly I wanted to do it because I was positive my stock injectors had never manually cleaned or replaced. So i grabbed a set from the local JY and cleaned them up, and rebuilt them with new orings, pintle caps, and microfilters.
Full Writeup HERE: https://www.cherokeeforum.com/f51/in...ap-4-0l-92149/
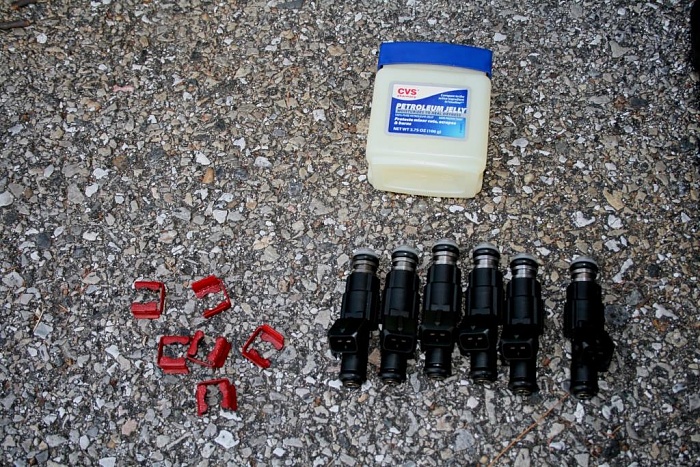
(Petroleum Jelly?)
Mmmm..tasty

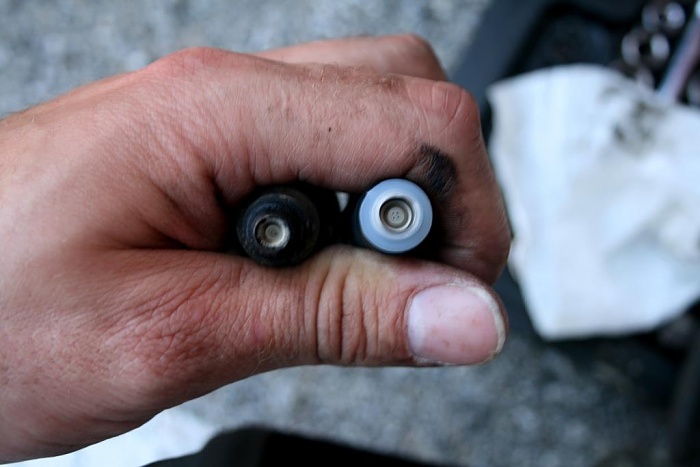
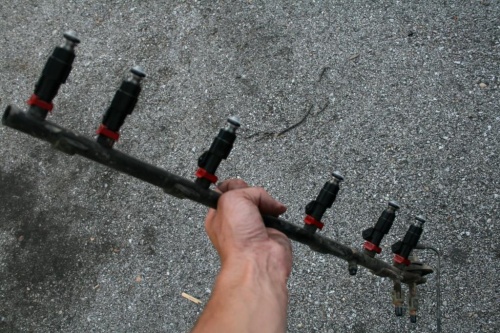
Way better
Niceeeeee
Runs a lot smoother now, and response seems better. MPGs now at 18.5-19.0 avg.
Full Writeup HERE: https://www.cherokeeforum.com/f51/in...ap-4-0l-92149/

(Petroleum Jelly?)
Mmmm..tasty

Way better
Niceeeeee

Runs a lot smoother now, and response seems better. MPGs now at 18.5-19.0 avg.
Last edited by dukie564; Nov 6, 2014 at 05:30 PM.
Thread Starter
☠ CF Sheriff ☠
Joined: Nov 2009
Posts: 15,197
Likes: 18
From: Aberdeen, MD
Year: 1995
Model: Cherokee
Engine: 4.0L HO I-6, 703 Injectors, Brown Dog Super Engine Mounts
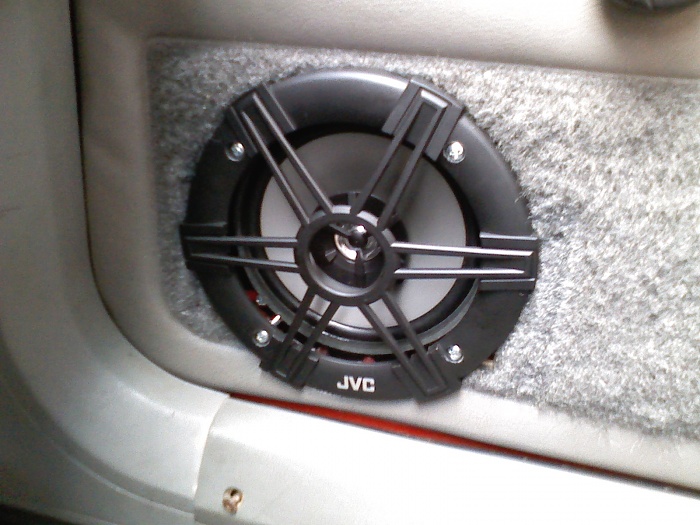
Installed one of my 6.5" door speakers - required quite a bit of creative "massaging" with a hammer and pliers

Last edited by dukie564; Nov 6, 2014 at 03:10 PM.
Thread Starter
☠ CF Sheriff ☠
Joined: Nov 2009
Posts: 15,197
Likes: 18
From: Aberdeen, MD
Year: 1995
Model: Cherokee
Engine: 4.0L HO I-6, 703 Injectors, Brown Dog Super Engine Mounts
so...onto the juicy stuff I guess, and my current place. Lift plans and parts collection.
Plans as they currently stand:
4 1/2" lift +/-
33x10.5 or 33x12.5 tires in 15x7 rims with 1.5" spacers
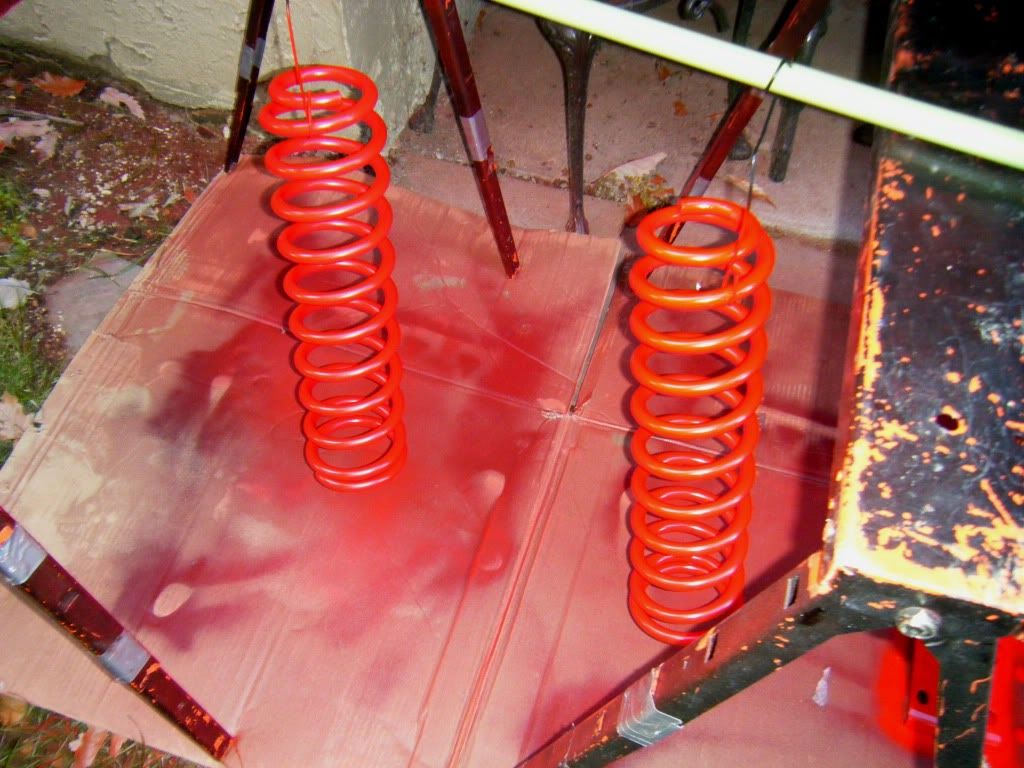
3" XJ (actually 4" TJ) coils + 1 1/2" poly spacer
Bastard Pack rear - XJ / Dakota components with graphite paint and liners, optimized to be as flexy as possible - 3" lift +/- goal for these over stock, w/ 7/16" center pins
Dakota shackles and HD Offroad Relocation boxes (already installed) for 1.5" lift
Stainless Steel extended brake lines
Adjustable short LCAs for now. Long arms later - ideally a 3 link, mid-arm setup.
Teraflex 9550 JK 4" Shocks - 10" travel front, 9" travel rear
Progressive bumpstops frear with custom bumpstop plates, progressive floating coil bumps up front with top plate
Adjustable trackbar and HD frame mount, with frame rail crosstie
steering box brace rod
shims in the rear to adjust angles
Stock Turbine Wheels
Skids - gas tank and TC case
The pile of parts collected so far:
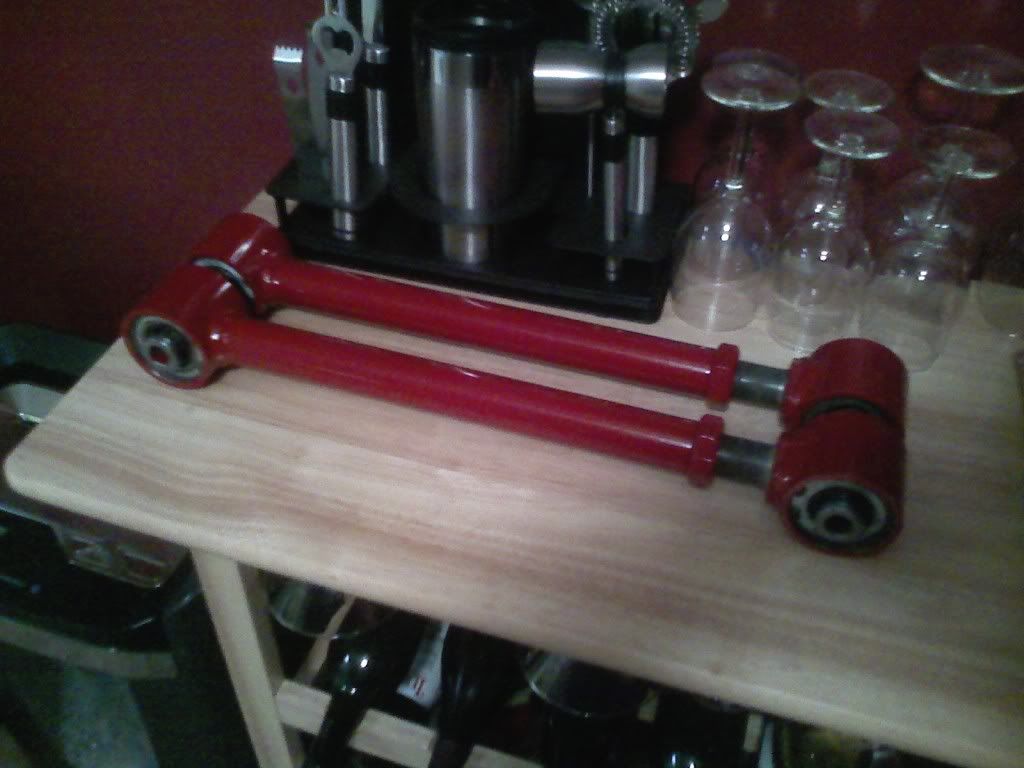
Currie 4" TJ springs and Adjustable LCAs with dual JJs - so beefy
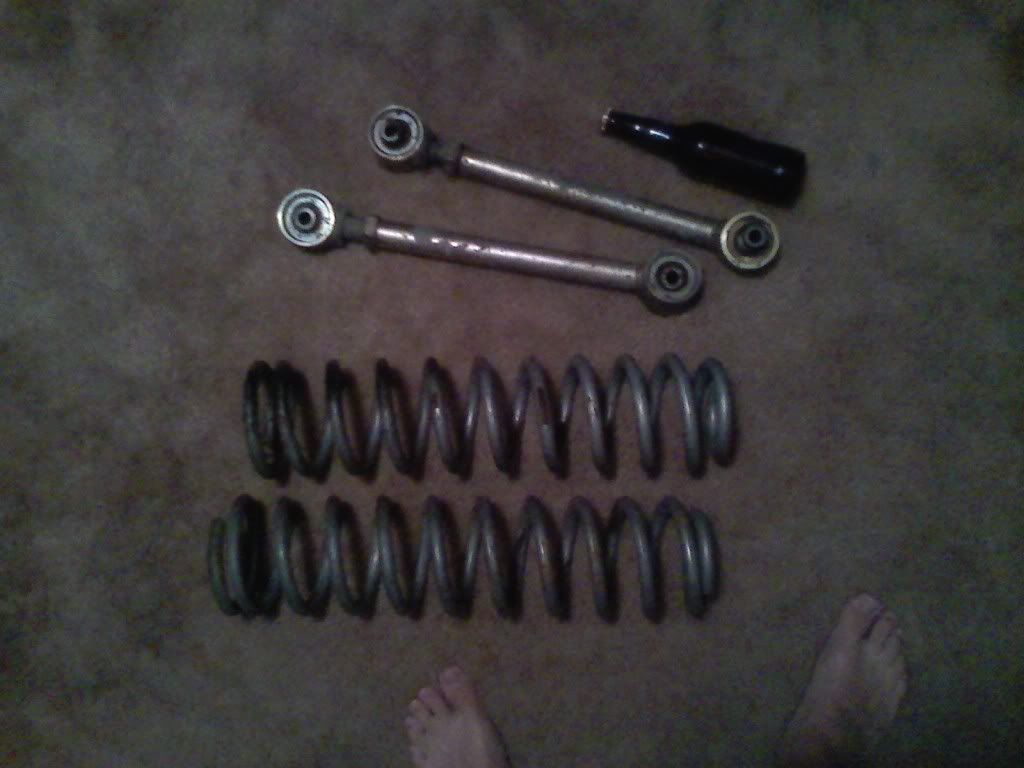
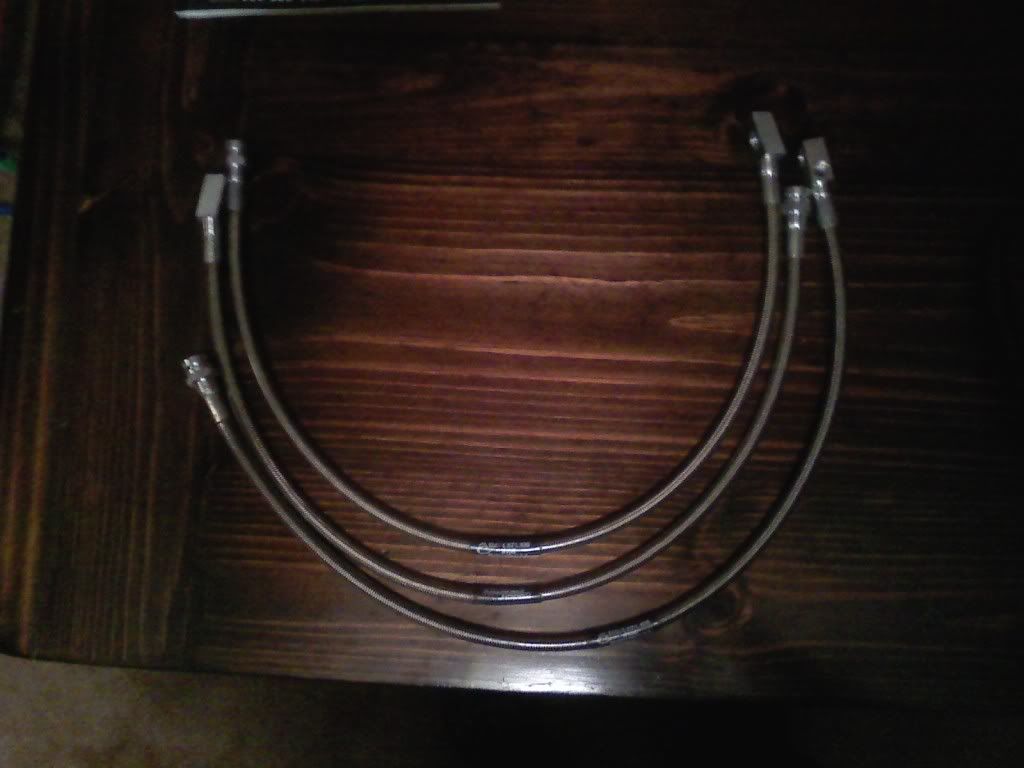
Rough Country Stainless Brake Lines
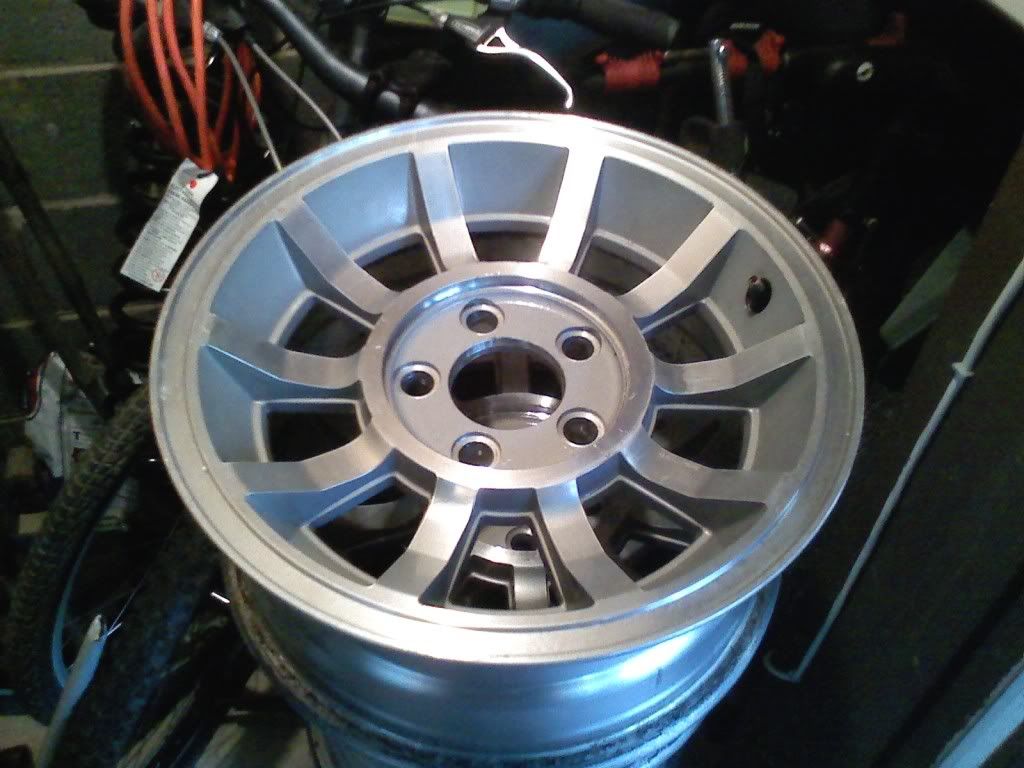
Stock Turbines:
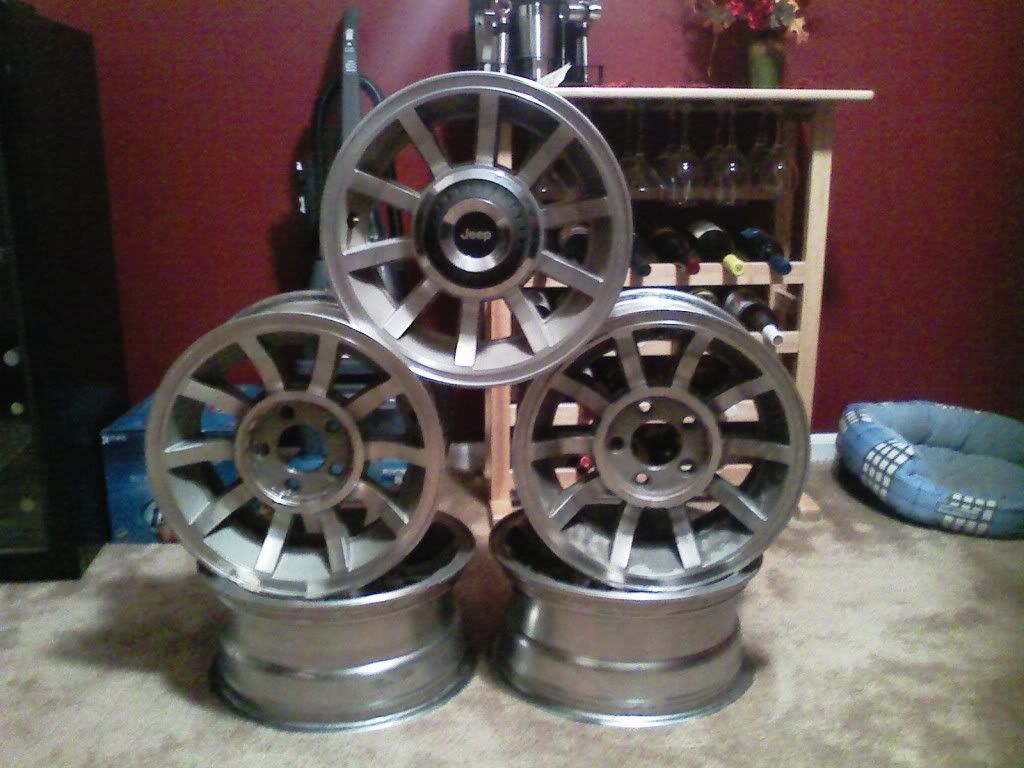
In great shape!
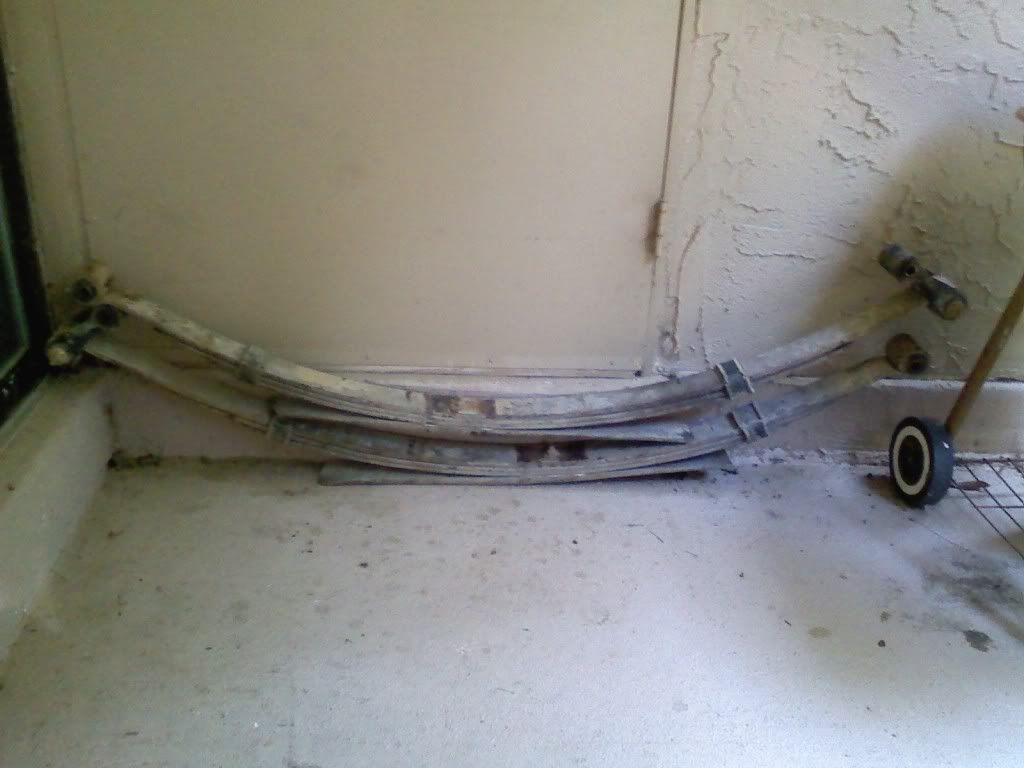
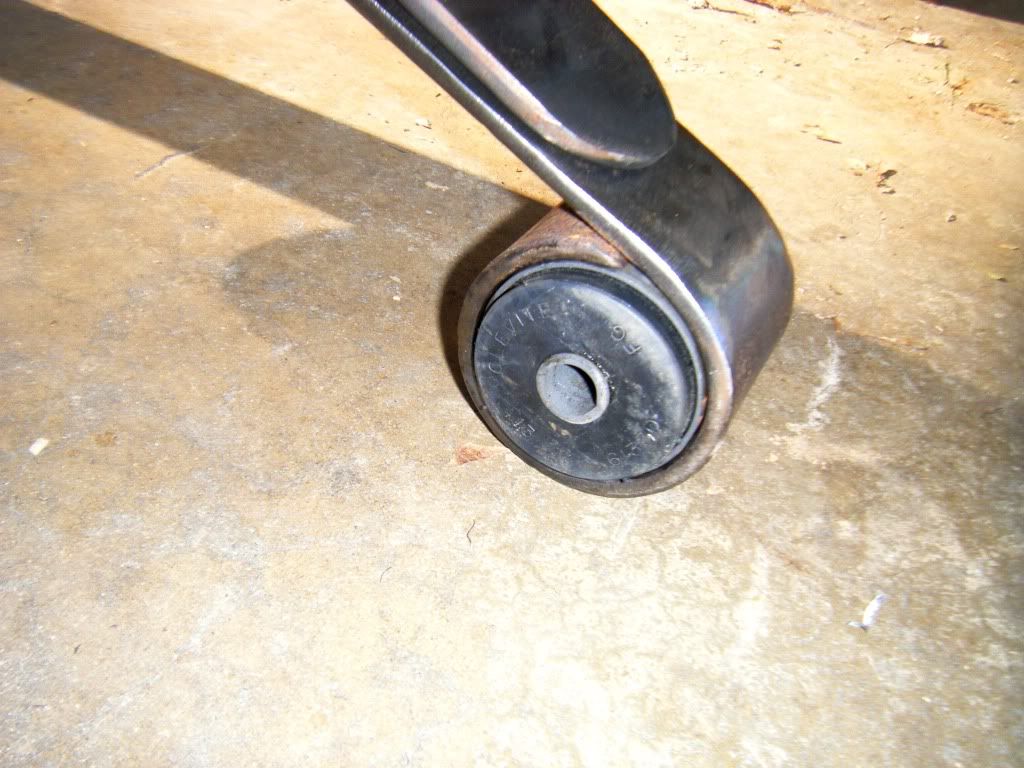
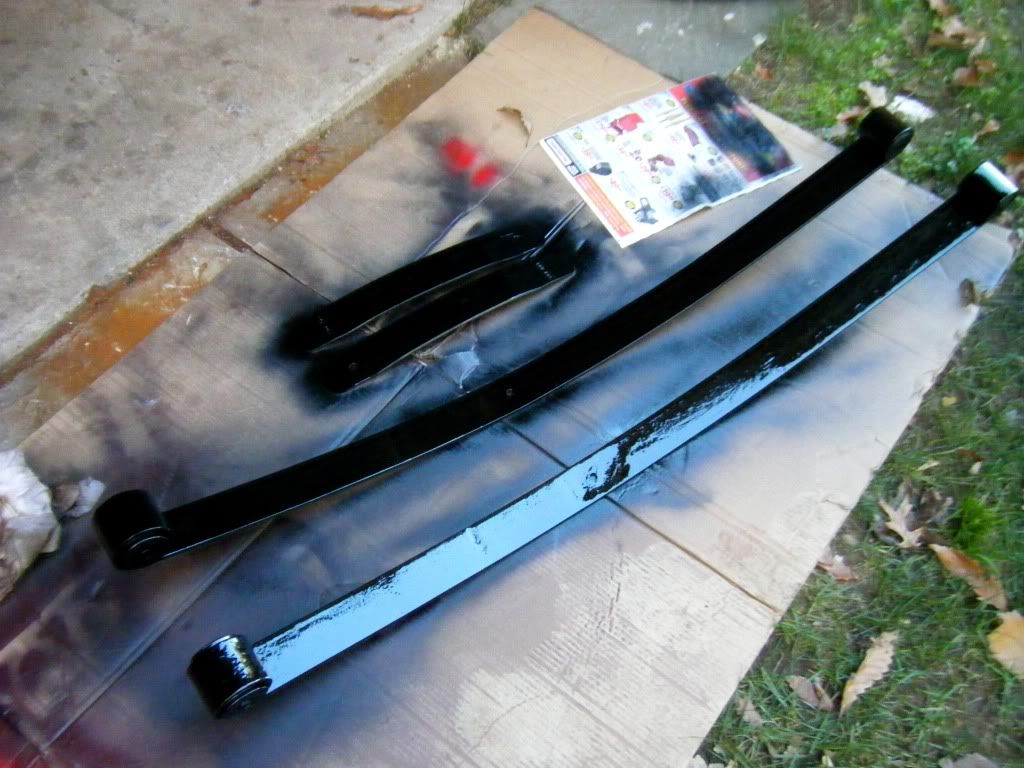
Dakota Leafs:
Stock gas tank skid and coil spacers

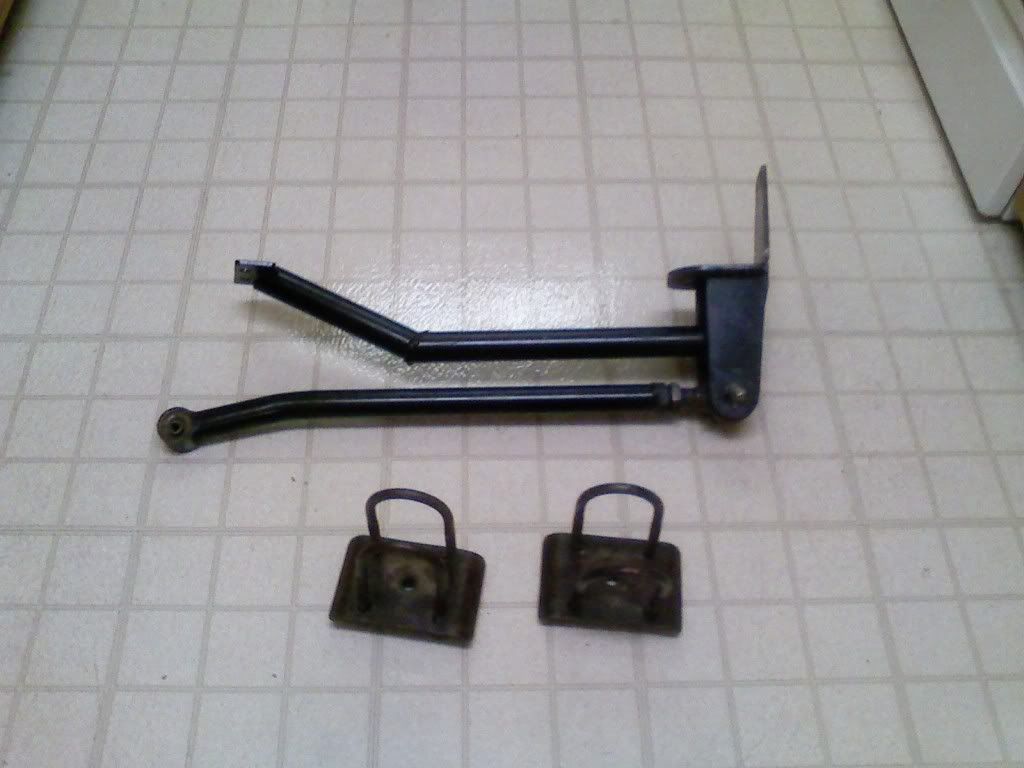
Custom trackbar (won't work for me), Clayton HD Mount, and Frame Crosstie, and Rusty's Offroad grade 8 spring plates and ubolts
Anyways...onto the finished(ish) products...
Painted and Rebuilt LCAs
Cleaned & Painted Coils:
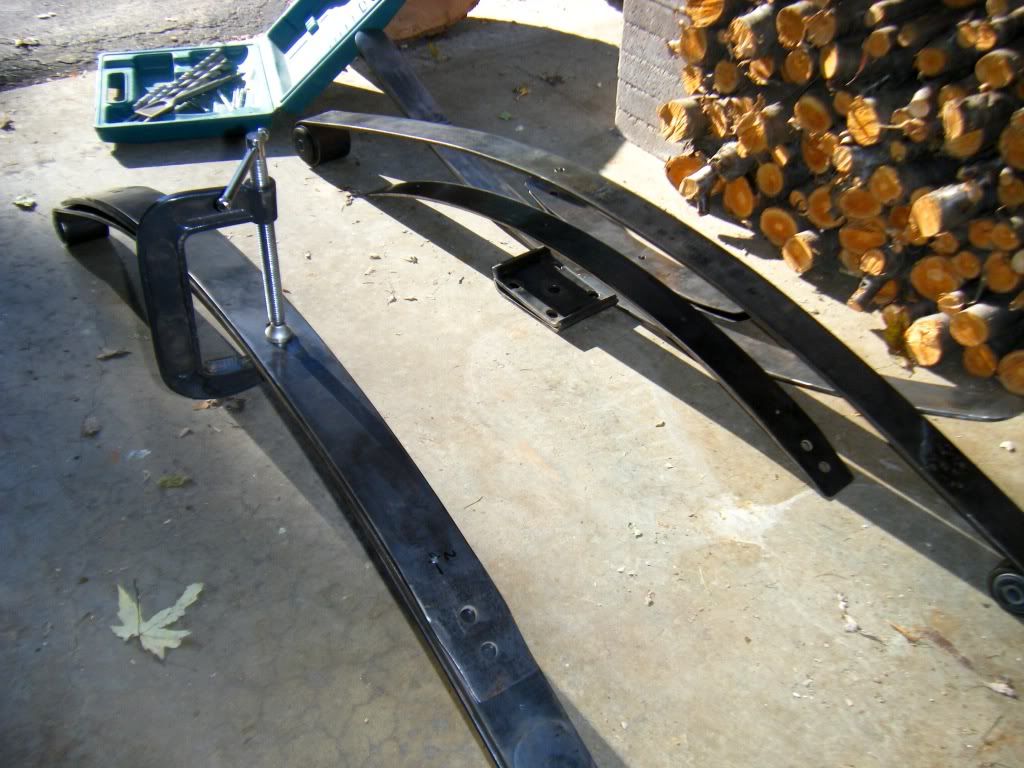
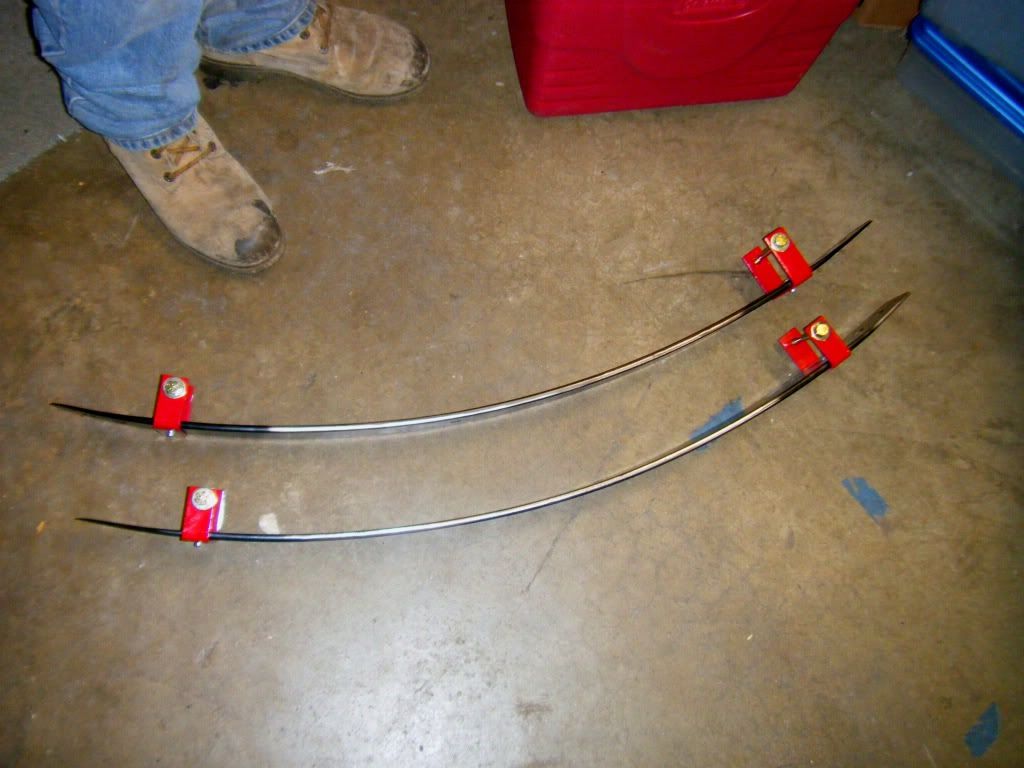
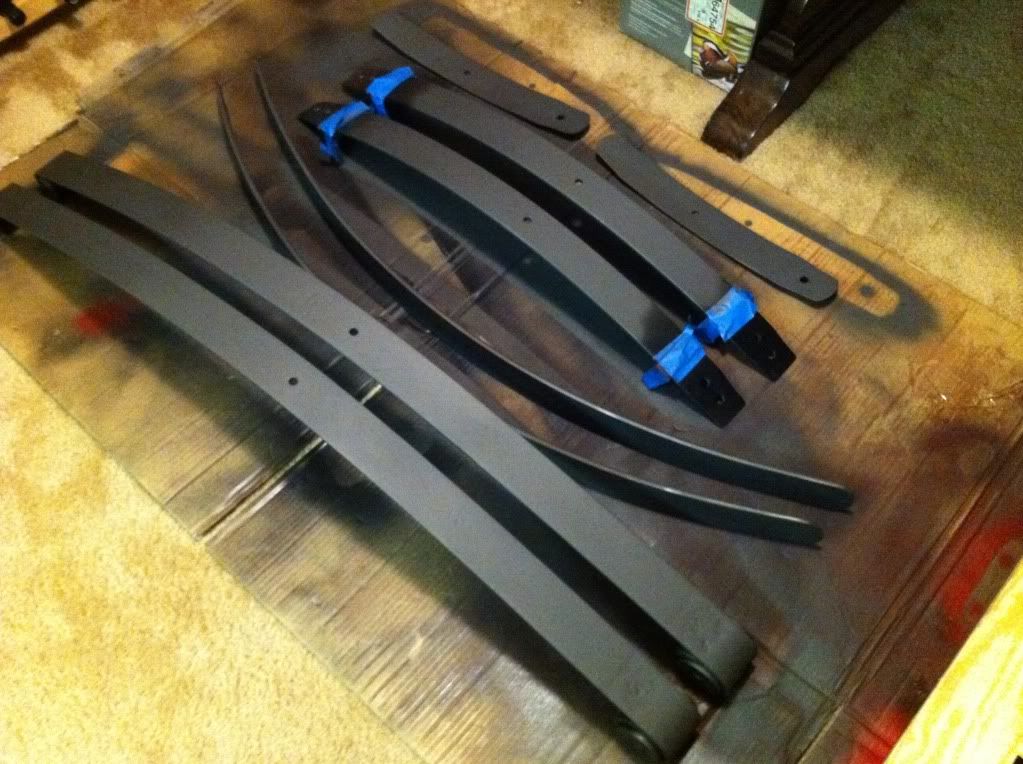
Spring pack Progress:
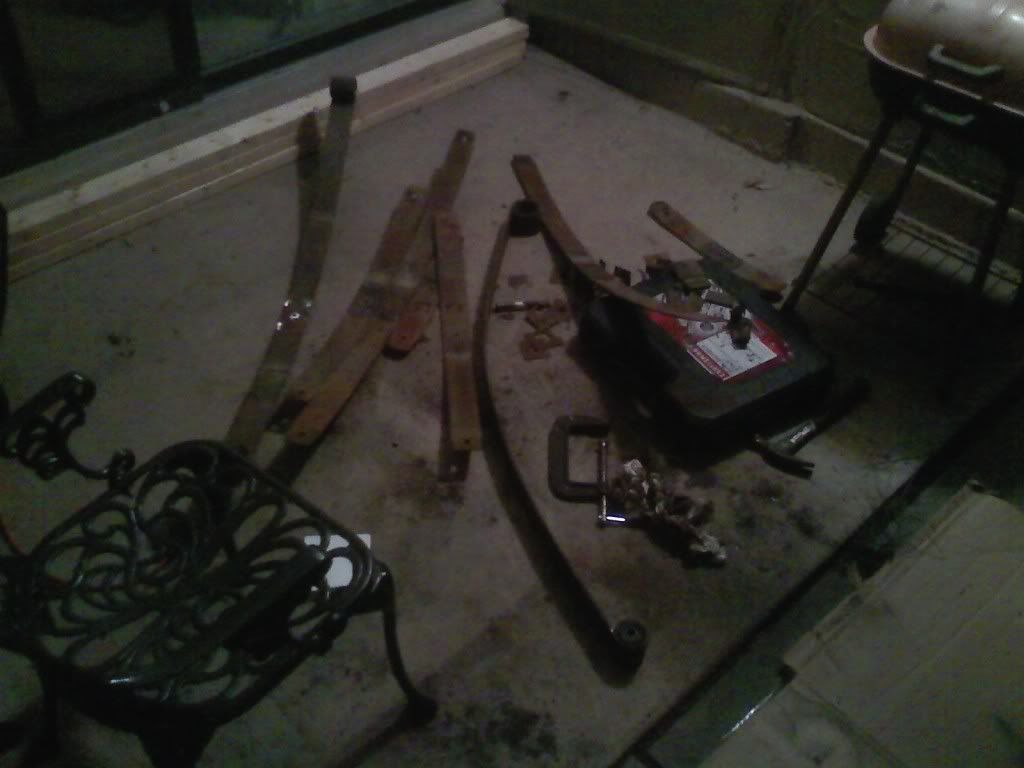
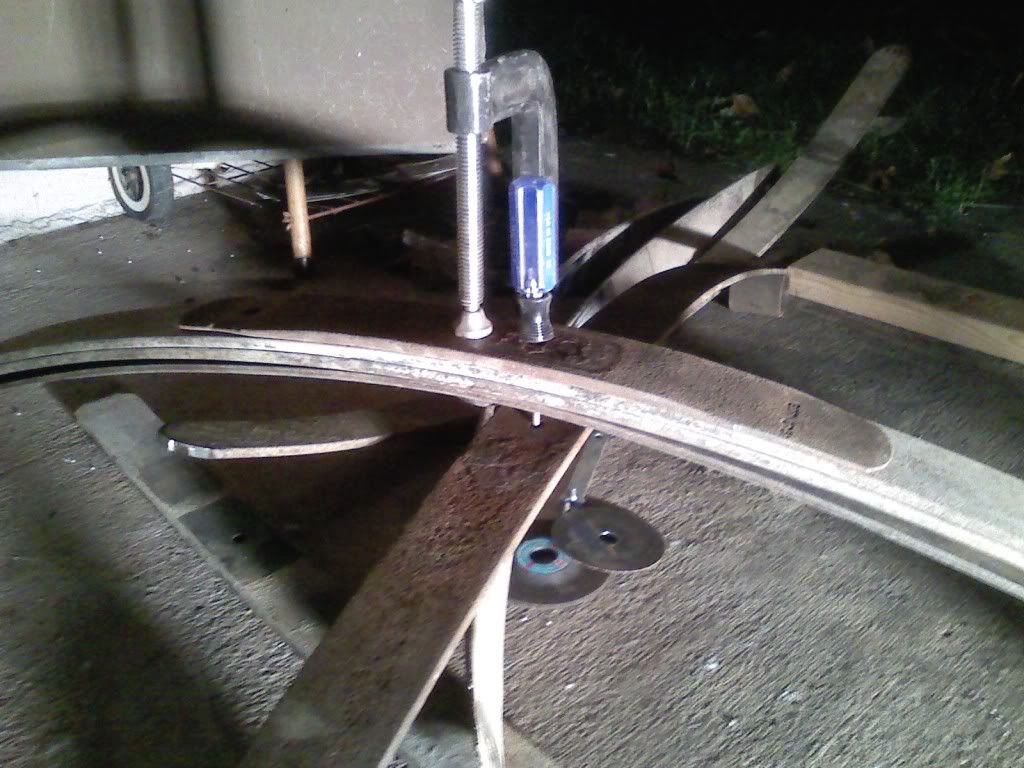
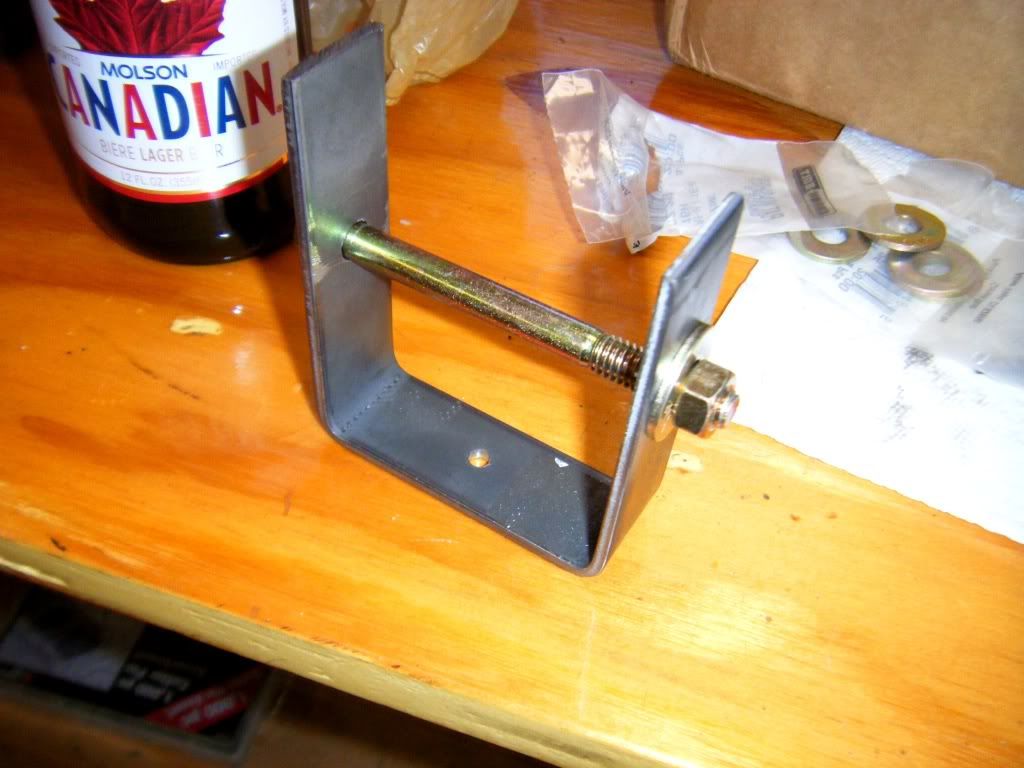
Made some spring clips

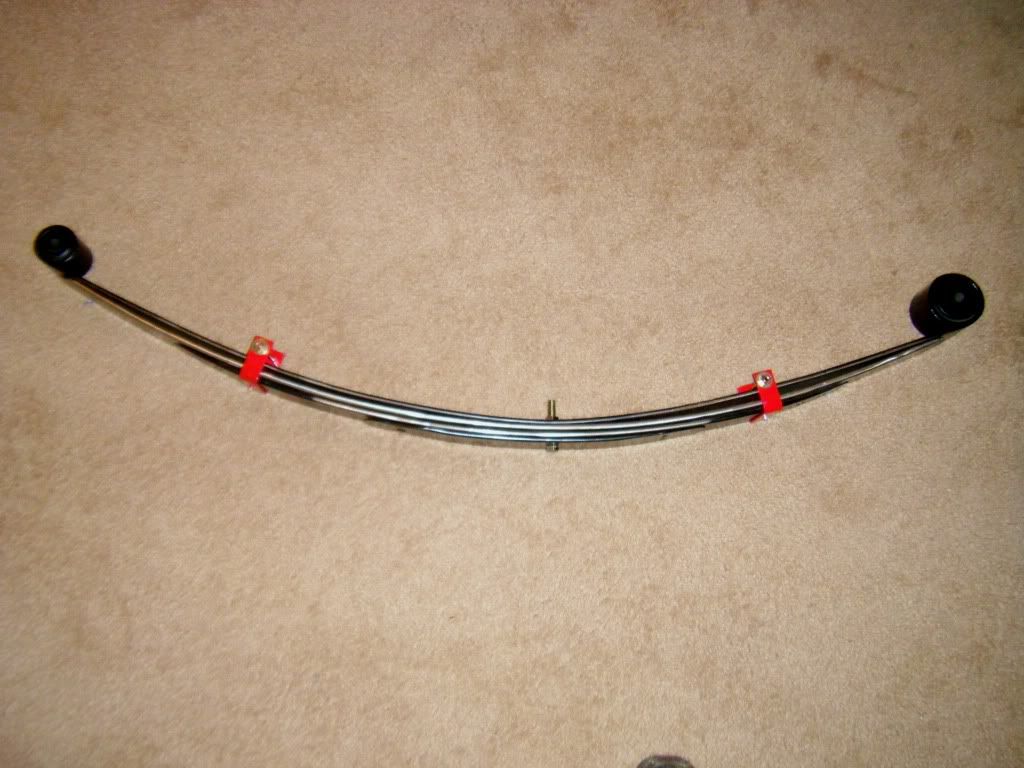
Graphite Paint Applied
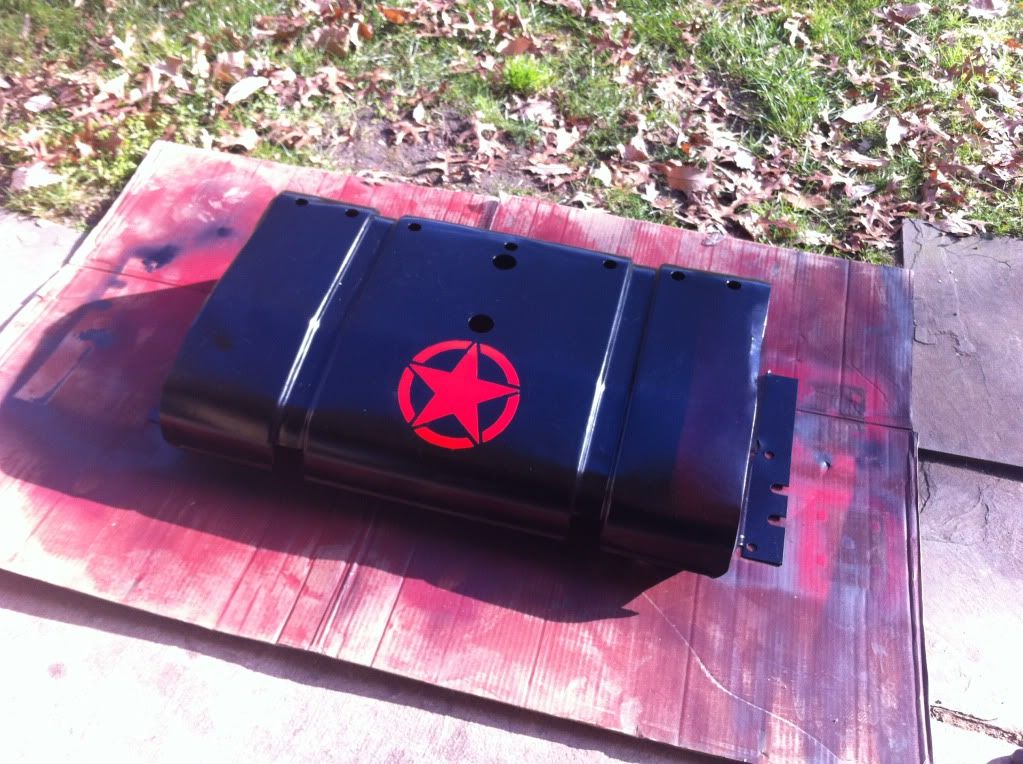
Gas Tank Skid cleaned and painted
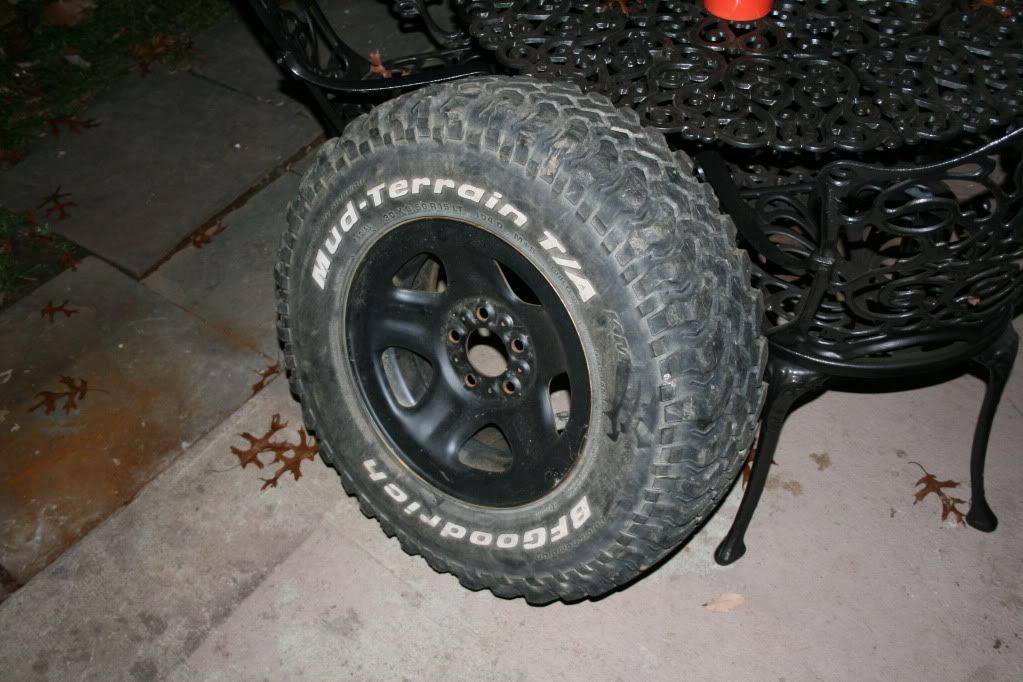
Picked up a 1/2 Tread BFG KM as a winter tire to replace my ****ty A/T spare till I can afford new bigger ones
Now you're up to date!
Plans as they currently stand:
4 1/2" lift +/-
33x10.5 or 33x12.5 tires in 15x7 rims with 1.5" spacers
3" XJ (actually 4" TJ) coils + 1 1/2" poly spacer
Bastard Pack rear - XJ / Dakota components with graphite paint and liners, optimized to be as flexy as possible - 3" lift +/- goal for these over stock, w/ 7/16" center pins
Dakota shackles and HD Offroad Relocation boxes (already installed) for 1.5" lift
Stainless Steel extended brake lines
Adjustable short LCAs for now. Long arms later - ideally a 3 link, mid-arm setup.
Teraflex 9550 JK 4" Shocks - 10" travel front, 9" travel rear
Progressive bumpstops frear with custom bumpstop plates, progressive floating coil bumps up front with top plate
Adjustable trackbar and HD frame mount, with frame rail crosstie
steering box brace rod
shims in the rear to adjust angles
Stock Turbine Wheels
Skids - gas tank and TC case
The pile of parts collected so far:
Currie 4" TJ springs and Adjustable LCAs with dual JJs - so beefy
Rough Country Stainless Brake Lines
Stock Turbines:
In great shape!
Dakota Leafs:
Stock gas tank skid and coil spacers
Custom trackbar (won't work for me), Clayton HD Mount, and Frame Crosstie, and Rusty's Offroad grade 8 spring plates and ubolts
Anyways...onto the finished(ish) products...
Painted and Rebuilt LCAs
Cleaned & Painted Coils:
Spring pack Progress:
Made some spring clips
Graphite Paint Applied
Gas Tank Skid cleaned and painted
Picked up a 1/2 Tread BFG KM as a winter tire to replace my ****ty A/T spare till I can afford new bigger ones
Now you're up to date!
Last edited by dukie564; Feb 23, 2012 at 10:59 AM.
Thread Starter
☠ CF Sheriff ☠
Joined: Nov 2009
Posts: 15,197
Likes: 18
From: Aberdeen, MD
Year: 1995
Model: Cherokee
Engine: 4.0L HO I-6, 703 Injectors, Brown Dog Super Engine Mounts
yea I figure I put enough effort into the planning for these things may as well document everything really well for others too

Registered Users
Joined: Jul 2011
Posts: 618
Likes: 0
From: 92392
Model: Cherokee
Really digging your build alot! Idk why but that first picture looks like 31's and 3" lift to me lol.
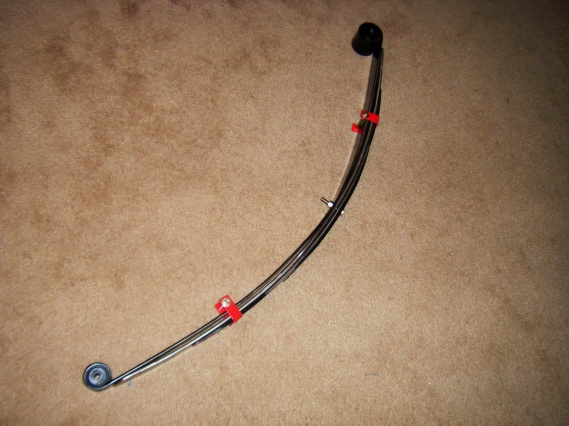
Your jeep looks good man! With the leaf spring clips, you should bring them towards the center of the leafs..I set mine just before the overload spring.
This allows the leafs to seperate when flexing or articulating! Alot of YJ guys do it, and suggested it to me. Just a thought.
Your jeep looks good man! With the leaf spring clips, you should bring them towards the center of the leafs..I set mine just before the overload spring.
This allows the leafs to seperate when flexing or articulating! Alot of YJ guys do it, and suggested it to me. Just a thought.
Thread Starter
☠ CF Sheriff ☠
Joined: Nov 2009
Posts: 15,197
Likes: 18
From: Aberdeen, MD
Year: 1995
Model: Cherokee
Engine: 4.0L HO I-6, 703 Injectors, Brown Dog Super Engine Mounts
they're not clips. They are not tight to the spring pack when it's put together - meaning they allow the leafs to separate up and down, but not fan out or come apart too much
It's hard to see but the cross bolt is a good 1/2" above the main leaf

It's hard to see but the cross bolt is a good 1/2" above the main leaf
Last edited by dukie564; Nov 6, 2014 at 03:11 PM.
Registered Users
Joined: Jul 2011
Posts: 618
Likes: 0
From: 92392
Model: Cherokee
How did you make those?
Also did you replace the leaf bushings? How? I could get mine out for crap and have new bushings waiting..just can't get my old ones out lol.
Last edited by dukie564; Nov 6, 2014 at 03:12 PM.