
Project 4 Banger Danger

Junior Member
Joined: May 2015
Posts: 91
Likes: 0
From: STL
Year: 2001
Model: Cherokee
Engine: 4.0
Keep the quarters stock. and fwiw mine have dust and surface rust drives me crazy im gonna spay it with corrosion wax to delay the rust
Last edited by 01EXPOXJ; Jun 1, 2017 at 03:00 PM.
Thread Starter
Seasoned Member
Joined: Dec 2015
Posts: 467
Likes: 6
From: Sioux Falls, SD
Year: 2001
Model: Cherokee (XJ)
Engine: 4.0l


 We'll see. I don't know the first thing about setting up a turbo so I'd need to do a LOT of reading. My dream is to eventually have a stroker setup similar to Outlaw Star's. Got a lot of work to do first though...
Thread Starter
Seasoned Member
Joined: Dec 2015
Posts: 467
Likes: 6
From: Sioux Falls, SD
Year: 2001
Model: Cherokee (XJ)
Engine: 4.0l
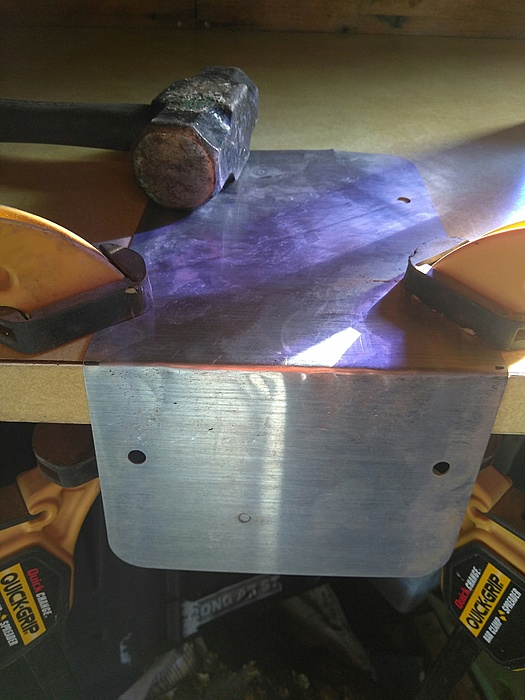
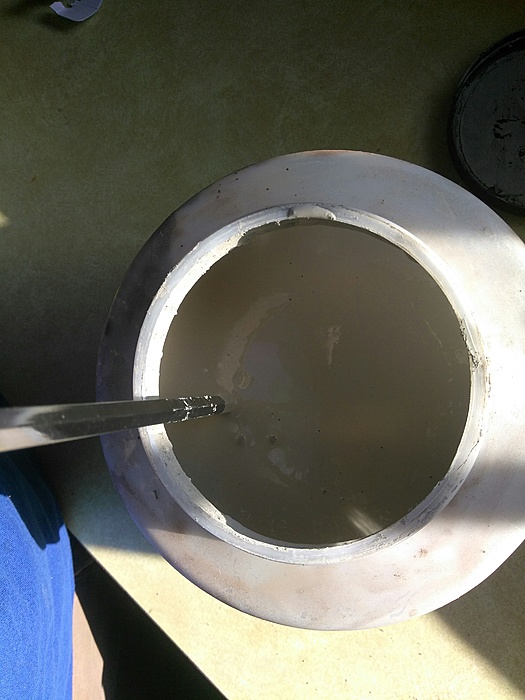
I decided to take a shot at repairing my rear quarter panel. As I've said before, I cannot weld, so I had to get creative. My plan was to use an old license plate as a "patch".
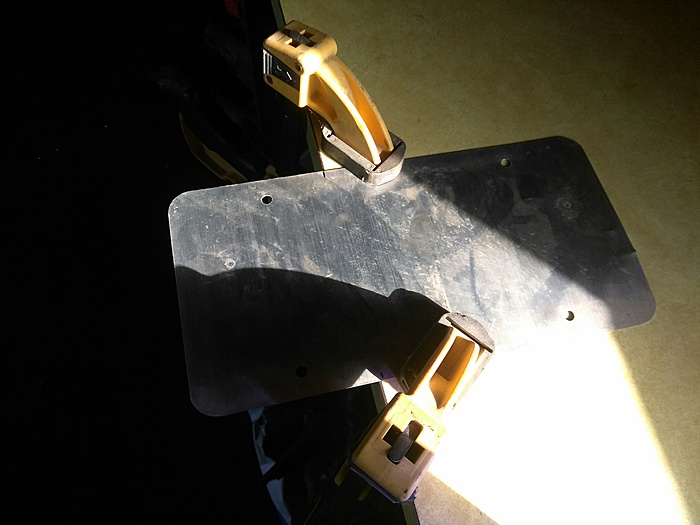
First I need to bend the plate to match the quarter panel. Some clamps and a BFH took care of that.
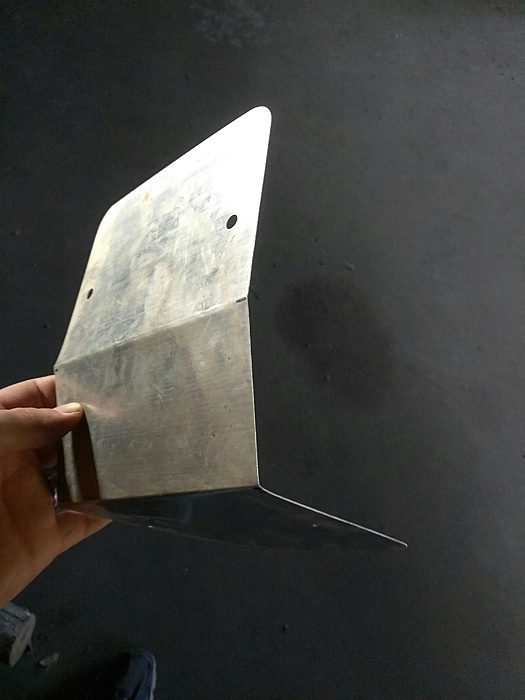
Ta daa!
Then I used sheet metal screws to fasten it in place.
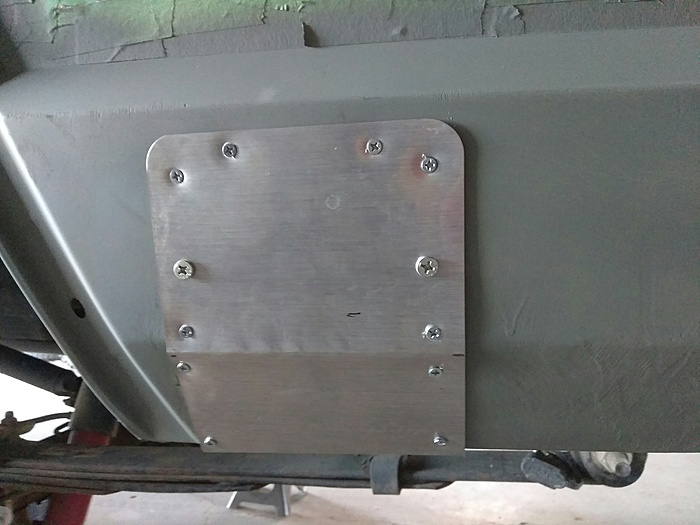
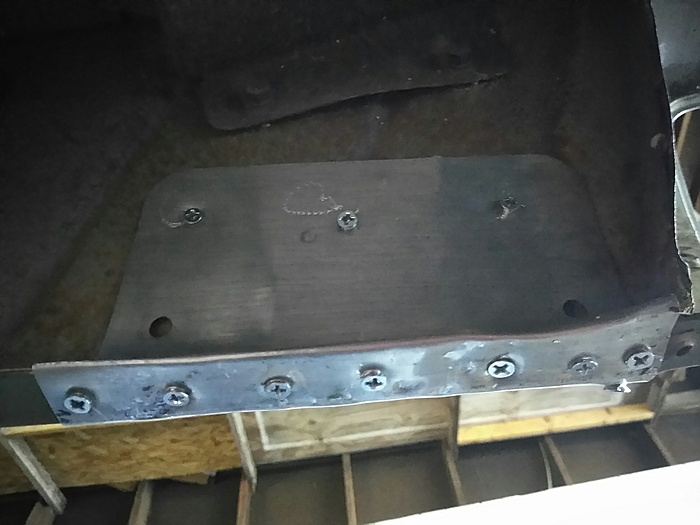
Yeah, I may have gone overboard with the screws... One of my mottos is "overkill is underrated".
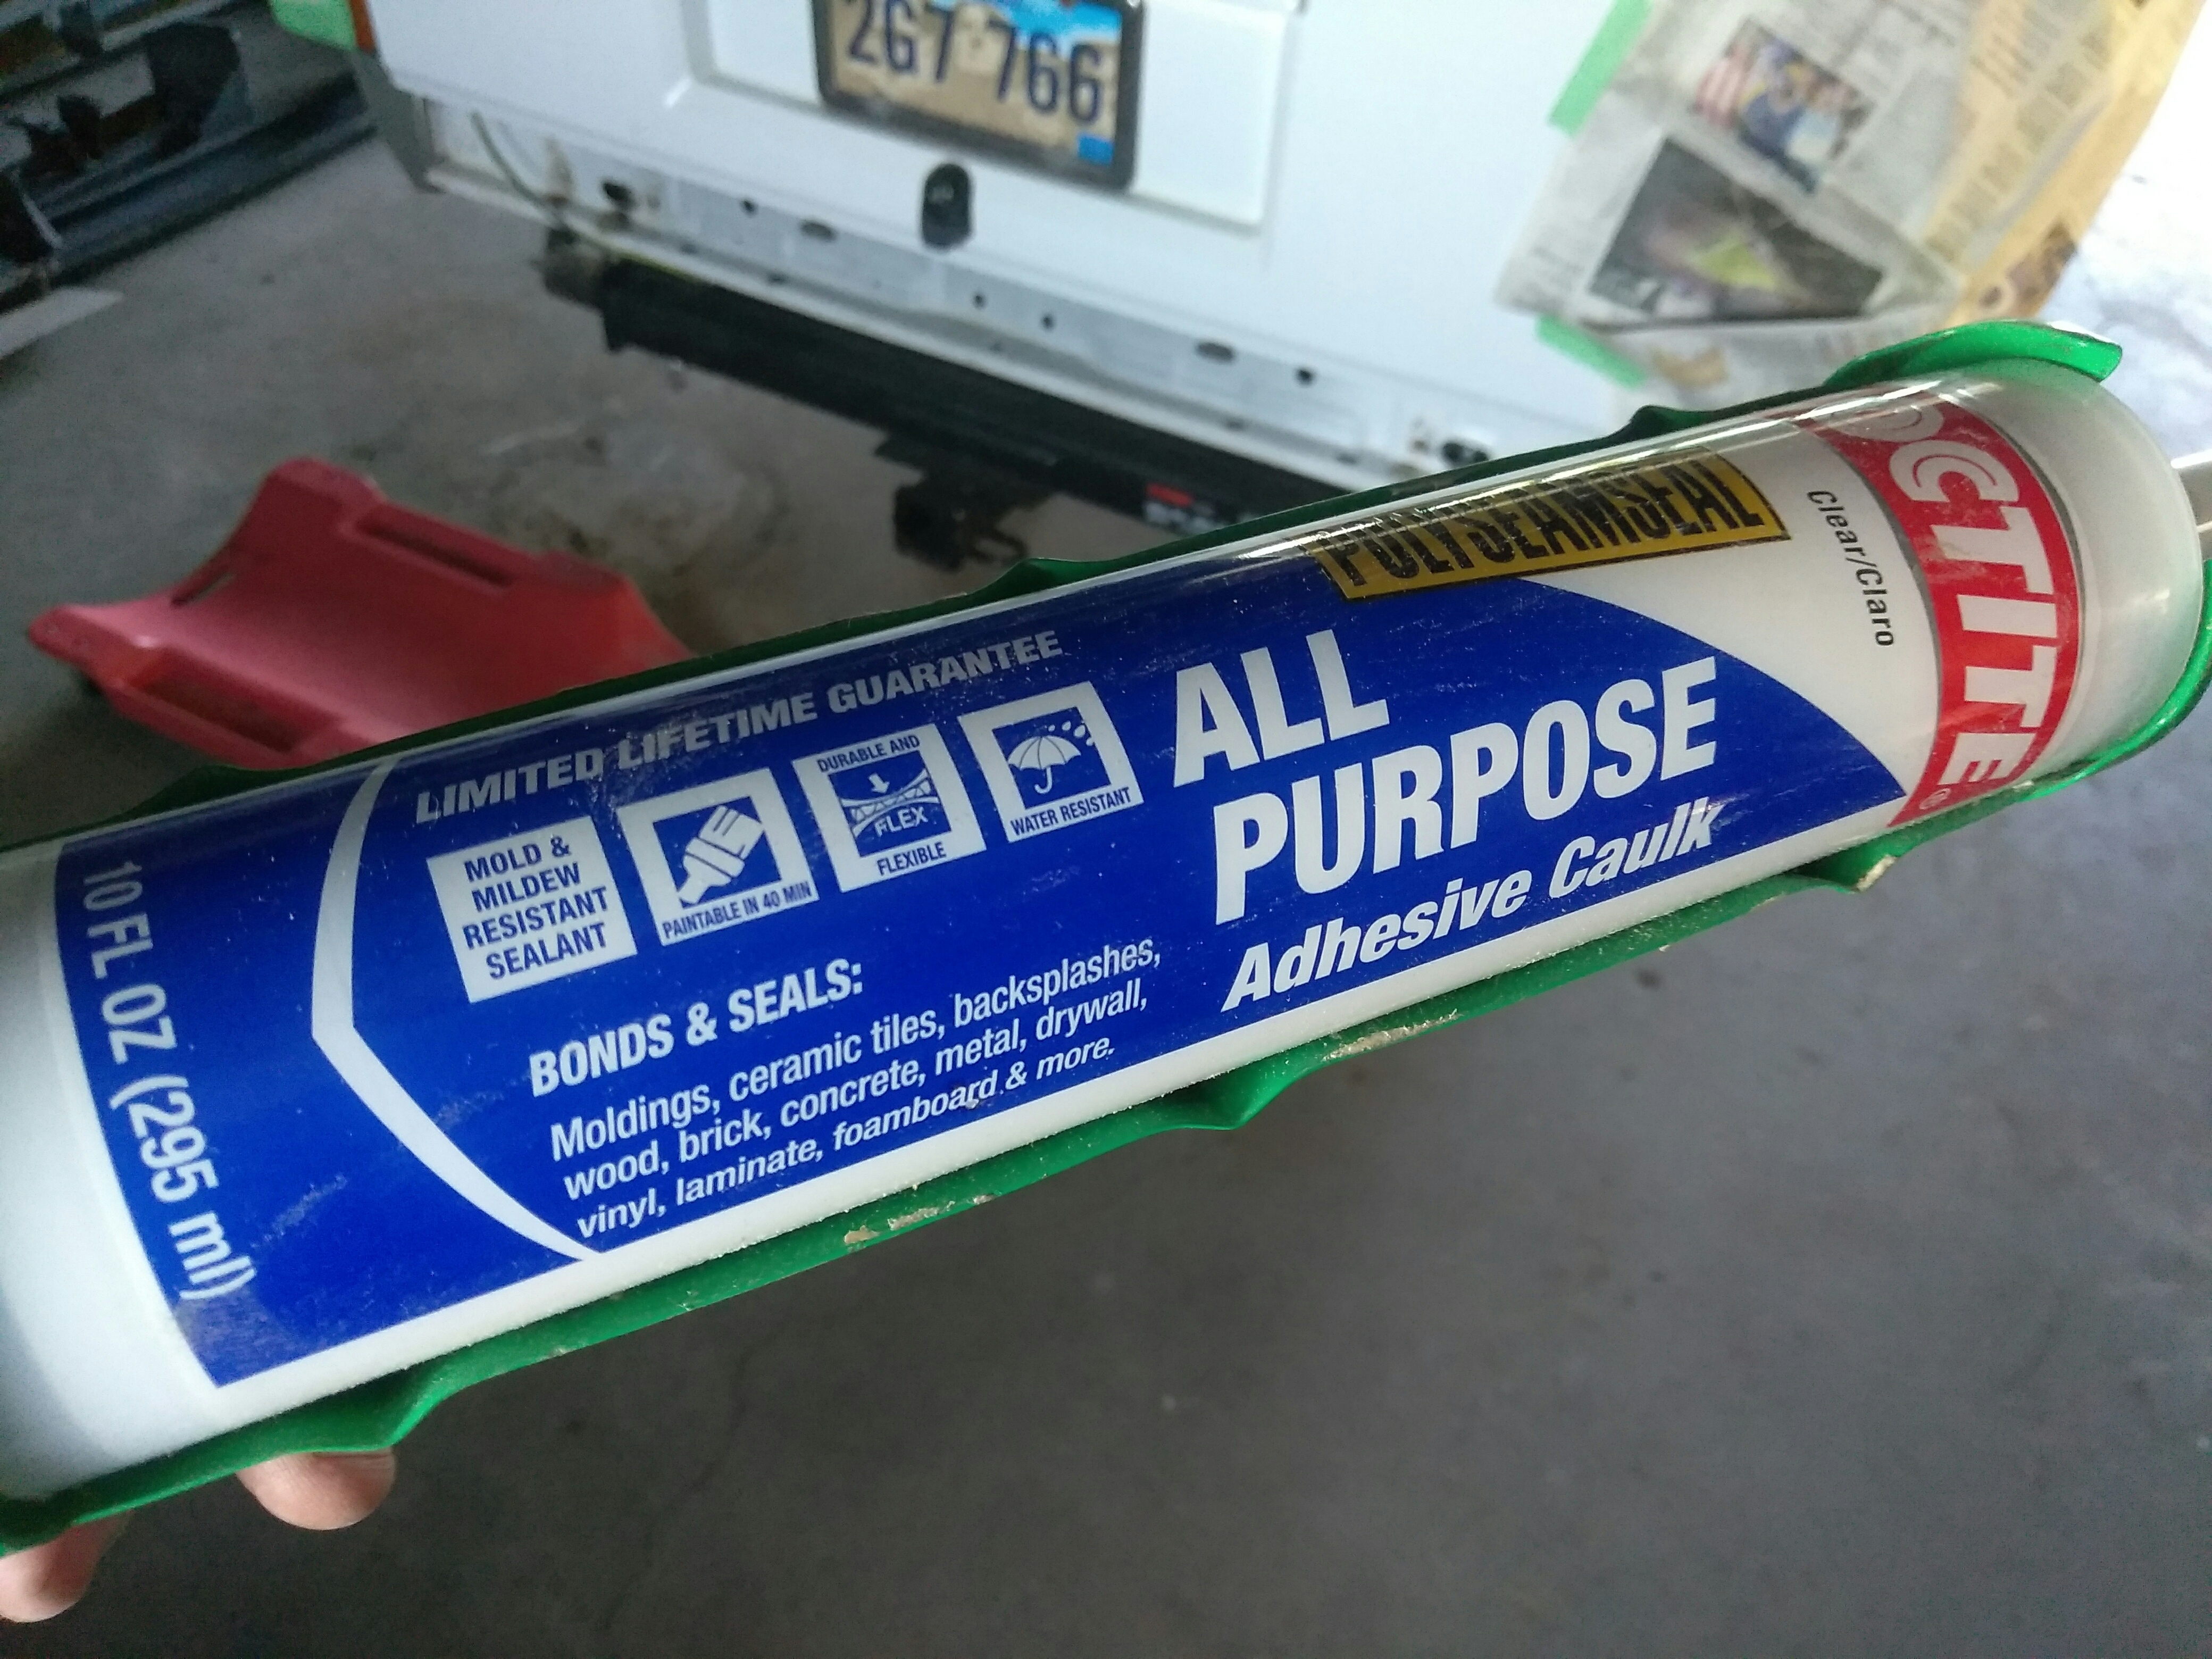
Now this is all worthless if I can't keep the water out. For that I enlisted the help of some Loctite sealer caulk.

All caulked!
Then primed.
It's not the prettiest thing in the world... We'll see if it works. Remember, I am still going to try to fix some armor to go over the top of this so that will hopefully take care of the aesthetics too.

First I need to bend the plate to match the quarter panel. Some clamps and a BFH took care of that.

Ta daa!

Then I used sheet metal screws to fasten it in place.


Yeah, I may have gone overboard with the screws... One of my mottos is "overkill is underrated".
Now this is all worthless if I can't keep the water out. For that I enlisted the help of some Loctite sealer caulk.
All caulked!


Then primed.

It's not the prettiest thing in the world... We'll see if it works. Remember, I am still going to try to fix some armor to go over the top of this so that will hopefully take care of the aesthetics too.
Last edited by 4BangerDanger; Jun 2, 2017 at 05:09 PM.
Thread Starter
Seasoned Member
Joined: Dec 2015
Posts: 467
Likes: 6
From: Sioux Falls, SD
Year: 2001
Model: Cherokee (XJ)
Engine: 4.0l
A while back on the "what grinds your gears" thread I had vented about my air compressor not working. What happened is that a while back I bought an air compressor from a friend. In my excitement I forgot the garage in the house I'm renting for a 240 volt outlet. Well it doesn't have one so I was in a pickle. After thinking about it for a while I picked up some 10 gauge wire and made an extension cord:
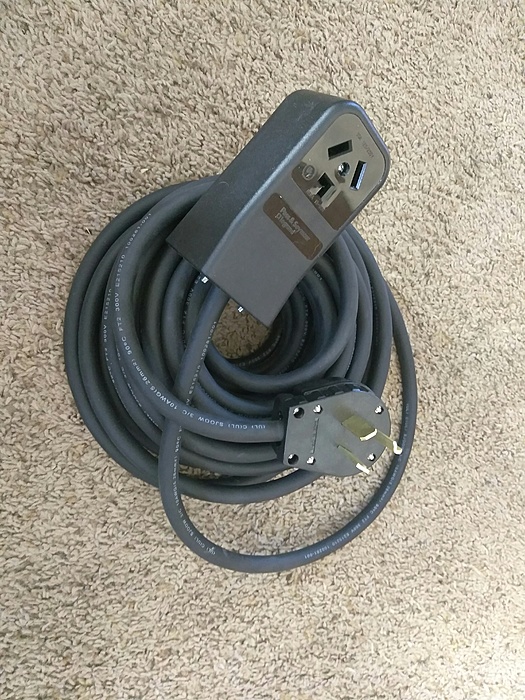
The plan was to run that cord from the dryer outlet into the garage. I tested it on the dryer itself and that ran fine, but when I plugged in the compressor this happened:
As you can see, the motor was acting like it wasn't getting enough juice. I couldn't figure it out! 10 gauge cord should've been heavy duty enough! Well today I had a buddy look at it and it turns out when I replaced the plug on the end of the compressor cord to plug into my extension, I mixed up the hot wire with one of the negatives. Classic rookie mistake!


The good news is I finally have a working air compressor! And since I happen to be in the middle of a painting project, I purchased my first air tool:
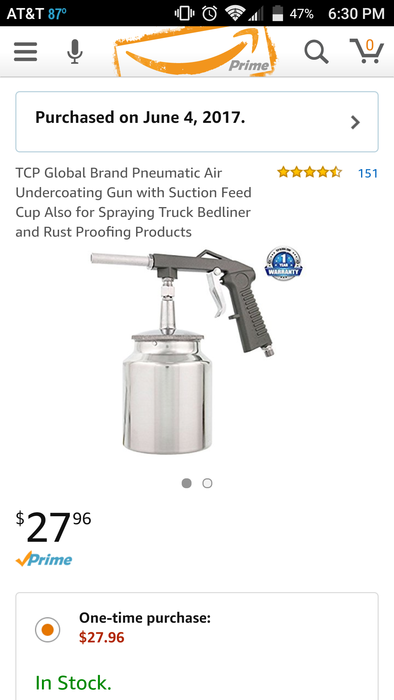
The plan is to use that to apply Al's Heat & Noise Reducer and then afterwards the bedliner to the lower panels.

The plan was to run that cord from the dryer outlet into the garage. I tested it on the dryer itself and that ran fine, but when I plugged in the compressor this happened:
As you can see, the motor was acting like it wasn't getting enough juice. I couldn't figure it out! 10 gauge cord should've been heavy duty enough! Well today I had a buddy look at it and it turns out when I replaced the plug on the end of the compressor cord to plug into my extension, I mixed up the hot wire with one of the negatives. Classic rookie mistake!
The good news is I finally have a working air compressor! And since I happen to be in the middle of a painting project, I purchased my first air tool:

The plan is to use that to apply Al's Heat & Noise Reducer and then afterwards the bedliner to the lower panels.
Last edited by 4BangerDanger; Jun 4, 2017 at 10:51 PM.
Thread Starter
Seasoned Member
Joined: Dec 2015
Posts: 467
Likes: 6
From: Sioux Falls, SD
Year: 2001
Model: Cherokee (XJ)
Engine: 4.0l
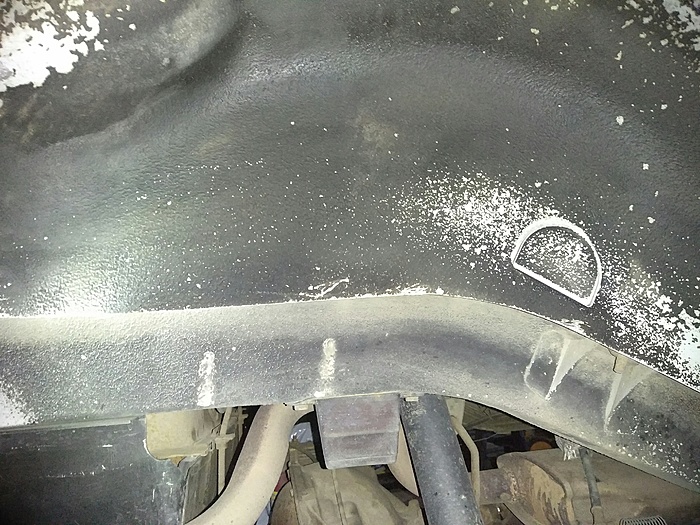
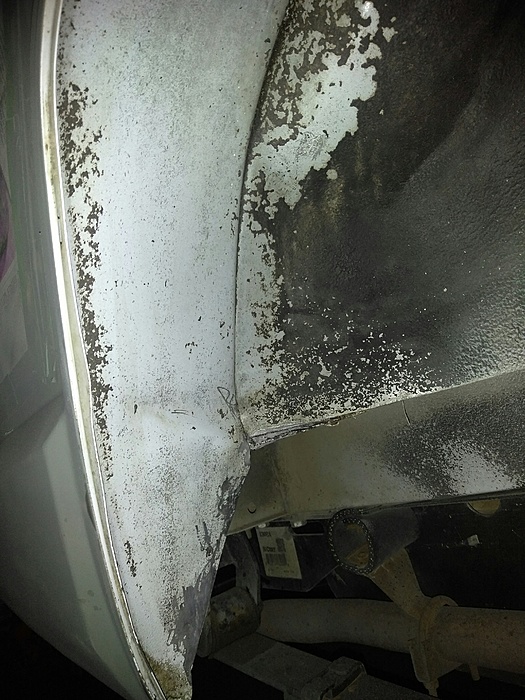
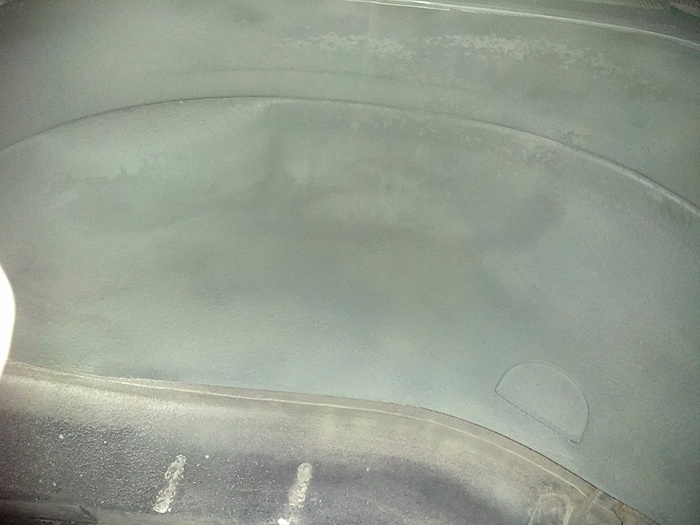
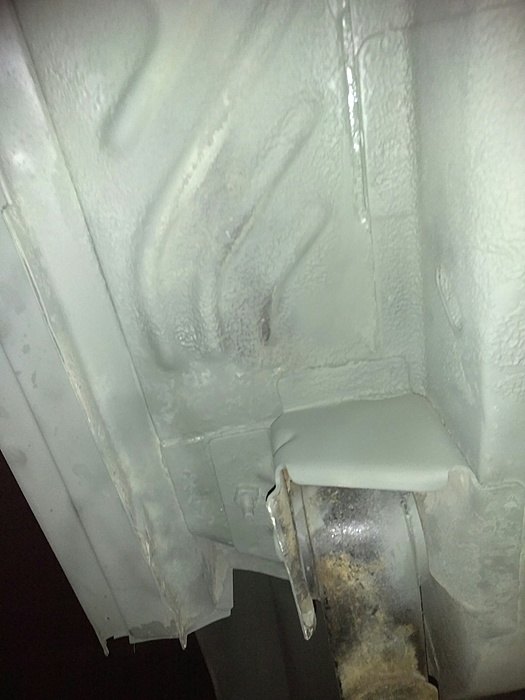
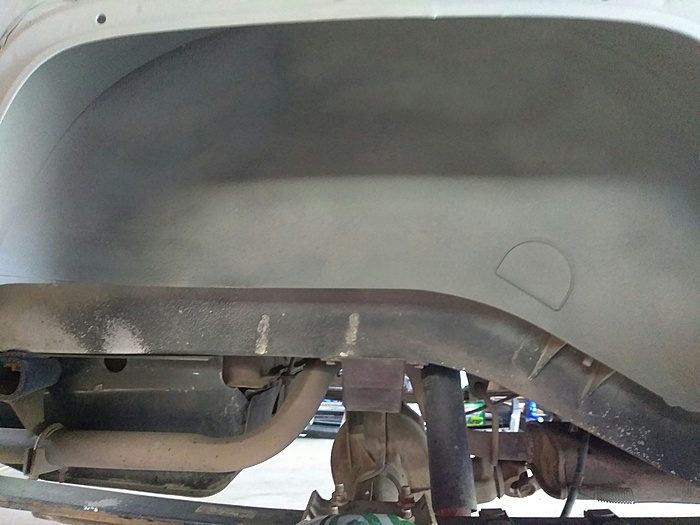
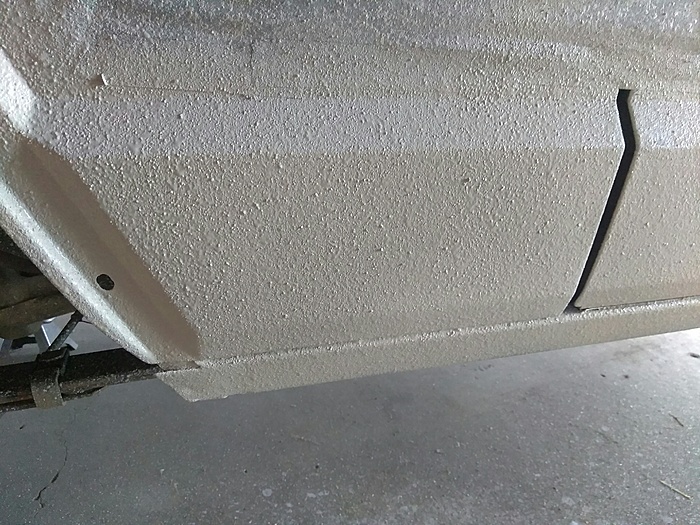
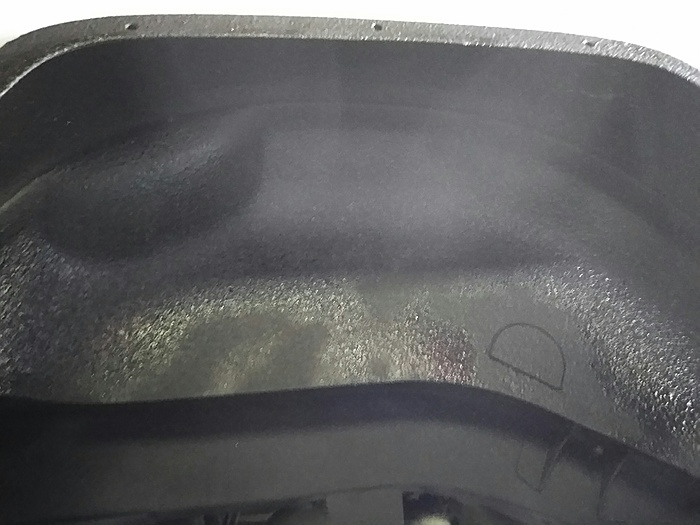
I started working on the wheel wells and underneath the rockers.
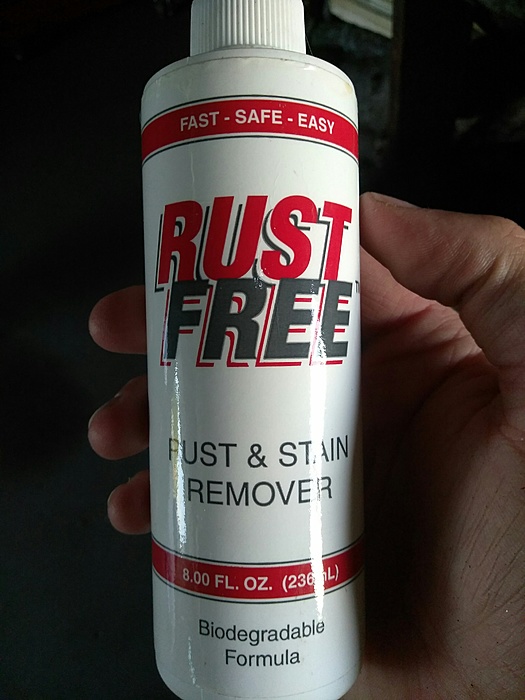
I didn't get a before shot but there was a fair amount of surface rust. I removed as much as I could with a flap disc and wire brush, and then I used a Dremel to get into the tiny crevices.
I sprayed the area with some rust remover.
Prepped:
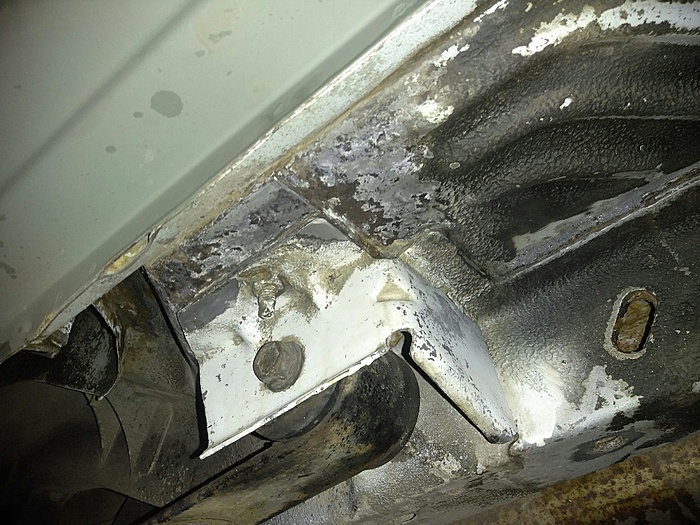
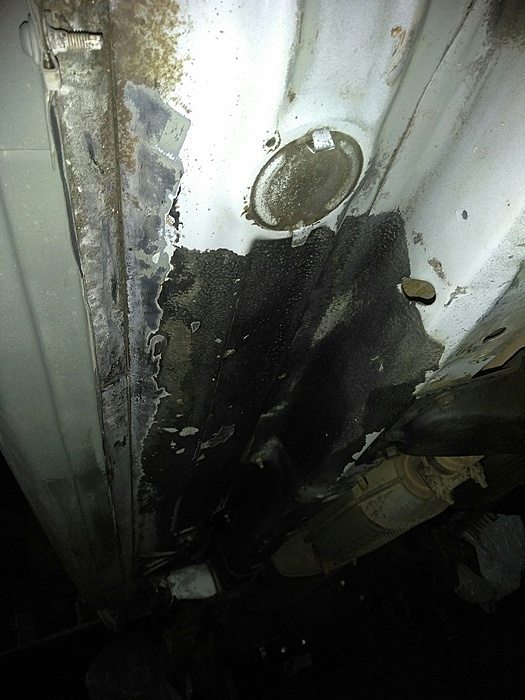
Primed:
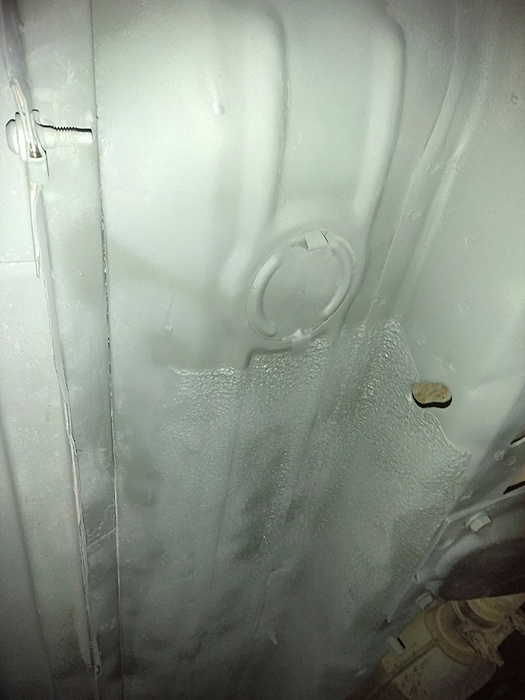
I only did the driver's side today. Sorry the pictures aren't the greatest. It was starting to get dark as I was finishing up. I'm not worried by the overspray as it's just primer. I also took the pictures right away so the paint had not even begun to dry.
After reading countless threads on bed liners, I made my decision...
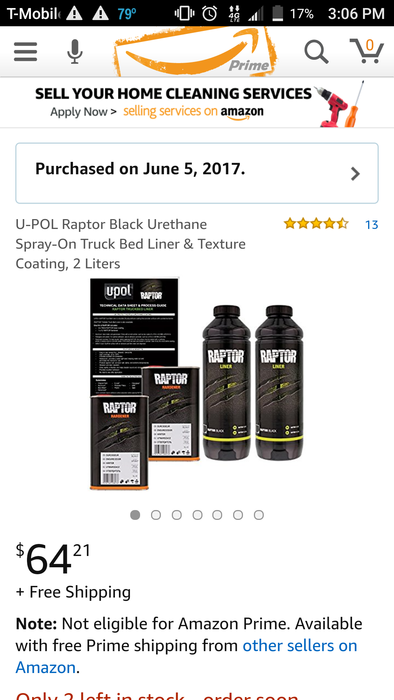
My reasons for choosing Raptor liner include the good reviews, the fact that it's a two-part system (that's allegedly easy to mix), supposedly easy to spray, and it's a fair price. We'll see how I like it.
I didn't get a before shot but there was a fair amount of surface rust. I removed as much as I could with a flap disc and wire brush, and then I used a Dremel to get into the tiny crevices.
I sprayed the area with some rust remover.

Prepped:


Primed:


I only did the driver's side today. Sorry the pictures aren't the greatest. It was starting to get dark as I was finishing up. I'm not worried by the overspray as it's just primer. I also took the pictures right away so the paint had not even begun to dry.
After reading countless threads on bed liners, I made my decision...

My reasons for choosing Raptor liner include the good reviews, the fact that it's a two-part system (that's allegedly easy to mix), supposedly easy to spray, and it's a fair price. We'll see how I like it.
Thread Starter
Seasoned Member
Joined: Dec 2015
Posts: 467
Likes: 6
From: Sioux Falls, SD
Year: 2001
Model: Cherokee (XJ)
Engine: 4.0l
Here's a couple better shots of the primer after sitting overnight:
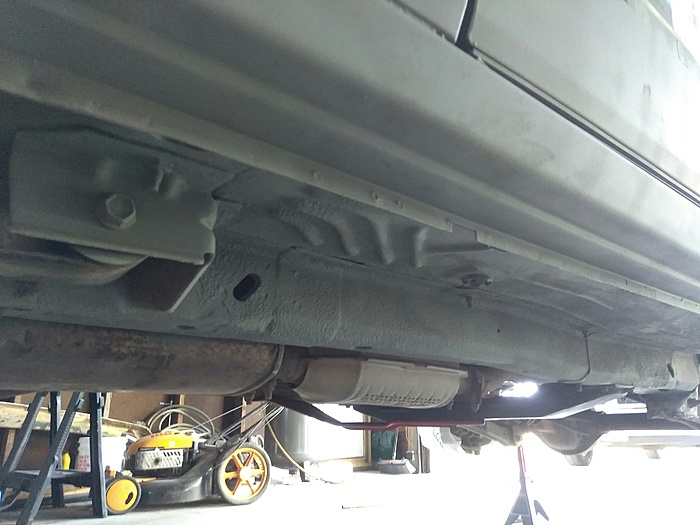
My undercoating gun came today!
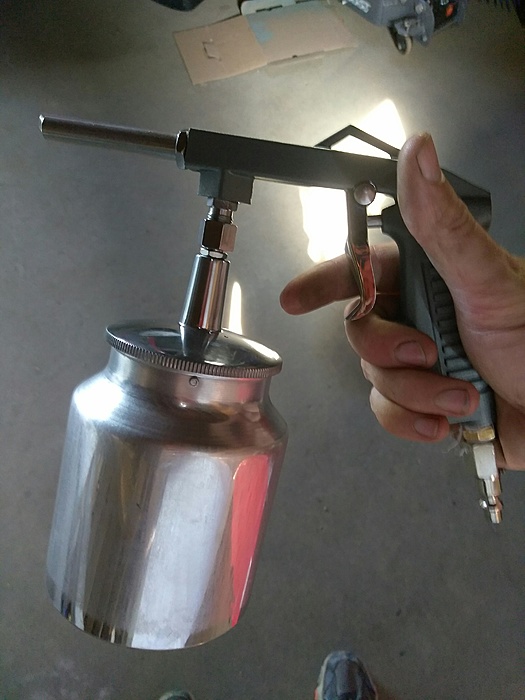
So that means it's time to spray Al's HNR. I double checked the directions...
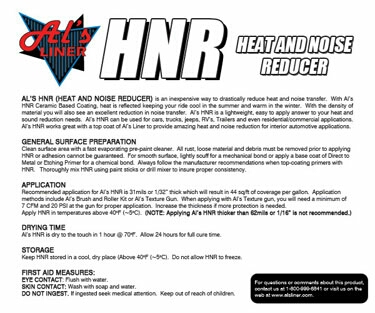
...and noticed the part where it says to not let the product freeze. It was in my uninsulated garage all winter, oops... After stirring it a while with a drill I thought it looked fine.
I may have gotten lucky there. Then I tried spraying it.

So far I only have done one coat, and it's my first time ever spraying paint with an air compressor. It was fun!
Speaking of spraying paint, some other toys also came today...
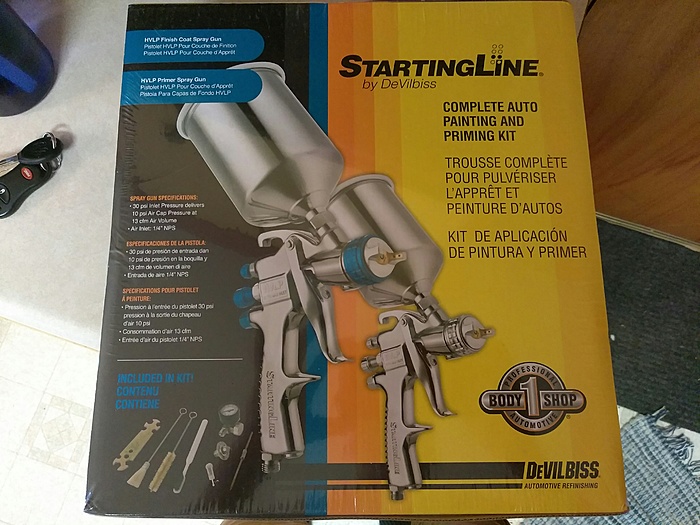
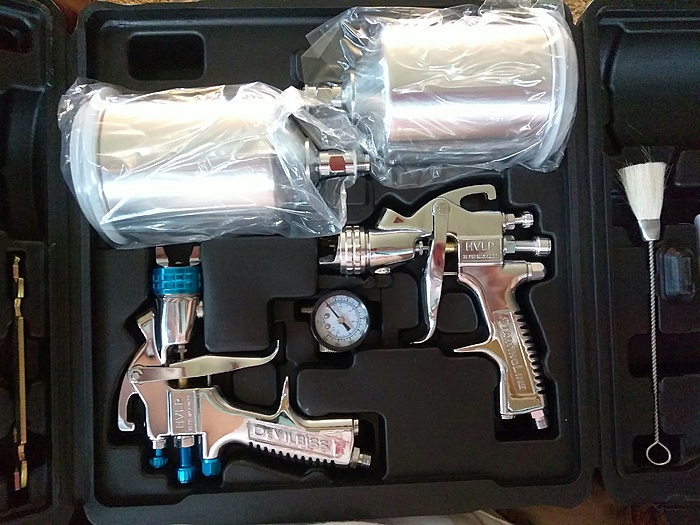
I'm excited to use them.


My undercoating gun came today!

So that means it's time to spray Al's HNR. I double checked the directions...
...and noticed the part where it says to not let the product freeze. It was in my uninsulated garage all winter, oops... After stirring it a while with a drill I thought it looked fine.

I may have gotten lucky there. Then I tried spraying it.


So far I only have done one coat, and it's my first time ever spraying paint with an air compressor. It was fun!
Speaking of spraying paint, some other toys also came today...


I'm excited to use them.
Thread Starter
Seasoned Member
Joined: Dec 2015
Posts: 467
Likes: 6
From: Sioux Falls, SD
Year: 2001
Model: Cherokee (XJ)
Engine: 4.0l
It's been raining a lot the past several days, so between the crazy humidity and a weekend trip we took I haven't been able to get any more painting done.
I did, however, try my hand at making some rear lower quarter panel armor...

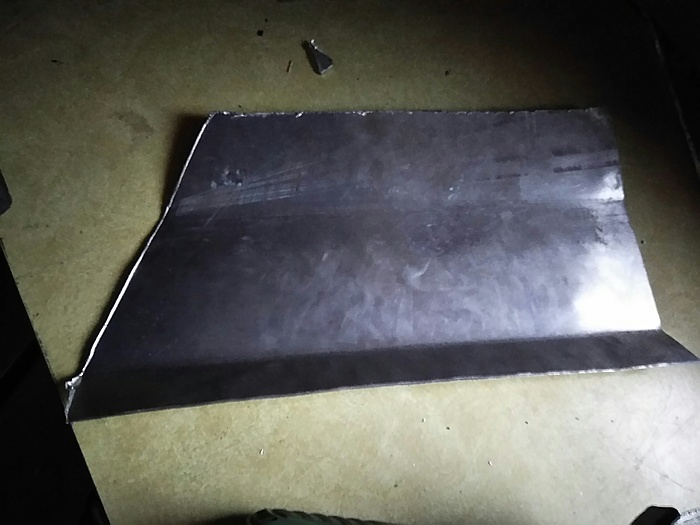
I'm disappointed in it. The aluminum sheet metal is 1/8" and is difficult to bend. I'm not comfortable attaching it as I can't form it appropriately to the profile of the Jeep.
Sooo...
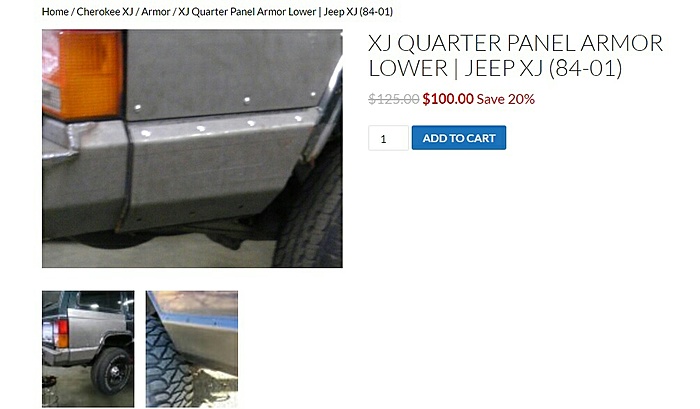
Ares Fab lower quarter panel armor is on the way!
Seasoned Member
Joined: Apr 2014
Posts: 494
Likes: 4
From: Ohio
Year: 98
Model: Cherokee(XJ)
Engine: 4.0L
I'm actually liking the idea of using aluminum sign blanks for armor plates. I work in a sign shop and i've monkeyed with the stuff a few times before, but it didnt occur to me to try it for that.
It can indeed be difficult to bend thhe way you want it to go though. i suppose one could invest in brakes and a vice but who knows. for longer parts of straight areas it might work great. Its relatively cheap as well.
I'm actually about to bedliner my lower areas too. I'd love to spray some preventative rustoleum underneath, as this XJ doesn't nearly have the rusting issues my old one did, but the thoughts of having to blast everything out, then soak it all in WD-40 to drive out the water, then after its dry, spraying it, seems a bit daunting.
Also, CantDrive55, i'm digging your fuel door! thats cool!
Thread Starter
Seasoned Member
Joined: Dec 2015
Posts: 467
Likes: 6
From: Sioux Falls, SD
Year: 2001
Model: Cherokee (XJ)
Engine: 4.0l

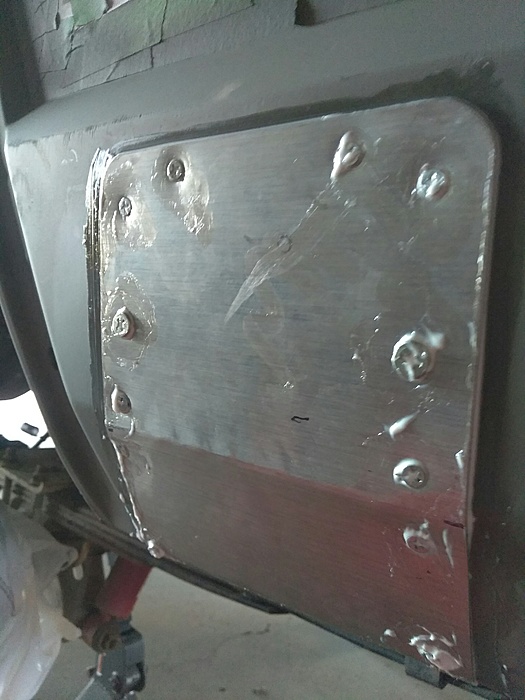
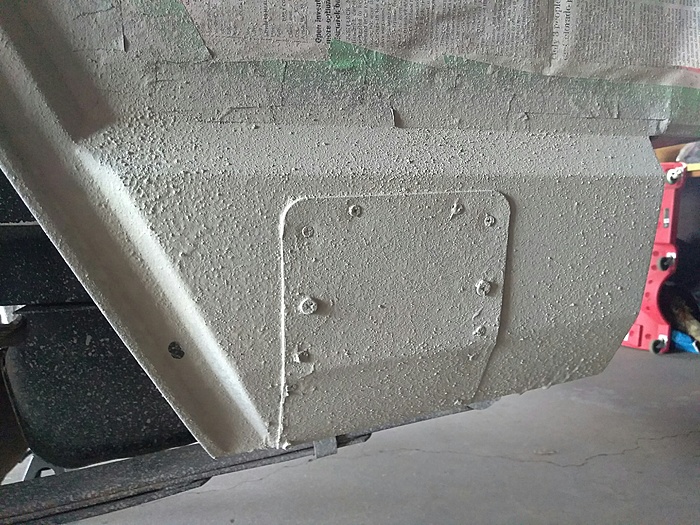
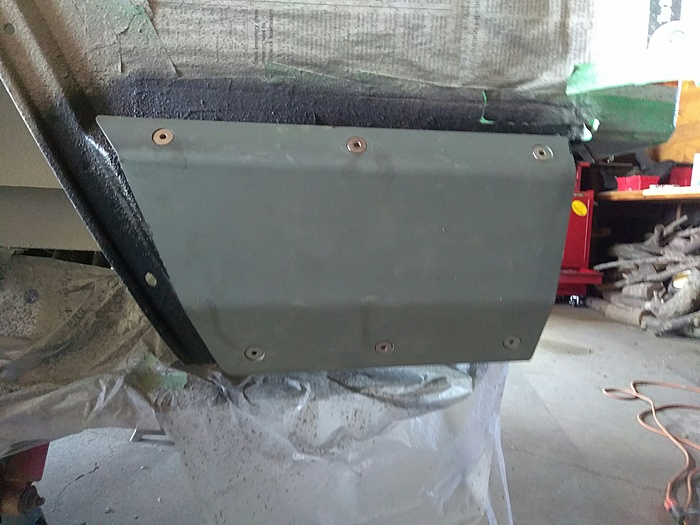
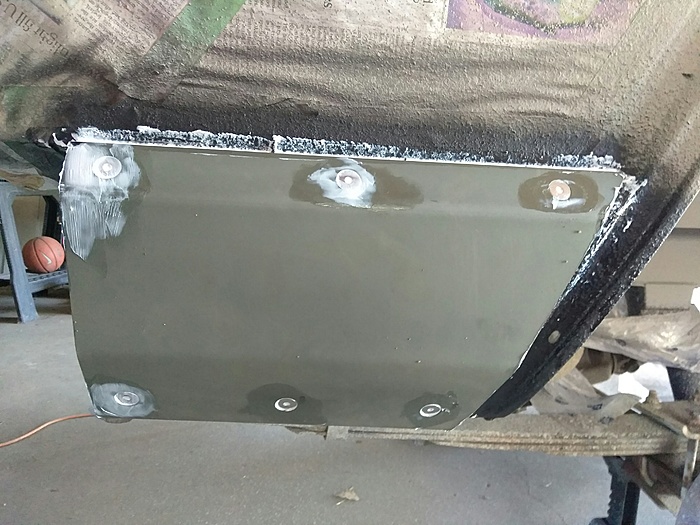
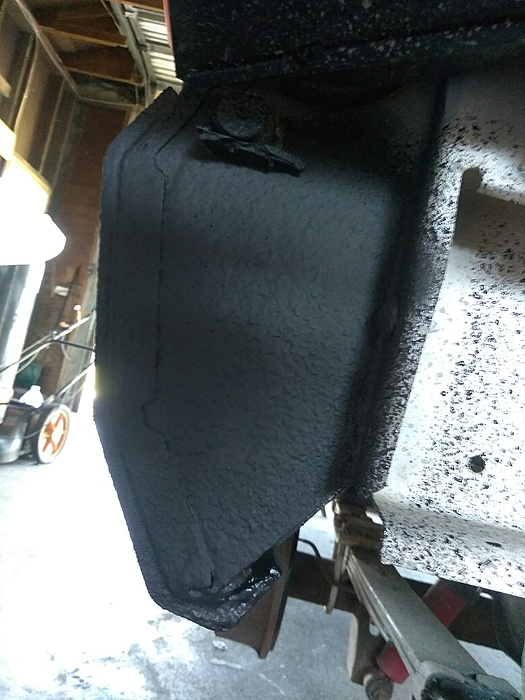
The quarter panel armor from Aries Fab. It's sturdy.

I shot the insides of the quarter panel armor with black appliance epoxy to hopefully keep the rust from creeping inside...

Sprayed.

The outward facing sides of the armor I sprayed with self-etching primer.

I shot a couple more coats of Al's HNR for good measure.

The HNR needs a topcoat as it cures rather soft. Since the rear quarter panels are going underneath the armor I sprayed some black spray paint on it to help it out.

Thread Starter
Seasoned Member
Joined: Dec 2015
Posts: 467
Likes: 6
From: Sioux Falls, SD
Year: 2001
Model: Cherokee (XJ)
Engine: 4.0l
For some reason the rest of my update wasn't included in the post, so let's try this again...
EDIT: I finally got it fixed...
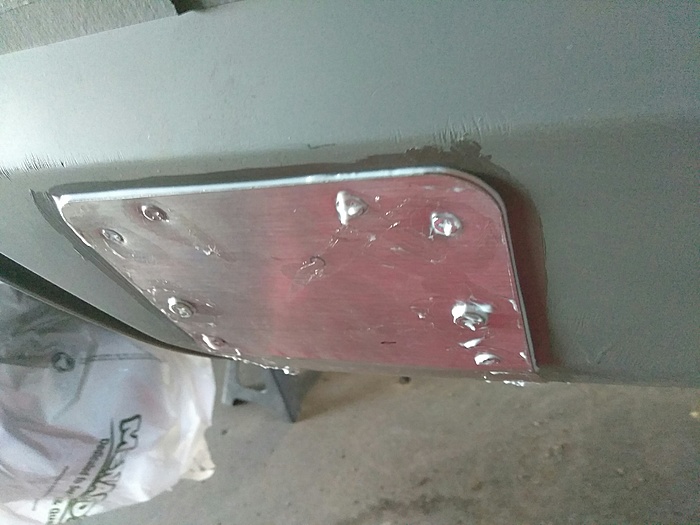
I got the armor mounted! The driver's side was a major PITA due to the fuel filler neck being in the way while trying to screw the nut on the back end of the bolts for the armor. The sheet metal screws (from my initial "patch") poking my hand didn't exactly help either...
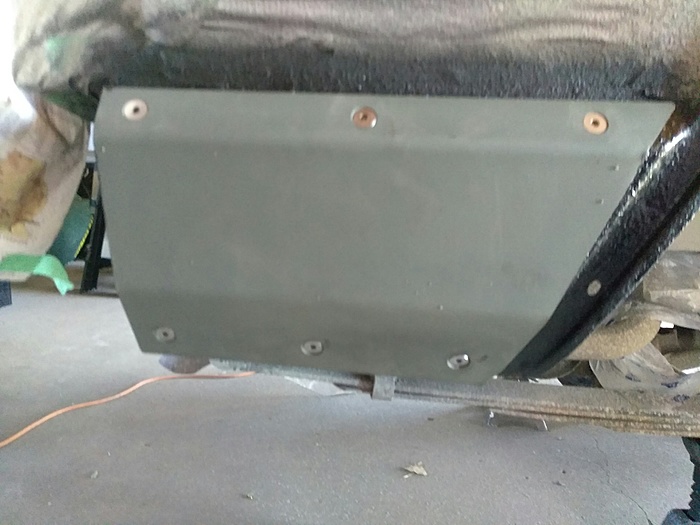
This one was much easier!
I went around the edges with Loctite sealer caulk.
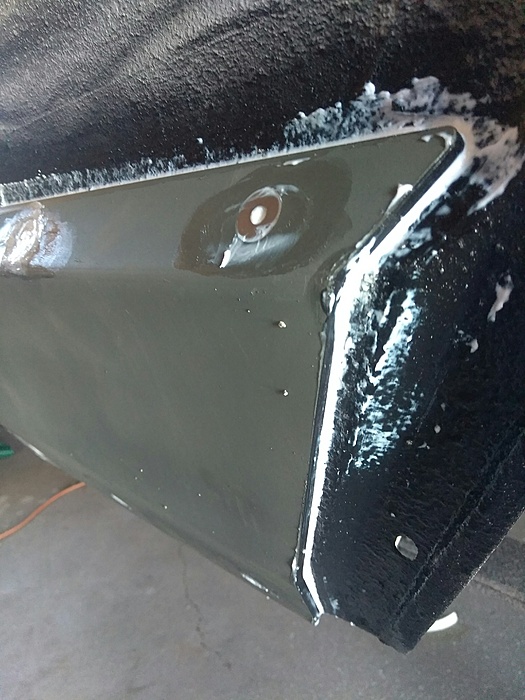
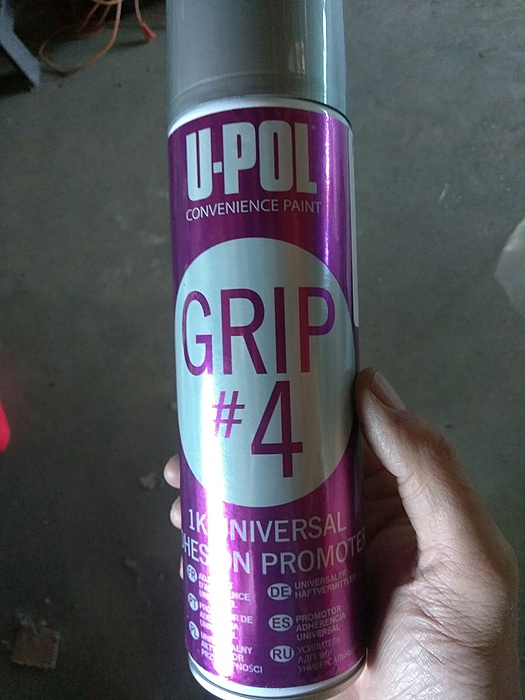
I shot a layer of U-Pol's adhesion promoter for good measure.
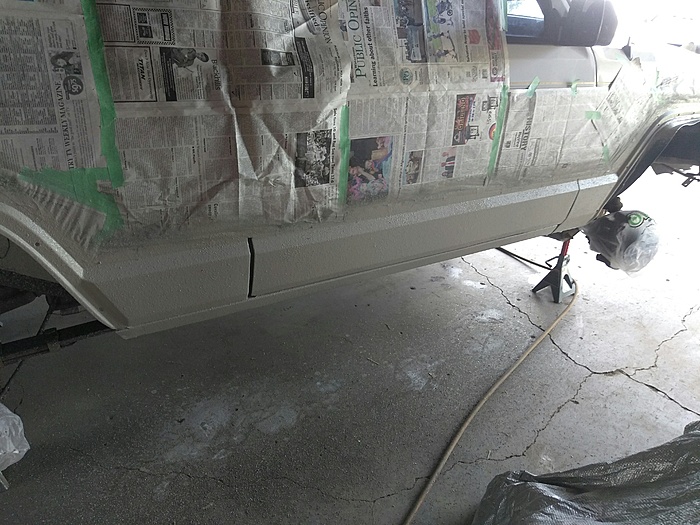
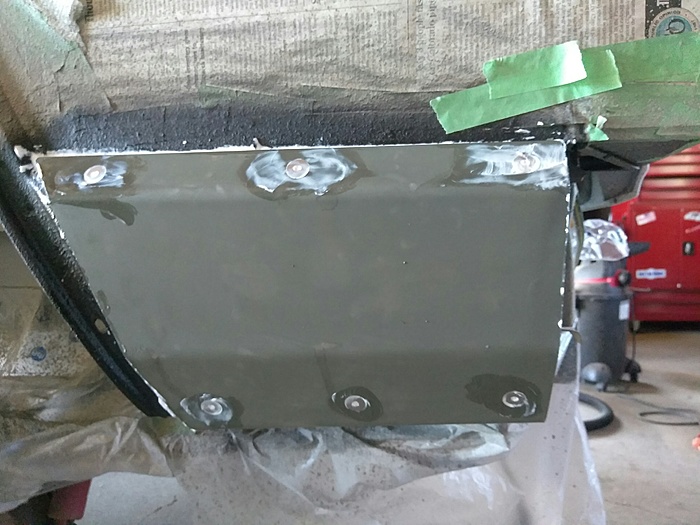
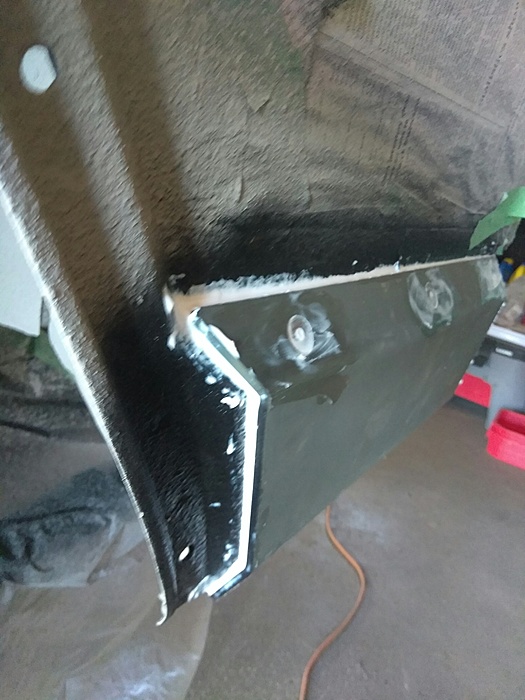
Then it was time to mix the Raptor liner and spray it! Here are the results.

I'm happy with the seal around the quarter panel armor.
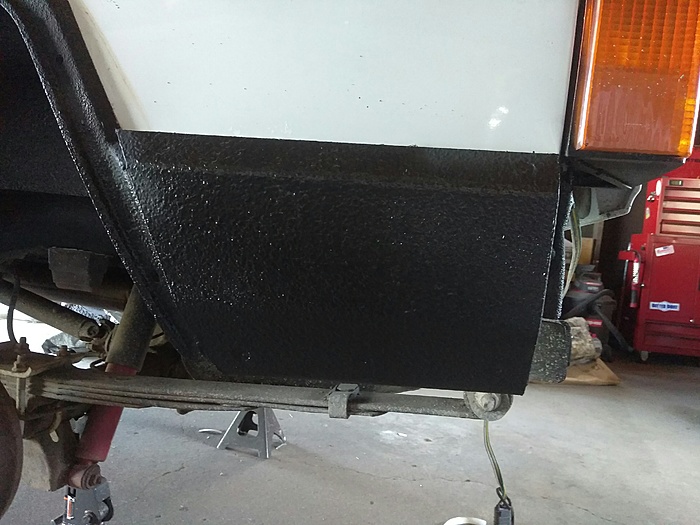
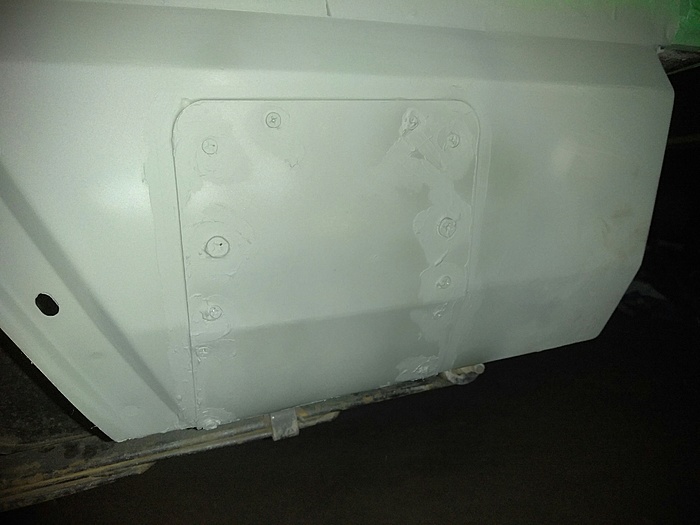
Here's the driver side where I did my "patch". The quarter panel armor and bed liner have concealed it nicely.
It looks stock unless you know what to look for! These should add some much needed support and protection.
EDIT: I finally got it fixed...

I got the armor mounted! The driver's side was a major PITA due to the fuel filler neck being in the way while trying to screw the nut on the back end of the bolts for the armor. The sheet metal screws (from my initial "patch") poking my hand didn't exactly help either...

This one was much easier!

I went around the edges with Loctite sealer caulk.


I shot a layer of U-Pol's adhesion promoter for good measure.

Then it was time to mix the Raptor liner and spray it! Here are the results.


I'm happy with the seal around the quarter panel armor.

Here's the driver side where I did my "patch". The quarter panel armor and bed liner have concealed it nicely.

It looks stock unless you know what to look for! These should add some much needed support and protection.
Last edited by 4BangerDanger; Jun 26, 2017 at 06:38 PM.
Thread Starter
Seasoned Member
Joined: Dec 2015
Posts: 467
Likes: 6
From: Sioux Falls, SD
Year: 2001
Model: Cherokee (XJ)
Engine: 4.0l
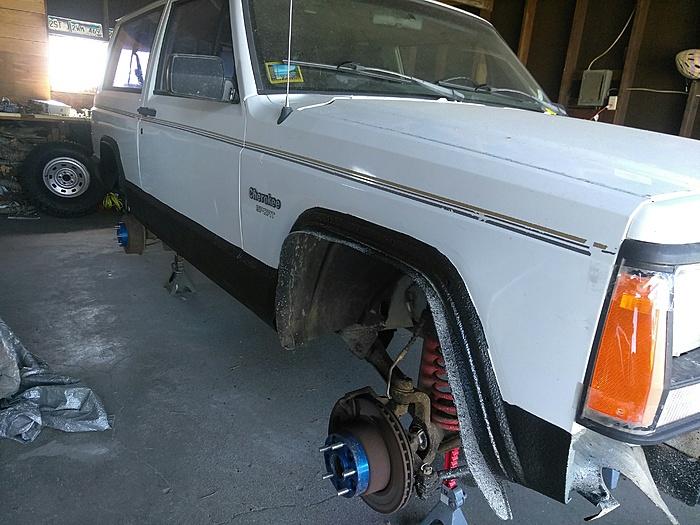
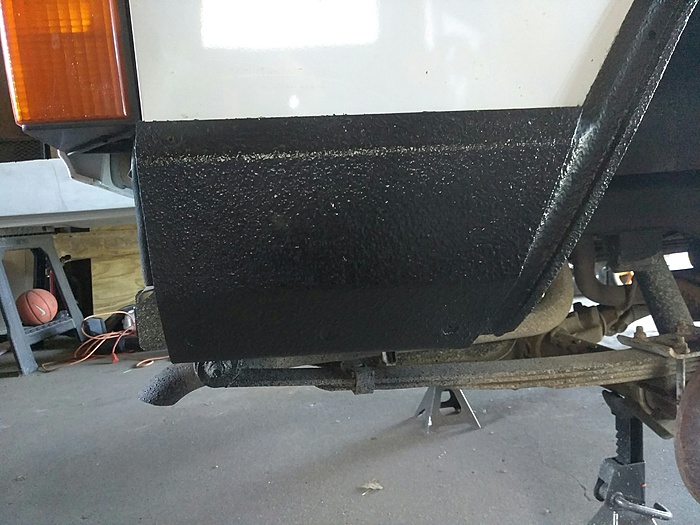
I put the Jeep back on it's own feet today, here's what the bed liner looks like in the sun:
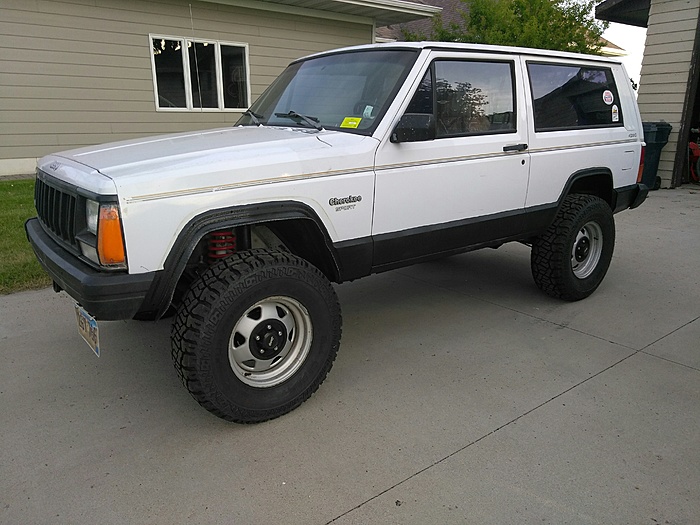
I intend to reinstall the factory fender flares, though I will say I actually really like how it looks without them. Hmm...
I thought I bought extra Raptor liner and I was going to spray the bumpers and flares to match, but that stuff lays down thick! I had barely enough to finish the lower panels and rockers. Oh well, maybe I'll do that at a later time.
It felt great to drive the Jeep after having it in the garage for a few weeks. Tomorrow morning it goes in to get the A/C fixed. I recharged it in May of last year, but in July my discharge hose burst while driving on the interstate. It had been rubbing on the bracket that holds the coolant overflow bottle. It seems I have a unique hose, as I have contacted both jeepair.com and Crown Automotive and neither have what I need. So I'm just going to have the hose rebuilt by a local shop and then afterwards have them vacuum & recharge the system. I'm going on a road trip/wheeling trip this weekend and I just want it fixed lol.
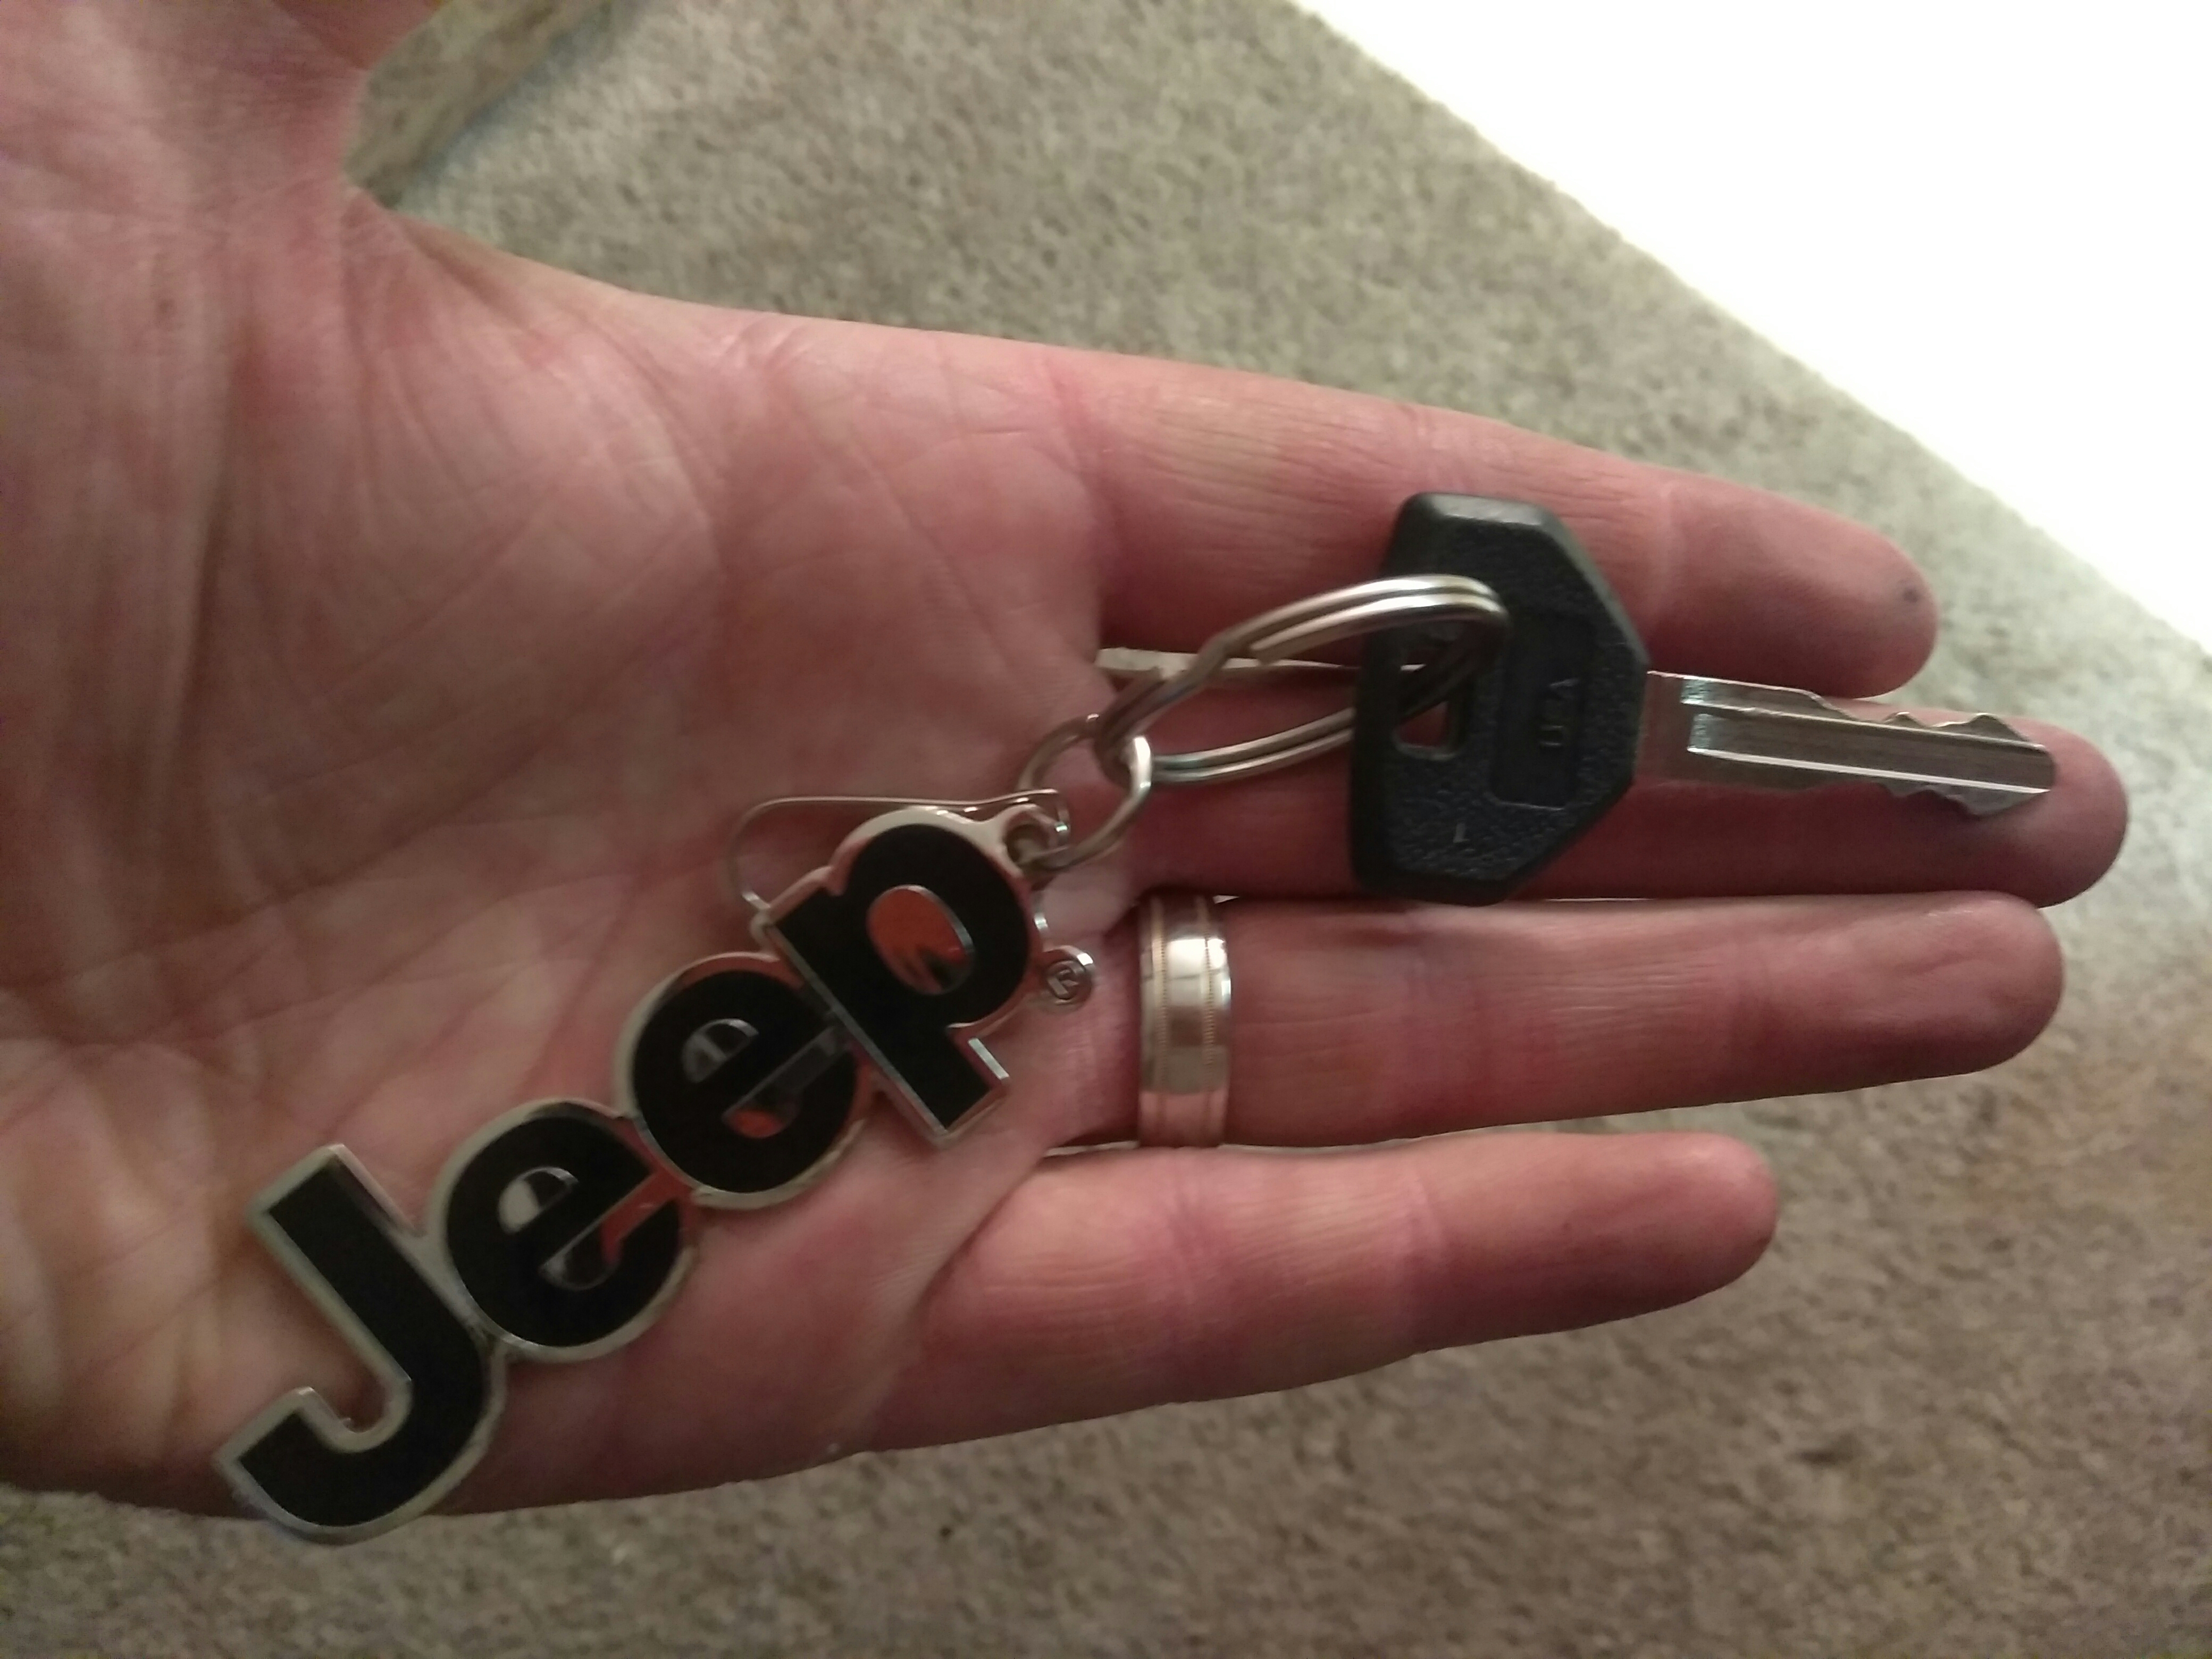
I lost my keychain a while back, so I picked up a new one:


It was time for a new air filter, so with Outlaw Star's recommendation I picked up this high-flow one from Spectre:
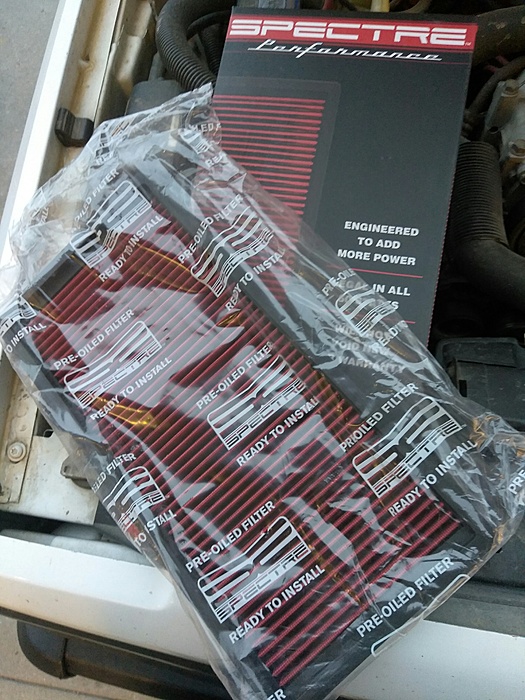
I was looking for the restrictor in the air box that a lot of people say they remove but I wasn't sure what to look for... I know this should be easy-peasy but does anyone have any tips? Lol...

I intend to reinstall the factory fender flares, though I will say I actually really like how it looks without them. Hmm...
I thought I bought extra Raptor liner and I was going to spray the bumpers and flares to match, but that stuff lays down thick! I had barely enough to finish the lower panels and rockers. Oh well, maybe I'll do that at a later time.
It felt great to drive the Jeep after having it in the garage for a few weeks.
Tomorrow morning it goes in to get the A/C fixed. I recharged it in May of last year, but in July my discharge hose burst while driving on the interstate. It had been rubbing on the bracket that holds the coolant overflow bottle. It seems I have a unique hose, as I have contacted both jeepair.com and Crown Automotive and neither have what I need. So I'm just going to have the hose rebuilt by a local shop and then afterwards have them vacuum & recharge the system. I'm going on a road trip/wheeling trip this weekend and I just want it fixed lol.I lost my keychain a while back, so I picked up a new one:
It was time for a new air filter, so with Outlaw Star's recommendation I picked up this high-flow one from Spectre:
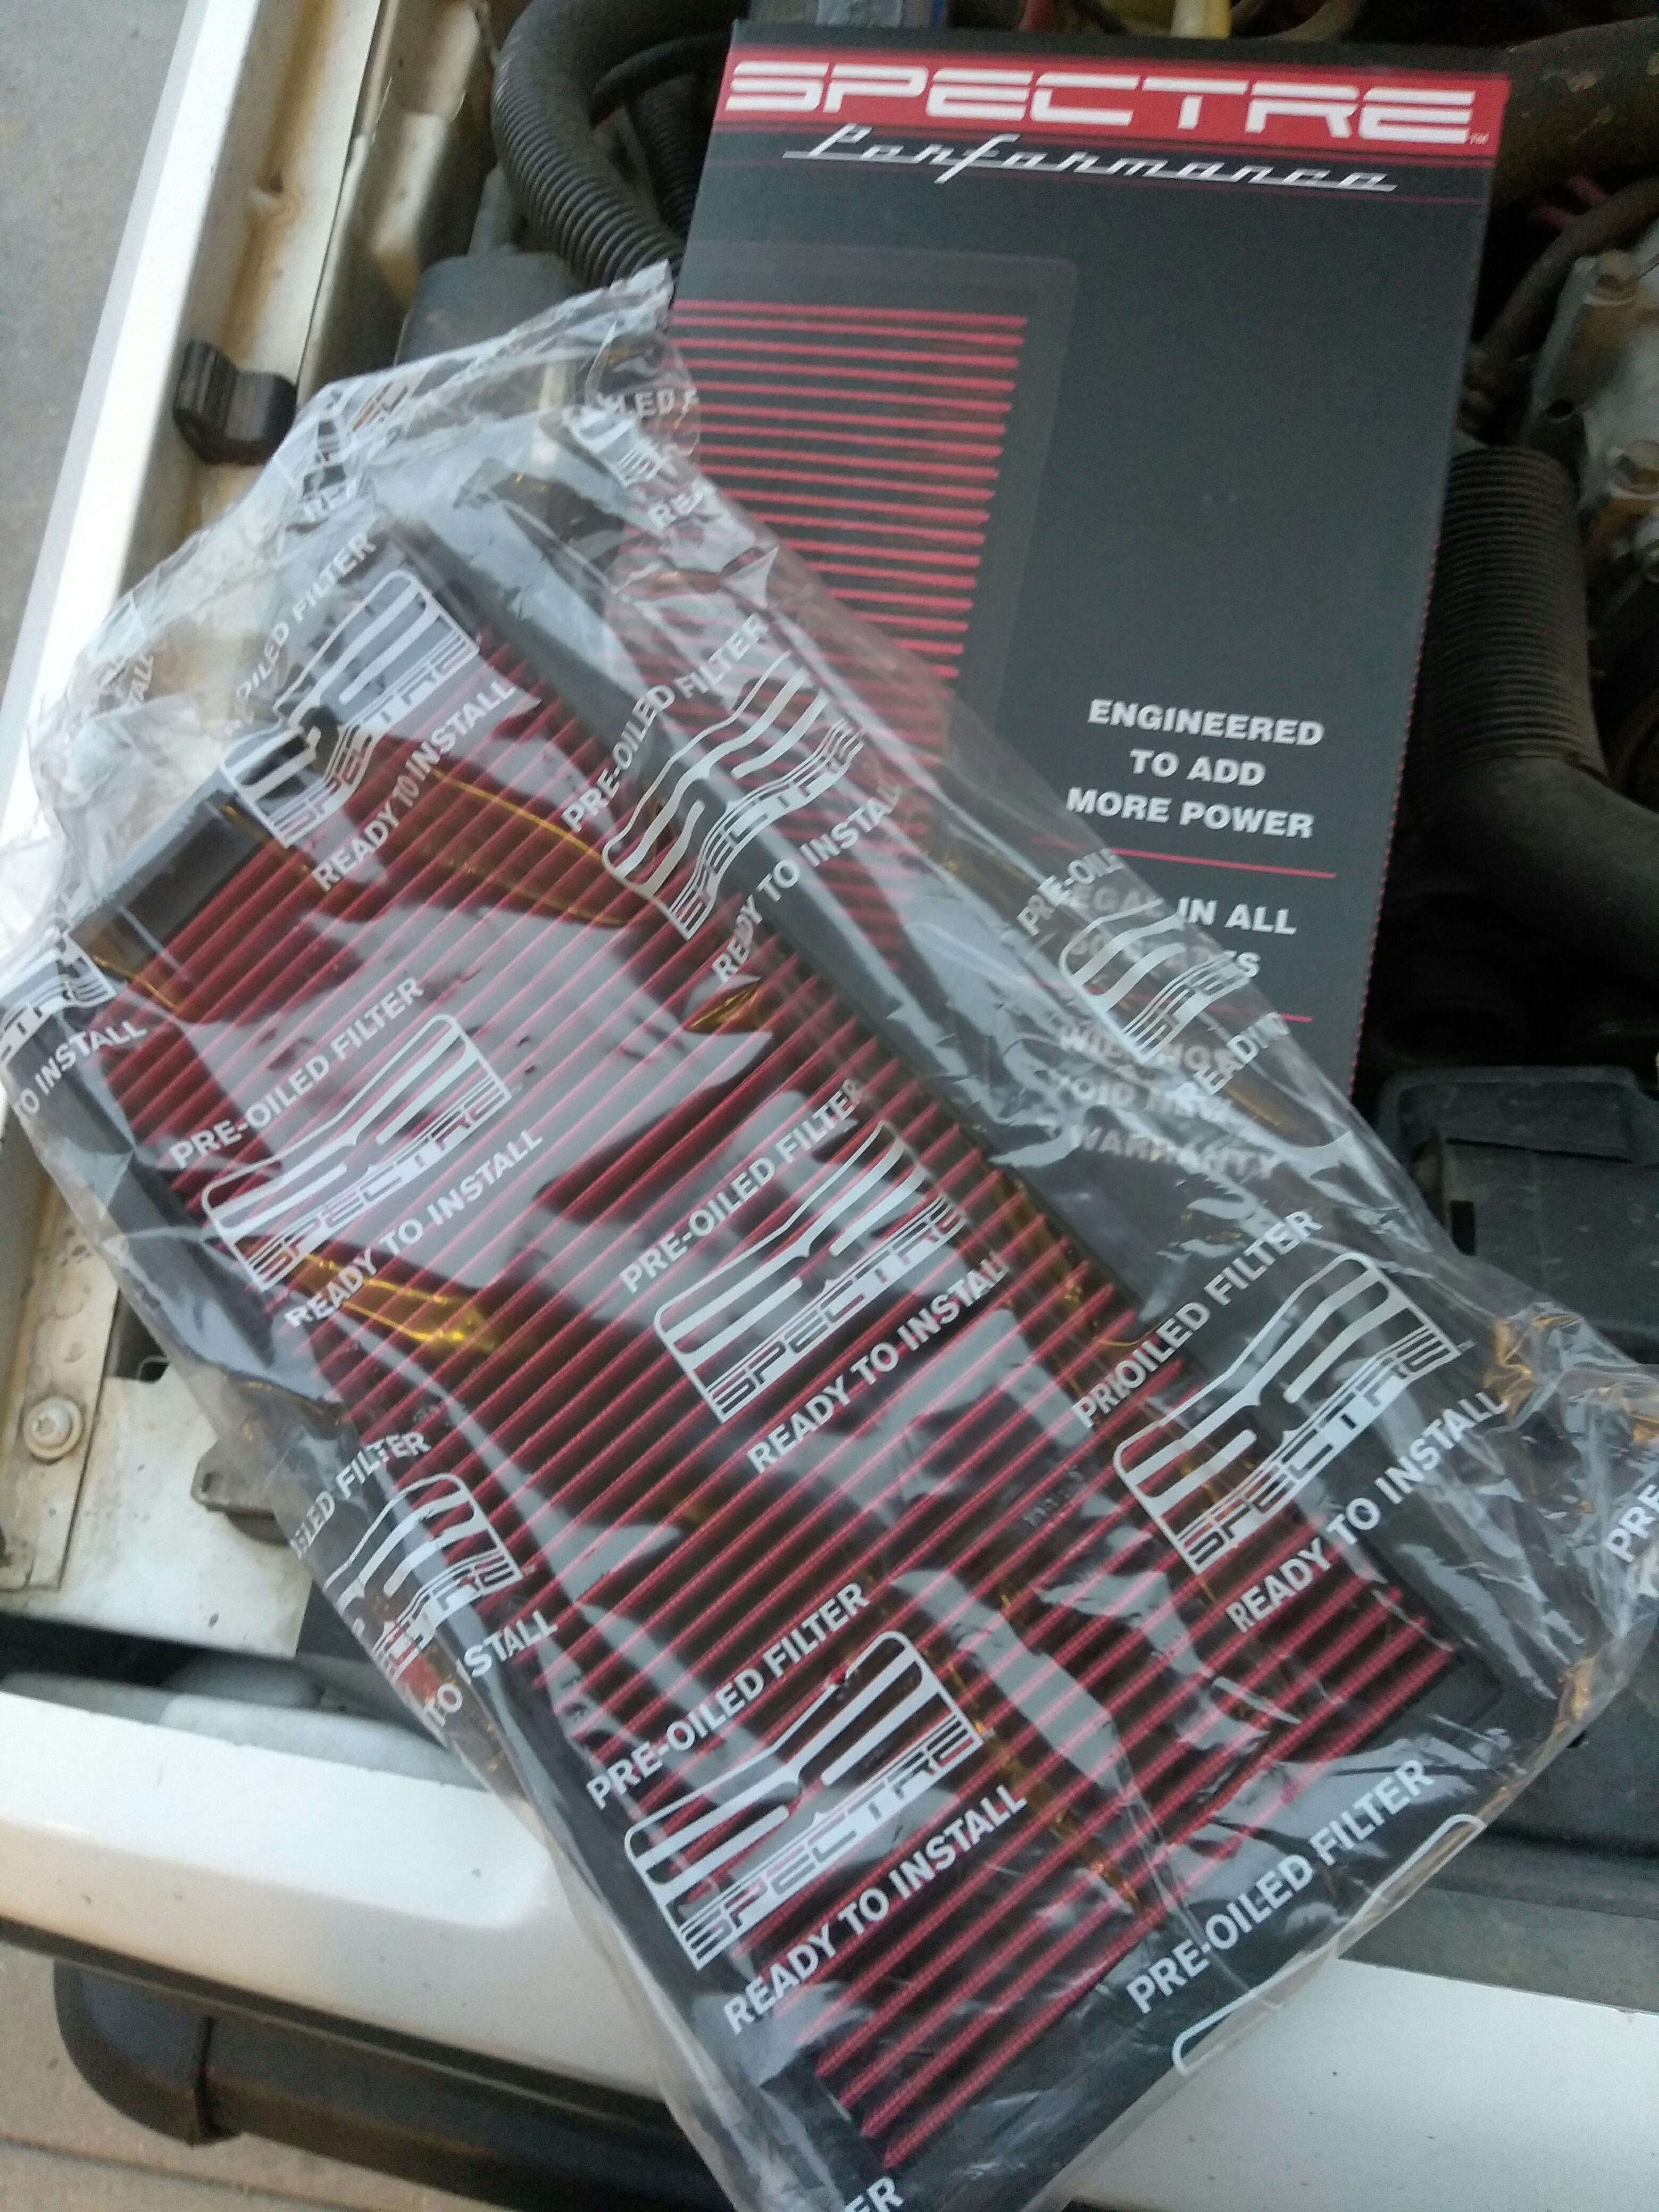
I was looking for the restrictor in the air box that a lot of people say they remove but I wasn't sure what to look for... I know this should be easy-peasy but does anyone have any tips? Lol...
Last edited by 4BangerDanger; Jun 27, 2017 at 10:07 PM.

Senior Member
Joined: Jun 2015
Posts: 549
Likes: 13
From: Chesapeake, VA
Year: 1999
Model: Cherokee (XJ)
Engine: 4.0L
Loving the progress man. Jeep looks really great! Have you thought bout removing that pinstriping? It looks nice and has a unique look, maybe it's just me but I feel that removing that would spruce it up and make it look cleaner. Can't wait to see more! I always turned away from the little 4cyl 5 speed XJs but honestly, if I had to, I wouldn't mind one. You're my favorite build at the moment because you're keeping it simple yet in a awesome way.
EDIT-
Would a tutorial on a YJ work as it's a 2.5L? I figure it's the same as the 4.0 as well. Not sure.
EDIT-
Would a tutorial on a YJ work as it's a 2.5L? I figure it's the same as the 4.0 as well. Not sure.
Last edited by CantDrive55; Jun 27, 2017 at 11:13 PM.