When you click on links to various merchants on this site and make a purchase, this can result in this site earning a commission. Affiliate programs and affiliations include, but are not limited to, the eBay Partner Network.
Finished up late tonight... It was the classic case of the job taking 10 times longer than expected (yeah... I'm slow lol). But that's okay, more time in the garage!
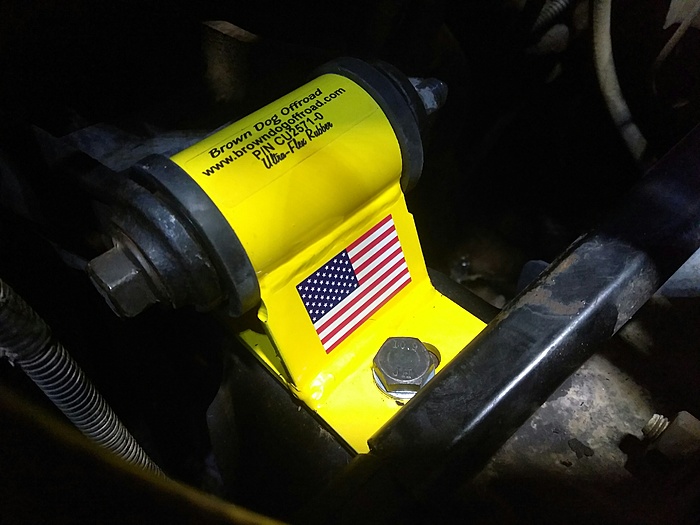
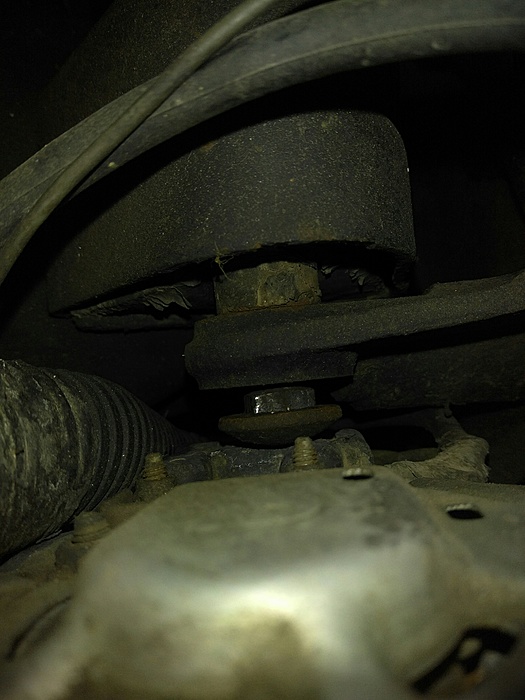
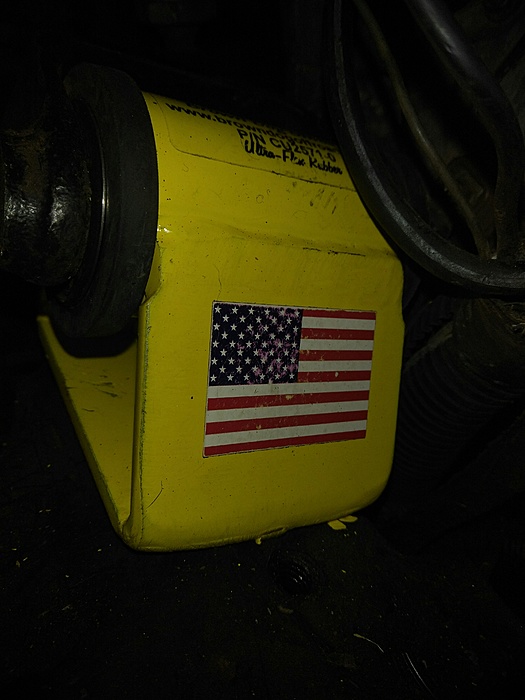
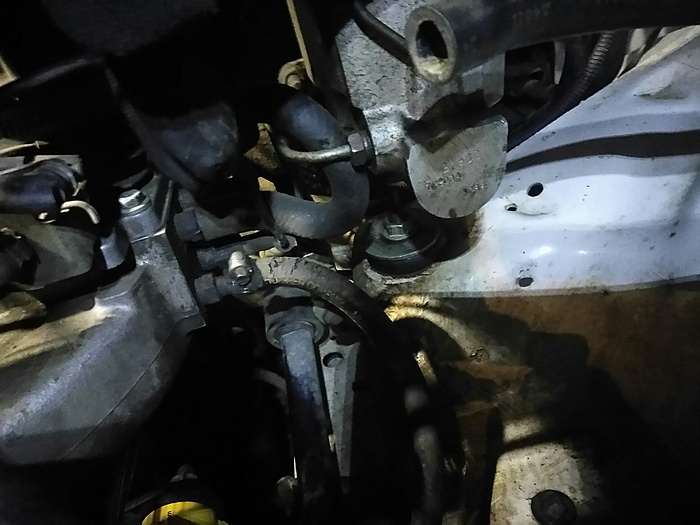
The driver's side motor mount went in pretty easy.
The passenger side was a bit more difficult. I was hoping to get away with not removing the alternator but this carriage bolt had other plans.
After I managed to get the old mount out the new one didn't want to line up correctly. So I got to wrestle with it until it eventually submitted.
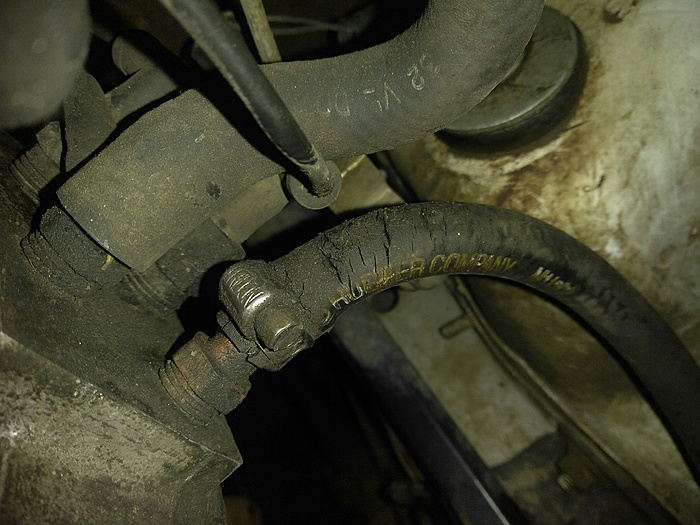
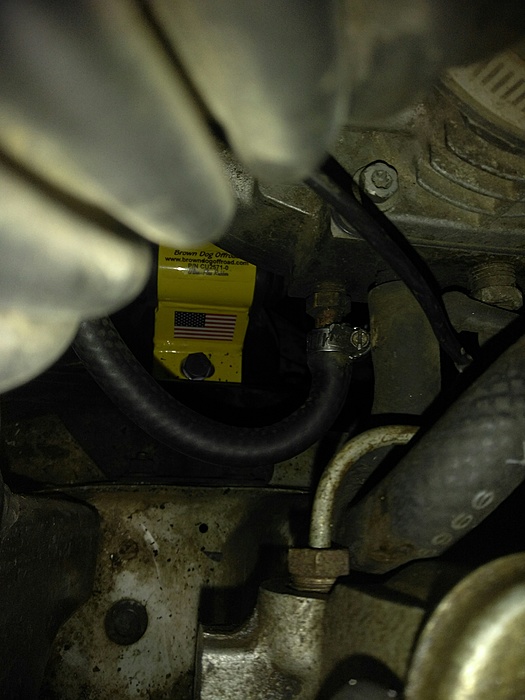
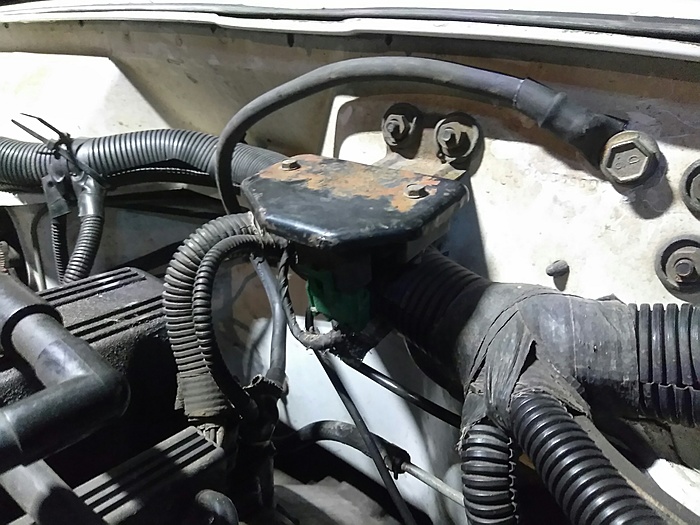
I noticed this vacuum hose had several cracks through it.
There was enough slack in the hose that I was able to cut off the leaking section and reattach it. It's not perfect but I hope it'll suffice until I can replace the hose.
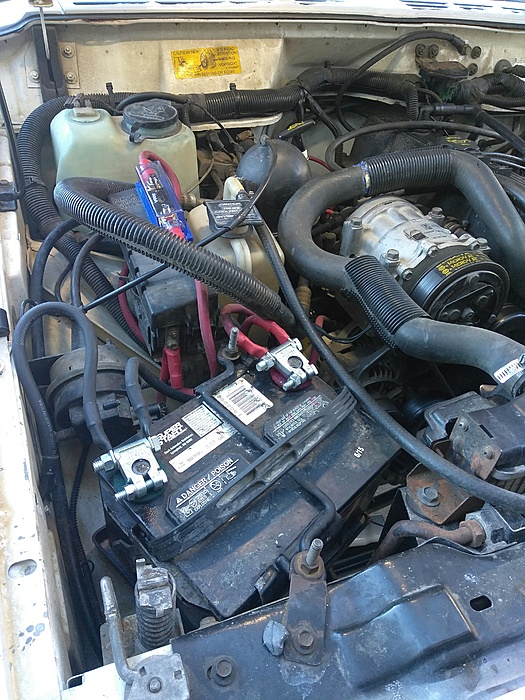
Oil change, new battery terminal, new serpentine belt...
Installing the new serpentine belt. I thought I remembered how to route it but I kept screwing it up. The diagram in my Haynes manual didn't match this engine for whatever reason and there's not many 2.5L diagrams online, but I eventually figured it out.
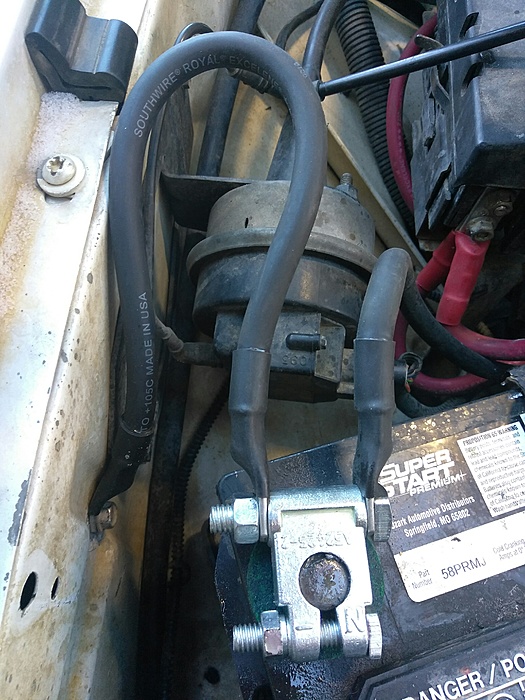
I noticed that the positive battery terminal broke. I've had a problem with battery terminals on this Jeep for whatever reason. The wires either won't stay clamped or the terminal breaks. This is the second terminal I've replaced on this Jeep.
New terminal installed. I just placed an order on XJWonders' upgraded battery cables so hopefully this will work until they get here. Then this terminal will be a toolbox spare.
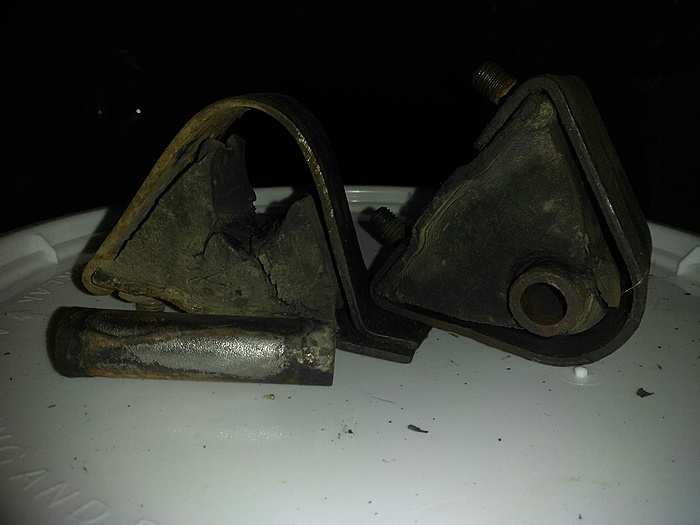
I got around to replacing the transmission mount too. I was careful to order the correct one from Rockauto, so I found it interesting that there is a slight height difference between the old and new.
New transmission mount in place.
I figured it was time to install my Christmas present to myself...
OEM transfer case skid plate!
It was dirty and a little beat up when I got it.
So I cleaned it up and used my angle grinder with a flap disc on it. Then I primed it.
The other side primed.
And I decided to paint it red! I thought I took a pic when I painted it but I couldn't find it.
Installed! I was able to use the stock mounting locations so that was nice.
I drove the Jeep for the first time today since installing the new mounts. Before, if I watched the engine while it started it would "bounce" or "rock" for a second before smoothing out. Shows how destroyed the old mounts were. Now it's nice and tight, as it should be. I had heard that there would be some vibrations at first after installing the Brown Dogs, and there definitely are. To be honest it was a bit more than I was expecting, but I'm willing to stick with them and see how they break in.
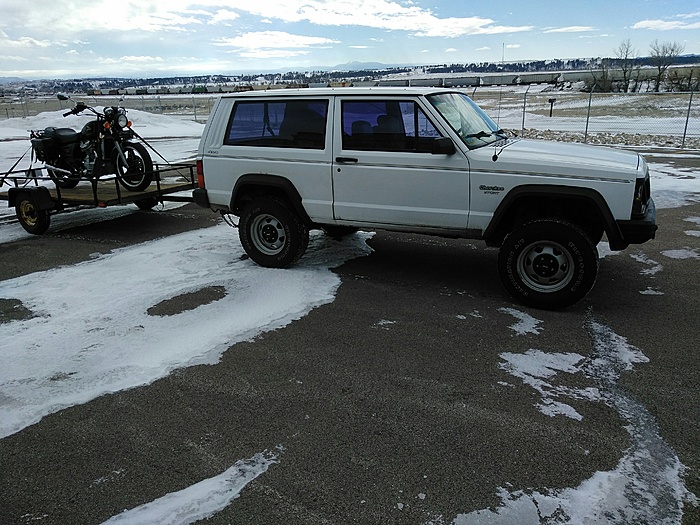
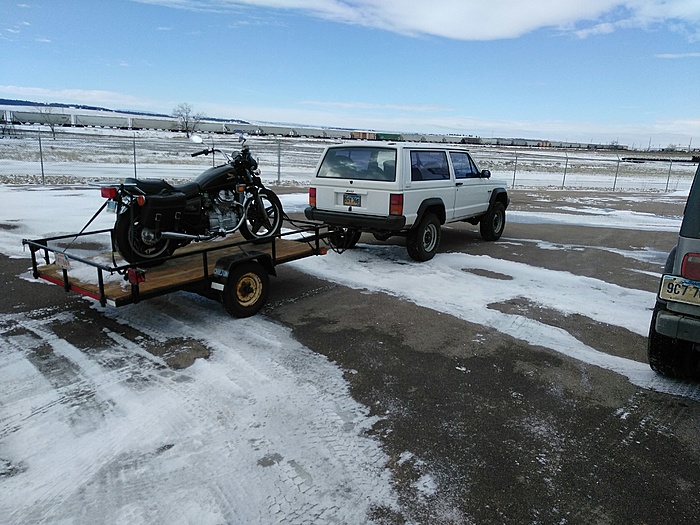
Immediately after my last post I towed a trailer 400 miles across South Dakota. That's one hell of a way to break in new mounts!
My wife's CX500 needs some work before motorcycle season and a friend of mine has a passion for bikes. I'm still learning my way around this Jeep and I'm not quite comfortable wrenching on a motorcycle yet. It's one thing for me to risk making a mistake on my toy, it's another thing to risk screwing up my wife's toy! So I brought the bike to my friend. The 4 banger did a solid job towing for that long of a ride.
I already have about 1,000 miles on the new motor mounts. The vibes have already decreased significantly.
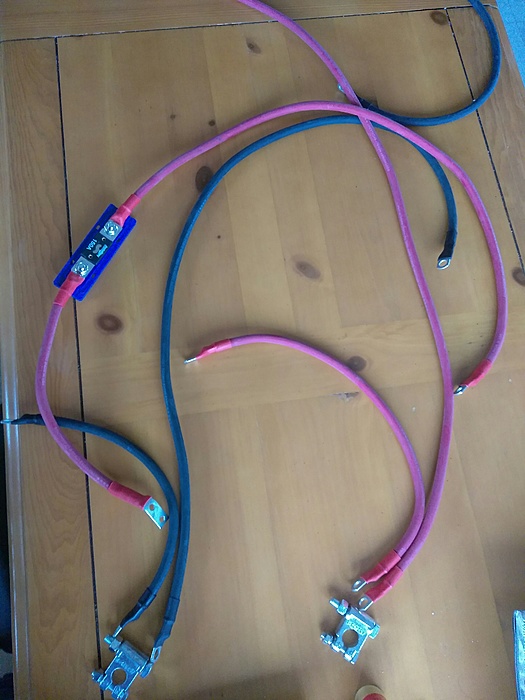
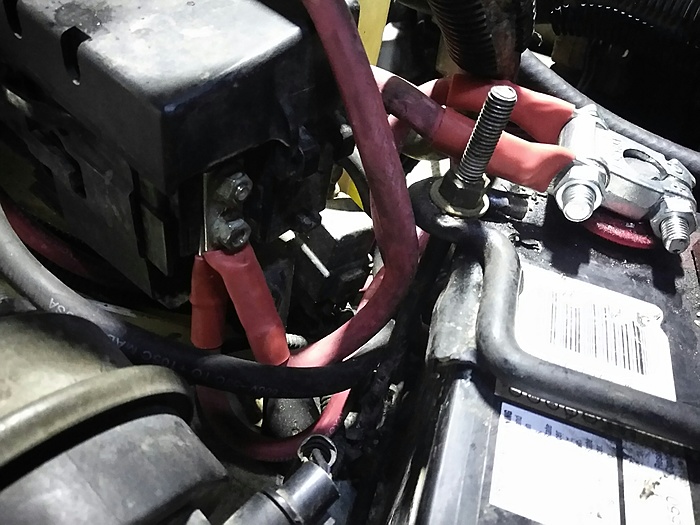
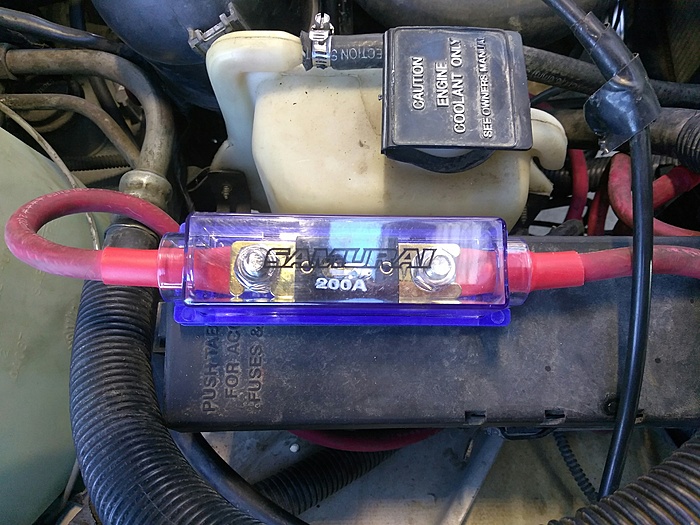
The battery cables I ordered from XJWonders arrived a couple weeks ago. Thanks Neal!
Pardon the mess, I laid them out on my kitchen table roughly how they go. I'm terrible with any sort of electrical work so I was a bit concerned about this job, but the Jeep needed it. Going through Neal's thread on the battery cables and reading what others have done really helped.
I had a couple problems with the installation, but that was no fault of the cables themselves. It was merely my inexperience. With Neal's help I finally got it. These cables rock!
Nice job. You should have seen a difference on the voltmeter too after installing Xjwonder's cables.
Thanks! I'm sure I would see a difference... If I had a voltmeter! The Jeep does seem to start up faster.
Swapping out the idiot lights for full gauges is on my to-do list. Since I will have to change the sensors for the full gauges, do you know if the 2.5 uses the same sensors as the 4.0?
Thanks! I'm sure I would see a difference... If I had a voltmeter! The Jeep does seem to start up faster.
Swapping out the idiot lights for full gauges is on my to-do list. Since I will have to change the sensors for the full gauges, do you know if the 2.5 uses the same sensors as the 4.0?
Yes, it does. The only two you will have to change is the oil pressure and temperature (on right rear of head). Everything else will work. Now, you will also need to calibrate the tach, which I can walk you through how to once you're ready. All that requires is a phillips head screwdriver.
Now before I did the cable upgrade, I was only registering 13V on the gauge. After the upgrade, I was registering 14.5V-16V.
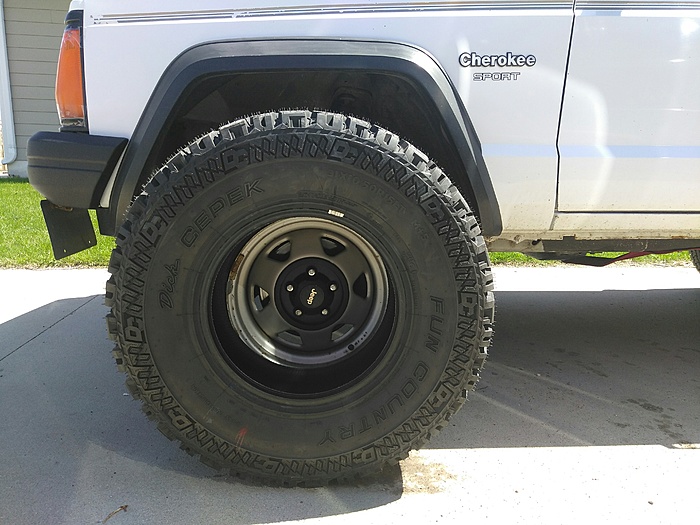
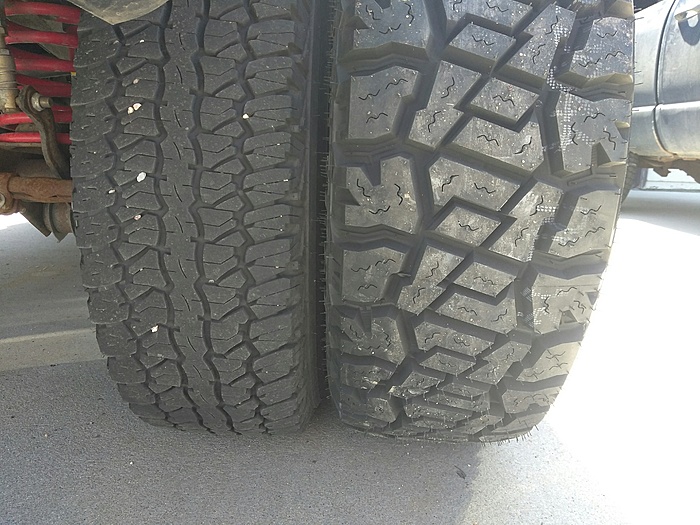
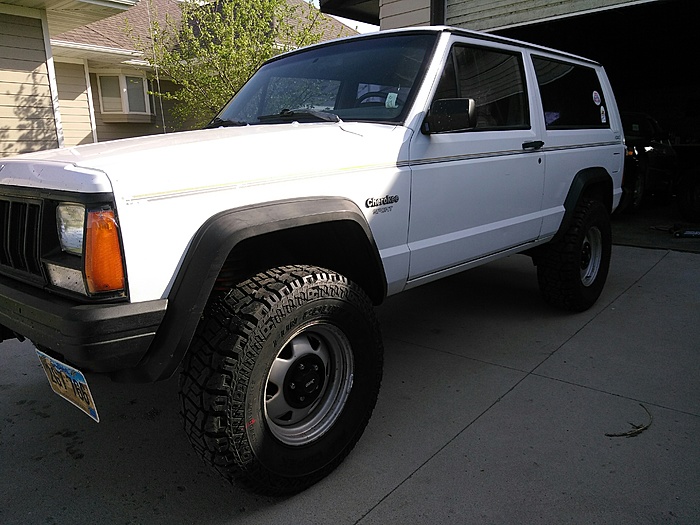
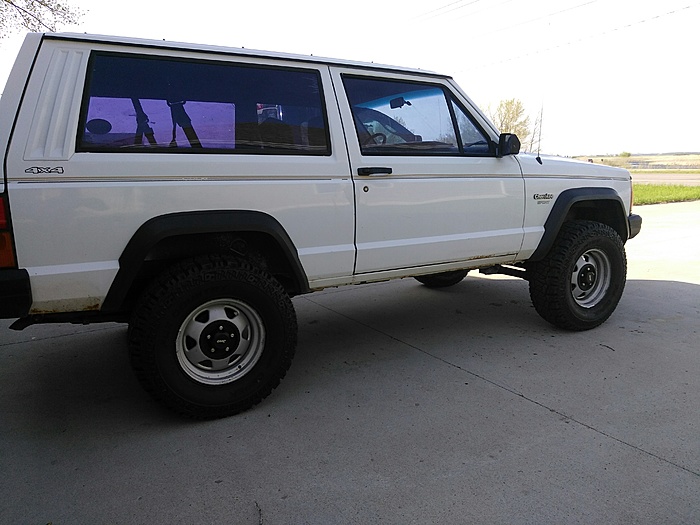
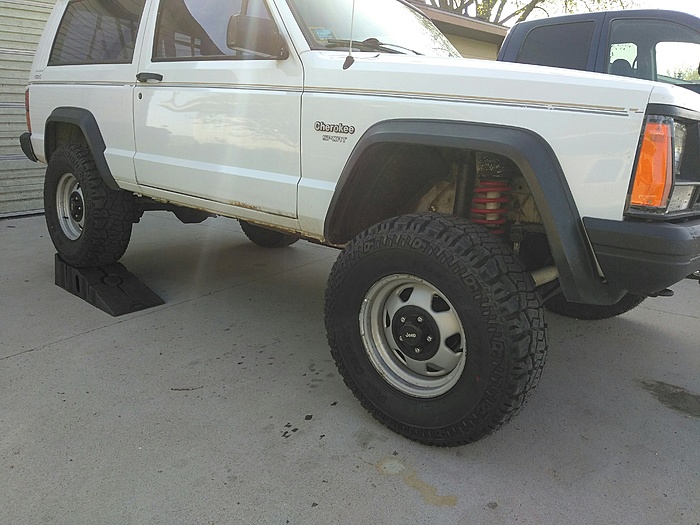
Good looking build! You should like those tires, I had them on my last XJ and enjoyed them very much. I will probably go back to them after my Grabber AT 2's wear out.
Yes, it does. The only two you will have to change is the oil pressure and temperature (on right rear of head). Everything else will work. Now, you will also need to calibrate the tach, which I can walk you through how to once you're ready. All that requires is a phillips head screwdriver.
Now before I did the cable upgrade, I was only registering 13V on the gauge. After the upgrade, I was registering 14.5V-16V.
Thanks for the info! I will definitely contact you when I have the gauges.
Originally Posted by quicksdraw92
Good looking build! You should like those tires, I had them on my last XJ and enjoyed them very much. I will probably go back to them after my Grabber AT 2's wear out.
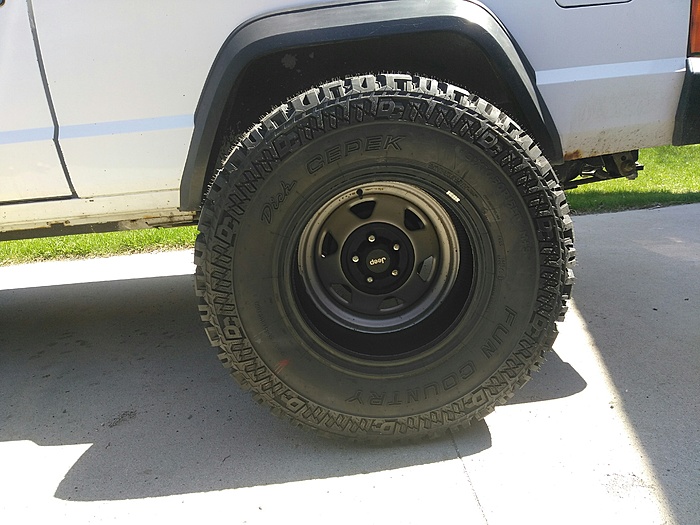
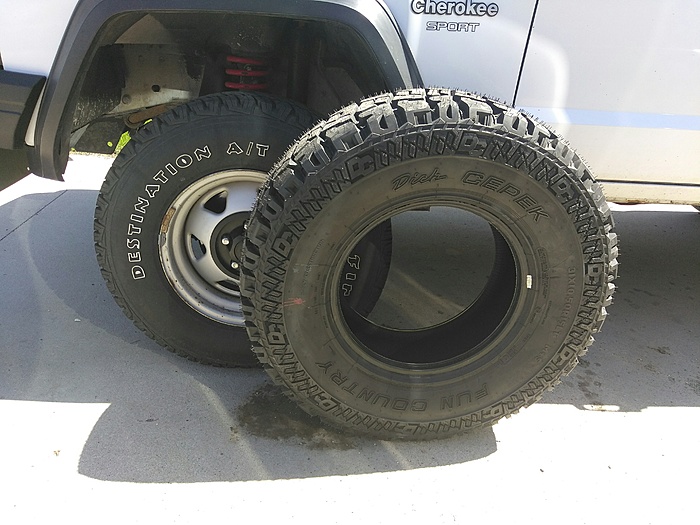
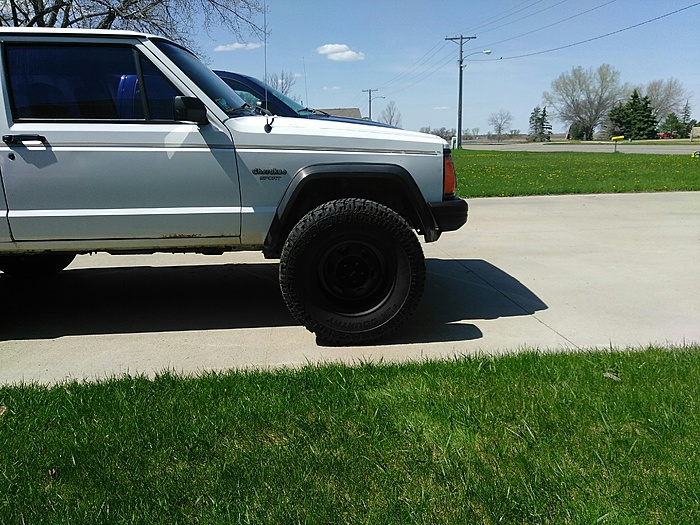
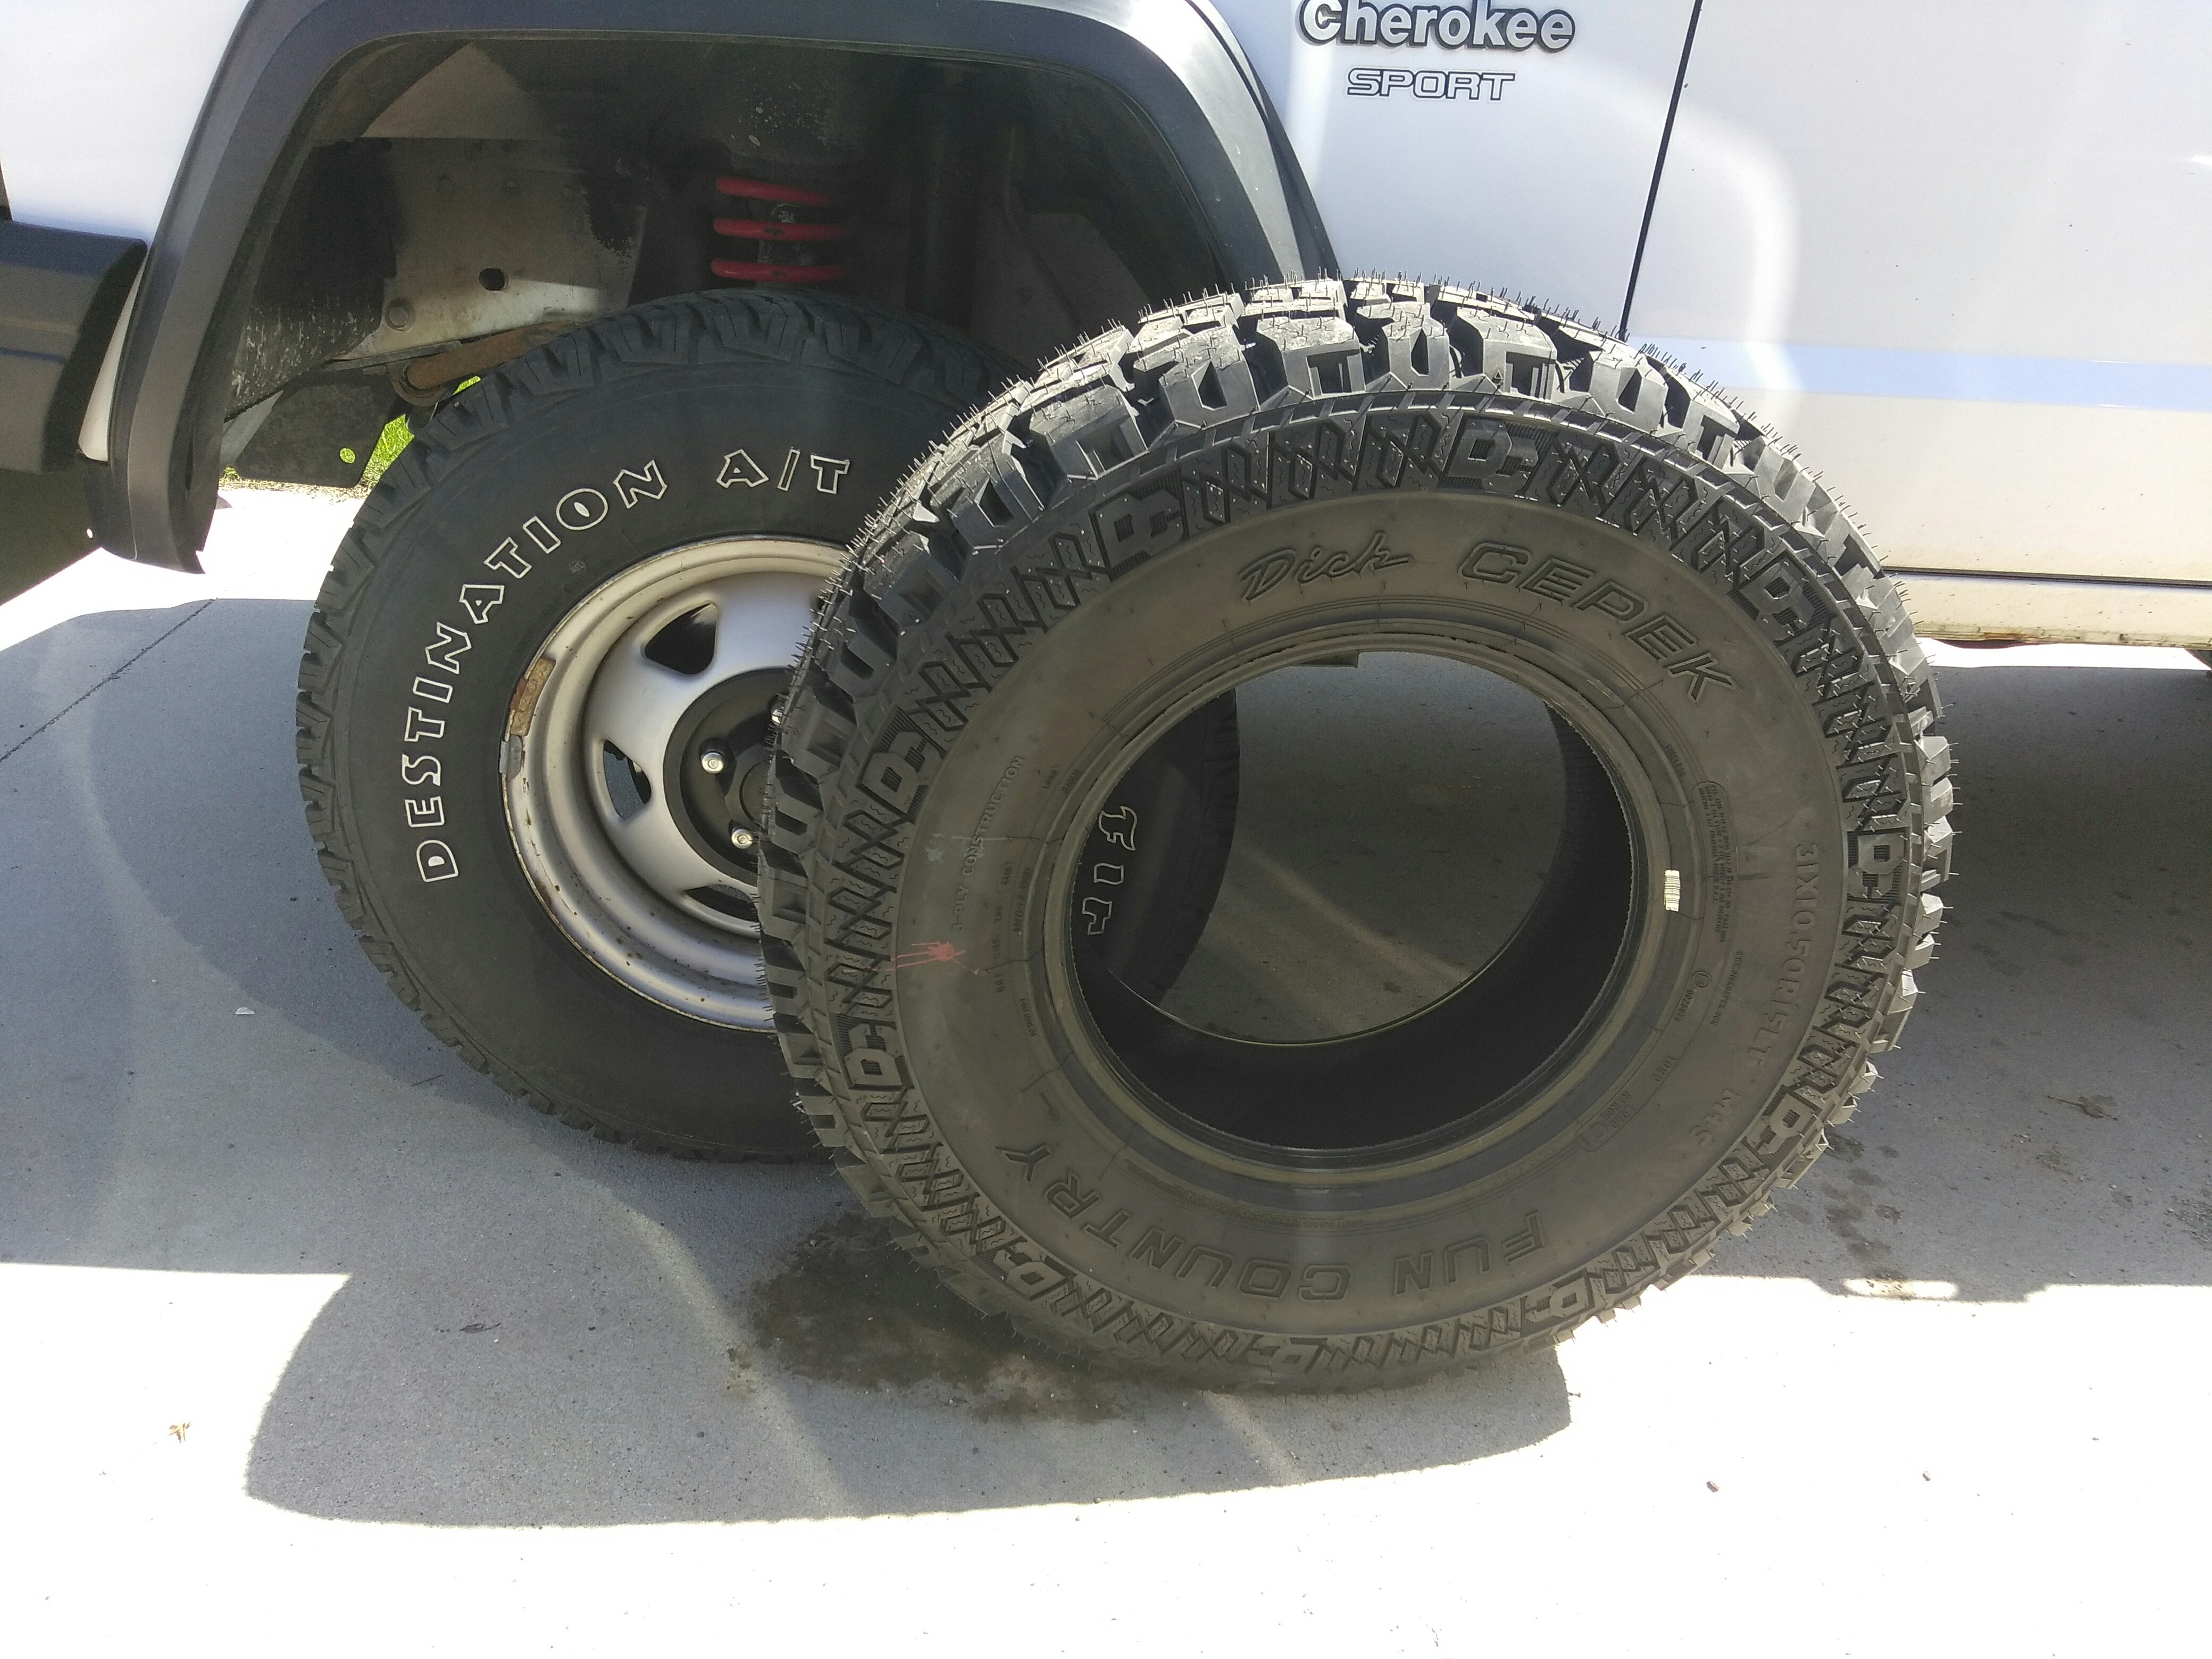
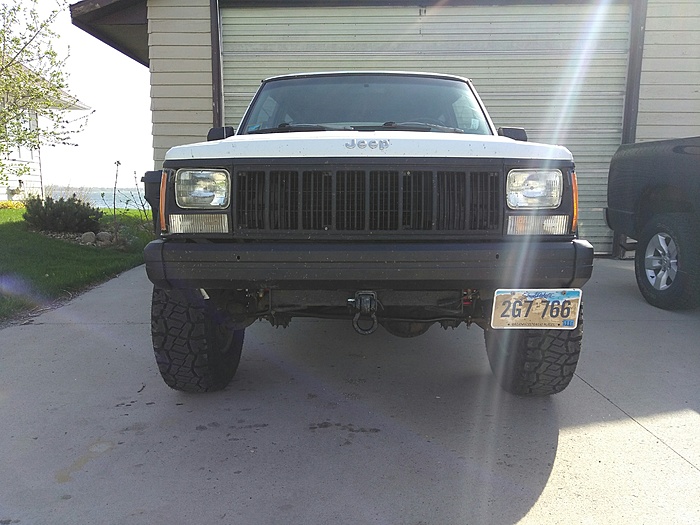
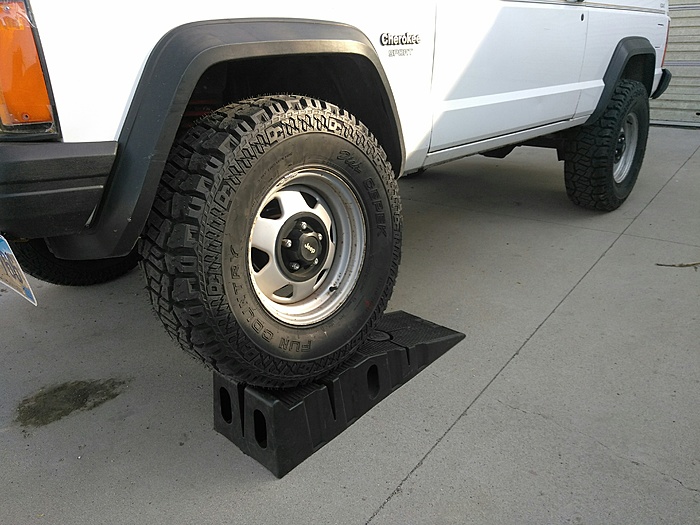
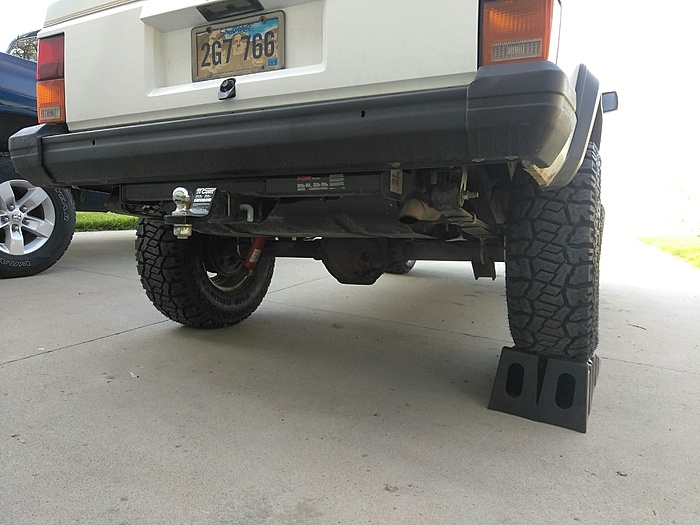
I've been watching the tracking numbers online for the tires. ONE tire arrived today and the rest come next week. That seems odd to me but I guess they were shipped from different places. Oh well. Here's some sneak peek pics!
Last edited by 4BangerDanger; May 5, 2017 at 11:49 AM.
You can get a set of steel wheels for about the same price as those spacers with proper backspacing. Better setup, and you don't have to worry about those spacers coming loose.
You can get a set of steel wheels for about the same price as those spacers with proper backspacing. Better setup, and you don't have to worry about those spacers coming loose.
You know, I went back and forth on that. I really like my stock rims and I couldn't find any cheap steelies in my budget that I cared for. I decided for my purposes that some Spydertrax spacers (properly torqued, of course) will work.