
Overland Build: Yellow Jeep XJ


Thread Starter
Junior Member
Joined: Nov 2015
Posts: 70
Likes: 0
From: New Hampshire
Year: 2001
Model: Cherokee
Engine: 242 CID 4.0 Inline 6 Chrysler MPI "High Output"
Overland Build: Yellow Jeep XJ
Now
Now
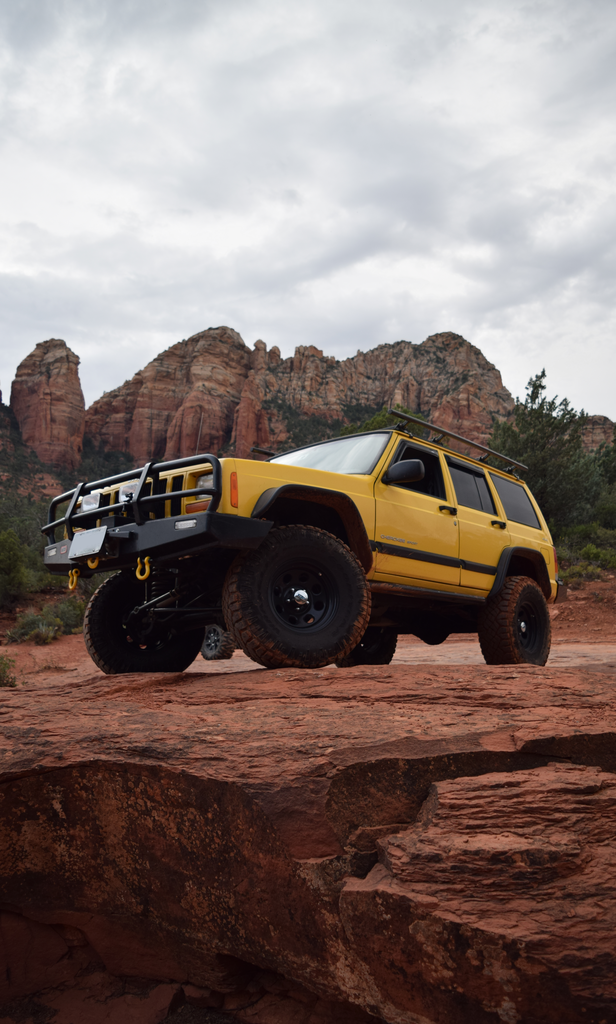
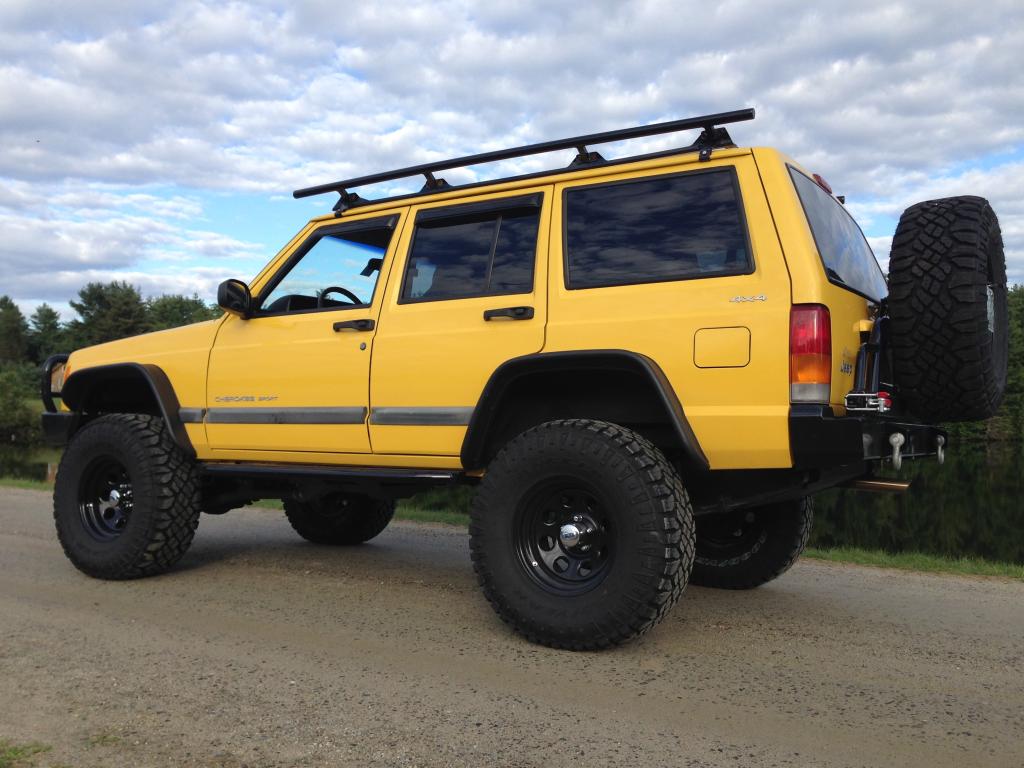
This is my XJ Expedition Project.
Then
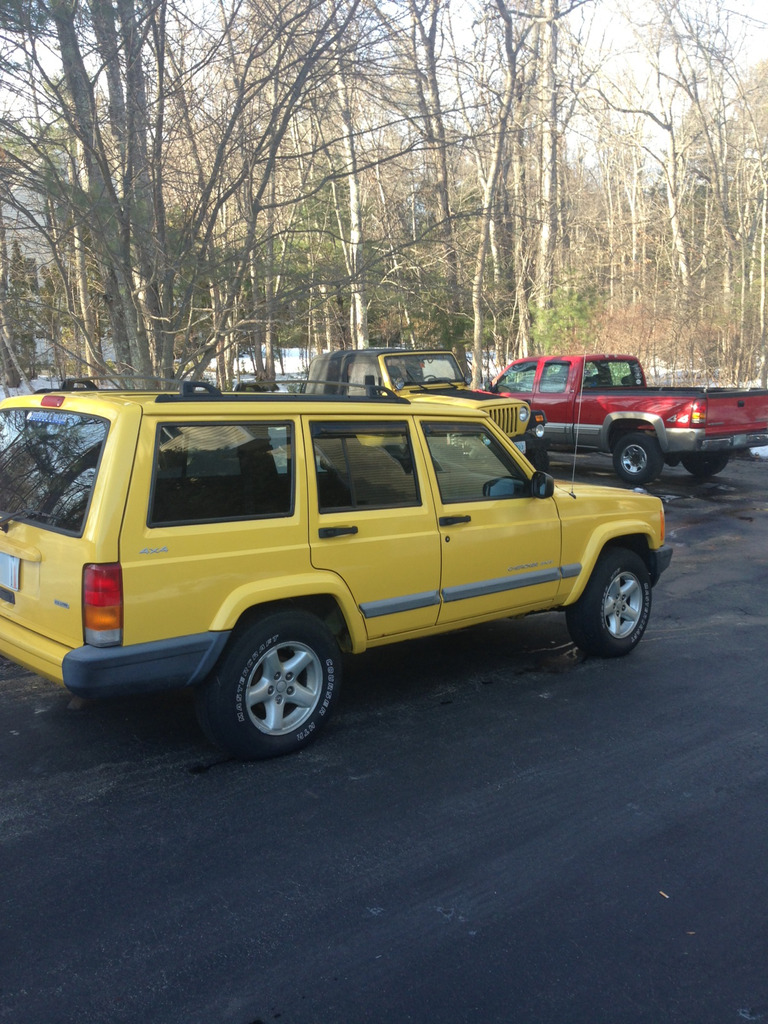
That was my stock 2001 Jeep XJ...
To Follow where I go with this Jeep:
https://www.facebook.com/Nomad-Exped...2214623365008/
Warning: This is not an in-depth tutorial. I am not a mechanic. This is my first build, with no prior experience. Any upgrades or modifications are researched online, and then completed in my driveway through trial and error. Google, Youtube and Forums are my friends. I often forget to take pictures while working on my Jeep. This is my daily driver, so it has to be put back together at the end of each day.
Knowing that, if you are still interested...
Backstory:
This is my first real Jeep Project.
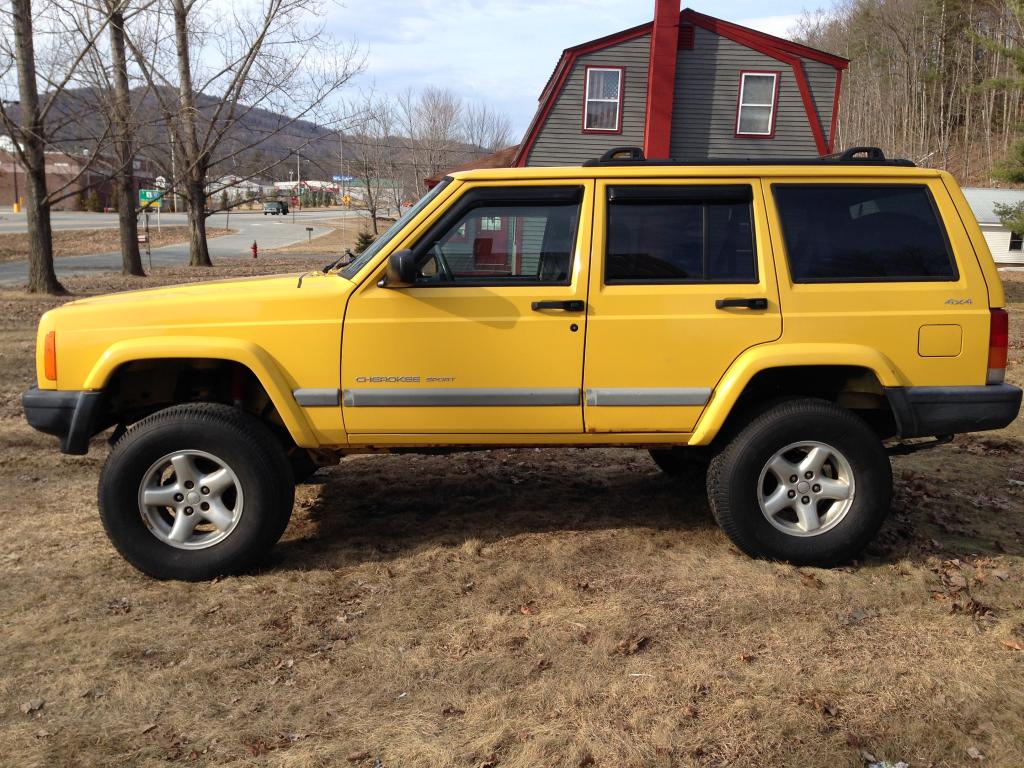
When I got the jeep the previous owner had installed a 3inch Suspension lift with 2inch spacers on the front and 2 inch Lift Shackles on the rear, sitting on 31inch tires.
He provided me with a picture of the vehicle stock, before the lift.
Everything else was stock, including the broken Sway Bar links.
It had a death wobble from hell, which I found out the hard way on the highway coming home after buying it.
Once we hit 40 mph and a bump, it shook extremely violently until it came to a complete stop.
The experience was like an 8.7 on the Richter Scale, inside a giant paint shaker, while trying to steer.
Any of you that have experienced an actual legit full fledged Death Wobble in all it's glory know what I'm talking about.
And I still had a 2 hour drive home from the sellers house...
So it was at this point that I decided to strip it down and start from scratch in regards to the steering and suspension components.
How it sat when purchased

Phase: 1
We worked on it slowly, a little bit each day.
I don't have a shop, so we worked in my driveway, weather permitting.
We diagnosed many of the causes to the "Death Wobble" symptoms through trial and error.
One of the by-products of lifting a Jeep Cherokee 5 inch with no modifications or upgrades to the stock steering or suspension.
We would be removing the present lift in favor of a long arm lift kit.
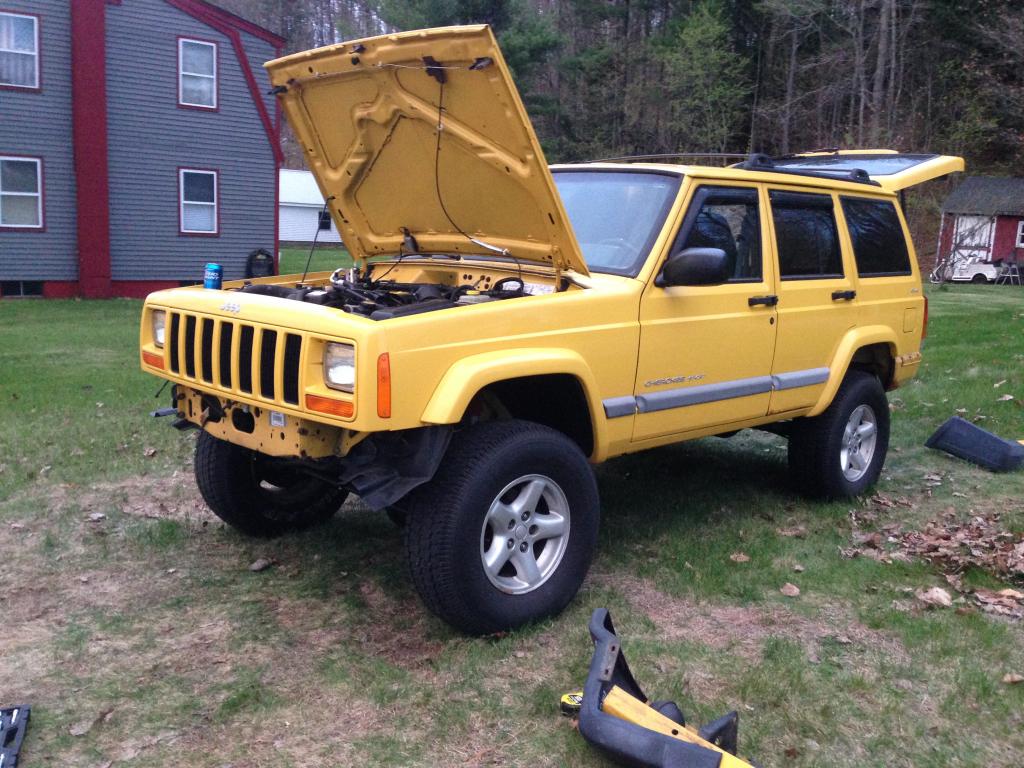
I also started prepping for some of the exterior mods we would be putting on as well.
Front/Rear Bumper Removal
Parts List
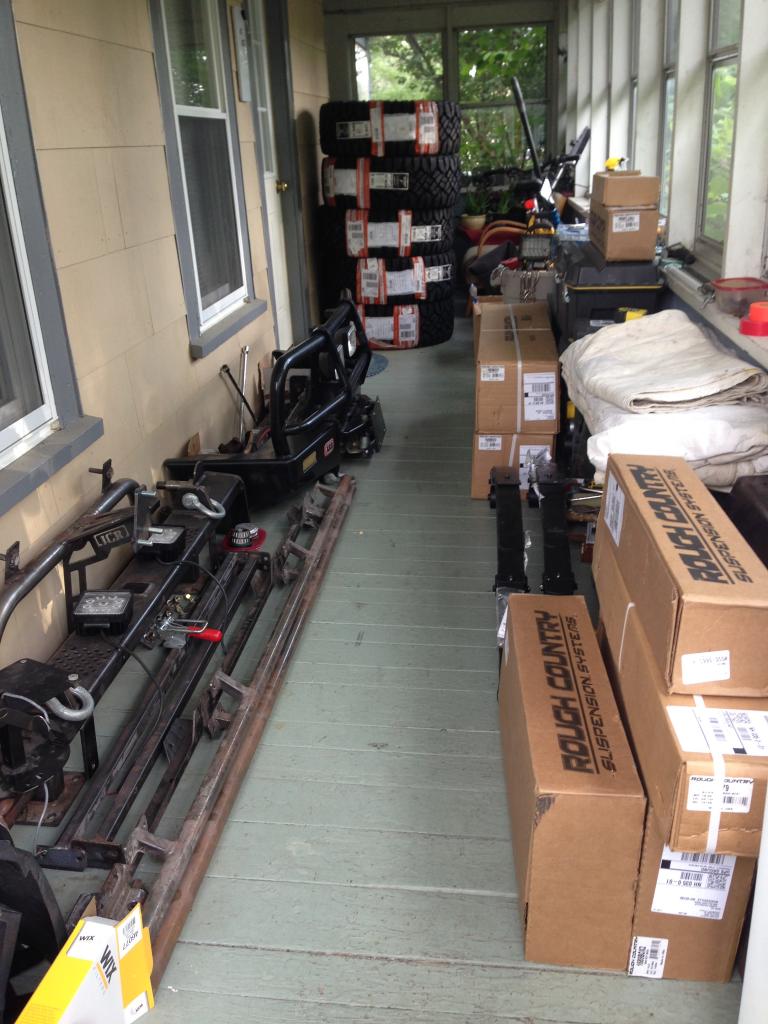
I started ordering parts, and one by one they began collecting on my front porch.
Once my porch was full, parts began collecting inside.
We were living in a Jeep Parts Shop, and kind of interesting.
Here is my part's list bellow
Suspension:
- RC 4.5 inch Long Arm Lift Kit:
- Lifted high flex coil springs
- Long arm Crossmember
- Adjustable upper control arms
- Adjustable lower control arms
- Transfer case skid plate
- Sway-bar quick disconnects
- Adjustable track bar
- Pitman arm
- Stainless steel braided brake lines
- Full Leaf Spring Packs
- Performance 2.2 Series Shocks)
- Rear Leaf Spring Shackles
Steering:
- New bearings,
- Moog upper and lower ball joints.
- Currie Currectlync Heavy Duty Tie Rod and Drag Link.
- Steering Box Brace.
- Upgraded Heavy Duty 2.2 Steering Stabilizer.
Brakes:
- New Rotors, Calipers and pads in front.
- Drums and shoes in rear
Tune Up:
- Air Filter
- Champion Copper Plugs, and wires.
- Oil change Mobile 1
- Change transmission fluid
- Coolant flush and fill
- New Thermostat
Drive Train:
- Slip Yolk Eliminator
- Custom Tom Woods Rear Driveshaft
Exterior:
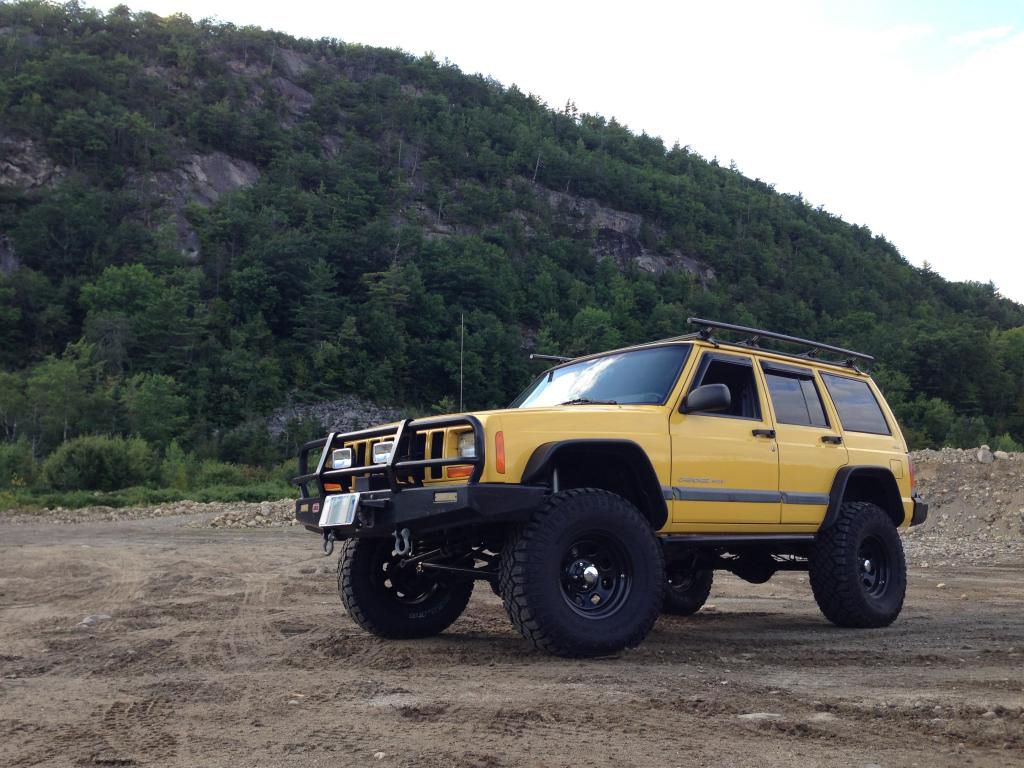
- ARB Deluxe Bull Bar Front Bumper
- Warn 8000 Winch
- 2 IPF Spot Lights
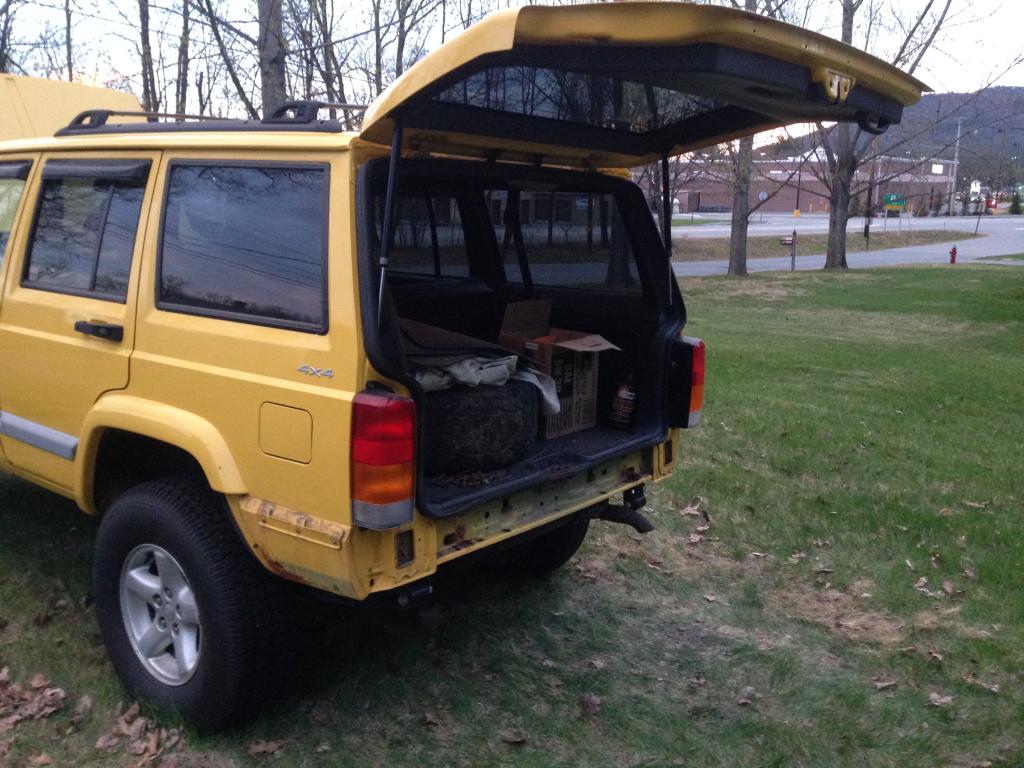
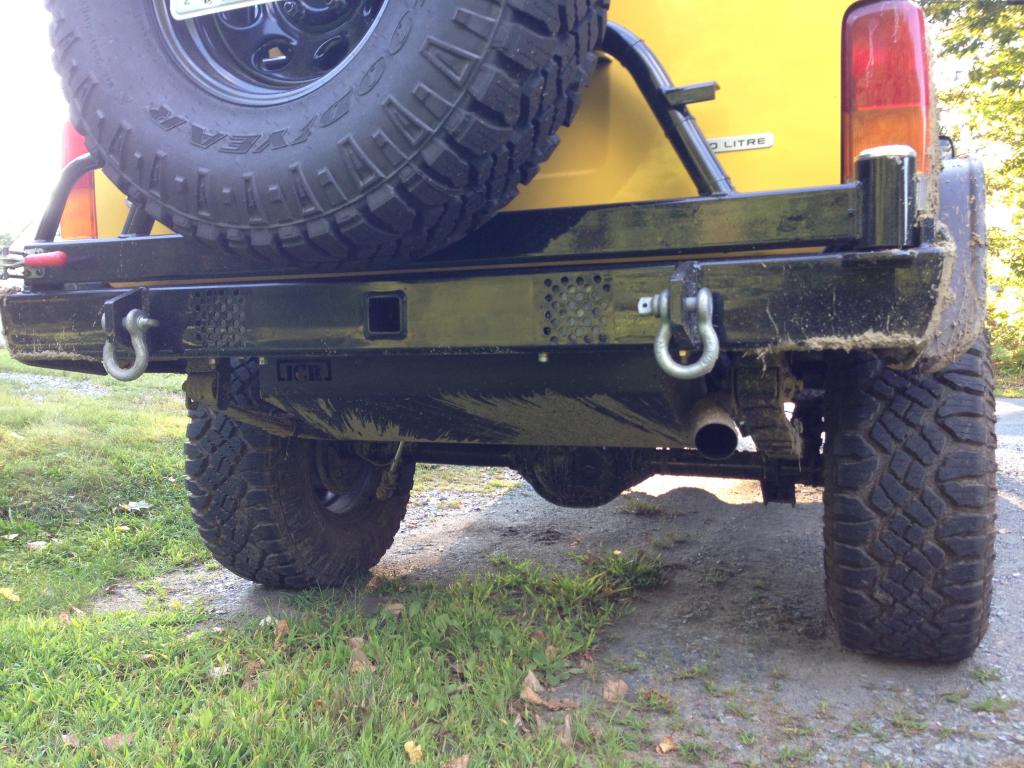
- JCR HD Rear Bumper/Tire Carrier
- AJ's Super Rails Rock Slider
- Roof Slider
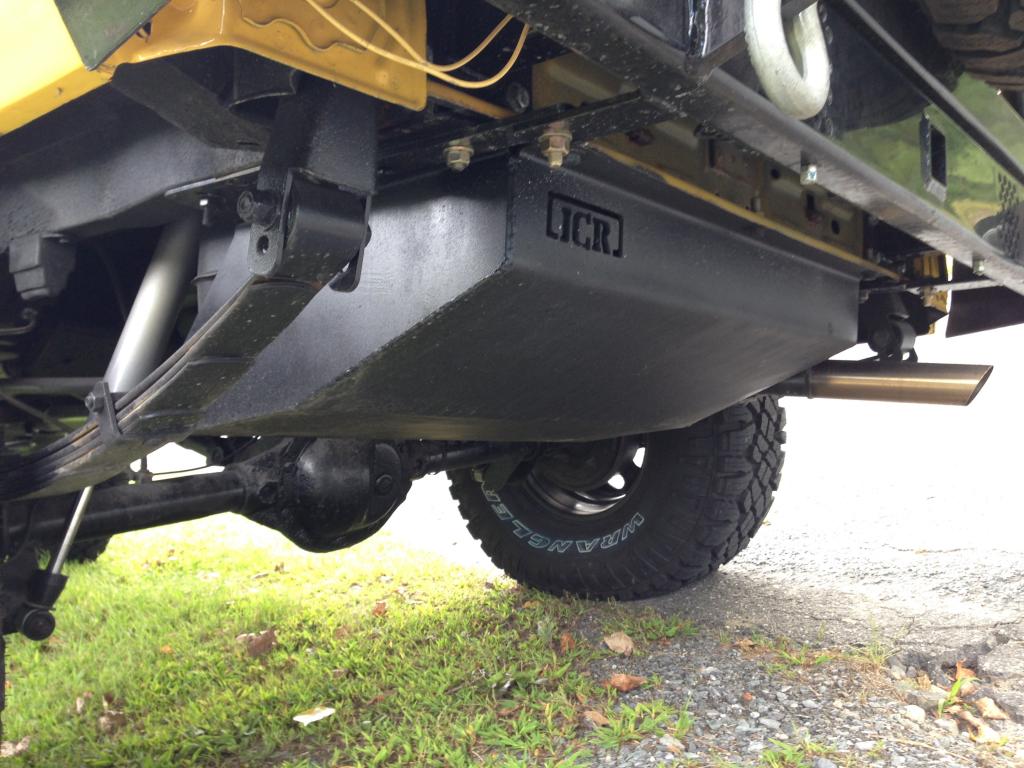
- JCR Gas Tank Skid Plate
- Bushwacker Flat Fender Flares
- Lower Rear Quarter plated on both sides
- Underneath re-coated
Wheels:
- 5 Cragar Soft 8 rims
- 5 Goodyear Wrangler Duratrac 33x12.5 inch tires
- Gorilla Chrome Lug and Lock set
Exhaust:
- Custom exhaust from the headers back
- Flowmaster Super 44 Muffler.
Miscellaneous:
- Fixed wiring on driver side door, passengers can now control power windows again.
- Fixed Rear Wiper.
- New Windshield Wipers
Parts:
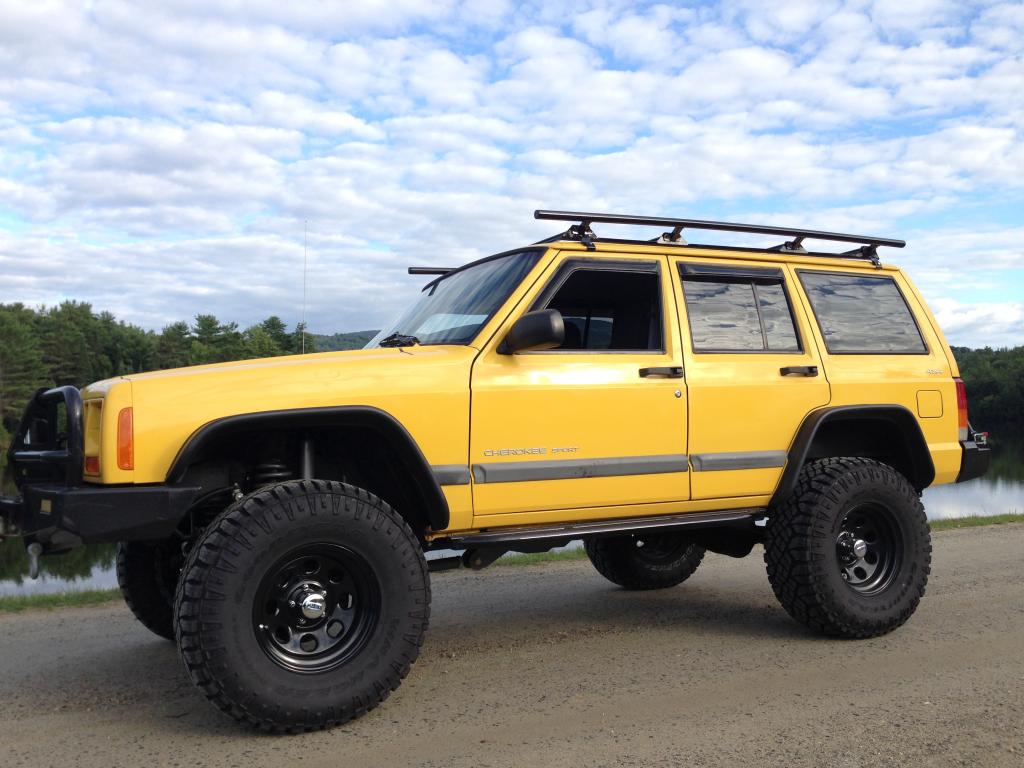
Phase: 1 Complete
Everything installed and tested.
After a little tinkering it road great.
Great articulation, good clearance, and no vibration at all.
The only thing steering/Suspension related that is still OEM in the vehicle is the actual sway bar itself, everything else was removed and upgraded.
The roof sliders had a bend to it, so we flipped them in the meantime until we straighten them out.
They are actually supposed to come down just above the door to protect the sides.
We had help from a shop installing the Lift and some of the equipment because we simply ran out of time.
The weather was upon us and we were working out of my driveway. So we put the project on hold and finished it in the spring.
Currie Currectlync Heavy Duty Tie Rod and Drag Link

Rough Country 4.5 Inch Long Arm Lift Kit

JCR Gas Tank Skid Plate
2001 Jeep XJ after Phase: 1 of the Expedition Build
More to come...
Last edited by TheF.N.G.; Jan 18, 2017 at 05:47 AM.

Thread Starter
Junior Member
Joined: Nov 2015
Posts: 70
Likes: 0
From: New Hampshire
Year: 2001
Model: Cherokee
Engine: 242 CID 4.0 Inline 6 Chrysler MPI "High Output"
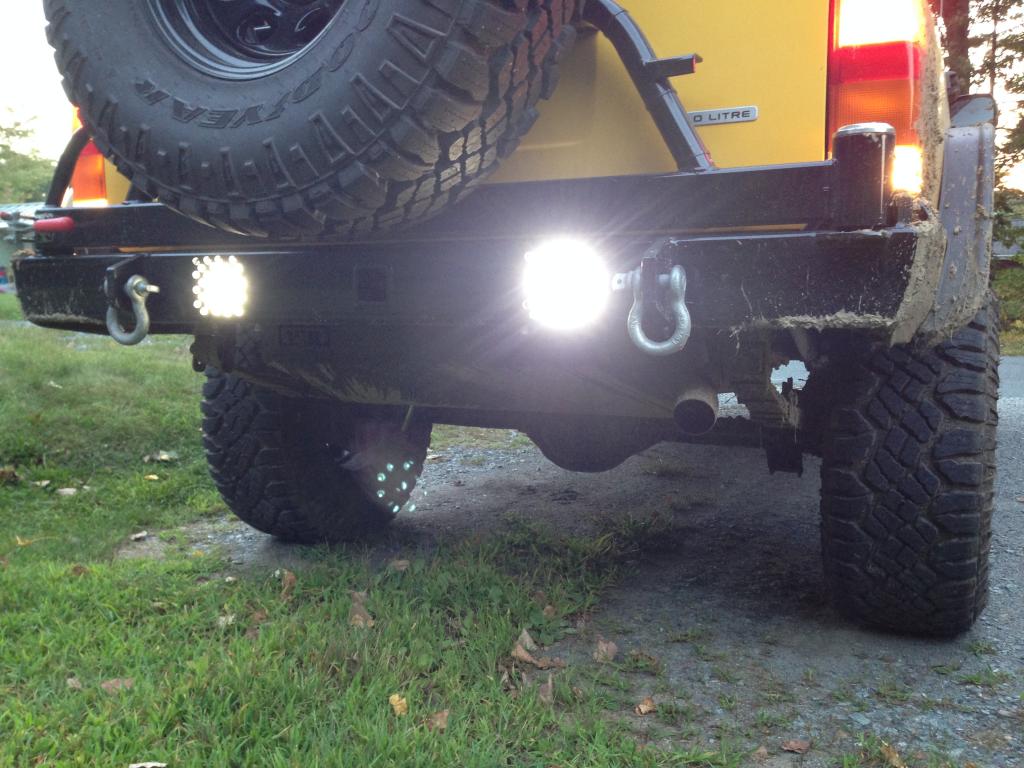
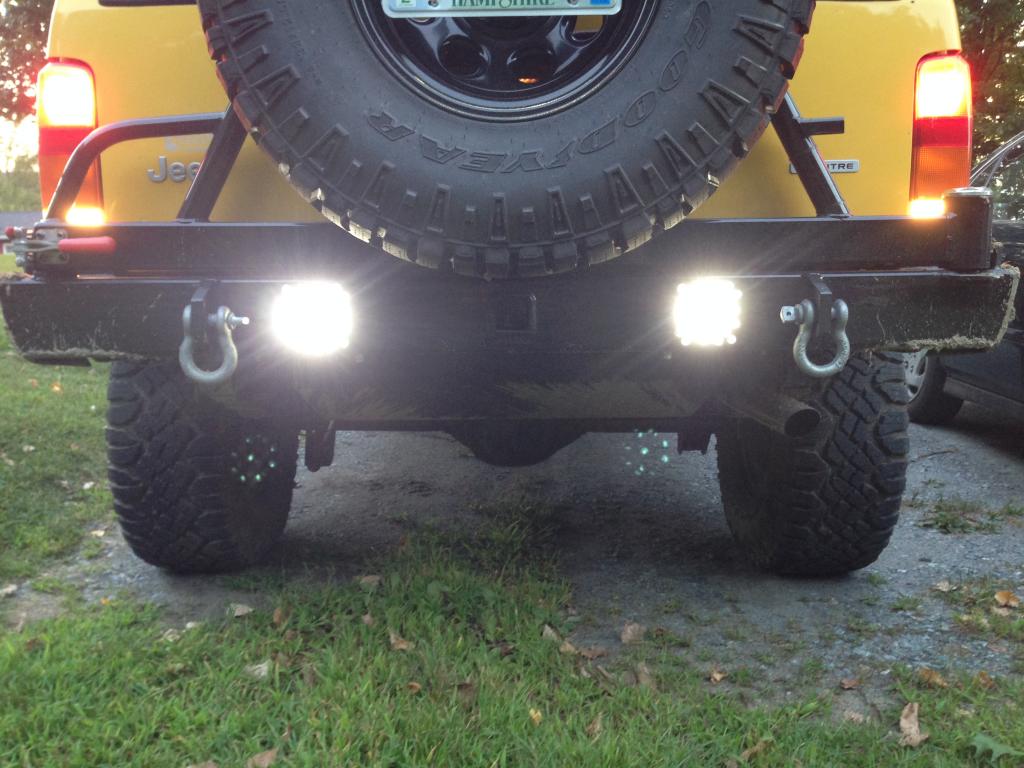
Bumper Integrated LED Reverse Lights
Installed LED spot lights in the JCR Rear Bumper, wired to my reverse lights.
Stock reverse lights were too obstructed by the JCR Rear Bumper to be of much use.
Decent lighting upgrade with major improvement for night visibility while backing up.

Installed LED spot lights in the JCR Rear Bumper, wired to my reverse lights.
Stock reverse lights were too obstructed by the JCR Rear Bumper to be of much use.
Decent lighting upgrade with major improvement for night visibility while backing up.
LED Reverse Lights


 Wow!
Wow!

Trending Topics
Thread Starter
Junior Member
Joined: Nov 2015
Posts: 70
Likes: 0
From: New Hampshire
Year: 2001
Model: Cherokee
Engine: 242 CID 4.0 Inline 6 Chrysler MPI "High Output"
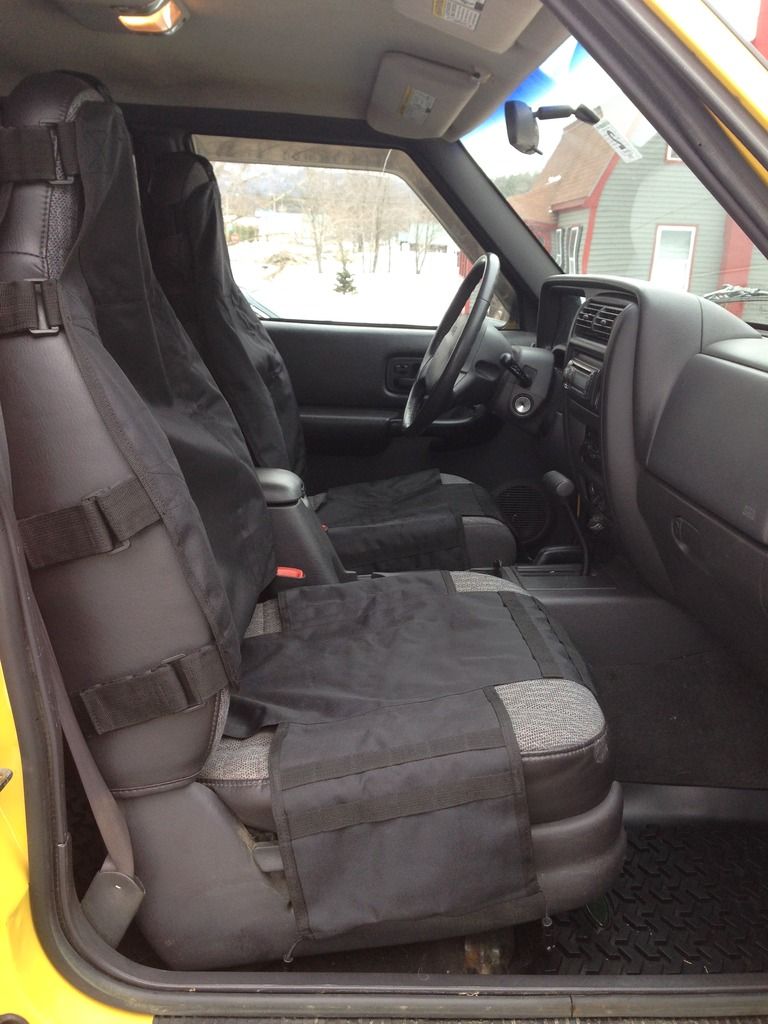
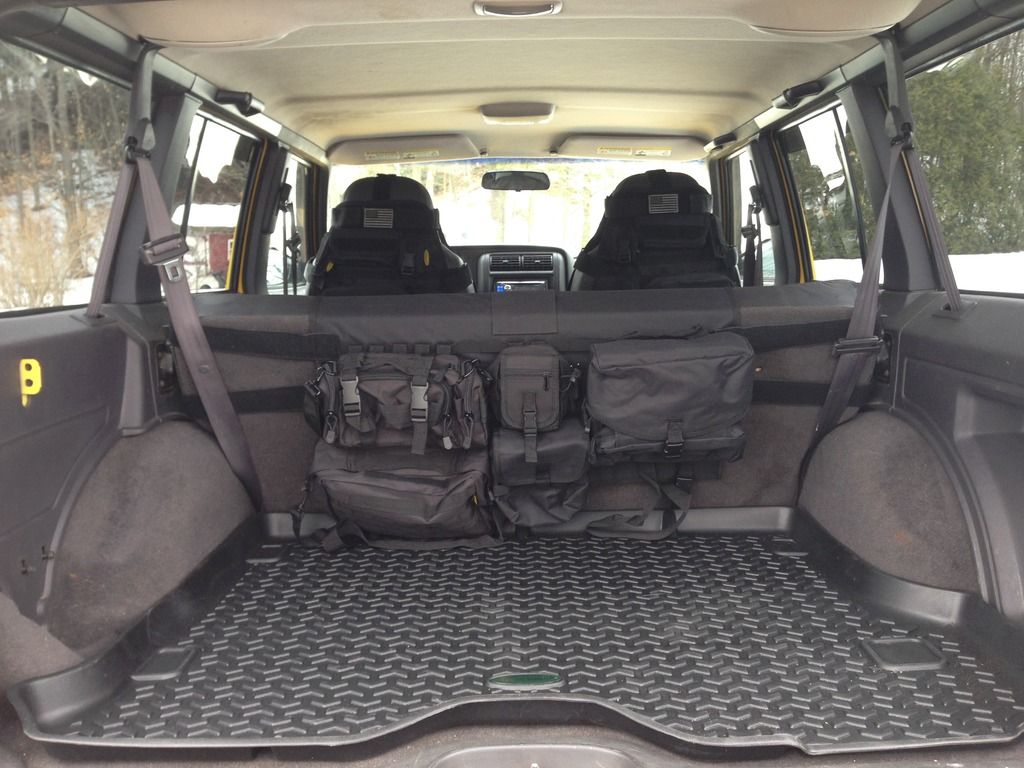
Interior Upgrades
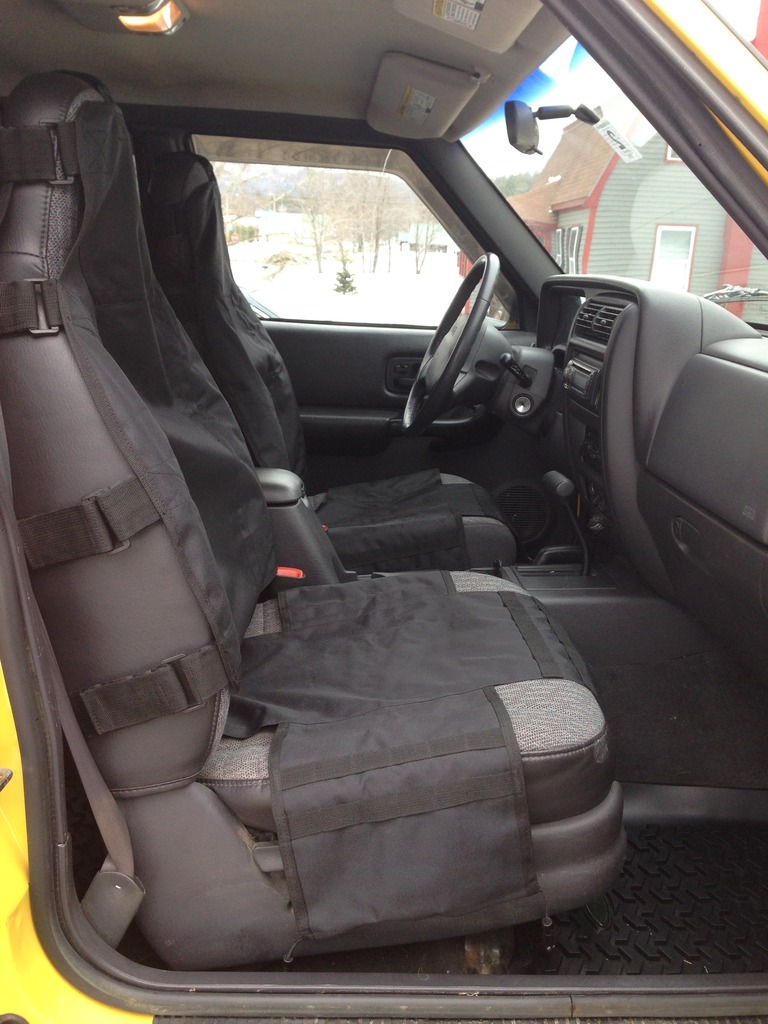
Smittybilt G.E.A.R. MOLLE Seat Covers, Quadratic Heavy Duty all weather floor and cargo mats, and started outfitting the interior of the rig.
MOLLE gear (Modular Lightweight Load-carrying Equipment) was the best way for me to maximize space, organize equipment, and customize on the fly.
Went with the heavy duty floor mats because they can handle all elements in all seasons. Easy to clean, regardless of terrain. Very low maintenance.


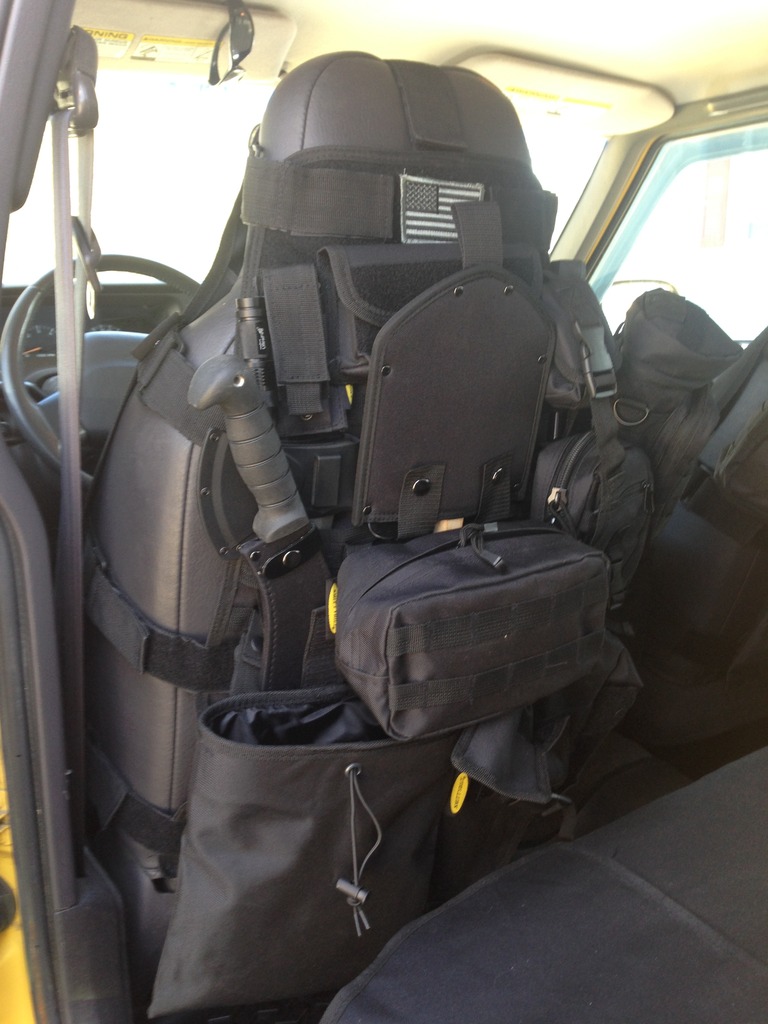
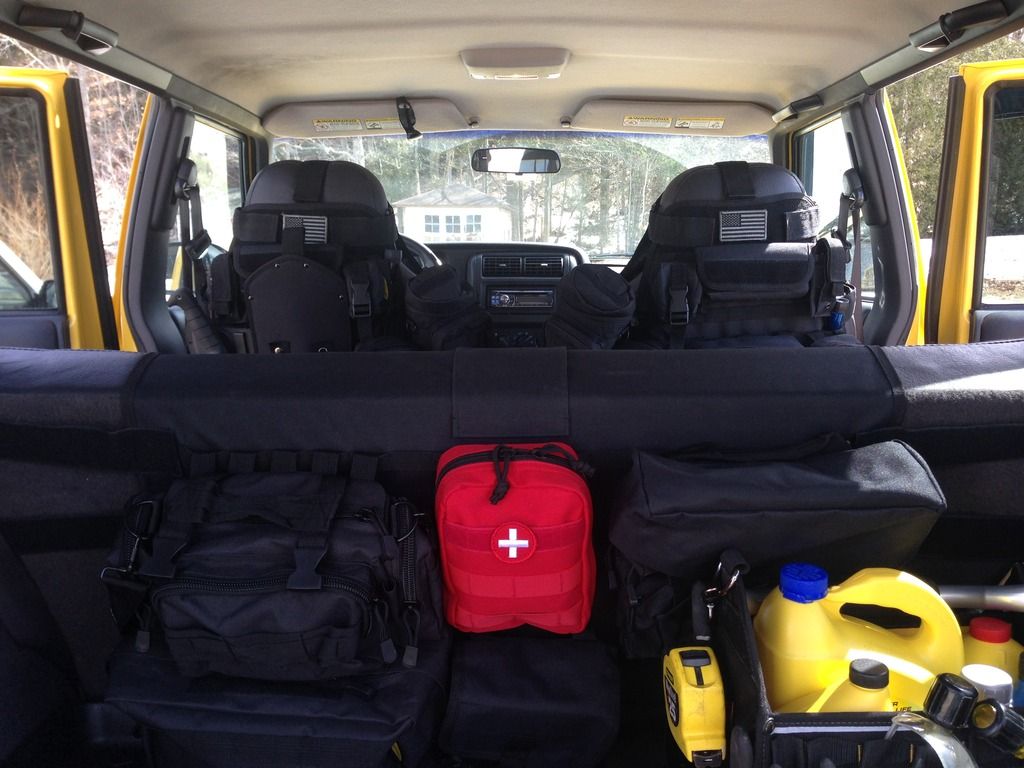
MOLLE Gear Outfitted with:
Ka-bar and assorted knives, Axe, Hatchet, Kukuri, Spetsnaz Trench Shovel, Maglites and various flash lights (battery operated and manual wind up), canteens, maps, compass, ponchos, Fire Starters (Flint and steel, wind proof matches, lights, etc) Med Kit, Multiple Tool sets, Jumper cables, Survival gear, bungees, ratchet straps, recovery equipment (Tree saver, ****** strap, tow straps, ****** block, d-rings) and a lot more. Just to give you a general idea of the setup.
Customized seats, and made some alterations.
In back a Mechanic's Tote that includes: (Coolant, oil, transmission fluid, brake fluid, PB Blaster, Spark Plugs, oil filter, Duct Tape, Electrical tape, fuses, assorted wrenches and screwdrivers, electrical/crimp tool, Quick Steel, Super Glue, zip ties, tape measure, scissors, bottle opener, etc etc)

Smittybilt G.E.A.R. MOLLE Seat Covers, Quadratic Heavy Duty all weather floor and cargo mats, and started outfitting the interior of the rig.
MOLLE gear (Modular Lightweight Load-carrying Equipment) was the best way for me to maximize space, organize equipment, and customize on the fly.
Went with the heavy duty floor mats because they can handle all elements in all seasons. Easy to clean, regardless of terrain. Very low maintenance.
Smittybilt G.E.A.R. MOLLE Seat Covers:
MOLLE Gear Outfitted with:
Ka-bar and assorted knives, Axe, Hatchet, Kukuri, Spetsnaz Trench Shovel, Maglites and various flash lights (battery operated and manual wind up), canteens, maps, compass, ponchos, Fire Starters (Flint and steel, wind proof matches, lights, etc) Med Kit, Multiple Tool sets, Jumper cables, Survival gear, bungees, ratchet straps, recovery equipment (Tree saver, ****** strap, tow straps, ****** block, d-rings) and a lot more. Just to give you a general idea of the setup.
Customized seats, and made some alterations.
In back a Mechanic's Tote that includes: (Coolant, oil, transmission fluid, brake fluid, PB Blaster, Spark Plugs, oil filter, Duct Tape, Electrical tape, fuses, assorted wrenches and screwdrivers, electrical/crimp tool, Quick Steel, Super Glue, zip ties, tape measure, scissors, bottle opener, etc etc)
Equipping MOLLE Gear
Last edited by TheF.N.G.; May 24, 2016 at 06:58 AM.
Senior Member
Joined: Jul 2014
Posts: 931
Likes: 0
From: Glen Ellyn, IL
Year: 1997
Model: Cherokee
Engine: 4.0 Inline 6
Interior Upgrades
Smittybilt G.E.A.R. MOLLE Seat Covers, Quadratic Heavy Duty all weather floor and cargo mats, and started outfitting the interior of the rig.
MOLLE gear (Modular Lightweight Load-carrying Equipment) was the best way for me to maximize space, organize equipment, and customize on the fly.
Went with the heavy duty floor mats because they can handle all elements in all seasons. Easy to clean, regardless of terrain. Very low maintenance.

MOLLE Gear Outfitted with:
Ka-bar and assorted knives, Axe, Hatchet, Kukuri, Spetsnaz Trench Shovel, Maglites and various flash lights (battery operated and manual wind up), canteens, maps, compass, ponchos, Fire Starters (Flint and steel, wind proof matches, lights, etc) Med Kit, Multiple Tool sets, Jumper cables, Survival gear, bungees, ratchet straps, recovery equipment (Tree saver, ****** strap, tow straps, ****** block, d-rings) and a lot more. Just to give you a general idea of the setup.
Customized seats, and made some alterations.
In back a Mechanic's Tote that includes: (Coolant, oil, transmission fluid, brake fluid, PB Blaster, Spark Plugs, oil filter, Duct Tape, Electrical tape, fuses, assorted wrenches and screwdrivers, electrical/crimp tool, Quick Steel, Super Glue, zip ties, tape measure, scissors, bottle opener, etc etc)


Smittybilt G.E.A.R. MOLLE Seat Covers, Quadratic Heavy Duty all weather floor and cargo mats, and started outfitting the interior of the rig.
MOLLE gear (Modular Lightweight Load-carrying Equipment) was the best way for me to maximize space, organize equipment, and customize on the fly.
Went with the heavy duty floor mats because they can handle all elements in all seasons. Easy to clean, regardless of terrain. Very low maintenance.
Smittybilt G.E.A.R. MOLLE Seat Covers:
MOLLE Gear Outfitted with:
Ka-bar and assorted knives, Axe, Hatchet, Kukuri, Spetsnaz Trench Shovel, Maglites and various flash lights (battery operated and manual wind up), canteens, maps, compass, ponchos, Fire Starters (Flint and steel, wind proof matches, lights, etc) Med Kit, Multiple Tool sets, Jumper cables, Survival gear, bungees, ratchet straps, recovery equipment (Tree saver, ****** strap, tow straps, ****** block, d-rings) and a lot more. Just to give you a general idea of the setup.
Customized seats, and made some alterations.
In back a Mechanic's Tote that includes: (Coolant, oil, transmission fluid, brake fluid, PB Blaster, Spark Plugs, oil filter, Duct Tape, Electrical tape, fuses, assorted wrenches and screwdrivers, electrical/crimp tool, Quick Steel, Super Glue, zip ties, tape measure, scissors, bottle opener, etc etc)
Equipping MOLLE Gear

I may have to borrow some ideas of yours...
Thread Starter
Junior Member
Joined: Nov 2015
Posts: 70
Likes: 0
From: New Hampshire
Year: 2001
Model: Cherokee
Engine: 242 CID 4.0 Inline 6 Chrysler MPI "High Output"
Hollow out the foam in the rear bench seat and mount it inside underneath. To access rifle simply flip the rear seat forward. Concealed and secure.
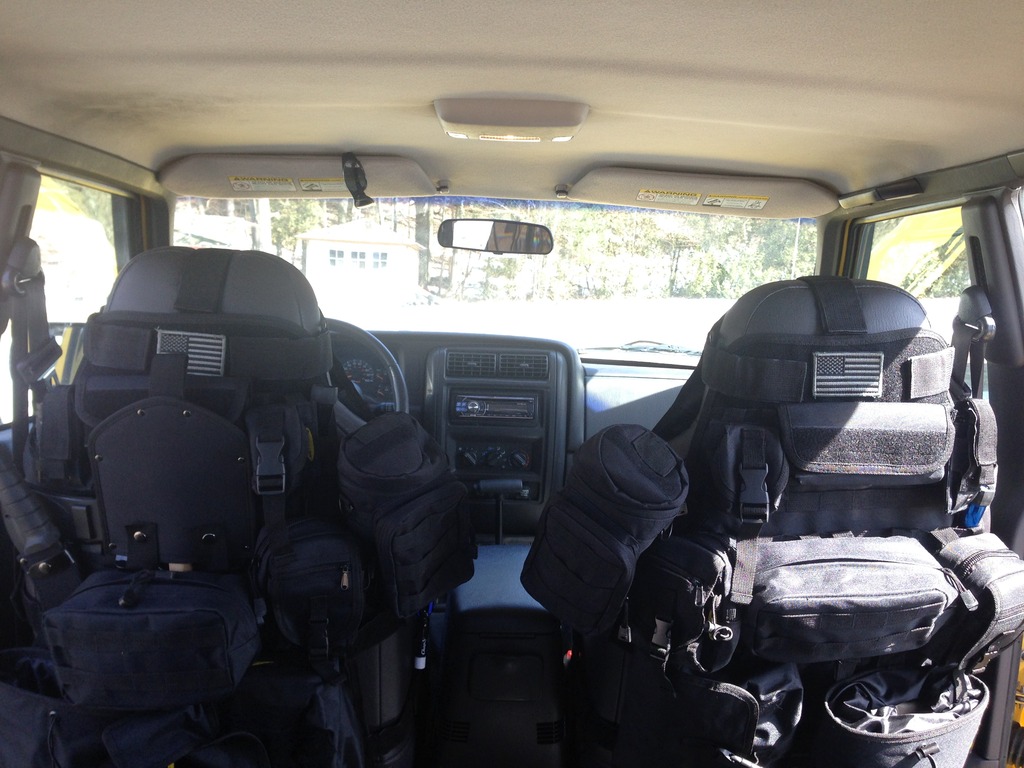
Overhead Cab:
Install an overhead bun mount to the ceiling of the cab, over across the two front seats.
Plate Carrier:
Hang the vest on the back of the drivers seat. Easy access and adds rear protect.
Both can be accessed from a sitting position in drivers side and at the ready in under ten seconds combined.
Thread Starter
Junior Member
Joined: Nov 2015
Posts: 70
Likes: 0
From: New Hampshire
Year: 2001
Model: Cherokee
Engine: 242 CID 4.0 Inline 6 Chrysler MPI "High Output"
Thread Starter
Junior Member
Joined: Nov 2015
Posts: 70
Likes: 0
From: New Hampshire
Year: 2001
Model: Cherokee
Engine: 242 CID 4.0 Inline 6 Chrysler MPI "High Output"
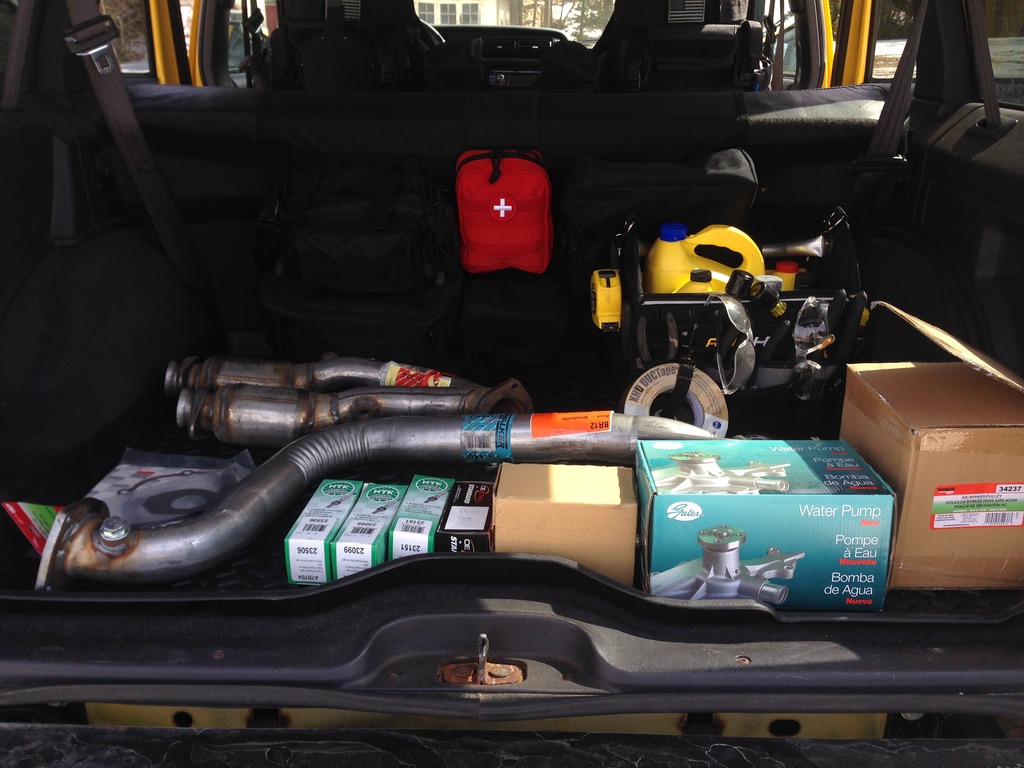
Partial Exhaust and Coolant System Replacement
Replacing the Radiator, water pump, thermostat and thermostat housing, thermostat inlet tube.
Decided on doing an A.C. delete; removing the compressor, condenser and canisters.
Replacing with an A.C. bypass pulley temporarily until I relocate the alternator to the former A.C.'s location.
Also replacing the pre-cats, the 4 O2 sensors and the front pipe.
This is the second step of the exhaust replacement.
In our first step we previously replaced the exhaust from the front pipe back with some custom work and a Flow Master Super 44.
All that will be left to replace is a new header, that will be step 3.
Parts