When you click on links to various merchants on this site and make a purchase, this can result in this site earning a commission. Affiliate programs and affiliations include, but are not limited to, the eBay Partner Network.
How do you like the cargo floor mat?
Have you tried putting a floor jack in there?
I've always been meaning to get one to avoid staining the rug in the cargo area from junkyard runs and my tools and my floor jack...
Engine: 242 CID 4.0 Inline 6 Chrysler MPI "High Output"
Originally Posted by 88whitecomanche
How do you like the cargo floor mat?
Have you tried putting a floor jack in there?
I've always been meaning to get one to avoid staining the rug in the cargo area from junkyard runs and my tools and my floor jack...
The floor mats I got from Quadratec are rugged.
A bit more expensive than I'm used to paying for floormats, but well worth it.
Dirt and waterproof, easy to clean, great protection for the interior of the vehicle. I have had them full of sand, mud, you name it.
I did end up taking out the one in the cargo area only because I have different plans for the space.
Engine: 242 CID 4.0 Inline 6 Chrysler MPI "High Output"
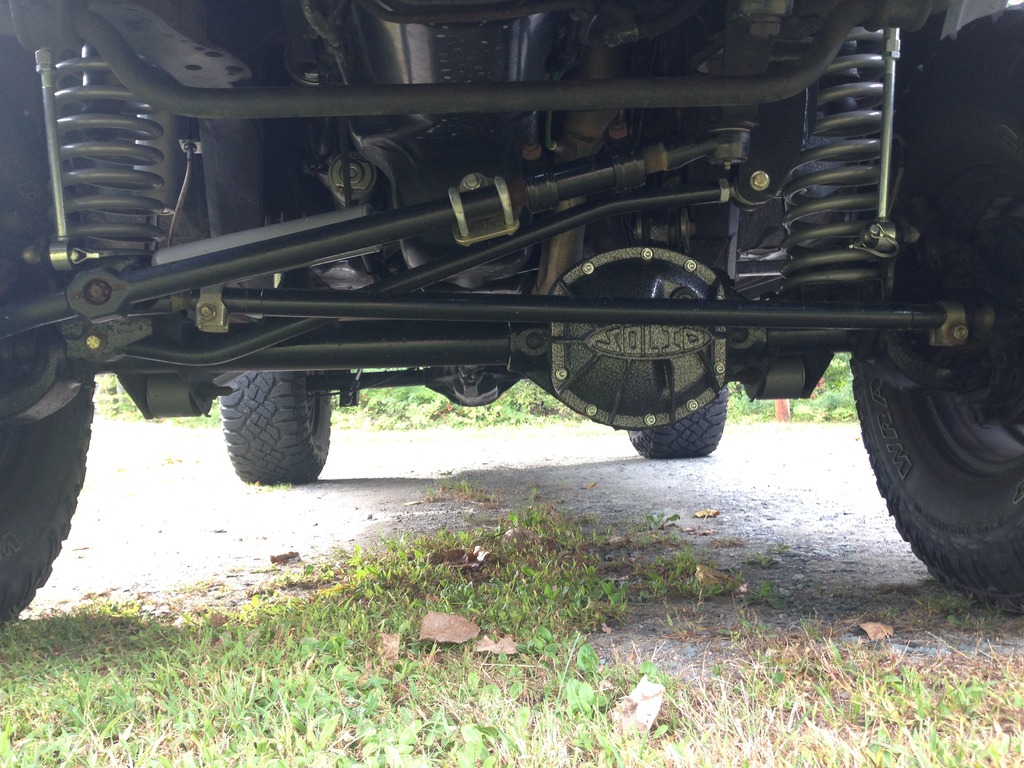
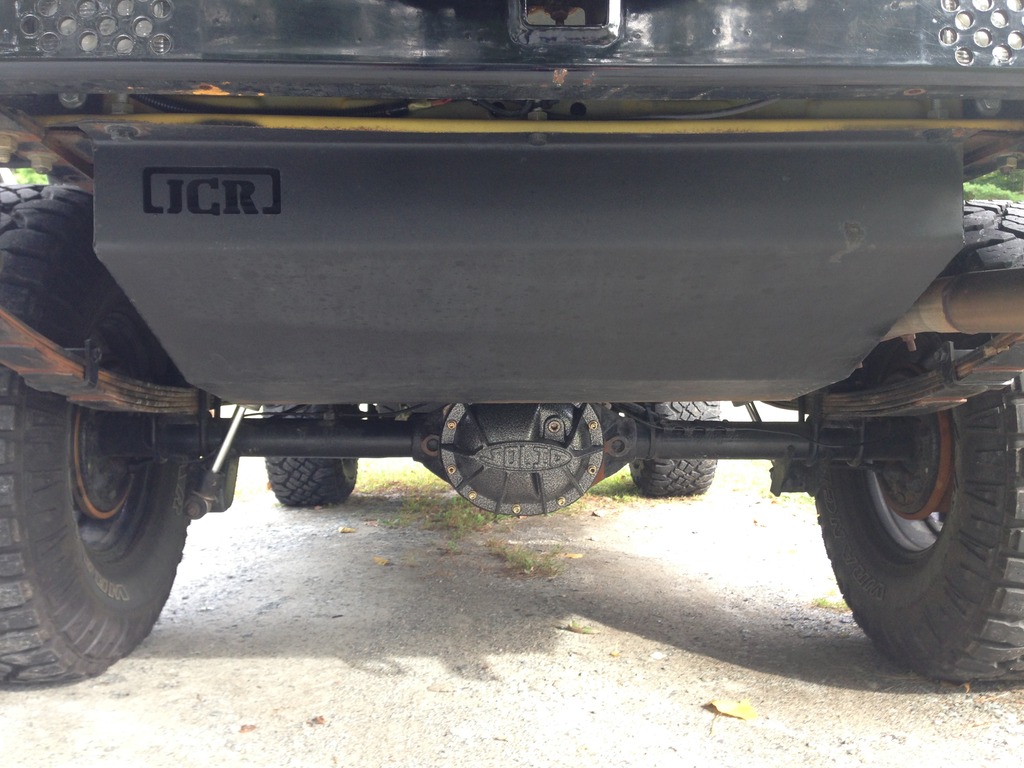
Re-gear: 4.56
Decided to re-gear to 4.56 on the front Dana 30 and rear Dana 35.
Added some "Solid" Differential Covers as well.
I had a shop do the re-gear as I have no prior experience re-gearing axles.
Re-gearing the Dana 35, while not my first choice was something that will at least hold me over until I can get my Rear Ford 8.8 swap next year.
The Dana 30/35 combo has held up well on a cross country road trip that included hitting trails across the U.S. in places such as Moab and Sedona with no issues.
While I am aware that the Dana 35 could be the Jeep's "Achilles Heel",
it has proved to not be nearly as fragile as some may say.
The Dana 35 has it's limitations, but in my experience if driven with control it will perform just fine under load and on trails.
That being said I am running 33" tires and open/open.
If I was running 35" tires and locked it might be a different story.
Engine: 242 CID 4.0 Inline 6 Chrysler MPI "High Output"
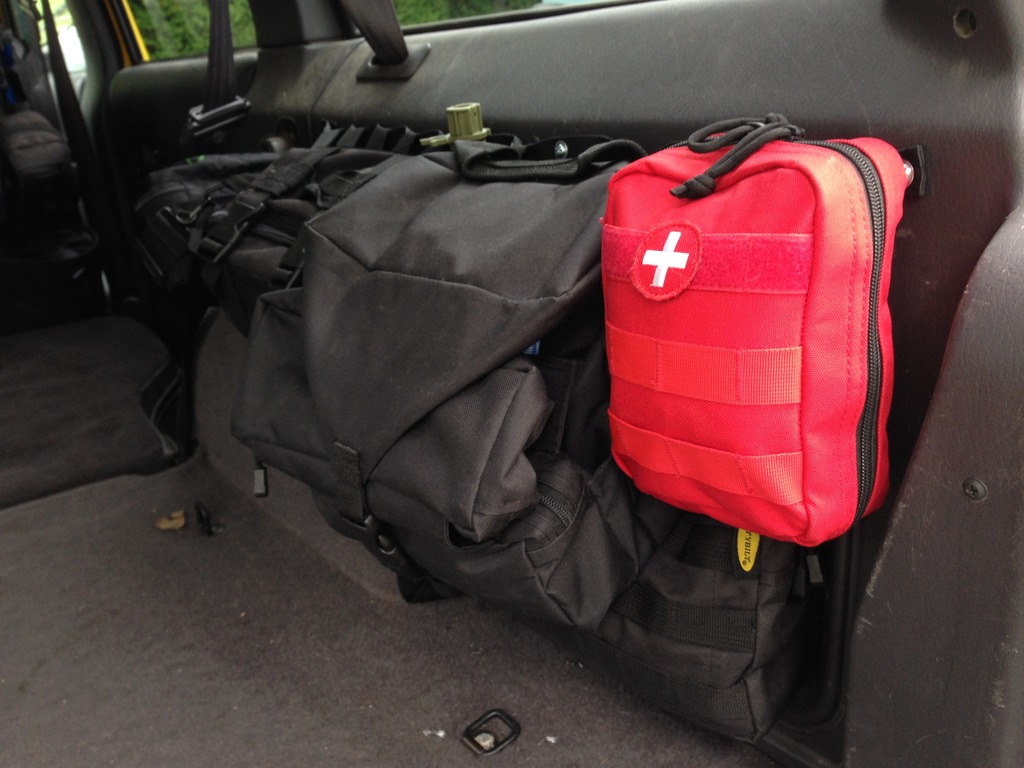
Rear Cargo Area MOLLE Gear Attachment Mod
I wanted to open up my cargo area for my gear and maximize space.
So I felt some MOLLE attachment points on the sides of the interior rear cargo area would be beneficial.
Looked up a couple of forums and found some walkthroughs from people that had already done this mod.
As there is already in-depth tutorials available, I will be brief.
So I got some supplies and got to work.
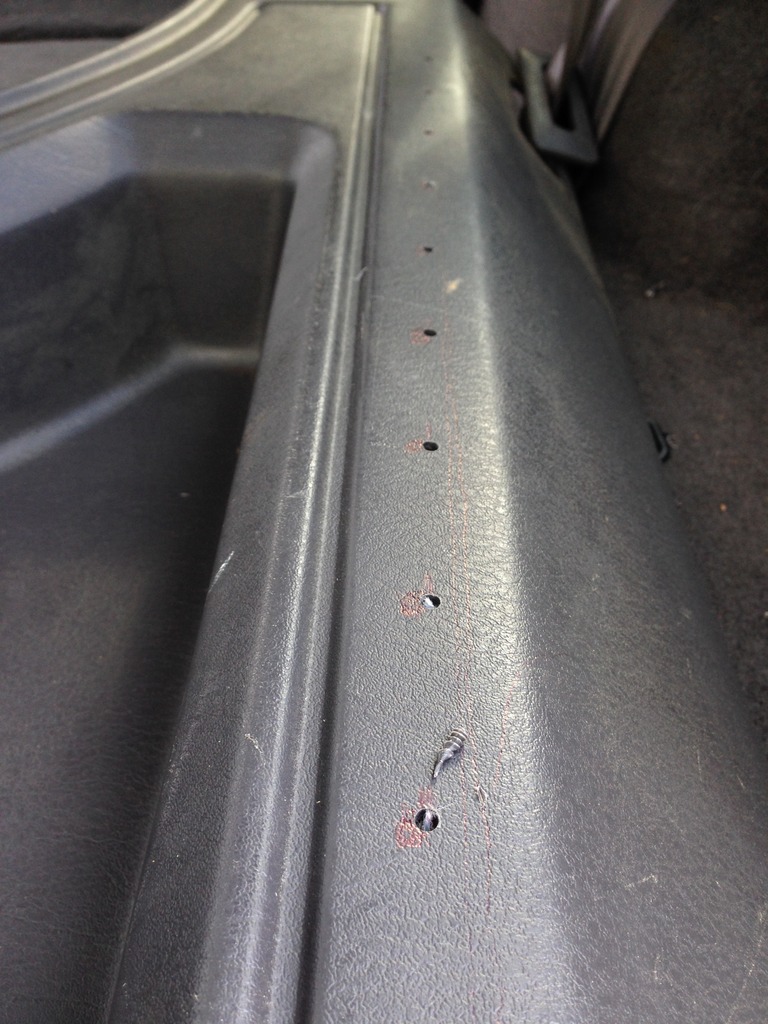
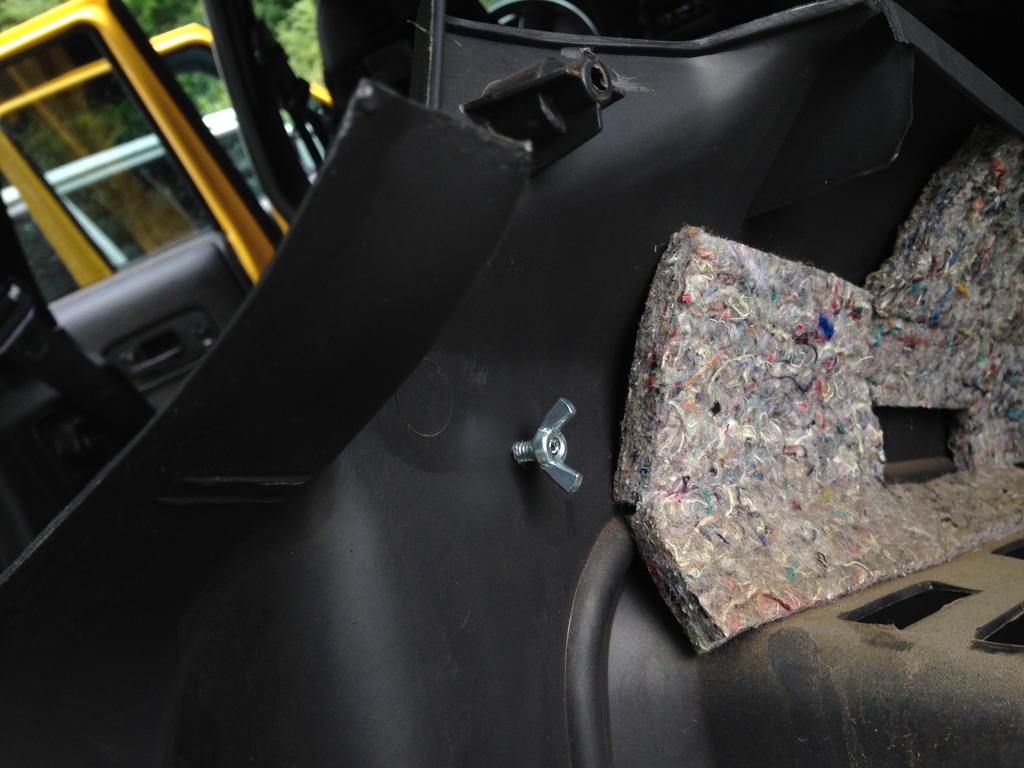
Tip:
Pull back the sound dampening insulation on the back side of trim before drilling.
Otherwise it will gum up your drill bit.
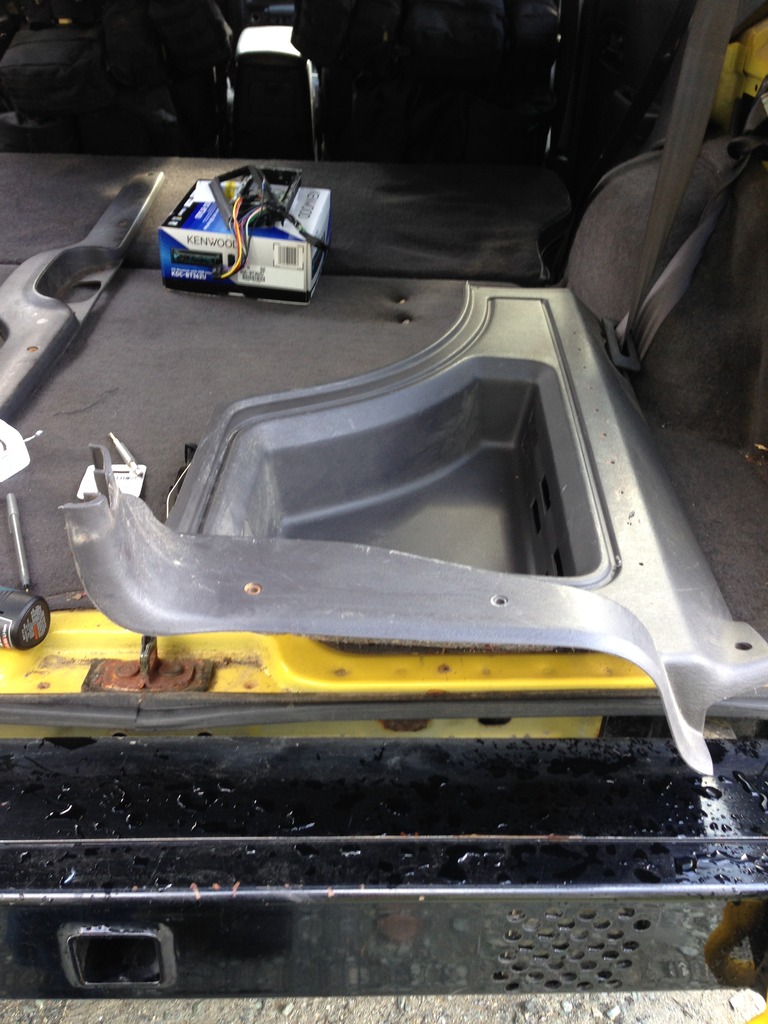
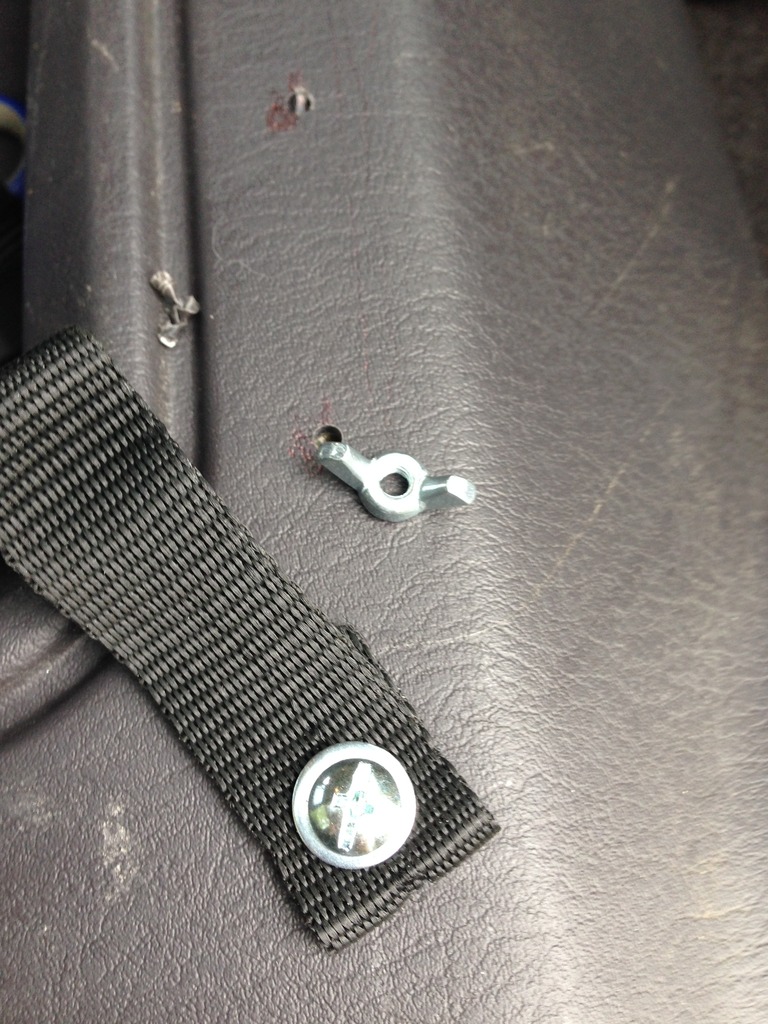
Removed Rear Quarter Interior Cargo Panel
Drill Holes 2 Inches Apart
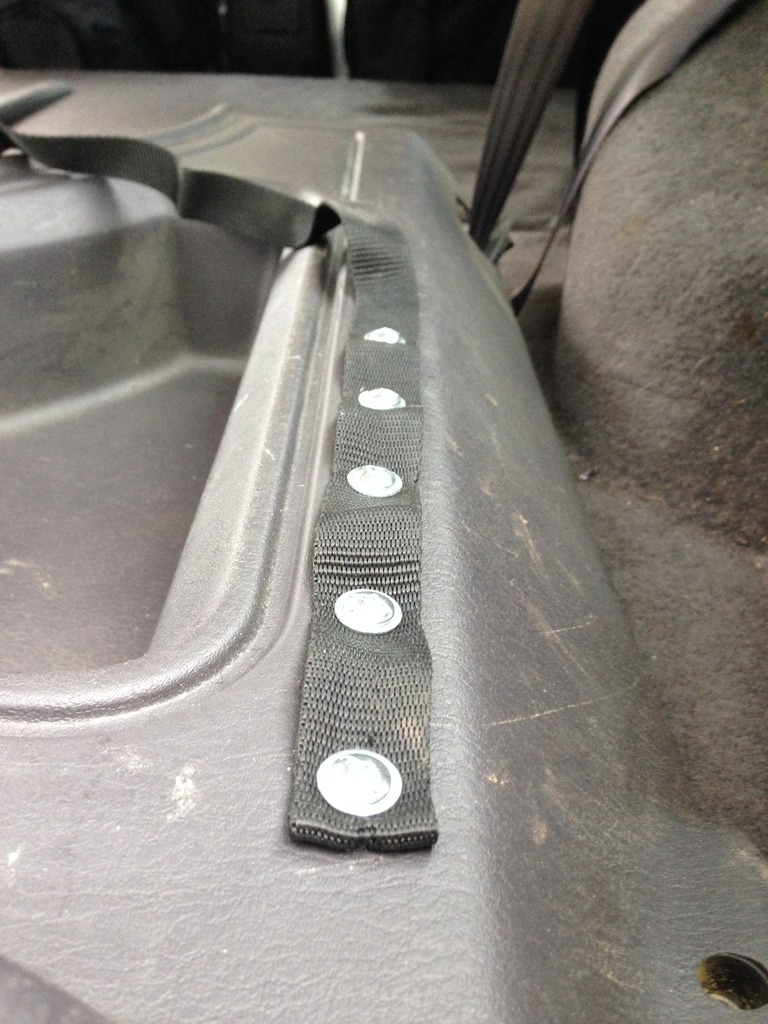
Attach nylon straps with round head machine screws and washers
Secure bolts with Wingnuts
Leave slack between screws in order to fit MOLLE gear straps through.
Re-gear: 4.56 Decided to re-gear to 4.56 on the front Dana 30 and rear Dana 35. Added some "Solid" Differential Covers as well. I had a shop do the re-gear as I have no prior experience re-gearing axles. Re-gearing the Dana 35, while not my first choice was something that will at least hold me over until I can get my Rear Ford 8.8 swap next year. The Dana 30/35 combo has held up well on a cross country road trip that included hitting trails across the U.S. in places such as Moab and Sedona with no issues. While I am aware that the Dana 35 could be the Jeep's "Achilles Heel", it has proved to not be nearly as fragile as some may say. The Dana 35 has it's limitations, but in my experience if driven with control it will perform just fine under load and on trails. That being said I am running 33" tires and open/open. If I was running 35" tires and locked it might be a different story. Solid Differential Covers
if you don't mind me asking how much did it cost for the regear? Trying to figure out average prices and good places to go because I really want to regear just don't want to pay an arm and a leg. Thanks!
Engine: 242 CID 4.0 Inline 6 Chrysler MPI "High Output"
Originally Posted by Scott'sXJ
That is probably the neatest thing I've seen on the CF.
If you don't mind, I'm gonna copy the **** out of that.
I'm not the first one to do it, but it's good to hear you like it.
A cheap yet effective interior mod that converts dead space into storage.
If you see an idea you like, feel free to incorporate it into your build.
Engine: 242 CID 4.0 Inline 6 Chrysler MPI "High Output"
Originally Posted by SatiricalHen
if you don't mind me asking how much did it cost for the regear? Trying to figure out average prices and good places to go because I really want to regear just don't want to pay an arm and a leg. Thanks!
I believe it was around $1,200.
Roughly $300 parts and $300 Labor = $600 per axle.
Parts: Carrier and Yukon 4.56 gears.
I had it done at an off-road specialist shop.
Neither myself nor my friends had much experience with re-gearing,
and I was pressed for time and wanted it done right.
I believe it was around $1,200. Roughly $300 parts and $300 Labor = $600 per axle. Parts: Carrier and Yukon 4.56 gears. I had it done at an off-road specialist shop. Neither myself nor my friends had much experience with re-gearing, and I was pressed for time and wanted it done right.
Thanks, the places I've spoken to around here want $600+ in just labor per axle. This is one of those times when I wish I had a buddy that owned a shop that could hook me up haha
Engine: 242 CID 4.0 Inline 6 Chrysler MPI "High Output"
Originally Posted by SatiricalHen
Thanks, the places I've spoken to around here want $600+ in just labor per axle. This is one of those times when I wish I had a buddy that owned a shop that could hook me up haha
That being said that was one off road Jeep shop in rural New Hampshire.
I felt I got a good price and quality work, but I also had to travel 2 hours one way to get there. Regular local shops were charging more and seemed less knowledgeable.
This is also the first time I have re-geared, so I am unsure of what the average "going rate" for an axle re-gear would be.
That being said that was one shop off road Jeep shop in rural New Hampshire. I felt I got a good price and quality work, but I also had to travel 2 hours one way to get there. Regular local shops were charging more and seemed less knowledgeable. This is also the first time I have re-geared, so I am unsure of what the average "going rate" for an axle re-gear would be.
as far as I've seen that's a good price for a regear. I wouldn't mind paying that.
Engine: 242 CID 4.0 Inline 6 Chrysler MPI "High Output"
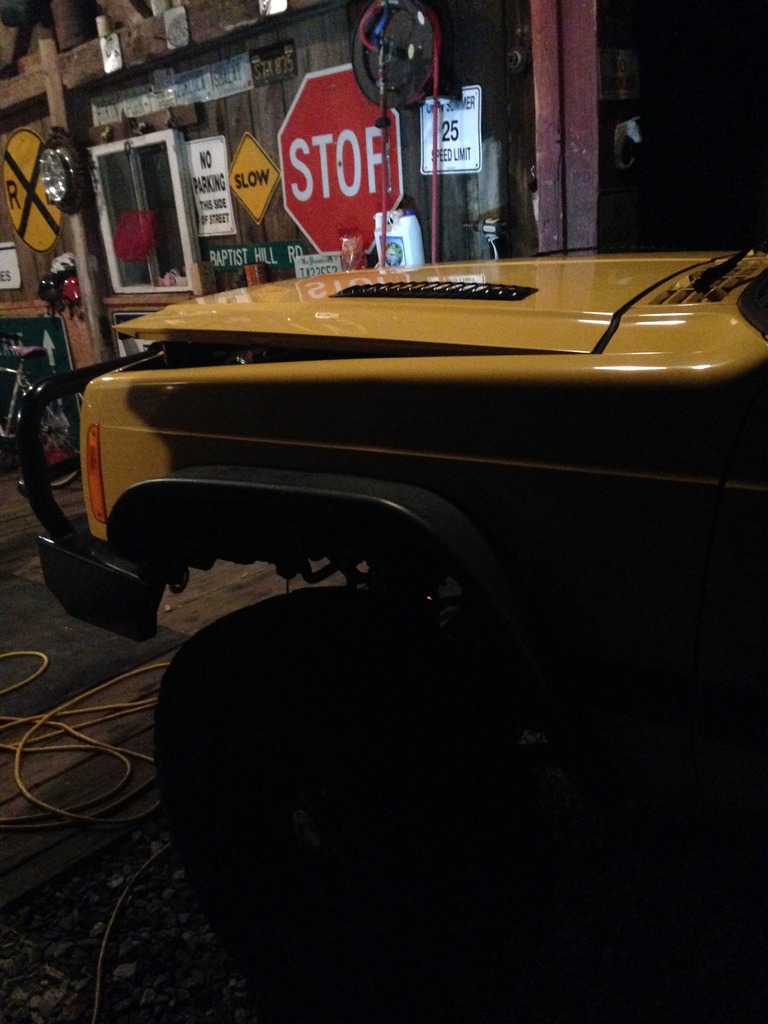
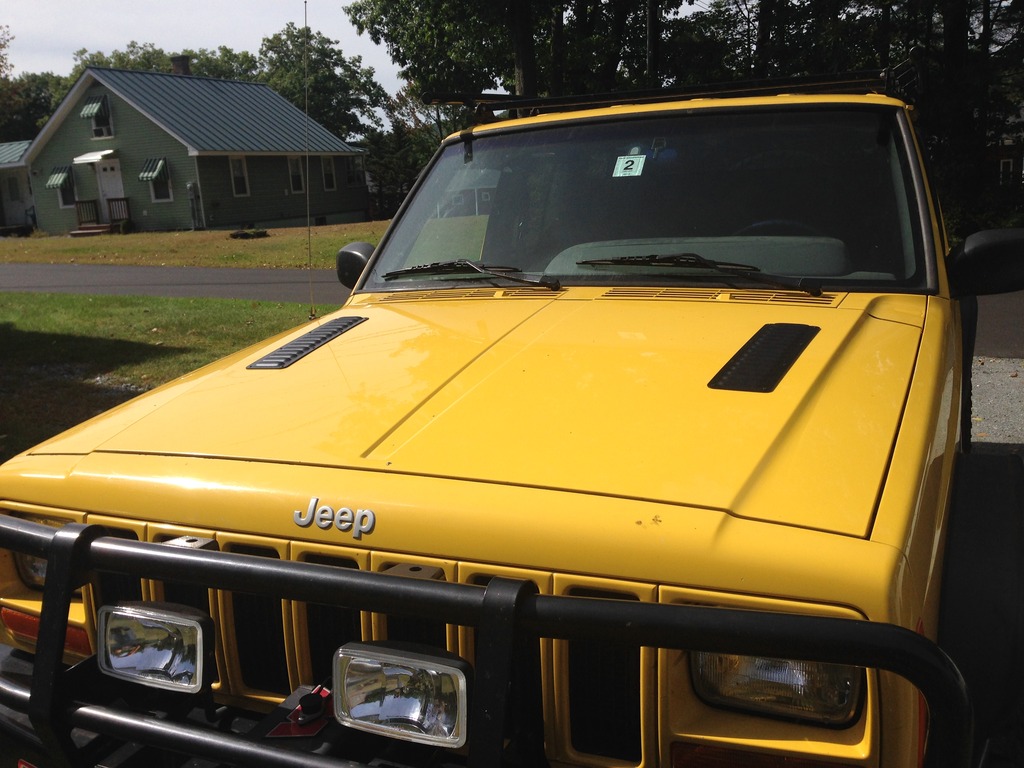
Hood Louvers Installation
Addressing some cooling issues.
The XJ would remain at 210F under normal conditions, but it would boil over under heavy load.
(Long Steep hill climbs, extended low gear 4wd off-roading, etc.
Previously replaced radiator, water pump, thermostat and hosing, inlet tube and a hose.
And a very thorough coolant flush.
Ran a lot better and was under 210 for the first time ever.
Hood and engine bay still had a lot of heat trapped in there though.
I was going to be leaving New England to travel across country, and had expeditions planned in high temp places such as the Mojave Desert.
So we decided to take extra measures to ensure air flow in higher temp environments.
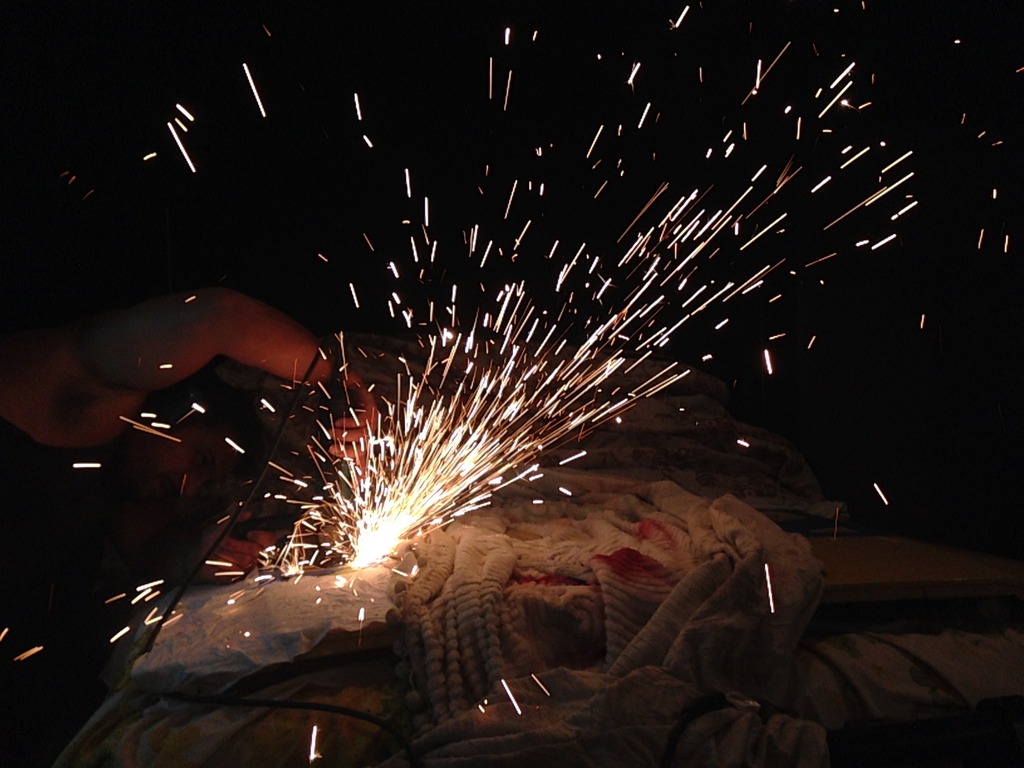
It was time to carve into the hood and let some of that heat out.
My buddy Mike carved up the passenger side. I chopped up the drivers side, then we compared cuts cause we're competitive like that.
The end result was pretty good. We chose a placement that will hopefully promote better airflow at both low and high speeds.
Definitely made a noticeable difference. This will hold me over until I get a Cowl Induction Hood next year.
Engine: 242 CID 4.0 Inline 6 Chrysler MPI "High Output"
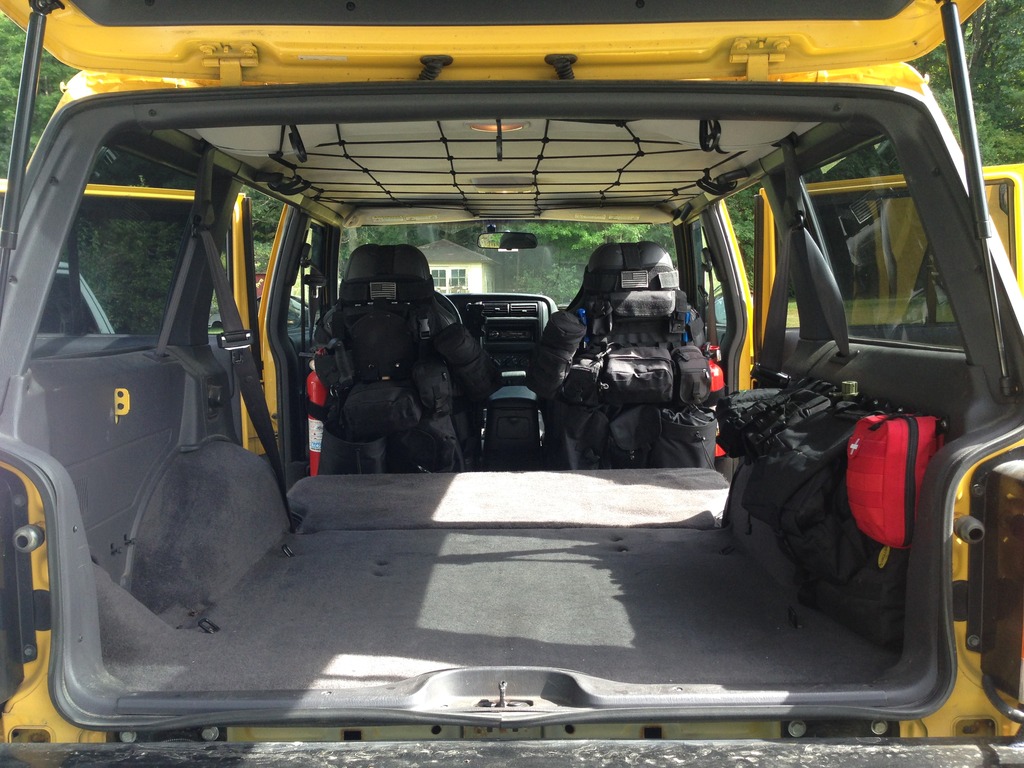
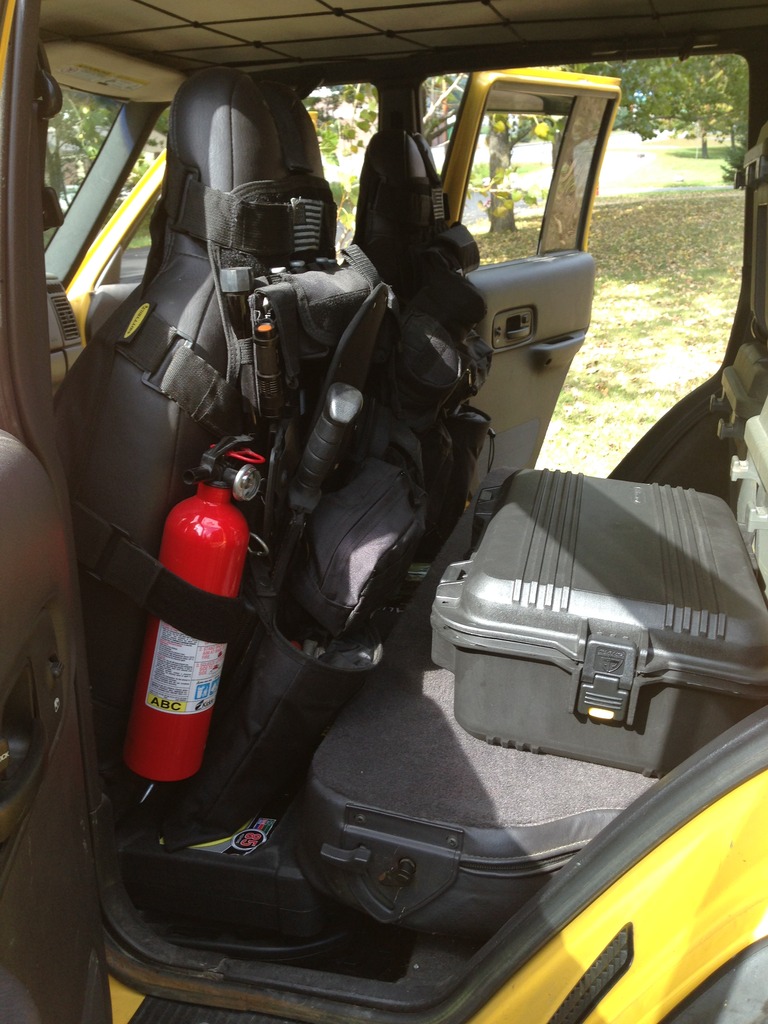
Maximize Space in Cargo Area
Removed the back seat to maximize use of space. Kept the back rest and flipped down to use as platform for crates, as well as store a few things under it.
Recovery gear is kept under seat backing for easy access.
(jack, ****** block, straps etc)
We now have enough space to sleep in cargo area of vehicle if conditions are not optimum for camping.
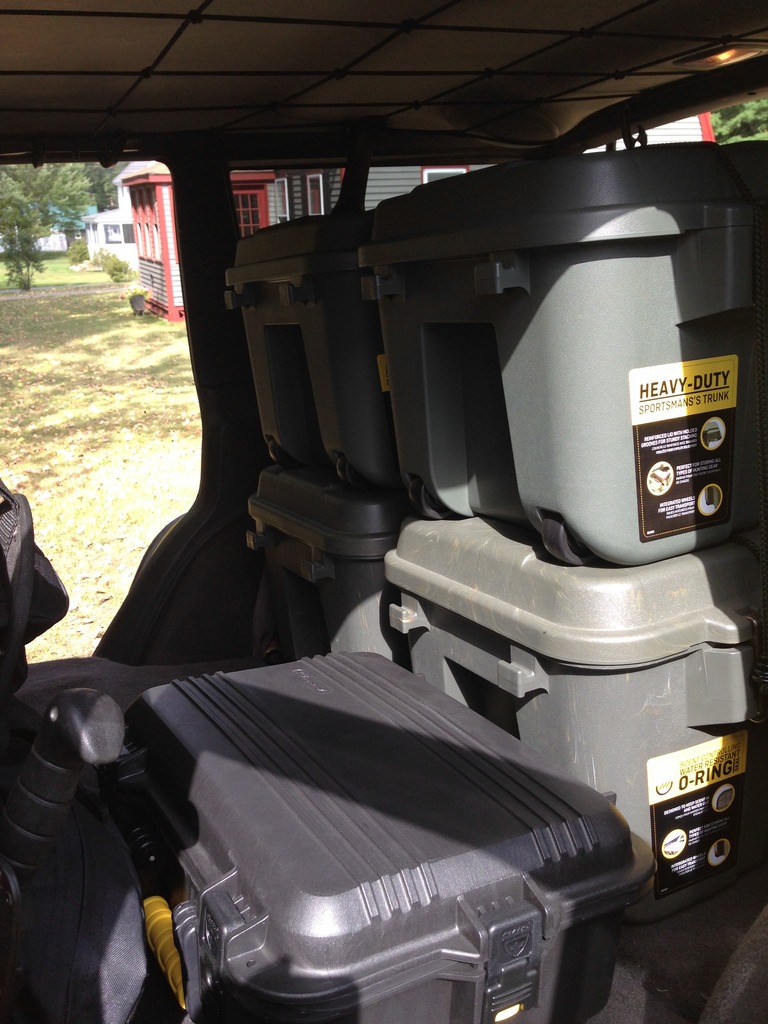
All expedition gear will be organized in cases and containers.
Room still available for cooler and personal gear.
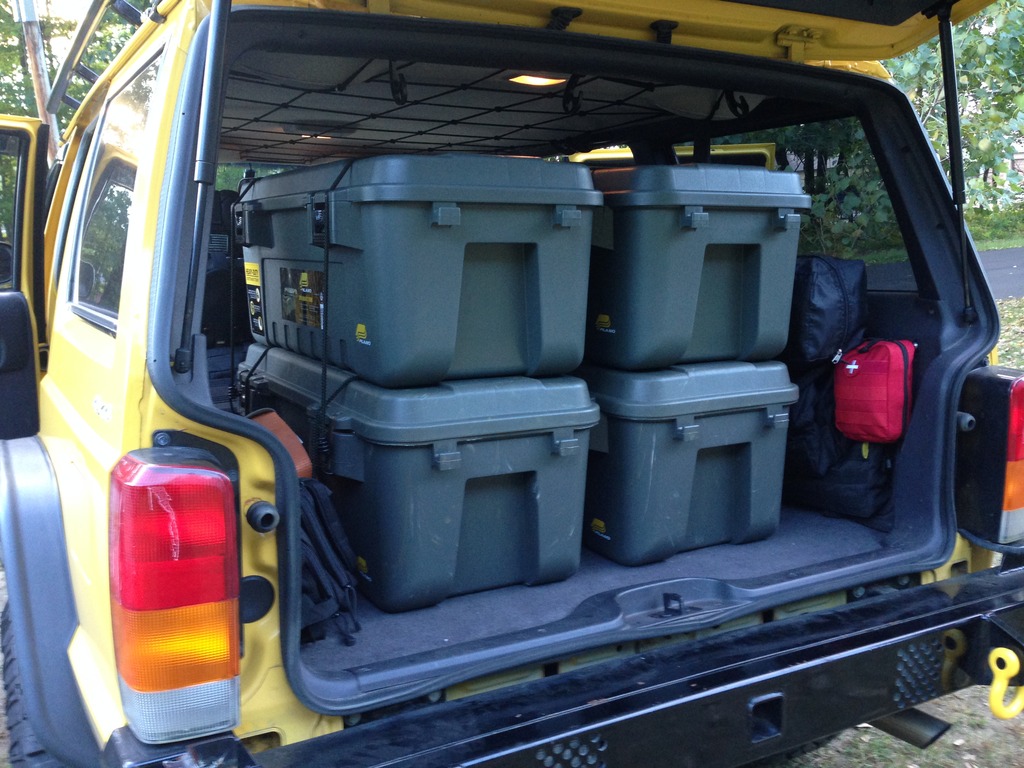
Cargo area consists of 4 Plano crates, 1 bug out bag and MOLLE gear on passenger side rear.
Space still available for various items.
Cases are heavy duty, impact and water resistant.
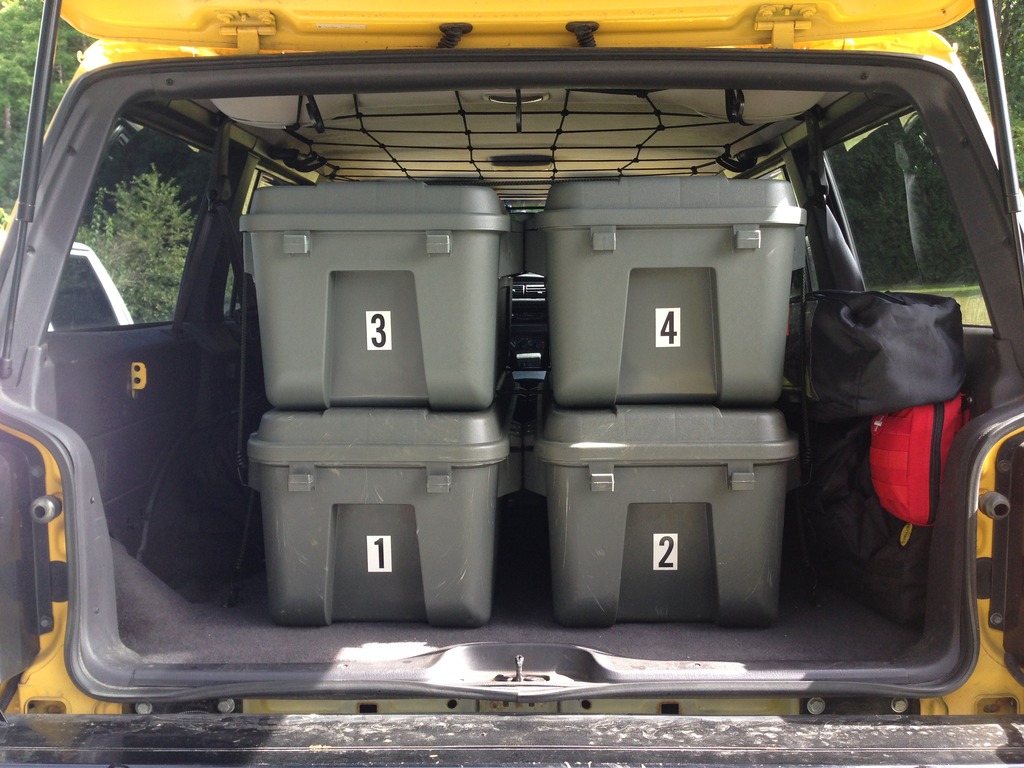
All containers will be marked for easy identification.
Automotive, Camp, Food and Sleep supplies all have corresponding numbers.
Gear will be kept pre-packed in containers at all times. All that is needed to pack for a trip is to load containers, 1 personal gear bag, and cooler.
Vehicle can be loaded, turn key and out of driveway in minutes; with enough gear and non perishable food to sustain 2 people for weeks.
Bench Seat Removed
Small Plano Hardcase for sensitive equipment
Large Plano crates for expedition equipment and gear
Gear Loaded mock up
Number Designation
Update:
We ran this setup on a month long road trip on both roads and trails.
Stress tested this hard on some rugged trails, as well as stop and go city driving. No issues with shifting gear whatsoever.
There was even an incident in Centralia where the Jeep got airborn. Girlfriend wasn't impressed, but the gear was fine.
Cons:
Decreased driving visibility, decreased quick accessibility to bottom row crates, increased weight when overpacked,
Drawback: blindspots.
This setup does hamper side/rear visibility to an extant.
Rearview mirror becomes useless, and visibility looking to the side/back to check blind spots in windows is decreased.
Must rely solely on side mirrors and side windows.
Not so much an issue on trails, but merging in traffic on cities and interstates requires more caution than normal.
Drawback: Weight.
Weight is a double edged sword. These Plano Crates weigh next to nothing, so it is far lighter than an integrated rack or platform system. But having crates can lead to filling them with more equipment, essentially overpacking and adding more weight in the process.
In the future I may build a floor rack platform with drawers no more than 6" in height, and downsize from four rear crates to two.
Gear would then be level with windows, keeping visibility.
This would also promote the need to prioritize gear for the sake of weight reduction, thus reducing the probability of overpacking.
I would caution against drawers. Unless you do a single layer of about 7.5"(tall enough to fit an ammo can) By the time you get the frame, hinges, slides and drawer frame, you lose allot of usable space. I have always liked large Cabelas or Jansport duffle bags or the rafting dry bags. You can stuff what you want in them and they still conform to whatever shape you want to reduce the take up of "wasted air space". I do like those totes, especially for like stoves, lanterns, kitchenettes, etc and i don't think a person can go away from having 1 or 2 in their rig(i am guilty myself at having a row of "grab and go totes") in the garage. I made my box just tall enough to fit the .50 cal ammo cans and still have room to throw my totes over it and a place for the dogs when im not carrying gear.
Last edited by WyoCherokee; 12-08-2015 at 09:49 AM.
 12-03-2015, 12:27 PM