When you click on links to various merchants on this site and make a purchase, this can result in this site earning a commission. Affiliate programs and affiliations include, but are not limited to, the eBay Partner Network.
So instead of posting a thread all the time of projects I thought I would create one location so anyone can follow my build. I will try to include all prices and details so anyone can get ideas for what they may want to do. I am working on my Cherokee every night trying to get it ready for wheeling this spring.
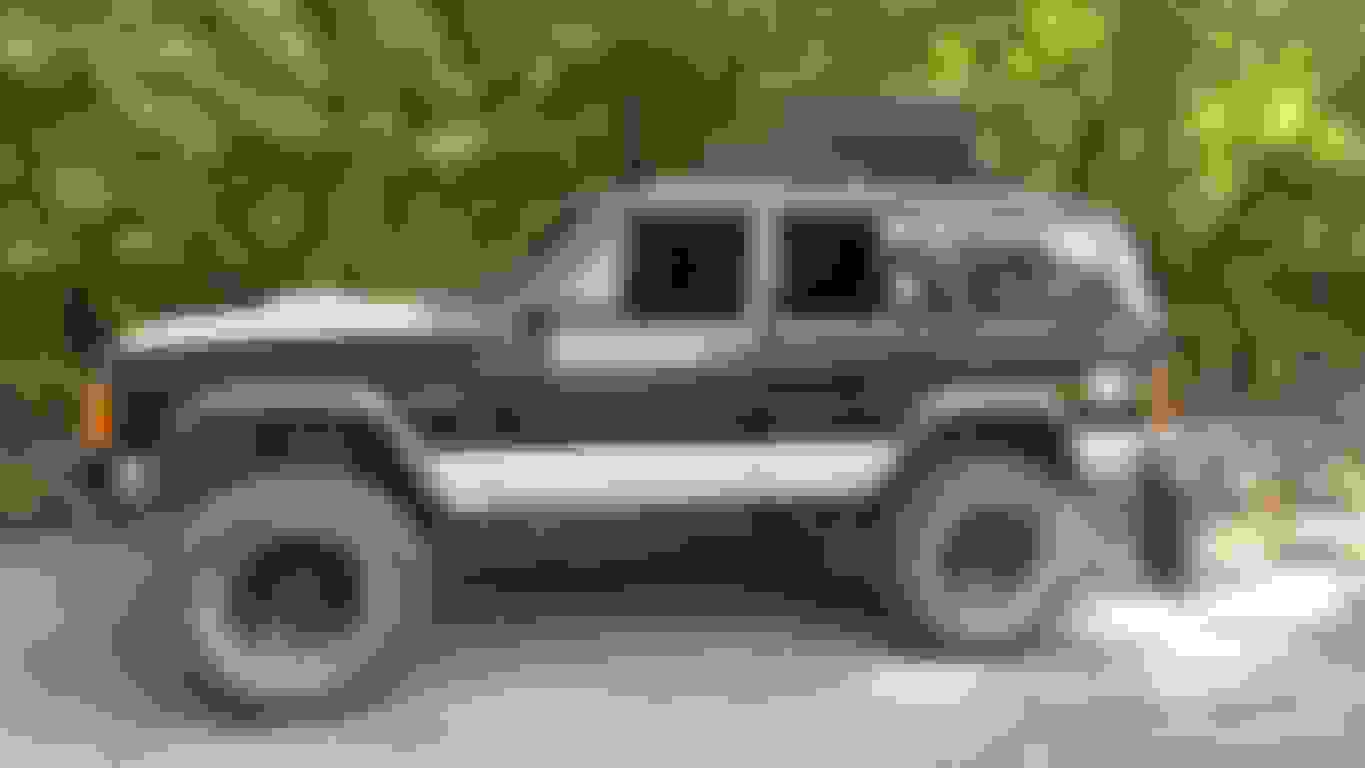
I purchased my XJ 2 years ago, its a 1996 XJ Sport with 240,000 miles on it. I purchased it for $3200. It came with a Rough Country 6.5" long arm lift, Currie 1 ton steering, and practically brand new 33x12.5 Goodyear Wrangler MT/Rs. Besides that it was stock. It took me about 6 months to find a Cherokee with a long arm lift and 33"s that was in decent condition. Millage was not too much of a concern to me as its not a daily driver. Just used for mountain biking, hunting and wheelin.
The first week I had it I purchased a spare engine and rear axle. Stock axle is a Dana 35. I purchased a Chrysler 8.25 that had a disc brake conversion, lunch box locker, and 4.10 gears for $450. I also picked up the engine from the guy for $400. Mainly for the spare parts on it as it came with, the A/C Pump, Alternator, Starter, 2001 Intake Manifold, Header, Power Steering Pump, Computer, New Plugs, Wires, Distributor. It also only had 150,000 miles on it. The guy built it up a little and then decided to swap an LS1 engine into his Cherokee. I figured for $400 it was worth it for all the accessories.
I will post about these but here is what I have done so far, I will make some posts on these.
New Oil Pan Gasket and Output bearing seal. ( I knew it needed these when I purchased it.
Rebuilt all the suspension, All new bushings
Swapped rear axle out for new one
Rebuilt front axle and geared to match rear.
Custom Rock Sliders
Cut and Trimmed the wheel wells
Rear Quarter Panel Sliders
Gusset Upper Control Arm Mount (Passenger Side)
Cut and Folded rear quarter panel
Rear Bumper
Lower Control Arm Skid Plates
Gusset Lower Control Arm Mounts
Front Frame Stiffeners
Current Mod list to do before spring. I will post updates on these as I finish them.
Install new U Joints and full circle C Clips
Swap to TJ style from Bump stops
Hidden Winch below radiator
Move front axle forward 1.5"
Gusset front Axle Cs
Sleeve Front Axle
WJ knuckle and brake conversion
Crossover Steering Conversion
New Track Bar
Custom Front Bumper
New Lower Front Shock Mounts
Install 2001 XJ Intake Manifold
Install Header
Roll Cage Top and A pillars external, B, C, and D pillars internal.
Not a lot to say here. 2"x3" .120 wall tubing cut at and angle and capped at both ends. I cut a notch in the pinch seam and mounted them to the from with 2x3x.120 tubing. The are welded to a .120 thick plate and bolted to the frame and used self tapping bolts for now. Later I will weld them to the frame once I do my mid body frame stiffeners as part of my roll cage will tie into the sliders. I will also bend up some 1.5" tubing to have them stick out a little and give more protection now that I purchased a tube bender. I really just wanted to keep them up tight and close to the body. Painted with Rustoleum Hammered
So for the rear Quarter Panel Sliders I did 3"x.188 plate bolted to the body with 8 stainless button head bolts. Yes I drilled through the body and put nuts on the back side. I also ran this plate all the way to the front and back seam to The tubing is 1.25x.120 wall turned 90 degrees which looks good and will have less friction when sliding along trees or rocks. The reason I used 1.25 tubing is once you turn it on its side its just over 1.5" wide from corner to corner and all my round tubing projects are done with 1.5" round. I made them so they stick out about 3".
A couple things to note, Bolt the plate steel to the jeep before you tack on the tubing. The body is not flat and you need to bend the plate to form with the body. Also the body is not vertical so if you want the sliders to be parallel to the ground you will have to bevel them a little. I just held min in place and tack welded them till they looked good and then threw a few more good tacks on them before taking them off and burning them in.
Tubes made and plate ready to bolt on Turned out good Nice and streamline
First off, you may have seen this post already by another user. I originally created an account linked to my Facebook and did not like the account being linked so I created a new one from my email address.
So for obvious reasons I set out to get rid of my stock bumper and build a full wrap bumper. Pictures of finished bumper are at just below, If you wan to read the write up on the build process keep scrolling. Also have full cost and pricing at the bottom if anyone is interested in what a project like this costs.
I had a couple key aspects I wanted to achieve
Side Protection
High and Tight for maximum clearance and departure angle
Flush receiver I hate receivers that stick out
Bombproof mounts
I will brake this down into the following sections.
Cut and Fold
Mounts
Main Bumper
Bumper Sides
Cost/Conclusion
But first. Here is the bumper!
Cut and Fold
Not a lot to say here, if you dont know how to do this, go watch the Bleepin Jeep video on Youtube. I did it a little different. The inside piece I only cut about 4 inches long, outside piece I cut 5 inches long to reach all the way back to the main floor. Before folding the outside in, I drilled 5 holes in it with a unibit about 2 inches down from the fold. This was later used for rossette welding. When I folder the outside piece in, I opted to put the pinch seam inside the section instead of on the outside. This made for a much cleaner look that no one will see... I fully welded that back seam and front seam. And then stitch welded the inner seam and rosette welded the holes. The reason I rossette welded it was to keep the inner piece from vibrating and it added a lot of strength. I then came back and caulked the inside as I only stitch welded part of it.
Mounts
Well the mounts where definitely the most time consuming part of this build. I wanted the mounts to slide all the way into the frame as far as I could. So I first cut out the back of the frame rail.
The drivers side has the gas tank fill lines going through your frame. So that limits that side. I took measurements on the to decide how much I had to cut off the end of the tubing, and cut it so it was only 1" tall.
The passenger side had a 2" piece of flat stock welded into the inside of the frame on the bottom that was tapped for a mount for something, it had two bolt holes that where tapped. I ended up determining this peice was about 1/8" thick, so i cut an 1/8" out of the end of my mount and welded in some flat bar so it was still capped off.
The main mounts are made out of 2"x4"x.120 tubing Passenger side, You can see the piece of metal welded into the frame with my spacer on the back side.
Passanger side spacer I made to go on the back side of the piece in the frame.
I then took 1/4" angle iron. 2"x2 for the outside and 1.5"x1.5" for the inside, I did have to cut the 2" down to 1.5" on the tubing side as I wanted my bumper to only be about 2" away from the rear body. I also cut the bottom and inside off the tub 2" back so when I weld on the rear bumper the mount goes all the way to both sides on the outside and top of the mount and is welded to the front and back of the main bumper piece. 1/4" thick angle iron welded and drilled for factory bolt holes
So the tubing now looks like this.
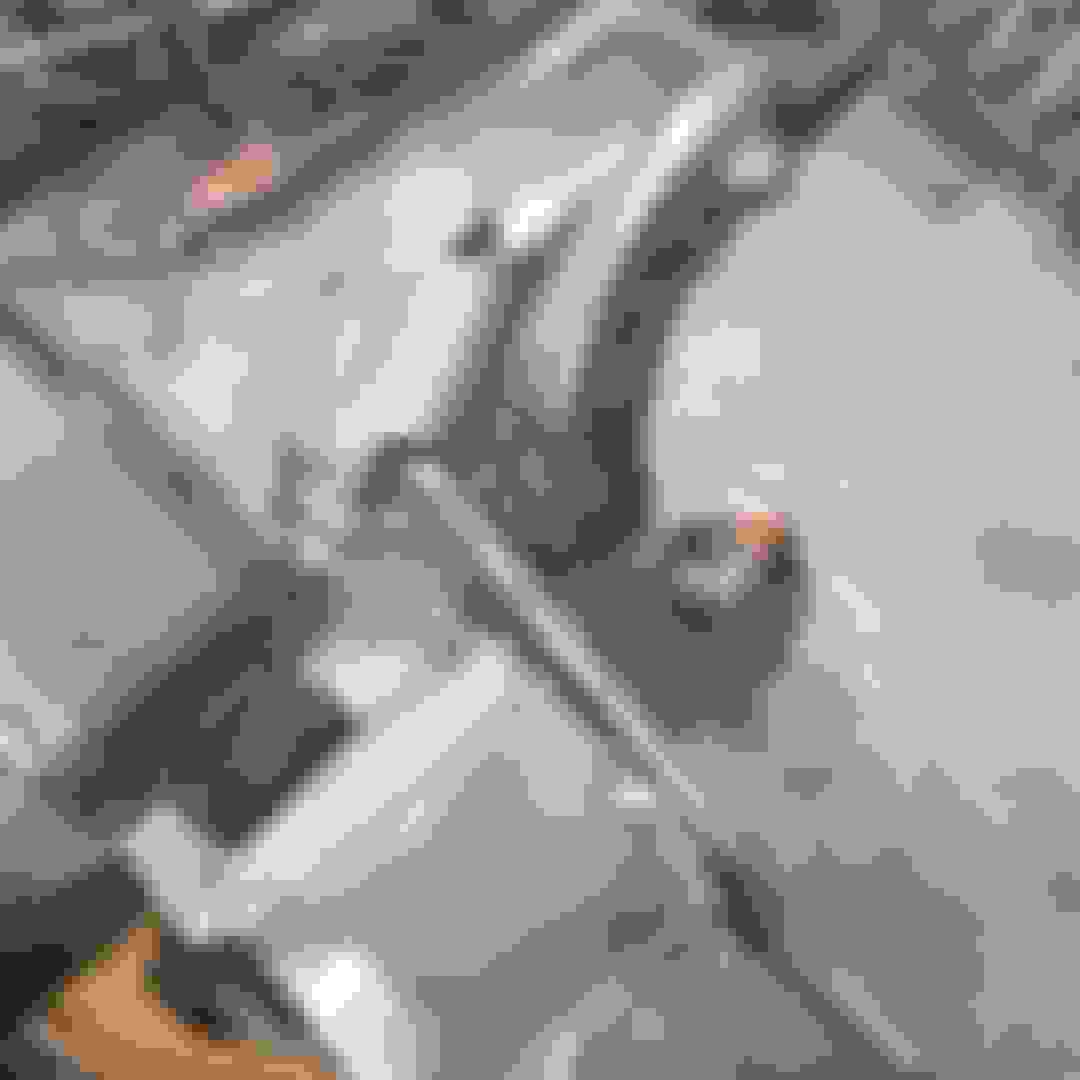
Once I had the angle Iron welded on and the tubing mounted to the frame I marked 5 holes on both pieces. I then drilled for 1/2" bolts on my drill press and welded in captive nuts... This really sucked and was hard to get to the nuts in the middle of the tubing. Drivers side not so bad but as the passenger side was about 16" long, getting your mig gun down in there was difficult. not pictured as it was not drilled yet is a large hole for the upper shackle bolt to pass through the mounts. Yeap thats right, your shackle bolt extends into the frame rail. So to remove my bumper you have to back the upper shackle bolt out. Drilled and captive nuts welded in
Remember that spacer I made to go way back in the frame on the passanger side. Well the last thing I did was weld that in. So I removed it, and drilled 4 holes in the bottom of the frame with a unibit. I then put the piece back in marked and drilled it out a 3/4" hole for the 1/2" mounting bolt to pass through to the bumper mount. I then put it back in, installed the bumper mount, bolted down the bumper mount and rossette welded the spacer to the frame Ressette welded spacer, be sure to have that rear frame bolt in so the spacer is sucked down tight to the frame.
Main Bumper
The main bumper was made out of 2"x5"x.120 tubing. You could go for .188 thickness, I just don't think its necessary. Depending on your wheelin style it might be.
This was fairly simple, I ended up doing this in 3 pieces. First cut a center section to go between my frame mounts.
Remember how I left the frame mounts cut in an L. Well they got welded to the front and back of the main bumper tube.
I also marked and drilled for my receiver before welding these up. a little easier before you weld them so you can use your drill press
I then cut the side pieces leaving them sticking out past the side of the body about 1/4" inch. The reason why I did these in 3 sections, one it was easier, two the outer pieces have a slight angle to them as they are angled inward to follow the body line a little more.
I marked both the outer sections 2" down and 11" in and buzzed them off with a cutt off wheel. This will add a nice look.
Bumper Sides
The sides I made out of 2"x3"x.120 wall tubing. I set them 1/4" away from the body and they stick out 1/4" past the body. The front side was cut at a 50 degree angle and capped off(before doing this I drilled and installed 1/2" captive nuts).
I also cleaned up the frame for a piece of 4"x.120 flat stock. making this as long as I could before the frame started to curve. This was going to be for some side support mounts to span from the frame to the bumper sides.
The mounts that span to the frame are 1.25"x.120" round stock welded to 2"x.120 flat stock the bolt mounts.
So the only thing with the frame plate is I wanted to have captive nuts on it for the support mounts. so I drilled the frame out large enough for the entire nut to pass though. That way the nuts could be welded to the back side of the frame plate. The only issue with this is there was not enough room for the nuts to clear the inner bumper mount tubes. so I ended up double stacking the frame plate with another plate. So the 4" frame plate was drilled out to 3/4 just like the frame. So a 1/2" nut can pass all the way through. The nuts where welded to the back side of a 2"x.120 flat stock that was then welded to the 4" frame plate that was then welded to the frame. If that makes sense. this spaced the nuts .120 out of the frame giving enough clearance for the bumper mounts to clear when you slide the bumper in. Holes where drilled in the inner bumper mounts for the bolts to pass though. the bolts are removed before removing the bumper so it can slide out.
You can kinda see the double stacked frame plates
frame cleaned up to be plated
frame plate tacked and side supports tacked up to the mounting plates
Some things not pictured are the receiving install. Nothing special 5" long receiver tubing welded on the front and back of the bumper. Hole was drilled 2.5" back from the front to allow room for the bumper and the welds.
The ends of the bumper where fully capped after reaching in and welding the inside of the bumper the best I could with the mig gun.
The bumper sits so close to the frame that I had to cut out the middle of the frame to allow the receiver to pass though it and give room so you could install the hitch pin.
Shackle/Clevis mounts. These where placed with the outside edge on top of the welds for the frame mounts. So technically they are welded to the frame mount tubes and the main bumper. I beveled them greatly with a flap disc and put about 7 beads on both sides and 3 on the top and bottom. There on there. This is the only place I feel as if .188 thick bumper could be better, or if you got longer shackle blocks that could have been welded along the bumper mounts for a few inches so they weren't just welded to the back of the bumper. as they are on the seam and welded to the end of the tubes that slide into the frame I think they will be plenty strong enough as long as you pull straight.
Clearance for receiver and room to get the hitch pin in.
The bumper then received a nice coat of primer and 3 coats of Rustoleum Hammered! All painted up. You can see the side mount supports in the background.
Conclusion and Costs
Overall I love the bumper, I love that its up close and tight to provide maximum clearance and departure angle. The only issue with it being so close is its a pain in the butt to get the bolts in the factory bumper mount holes. I have to slide a ratchet in from the cut out in the frame for the receiver and use a wrench on the outer ones. Also having to cut out the cross member on the back of the uni-body sucks. I thought about strengthening this but as the bumper is bolted in between the two frame rails its now the cross member.
Even though I welded most all of the main bumper tube that's between the two frame mounts when the frame mounts where bolted up. I experienced some warping. This cold have also been from the heat I put to the bumper when welding the shackle tabs on. I should have let it cool more inbetween each pass.
Bumper is attached with 26 Bolts total.
8X 10mm bolts in the factory location
10X 1/2 bolts, 5 along each frame rail from the bottom.
8X 1/2 bolts for the sides, 2 on the frame side, 2 on the bumper side.
The only other thing I will probably do is get frame stiffeners in the back which will plate the bottom of the frame where the bumper bolts through.
I was going to plate the corners of the bumper to fill in below the tail lights, I opted to not do this as I am going to make custom tail lights that will be longer and will fill in this area.
Costs
Total Cost was about $175 plus welding gas/wire/time. Also wear on cut off wheels :-)
I do get a discount at both places I purchased the metal and bolts.
Tubing 4"x2".120 4ft = 24.29
Flat Bar 1/8"x4" 5ft (only used about a foot.) $7.68
5x2x.120 Rectangle tubing. 6ft $38.58
3x2x.120 rectangle tubing 4ft $19.78
1-1/4"x.120 Round 3ft $6.44
Flat Bar 1.5x.120 2ft $1.16
Flat Bar 2"x.120 3ft $2.69
2" Angle Iron (dont have price)
1.5" Angle Iron (dont have price)
Receiver Tubing 6" $4.95
Cutting Charge $15
8X 1/2"x1" Zinc Grade 8 bolts $5.37
10X 1//2x1.5" Zinc Grade 8 Bolts $8.63
18X 1/2" Zinc Grade 8 Nuts $3.69
18X 1/2" Zinc Grade 8 Washers $14.35
2 flap discs $4
2 4" Cut off wheels. $3
Let me know your thoughts, what would you do differently.
So instead of posting a thread all the time of projects I thought I would create one location so anyone can follow my build. I will try to include all prices and details so anyone can get ideas for what they may want to do. I am working on my Cherokee every night trying to get it ready for wheeling this spring.
I purchased my XJ 2 years ago, its a 1996 XJ Sport with 240,000 miles on it. I purchased it for $3200. It came with a Rough Country 6.5" long arm lift, Currie 1 ton steering, and practically brand new 33x12.5 Goodyear Wrangler MT/Rs. Besides that it was stock. It took me about 6 months to find a Cherokee with a long arm lift and 33"s that was in decent condition. Millage was not too much of a concern to me as its not a daily driver. Just used for mountain biking, hunting and wheelin.
The first week I had it I purchased a spare engine and rear axle. Stock axle is a Dana 35. I purchased a Chrysler 8.25 that had a disc brake conversion, lunch box locker, and 4.10 gears for $450. I also picked up the engine from the guy for $400. Mainly for the spare parts on it as it came with, the A/C Pump, Alternator, Starter, 2001 Intake Manifold, Header, Power Steering Pump, Computer, New Plugs, Wires, Distributor. It also only had 150,000 miles on it. The guy built it up a little and then decided to swap an LS1 engine into his Cherokee. I figured for $400 it was worth it for all the accessories.
I will post about these but here is what I have done so far, I will make some posts on these.
New Oil Pan Gasket and Output bearing seal. ( I knew it needed these when I purchased it.
Rebuilt all the suspension, All new bushings
Swapped rear axle out for new one
Rebuilt front axle and geared to match rear.
Custom Rock Sliders
Cut and Trimmed the wheel wells
Rear Quarter Panel Sliders
Gusset Upper Control Arm Mount (Passenger Side)
Cut and Folded rear quarter panel
Rear Bumper
Lower Control Arm Skid Plates
Gusset Lower Control Arm Mounts
Front Frame Stiffeners
Current Mod list to do before spring. I will post updates on these as I finish them.
Install new U Joints and full circle C Clips
Swap to TJ style from Bump stops
Hidden Winch below radiator
Move front axle forward 1.5"
Gusset front Axle Cs
Sleeve Front Axle
WJ knuckle and brake conversion
Crossover Steering Conversion
New Track Bar
Custom Front Bumper
New Lower Front Shock Mounts
Install 2001 XJ Intake Manifold
Install Header
Roll Cage Top and A pillars external, B, C, and D pillars internal.
Still catching up on posts from past projects. While I do plan to do the mid frame stiffeners I wanted to do the front frame stiffeners done before I built my front bumper as they would change the width of the frame and thus change the bumper. I went with the RuffStuff Specialties frame stiffeners as they are 3/16 thick and have slots for welding instead of round holes for rosette welds. I think slot welds would be a lot stronger and the thicker plates are nice. The only main difference between Ruff Stuff's stiffeners and other companies is they are 3/16 instead of 10 gauge and they don't wrap under the frame on the cab side like some other companies. While I don't think that is necessary as the frame is really stiff through there as thats the old control arm location. The thing I really liked about the slots is that it made the plates easy to bend as your frame is not flat. The frame curves in at the spring tower and then back out. C clamps easily pulled the plates in flat to the frame. The only thing I do not like about the plates is they are not drilled for the factory bumper mount holes.
First I removed the springs, shocks, track bar, and brakes to make room to access the frame. I mocked up the plates with C clamps so I could mark where the paint needed to be removed for welding. You want to have nice shinny clean metal for your welds. Around the shock tower their is a body seam that the plates rest up against on the top which makes it easy to line up. The front plate you line up with your power steering mount holes.. Yes these are on both frame rails even though your power steering is only on one side. I had some frame damage on my passenger side where the rear bumper mount hole is. Frame was crushed in from a previous accident the owner had out in the mountains.
Passenger Plates tacked up so I can mark where the paint needs to be removed
I used a wire wheel on a grinder to remove the paint and then hit it with a small flap disc on an angle grinder. Drivers side all cleaned and ready for welding.
Here you can see I used a 3" chunk of 2x4 cut in half on the back side of the frame for the C clamps. This really helped keep the C clamps straight so I could get some force on the plates and bend them in flush with the frame. Then I just put some tack welds on them ever few inches to hold them in place. :Look at how nice and close those plates are
Passenger Plates tacked up
Passenger Plates tacked up
After you have them all tacked up, you just burn them in good. I welded these over 3 or 4 days. Doing 3 inch long welds in 3 different locations on them at a time to keep the heat down. Drivers side finished Drivers side finished
After your done the only place you really have to sand the welds down flush is where the bumper mounts are and at the location of your Track bar mount. Do keep this in mind that it makes your frame slightly wider so your track bar mount might not bolt up anymore. You can always weld it on now that your frame is thick enough or grind out the bolt hols on the bottom of the track bar mount 3/16 of an inch so it will still bolt up. I am doing a WJ brake conversion so I will be building a new track bar.
The only thing I did not like about them is the fact they dont have holes for the factory bumper mount. It was easy to mark and drill the upper front factory bumper mount, but the lower one is right on a slot in the plate and you cant drill it without your bit sliding into the slot. I used a rotary bur to create this hole as I want to use the front two bumper mount holes. I did not drill the rear bumper mount hole as my bumper mounts incorporate all of the power steering mount holes.
Well I have the axle out with the knuckles remove and getting the tubes cleaned up to be sleeved. While I am waiting on some parts I cut the cups off the bump stop towers and tapped the hole for 10mm to install TJ style bump stops. The hole that already existed in the factory was a tad big so the threads I tapped where not that deep. We will see how it holds up. Might have to drill a big hole and weld a nut to a washer and then weld the washer to the towers. Way nicer having this style bump stop then the factory cup style.
Received my C gussets last night and got the upper ones burned in. I went with the Artec kit and love them. Fit great, I had to bevel a couple corners and I sanded down one of the seams where the spring touches. I know other people have complained about the spring rubbing on these. They are a builder part, just grind them down on the corner next to your spring to create a little more clearance. Welded about an inch or two at a time and let them cool inbetween.
Making sure they are sucked in tight up against the axle
You've got some clean attractive work going on with those frame rails. Very nicely done! how are you running your track bar bracket after plating the frame? making a new frame bracket or elongating the 2 bottom holes to compensate?
Thanks @That Jeep Guy XJMJ , I plan to get a new track bar as I am currently working on a WJ brake conversion so I am converting all my steering to heim joings with 1.5" DOM tubing. Ill be building a new track bar with 1.5" DOM and Heim joints as well. So far my plan is to do the RuffStuff Panhard kit with the offset axle bracket and outside frame bracket. I have to get my axle back under the XJ before I can take some measurements and make sure the outside frame bracket will work. But Im hoping it will so I can get as long of a track bar as possible. https://www.ruffstuffspecialties.com...og/PANKIT.html
Burned in the lower C gussets tonight. They fit amazingly.. I also started plating the bottom of the spring baskets to give them a little more strength
So I wanted a winch mount that did not stick out so when I build my bumper I can maximize clearance and approach angle. I was able to make room under the radiator. I cut the entire front section of the frame out. Which yes made the frame pop out about 3/4", I was sure to suck this back in with a bar clamp before welding the winch plat one. I first welded 1/4" plate to the bottom of the frame rails to space the winch plate down 1/4". Without this the winch rubbed on the bottom of the radiator.
Winch Plate is 1/4" plate that started out as 8" wide. I used a cut off wheel on my grinder and cut the plate 1 inch in from the back all the way through on 60% of the plate and almost all the way through on the rest. Bent that up to 90 degrees and welded it on top and bottom. Winch mount holes are 1" in from the back and 1.5" from the front. I doubled up the front edge with a 1" wide 1/4" thick flat bar to keep the plate from flexing and give it a little more strength. This all was welded to the bottom of the frame rails. Not shown in pictures but the bent up back was gusseted into the passenger frame rail. The engagement **** on the winch sticks out past the grill 3/4". The control unit for the winch will be mounted inside the engine compartment up by the radiator overflow.
Total cost to build without welding supplies was $30 $24 for the plate and 6 for the 1" bar stock(I bought 4 ft)
Last edited by PNWCherokee; Mar 11, 2019 at 05:00 PM.
Reason: typo
Well I am almost done with the front axle and winch on the jeep. Just pulled the jeep out of the garage for the first time in 3 months and check clearance to order shocks. My track bar is about 1.5" too long so I ordered a new rod end to shorted it a tad. Looks like everything clears and will work out. Ill be running 14" travel shocks that I just ordered and will get somewhere around 26" of wheel travel. Few things left to do and I will do a full write up on the WJ knuckle conversion later as It was a bit confusing and got different information from all over. So I will do a full write up with parts list and cost.. which was probably higher then expected but oh well.. Overall I am amazed at the flex I am getting.
Since my last post
Axle Sleeves installed. The long side was a pain in the @#$# and I should have sanded down the lip in the axle more. When the C on the passenger side was pressed onto the factory tube it pinched the tube a little making a bump on the inside. I sanded it down a bit but should have sanded it more. Took an hour and a half hammering with a sledge hammer to get it in.
Front steering, and track bar all done. Just need to shorten the track bar a couple inches.
Dodge Durango steering box
Brakes all installed- I am running 15" wheels so I had to clearance the calipers a little. No big deal but hey fit so I am excited
Dodge Durango steering box Passanger Axle Sleeve... Stuck 1/4 left to go.. oh well 16 Ton Crimp Custom Winch CAbles New battery Cables Reaming steering out to GM 1 ton 1.5x.25 DOM for steering and drag link Grand Cherokee rotors getting a new bolt pattern Not much clearance, this was before clearance my calipers Brakes are way bigger Clearances the Calipers a little I must have drilled the new bolt pattern correctly.. they fit perfectly. I'm actually running a different Pitman arm that has less drop then this. Both Drag link and Track bar are at a perfect 9 degree angle.
New battery and winch cables made from 2 gauge USA welding cable. Hydraulically crimped and marine heat shrink.
Custom Winch controller mount under the hood.
Things left to do
Fuel line by the fuel filter decided to start leaking. But I need to replace the fuel filter anyways so thats getting done,
Axle, Finish welding lower track bar mount, shorten track bar, finish welding upper mount and gusset it, Adjust steering, adjust caster, Burn in shock mounts, final clearance testing
Finish front bumper
Paint front springs
Weld on Axle sway bar mounts and build new upper mount locations
... then we should be good to go wheeling hopefully by the end of the month as the snow leaves.