
daily driver XJ


Thread Starter
Senior Member


Joined: Feb 2009
Posts: 522
Likes: 28
From: Prosser, WA
Year: 1993
Model: Cherokee(XJ)
Engine: 4.0
OK here we go.
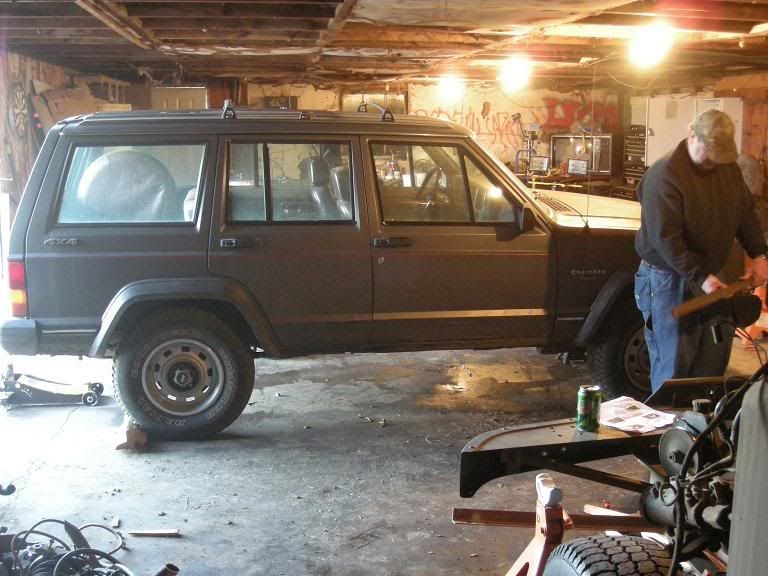
couple weeks ago i picked up a 1987 XJ 4.0L, 5 speed, 30 front (of course), and 35 rear. seller said it needed the brakes bled, as soon as i test drove it i new that wasnt true (needed new brakes). new items in it, clutch, water pump, alt, brake master cylinder, new tires. seller was asking $700
i picked it up for $500.
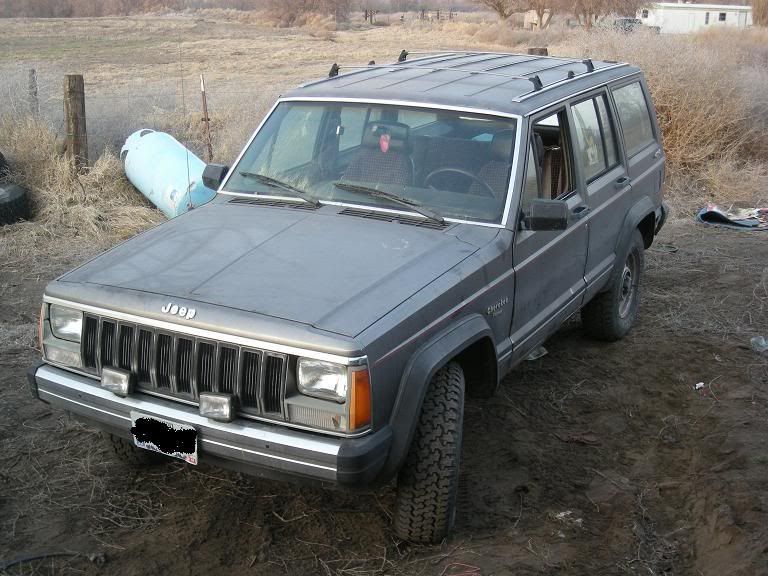
yep needed new brakes
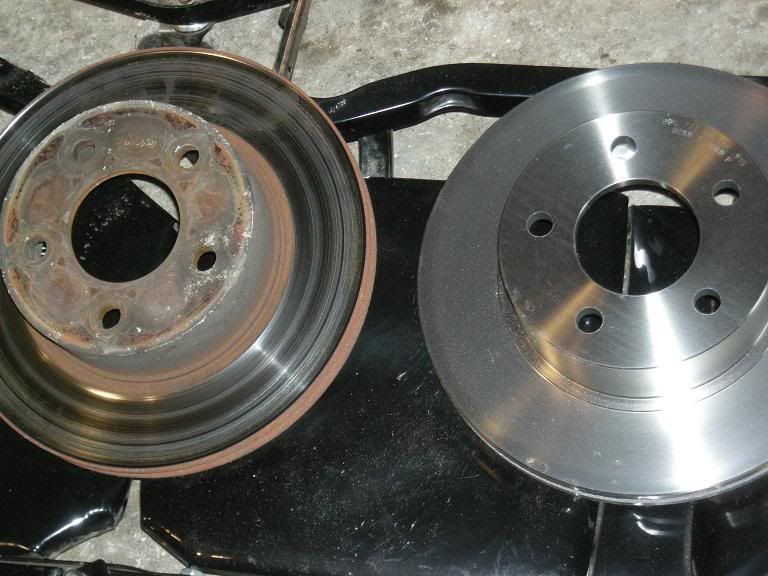
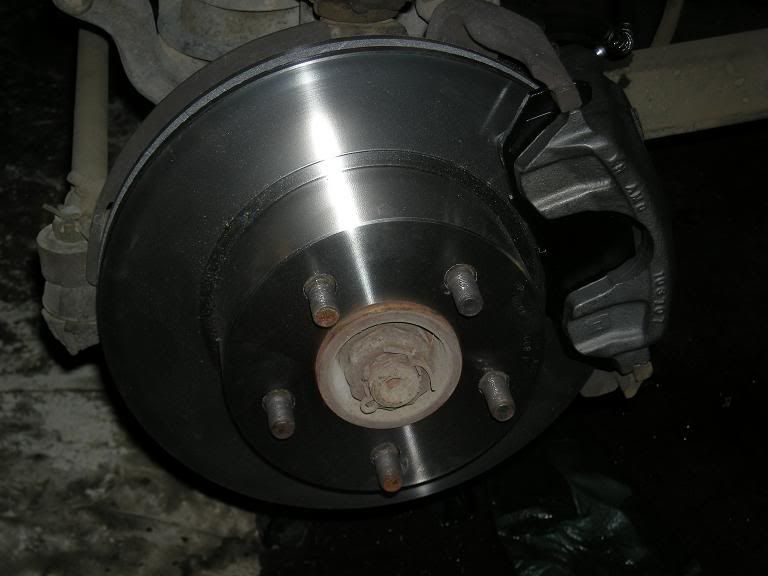
installed new rotors, cailpers and pads in the front and new pads and wheel cylinders in the rear. was having some pedal issues so i borrowed a power bleeder from a buddy and problem solved.
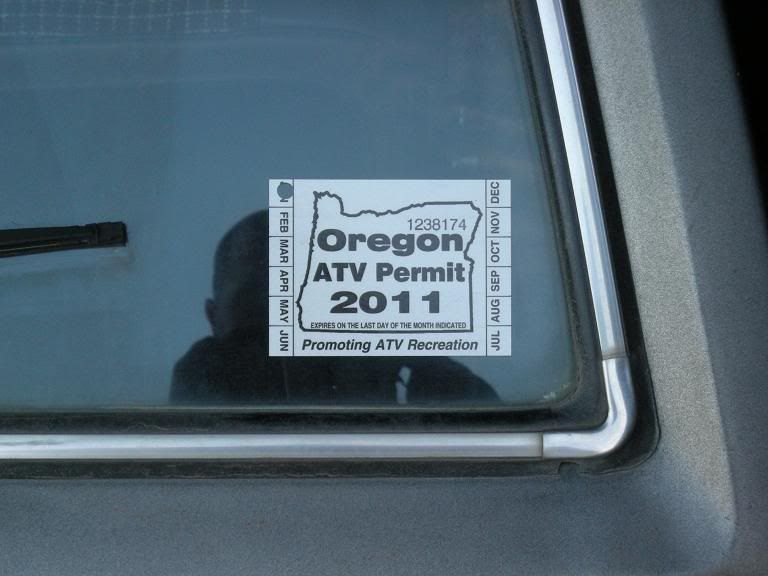
today i changed the plugs, cap, and rotor, wires were still in good shape. ive put one tank of gas through it and got 16MPG, so now that i did a small tune up on it i will see if it gets better. the heat blows hot, the motor runs cool, but it does need new shocks and some steering work. put a new OHV permit on it.
upcomming modifications:
build front winch bumper
winch
build rear tire carrier/bumper
build roof rack
cd player
winch
build custom center console
2" rustys budget boost (spacer/shackle)
CB
brighter dome lights
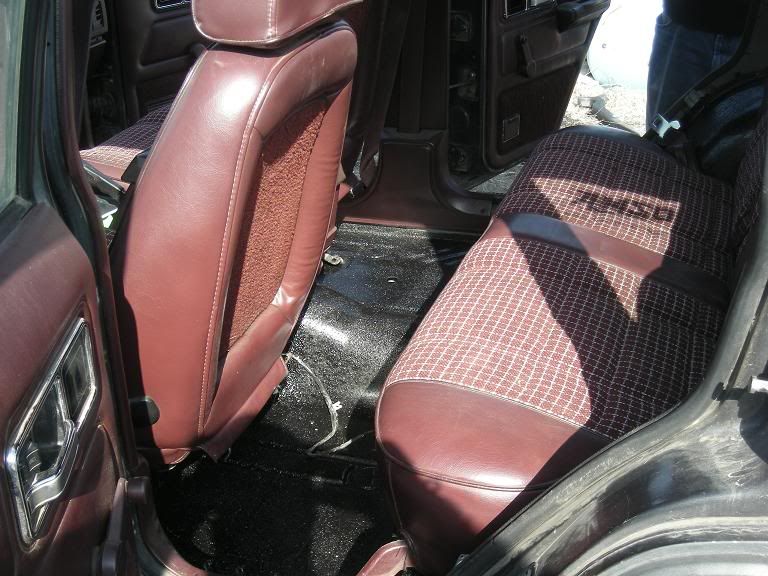
herculine interior
i picked up this to build my rear tire carrier http://www.atozfabrication.com/store...cat=274&page=1
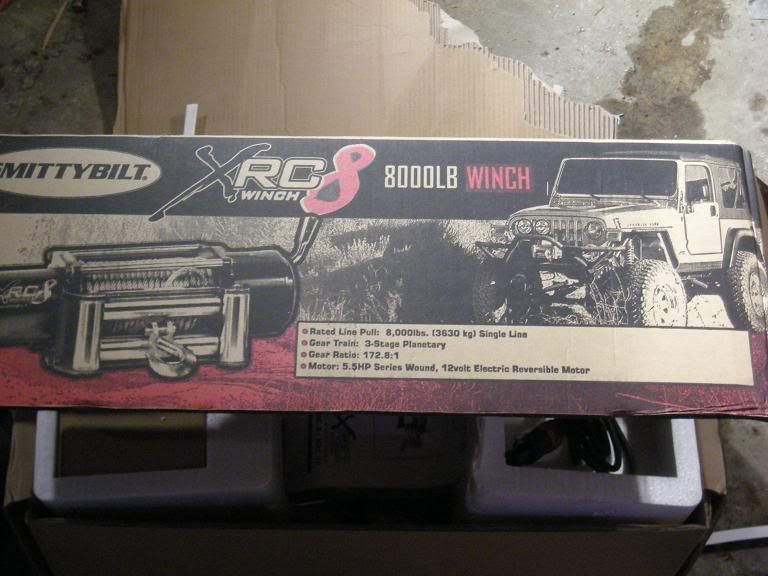
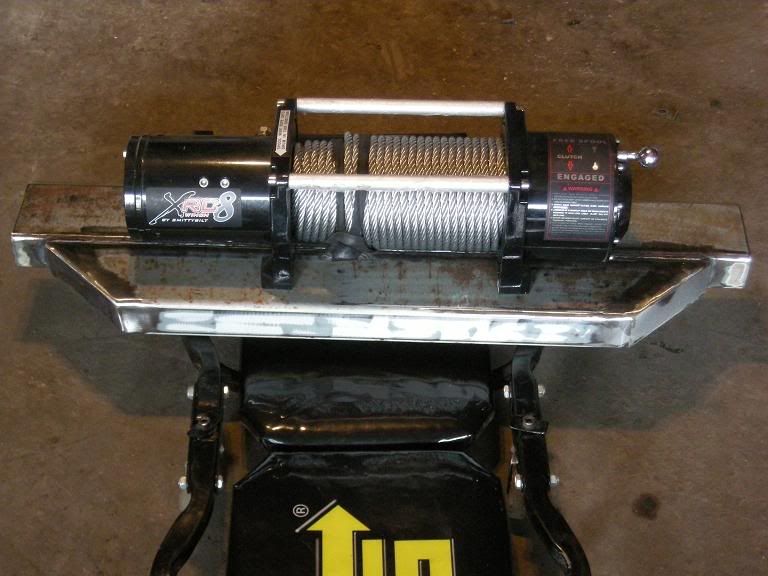
picked up my winch
more random pics

couple weeks ago i picked up a 1987 XJ 4.0L, 5 speed, 30 front (of course), and 35 rear. seller said it needed the brakes bled, as soon as i test drove it i new that wasnt true (needed new brakes). new items in it, clutch, water pump, alt, brake master cylinder, new tires. seller was asking $700
i picked it up for $500.
yep needed new brakes
installed new rotors, cailpers and pads in the front and new pads and wheel cylinders in the rear. was having some pedal issues so i borrowed a power bleeder from a buddy and problem solved.
today i changed the plugs, cap, and rotor, wires were still in good shape. ive put one tank of gas through it and got 16MPG, so now that i did a small tune up on it i will see if it gets better. the heat blows hot, the motor runs cool, but it does need new shocks and some steering work. put a new OHV permit on it.
upcomming modifications:
build front winch bumper
winch
build rear tire carrier/bumper
build roof rack
cd player
winch
build custom center console
2" rustys budget boost (spacer/shackle)
CB
brighter dome lights
herculine interior
i picked up this to build my rear tire carrier http://www.atozfabrication.com/store...cat=274&page=1
picked up my winch
more random pics
Thread Starter
Senior Member
Joined: Feb 2009
Posts: 522
Likes: 28
From: Prosser, WA
Year: 1993
Model: Cherokee(XJ)
Engine: 4.0
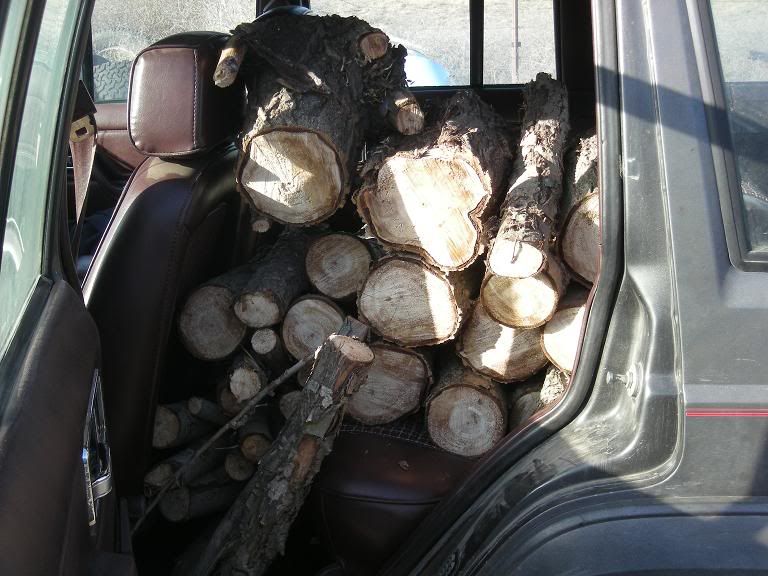
a tree fell in my yard this weekend in a wind storm so i cut it up and had to get it up to the shop so i made the jeep work lol
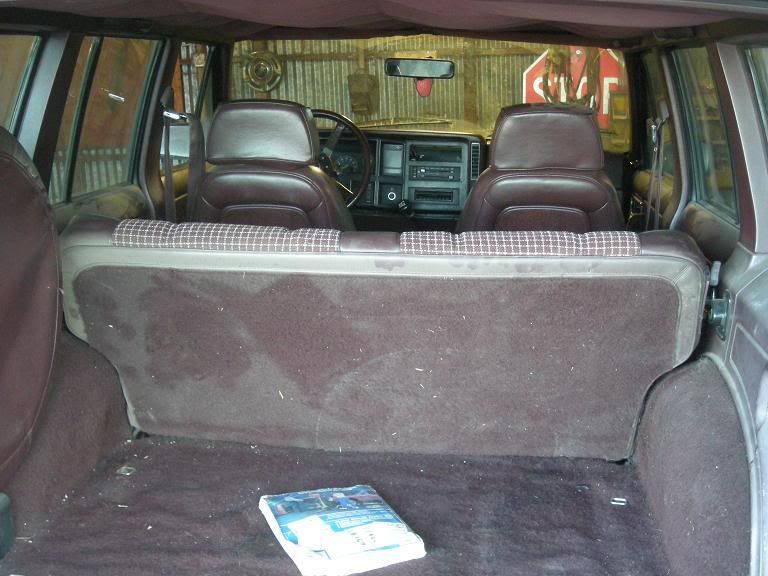
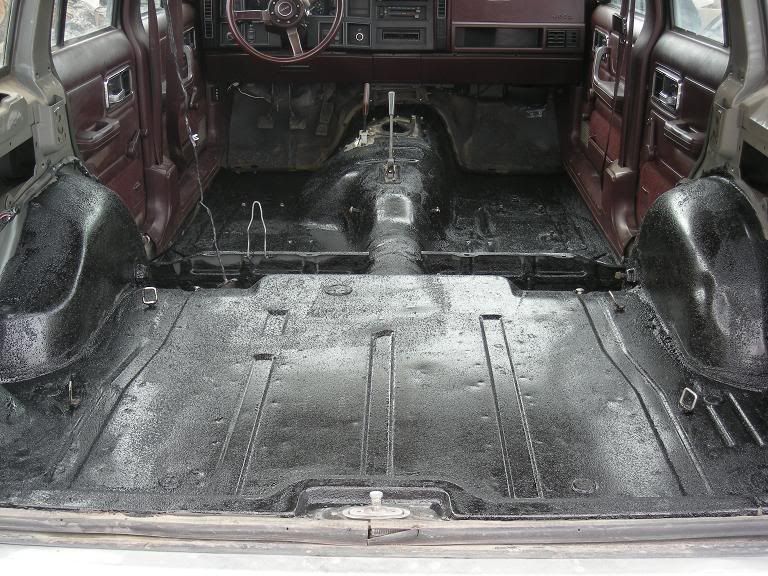
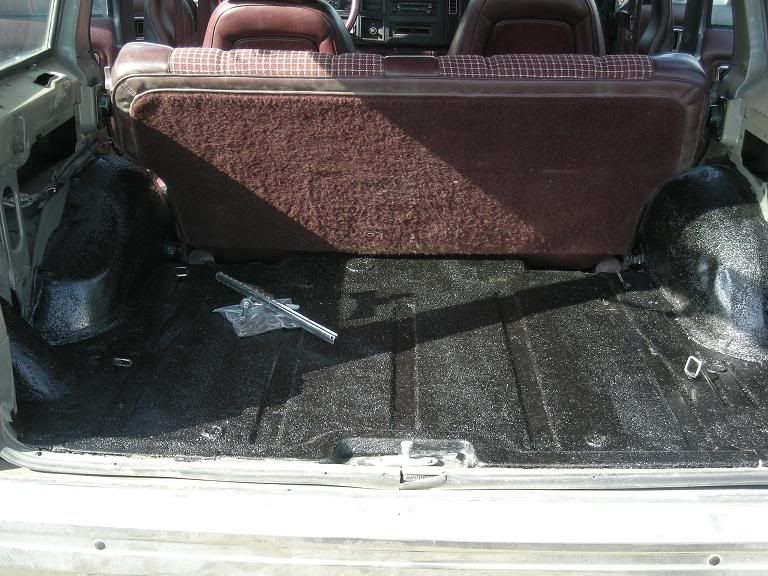
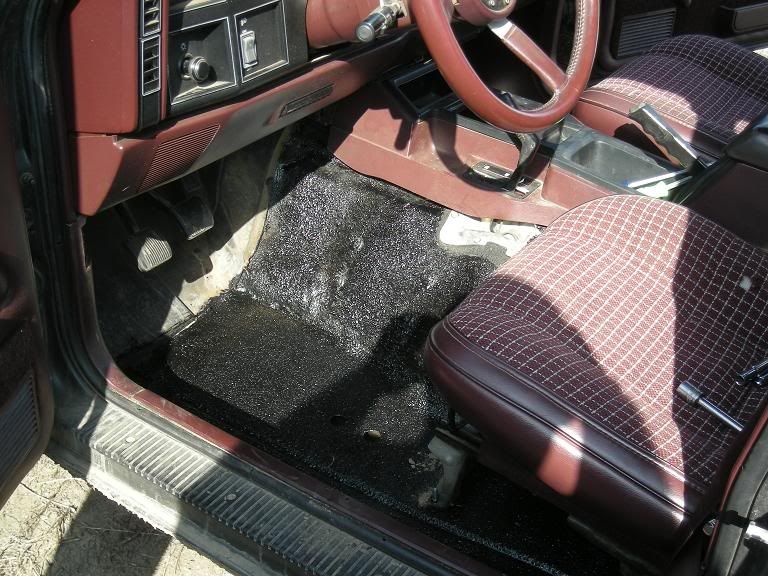
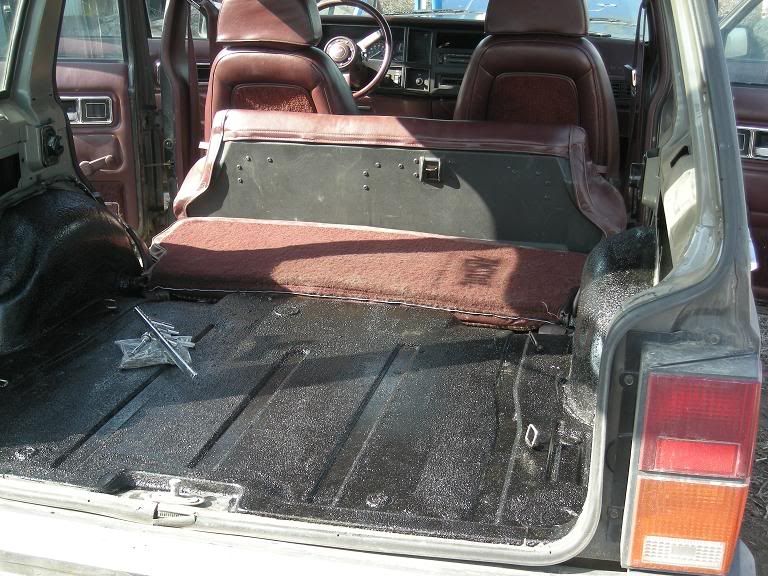
tonight i started to rip up the carpet and to my suprise it wasnt as bad as i expected.

here is the before pic

the worse rust spot after i hit it with the flapper wheel

first coat
second coat
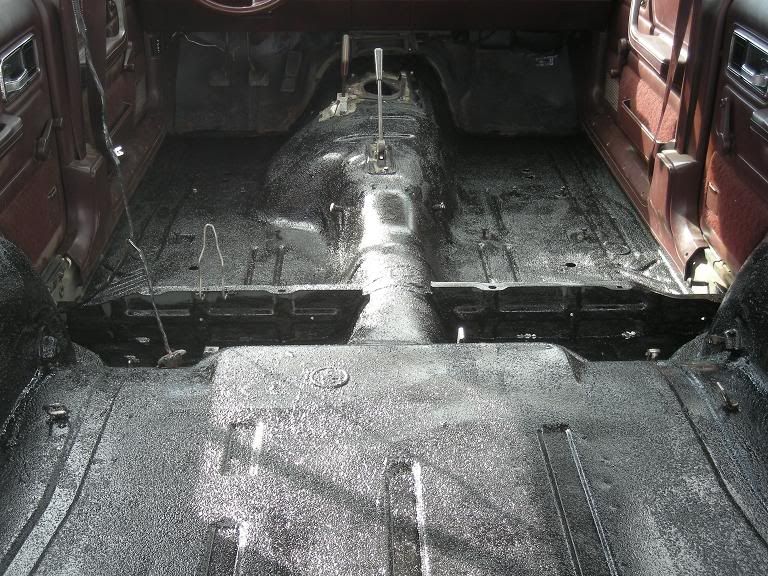
today is definately turning into spring, after getting each coat done, it started to sprinkle rain lol. then it would stop and the sun would come back out. i have to wait till tomorrow to get the seats and stuff back in, it has to cure for 24 hrs, bit dont worry ill post dome pics when its back together.
tonight i started to rip up the carpet and to my suprise it wasnt as bad as i expected.
here is the before pic
the worse rust spot after i hit it with the flapper wheel
first coat
second coat
today is definately turning into spring, after getting each coat done, it started to sprinkle rain lol. then it would stop and the sun would come back out. i have to wait till tomorrow to get the seats and stuff back in, it has to cure for 24 hrs, bit dont worry ill post dome pics when its back together.
Thread Starter
Senior Member
Joined: Feb 2009
Posts: 522
Likes: 28
From: Prosser, WA
Year: 1993
Model: Cherokee(XJ)
Engine: 4.0
ok so the other day i started to take the front bumper off to build a winch bumper, nothing special just something to hold the winch. basicly all i got done was taking the bumper off and cutting the fangs, and i cut some of the material for the new one.
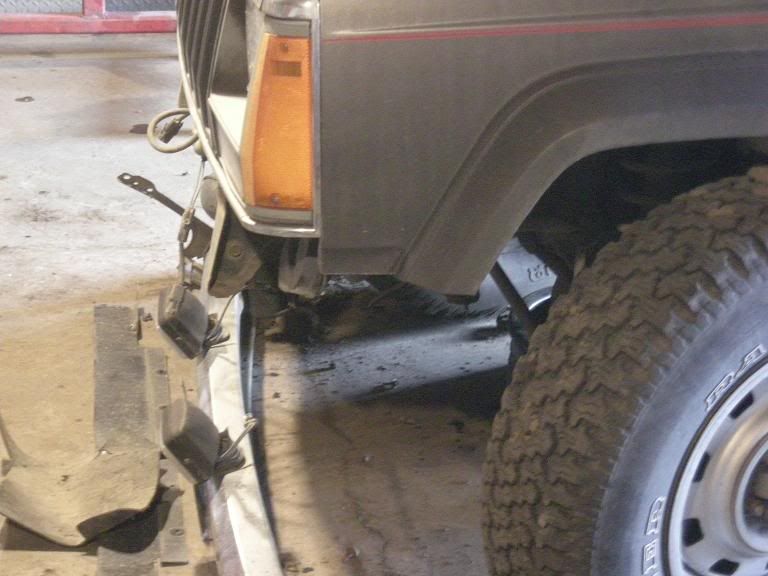

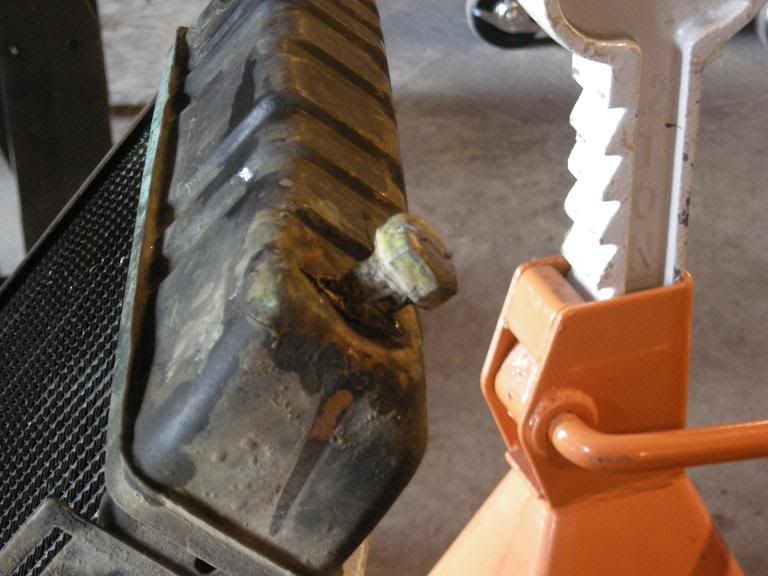
i had today off so i was hoping to get all/most of it done BUT as i wa making a cardboard template for my bumper mount i noticed something on the side of my radiator. it looks like there was a hole in the side of it and they stuck a good sized bolt into it and then tried JB weld. i touched it and it started leaking SO now i have a new radiator on order. > not happy.
after that i didnt even feel like working on it anymore but i made myself do it anyways and got one of the mounts cut out.
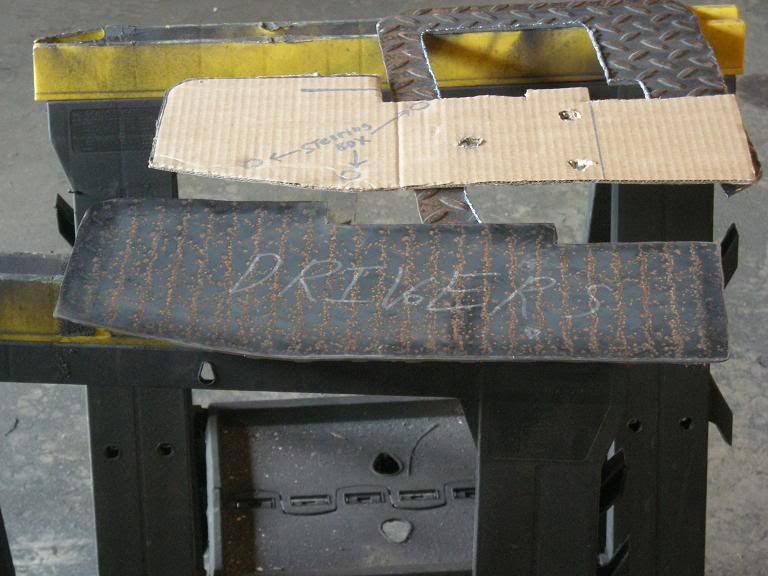
this shows how much further the mount will go back on the "frame" than the stock one. the driver side will incorporate the steering box bolts and i will add more on the passenger side also.

here is the center section of the bumper (not finished)

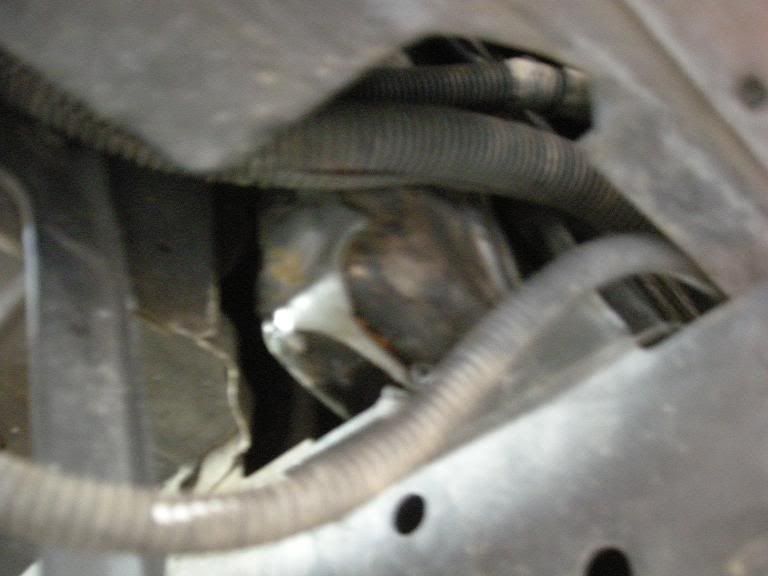
ok so this was what they had JB welded into the radiator
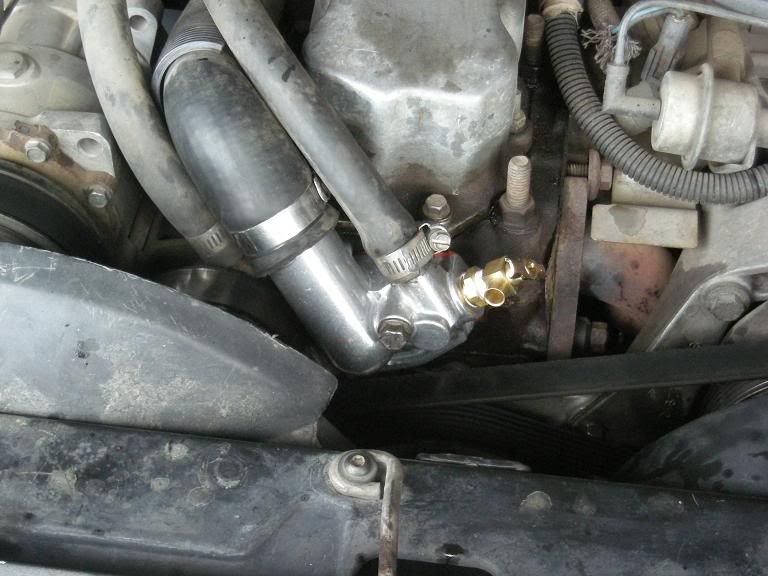
i got the new radiator in and of course with it being a closed cooling system it is fun to get the air out so i decided i was going to make it easier and installed a 92 thermostat housing and put a drain in, also drilling a small hole in the top of the thermostat flange itself to help get air out.
i had today off so i was hoping to get all/most of it done BUT as i wa making a cardboard template for my bumper mount i noticed something on the side of my radiator. it looks like there was a hole in the side of it and they stuck a good sized bolt into it and then tried JB weld. i touched it and it started leaking SO now i have a new radiator on order. >
not happy.after that i didnt even feel like working on it anymore but i made myself do it anyways and got one of the mounts cut out.
this shows how much further the mount will go back on the "frame" than the stock one. the driver side will incorporate the steering box bolts and i will add more on the passenger side also.
here is the center section of the bumper (not finished)
ok so this was what they had JB welded into the radiator
i got the new radiator in and of course with it being a closed cooling system it is fun to get the air out so i decided i was going to make it easier and installed a 92 thermostat housing and put a drain in, also drilling a small hole in the top of the thermostat flange itself to help get air out.
Thread Starter
Senior Member
Joined: Feb 2009
Posts: 522
Likes: 28
From: Prosser, WA
Year: 1993
Model: Cherokee(XJ)
Engine: 4.0
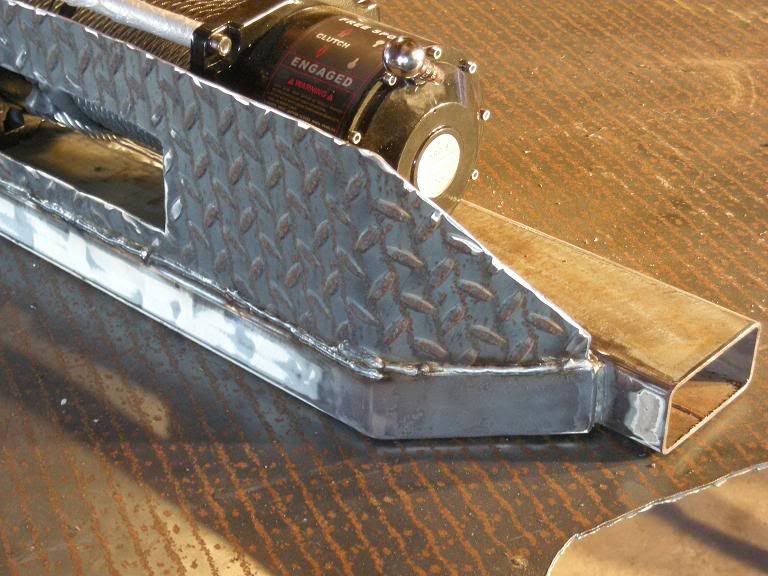
ok i got the passenger side bracket cut out today, also cut out the center section for my winch fairlead to mount to, bent it up and welded it on. looks like i might need to cut a little higher for the cable to come through.

my buddy had a bracket that fit on the fairlead that held his license plate and it would flip up or down depending on how it was mounted. well if it was flipped up you can see the winch cable spooling, and if its down and you winch upto something it will rip it off. so i am working on a bracket to flip the license plate out sideways.
my buddy had a bracket that fit on the fairlead that held his license plate and it would flip up or down depending on how it was mounted. well if it was flipped up you can see the winch cable spooling, and if its down and you winch upto something it will rip it off. so i am working on a bracket to flip the license plate out sideways.
Trending Topics
Thread Starter
Senior Member
Joined: Feb 2009
Posts: 522
Likes: 28
From: Prosser, WA
Year: 1993
Model: Cherokee(XJ)
Engine: 4.0
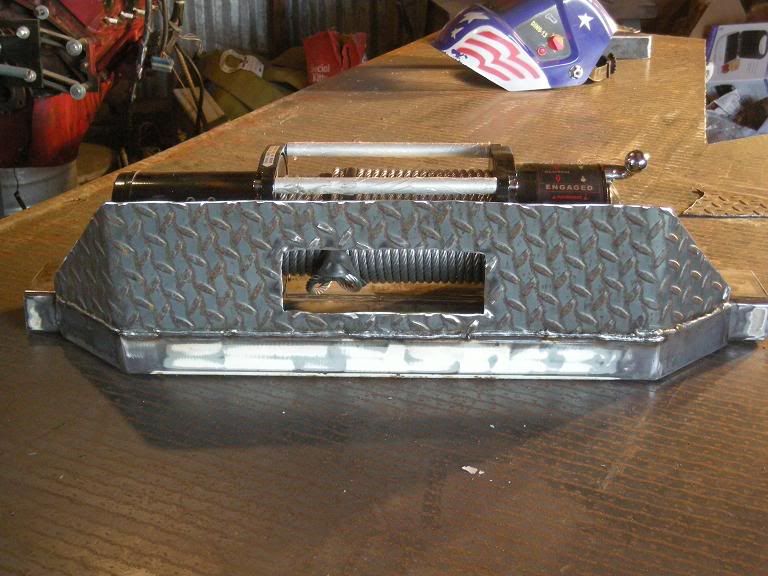
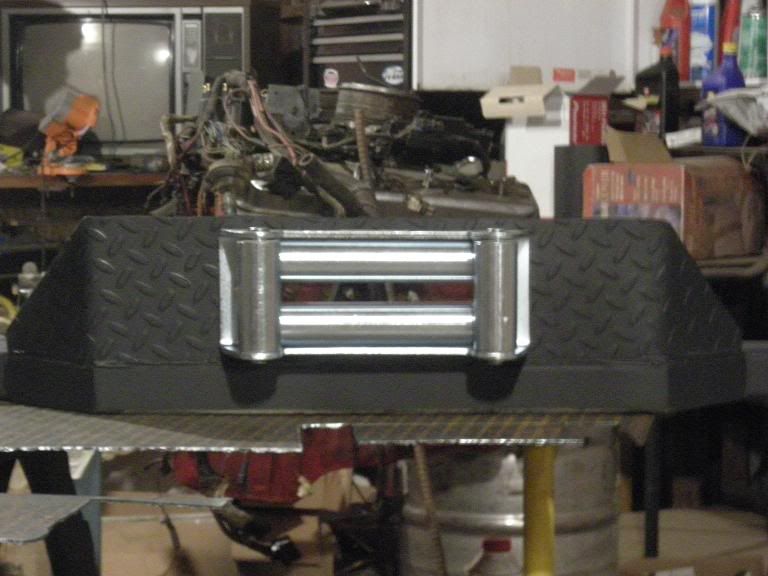
my amazing paint skillllz lol
the grey is the extra i cut out and the blue is where i cut another piece and welded it to the back for extra strength.
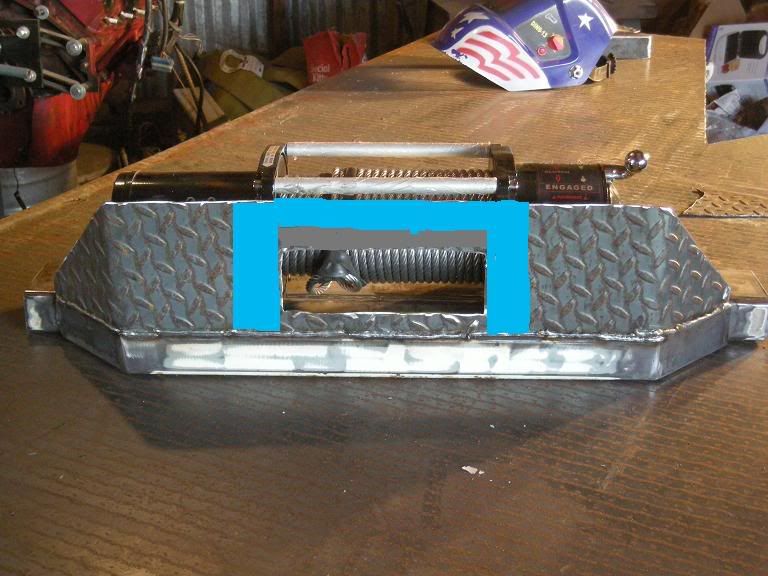
and painted and the fairlead mounted
the grey is the extra i cut out and the blue is where i cut another piece and welded it to the back for extra strength.
and painted and the fairlead mounted
CF Veteran
Joined: Feb 2009
Posts: 1,268
Likes: 0
From: rogersville, tn
Year: 1988
Model: Cherokee
Engine: 4.0
man o man do i love home made bumpers, i made my own and i think it makes one appreciate it more. i like the floors i did mine in herculiner i thought it turned out great


CF Veteran
Joined: Oct 2008
Posts: 1,052
Likes: 0
From: Wyo
Year: 1996
Model: Cherokee
OK, SO I'm guessing central to Eastern Oregon. Maybe South Central, but My guess is Madras. How close am I? You didn't give me much landscape to work with for guessing.
Great build by the way. I'm very interested in your bumper design and can't wait to see it installed.
s
Great build by the way. I'm very interested in your bumper design and can't wait to see it installed.
s
