
'86 Comanche DD

Thread Starter
CF Veteran
Joined: Apr 2011
Posts: 1,146
Likes: 0
From: Clayton, NC
Year: 1988
Model: Cherokee
Engine: 4.6L I6 Stroker with port matched +99 intake and 62mm TB
Picked this baby up today.
1986 Jeep Comanche Custom
- 2.5L I4 TBI Now a 4.0L I6 MPFI
- AX4 4-speed manual Now an AX15 5-speed
- 4WD NP207 Command-Trac Now a NP242 Selec-Trac
- 7-ft longbed
- Custom dual exhaust
- 82,000 body miles
- Donor YJ engine (mileage unknown) Now a rebuilt donor XJ engine with supposedly 15k miles
- Stock, otherwise Now far from stock, hehe.
Going to get her running good and fix all the cosmetic stuff. Here's a few pictures as she sits now. More to come soon. Progress will be slow.
My plans for this one is to keep it mostly stock for fuel efficiency and hauling stuff. So far on the bucket list:
- Engine tune up
- Change all the fluids
- Upgrade the headlights Done
- Instrument cluster with tach and true meter gauges (ridding me of the idiot lights) Done
- Swap to a dual-diaphragm brake booster from a '95-'96 XJ (removing the load sensing rear prop. valve in the process) Done, WJ booster and MC
- Rear disc brakes
- Paint the whole truck with tractor paint in the color "Ford Blue"
- Bedline the cargo box in black and the floor pans/cab in tan using Rust-Oleum aerosol bedliner Done, with floor pans.
- LED cab marker lights
- LED high/center mount third brake light
- Modified XJ overhead console with dome lights, compass and temperature gauge Done, just got to get temp gauge working
- Power locks, power windows, keyless entry
- Fix/straighten rear bumper
- Replace fog/spot lights Done
- Add brighter reverse lights
- Add full-size spare Done
- Paint "Jeep" letters in black on liftgate Done, got J-e-e-p vinyl stickers to go over it.
- Paint rims black Done
- Refresh emblems/badges Done
1986 Jeep Comanche Custom
- 2.5L I4 TBI Now a 4.0L I6 MPFI
- AX4 4-speed manual Now an AX15 5-speed
- 4WD NP207 Command-Trac Now a NP242 Selec-Trac
- 7-ft longbed
- Custom dual exhaust
- 82,000 body miles
- Donor YJ engine (mileage unknown)
Now a rebuilt donor XJ engine with supposedly 15k miles- Stock, otherwise Now far from stock, hehe.
Going to get her running good and fix all the cosmetic stuff. Here's a few pictures as she sits now. More to come soon. Progress will be slow.
My plans for this one is to keep it mostly stock for fuel efficiency and hauling stuff. So far on the bucket list:
- Engine tune up
- Change all the fluids
- Upgrade the headlights Done
- Instrument cluster with tach and true meter gauges (ridding me of the idiot lights) Done
- Swap to a dual-diaphragm brake booster from a '95-'96 XJ (removing the load sensing rear prop. valve in the process) Done, WJ booster and MC
- Rear disc brakes
- Paint the whole truck with tractor paint in the color "Ford Blue"
- Bedline the cargo box in black and the floor pans/cab in tan using Rust-Oleum aerosol bedliner Done, with floor pans.
- LED cab marker lights
- LED high/center mount third brake light
- Modified XJ overhead console with dome lights, compass and temperature gauge Done, just got to get temp gauge working
- Power locks, power windows, keyless entry
- Fix/straighten rear bumper
- Replace fog/spot lights Done
- Add brighter reverse lights
- Add full-size spare Done
- Paint "Jeep" letters in black on liftgate Done, got J-e-e-p vinyl stickers to go over it.
- Paint rims black Done
- Refresh emblems/badges Done
Last edited by onlyinajeep726; Jan 5, 2015 at 09:18 PM.
Thread Starter
CF Veteran
Joined: Apr 2011
Posts: 1,146
Likes: 0
From: Clayton, NC
Year: 1988
Model: Cherokee
Engine: 4.6L I6 Stroker with port matched +99 intake and 62mm TB
So, little update. Progress has been slow. Between working damn near full time and raising two kids, I have only been able to work on the MJ a handful of nights for about 3 hours at a time. Anyway, made some progress on the interior the past couple of nights. First, I diagnosed a minor electrical problem. Instrument cluster backlights and various other dash lights were not working. Found a mysterious 6 prong plug hanging in the dash behind the cigarette plug. Have no idea what it goes to as I could not find its possible mate. All I know is that it had an orange/black wire and blue wire going to it. Come to find out that when the parking lights/headlights are on, the blue wire receives power. The orange/black wire feeds all the dash lights, so I just made a jumper between those two and wah-lah, I have dash lights. Can't dim them, but that's okay, switching to LEDs one day...
Tonight, I removed the shifter console and the bench seat. All but two of the eight nuts came off without hassle for the seat brackets. Of course, on the driverside, one was rusted out of the frame, the other refused to turn. I ended up using an angle grinder with a cut off wheel to cut that ***** off. Have to figure out how to safely secure the seat back later. I pulled all the rubber matting out as well as the sound muffling material... Oh the joy as I found a truck load (no pun intended) of rust on the floor pans. Mostly just surface rust but it's going to be a lot of work to grind/sand/wire wheel it all off to get it ready to bedline.
Also got my knock off Flowmaster 40 muffler today from performance-curve.com. Got to go to the parts store on Saturday to pick up my $30 power steering hose.
I will post pictures of all this tomorrow or in the following days. I'm much too tired after working and then working on the truck.
Last edited by onlyinajeep726; Oct 21, 2013 at 07:46 PM.
CF Veteran
Joined: Jan 2009
Posts: 2,740
Likes: 0
Year: 87
Model: Cherokee
Engine: 4.0
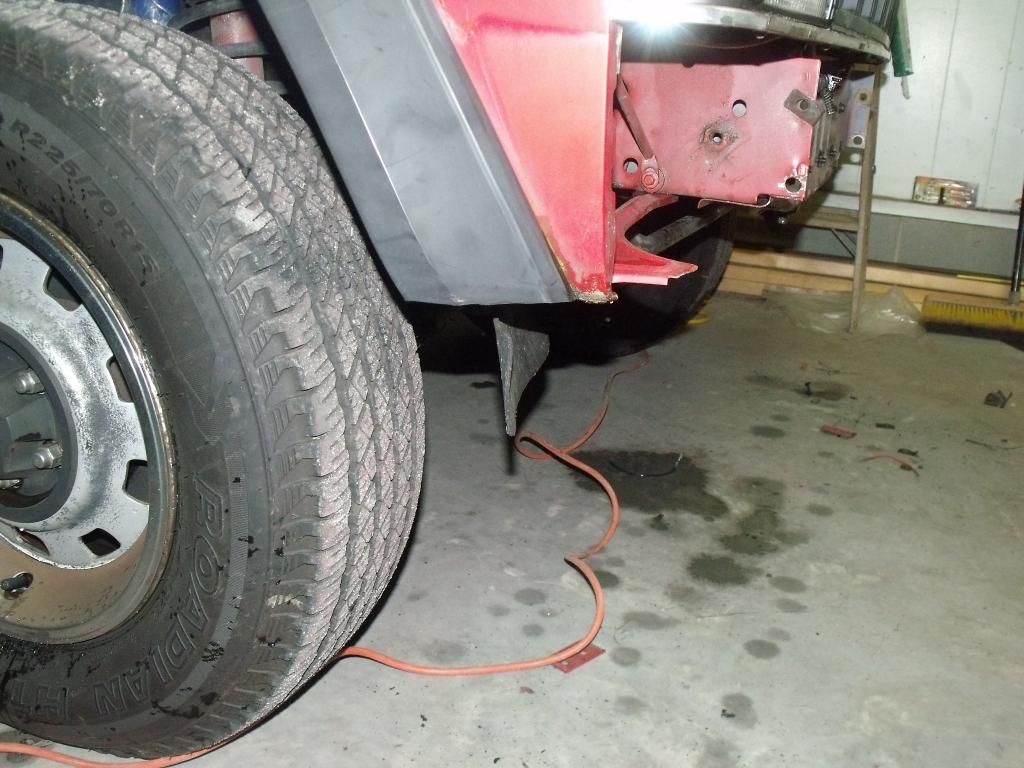
YOu have now. or have had a leaky clutch master cylinder... this is abvious do the rust so high on the toe boards.
Also keep in mind that the MJ's shared the wiring harness of the XJ's. They used the same harness for the fully loaded rigs all the way down to the stripped rigs.
Also DO yourself a favor and replace the MJ specific prop valve with a xj one.. and re run your rear brake lines. They like to rust right at the fuel tank. Also the fuel tanks are famous for rusting.. there use to be a vendor on ebay who sold new tanks for under a c-note.
I used to be big into DD'ing Mj's.. now I prefer building truggies/wheeling rigs out of them. I also do the same thing with Xj Btw.
Lastly do not spend a lot of money on a 2.5... PPl literaly give low mileage ones away when they do v-8 swaps.
Trending Topics
Thread Starter
CF Veteran
Joined: Apr 2011
Posts: 1,146
Likes: 0
From: Clayton, NC
Year: 1988
Model: Cherokee
Engine: 4.6L I6 Stroker with port matched +99 intake and 62mm TB
Thread Starter
CF Veteran
Joined: Apr 2011
Posts: 1,146
Likes: 0
From: Clayton, NC
Year: 1988
Model: Cherokee
Engine: 4.6L I6 Stroker with port matched +99 intake and 62mm TB
Time for an update... this one is going to be a fairly large one since I've been quite busy with a lot of mini projects on the MJ. Lots of pictures too, so bare with me here.
Anyway, I've got the interior of the truck 99% back together, this excludes the shifter console. I am likely going to build a custom console because the stock one is both broken and doesn't fit correctly now that the rubber matting has been removed. The things that were done to the interior are as follows:

After floorpans were bed lined.

Bench seat bracket remake.

Instrument cluster with full gauges swapped in, indicating original mileage. Tachometer calibrated from a 4.0L to my 2.5L.

This shows how I used the MJ's original speedo-cable retaining clip and modified it for use on the '90 XJ speedometer. Yes, it can be done and yes, it works. When I installed the instrument cluster, I heard and felt a distinct click.

Brand new, OEM shift **** from eBay.

6" x 9" MTX speakers and boxes mounted to inner rail beam.

6.5" Pyle subwoofers and 1" Pyle tweeters installed. Crossover box on passenger side was mounted under the kick panel.

Pioneer Premier Supertuner III D head unit.
Anyway, I've got the interior of the truck 99% back together, this excludes the shifter console. I am likely going to build a custom console because the stock one is both broken and doesn't fit correctly now that the rubber matting has been removed. The things that were done to the interior are as follows:
- Rubber matting completely removed
- Floor pans, trans. tunnel and all floor board metal grinded/sanded/wire-wheeled to remove surface rust
- All of the above sprayed down with Rust-Oleum� Stops Rust� Rust Reformer
- All of the above sprayed over twice with Rust-Oleum� Truck Bed Coating
- Bench seat brackets partially remade due to rust
- Instrument cluster swap, tachometer calibrated for 4-cyl., odometer clocked back to indicate original mileage
- New shift **** as old one was dry rotted and cracked
- 6" x 9" MTX speakers and boxes added behind seat
- 6.5" Pyle subwoofers and 1" Pyle tweeters added to doors
- Pioneer Premier Supertuner III D head unit installed and tuned
- Replaced rear view mirror
After floorpans were bed lined.
Bench seat bracket remake.
Instrument cluster with full gauges swapped in, indicating original mileage. Tachometer calibrated from a 4.0L to my 2.5L.
This shows how I used the MJ's original speedo-cable retaining clip and modified it for use on the '90 XJ speedometer. Yes, it can be done and yes, it works. When I installed the instrument cluster, I heard and felt a distinct click.
Brand new, OEM shift **** from eBay.
6" x 9" MTX speakers and boxes mounted to inner rail beam.
6.5" Pyle subwoofers and 1" Pyle tweeters installed. Crossover box on passenger side was mounted under the kick panel.
Pioneer Premier Supertuner III D head unit.
Last edited by onlyinajeep726; Feb 4, 2013 at 09:03 PM.
Thread Starter
CF Veteran
Joined: Apr 2011
Posts: 1,146
Likes: 0
From: Clayton, NC
Year: 1988
Model: Cherokee
Engine: 4.6L I6 Stroker with port matched +99 intake and 62mm TB
The outside of the truck is still not completely done and probably won't be for quite some time. However, I have managed to get a few things done both needed and unneeded. Below is a list of what I've done to the exterior:

Newer valve cover.

Power steering hose replaced.

Vacuum ball/bottle relocated.

Head light bezels bed lined, grill swapped and bumper removed to be bed lined also.
Front flares cut even with bottom of bumper.

Chassis grounding cable added.

Oil pressure sending unit and coolant temperature sending unit.

Side louvers painted black.
- Newer style valve cover from a '92 XJ with the 2.5L
- Powersteering hose replaced
- PCV components adapted to newer valve cover
- Windshield washer bottle replaced with one with low fluid sensor
- Overflow bottle cleaned out with purpler cleaner to remove sludge
- A few vacuum lines replaced
- Vacuum ball/bottle relocated from bumper
- Front bumper sanded and painted with bed liner
- Head light bezels painted with bed liner
- Grill replaced to 8-slotted XJ grill
- Front flares cut to be even with bottom of bumper
- Section under battery tray sprayed with rust inhibitor and bed lined
- Chassis grounding cable added
- Spark plugs replaced
- Starter and starter wires cleaned up thoroughly for good contact
- Oil pressure sending unit and coolant temperature sending unit swapped in to compliment instrument cluster swap
- Air box cleaned out
- Ricer-sounding muffler cut out and replaced with FM40 knockoff (EDIT: Replaced again with Cherry Bomb Pro 7477)
- Side louvers painted
- New battery
Newer valve cover.
Power steering hose replaced.
Vacuum ball/bottle relocated.
Head light bezels bed lined, grill swapped and bumper removed to be bed lined also.
Front flares cut even with bottom of bumper.
Chassis grounding cable added.
Oil pressure sending unit and coolant temperature sending unit.
Side louvers painted black.
Last edited by onlyinajeep726; Mar 7, 2013 at 11:19 PM.

Thread Starter
CF Veteran
Joined: Apr 2011
Posts: 1,146
Likes: 0
From: Clayton, NC
Year: 1988
Model: Cherokee
Engine: 4.6L I6 Stroker with port matched +99 intake and 62mm TB
Finished painting the driverside border today. Sprayed her with bed liner. Also painted the rims high gloss black enamel. Put the drop in liner back in the truck as well as bolted down a toolbox I got, and lastly bolted the front bumper back on for now. Those last three things are not pictured but you know what it looks like.

Last edited by onlyinajeep726; Feb 5, 2013 at 05:54 PM.
CF Veteran

Joined: Aug 2010
Posts: 1,220
Likes: 0
From: Greensboro
Year: 1992
Model: Cherokee
Engine: 4.0L
Great stuff. I'm happy to see another old low mileage rig around. Bought my XJ with 71K on her back in 2010.
Oh, and if you're in Clayton like your location says, you're only about an hour from my home. Just too bad I only spend 3 months of the year there. Rest is in Charlotte.
Oh, and if you're in Clayton like your location says, you're only about an hour from my home. Just too bad I only spend 3 months of the year there. Rest is in Charlotte.