
How I fixed my rear XJ lower broken shock mount

Thread Starter
Newbie
Joined: Mar 2014
Posts: 9
Likes: 2
Model: Cherokee
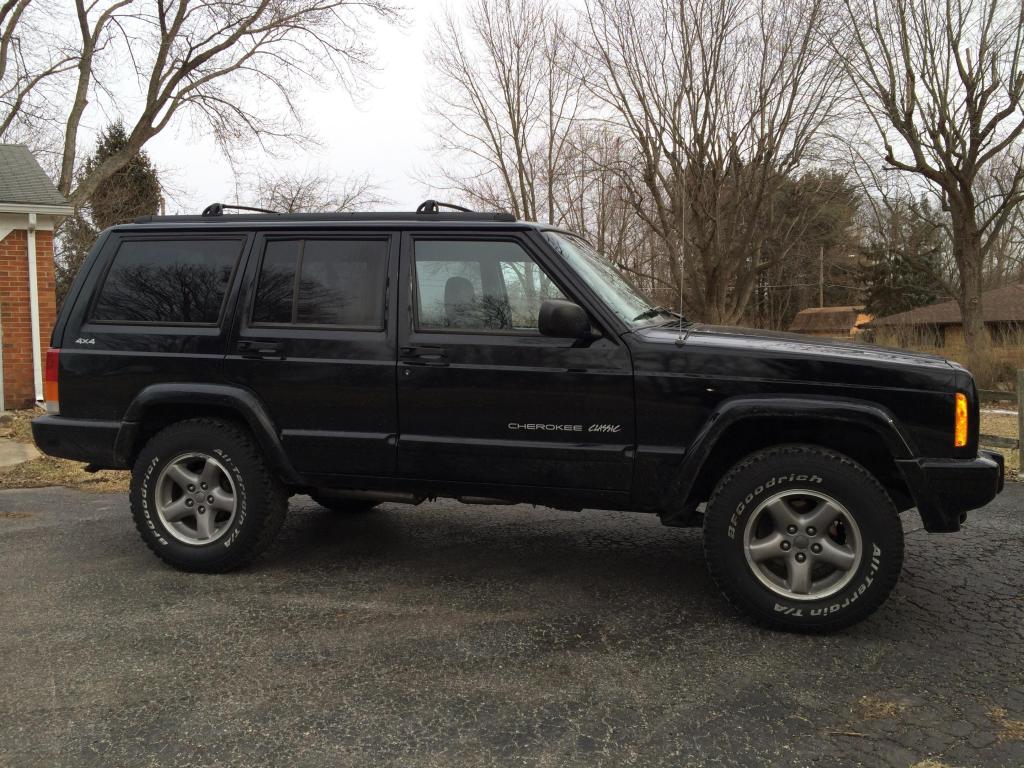
When replacing shocks, I snapped the lower shock bolt on my 98 Jeep Cherokee classes with the up country suspension option. From searching this forum I found a few different threads with similar idea's, but no pictures to visualize. So thought this thread would be helpful with added picts to visualize how easy it was.
Tools and parts needed.
1. F size .257 drill bit.
2. 5/16" thread tap.
3. 5/16" large washer.
4. 5/16" lock washer.
6. 5/16" star lock washer.
7. 5/16" by 3/4" length grade 8 bolt. You length may vary.
8. thread lock.
Drill deep enough into where bolt snapped off for your length bolt.
Thread hole.
Add lock tight to 5/16" bolt threads.
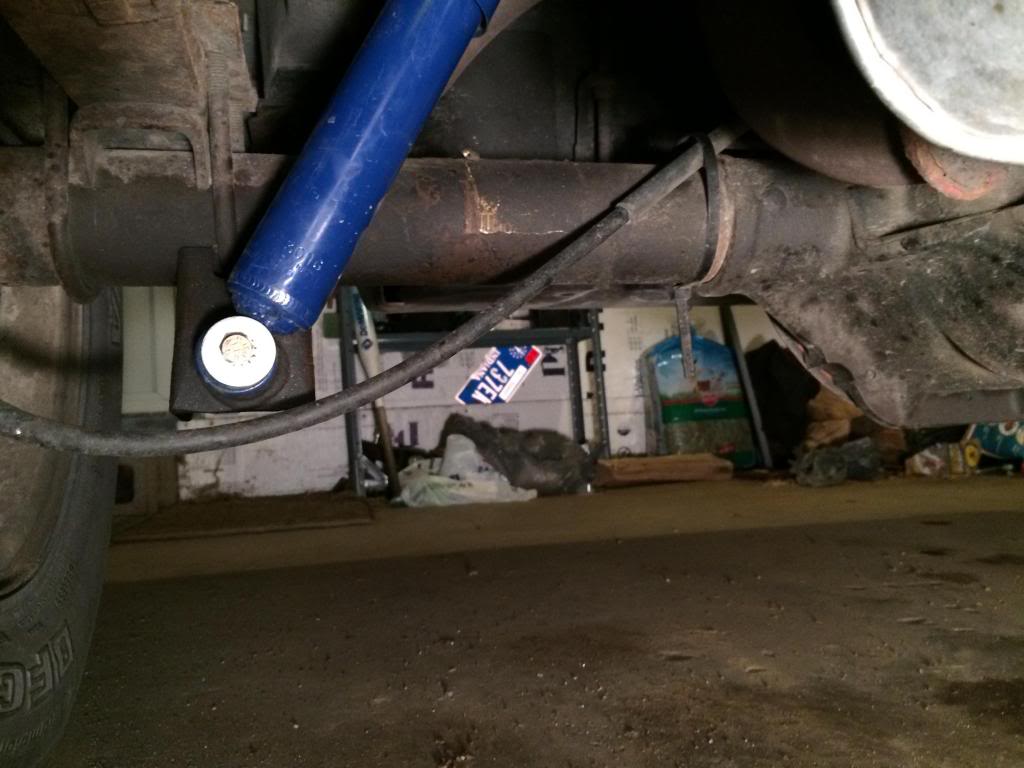
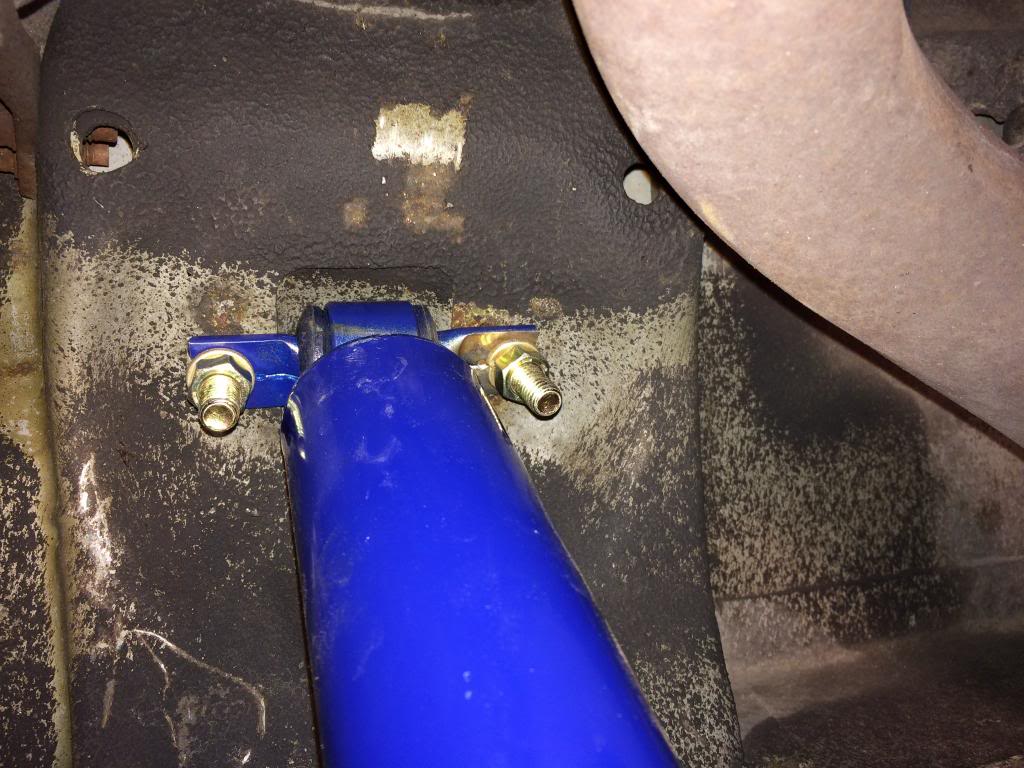
Mount shock.
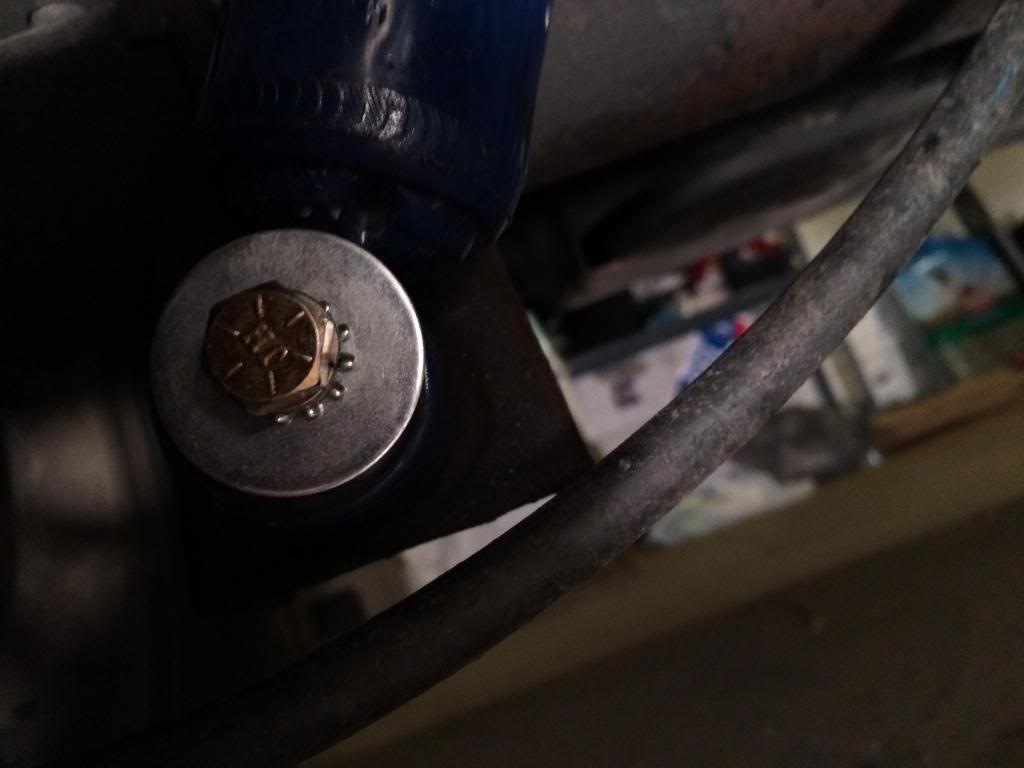
Add lock washer, star washer, and then last add large washer.
Bolt into drilled and tapped hole, but not too tight to strip threads.
Easily fixed rear lower shock mount.
[IMG]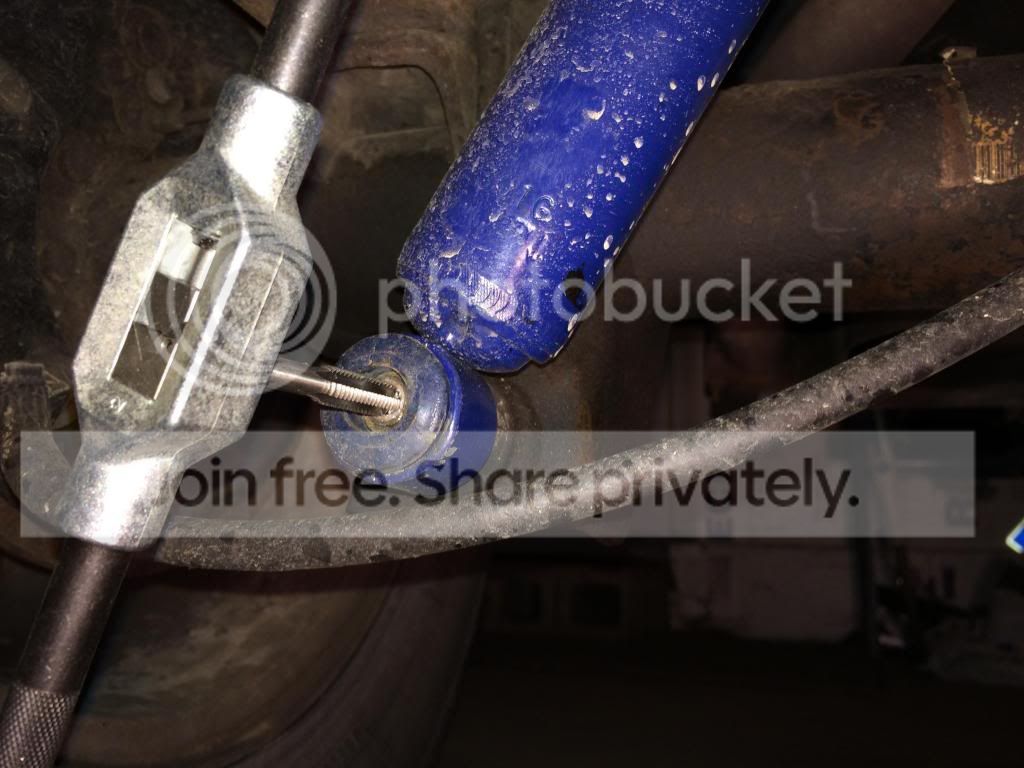 [/IMG]
Hope this helped. I just compiled the info from fragmented threads I found on this topic, and took picts to show how easy it was. The others were hard to visualize without pictures.
Tools and parts needed.
1. F size .257 drill bit.
2. 5/16" thread tap.
3. 5/16" large washer.
4. 5/16" lock washer.
6. 5/16" star lock washer.
7. 5/16" by 3/4" length grade 8 bolt. You length may vary.
8. thread lock.
Drill deep enough into where bolt snapped off for your length bolt.
Thread hole.
Add lock tight to 5/16" bolt threads.
Mount shock.
Add lock washer, star washer, and then last add large washer.
Bolt into drilled and tapped hole, but not too tight to strip threads.
Easily fixed rear lower shock mount.
[IMG]
 [/IMG]


Hope this helped. I just compiled the info from fragmented threads I found on this topic, and took picts to show how easy it was. The others were hard to visualize without pictures.
Thread Starter
Newbie
Joined: Mar 2014
Posts: 9
Likes: 2
Model: Cherokee
CF Veteran
Joined: Dec 2012
Posts: 4,169
Likes: 6
From: York, PA
Year: 1998
Model: Cherokee
Engine: 4.0
Thread Starter
Newbie
Joined: Mar 2014
Posts: 9
Likes: 2
Model: Cherokee
Yeah, they both snapped, instantly, even after PB blaster spray. Just used snippets from other threads on hear, and used a 1/2" center punch, and a mini sledge hammer, and the rest popped right out with a few whacks. My hands were just the right size to feed new bolts thru, and attach the top of the shock.


Trending Topics

Newbie
Joined: Aug 2015
Posts: 1
Likes: 1
Model: Cherokee
This is great & easy fix! Did it yesterday. I don't know how to weld so I many of the fixes on other threads were no help. I could have cut the rest of the mount pin off and drilled through and used a large bold or universal shock mount kit, but I thought I'd give this a try first as this way seems to preserve to the original integrity of the shock mount better. Followed the directions on here, went to ACE hardware and picked up everything on the list. I had to buy a tap & tool since I had never done a tap before. It was my first time tapping a thread and it was easy. The only thing I would add for noobs like myself is to make sure you get your hole as straight as possible. I did this by starting out with a smaller drill bit for my initial hole. I then went to the 1/4 inch bit. Then I tapped. Also, it should go without saying, but be sure to use a cutting oil during the whole process, especially the thread tapping. I used PB Blaster because it's all I had on hand, but it worked fine. I imagine a real cutting oil would make it even easier. Again, this is a great, easy fix! If you can change your own shocks, you can do this.
Incidentally, none of my upper shock bolts broke. Funny because these are the ones I expected to break and was prepared to fix. I had soaked them with Blaster 3 different times during the week prior to doing the work. Guess it worked.
Incidentally, none of my upper shock bolts broke. Funny because these are the ones I expected to break and was prepared to fix. I had soaked them with Blaster 3 different times during the week prior to doing the work. Guess it worked.
Old fart with a wrench
Joined: Nov 2010
Posts: 14,398
Likes: 740
From: Manlius, east of Syracuse, NY
Year: 2000 XJ Sport & WJ Laredo
Model: Grand Cherokee (WJ)
Engine: 4.0L
Nice job! Being that I'm a toolmaker with 50 years experience, I have all the stuff I need in my toolbox already. What you did was exactly what I would have done and have done before on other vehicles. Where most people get into trouble is not starting with a small drill first, and of course not getting it in the center of the broken bolt.
BTW, don't waste your money on Harbor Freight drills! They are total garbage!
BTW, don't waste your money on Harbor Freight drills! They are total garbage!
Last edited by dave1123; Nov 14, 2018 at 02:47 AM.
CF Veteran

Joined: Nov 2015
Posts: 3,636
Likes: 469
From: Southern OH
Year: 1997
Model: Cherokee(XJ)
Engine: 4.0
I have one of the new Bauer battery powered drills from Harbor freight and it has done great so far, from what I can tell it is the same thing as the Porter Cable, and Craftsman 20v.

CF Veteran
Joined: Nov 2017
Posts: 3,700
Likes: 238
From: Groton, MA
Year: 1995
Model: Cherokee(XJ)
Engine: I6 4.0L
Being that I am NOT a tool-maker and only drill stuff "as needed", I grabbed my worn metal drilling bit set and went with a tiny bit and worked my way up, then I used the bit that matched the tap only to get the last little bit so as to minimize the use of that bit. Like most properly done jobs, the prep work is the critical step - painstakingly centering the punch and starting the initial drilling carefully so as to get as close to center as possible.
Also like most jobs I do, despite the painstaking prep, I still managed to not get it perfectly centered, but it was pretty damn close and so far has held up great. Fortunately in this case, you don't need a massive bolt - the primary forces are up and down rather than in and out.
Thread Starter
Newbie
Joined: Mar 2014
Posts: 9
Likes: 2
Model: Cherokee
Thanks everyone. Seems I just received an email that someone commented on the thread. Within last two or three days, and wanted to respond. I myself punched the hole to drill, then used the old shock as sort of a guide when drilling to keep the drill bit as parallel to the inside diameter of the shock as possible. Glad I could have been help. I've since then put on a rough country 3" lift with add a leaf, and the 2.0 shocks. After the first rear shock, I went to replace the other side rear shock for my lift kit, and already expected to top bolts to break out. So I was already prepared to wrap small diameter solid core wire around the threads of the bolt so could feed it thru to the bolt holes. Took 5 minutes after having done the other side shock.

CF Veteran


Joined: Mar 2016
Posts: 3,816
Likes: 725
Year: 96
Model: Cherokee (XJ)
Engine: 4.0
Amen to that!
Being that I am NOT a tool-maker and only drill stuff "as needed", I grabbed my worn metal drilling bit set and went with a tiny bit and worked my way up, then I used the bit that matched the tap only to get the last little bit so as to minimize the use of that bit. Like most properly done jobs, the prep work is the critical step - painstakingly centering the punch and starting the initial drilling carefully so as to get as close to center as possible.
Also like most jobs I do, despite the painstaking prep, I still managed to not get it perfectly centered, but it was pretty damn close and so far has held up great. Fortunately in this case, you don't need a massive bolt - the primary forces are up and down rather than in and out.
Its especially satisfying when a small OD fastener breaks of flush in a hole, and you get it first time, using the right tools

Thread
Thread Starter
Forum
Replies
Last Post
investinwaffles
Modified XJ Cherokee Tech
11
May 18, 2021 12:02 PM
SixShooterXJCherokee
Stock XJ Cherokee Tech. All XJ Non-modified/stock questions go here
9
Sep 23, 2015 06:27 PM
9krpmrx8
Modified XJ Cherokee Tech
24
Aug 24, 2015 09:09 PM
Currently Active Users Viewing This Thread: 1 (0 members and 1 guests)