
Front leaf spring captive nut fix and bolt removal

Thread Starter
Newbie
Joined: Apr 2013
Posts: 5
Likes: 0
From: Columbus, Ohio
Year: 1996
Model: Cherokee
Engine: 4.0
Hey, this is my first post; I wanted to make sure I had something worthwhile before starting. Anyway, I was removing my leafs to install my new 3" lift springs when I found out about the infamous front bolt issues. On the passenger side, the bolt actually came about halfway out then seized in the sleeve. I just cut the bolt off flush and pryed the spring out of the pocket. The drivers side was a different story. The bolt moved about half an inch then the nut spun in the frame rail. I cut the bolt off so I could remove the spring then I did a search and found lots of advice but no write ups or pictures, so I documented what I did to repair the damage:

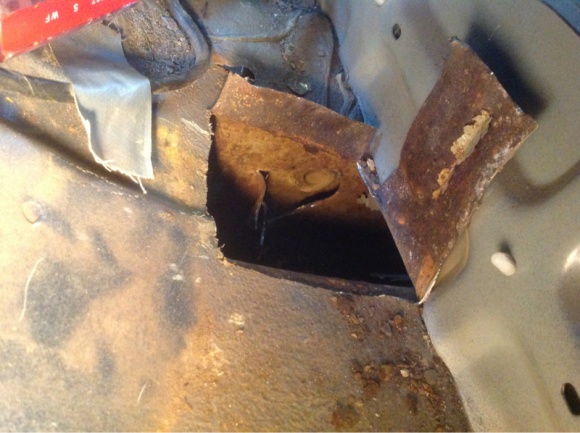
Access to the captive nut is under the rear seat. I cut the floor board and pryed it up, then made a couple of cuts to the area around the nut. I had to do this to allow torch access for welding
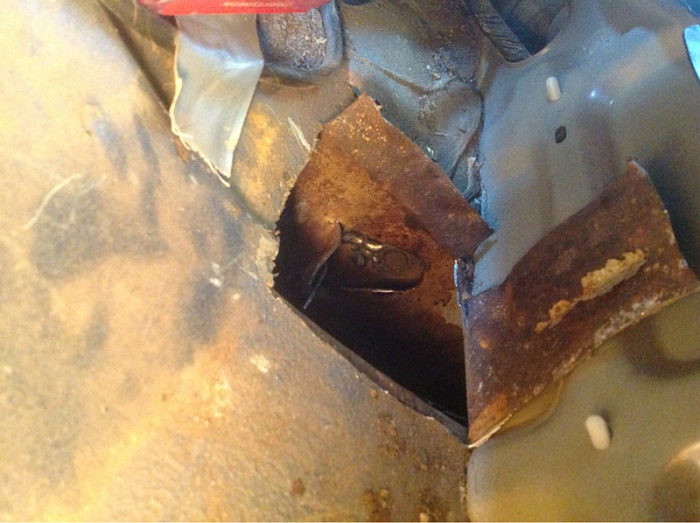
I put a nice sized tack on the nut. This thing is a pain to reach. I read posts stating to just cut the floor and weld it up. As you can see, space is at a premium and its easier said than done.
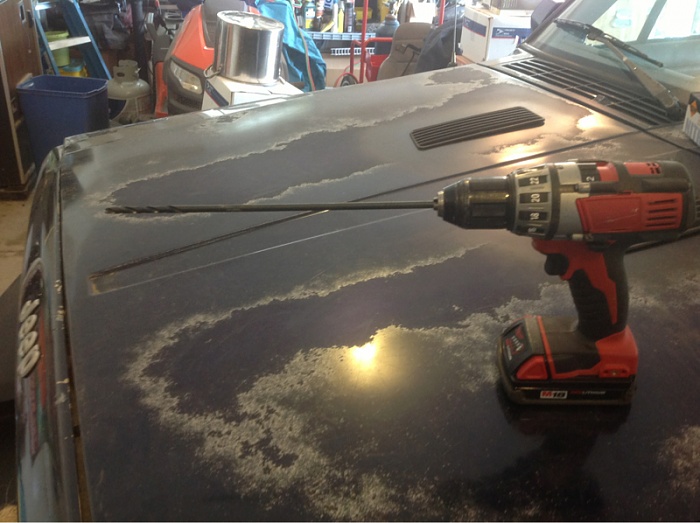
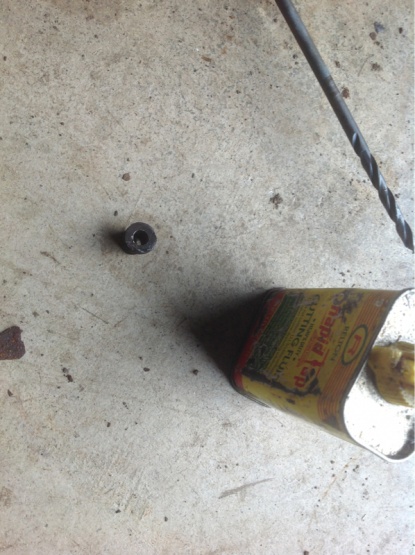
I used an extra long 1/4" drill bit so I could reach the cut off bolt

The cut off bolt
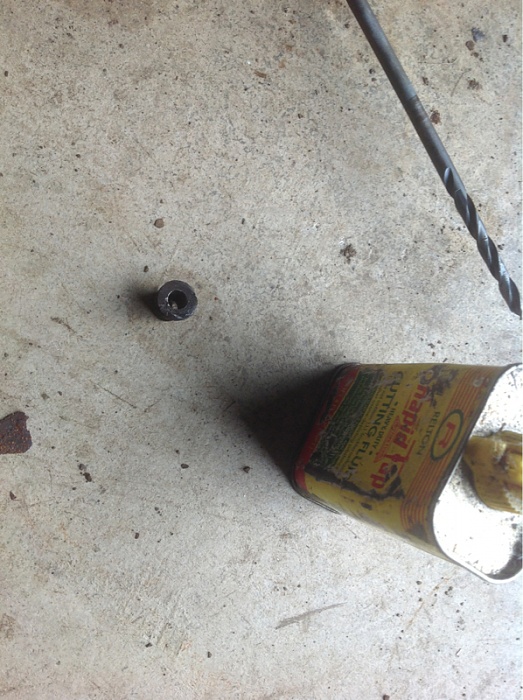
Plenty of Rapid Tap, and I had the bolt drilled. Added some heat and an easy out and viola!
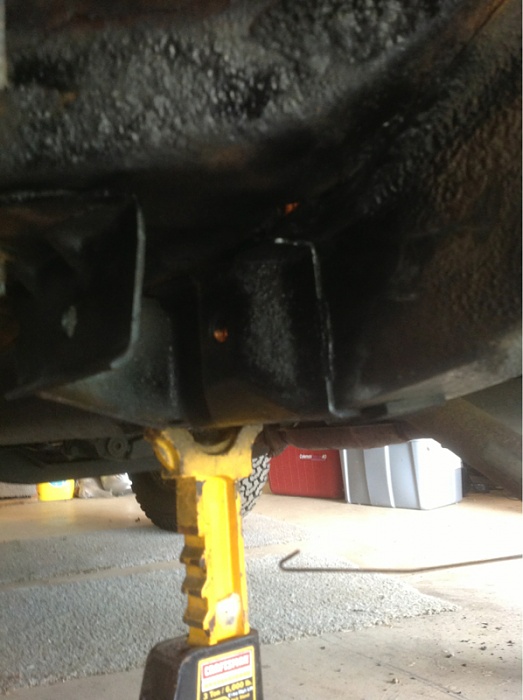
No more broken bolt and that nut ain't going anywhere. Knocked everything back together and fixed all my cuts. Hope this helps anyone who runs across this problem, Mike.
Access to the captive nut is under the rear seat. I cut the floor board and pryed it up, then made a couple of cuts to the area around the nut. I had to do this to allow torch access for welding

I put a nice sized tack on the nut. This thing is a pain to reach. I read posts stating to just cut the floor and weld it up. As you can see, space is at a premium and its easier said than done.

I used an extra long 1/4" drill bit so I could reach the cut off bolt

The cut off bolt
Plenty of Rapid Tap, and I had the bolt drilled. Added some heat and an easy out and viola!

No more broken bolt and that nut ain't going anywhere. Knocked everything back together and fixed all my cuts. Hope this helps anyone who runs across this problem, Mike.


CF Veteran
Joined: Dec 2015
Posts: 3,038
Likes: 338
From: PA
Year: 1997
Model: Cherokee
Engine: 4.0L

Last edited by fb97xj1; Jun 29, 2017 at 10:21 PM.

Newbie
Joined: Aug 2014
Posts: 13
Likes: 2
Model: Cherokee
Hey - great write up !
Need to do the same - do you still have the exact location to open the inner
floor at the cross member ? Many thanks !
E=narwhale671;2482643]Hey, this is my first post; I wanted to make sure I had something worthwhile before starting. Anyway, I was removing my leafs to install my new 3" lift springs when I found out about the infamous front bolt issues. On the passenger side, the bolt actually came about halfway out then seized in the sleeve. I just cut the bolt off flush and pryed the spring out of the pocket. The drivers side was a different story. The bolt moved about half an inch then the nut spun in the frame rail. I cut the bolt off so I could remove the spring then I did a search and found lots of advice but no write ups or pictures, so I documented what I did to repair the damage:
Attachment 195194
Access to the captive nut is under the rear seat. I cut the floor board and pryed it up, then made a couple of cuts to the area around the nut. I had to do this to allow torch access for welding
Attachment 195195
I put a nice sized tack on the nut. This thing is a pain to reach. I read posts stating to just cut the floor and weld it up. As you can see, space is at a premium and its easier said than done.
Attachment 195197
I used an extra long 1/4" drill bit so I could reach the cut off bolt
Attachment 195198
The cut off bolt
Attachment 195199
Plenty of Rapid Tap, and I had the bolt drilled. Added some heat and an easy out and viola!
Attachment 195200
No more broken bolt and that nut ain't going anywhere. Knocked everything back together and fixed all my cuts. Hope this helps anyone who runs across this problem, Mike.[/QUOTE]
Newbie
Joined: Aug 2014
Posts: 13
Likes: 2
Model: Cherokee
Good & helpful post ! I ni\ow plan to do the same - so can you pls. tell me the exact spot where you opened up the floor to reach the front leaf spring bolt through the open frame rail ? directly behind the bracket and how far from the inner rocker ? many thanks & cheers
Hey, this is my first post; I wanted to make sure I had something worthwhile before starting. Anyway, I was removing my leafs to install my new 3" lift springs when I found out about the infamous front bolt issues. On the passenger side, the bolt actually came about halfway out then seized in the sleeve. I just cut the bolt off flush and pryed the spring out of the pocket. The drivers side was a different story. The bolt moved about half an inch then the nut spun in the frame rail. I cut the bolt off so I could remove the spring then I did a search and found lots of advice but no write ups or pictures, so I documented what I did to repair the damage:
Attachment 195194
Access to the captive nut is under the rear seat. I cut the floor board and pryed it up, then made a couple of cuts to the area around the nut. I had to do this to allow torch access for welding
Attachment 195195
I put a nice sized tack on the nut. This thing is a pain to reach. I read posts stating to just cut the floor and weld it up. As you can see, space is at a premium and its easier said than done.
Attachment 195197
I used an extra long 1/4" drill bit so I could reach the cut off bolt
Attachment 195198
The cut off bolt
Attachment 195199
Plenty of Rapid Tap, and I had the bolt drilled. Added some heat and an easy out and viola!
Attachment 195200
No more broken bolt and that nut ain't going anywhere. Knocked everything back together and fixed all my cuts. Hope this helps anyone who runs across this problem, Mike.


Trending Topics
CF Veteran
Joined: Dec 2015
Posts: 3,038
Likes: 338
From: PA
Year: 1997
Model: Cherokee
Engine: 4.0L
Joey, dont cut the floor. Just cut the perch open as shown in post #4. The nut is right there. You can have that hole welded shut when done. No need to go thru the floor from above.
You are aware of the red loctite the factory used on those bolts, yes? You need a torch to liquify that stuff in order to break the bolts loose. And the sleeves in the bushing have a habit of rusting the bolt. If you are replaicng the leaves you can cut the leaf off at the eye, then cut the eye off from around the bushing sheel. Do the same with the sheel, followed by the rubber. This exposes that sleeve. Find the groove and chisel it open to break it loose from the bolt. This is where the torch comes in. Heat around the nut to liquify the loctite. You may have to repeat this a couple times. If you do break that nut loose, or you have done so already, remember you can cut a window in the perch to gain immediate access to that nut. Going thru the floor is overkill.
Let us know it goes.

Thread
Thread Starter
Forum
Replies
Last Post
nicksan
Stock XJ Cherokee Tech. All XJ Non-modified/stock questions go here
47
Oct 6, 2015 02:09 PM
Batman33165
Stock XJ Cherokee Tech. All XJ Non-modified/stock questions go here
7
Aug 27, 2015 02:20 PM
Currently Active Users Viewing This Thread: 1 (0 members and 1 guests)