When you click on links to various merchants on this site and make a purchase, this can result in this site earning a commission. Affiliate programs and affiliations include, but are not limited to, the eBay Partner Network.
Beginner?s DIY Guide to Jeep 4.0 Head Replacement: Draft #1
Stock XJ Cherokee Tech. All XJ Non-modified/stock questions go hereXJ (84-01)
All OEM related XJ specific tech. Examples, no start, general maintenance or anything that's stock.
If anybody is wondering why folks keep reviving this old thread, it's because it's the top result on google for "jeep 4.0L head gasket replacement"
I'm doing mine right now. It took maybe two hours to get the intake and exhaust manifolds off, valve cover, etc. I need to go buy some new tools now.
Called a machine shop, $300 to do a valve job, resurface the block, clean it, etc. I know that compression is good so I will probably not have them mess with the valves. I may test them put putting acetone in the upside-down cylinder domes and see if any leaks out after 24 hours.
Mainly what I need though is for them to check for cracks. Is there any way I can do that myself?
Last edited by mannydantyla; Jun 15, 2018 at 02:14 PM.
I'll add my observations, doing mine this weekend (the usual 2000 cracked 0331 head). At this point I have the new Clearwater head on, manifolds, rockers, and valve cover back on (all the PITA stuff), sipping a well deserved Scotch, tomorrow I'll finish reinstalling the accessories.
I have no idea how anybody could get the manifolds off with any combination of sockets and extensions, with or without universals. Fortunately I was able to reach even the bottom bolts with a box wrench, and I was able to break them loose with that wrench.
Similarly, there is no way I could get a torque wrench on any but a couple of the upper manifold bolts when reinstalling; I had to guesstimate the torque.
The new head didn't have the dowels to locate the intake manifold. I was able to get them out of the old head with vise grips, it bunged them up a bit but I chucked them up in my mill and turned them back down to size, then tapped them into the new head. You could do the same with a drill press and a file.
I wanted to unbolt the exhaust pipes from the manifold and put it together on the bench, but there was no way. The nut plates just spun, and the hex part of the nut plate is no known wrench size... 15mm too big, 14mm too small, 9/16 barely too small. So I just left them in place and bolted the manifolds back on after putting the head on.
I temporarily installed the #1 and #6 rocker bridges to have something to attach the rope to to lift the heads out and back in with a pipe stuck through and the assistance of my son in law.
I didn't remove the hood and see no reason why I would have needed to.
I didn't have to remove the A/C bracket, just the two bolts that go into the head.
Removing the power steering pump is a lot easier if you pull the fan in front of it first.
Be careful putting the valve cover back on... Even though I was careful, I broke one of the bolts (I couldn't find my small torque wrench, I think it's in my hangar at the airport). Fortunately it was one of the front bolts and miracle of miracles, I was able to drill it and use an EZ-out to get it out. It's 1/4-20, not metric.
The pdf factory manual from Pacific Coast Manuals was a godsend... when the Haynes manual covers 1983-2002, it's just not gonna have the required detail.
The "universal" fuel line quick disconnect tool I have was too big (it's never worked yet), but I was able to improvise with a split piece of steel tubing.
Why the hell does Chrysler use a different locking mechanism for every electrical plug? Some you push, some you pull, some have a sliding deal to disconnect.
Be careful with the locking tabs on the fuel injector electrical plugs. I broke the first two before I got the hang of it, I guess I'll zip tie them back on.
I second most of BiplaneGuy's suggested revision points. I'll add just a couple after doing my '98 XJ head @180k (and piston, and bearings, and oil pump).
I saw zero value in removing hood. The XJ hood was out of the way plenty.
There is a grounding bolt to come off at the back of the block before the valve cover can come off.
I too needed both a 1/2 and a 13mm deep socket; one fit the old bolts while the other fit the new bolts. Odd.
After working on the exhaust downpipe for over an hour, I gave up and took the intake & exhaust manifolds out separately in 20 mins. It may be an XJ thing but I found unbolting and removing them separately was much easier than trying to get them out together. These was done with various extensions.
Clean the hell out of your intake manifold - likely never have a time to do it again.
Felt it was just as easy to re-assemble them separately.
Be sure to check for random connections, as I found a hard-to-reach bracket for the fuel line under the manifolds then a random connection back by the firewall and on the oil pan.
KEEP the metal sleeves from the valve cover bolts. I thought mine weren't needed seeing the new grommets in my gasket kit but then found out they are very helpful in limiting the torque on the bolts.
I used upside down cardboard boxes with holes made so I can put the valve cover bolts, rockers and push rod, and head bolts in order. This was very helpful.
2cyl oil and knife sharping block were awesome ideas (I also used the 3m cleaning pads and a brass wire wheel on areas of the head)
Check the condition of your cylinder walls and pistons while it's open.
Great time to replace your motor mounts while so much is out of the way.
Gentle with the t-stat hosing, I broke my bolt installing
Overall, this post was clutch. I felt I would have missed some points if I didn't find this. Thank you!
I just read thru completely this whole thread and no one mentioned the front-most cylinder head bolt on the driver's side. This bolt is the only one that is threaded into the water jacket with no bottom and must be only torqued to 100 lb/ft and sealed with something to prevent coolant from wicking up thru the threads and leaking into the first exhaust manifold bolt stud threads. If this head bolt is torqued too much, it has been known to crack the block deck surface! This is important enough for the Haynes manual to mention it, but not explain why. I only found out about the sealant after noticing a crystaline deposit around that first manifold stud nut and researched what it was.
ALSO, I installed a Clearwater head at 165K miles and started using some oil between changes, more than before. I figure it was because now that the valves are sealing better, the cylinder pressure is up causing oil to bypass the worn rings. Just be aware this could happen. The increased blow-by started sending oil thru the CCV valve into the intake manifold which I countered with an oil catch can. Google it. This engine now has 246K miles on it and I think I have a cracked piston skirt because there's some piston slap on cold start-up and #5 will foul it's sparkplug if idled too long. This jeep owes me nothing. It's been used to deliver newspapers and as my DD for 6 years now and never left me stranded. 2000 WJ 4.0L
So is getting a new cylinder head a must, or do you take the old one off and see if it is still good?
Originally Posted by BiplaneGuy
In my case it was obvious, looking through the oil fill cap I could see tiny drops of green coolant oozing in through the (invisible) crack.
With a '97 I would see if it is still good and get it redone if necessary.
With an '00 with the original 0331 head would not even waste my time.
Get a TUPY head or one of the Clearwater ones.
With a '97 I would see if it is still good and get it redone if necessary.
With an '00 with the original 0331 head would not even waste my time.
Get a TUPY head or one of the Clearwater ones.
This. Anything with an original 0331 (non-TUPY) will eventually crack at some point, could be 100k miles, could be 150, etc.
In my opinion, a 0331 head is like a time bomb waiting to happen. Some, very few, don't crack but I'm keeping a close eye on mine. Had it happen on my Grand, now waiting for my XJ to happen. The Grand cracked at 165K and the XJ's got 145K on it now. The totally amazing part is the XJ hasn't required adding any coolant at all in the past 6 months since I replaced all the hoses. No oil either since doing the valve cover.
So just a thought, I have oil in my coolant but no coolant in my oil. I have not experienced over heating.
I'm wondering if there is another issue causing the oil to get into the coolant.
One video on the youtubes indicated that your tranny oil could seep into the coolant vai the radiator. I know our tranny oil is cooled by tanks on the side of the radiator. I have an aftermarket radiator, CSF, and I've had it about 13 years now.
I'll try and figure out a way to tell if those tranny tanks are leaking.
Oh no. My '00 XJ is closing in on 167K. LOL
I know it is a 0331 head but not if it is original.
I am third owner.
Good thing I have 2 TUPY heads in "stock". MLOL.
I WROTE A BIG GUIDE ON HOW TO REBUILD THE 4.0 HEAD, WITH LOTS OF PICS AND DETAILED INFO. READ IT HERE:
_______________________________________ http://dannix.net/lib/truck/jeep-engine-rebuild
=====================================
Last edited by mannydantyla; Dec 12, 2019 at 11:29 AM.
Amazing thread, just used it to disassemble and prep for replacement today. The right tools make this job go smoothly.
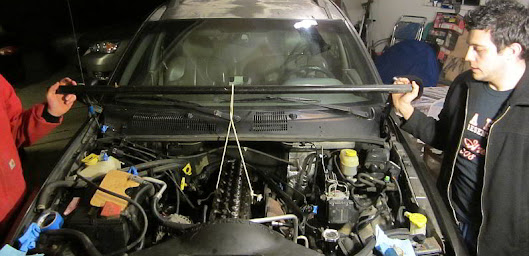
So, my neighbor maintains race cars for a few wealthy-is folks and told me that using ATF-4 to cover the piston heads allows for added piston seal conditioning and some wall conditioning. Thoughts on this? Additionally, he loaned me the deck scraper seen below...might be a good addition to this thread for future head changers.
Tomorrow, old 0331 gets removed and the new gaskets / head get installed and hopefully after the manual crank of the motor it'll start to purr.
Clearwater Head (new) Beautiful day for disassembly Carbide Scraper
Beginner’s DIY Guide to Jeep 4.0 Head Replacement: Draft #1
The Jeep 4.0 engine head 0331 casting is prone to crack over the model years 2000-2002. This crack usually manifests as coolant leakage into the oil. I am not a mechanic, but I was able to successfully replace this head myself. I write this guide for other DIY "non-professionals" who might wish to attempt this head-replacement job in their own home garage. I would not have attempted this project, were it not for others who took time to post thier own experiences in doing so before me. Furthermore, I might not have been able to complete this project without the online help generously offered by others (special thanks to CCKen, Talyn, cruiser54, OnTheOffRoad, and many others). In such thanks, I pay forward, by posting my experience for other DIY newbies, who might be tempted to this job for themselves: You CAN replace that cracked head on your Jeep youself!
You should watch this you-tube video to see the first steps (valve-cover removal): 2001 Jeep Grand Cherokee Engine Noise (4.0L) - EricTheCarGuy - YouTube
Pay very close attention to how he gently revomes the throttle-body cables. Each comes off in a different way. I broke one of mine, but I was able to glue it back together at the end.
OK; think you can do the rest?
You will need the following chemicals:
1) Engine degreaser.
2) Carb cleaner: needed to clean caked-on crud off of surfaces.
3) Brake cleaner: needed to degrease gasket-mating surfaces after you clean them with carb cleaner.
4) WD-40: needed on each electrical harness connector to help free it before you disconnect it; use a bit more when you reconnect it. Be gentle with these fragile parts.
5) Thread sealant. You need this for the threads of head bolt #11 to prevent coolant leakage through that bolt. Get the kind that does not harden. I used Permatex Hi-temp Thread Sealant.
6) Engine assembly lube (I used Lucas) for the rocker re-assembly.
7) Anti-sieze lube: for EVERY bolt that screws into the aluminum head (not just spark plugs).
8) 2-cycle oil: to help keep your piston rings clean while you scrape old gasket off the block (see explanation below).
You will need the following special tools:
1) A 12-point deep-socket, either 1/2inch or 13mm to remove and install the “star” head bolts. My Kobalt (Lowes) ˝-in 12-point fit VERY tight: it was good for head-bolt removal, but the center hole was not big enough to for the new (non-rusty) head-bolt studs. Craftsman 13mm 12-point deep socket worked great for reassembly. Though it fits the “star” head-bolts looser, I imagine it would work well for head-bolt removal as well, as long as you keep pressure down against the bolt.
2) The fuel-line disconnect “tool”. The fuel line connects to the fuel rail with a “quick connect” (but difficult-disconnect) fitting. The plastic ring “tool kit” from O’Rileys did not work for me; I spent over an hour trying to make it work. The nylon ring kit from Autozone did work for me.
3) Haynes Repair Manual for 2000 Jeep. I regret not getting it sooner. Follow it step-by-step; yet take my advice below.
4) Impact wrench (air gun): you'll need this to get the lower exhaust maifold bolts off the exhaust pipe (or maybe you can find a way to just cut them them off from their middle to remove it from the exhaust pipe). If you try to remove the manifolds before removing the head from the block, then you will instead need: lots of socket extensions of different lengths, along with time and patience. “Luke, use the force!”
5) Shop-vac: you need to vac out the old head gasket shavings out of the cylinders and off the lifters. You will need the narrow “crevice” end-attachment to get down to the lifters. I used the crevice attachment off my home vac, put it down into the engine, and used my hand as a 90-deg-bend to “connect it” onto the shop-vac hose end. Worked great.
6) Harbor Freight sells a flat stone block for sharpening knives (on sale for $1). This big, perfectly-flat, abrasive surface works AWESOME to clean old gasket off all flat aluminum surfaces: intake manifold, thermostat housing, etc. Rinse away all that greasy-stone-sand with water (as you sand), then use carb cleaner, then brake cleaner, before re-assembly.
You will need the following parts:
1) A re-man head. I chose a re-man 0331 casting with the TUPY stamp.
2) Head gasket “set/kit”. This gives you more parts than you need, yet it is cheaper than ordering each gasket part individually. I got the Victor-Reinz head set, and a new set of V-R head-bolts. I suggest RockAuto if you order online. Also consider ordering a new serpentine belt, and new thermostat as well.
So, lets get started: If possible, take your Jeep to the car wash (the kind where you put in quarters, and get the high-pressure spay-gun), hopefully less than 2 miles away, so your exhaust manifold stay reasonably cool. Open the hood, and use a whole can of engine degreaser liberally all over. Let it soak for a few min. Then spray the crap out of your engine with the high-pressure gun on soap setting, and then rinse. This will make everything much cleaner for the rest of the job ahead. Otherwise, do your best with your hose at home (but don’t skip this important step).
Remove your hood from the start. When I finally did, it seemed easiest to cut the wires connecting to the hood light: you’ll see why. I plan to twist them back together at the end.
Be VERY gentle removing the plastic clips that connect the throttle wires to the throttle body. They each come off in a different way. I can promise that you will break the front-most-clip if you fail to pull it forward (towards the driver’s door) before disengaging it. See youtube video.
After you remove the valve cover: check to see that all of you rockers are nice and tight. If any rocker is even a bit loose (if you can wiggle any rocker at all), then you have a problem that must be addressed: look for a bad lifter or bent pushrod. See you-tube video above. Mine were all tight, so I left my lifters alone. Disassemble your rockers very gently and evenly: the bridges can get twisted very easily. Keep all your rocker assemblies and push-rods in their original orientation as you remove them, and store them in that same orientation and order.
Inspect your removed rockers now. If the pivots are worn, order new pivots and rockers now. Or, make plans to pull used ones from the junkyard, like my buddy did for me (these engines are everywhere). This pic shows good pivots (on a twisted bridge, on the right) compared to a bad pivot (on the left):
I re-bent the the twisted bridge (on the right) to lay flat before re-installation.
We used a crow bar to break the bottom of the air-filter-box off the bottom bolts. If the nut-side is rusted, you can’t get to it, and they spin: I’m glad we finally took the crow-bar to break this plastic off these bolts. No real harm done; these breaks are made UNDER the air filter.
Remove as many electrical connector harnesses as you can from the plastic fuel-injector electrical bar, or you will be fighting this plastic bar the whole time. Make sure you remove the connector under the power steering pump to really free it up. Get a flashlight to see it. Finally: you will see 1 thin wire that somehow goes to injector #1 that I could not disconnect. If I had to do this job again, I'd just cut that single wire, and twist it back together at the end of the job.
On my 2000 Grand Cherokee, there was no need to remove the alternator or it’s electrical connections. I just removed 2 bolts to free that connection from the head.
To dismount the steering pump, use the holes in the pulley to get easy deep-socket access to the 3 bolt heads. I also (later) loosened that PS bracket (15mm bolt) to allow better access to the front exhaust bolt. Set the pump aside to where your air-filter box used to be.
I removed the thermostat housing before removing the head. This made it easier to lift out the head, b/c the rigid AC hose is right above this housing on my model year. Closed-end wrench and patience to get that bottom bolt off the thermo housing.
If possible, remove the head, intake, and exhaust manifold as a single unit. This will save you much time. It may be a challenge to get the exhaust bolts off (from under the car, using many extensions on your impact-wrench, hopefully without spinning/crushing the rusted nut-retainers off the exhaust nuts). It is definitely worth it if you can make this happen. Then, just rig ropes over a pole and get some friends to help lift off this heavy assembly. See pic of re-install below for an example of how to rig ropes and pole. If you happen to have an engine hoist, well, that would work too.
Let me be clear on this point: make every effort to remove the head, intake, and exhaust manifold as a single unit, even if you need to cut the lower exhaust mainfold bolts off the exhaust pipe to do so. Otherwise, if you try to remove the manifolds before removing the head, you will need: lots of socket extensions of different lengths, along with time and patience... You cannot see those lower manifold bolts, and they are very difficult to reach... “Luke, use the force!” This is how I did it myself, so it’s not impossible. In this case, a friend with a flashlight and mirror will help a lot.
Harbor Freight sells a flat stone block for sharpening knives (on sale for $1). This big, perfectly-flat, abrasive surface works AWESOME to clean old gasket off all aluminum surfaces: intake manifold, thermostat housing, etc. Rinse away all that greasy-stone-sand with water (as you sand), then use carb cleaner, then brake cleaner, before re-assembly.
For cleaning old gasket off the engine block: I used a razor scraper, then a brass brush wheel on my electric drill. Unlike aluminum, razors and brass power-wheels will not hurt your steel engine block. Of course, powder debris dusted all down into my engine (to protect with 2-cycle oil; see below). I finished the block with carb cleaner and Scotch-Brite (green kitchen scrubbing pads). I did not use the knife-sharpening stone on my engine block, fearing the sand it would shed into my engine. I vaccummed out all the shavings with my shop vac (both the pistons, and the lifters).
If I had to do it over: here’s how to keep your rings clean while you remove the old head-gasket off your block: pour 2-cylce engine oil onto each piston, so that it totally fills the gap around the piston, and lightly covers the piston head. This will protect the rings from falling debris and wheel dust as you scrape old gasket off your head. Keep in mind: 2-cycle oil was designed to be burned in combustion chambers, so I can’t imagine any harm in flooding it over your rings and pistons. Do this BEFORE you start scraping and power-brushing the old gasket off the block. Also pour the thickest oil you have onto the tops of your lifters. The old gasket shavings and dust will then land on top of the oil, and just sit there on top of the oil (which you will shop-vac off soon enough). Now, use compressed air to the blow gasket shavings out the head-bolt threads in your block. If you want to chase out your blocks threads, then do so. NOW, shop-vac that oil off the pistons, rings, and lifters: you will now be removing those shavings and dust before they ever touched your rings or lifters.
OK. If you have made it this far, then I can assure you that re-assembly will be much easier.
Use the head side-bolts with rope and pole to gently lower your new naked head onto your new gasket.
PIC:
My Autozone rental torque-wrench was completely broken: test your torque wrench on your lug-nuts to see it works at both light and heavy settings before you get started on your new bolts on your new head on your new gasket. Follow the Haynes guide for sequential torque specs.
Re-installing the maifolds after the new head is on: Use a freind with a mirror and flashlight to help you get the lower manifold bolts in place. Or, do like I did in advance: Pre-thread all the lower manifold bolts on, with sockets and extensions on each bolt, BEFORE you slip on the intake manifold:
PIC:
Re-installing your new rockers/pivots/bridges onto your new head: My rockers and pivots bearing surfaces were utterly DESTROYED by running coolant in my oil (yet, my lower engine bearings still yield 20 PSI at hot idle). I got shiny junk-yard rockers/pivots/bridges to replace mine. My OEM parts had grooves cut into them (?for oil flow?). Yet, the one new replacement pivot I bought had no groove at all. Therefore, if you get junk-yard parts like I did, I see no need to worry about how these OEM grooves mate. I turned the engine with a wrench to get both pushrods in the "down position" before gently torquing each rocker/pivot/bridge assembly on to each cylinder.
I used no RTV on my therm housing gasket (b/c all surfaces were polished smooth with my stone). It has not leaked since. I did drill a TINY pin-hole into the top of my new thermostat to aid coolant filling/burping (not sure this really matters).
Remember all those electrical harnesses you disconnected: they all just fall back into place at the end.
Hope this helps (draft #1; 3/29/13),
JohnEP
I was trying to find out if i can remove my 1991 6cyl head with the combined intake and exhaust that i just did last weekend. I may have blown the head gasket since my recent new motor mounts and stuff allowed for some
overly enthusiastic right foot movements. oops. lol..me my own mechanic since 1981 and over 60 vehicles. TY. (SIC.)


 Why the hell does Chrysler use a different locking mechanism for every electrical plug? Some you push, some you pull, some have a sliding deal to disconnect.