When you click on links to various merchants on this site and make a purchase, this can result in this site earning a commission. Affiliate programs and affiliations include, but are not limited to, the eBay Partner Network.
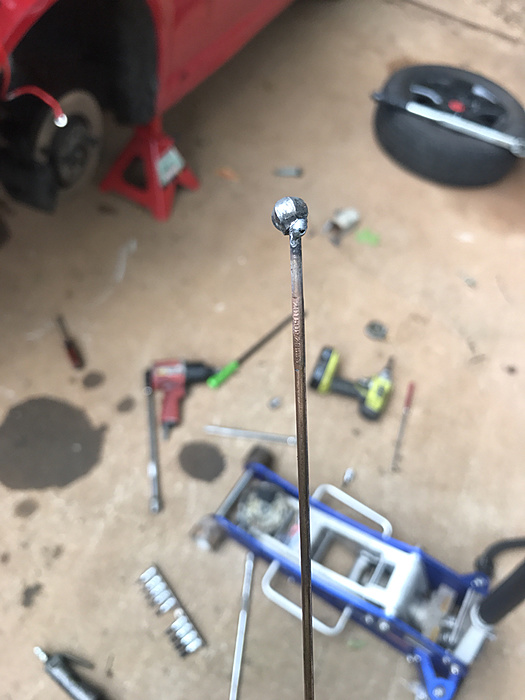
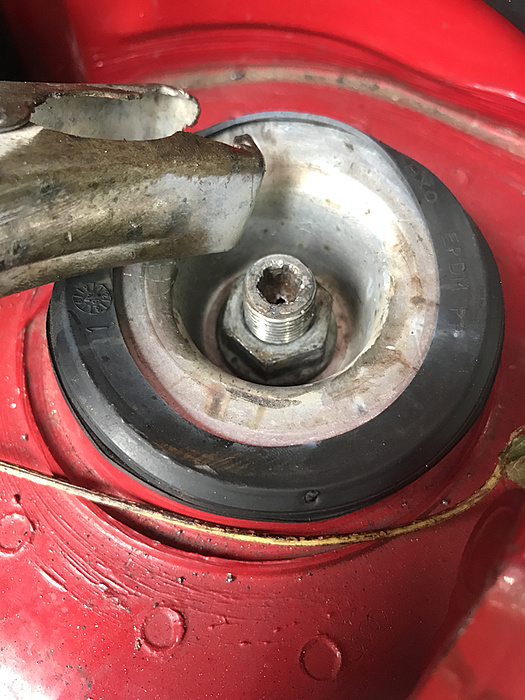
Was trying to get the struts out on my Jetta to replace the bushings and bearings. Well them suckers were in there. Snapped the head of a wobble Allen bit off and welded a piece of tig wire to it to pull it out. Took a couple tries, but I got it.
Didn't weld it, but I did come up with a solution for my welding table needs....
Started its life as a Kobalt workbench...
Belonged to a buddy of mine. His wife gave it to him for his birthday or christmas... or anniversary... anyway.... she left him and he didn't want anything to do with anything she ever bought him, so he unloaded a bunch of stuff to me. I already had a work bench, but I figured I could make use of this thing somehow.
Sat in my garage for 2 years with crap piled on top of it. I had been thinking for a while that a welding table would be really handy to have... then it just hit me one day, why not cut the metal backboard off, secure it to the particle board top, remove the finish and use that?
Well.... it worked! I added some castor wheels to the bottom and Bob's your uncle, welding table. Even have a spot for my welder, helmet, and all my metal-working tools.
Now I can take that metal frame I made for the welding cart and start making my tool box bracket for the back of the XJ.
Don't put your welding machine under your welding table. I did that initially, small garage. Had to blow the machine out every other time I used it. All the grinding dust from the welding table drops right on/in the machine. I now have my machine on a separate cart. Everything on the lower shelf of the welding table is COVERED in grinding dust.
quick question about flux core welding. i'm not able to access welding gas for now. the settings on my lincoln 180 show that the lowest gauge it should be able to weld is 18 gauge.
i got new floor pans which i believe are either 16 or 18ga and will also get new sheet metal for the smaller patches to weld in. anybody has experience doing something similar? what is the best way not to burn through? do i punch holes all around my floor pans and simply fill them in with a tack and fill all around with seam sealer? should i lap weld too? what about under the jeep where it contacts the frame rails, do I need to weld there too?
i was thinking maybe doing a tack every inch or half inch so i don't weld longer than 1-2 second at a time. i will also use 0.030 wire
inb4 "you should use mig instead", I know!!
It's extremely hard to do floor pans with FCAW. It takes a lot of practice ahead of time and definitely takes little tack welds on alternating sides of the patch. You need to keep the metal cool and you won't be able to run beads or stitch welds. I've never personally tried plug welds, but I believe the best way is just to do butt joints with small tacks and alternating sides of the patch as said.
BIGGEST piece of advice is lots of practice on similar material to learn how the welder and material is going to behave before actually moving on to doing the work on your Jeep.
BIGGEST piece of advice is lots of practice on similar material to learn how the welder and material is going to behave before actually moving on to doing the work on your Jeep.
excellent advise. when i first started messing around with body work i took an old car hood and a fender and used my cutoff wheel to make slices in them. then messed around welding them shut. probably not the perfect way to learn but i learned quickly how easy it was to burn through(never welded this stuff before that)
you are pretty much just going to have to start somewhere and take your time. think at least twice before you cut whatever you are going to cut. youll get the hang of it.
I personally dont use seam sealer I use Chassis Saver. its similar to POR15 with is great stuff too. if you prep the surface right and coat and recoat properly it can turn out great
Here are a few pics that show what I did (Lincoln 180 with gas).
What I started with ...
Cut out the rust, clean the interior of the frame rails, paint with POR15 ... (Note - the top faces of the rails were sanded down to clean metal before plug welding)
Fit your new floors (not shown - drill 3/16" holes an inch or so apart for plug welding the floor to the to frame rails) ...
Generally, tack one spot, tack 6-8" away, tack an inch from the first weld, tack a inch from the second weld and so on. When the floor was fully tacked, I seam welded the whole floor and finished the welds with a flap sander ...
Paint with POR15 (or any good enamel as the metal would be rust free at this point) let it dry, apply seam sealer and paint again.
Note - I also welded the underside, applied seam sealer, painted, etc.
Note: the weld on the right looks ****ty 'cause I was testing the waters. I just put in a bunch of tacks to make sure the cast wasn't going to crack on me.
Good solid BMR. I had to do the same on my 90 last year. I am curious to pull the calipers and see how the repaired area is holding up. I am not sure if the weld is as hard as the cast. Either way, repair looks good.
How'd it turn out? Notice a difference? That's been on my "To do" list for mine. Looks good!
Originally Posted by Basslicks
x3, I know how I'm repairing my floors now!
Recent project of mine...
Note: the weld on the right looks ****ty 'cause I was testing the waters. I just put in a bunch of tacks to make sure the cast wasn't going to crack on me.