Jeep Grand Cherokee 1993-1998: How to Replace Tie Rod End
Replacement of the joints in the steering linkage can make your vehicle steer like new again.
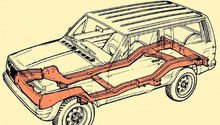
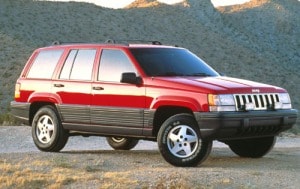
This article applies to the Jeep Grand Cherokee ZJ (1993-1998).
If it feels like your vehicle has to think about the direction you are telling it to go, it's very likely that some of the joints in your steering linkage could need to be changed out. Other signs of this could be slop in the steering feel or a shimmy or vibration felt at higher speeds. Like with anything else on a vehicle, there are parts that wear out over time. In order to make the steering feel almost new again, these parts need to be replaced.
The steering system on these Jeeps is very simple. This is in part due to the fact that they were based off of a basic truck style steering system. The linkages that connect the wheels together to make them turn at the same time when you turn the steering wheels is called the steering linkage. The steering linkage is made up of a few parts. You have the center link, which connects the steering box to the right wheel, and then you have a tie rod that connects the center link to the left wheel. The tie rod end is the parts that has a ball joint and will be the most common cause of failure in your steering system. Luckily, it's the easiest part to change out, which is always a plus.

Materials Needed
- Sockets sizes 13mm-21mm
- Ratchet
- Wrenches sizes 13mm-15mm
- Channel lock pliers
- 2 jaw puller
- Jack and jack stands
- Large flat head screwdriver
- Penetrating oil
- Chassis grease
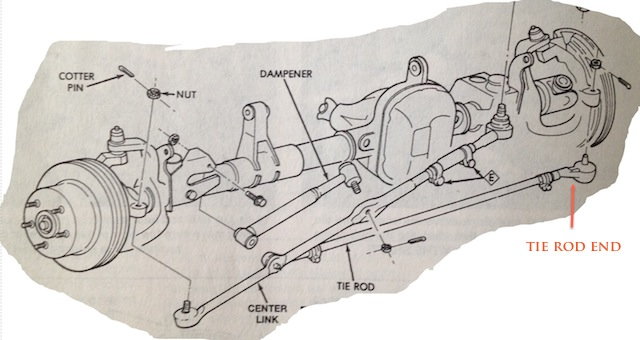
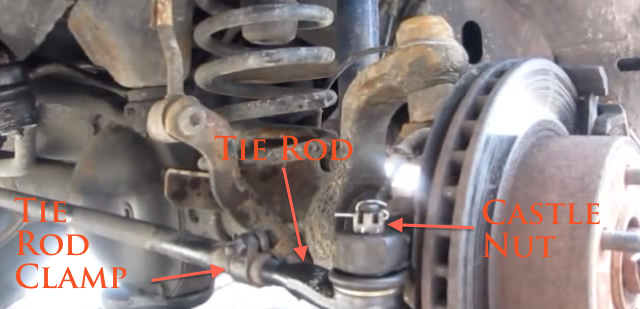
Below is a diagram of the front suspension layout. The part that you will be replacing is the tie rod end, which is identified in red. Remember that changing this part out will require you to get an alignment on your vehicle when you are finished with the repair.
Step 1 – Raise vehicle and remove wheel
First things first, break the lug nuts on your wheels loose, but you don't need to remove them. You will want to raise the vehicle with your jack and support it securely on jack stands. You don't need to have the ability to move the axle at all, so it is okay to place the jack stands under the front axle assembly.
Once you have the vehicle securely placed on the jack stands, continue to remove the lug nuts and remove the driver side wheel. The tie rod end is attached to the steering knuckle on the driver's side, so to gain access you only really need to remove this wheel to get to it.
Step 2 – Loosen the castle nut on the tie rod end
When you look at the tie rod end, you will notice that it is held into the steering knuckle by a castle nut and that there is also a cotter pin through this nut. First thing you will want to do is remove the cotter pin from the castle nut and discard it. Never reuse cotter pins. After you have done this, you can then loosen the castle nut but don't remove it yet.
Step 3 – Remove tie rod end from steering knuckle
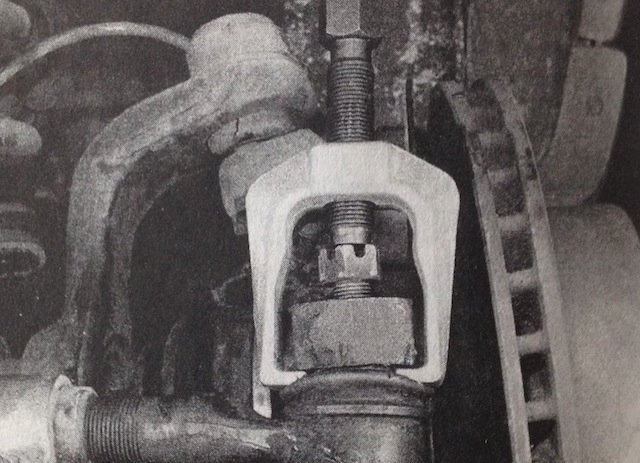
The piece of the tie rod that sits inside the steering knuckle is tapered. This causes the tie rod end to press itself into the steering knuckle. Unfortunately, this means that it will take force to remove it from the steering knuckle. That is where a two jaw puller like the one in the picture below comes into play. You can buy these fairly inexpensively, or you can also rent them from most major auto parts stores. Believe me, it is the easiest way to remove the tie rod end from the steering knuckle. Once you place the puller on the tie rod and tighten it down, the tie rod will pop out and you can then remove the castle nut completely, which will then allow you to remove the tie rod end from the steering knuckle.
Step 4 – Count number of threads on the tie rod end
Before moving on to loosen the tie rod clamp and removing the tie rod end, you will want to count the number of threads exposed on the tie rod end. The reason for this is because you will want to thread the new tie rod end in with the same number of threads exposed. This will allow you to set everything back to where it was, allowing you to drive and get the vehicle aligned when you are done.

Step 5 – Loosen tie rod clamp and unscrew tie rod end
After you have counted the threads and written it down for later, you can now loosen the tie rod clamp which will allow you to unscrew the tie rod end. Sometimes, the tie rod end will be very difficult to unscrew. Spraying some penetrating oil on the threads can help out a little bit, and using some channel lock pliers might do the trick.

Step 6 – Install new tie rod end
Place some chassis grease on the new tie rod end before installing it. The rest of the installation steps are the reverse of removal.
- Thread new tie rod end in the number you counted before it was removed.
- Tighten the tie rod clamp.
- Place new tie rod end in the steering knuckle.
- Tighten down the castle nut.
- Install the new cotter pin in the castle nut.
- Install the wheel.
- Take the vehicle off of the jack stands and place it back on the ground.
Ensure that all fasteners are torqued to the factory specifications.
Related Discussions
- Tie Rod Upgrade - CherokeeForum.com
- Tie Rod End Replacements - CherokeeForum.com
- Right Side Tie Rod - CherokeeForum.com
- Tie Rod End Won't Come Off - CherokeeForum.com
- Bent Tie Rod - CherokeeForum.com