Jeep Cherokee 1984-2001: How to Replace Water Pump
A failing water pump can leak, make awful noises, and allow for engine overheating. Fortunately, a bad water pump on the XJ Jeep Cherokee is fairly accessible and can be swapped out with the removal of only a few other components. It can also be an opportune time to replace the serpentine belt, thermostat, and any old coolant hoses.
This article applies to the XJ Jeep Cherokee (1984-2001).
The water pump is the heart of the cooling system. The water pump is driven via the serpentine belt, which spins the impeller and circulates water throughout the cooling system. Unfortunately, water pumps are prone to various failures, especially on high mileage vehicles. It is common for the water pump bearing or seal to fail and allow coolant to leak out of the weep hole. In severe cases, the water pump shaft can have excessive play and become noisy from bearing wear. Additionally, blades on the impeller can corrode or break and reduce coolant flow. In either case, a new water pump is needed to help keep the engine cool. Water pumps for XJ Jeep Cherokee models are readily available and fairly inexpensive. If you are handy with a wrench, replacing the water pump can be quickly accomplished in an afternoon and save you a good amount of money versus having a local shop do it. This article will outline the procedure for replacing the water pump on XJ Jeep Cherokee.

Materials Needed
- Metric wrench and socket set
- 3/8" drive ratchet and extensions
- Torque wrench
- Catch pan
- Scraper or razor blade
- Mineral spirits (i.e. acetone)
- RTV silicone or similar
- Flat head screwdriver
- Rubber mallet or hammer
- Funnel
- Pliers
- Anti-seize paste
- Teflon tape or thread sealer
- Shop rags
Warning!
The engine should be cool to the touch prior to beginning the water pump replacement procedure. A hot engine will have scalding hot coolant that can cause severe injuries if it comes in contact with your skin.
Step 1 – Drain coolant
Before getting started with removal of the water pump, drain the cooling system. Coolant can be drained from the radiator drain cock located on the passenger's side of the radiator, or by removing the lower radiator hose. Be sure to have a catch pan handy to collect the draining coolant.
See the Related Article: How to Flush Your Cooling System for detailed steps on draining the coolant.
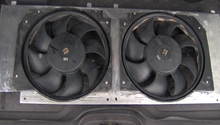
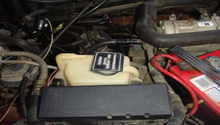
Step 2 – Remove air box and electric fan
While the coolant is draining, proceed with removal of the air box and electric fan. This will allow for additional space to access the water pump.
- Un-clip the plastic clips securing the air box lid in place.
- Remove the rubber breather tubes from the air box lid.
- Disconnect the plastic intake tube. This can either be removed from the air box lid or from the throttle body. Lift off air box lid and remove air filter.
- Remove the fasteners inside of the air box base and lift air box base from engine bay.
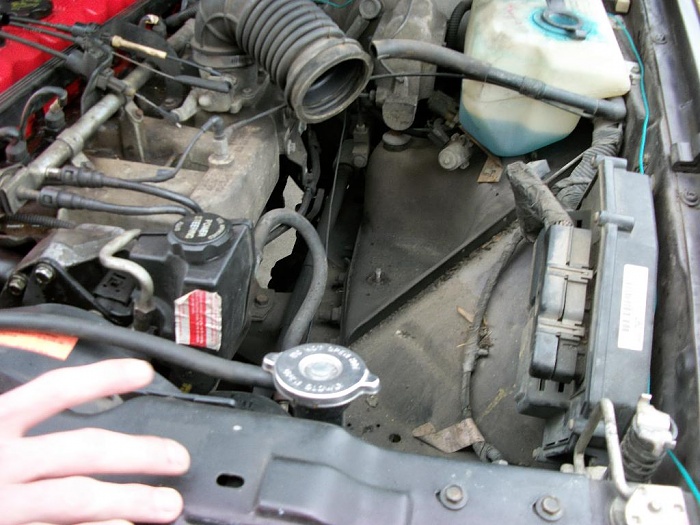
- Disconnect the electrical plug at the electric fan.
- Disconnect the radiator overflow hose from the radiator nipple.
- Remove the two 8mm bolts securing the electric fan to the radiator crossmember.
- Lift the electric fan up and out of the engine bay.

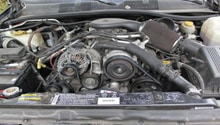
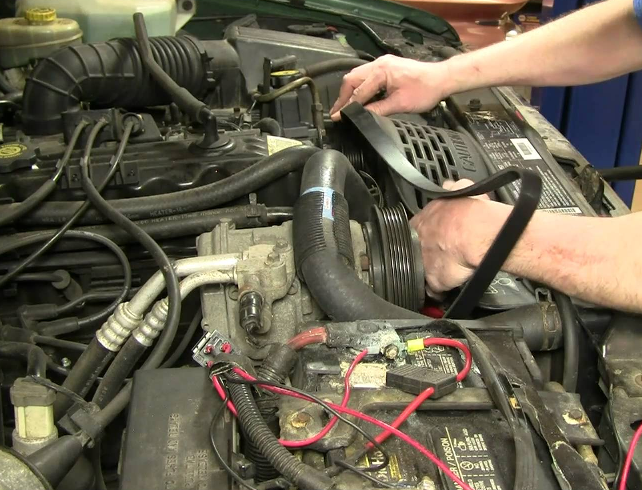
Step 3 – Remove serpentine belt
With additional work space now available, proceed with removing the serpentine belt.
- Before removing tension from the serpentine belt, it is highly recommended that the water pump pulley bolts be loosened. This will greatly aid in pulley removal later on.

- The method of belt removal varies depending on the model year of the vehicle. Early XJ models must relieve belt tension by loosening the power steering pump and unscrewing the tensioner bolt. Later models only require loosening of the tensioner puller and adjuster bolt.
See the Related Article: How to Replace Serpentine Belt for detailed belt removal steps.
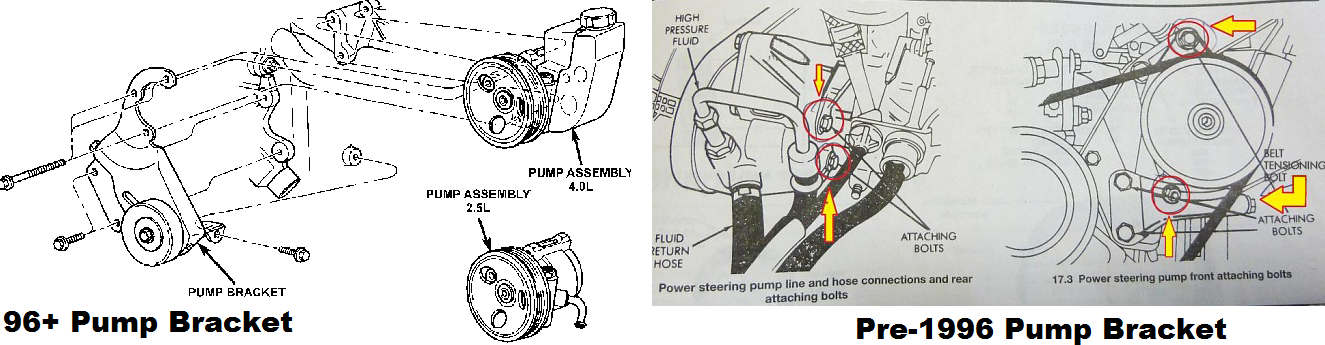
Step 4 – Remove power steering pump
The water pump helps to support the power steering pump and reservoir. Remove the power steering pump bracket bolts and slide the power steering pump away from the water pump.
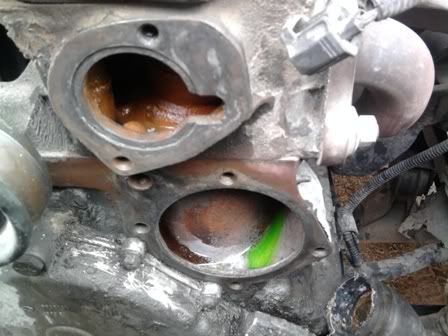
Step 5 – Remove water pump
- For easiest removal of the water pump, it is highly recommended that the thermostat housing and thermostat first be removed.
Refer to the Related Article: How to Replace Thermostat for detailed information on thermostat and thermostat housing removal.

- Remove the water pump pulley by removing the pulley bolts that were loosened in Step 3.
-
Remove the four bolts securing the water pump to the engine block and maneuver the water pump out of the engine bay. The water pump may be stuck in place and require a slight tap with a hammer or rubber mallet to break it free.

Step 6 – Install new pump
- It is very important to take a few moments and clean the mating surface on the engine block to remove all old gasket material, sealer, and scale. A clean mating surface will ensure proper water pump fitment and prevent any coolant leaks. A scraper, razor blade, and mineral spirits (brake cleaner, acetone, etc.) will help with cleaning.
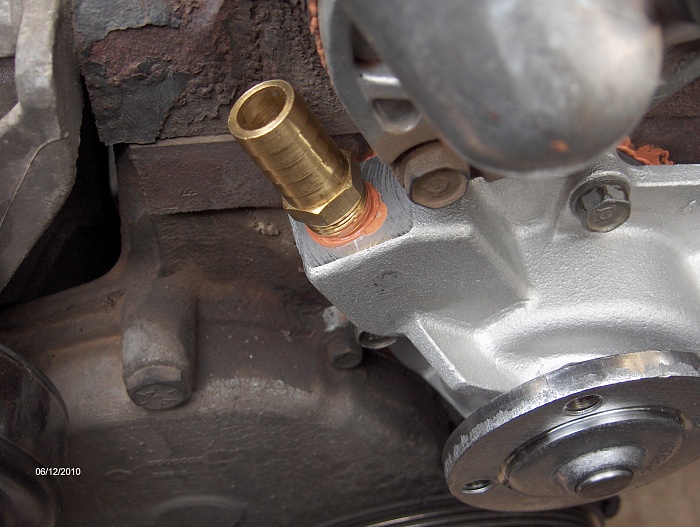
- If your new water pump does not have a heater hose fitting installed, remove the fitting from the old water pump and install it in the new pump. Similarly, a new fitting can be installed. Use Teflon tape or a coolant safe thread sealer on the fitting.
- Using a new gasket, install the water pump. The gasket can usually be installed "dry;" however, you may consider using an RTV sealer or similar gasket silicone if the water pump mating surface is etched, pitted, or damaged. Tighten the water pump mounting bolts to 13 ft/lbs on 2.5L engines, and 17 ft/lbs on 4.0L engines.
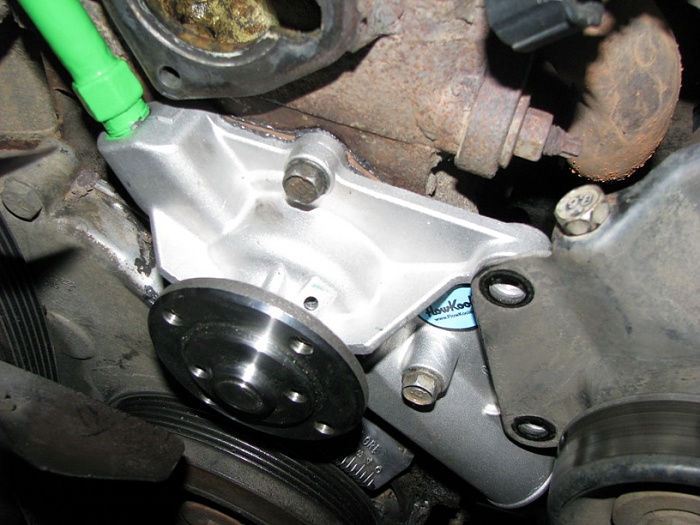
- Install the thermostat and thermostat housing using silicone on the gasket if desired. Torque bolts to 13 ft/lbs. It is highly recommended that a new thermostat be installed when installing a new water pump. They are inexpensive and will ensure no cooling system problems associated with the thermostat arise.
Pro Tips
- It is very important that the water pump and thermostat housing bolts are not over-tightened. Over-tightening can damage the pump/thermostat housing and cause coolant leaks.
- Anti-seize paste can be used on the water pump and thermostat housing bolts to prevent them from rusting.
Step 7 – Reassemble
With the new water pump in place, simply reinstall all components before starting the car.
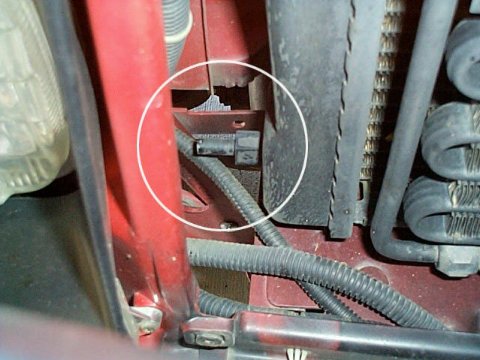
- Attach hoses to the thermostat housing and water pump. Connect temperature switch plug at thermostat housing (if applicable).
- Reattach coolant hose to lower radiator.
- Attach pulley to water pump. Torque to approximately 20 ft/lbs after installing serpentine belt.
- Attach power steering pump bracket to water pump. Torque to approximately 35 ft/lbs.
- Install serpentine belt and set proper belt tension.
- Reinstall the electric fan. Be sure to connect the electrical plug. Attach coolant overflow hose to radiator nipple if necessary.
- Reinstall air box and air filter element.
- Close radiator drain cock and fill cooling system with coolant.

Step 8 – Start vehicle
With all components installed and the cooling system topped off, proceed to start the car. Once the car is running, inspect that the serpentine belt is running true and that there are no leaks at the water pump, thermostat housing, or various coolant hoses. Top off the coolant level as necessary.
Pro Tip
It is highly recommended that the coolant level be checked over the next few days of driving to ensure that all residual air has bled out of the cooling system and that the coolant level is correct.
Related Discussions
- Best Radiator & Water Pump - CherokeeForum.com
- Bad Wobble in Water Pump Pulley - CherokeeForum.com
- Water Pump Inlet Tube - CherokeeForum.com