
-Homemade Snorkel How To-


Thread Starter
Newbie
Joined: Mar 2012
Posts: 10
Likes: 0
Model: Cherokee
Just thought I would share what I just did to my xj, Here is a general idea on how to build your own snorkel, you can copy mine exactly or just use it as a reference. All that matters to me is if I helped even one person keep their engine dry
Okay so I looked around first at different hardware stores to find the cheapest prices on materials, and this whole project ended up costing me around $50 which is alot cheaper than buying one of these knock off brands off ebay.
Heres my build list.
2- 45* Street PVC 3"
2- 90* Elbows PVC 3"
1- 2" into 3" Adaptor PVC
1- 10' ft. Stick Black ABS 3"
1- CPVC/PVC/ABS Pipe Glue
1- All purpose purple pipe cleaner
1- 3" Cone (Air Raid) Air filter
Roll of pipe strapping
Stock air tube
I started out by removing the stock air box, unbolting the computer, and moving lots of wires out of the way.
I used a piece of PVC to measure a hole behind the computer near the front of the engine bay because that is pretty much the only suitable place to cut a hole through the fender, (people cut toward the back of the engine bay out to the fender but there is alot of wires and I believe the unibody brace goes across there, or atleast the spring brace) Using a skill saw I cut a hole starting on the inside of the fender and mirrored it to the outside, Alot of people use a hole saw in this step but I could not find a 3 and a half inch hole saw that would cut through that with precision
Then I took the intake tube and glued it to the top of the throttle body to be certain no water was getting in (a hose clamp would of worked fine but I figured I'd take it to the next level.
I tried to squeeze the stock air tube onto the 3" ABS pipe but no luck (even though it measured out to 3" inside diameter) so I bought a 2" into 3" PVC adapter to fit inside the tube and onto the ABS shown below.
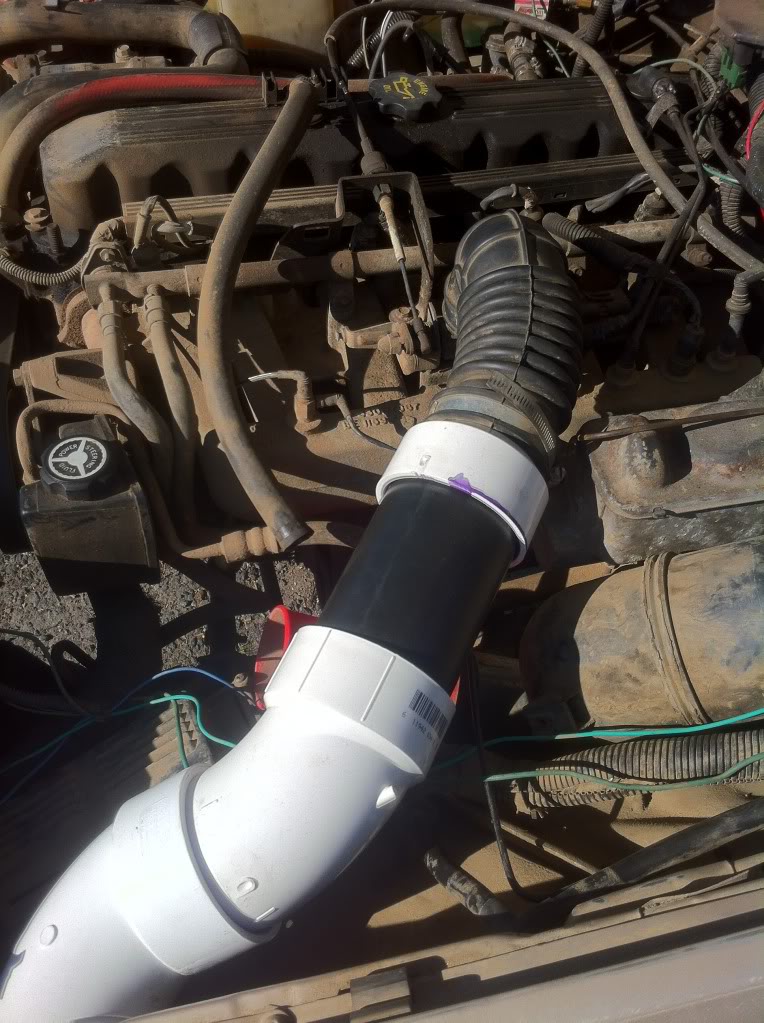
Then I cut about 7" (give or take on all of these measurements) of ABS pipe and glued it onto the adapter and onto a 45* Street elbow
Next comes the stressful part, I used two 90* elbows to fit through the fender at first but found out that it would be squeezing the fender too tightly and it would mess up the whole angle of the outside pipe. So in tern I used about a 4" piece of ABS to go between the two elbows to give the necessary space and angle.
so lets recap sofar, We have the stock tube on the throttle body, The adapter on the end of the stock tube, A piece of abs tube on the adapter, and a 45*street elbow on the end of that.
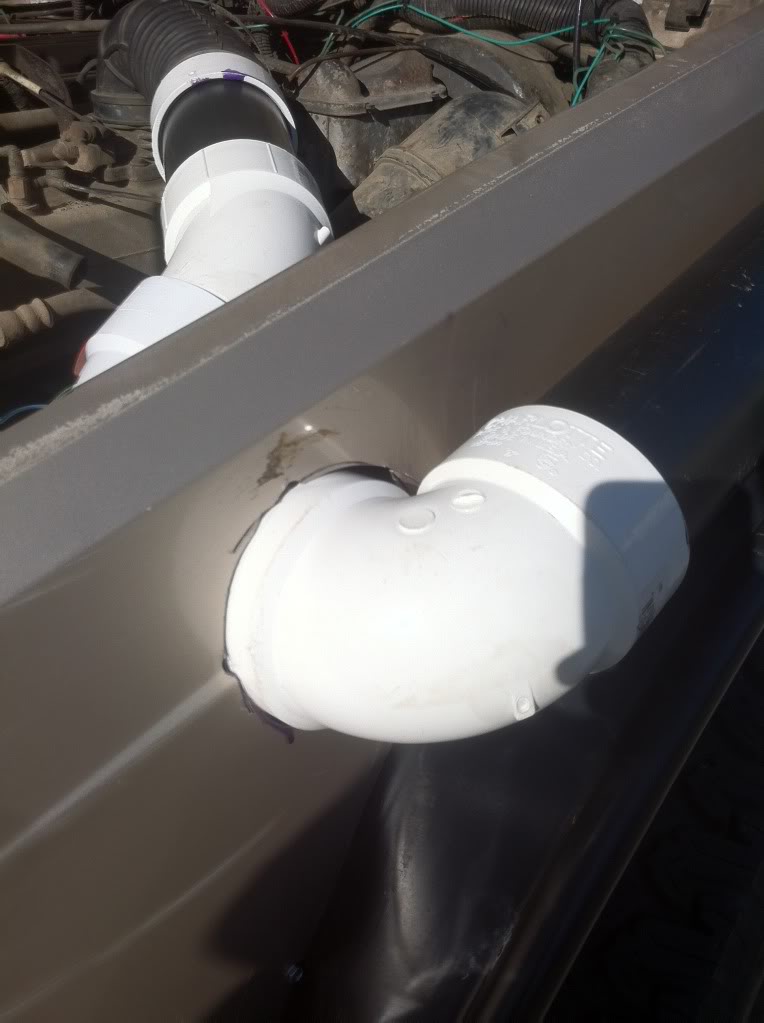
Next, As I was starting to say above, assemble the inner/outer fender type workings of the tubing by mimicking the angles and attaching the outside 90* elbow to a piece of ABS tube that you will feed into the engine bay from the outside. After you have the abs and the 90 glued together, attach the other 90* elbow to the end of the 40* street elbow that you have already attached to the intake. Make sure the 90 on the inside is lined up with the hole you cut in the fender because once this pipe glue sets its near impossible to pry apart.
Ok so lets say you have the underhood part of this build done as in the parts all the way up to the 90* elbow under the hood.
This next step is CRITICAL to aligning the outside ABS pipe so proceed with care. prime and glue the 90* that you have under the hood and attach it to the ABS and 90* elbow that you already glued. Make sure you are happy with the way the outside angle sits before you glue it because this will ultimately effect the outcome of the angle of the ABS pipe that runs along the fender and it will effect the way it runs up the windshield
after you have the scary part out of the way the next few steps are a breeze
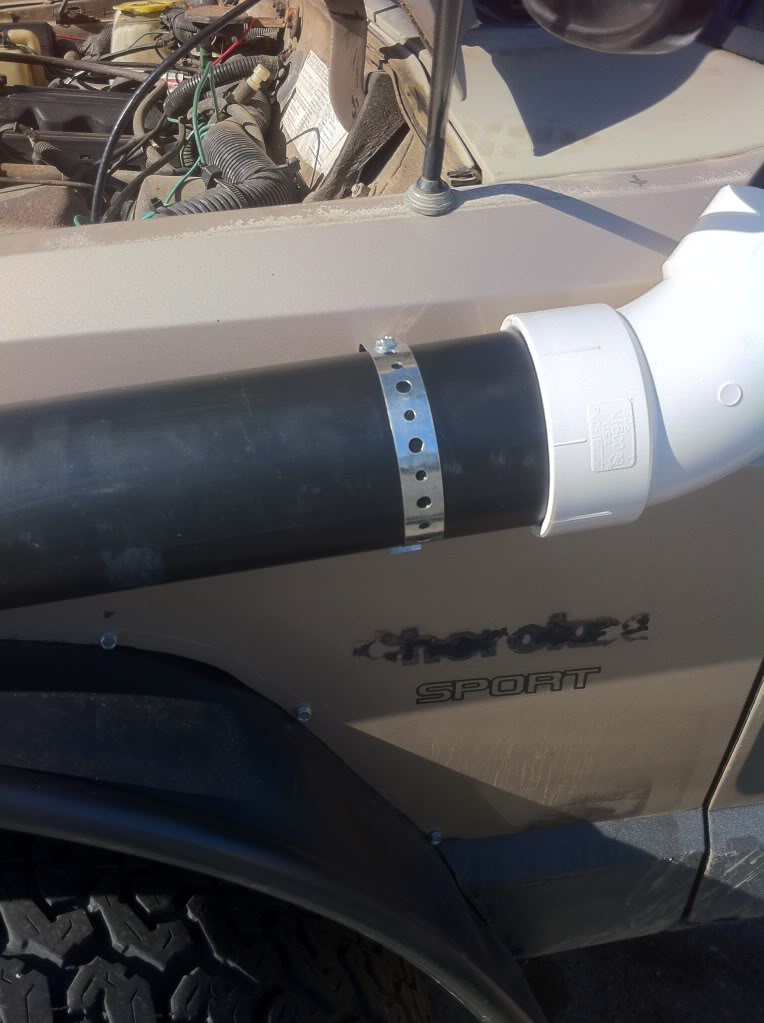
Measure and cut a long enough piece of pipe to run along the side of the fender to about the emblem. make sure that the 45* elbow will not be in the way of the door opening and If you have removable doors cut back even more on where the angle sits, as you can see here I did not measure properly to accommodate my removable doors so I had to re-align the whole snorkel

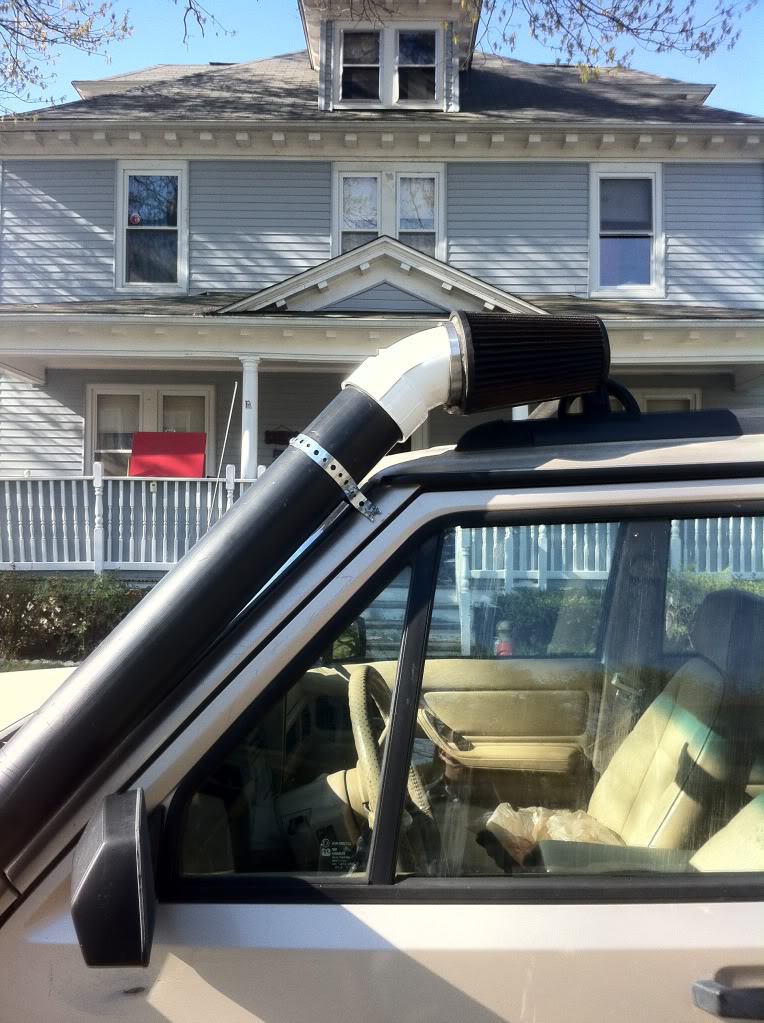
Then attach the 45* elbow on the end of the ABS and Cut another piece of abs to run beside the windshield (here is where you will need a helping hand to make sure the pipe does not sag while you are attaching it) use the pipe strapping to hold up the piece on the fender once you have the angle right.
and the top tube is pretty much up to you, You could do as I did and put a 45* street elbow and attach a cone filter or you could do something else such as a gutter style opening facing the rear or anything you please.
Dont rag on me too much this is my first publicized build guide and im not to good with writing things down as I do them.
thanks guys,
Hope I could help a little bit
Okay so I looked around first at different hardware stores to find the cheapest prices on materials, and this whole project ended up costing me around $50 which is alot cheaper than buying one of these knock off brands off ebay.
Heres my build list.
2- 45* Street PVC 3"
2- 90* Elbows PVC 3"
1- 2" into 3" Adaptor PVC
1- 10' ft. Stick Black ABS 3"
1- CPVC/PVC/ABS Pipe Glue
1- All purpose purple pipe cleaner
1- 3" Cone (Air Raid) Air filter
Roll of pipe strapping
Stock air tube
I started out by removing the stock air box, unbolting the computer, and moving lots of wires out of the way.
I used a piece of PVC to measure a hole behind the computer near the front of the engine bay because that is pretty much the only suitable place to cut a hole through the fender, (people cut toward the back of the engine bay out to the fender but there is alot of wires and I believe the unibody brace goes across there, or atleast the spring brace) Using a skill saw I cut a hole starting on the inside of the fender and mirrored it to the outside, Alot of people use a hole saw in this step but I could not find a 3 and a half inch hole saw that would cut through that with precision
Then I took the intake tube and glued it to the top of the throttle body to be certain no water was getting in (a hose clamp would of worked fine but I figured I'd take it to the next level.
I tried to squeeze the stock air tube onto the 3" ABS pipe but no luck (even though it measured out to 3" inside diameter) so I bought a 2" into 3" PVC adapter to fit inside the tube and onto the ABS shown below.
Then I cut about 7" (give or take on all of these measurements) of ABS pipe and glued it onto the adapter and onto a 45* Street elbow
Next comes the stressful part, I used two 90* elbows to fit through the fender at first but found out that it would be squeezing the fender too tightly and it would mess up the whole angle of the outside pipe. So in tern I used about a 4" piece of ABS to go between the two elbows to give the necessary space and angle.
so lets recap sofar, We have the stock tube on the throttle body, The adapter on the end of the stock tube, A piece of abs tube on the adapter, and a 45*street elbow on the end of that.
Next, As I was starting to say above, assemble the inner/outer fender type workings of the tubing by mimicking the angles and attaching the outside 90* elbow to a piece of ABS tube that you will feed into the engine bay from the outside. After you have the abs and the 90 glued together, attach the other 90* elbow to the end of the 40* street elbow that you have already attached to the intake. Make sure the 90 on the inside is lined up with the hole you cut in the fender because once this pipe glue sets its near impossible to pry apart.
Ok so lets say you have the underhood part of this build done as in the parts all the way up to the 90* elbow under the hood.
This next step is CRITICAL to aligning the outside ABS pipe so proceed with care. prime and glue the 90* that you have under the hood and attach it to the ABS and 90* elbow that you already glued. Make sure you are happy with the way the outside angle sits before you glue it because this will ultimately effect the outcome of the angle of the ABS pipe that runs along the fender and it will effect the way it runs up the windshield
after you have the scary part out of the way the next few steps are a breeze
Measure and cut a long enough piece of pipe to run along the side of the fender to about the emblem. make sure that the 45* elbow will not be in the way of the door opening and If you have removable doors cut back even more on where the angle sits, as you can see here I did not measure properly to accommodate my removable doors so I had to re-align the whole snorkel
Then attach the 45* elbow on the end of the ABS and Cut another piece of abs to run beside the windshield (here is where you will need a helping hand to make sure the pipe does not sag while you are attaching it) use the pipe strapping to hold up the piece on the fender once you have the angle right.
and the top tube is pretty much up to you, You could do as I did and put a 45* street elbow and attach a cone filter or you could do something else such as a gutter style opening facing the rear or anything you please.
Dont rag on me too much this is my first publicized build guide and im not to good with writing things down as I do them.
thanks guys,
Hope I could help a little bit


Thread
Thread Starter
Forum
Replies
Last Post
Austindude2015
Cherokee Chat
17
Dec 28, 2020 05:12 PM
Morris4x4Center
Vendor Showcase
0
Sep 22, 2015 10:41 AM
Currently Active Users Viewing This Thread: 1 (0 members and 1 guests)