When you click on links to various merchants on this site and make a purchase, this can result in this site earning a commission. Affiliate programs and affiliations include, but are not limited to, the eBay Partner Network.
Yes.
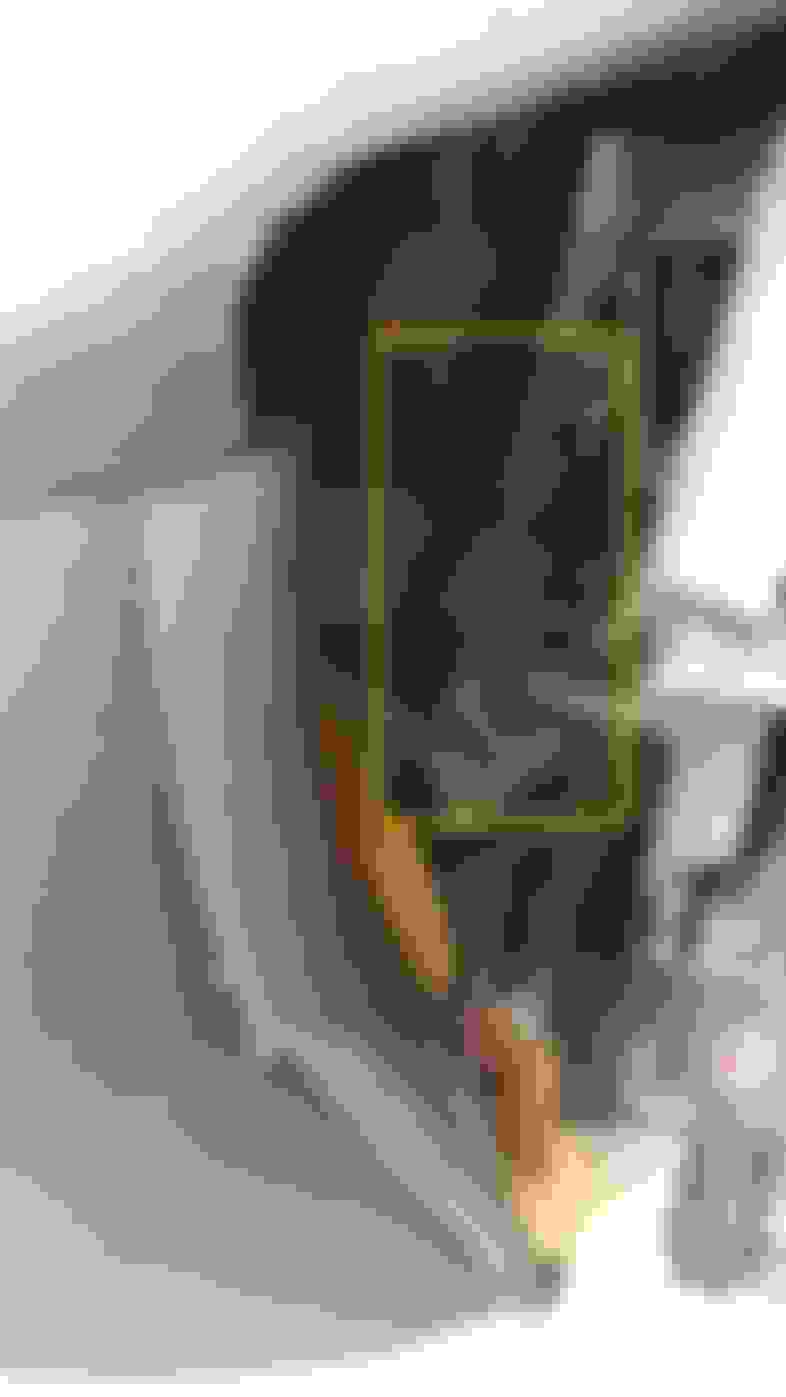
The long metal brake line that comes from the proportioning valve on the driver's side goes into a brake hose that
is attached to the top of your rear diff. Both metal lines to each rear wheel from there.
On top is the rubber hose for the breather and from there into the unibody.
Here is a shot a grabbed off the internet looking at it from the front looking toward the back of the Jeep.
That hose going into the uni-body is attached to a nylon nipple.
So I have no idea what it looks like inside the uni-body. As a matter of fact when I see shots of guys replacing the floors in
their cargo area I look closely at them hoping to see what is inside the uni-body. To this day still have not seen the right shot
from the right angle. LOL.
Now I like Fluid Film. Even inside the uni-body. My thinking is that you do not what to be gunking up the breather in there.
Cause it won't breath properly. Duh.
So I ran hose for the breather up front along the long brake line, positioned it in the engine compartment where my front diff
breather is, and use the same top hat breather as the front diff for the hose. Did that with tranny and transfer case too.
So I just mocked this up real quick. This is the Grote Brite Zone LED BZ551-5. We sell a lot of these in the store. Scored 2 off ebay for a total of about $38. From 2 different sources. Only have the one at the moment. Thinking even through the store it would have run me at least $50 for the 2.
This will not happen till next year.
Was thinking I would do round lights when I got around to this but then saw these.
What do you guys think?
Your the one that has to look at it everyday, so pick the one's that won't activate your OCD....lol.
This one of the few things that I don't think will put my OCD into overdrive. LOL.
But I did have a really stupid idea (what else is new) a couple minutes ago.
What if I hung the cube lights under the bar instead of on top? MLOL.
Year: 1998 Classic (I'll get it running soon....) and 02 Grand
Model: Cherokee (XJ)
Engine: 4.0
Bought and installed a new driver's seat for my WJ. My boys had managed to break the mount! Flopping in, instead of sitting down. Still, kinda weird. The seat is pretty nice, otherwise. I'll probably be giving this seat away here on the forum. PM me if you are interested. Weldable? Maybe... But I don't have the skill yet....
I had to jump start it. Then I decided that I didn't care for the brown paint anymore. I'm sure I'll change my mind again and paint it brown again here soon...after I get some work done on it.
Well, not exactly new but new to me. I'm in the process of installing an OEM leather interior in my 96 Country. So far I have the back and passenger seat installed. Lastly need to do the driver's seat.The leather came for another Country that a friend was converting to interestingly enough, a 92 Limited. All the leather is in good shape except the driver seat pan. The back is ok. I am in the process looking to find eith a seat in good condition or get it repaired but it will be expensive.
Began second phase of seat leather/vinyl repair and gave up finishing off matching the color with the top coat stuff.
3M does have a good kit, I am just too sloppy with that stuff. The part that I applied and heated up (used a heat gun to heat the metal heating fixture) stuck ok. Still, I did not match the color well and was still making a bit of a mess.
The first phase, several days ago, went fine. Put the vinyl adhesive in the places that needed it, let that dry untouched over night, reapplied where needed, and everything looked good enough. BTW that 3M vinyl adhesive looks and smells just like Elmer's all-purpose glue-all.
If you are going to put seat covers on over junk yard seats anyway, my suggestion is maybe repair the splits and rips with vinyl adhesive, and just use the seat covers without bothering with color matching.
I have a leaking front and rear main seal plus the steering and ball joints need replaced. So I decided to just pull the entire front axle. I can then do the front end overhaul in the garage and have nothing in the way while getting the oil pan off.
Year: 1998 Classic (I'll get it running soon....) and 02 Grand
Model: Cherokee (XJ)
Engine: 4.0
Started a rear brake job on my WJ. Took an hour just to get the caliper bolts loose. I hope to finish tomorrow, between the raindrops.
I am convinced that there have been no significant advances in brake technology since the invention of the disc brake. The way brakes are put together is antiquated. Drum brakes especially. It's stupid!
Yes.
The long metal brake line that comes from the proportioning valve on the driver's side goes into a brake hose that
is attached to the top of your rear diff. Both metal lines to each rear wheel from there.
On top is the rubber hose for the breather and from there into the unibody.
Here is a shot a grabbed off the internet looking at it from the front looking toward the back of the Jeep.
That hose going into the uni-body is attached to a nylon nipple.
So I have no idea what it looks like inside the uni-body. As a matter of fact when I see shots of guys replacing the floors in
their cargo area I look closely at them hoping to see what is inside the uni-body. To this day still have not seen the right shot
from the right angle. LOL.
Now I like Fluid Film. Even inside the uni-body. My thinking is that you do not what to be gunking up the breather in there.
Cause it won't breath properly. Duh.
So I ran hose for the breather up front along the long brake line, positioned it in the engine compartment where my front diff
breather is, and use the same top hat breather as the front diff for the hose. Did that with tranny and transfer case too.
About how long is that fuel line from the tank to the filter? While I am replacing the fuel filter I might as well replace the rubber line that was installed at the factory.