
What did you do to your Cherokee today?

CF Veteran
Joined: Sep 2010
Posts: 12,692
Likes: 6
From: Mercer County, NJ
Year: 2001
Model: Cherokee
Engine: 4.0L I6 HO
Newbie
Joined: Sep 2010
Posts: 9
Likes: 0
From: Renton, Washington
Year: 1989
Model: Cherokee
Engine: 4 Liter
I have been looking at the Labaron Hood Vent installs and thought they looked great so I decided to do an install on my hood. I am about 6 years behind the curve but I wanted to install the Labaron drip pans also so I thought it would make a good post.
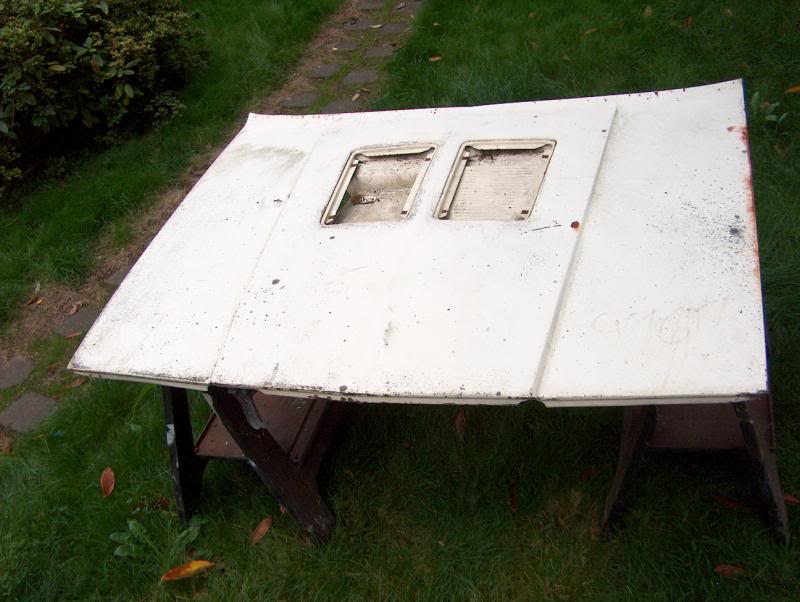
This is the Labaron Hood:
The flip side:
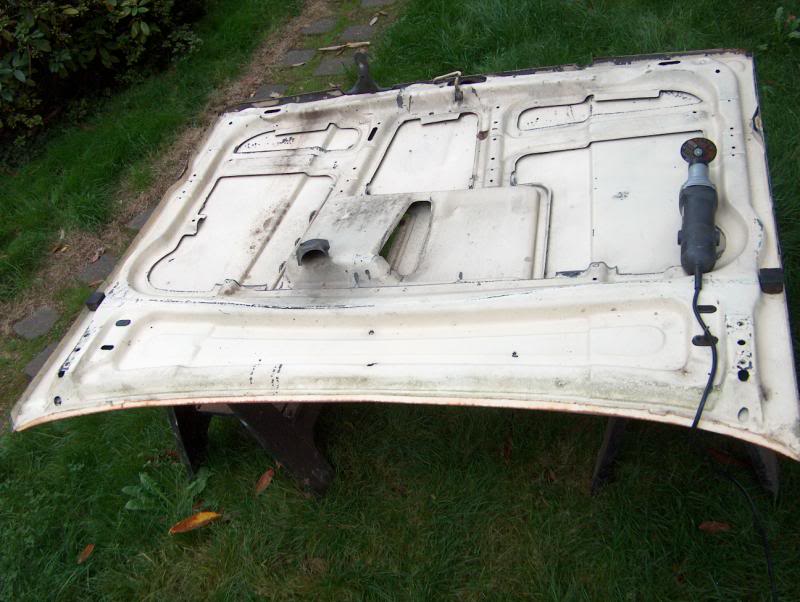
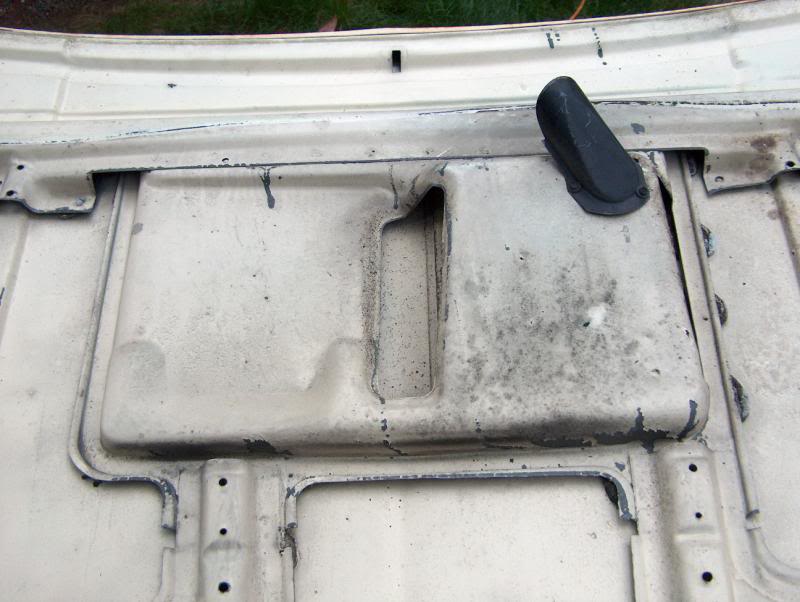
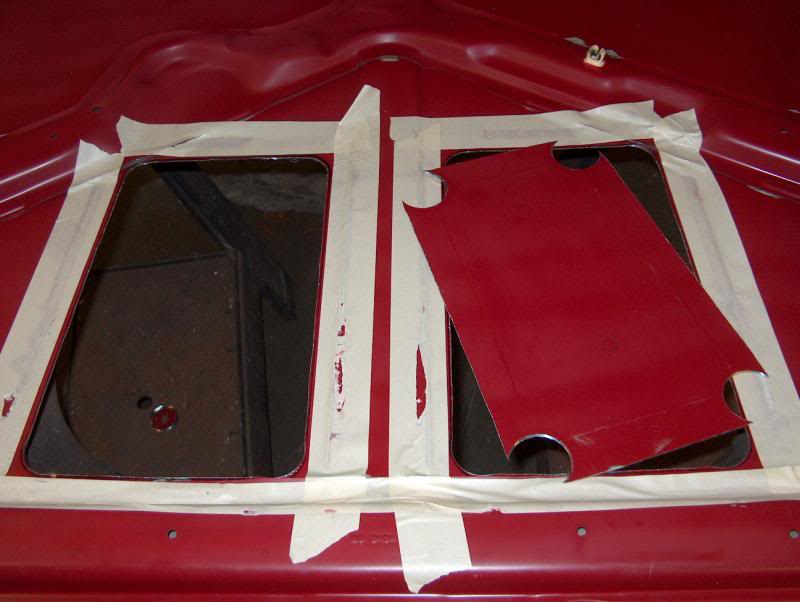
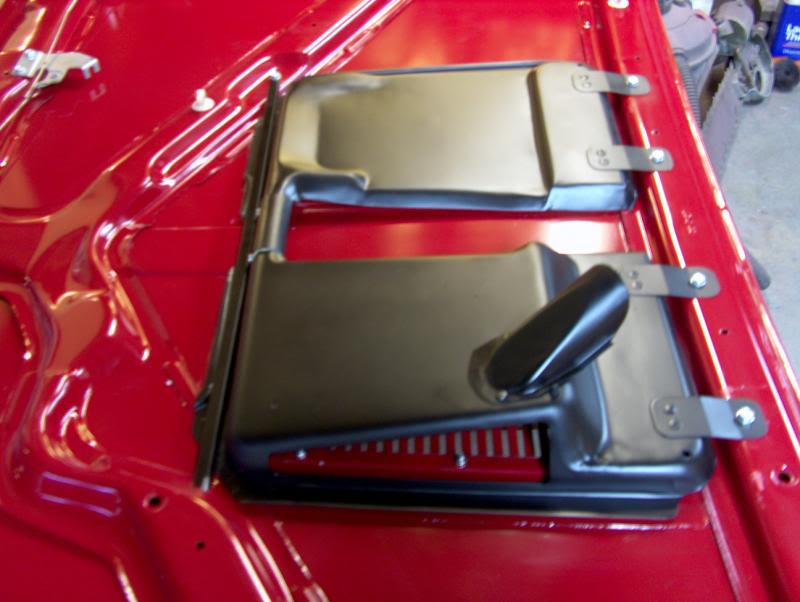
This is what the drip pans look like from underneath:
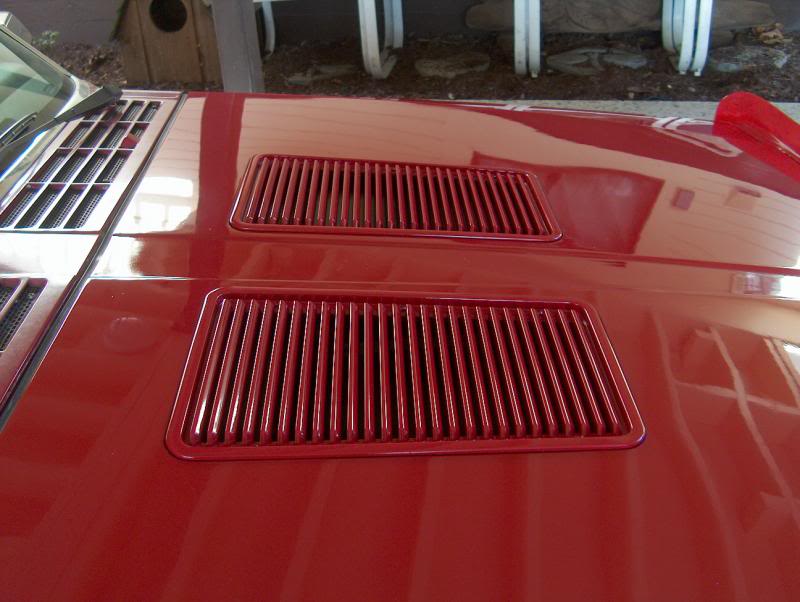
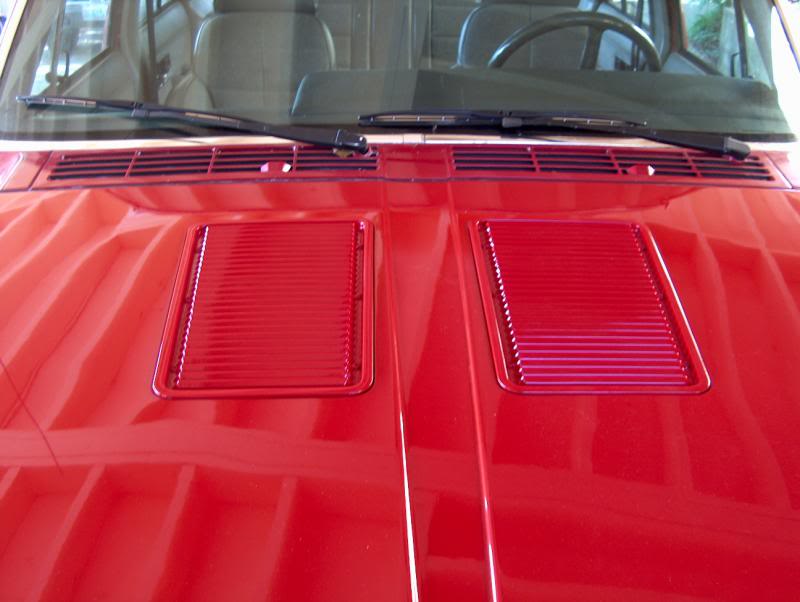
This is what the drip pans look like from the top of the hood
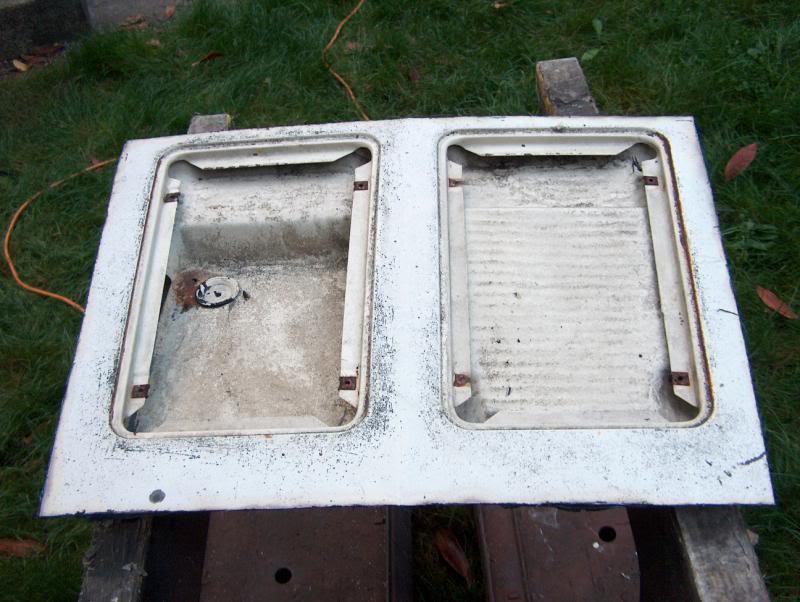
To remove the drip pans I had to grind off a number of spot welds. Then I had to cut them apart and bend up the sides and fab an extension to reach between the drip pans.
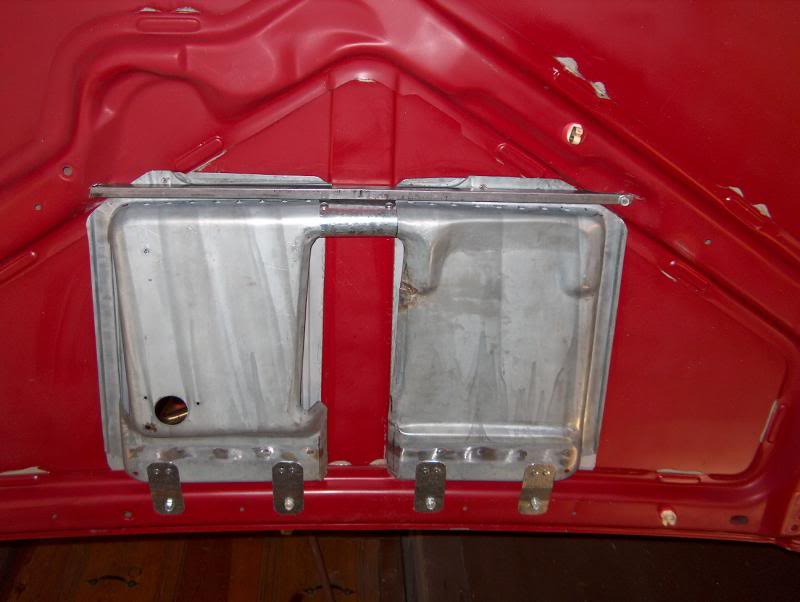
This is how they look mounted on the underside of the Jeep hood. Lots of cutting and shaping and soldering. I added tabs to attach them to the hood at the back (bottom edge in picture)
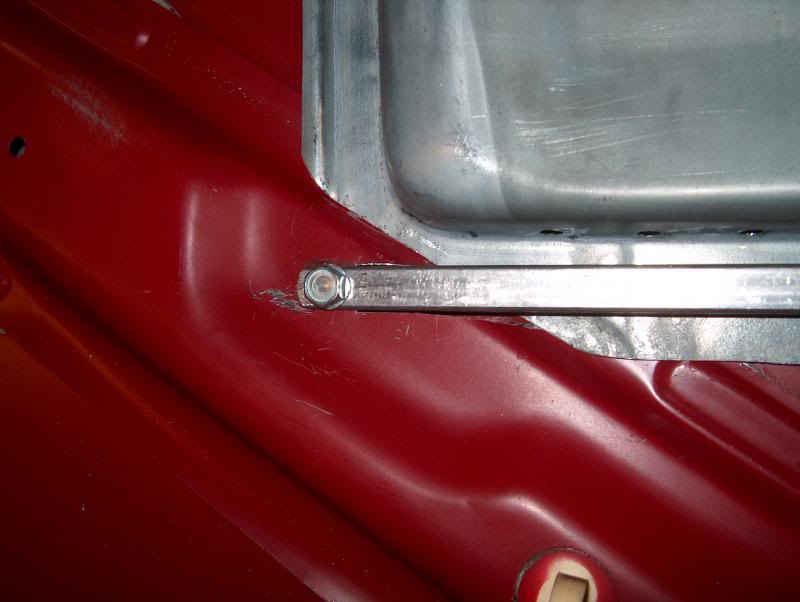
Along the top I used a square tube that slid into a square hole I cut in the hood on one side.

On the other side I cut a notch that allowed the bar to side into. Then a screw to hold it in place.
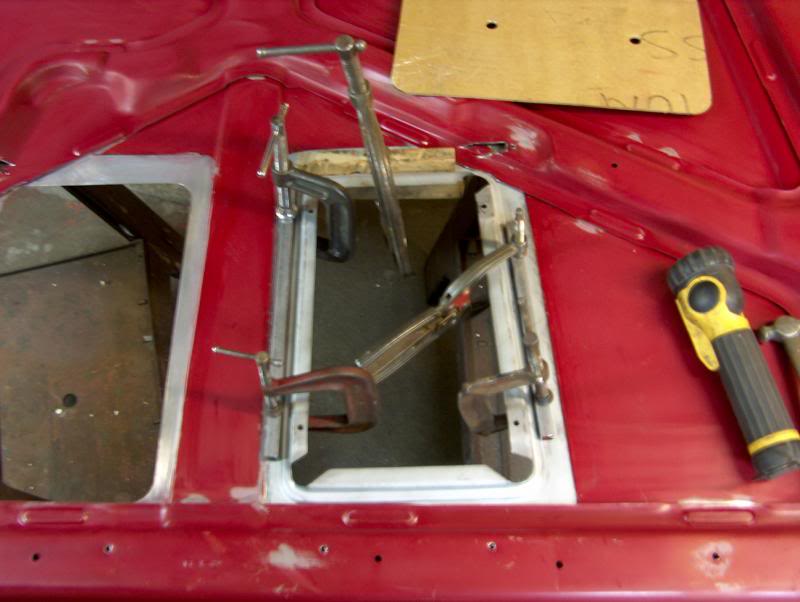
I cut out the frames that held the hood vents in place to fit in under the hood bracing:
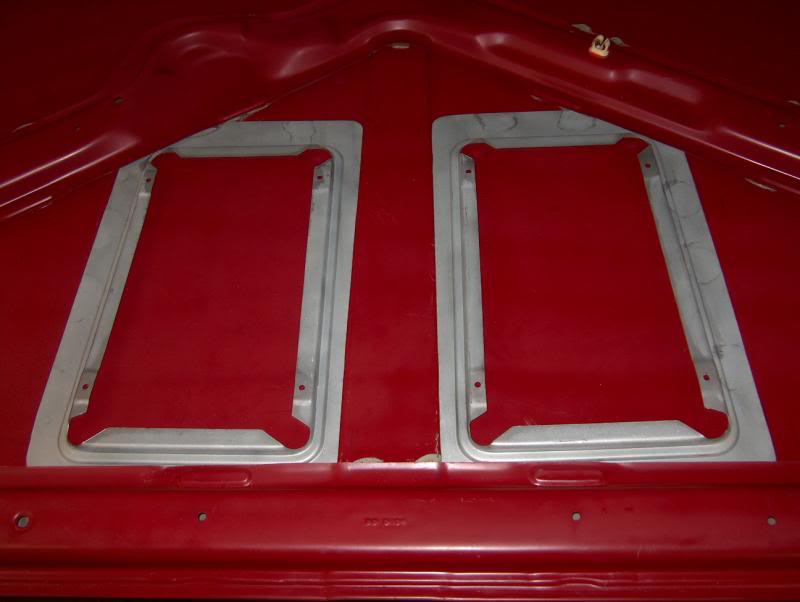
This hood came from the junk yard. I did not want to mess up my original hood. I cut out the holes 1/16 inch larger than the outside dimensions of the inserts so they could rest in the frames attached underneath:
I stripped the paint off the donor Jeep hood from the junk yard. The paint was in poor shape.
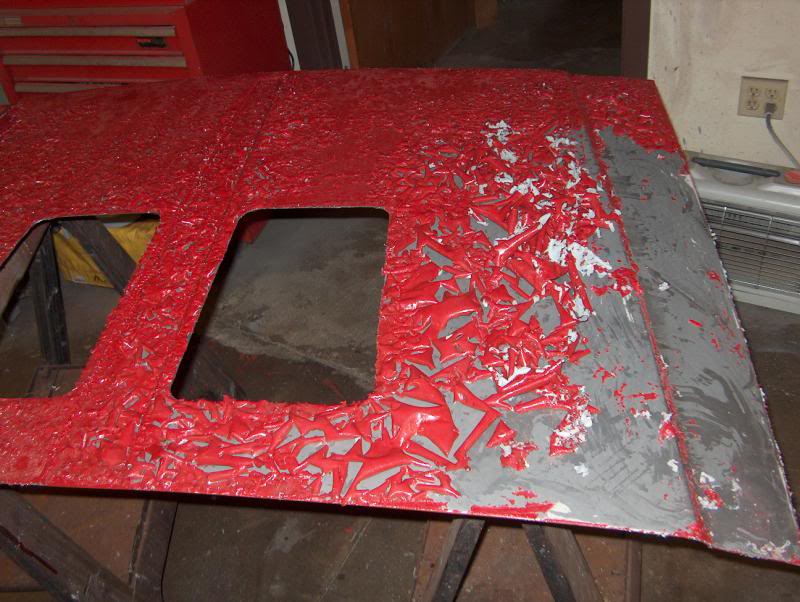
I epoxied in the frames around the holes.
I painted the underside of the hood:

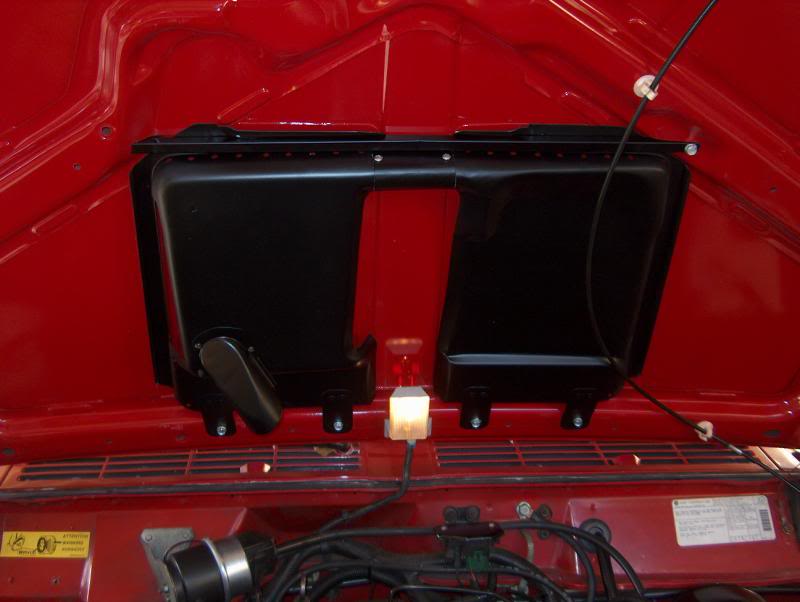
Drip pans installed. The water runs from the driver's side toward the front of the hood, across the connection and down hill toward the fire wall in the passenger side drip pan and drains in front of the fire wall. Both drip pans are vented around the sides. I installed a Cadillac junk yard hood light centered along the bottom of the hood.
A friend painted the top of the hood at is body shop:
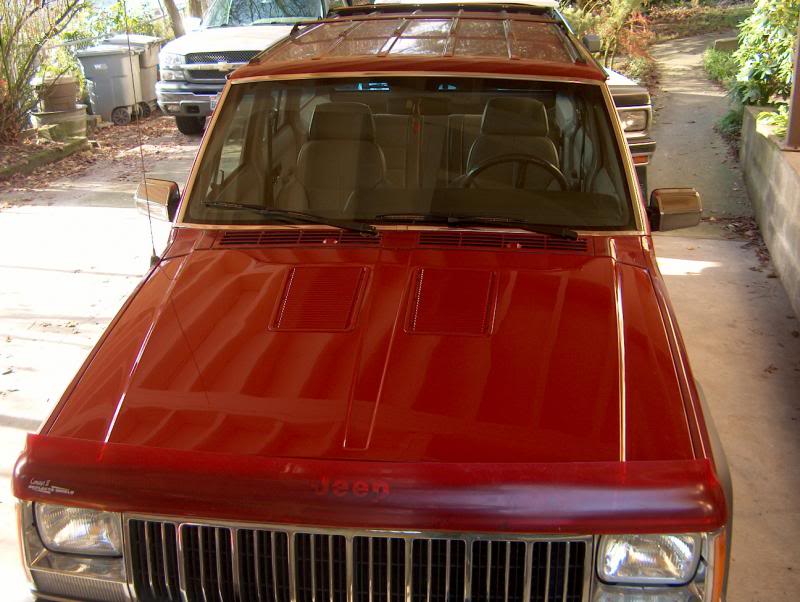
It was way too much work. If I had to do over I would probably just mount the vents directly to the hood and skip the mounting frames from the Labaron hood. But the drip pans were worth the trouble.
This is the Labaron Hood:

The flip side:

This is what the drip pans look like from underneath:

This is what the drip pans look like from the top of the hood

To remove the drip pans I had to grind off a number of spot welds. Then I had to cut them apart and bend up the sides and fab an extension to reach between the drip pans.
This is how they look mounted on the underside of the Jeep hood. Lots of cutting and shaping and soldering. I added tabs to attach them to the hood at the back (bottom edge in picture)

Along the top I used a square tube that slid into a square hole I cut in the hood on one side.

On the other side I cut a notch that allowed the bar to side into. Then a screw to hold it in place.

I cut out the frames that held the hood vents in place to fit in under the hood bracing:

This hood came from the junk yard. I did not want to mess up my original hood. I cut out the holes 1/16 inch larger than the outside dimensions of the inserts so they could rest in the frames attached underneath:

I stripped the paint off the donor Jeep hood from the junk yard. The paint was in poor shape.

I epoxied in the frames around the holes.

I painted the underside of the hood:

Drip pans installed. The water runs from the driver's side toward the front of the hood, across the connection and down hill toward the fire wall in the passenger side drip pan and drains in front of the fire wall. Both drip pans are vented around the sides. I installed a Cadillac junk yard hood light centered along the bottom of the hood.


A friend painted the top of the hood at is body shop:


It was way too much work. If I had to do over I would probably just mount the vents directly to the hood and skip the mounting frames from the Labaron hood. But the drip pans were worth the trouble.

Herp Derp Jerp

Joined: Nov 2011
Posts: 18,251
Likes: 17
From: Parham, ON
Year: 1999
Model: Cherokee
Engine: 4.0L OBD-II
So last week I was mulling over an OBA system for my Jeep. Nothing special, just an electric compressor that lives on a shelf in the back. Really a matter of convenience since how my compressor works is annoying (clip to battery, try not to trip over anything). http://www.4x4wire.com/tech/portable_oba/ looks like fun
Well two nights ago the gimmicky tire-filling-only-with-stupid-nozzle too-short hose that was included with my compressor either died or froze up. Today bought a proper hose rated to -40. More goodies on sale this Tuesday... soooooooooooo I guess today I started hoarding parts for OBA lol
Well two nights ago the gimmicky tire-filling-only-with-stupid-nozzle too-short hose that was included with my compressor either died or froze up. Today bought a proper hose rated to -40. More goodies on sale this Tuesday... soooooooooooo I guess today I started hoarding parts for OBA lol
Last edited by salad; Dec 1, 2013 at 10:40 PM.
CF Veteran
Joined: Dec 2010
Posts: 9,897
Likes: 2
From: shawnee,ks
Year: 1993
Model: Cherokee
Engine: 4.0
CF Veteran
Joined: Feb 2012
Posts: 6,468
Likes: 18
From: Forest Hill, Maryland
Year: 1998
Model: Cherokee
Engine: 4.0L
I may be finally getting around to getting my Jeep back on the road.
my aunt may let me borrow the half of her garage she doesnt use to work on my Jeep.
also since I plan on just daily driving my Jeep the way it is after fixing it and not going to off-road it after my overhaul. I got some/borrowing some 30" tires to drive with so it doesn't look too too horrible. better than the 215/65s that are on it now.
Last edited by kuzican; Dec 1, 2013 at 10:16 PM.
::Regional Moderator::
Joined: Jul 2011
Posts: 2,912
Likes: 6
From: Over here...
Year: 1986
Model: Cherokee
Engine: 2.8
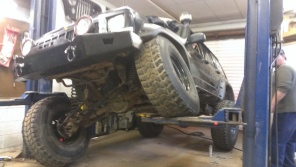
Installed a radiator, fan clutch, and shroud on my '00. Also debadged it for the most part. Just got back from helping my friend buy his first XJ. Another one brought into the fold, muhahaha!!
Edit: pics of his junk
Edit: pics of his junk
CF Veteran
Joined: Dec 2010
Posts: 9,897
Likes: 2
From: shawnee,ks
Year: 1993
Model: Cherokee
Engine: 4.0
CF Veteran

Joined: Jul 2012
Posts: 4,104
Likes: 2
From: San Antonio, TX
Year: 1996
Model: Cherokee
Engine: 4.0L
I have been looking at the Labaron Hood Vent installs and thought they looked great so I decided to do an install on my hood. I am about 6 years behind the curve but I wanted to install the Labaron drip pans also so I thought it would make a good post.
This is the Labaron Hood:

The flip side:

This is what the drip pans look like from underneath:

This is what the drip pans look like from the top of the hood

To remove the drip pans I had to grind off a number of spot welds. Then I had to cut them apart and bend up the sides and fab an extension to reach between the drip pans.
This is how they look mounted on the underside of the Jeep hood. Lots of cutting and shaping and soldering. I added tabs to attach them to the hood at the back (bottom edge in picture)

Along the top I used a square tube that slid into a square hole I cut in the hood on one side.
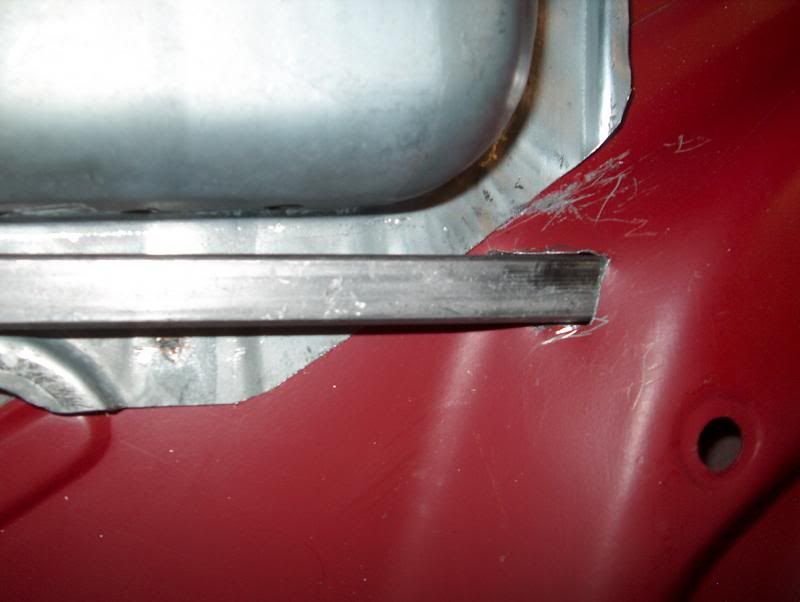
On the other side I cut a notch that allowed the bar to side into. Then a screw to hold it in place.

I cut out the frames that held the hood vents in place to fit in under the hood bracing:

This hood came from the junk yard. I did not want to mess up my original hood. I cut out the holes 1/16 inch larger than the outside dimensions of the inserts so they could rest in the frames attached underneath:

I stripped the paint off the donor Jeep hood from the junk yard. The paint was in poor shape.

I epoxied in the frames around the holes.

I painted the underside of the hood:

Drip pans installed. The water runs from the driver's side toward the front of the hood, across the connection and down hill toward the fire wall in the passenger side drip pan and drains in front of the fire wall. Both drip pans are vented around the sides. I installed a Cadillac junk yard hood light centered along the bottom of the hood.


A friend painted the top of the hood at is body shop:


It was way too much work. If I had to do over I would probably just mount the vents directly to the hood and skip the mounting frames from the Labaron hood. But the drip pans were worth the trouble.
This is the Labaron Hood:
The flip side:
This is what the drip pans look like from underneath:
This is what the drip pans look like from the top of the hood
To remove the drip pans I had to grind off a number of spot welds. Then I had to cut them apart and bend up the sides and fab an extension to reach between the drip pans.
This is how they look mounted on the underside of the Jeep hood. Lots of cutting and shaping and soldering. I added tabs to attach them to the hood at the back (bottom edge in picture)
Along the top I used a square tube that slid into a square hole I cut in the hood on one side.
On the other side I cut a notch that allowed the bar to side into. Then a screw to hold it in place.
I cut out the frames that held the hood vents in place to fit in under the hood bracing:
This hood came from the junk yard. I did not want to mess up my original hood. I cut out the holes 1/16 inch larger than the outside dimensions of the inserts so they could rest in the frames attached underneath:
I stripped the paint off the donor Jeep hood from the junk yard. The paint was in poor shape.
I epoxied in the frames around the holes.
I painted the underside of the hood:
Drip pans installed. The water runs from the driver's side toward the front of the hood, across the connection and down hill toward the fire wall in the passenger side drip pan and drains in front of the fire wall. Both drip pans are vented around the sides. I installed a Cadillac junk yard hood light centered along the bottom of the hood.
A friend painted the top of the hood at is body shop:
It was way too much work. If I had to do over I would probably just mount the vents directly to the hood and skip the mounting frames from the Labaron hood. But the drip pans were worth the trouble.

CF Veteran
Joined: Aug 2011
Posts: 1,994
Likes: 8
From: San Jose
Year: 89
Model: Cherokee
Engine: 4.0 I6
Ps, you've got to be much closer to the truck if you want to get any real benefit out of it!