
Noob weld cart build.

CF Veteran
Joined: Jul 2011
Posts: 4,521
Likes: 1
From: JOCO
Year: 1999
Engine: 4.0 Inline 6
Thread Starter
CF Veteran
Joined: Dec 2012
Posts: 4,169
Likes: 6
From: York, PA
Year: 1998
Model: Cherokee
Engine: 4.0
Got a lot done today! I picked up some more 1x1 steel, and also 1" round tube for the future handle on the front, and a small 16 gauge panel for underneath where I will mount the outlets. Sorry, no pics of that and the ones I have suck because I forgot my good camera. I started the evening with two goals in mind: Drink some beer, and then weld some steel up and get the back wheels on the cart at least. Mission accomplished!
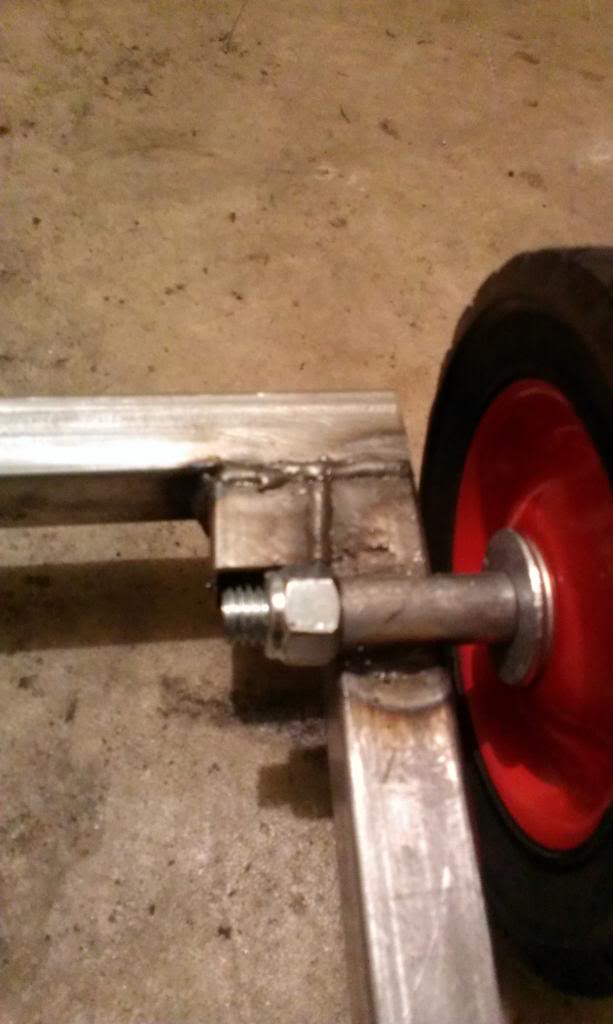
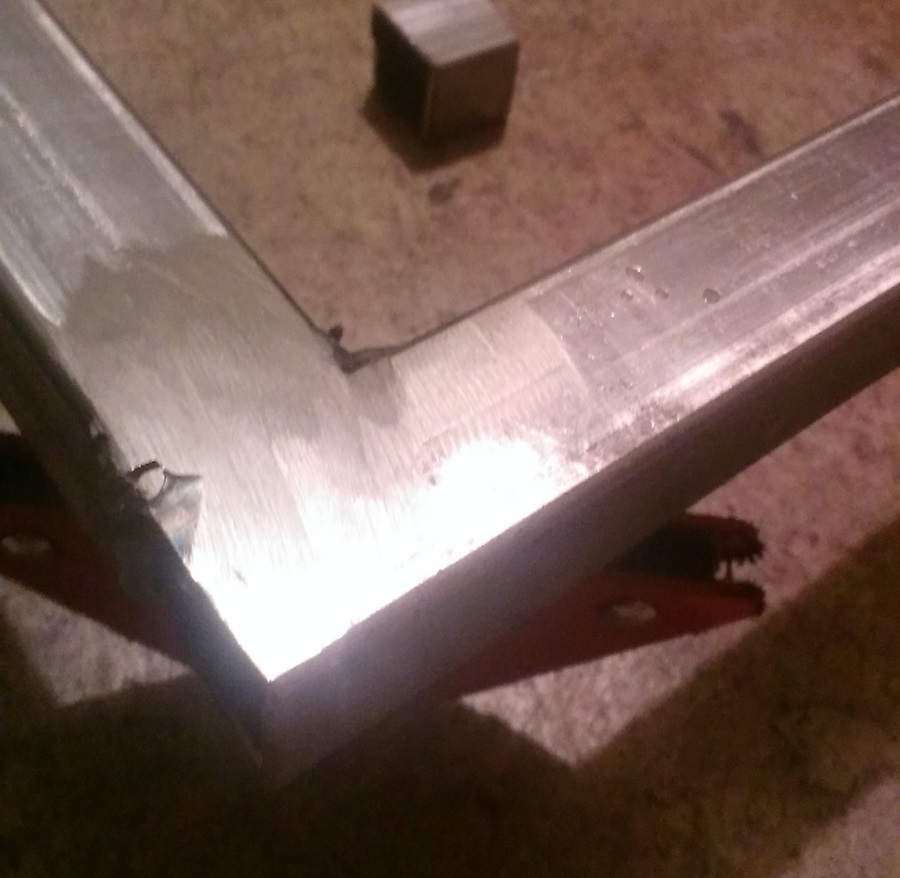
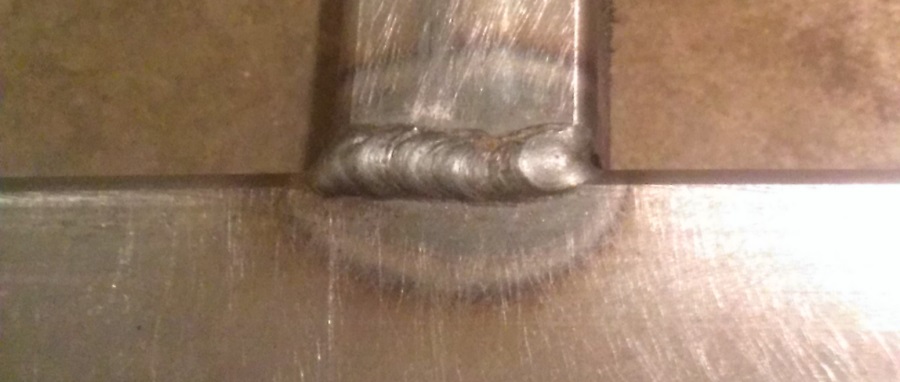
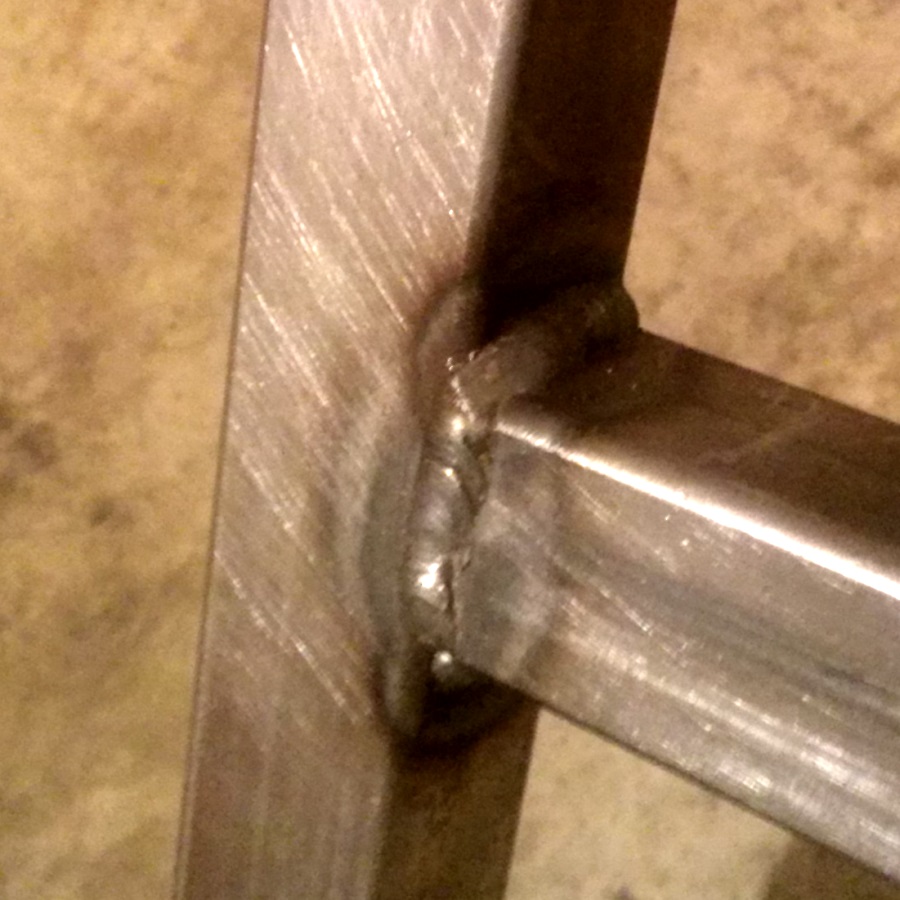
I was pretty happy about how these welds turned out. I had some trouble later and also with burn-through, so I played around with the settings a bit and turned the voltage back a little, seemed to solve the problem.
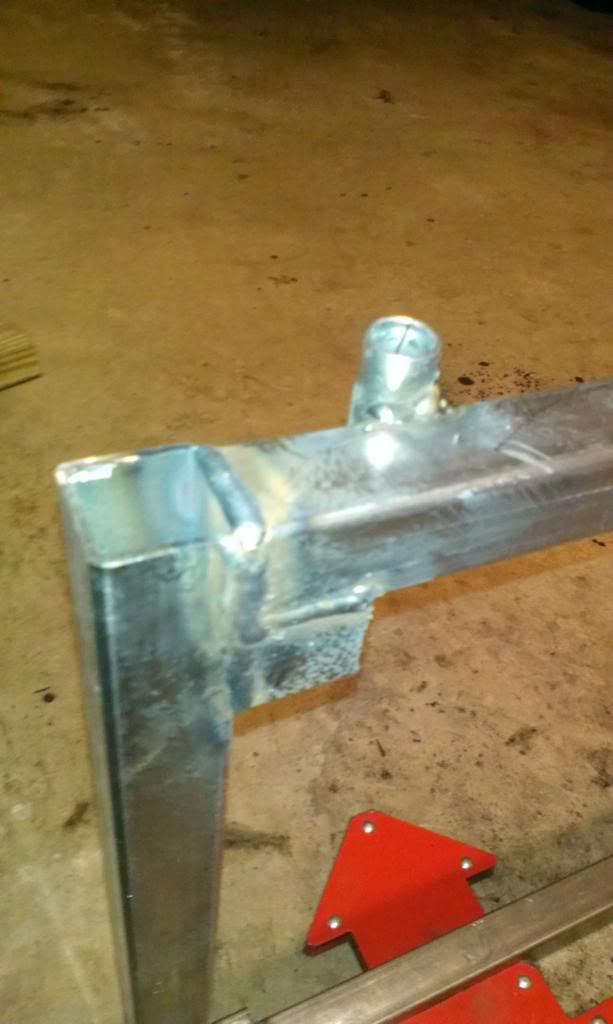
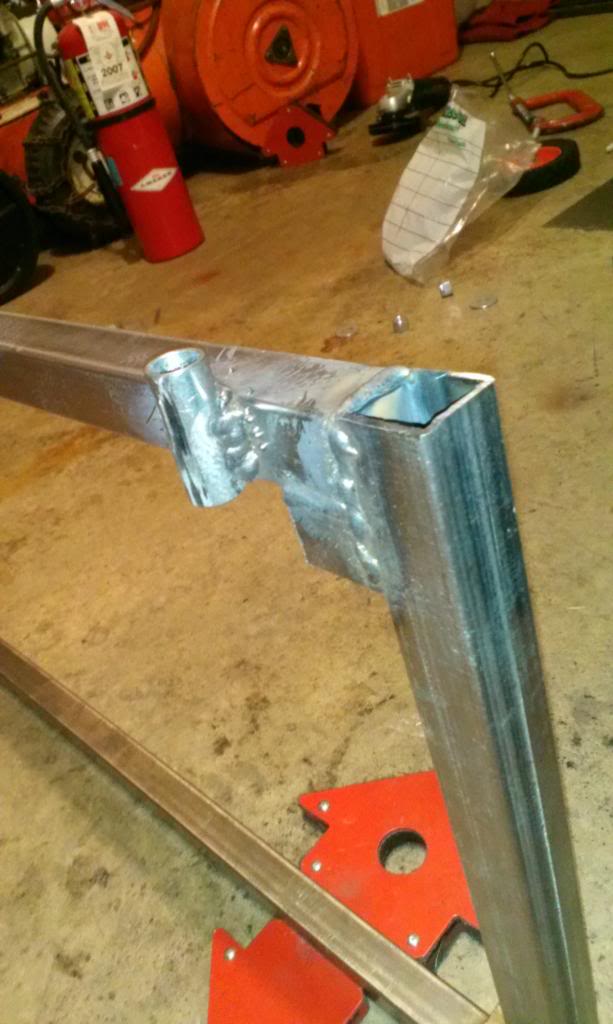
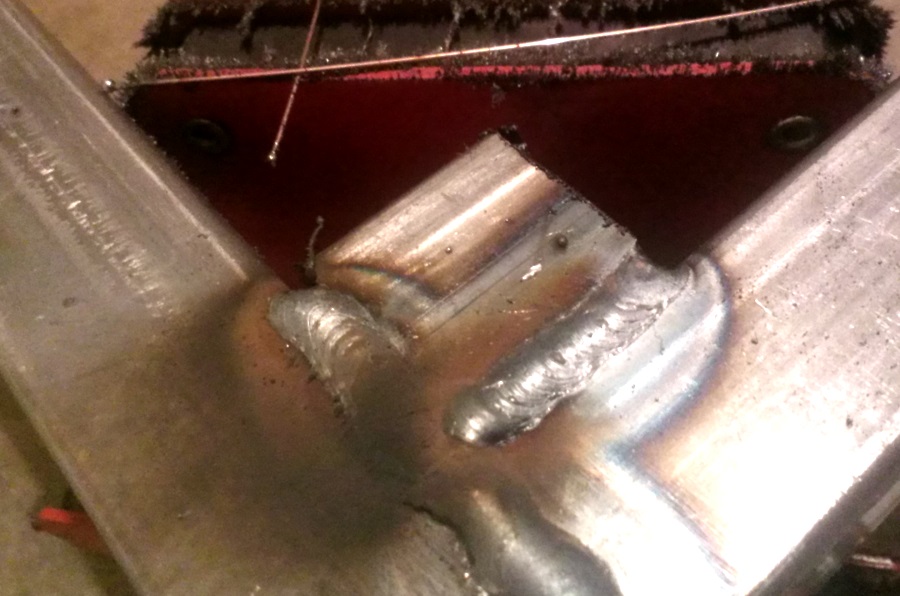
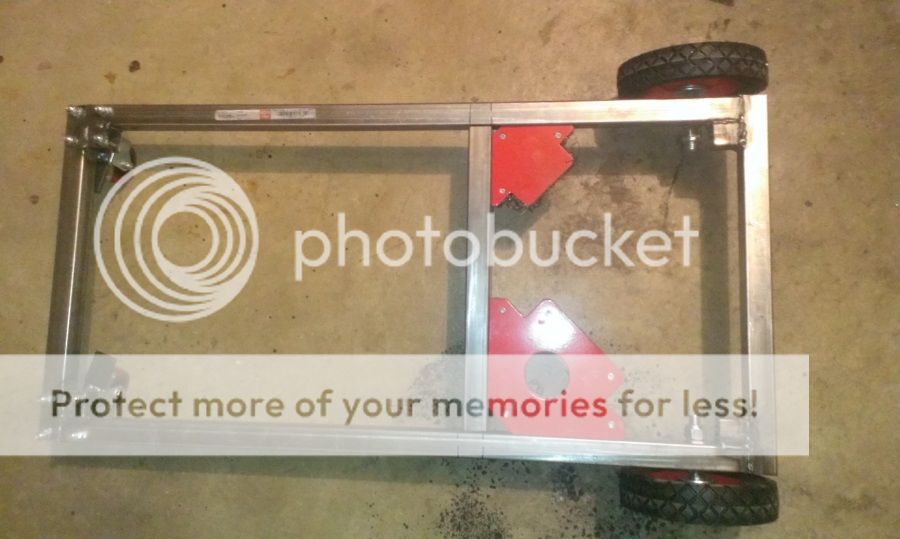
I decided on picking up 1/2" sleeves to weld to the bottom of the frame instead of running the bolt through it. I'm very happy I did. The hardest time I had welding was with these! One stupid thing I did and didn't realize until the sleeves were welded--I welded them onto the side that the front wheels were supposed to go. That's why I welded in a 1x1 square block in the corner...Oh well, more welding practice, and extra support in that area I figure.
You can also see the fire extinguisher there in the background that I picked up from work. It's actually pretty big, probably way overkill for this cart. I have just enough room for the gas tank and this to mount on the back of the cart. More to come later on that.
Also, I picked up this drawer from work, turns out it IS all metal...
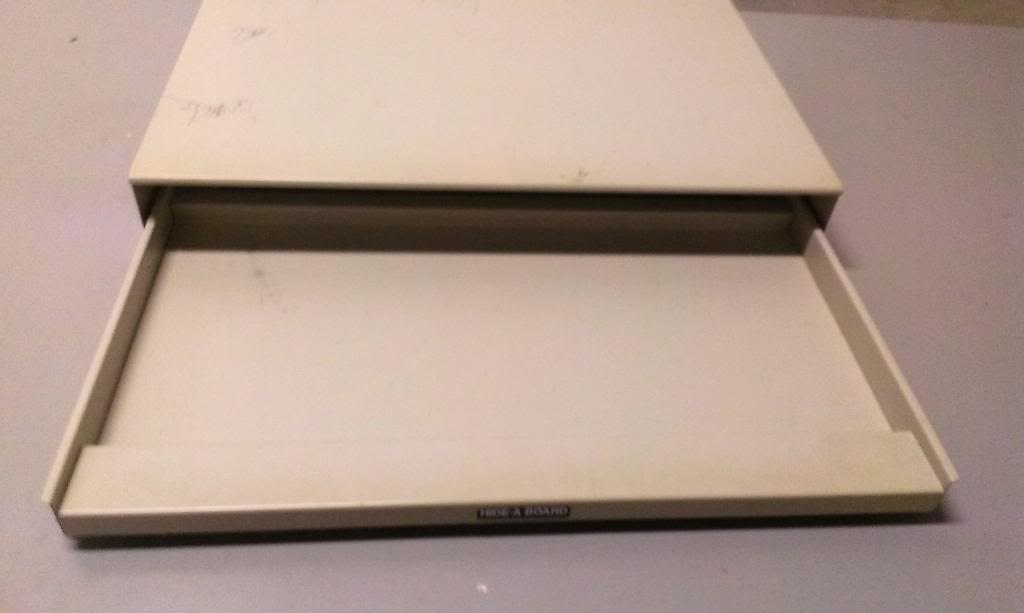
Unfortunately, it is rather large for my small-footprint cart. I don't really wish to make the cart bigger to accomodate it. I need a smaller drawer. This thing would be great for a tool tray though, so I may save it for a future project.
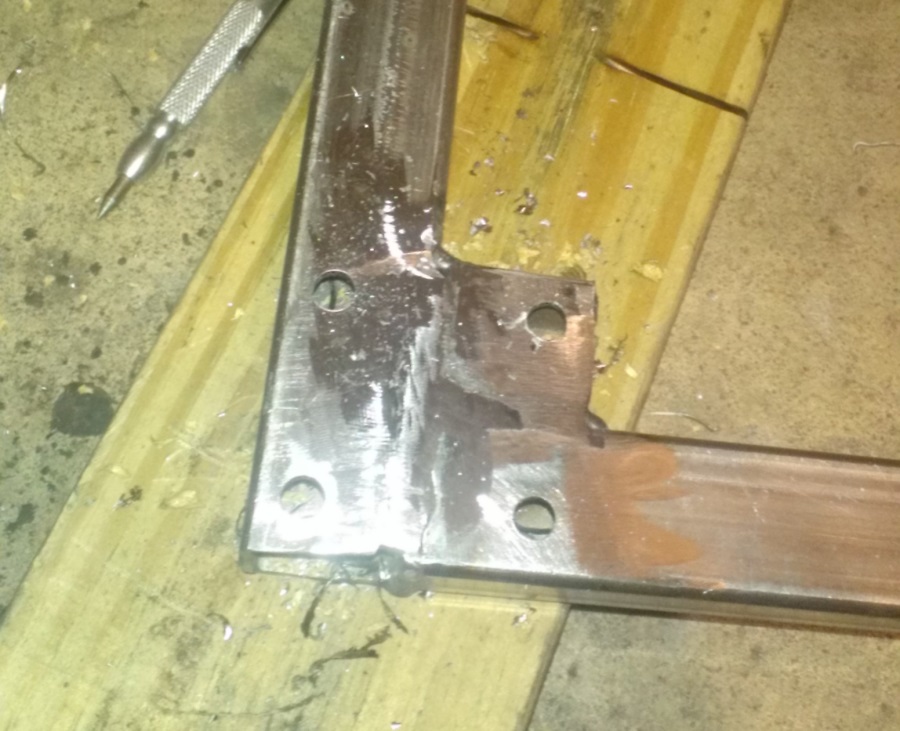
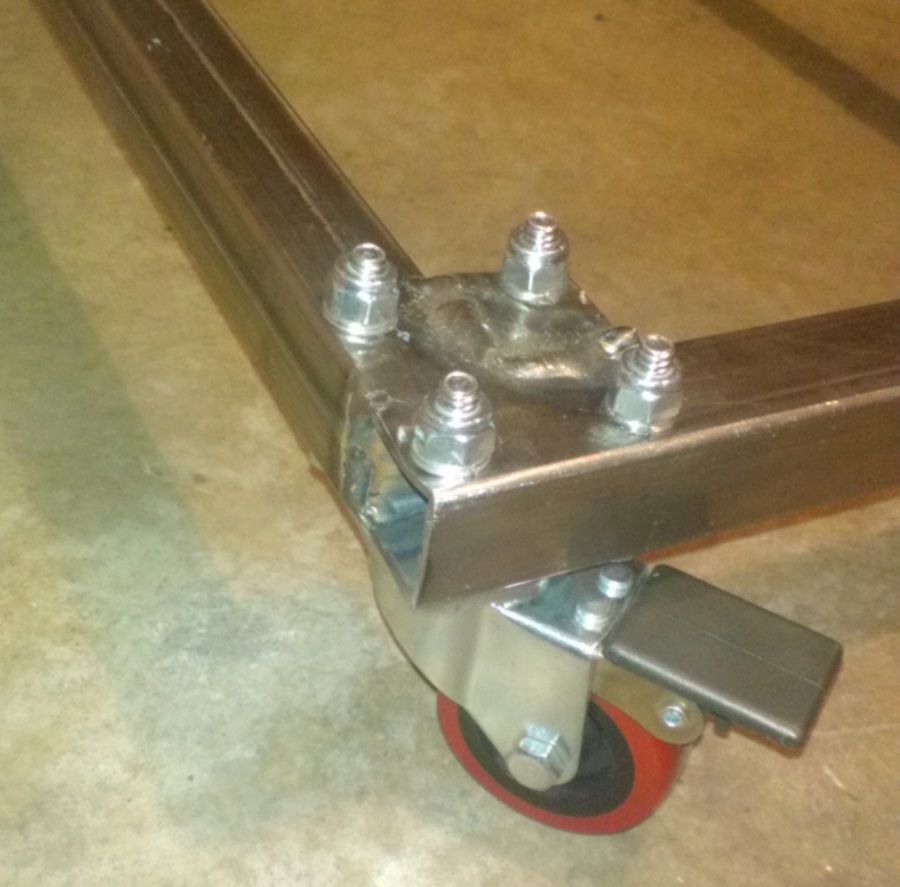
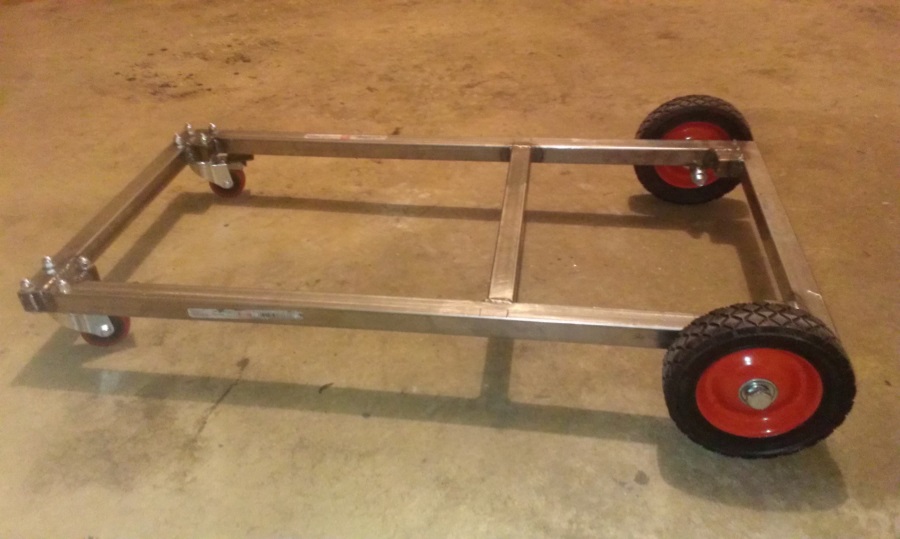
Wheels mounted...
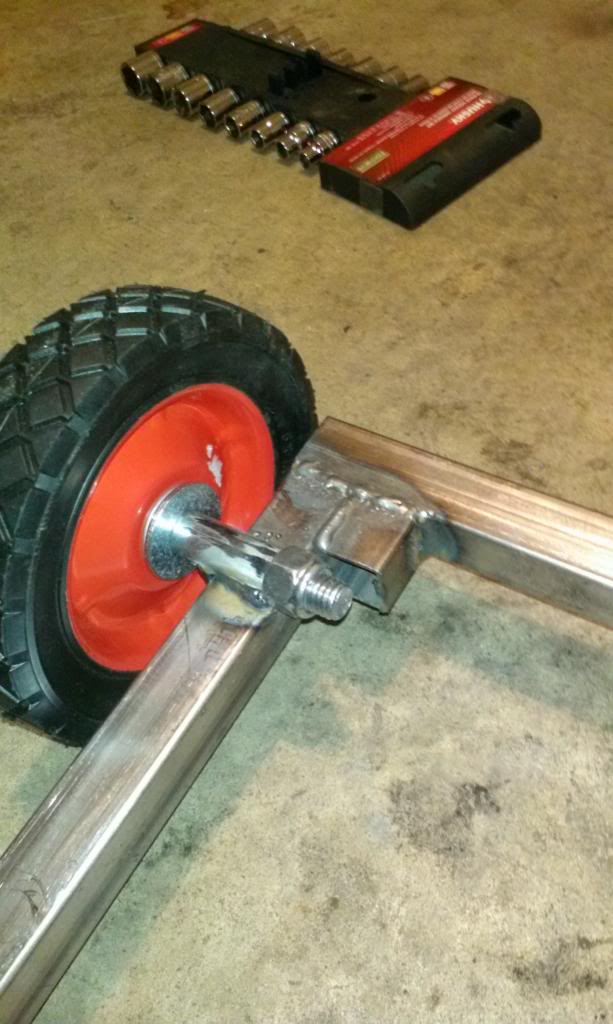
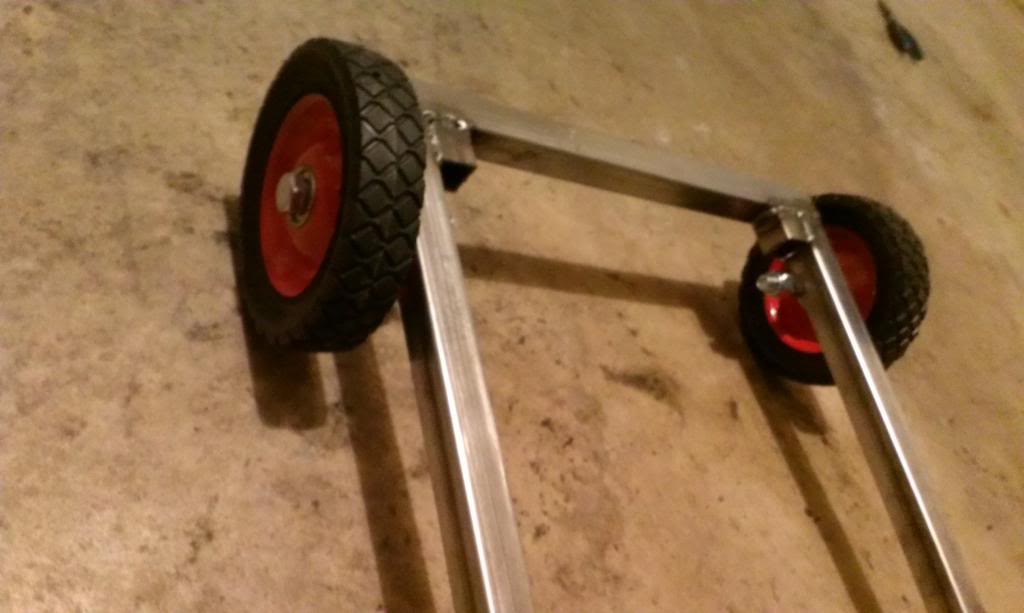
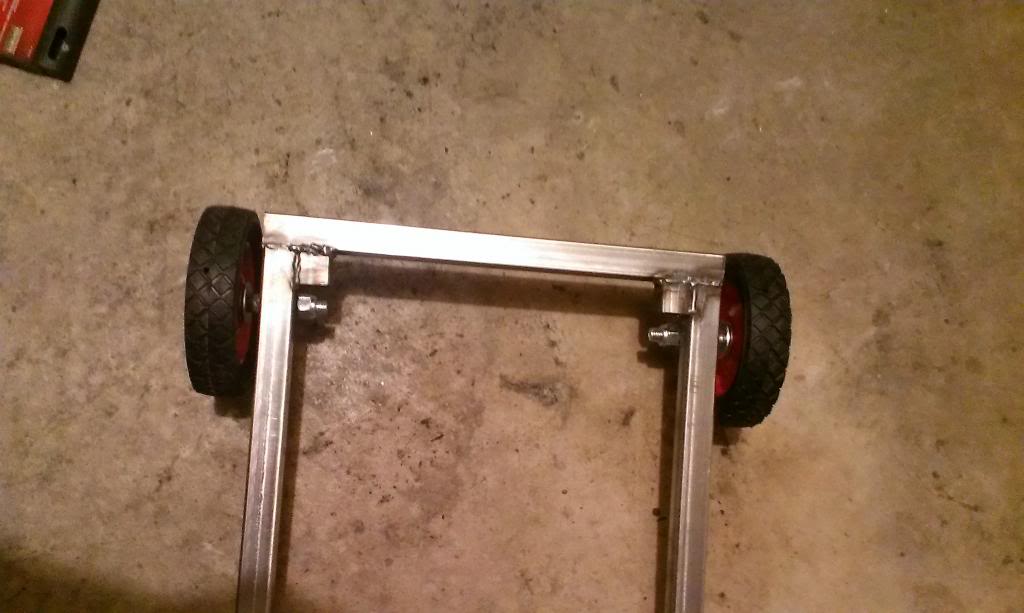
I've determined that there really is an art to welding, and well let's just say I'm certainly no artist! But the frame is VERY sturdy so far. Overall, I'm pretty happy with how it is turning out. I'll definitely be popping those wheels off a little later down the road to clean up the welds some with the angle grinder. Problem now is that I have no clue where my spanner wrench is, and I wasn't about to pay 8 bucks for one! Time to build my own I guess!
I was pretty happy about how these welds turned out. I had some trouble later and also with burn-through, so I played around with the settings a bit and turned the voltage back a little, seemed to solve the problem.
I decided on picking up 1/2" sleeves to weld to the bottom of the frame instead of running the bolt through it. I'm very happy I did. The hardest time I had welding was with these! One stupid thing I did and didn't realize until the sleeves were welded--I welded them onto the side that the front wheels were supposed to go. That's why I welded in a 1x1 square block in the corner...Oh well, more welding practice, and extra support in that area I figure.
You can also see the fire extinguisher there in the background that I picked up from work. It's actually pretty big, probably way overkill for this cart. I have just enough room for the gas tank and this to mount on the back of the cart. More to come later on that.
Also, I picked up this drawer from work, turns out it IS all metal...
Unfortunately, it is rather large for my small-footprint cart. I don't really wish to make the cart bigger to accomodate it. I need a smaller drawer. This thing would be great for a tool tray though, so I may save it for a future project.
Wheels mounted...
I've determined that there really is an art to welding, and well let's just say I'm certainly no artist! But the frame is VERY sturdy so far. Overall, I'm pretty happy with how it is turning out. I'll definitely be popping those wheels off a little later down the road to clean up the welds some with the angle grinder. Problem now is that I have no clue where my spanner wrench is, and I wasn't about to pay 8 bucks for one!
Time to build my own I guess!
Thread Starter
CF Veteran
Joined: Dec 2012
Posts: 4,169
Likes: 6
From: York, PA
Year: 1998
Model: Cherokee
Engine: 4.0
 I was afraid to go any slower because of the burn-through that got me earier. I was able to fix it though. I'll keep practicing.
CF Veteran
Joined: Jul 2011
Posts: 4,521
Likes: 1
From: JOCO
Year: 1999
Engine: 4.0 Inline 6
perfect practice makes perfect.
looks good man. this is a great place to start learning. plan ahead on your design. think everything through and measure twice! i'd deff keep that shelf/drawer though. might use it on a future tool cart or something.
looks good man. this is a great place to start learning. plan ahead on your design. think everything through and measure twice! i'd deff keep that shelf/drawer though. might use it on a future tool cart or something.
Thread Starter
CF Veteran
Joined: Dec 2012
Posts: 4,169
Likes: 6
From: York, PA
Year: 1998
Model: Cherokee
Engine: 4.0
I'm starting to plan how I'm going to finish the base. I'm thinking of welding the 1/2"x1/2" flush with the frame across a few times, enough for better than enough support. Also probably weld some panel on that, with a piece of flat iron around the border to help hold things in. Another thing I was considering though, was leaving the bottom an open grate instead of welding panel overtop. That way it would stay cleaner. I'm gonna draw some ideas out tomorrow. Still haven't forgotten about the top part of the frame either. I'll probably have the welder at a slight upwards angle.
CF Veteran
Joined: Jul 2011
Posts: 4,521
Likes: 1
From: JOCO
Year: 1999
Engine: 4.0 Inline 6
want some good practice? weld some expanded metal to the base of the bottom of the cart. that way it'll give plenty of extra support, it's great welding practice and it'll act as a self cleaning shelf to hold tools and gear. do the same with the top that holds the welder.
i'll see if i can dig up some pics off the interwebz...
i'll see if i can dig up some pics off the interwebz...
CF Veteran
Joined: Jul 2011
Posts: 4,521
Likes: 1
From: JOCO
Year: 1999
Engine: 4.0 Inline 6
i know it's ugly but im talking about the expanded metal. except put it on the underside of the shelf so the tubing acts as rails.
http://www.tractorbynet.com/forums/a...t-sd530729.jpg
http://www.tractorbynet.com/forums/a...t-sd530729.jpg
CF Veteran
Joined: Jul 2011
Posts: 4,521
Likes: 1
From: JOCO
Year: 1999
Engine: 4.0 Inline 6
::CF Administrator::


Joined: Feb 2011
Posts: 14,479
Likes: 805
From: Blunt, South Dakota
Year: 97
Model: Cherokee (XJ)
Engine: 4.6 stroker
It used to be an ultrasound machine that I bought at auction and parted out and sold on ebay. It's pretty beefy with nice heavy duty wheels and lots of storage...and the torch hangs on the side where all the attachments used to go, once I had the machine taken out and had the rolling chassis, I took one look at it and said "there's my new welding cart!" LOL
Thread Starter
CF Veteran
Joined: Dec 2012
Posts: 4,169
Likes: 6
From: York, PA
Year: 1998
Model: Cherokee
Engine: 4.0
Awesome...hey as long as it works, that's all that matters! Here's mine:
Attachment 217533
It used to be an ultrasound machine that I bought at auction and parted out and sold on ebay. It's pretty beefy with nice heavy duty wheels and lots of storage...and the torch hangs on the side where all the attachments used to go, once I had the machine taken out and had the rolling chassis, I took one look at it and said "there's my new welding cart!" LOL

::CF Administrator::
Joined: Feb 2011
Posts: 14,479
Likes: 805
From: Blunt, South Dakota
Year: 97
Model: Cherokee (XJ)
Engine: 4.6 stroker

Thread Starter
CF Veteran
Joined: Dec 2012
Posts: 4,169
Likes: 6
From: York, PA
Year: 1998
Model: Cherokee
Engine: 4.0
Made some progress today, fellas. After watching some YouTube videos, I tried doing the "e" method and I think it worked out really well for me. I also took into consideration some other tips you guys offered. Let me know what ya'll think!
Goal for the day: mount the front wheels. I started the evening by grinding down some of the other welds. Needed this surface flat for the front wheels.
I also cut and welded new 1" square pieces for the other end of the base for the front wheels. I think these two welds came out pretty nice, no?
After all that, I ground down the welds and got to work on drilling for the wheels.
Notice here a little problem I ran into when tightening down the bolts. The metal caved a little under the torque. I'm not sure what I'm going to do about that quite yet, but I'll probably end up welding these caps shut after straightening it out. That should help some.
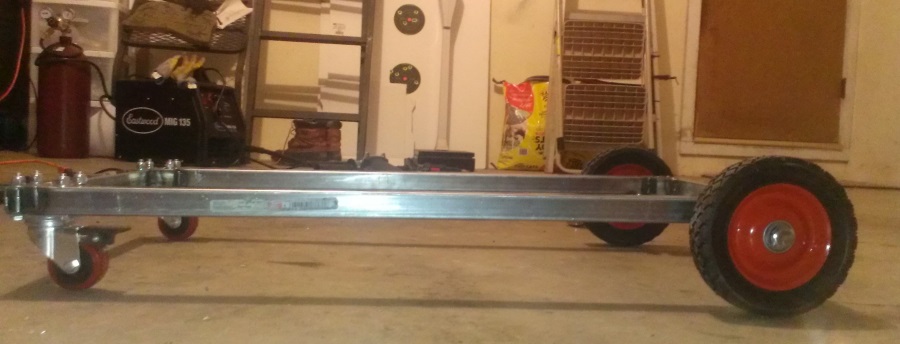
Both sides done
Notice here, it doesn't sit 100% level. I'll probably add some washers to the front wheels to level it.
Since I already met my goal for the evening with time to spare, I decided to add the center support that will separate the front of the cart from the rear where the gas will sit. (before welds)
I think the welds came out pretty good on this.
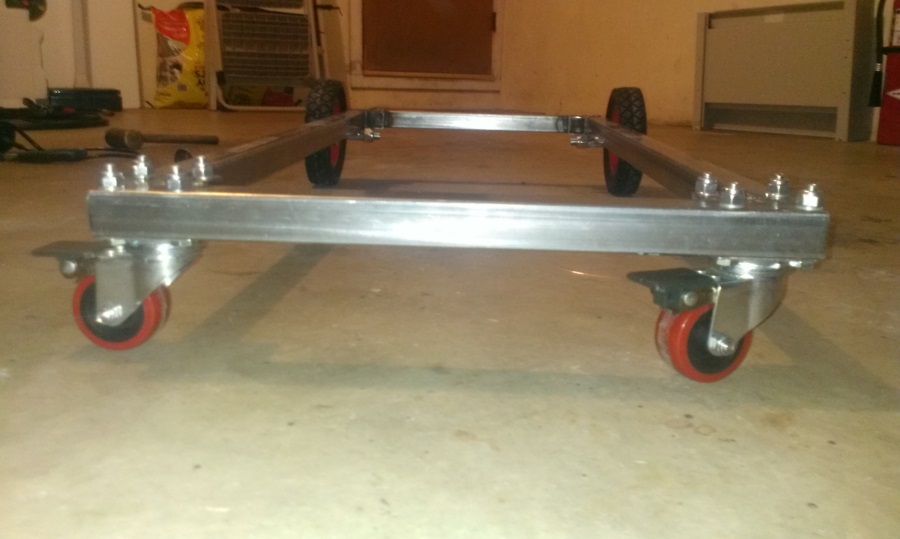
And here's the final result for the evening!
Still some quirks to work out. As it sits it holds my body weight easily (about 210lbs). Also I need to figure out how I'm going to mount the vertical beams for the upper part. I may try to weld some 1x1 in the center of the front wheel bolts. To be continued!
Goal for the day: mount the front wheels. I started the evening by grinding down some of the other welds. Needed this surface flat for the front wheels.
I also cut and welded new 1" square pieces for the other end of the base for the front wheels. I think these two welds came out pretty nice, no?
After all that, I ground down the welds and got to work on drilling for the wheels.
Notice here a little problem I ran into when tightening down the bolts. The metal caved a little under the torque. I'm not sure what I'm going to do about that quite yet, but I'll probably end up welding these caps shut after straightening it out. That should help some.
Both sides done
Notice here, it doesn't sit 100% level. I'll probably add some washers to the front wheels to level it.
Since I already met my goal for the evening with time to spare, I decided to add the center support that will separate the front of the cart from the rear where the gas will sit. (before welds)
I think the welds came out pretty good on this.
And here's the final result for the evening!
Still some quirks to work out. As it sits it holds my body weight easily (about 210lbs). Also I need to figure out how I'm going to mount the vertical beams for the upper part. I may try to weld some 1x1 in the center of the front wheel bolts. To be continued!