Homebrew Jeep Mods


Senior Member
Joined: Nov 2010
Posts: 922
Likes: 0
From: Vegas Baby!
Model: Cherokee
Hey,
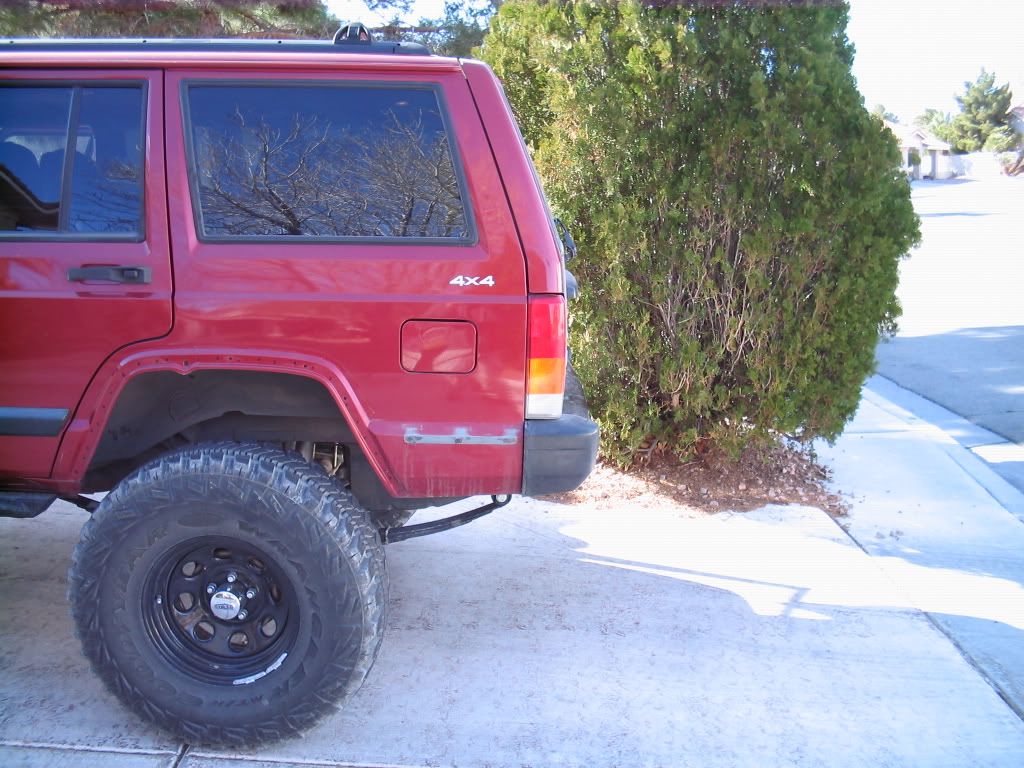
my bro and I modified my endcaps to fit tight against the body of the XJ. I am planning to bedline the rear quarters along the lower body line.
So first, get yourself a plastic welding kit from HF ~$10
Then measure the length of the endcap and cut the excess off...with the excess, find a nice flat spot and trace the profile of your endcap and cut out a matching piece.


Don't worry about making it perfect or smooth...you will deal with this later...actually, you do not want it smooth.
Then, tape the two pieces together from the back side to temporarily hold them while you weld them as in this pic.

Then, weld the two pieces together. It's a bit tricky at first, but you'll pic it up quick.
Start by melting some of the stick onto the iron as so...

Then press that into the seam while pressing the welding stick into the seam as well...slowly pull out the welding stick and smooth the hot plastic into the seam.

Fill up the gaps inbetween the seams and smooth it as you go...when it's hot it moves around like putty.

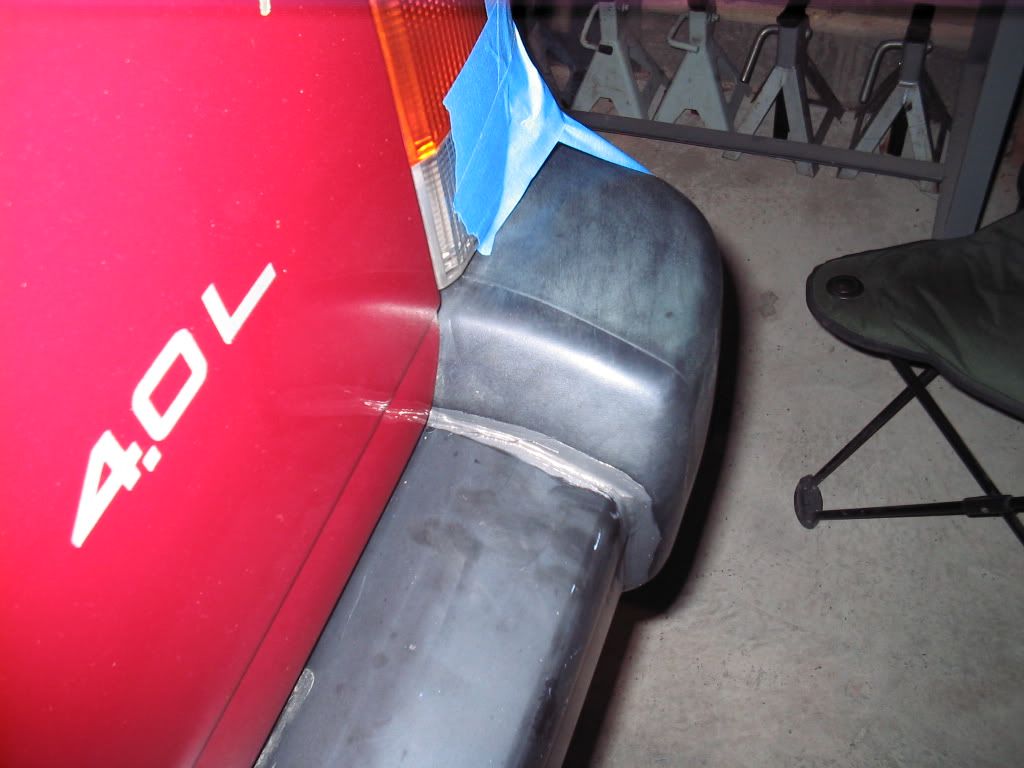
Once you are done, mount them with the one stock fastener from the bottom...then we used RTV black to hold it snug onto the rear bumper. You can drill it if you want, but this is quick, easy, and if I want to remove it...no problem.
We used painters tape to hold it in place overnight...

RTV....

Finished result...you can sand and paint them as you wish...I'm going to bedliner them.


WARNING...
Do NOT try to weld plastic in your house...the smoke is very pungent...you WILL need a fan blowing across your work area to keep the smoke out of your face.
my bro and I modified my endcaps to fit tight against the body of the XJ. I am planning to bedline the rear quarters along the lower body line.
So first, get yourself a plastic welding kit from HF ~$10
Then measure the length of the endcap and cut the excess off...with the excess, find a nice flat spot and trace the profile of your endcap and cut out a matching piece.
Don't worry about making it perfect or smooth...you will deal with this later...actually, you do not want it smooth.
Then, tape the two pieces together from the back side to temporarily hold them while you weld them as in this pic.
Then, weld the two pieces together. It's a bit tricky at first, but you'll pic it up quick.
Start by melting some of the stick onto the iron as so...
Then press that into the seam while pressing the welding stick into the seam as well...slowly pull out the welding stick and smooth the hot plastic into the seam.
Fill up the gaps inbetween the seams and smooth it as you go...when it's hot it moves around like putty.
Once you are done, mount them with the one stock fastener from the bottom...then we used RTV black to hold it snug onto the rear bumper. You can drill it if you want, but this is quick, easy, and if I want to remove it...no problem.
We used painters tape to hold it in place overnight...
RTV....
Finished result...you can sand and paint them as you wish...I'm going to bedliner them.
WARNING...
Do NOT try to weld plastic in your house...the smoke is very pungent...you WILL need a fan blowing across your work area to keep the smoke out of your face.
Seasoned Member
Joined: Aug 2011
Posts: 404
Likes: 0
From: Oskaloosa Iowa 52577
Year: 1997
Model: Cherokee
Engine: 4.0
Originally Posted by JD Cravin
Hey,
my bro and I modified my endcaps to fit tight against the body of the XJ. I am planning to bedline the rear quarters along the lower body line.
So first, get yourself a plastic welding kit from HF ~$10
Then measure the length of the endcap and cut the excess off...with the excess, find a nice flat spot and trace the profile of your endcap and cut out a matching piece.
Don't worry about making it perfect or smooth...you will deal with this later...actually, you do not want it smooth.
Then, tape the two pieces together from the back side to temporarily hold them while you weld them as in this pic.
Then, weld the two pieces together. It's a bit tricky at first, but you'll pic it up quick.
Start by melting some of the stick onto the iron as so...
Then press that into the seam while pressing the welding stick into the seam as well...slowly pull out the welding stick and smooth the hot plastic into the seam.
Fill up the gaps inbetween the seams and smooth it as you go...when it's hot it moves around like putty.
Once you are done, mount them with the one stock fastener from the bottom...then we used RTV black to hold it snug onto the rear bumper. You can drill it if you want, but this is quick, easy, and if I want to remove it...no problem.
We used painters tape to hold it in place overnight...
RTV....
Finished result...you can sand and paint them as you wish...I'm going to bedliner them.
WARNING...
Do NOT try to weld plastic in your house...the smoke is very pungent...you WILL need a fan blowing across your work area to keep the smoke out of your face.

Member
Joined: Feb 2010
Posts: 303
Likes: 0
From: Kingwood, Texas
Year: 1989
Model: Cherokee
Engine: 4.0
my mods. added led light strips to cargo area. trimmed out the panels for extra storage. gun racks on both back windows. camo headliner. cb above mirror. lighted rear view mirror from a mustang.
Seasoned Member
Joined: Oct 2010
Posts: 454
Likes: 0
From: Camp Lejeune, NC
Year: 1993
Model: Cherokee
Engine: 4.0 HO
Member
Joined: Mar 2011
Posts: 201
Likes: 0
From: Houston
Year: 1997
Model: Cherokee
Engine: 4.0
CF Veteran
Joined: Jun 2011
Posts: 2,448
Likes: 0
From: Colorado
Year: 1992
Model: Cherokee
Engine: 4.0
Member
Joined: Feb 2010
Posts: 303
Likes: 0
From: Kingwood, Texas
Year: 1989
Model: Cherokee
Engine: 4.0
the lighted mirror came from a bubble body year. late 90's I guess.
the led strip I got from AutoZone. ran a hot all the way to the back. put a switch on the moulding on the headliner.
the rack holding the shovel is just a gun rack and bungees. the racks were on sale at Academy for $3 so I got several :-)
the led strip I got from AutoZone. ran a hot all the way to the back. put a switch on the moulding on the headliner.
the rack holding the shovel is just a gun rack and bungees. the racks were on sale at Academy for $3 so I got several :-)
Member
Joined: May 2010
Posts: 182
Likes: 0
From: Concord, NH
Year: 1998
Model: Cherokee
Engine: 4.0L
Hey,
my bro and I modified my endcaps to fit tight against the body of the XJ. I am planning to bedline the rear quarters along the lower body line.
So first, get yourself a plastic welding kit from HF ~$10
We used painters tape to hold it in place overnight while the RTV cured.
WARNING...
Do NOT try to weld plastic in your house...the smoke is very pungent...you WILL need a fan blowing across your work area to keep the smoke out of your face.
CF Veteran
Joined: Feb 2010
Posts: 3,869
Likes: 2
From: Allentown, Pa
Year: 1994
Model: Cherokee
Engine: 4.0L HO
Originally Posted by ChileRedBateman
if that is RTV Black, it is going to get soft in the direct sun and let go, should go with some black chaulking (liquid nails or similar)
CF Veteran
Joined: Jun 2011
Posts: 2,460
Likes: 0
From: Dayton, Ohio
Year: 1992
Model: Comanche
Engine: 4.0