
Fiberglass sub enclosure for the rear

Thread Starter
Member
Joined: Jun 2010
Posts: 113
Likes: 1
From: Columbus, OH
Year: 1996
Model: Cherokee
Engine: 4.0 of course
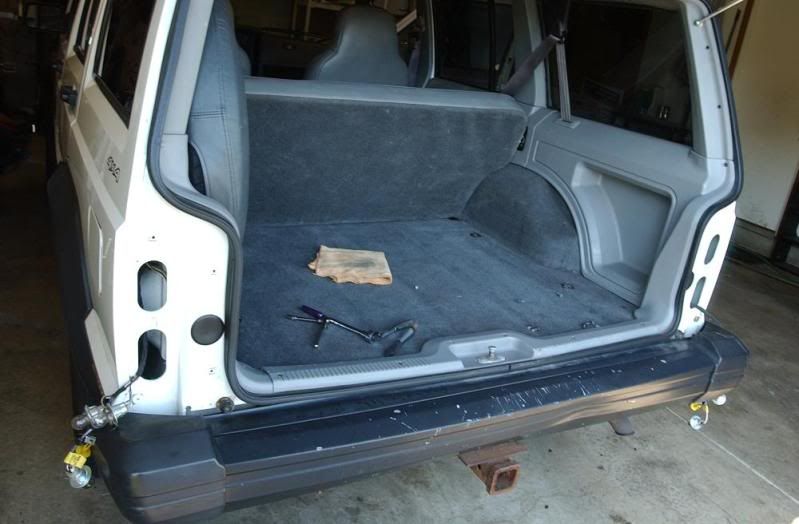
I always like to have a decent sounding stereo in my cars so one of the first things I did was look where I could mount a box without taking much cargo space. The obvious area was the little cubby in the rear panel so after tossing a few ideas around it looked like the easiest way was to make a full fiberglass enclosure to maximize space while minimalizing space use.
Supplies:
Masking tape
cooking spray
Fiberglass resin/hardener
Fiberglass mat
MDF board
t-shirt or fleece
Adhesive spray
First thing to do is remove the rear panel which is basically a couple screws and clips. Idealy you'll need to remove the seat belt anchor and tensioner but screw that, I just snipped the panel a bit so I could get the belt out.
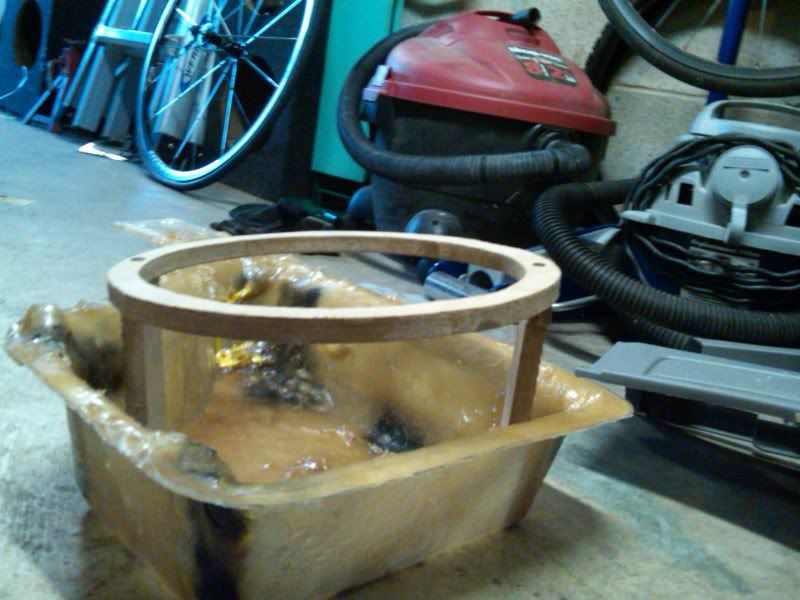
Once that panel is out cover it in masking tape...
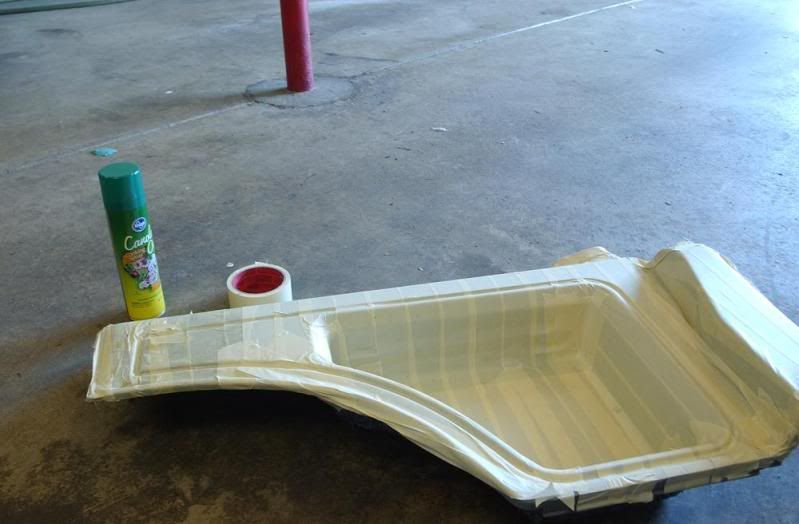
After this go steal your mom or gf or wife's non-stick cooking spray. This step is really important cause if you don't spray the tape, the resin will stick right to it.
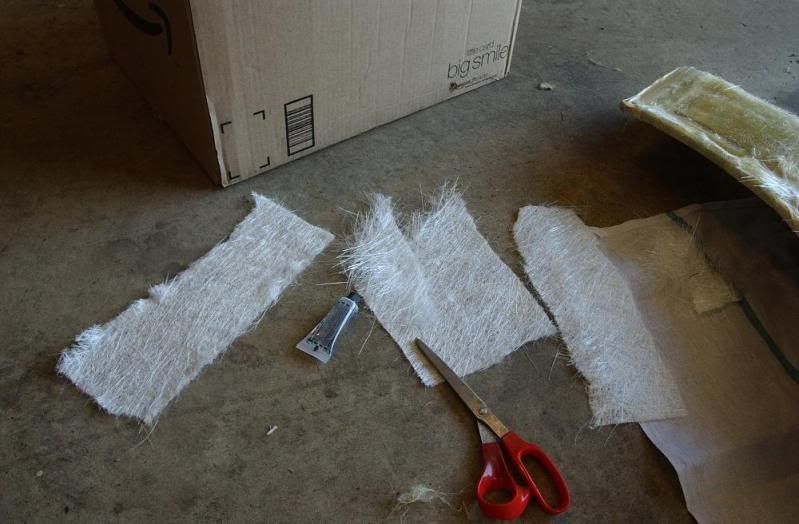
Once that's done, pre-cut your fiberglass mat out...
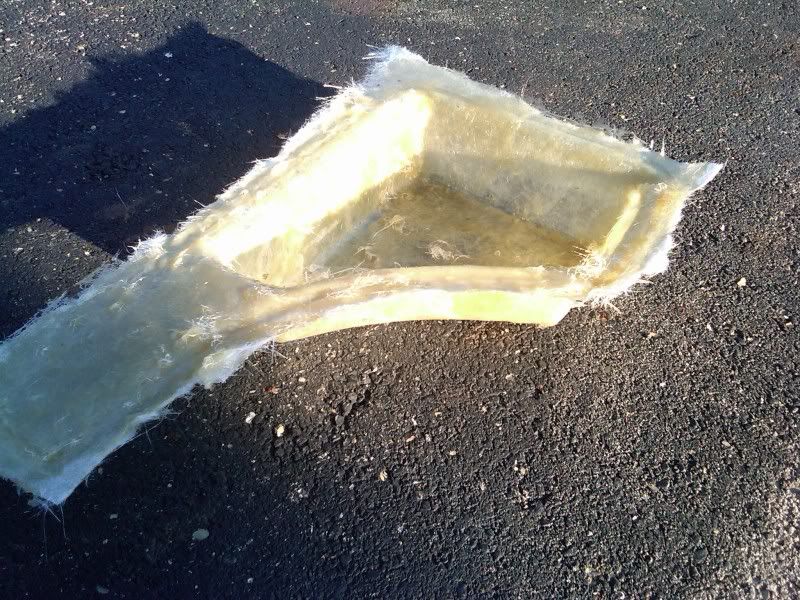
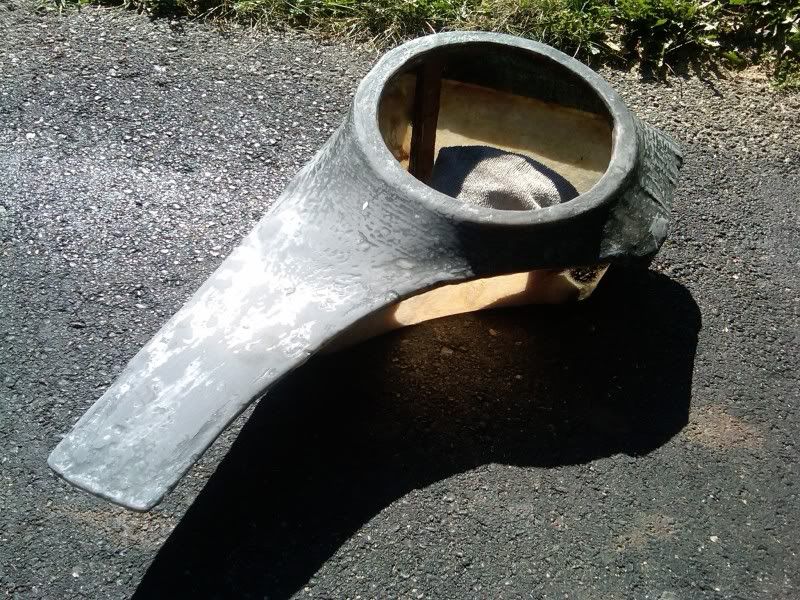
Then mix up your resin, a good bit to start cause you want to make sure the mat is thoroughly saturated. Didn't take a pic of this step cause I forgot but then cover all exposed mat and let dry. Once it's dry, pull it out gently so you don't crack it if any of it did stick and viola, perfect mold of the cubby...
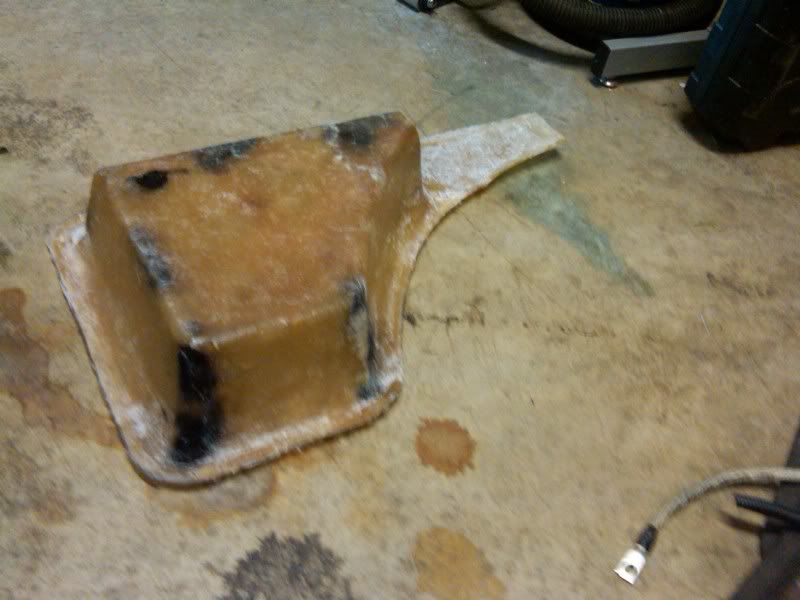
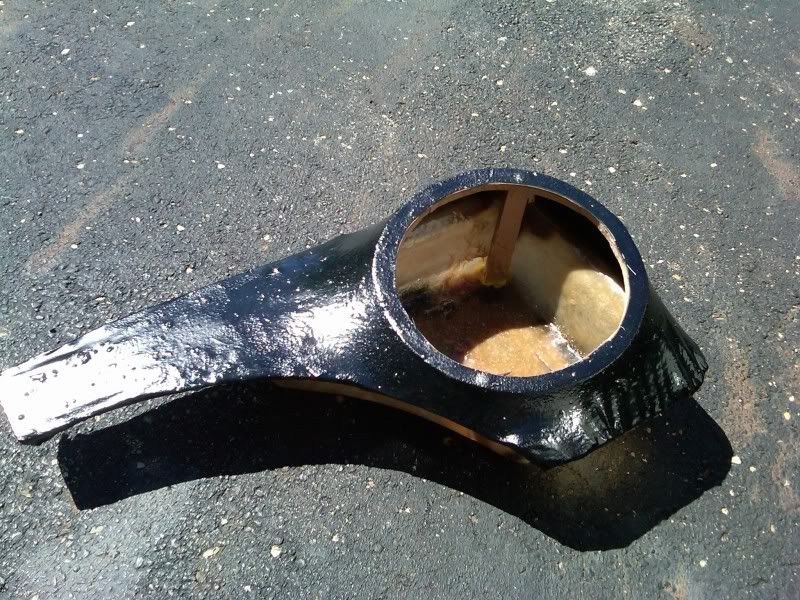
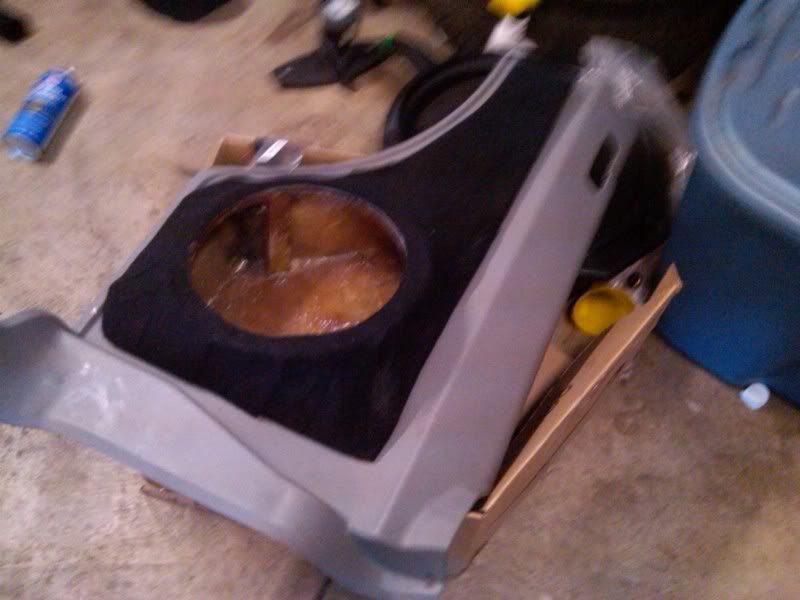
I put another coat or two on then trimed off the excess with my dremel leaving this...
The black is where I saw holes I needed to patch up.
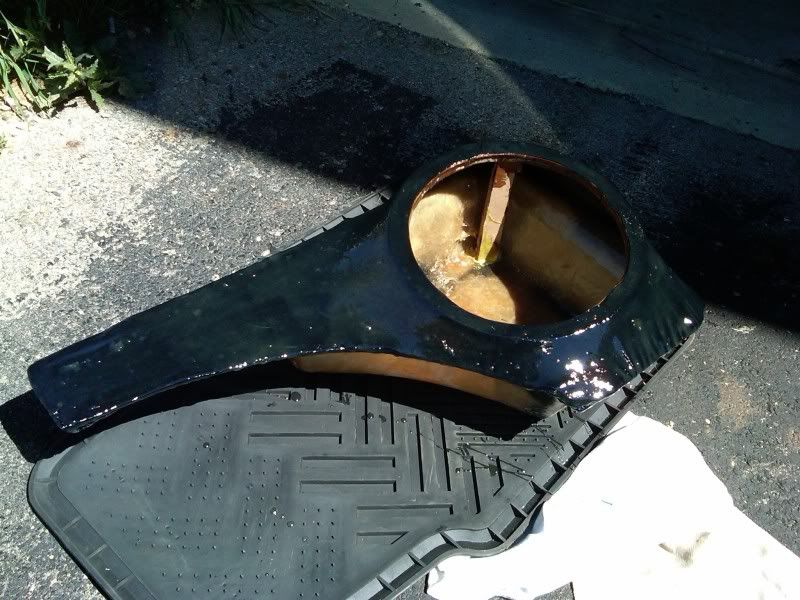
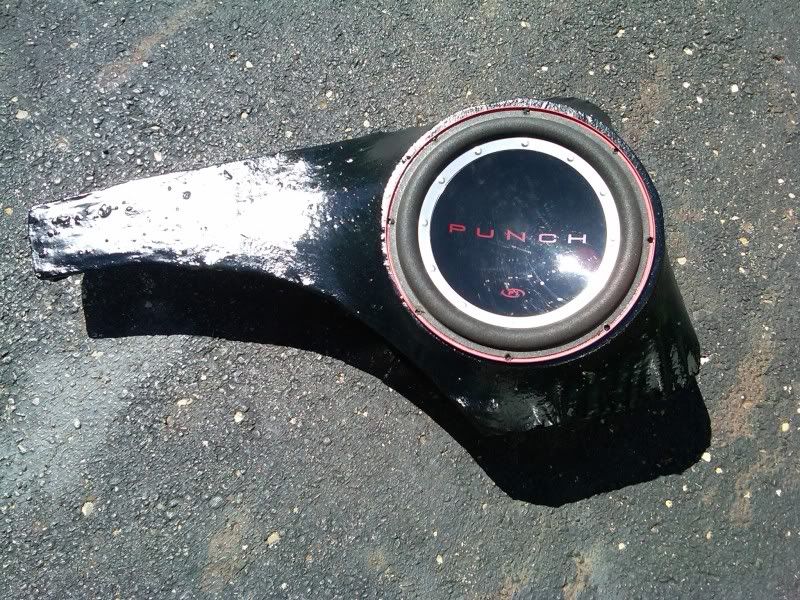
After that, take your MDF board and cut out your template for the speaker. In my case I'm using a Fosgate Punch 10", a 12" probably won't fit and wouldn't have enough volume to sound good. Even this I'm sure is a bit small for this 10". An 8" would probably be ideal for adding a bit or bass while retaining sound quality (which is what I want!)
I also used some scrap MDF to make a few supports to hold the ring up leaving me with this...
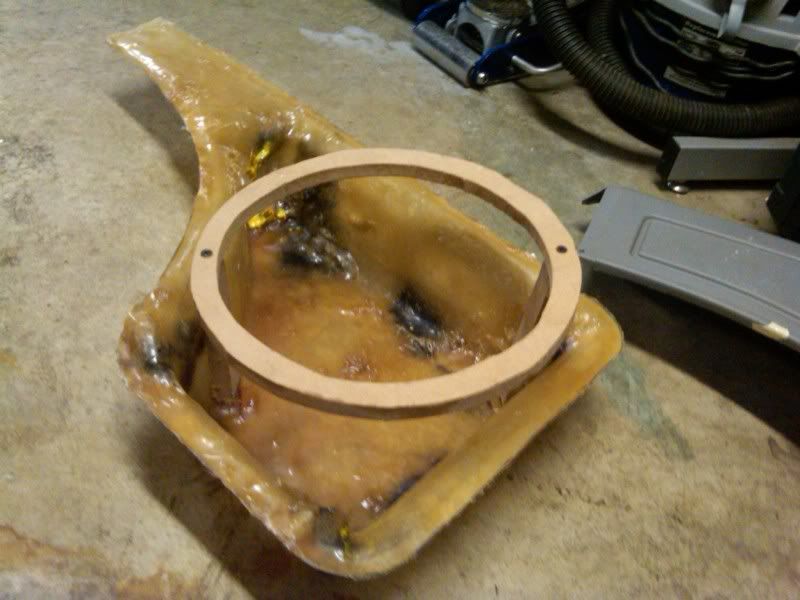
Then I found an old t-shirt I didn't need anymore and ripped it up and stretched it over the mold and used some adhesive spray to adhere it to the bottom of the mold and to the MDF ring.
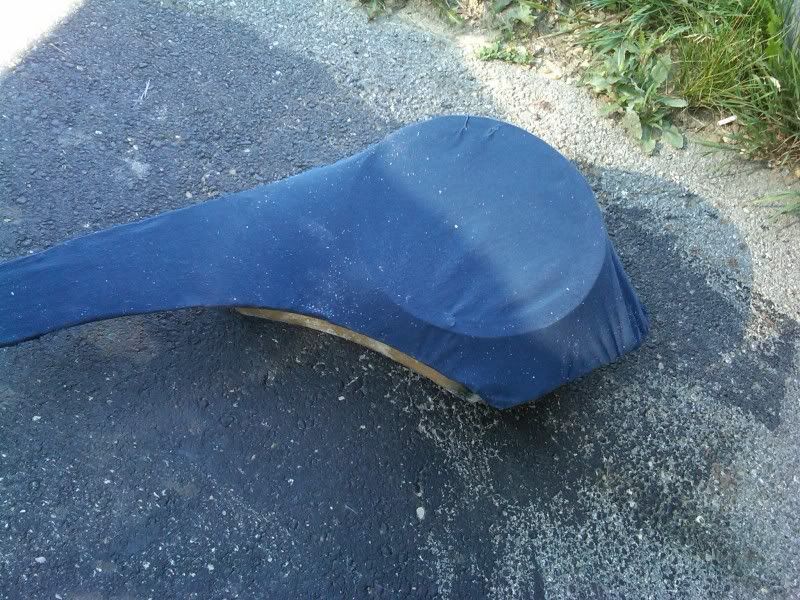
And then, mix up some more resin, a good bit again cause you want to make it's fully saturated into the material.
First layer
3rd layer...
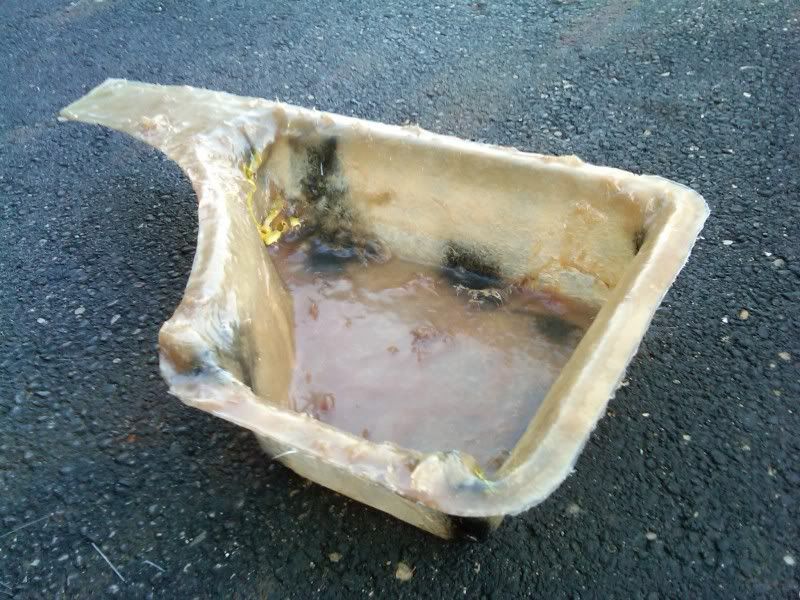
And ended up doing about 6 layers on this to make sure it could take some abuse if it got bumped.
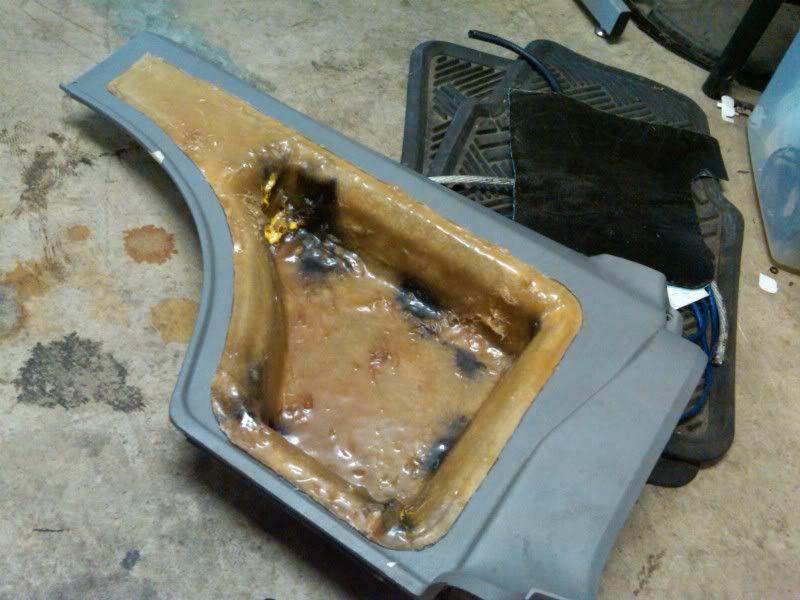
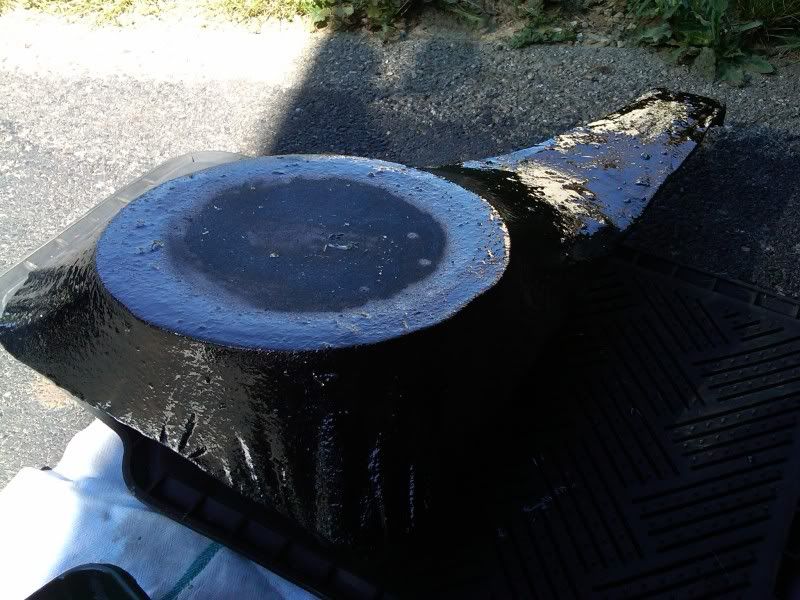
Test fits...
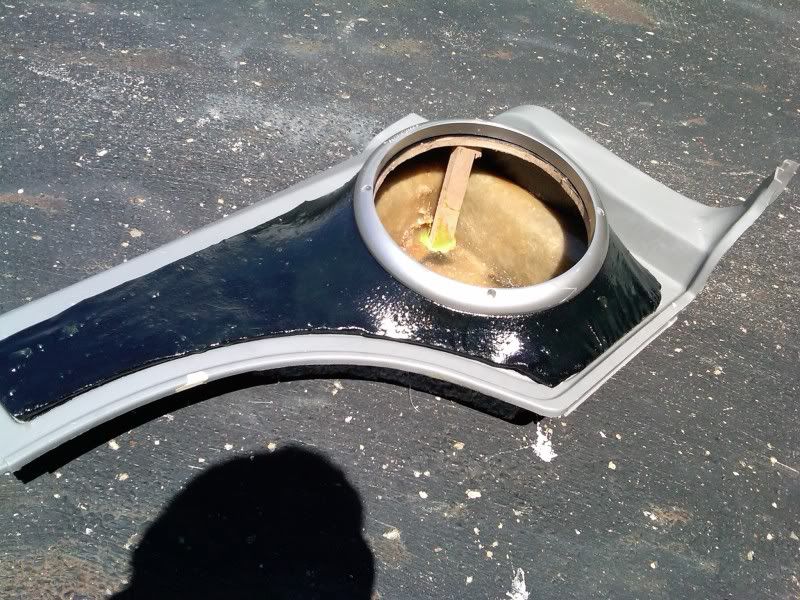
At this point you need to decide if you want to cover it or paint it. I decided to cover it cause it's not a show car so I don't need some blingin stereo piece in the back. So I sanded off most of the heavy grit and larger bumps in the resin leaving this...
If you're wanting to paint you'll need quite a bit more sanding and some filler to make it look good. I first tried to use some cheap, autozone carpet I've had laying around but it wouldn't stretch over the bends so I just used another old black t-shirt.
And here's basically the finished product, this is with the crappy carpet. Don't have any of the t-shirt material, may even switch to gray. It won't win any car shows or rattle your neighbor hood to pieces but it will sound nice and retain almost all of your cargo space! I still have to run all my wiring in the jeep so soon as I get it in I'll post some pics of it.

Nick
Supplies:
Masking tape
cooking spray
Fiberglass resin/hardener
Fiberglass mat
MDF board
t-shirt or fleece
Adhesive spray
First thing to do is remove the rear panel which is basically a couple screws and clips. Idealy you'll need to remove the seat belt anchor and tensioner but screw that, I just snipped the panel a bit so I could get the belt out.
Once that panel is out cover it in masking tape...
After this go steal your mom or gf or wife's non-stick cooking spray. This step is really important cause if you don't spray the tape, the resin will stick right to it.
Once that's done, pre-cut your fiberglass mat out...
Then mix up your resin, a good bit to start cause you want to make sure the mat is thoroughly saturated. Didn't take a pic of this step cause I forgot but then cover all exposed mat and let dry. Once it's dry, pull it out gently so you don't crack it if any of it did stick and viola, perfect mold of the cubby...
I put another coat or two on then trimed off the excess with my dremel leaving this...
The black is where I saw holes I needed to patch up.
After that, take your MDF board and cut out your template for the speaker. In my case I'm using a Fosgate Punch 10", a 12" probably won't fit and wouldn't have enough volume to sound good. Even this I'm sure is a bit small for this 10". An 8" would probably be ideal for adding a bit or bass while retaining sound quality (which is what I want!)
I also used some scrap MDF to make a few supports to hold the ring up leaving me with this...
Then I found an old t-shirt I didn't need anymore and ripped it up and stretched it over the mold and used some adhesive spray to adhere it to the bottom of the mold and to the MDF ring.
And then, mix up some more resin, a good bit again cause you want to make it's fully saturated into the material.
First layer
3rd layer...
And ended up doing about 6 layers on this to make sure it could take some abuse if it got bumped.
Test fits...
At this point you need to decide if you want to cover it or paint it. I decided to cover it cause it's not a show car so I don't need some blingin stereo piece in the back. So I sanded off most of the heavy grit and larger bumps in the resin leaving this...
If you're wanting to paint you'll need quite a bit more sanding and some filler to make it look good. I first tried to use some cheap, autozone carpet I've had laying around but it wouldn't stretch over the bends so I just used another old black t-shirt.
And here's basically the finished product, this is with the crappy carpet. Don't have any of the t-shirt material, may even switch to gray. It won't win any car shows or rattle your neighbor hood to pieces but it will sound nice and retain almost all of your cargo space! I still have to run all my wiring in the jeep so soon as I get it in I'll post some pics of it.
Nick
Senior Member
Joined: Oct 2009
Posts: 633
Likes: 0
From: Sutton, New Hampshire
Year: 1995
Model: Cherokee
Engine: 4.0L
A little rough, but the general shape is there. What are using for backfill? I'd be concerned with the vibrations pulling the housing out over time.
Thread Starter
Member
Joined: Jun 2010
Posts: 113
Likes: 1
From: Columbus, OH
Year: 1996
Model: Cherokee
Engine: 4.0 of course
Yea I know, it's not perfect, like I said though, I was more concerned with the function than the looks of this. I've made some much nicer looking pieces before, just didn't feel like spending the hours of finish sanding on this one. Plan on using some cotton foam stuff and I've got some sound deadening I'm using too and as stated above. Using 3M adhesive all around to hold it in. It's not going to rattle any windows out, I've got a fairly small amp too, not looking for earth shattering bass.
Thread Starter
Member
Joined: Jun 2010
Posts: 113
Likes: 1
From: Columbus, OH
Year: 1996
Model: Cherokee
Engine: 4.0 of course
Well as I kind of suspected. The 3M tape alone wasn't enough, worth a shot so now I have to run a few screws in, just gotta make sure I seal them up real well.


Trending Topics


Member
Joined: Sep 2010
Posts: 225
Likes: 1
From: ABQ
Year: 1996
Model: Cherokee
Engine: 4.0
Looks like you did a really nice job on the enclosure. 
Curious why you would not slice and dice the rear panel accessing all that open air space in behind it. There is quite a bit of room infront of and below the right rear pocket. If one tapped into that area then there is no need to consume extra cargo space.
I'm thinking of how to glass in a new side side panel with pockets for storage in that unused space. Already prepped and laid down some beadliner in that area when I did the interior. External noise has significantly been reduced for minimal weight.

Thread
Thread Starter
Forum
Replies
Last Post
canada_man
Stock XJ Cherokee Tech. All XJ Non-modified/stock questions go here
0
Sep 4, 2015 11:05 AM
Currently Active Users Viewing This Thread: 1 (0 members and 1 guests)