
DIY Heavy Duty Motor Mounts

Thread Starter
CF Veteran

Joined: Feb 2015
Posts: 1,528
Likes: 2
From: North Carolina
Year: 1993
Model: Cherokee
Engine: 4.0
So, we all know the factory motor mounts just don't cut it. Many people like to upgrade to after market motor mounts such as brown dog but that can get pricey. So I decided to make my own motor mounts.
First off, parts you will need:
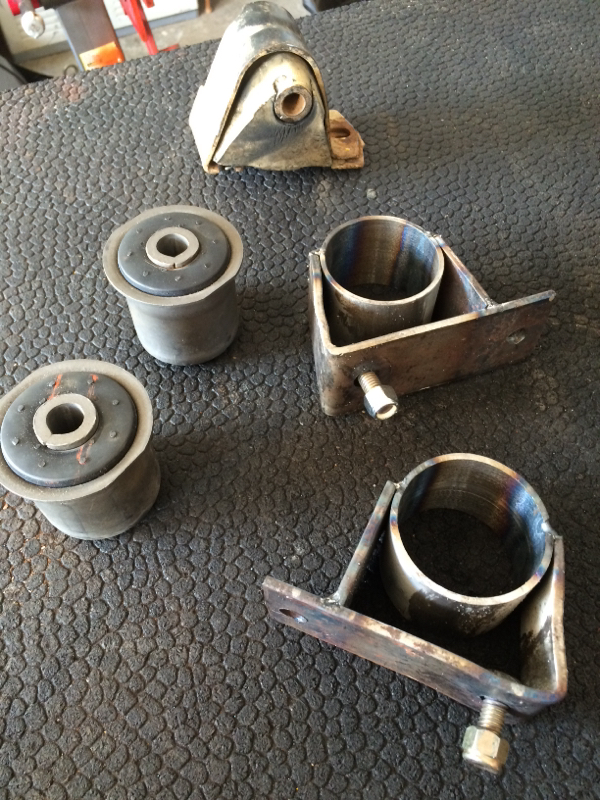
- 2 lower control Arm Bushings
- 2" wide by 1/8" thick flat bar
- 2 1/4" ID tubing w/ 1/8" thick wall
- 2 grade 8, 9/16" X 1.25" bolt and nut
Tools Needed:
- Welder
- Cutting Tool (angle grinder, sawzaw, etc)
- vice/press
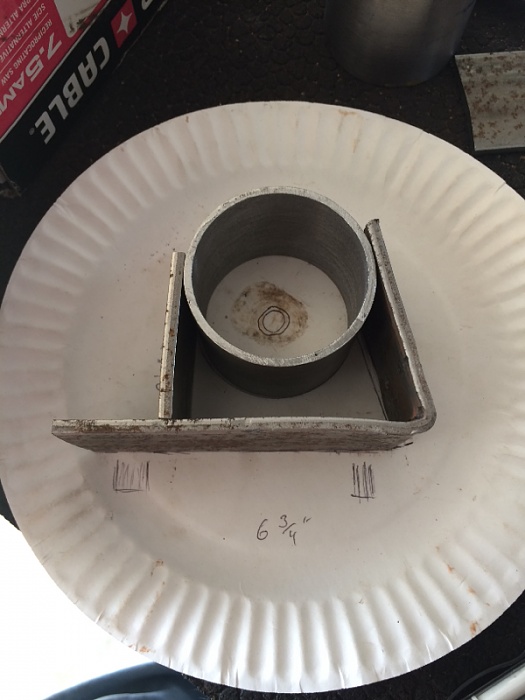
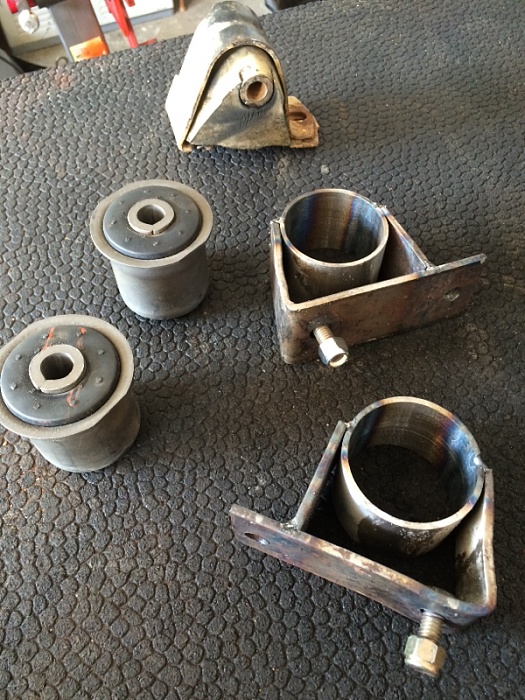
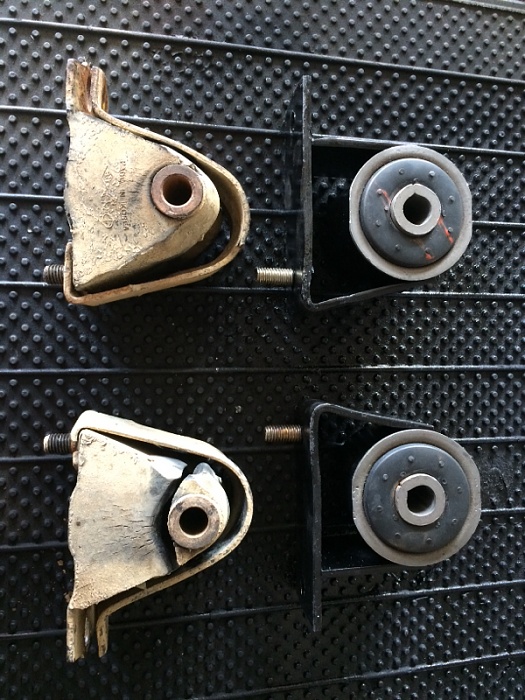
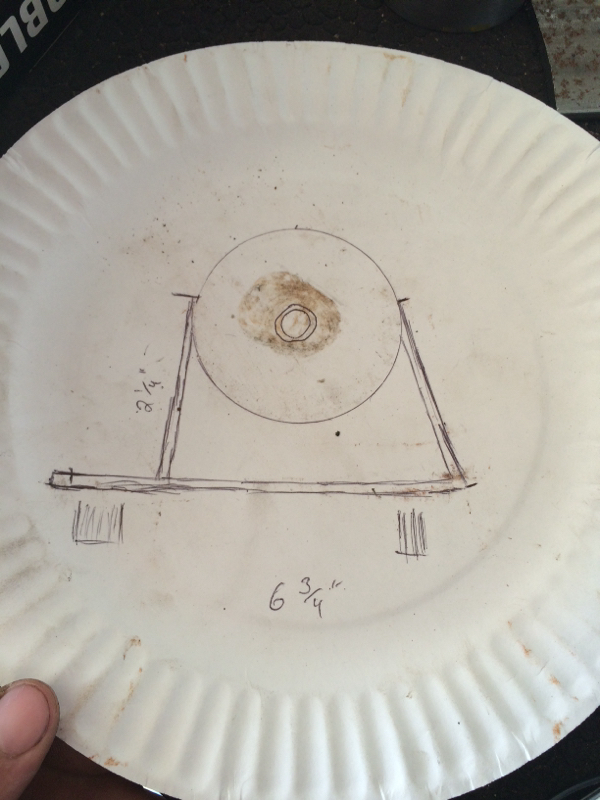
First off, remove your old motor mounts and use these as a templet as to where the minting hold need to be on the new mounts. I traced a diagram with measurements on a paper so I could lay parts out as I go.

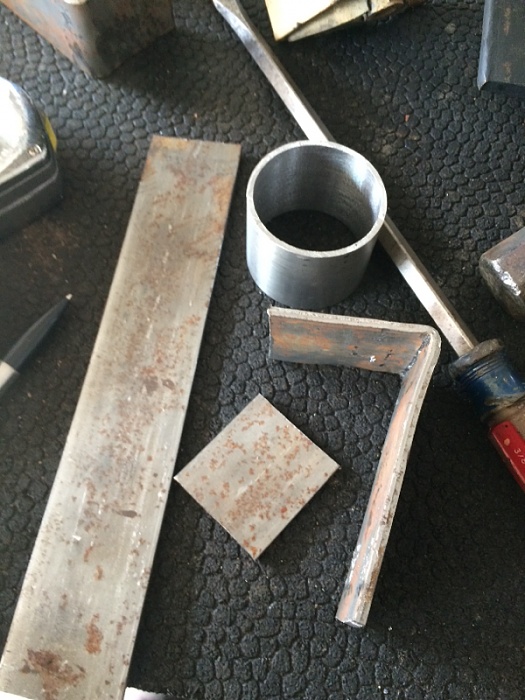
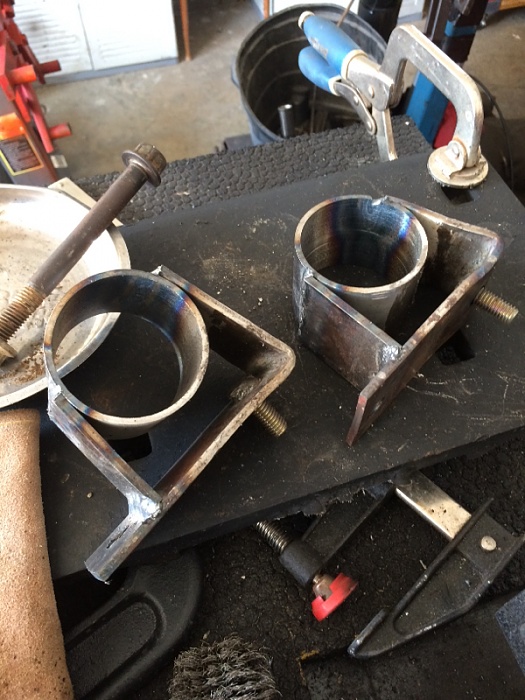
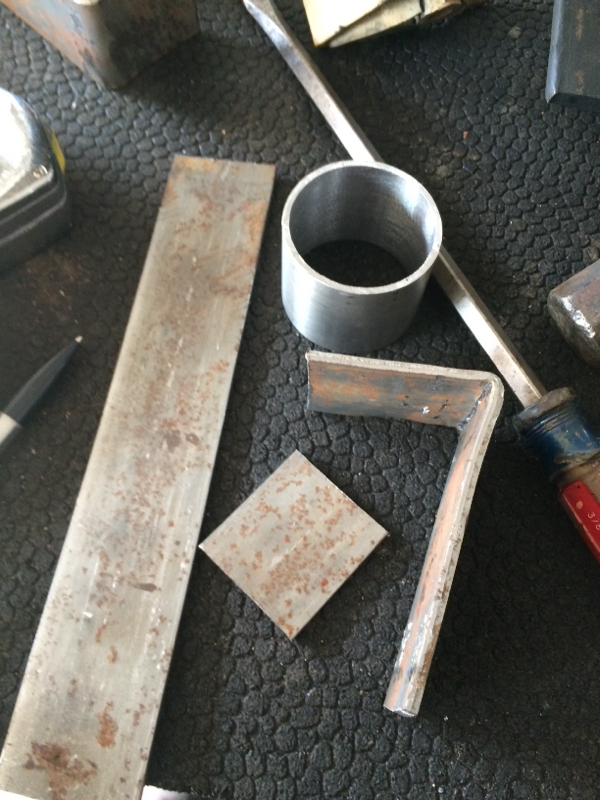
Next you'll want to take your tubing, put the new control arm bushings next to it in order to get an idea as to where you'll need to cut the tubing so it will be the correct length. Once your tubing is ready. Take your flat bar, with the measurements you have, cut off the appropriate length pieces needed to make the mounts. Mine are listed in the diagram I drew in the pictures. (FYI, the larger measurement is not just for the bottom side but the length of the entire piece even after the bend.) I just kept cutting and bending pieces until it fit in the drawn diagram perfectly.
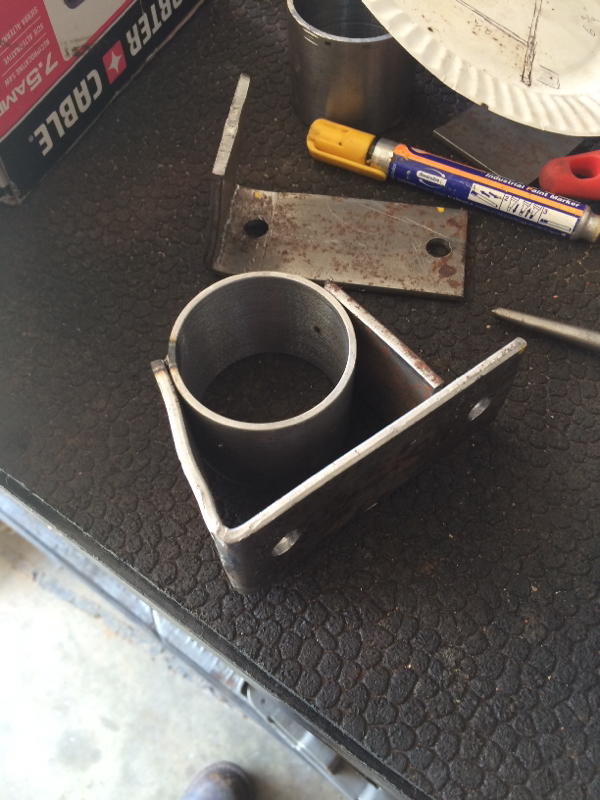
Next, go ahead and place a few tack welds (I did mine while it was still in the diagram to make sure the metal would not move from where it needed to be) and drill your holes (I used 7/16 bit) using the old motor mount bracket to mark where you need to drill.
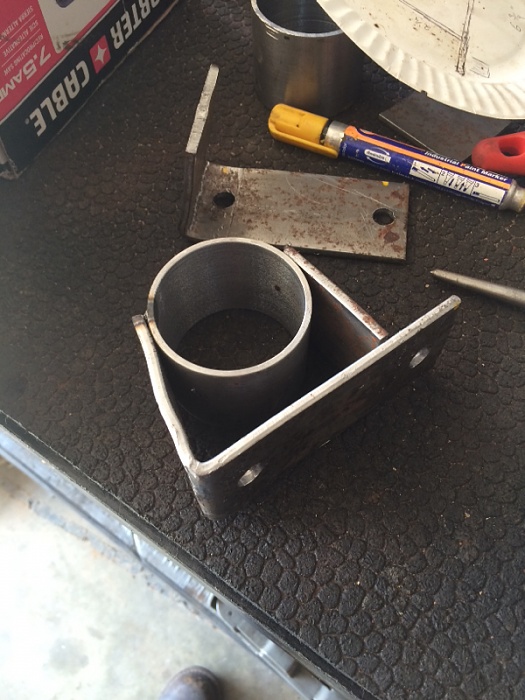
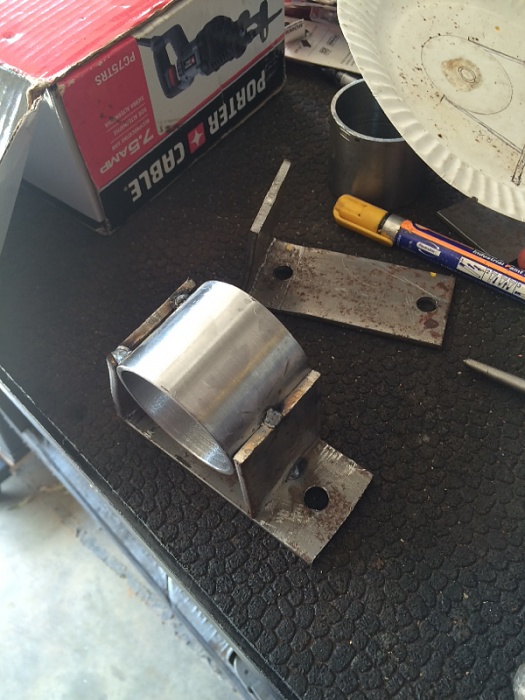
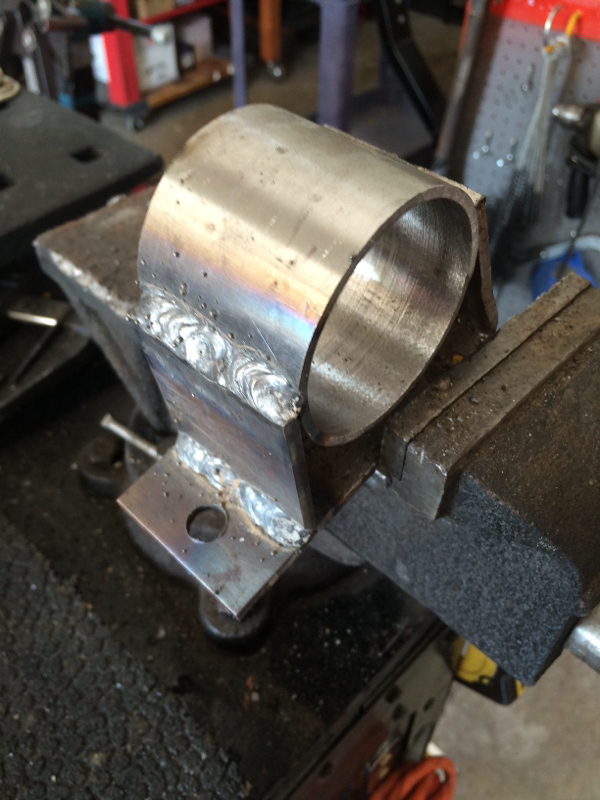
Once you've tacked it in place and double checked it on the template, weld it up!

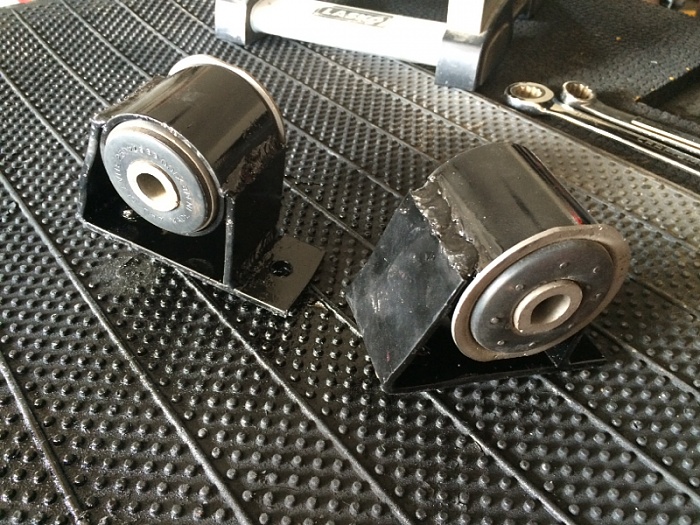
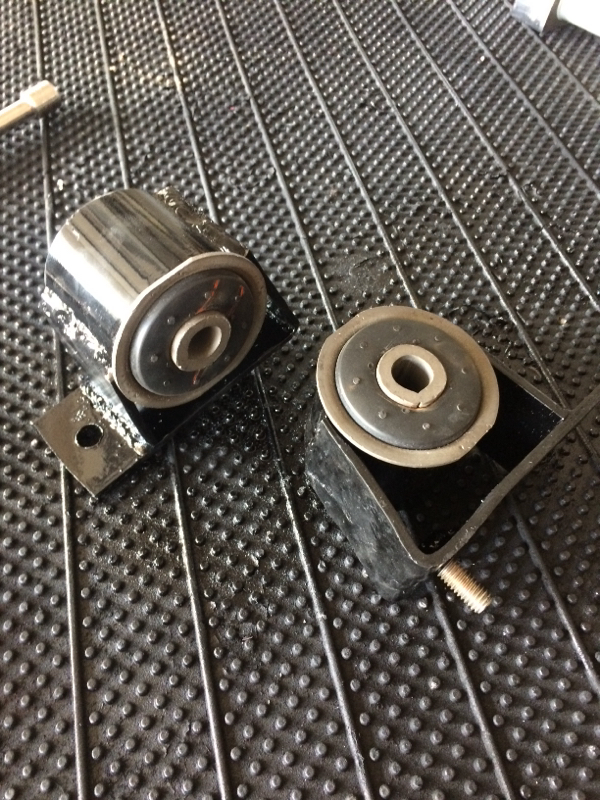
Then, all that's left to do is to clean up the welds with a wire brush, throw a coat of paint on em, and press your new bushings in with a vise/press. Also, you'll notice the new mounts aren't as thick as the old ones, you'll need to cut a metal sleeve out of the old mounts and cut 4 little 1/8" spacers. I forget to get pics, but you get the idea. But a spacer on each side of the mount when installing and it should be nice and snug.

Then go for a test drive. Keep in mind, these motor mounts, being a bit stiffer, Its gonna have a little more vibrations then the standard OEM mounts. Also, make sure your transmission mount is new or in good shape, otherwise you will have more severe vibrations
First off, parts you will need:
- 2 lower control Arm Bushings
- 2" wide by 1/8" thick flat bar
- 2 1/4" ID tubing w/ 1/8" thick wall
- 2 grade 8, 9/16" X 1.25" bolt and nut
Tools Needed:
- Welder
- Cutting Tool (angle grinder, sawzaw, etc)
- vice/press
First off, remove your old motor mounts and use these as a templet as to where the minting hold need to be on the new mounts. I traced a diagram with measurements on a paper so I could lay parts out as I go.
Next you'll want to take your tubing, put the new control arm bushings next to it in order to get an idea as to where you'll need to cut the tubing so it will be the correct length. Once your tubing is ready. Take your flat bar, with the measurements you have, cut off the appropriate length pieces needed to make the mounts. Mine are listed in the diagram I drew in the pictures. (FYI, the larger measurement is not just for the bottom side but the length of the entire piece even after the bend.) I just kept cutting and bending pieces until it fit in the drawn diagram perfectly.

Next, go ahead and place a few tack welds (I did mine while it was still in the diagram to make sure the metal would not move from where it needed to be) and drill your holes (I used 7/16 bit) using the old motor mount bracket to mark where you need to drill.

Once you've tacked it in place and double checked it on the template, weld it up!

Then, all that's left to do is to clean up the welds with a wire brush, throw a coat of paint on em, and press your new bushings in with a vise/press. Also, you'll notice the new mounts aren't as thick as the old ones, you'll need to cut a metal sleeve out of the old mounts and cut 4 little 1/8" spacers. I forget to get pics, but you get the idea. But a spacer on each side of the mount when installing and it should be nice and snug.


Then go for a test drive. Keep in mind, these motor mounts, being a bit stiffer, Its gonna have a little more vibrations then the standard OEM mounts. Also, make sure your transmission mount is new or in good shape, otherwise you will have more severe vibrations
Last edited by 93XJeeper; Sep 16, 2016 at 06:25 PM.

Thread Starter
CF Veteran
Joined: Feb 2015
Posts: 1,528
Likes: 2
From: North Carolina
Year: 1993
Model: Cherokee
Engine: 4.0
Originally Posted by Dustin Lemos
Hows it going man i kmow this is an old post but still wantee to check if you had any luck with this build

Member
Joined: Jun 2017
Posts: 159
Likes: 0
From: Yakima, WA Pacific Northwest
Year: 1990
Engine: 4.0 renix
Yea man. I ran the motor mounts for about a year. They are strong work good but the Jeep has become my daily driver and I ended up goin back with some oem mounts. They had a bit to much vibration for my liking but otherwise worked great. I still have em sitting on the shelf in the garage.
Thread Starter
CF Veteran
Joined: Feb 2015
Posts: 1,528
Likes: 2
From: North Carolina
Year: 1993
Model: Cherokee
Engine: 4.0
Originally Posted by Abaka
Any change you want to get ride of the
ose mounts??
ose mounts??
Trending Topics

Thread
Thread Starter
Forum
Replies
Last Post
xjlove1982
Stock XJ Cherokee Tech. All XJ Non-modified/stock questions go here
9
Sep 5, 2016 03:42 PM
salvagedstitch
Stock Grand Cherokee Tech. All ZJ/WJ/WK Non-modified/stock questions go here!
6
Aug 31, 2016 05:50 PM
bburke
Stock XJ Cherokee Tech. All XJ Non-modified/stock questions go here
13
Aug 27, 2016 02:34 PM
mdtobe
Stock XJ Cherokee Tech. All XJ Non-modified/stock questions go here
5
Aug 19, 2016 10:27 PM
Currently Active Users Viewing This Thread: 1 (0 members and 1 guests)