Project: Keeping It Clean


 02-20-2018, 07:30 AM
#32
Junior Member
Join Date: Mar 2011
Location: central pa mifflinburg 17844
Posts: 79
Likes: 0
Received 0 Likes
on
0 Posts
Year: 2001
Model: Cherokee
Engine: 4.0L HO
dang i'm loving this build, all the small things matter **** as i am your wifes prolly same way as mine she hates it
02-20-2018, 07:43 AM
#33

So, the other thing I got taken care of, was a battery cable upgrade.
I bartered some LED stuff with XJWonders (MeanLemons Battery Cables), for a 2AWG set.
It took me a few hours to get it all in place, as I'm a bit attentive to making routing as clean as possible without the cable touching things, firmly secured, etc.
My "review"
Pros:
- Great Crimps
- Great cable
- Comes with everything needed (mostly)
Cons:
- Was shipped two negative battery terminals
- In some areas, I would have made the cable different
- The cable lug end meant for the alternator, didn't fit my stock stud or the new Alternators stud.
I'll add some pictures:
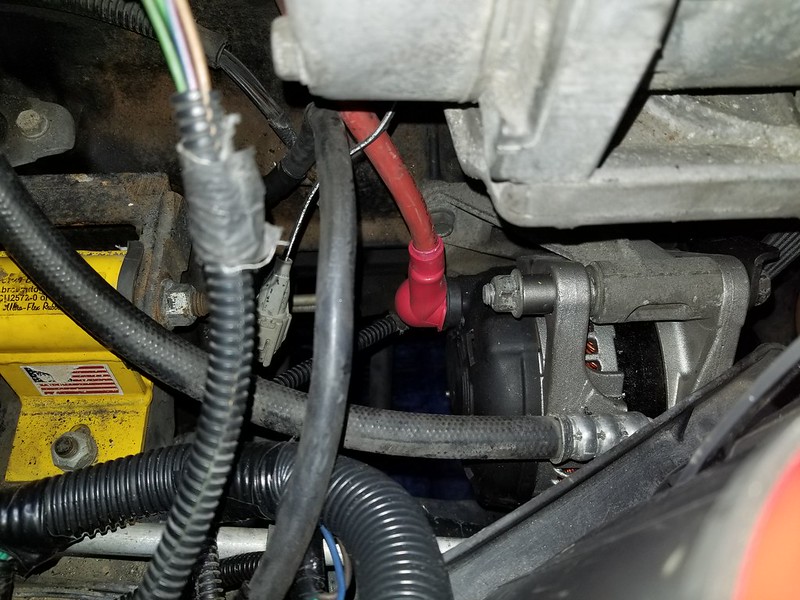
Connected to the alternator, I added a rubber wire boot (I've got a bunch of spare electrical stuff). The stock plastic cover wouldn't fit on the 2AWG. I had to drill out the lug to fit on the alternator stud.
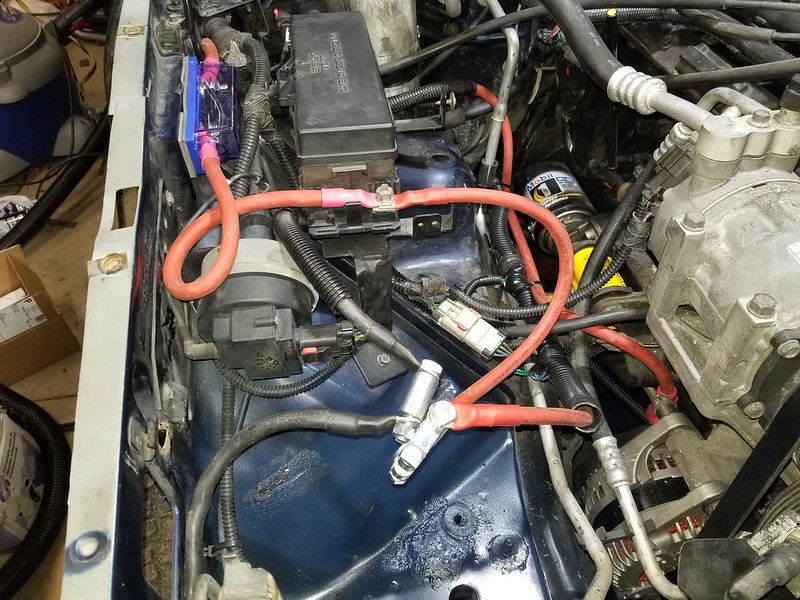
Final routing. Not the "most" ideal as I'd have it laid out, but it will work just fine.
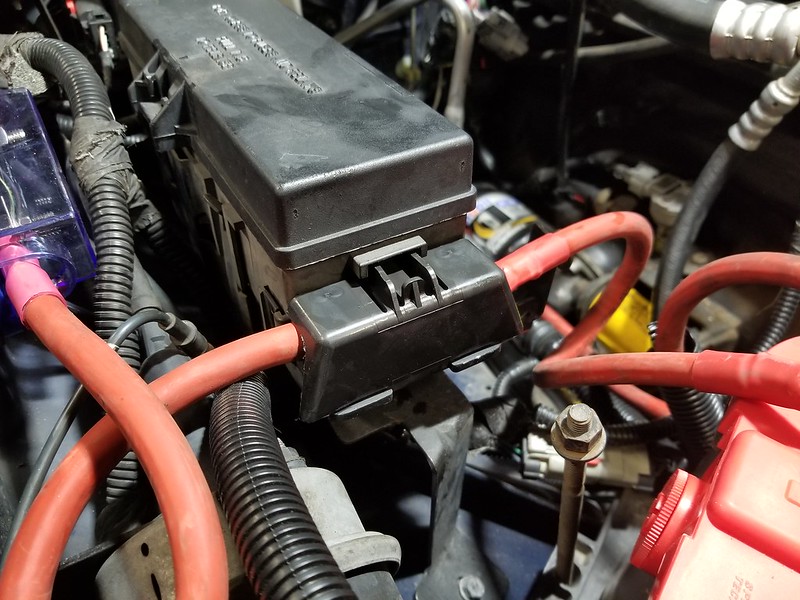
I drilled and mounted the fuse holder along the fenderwell.
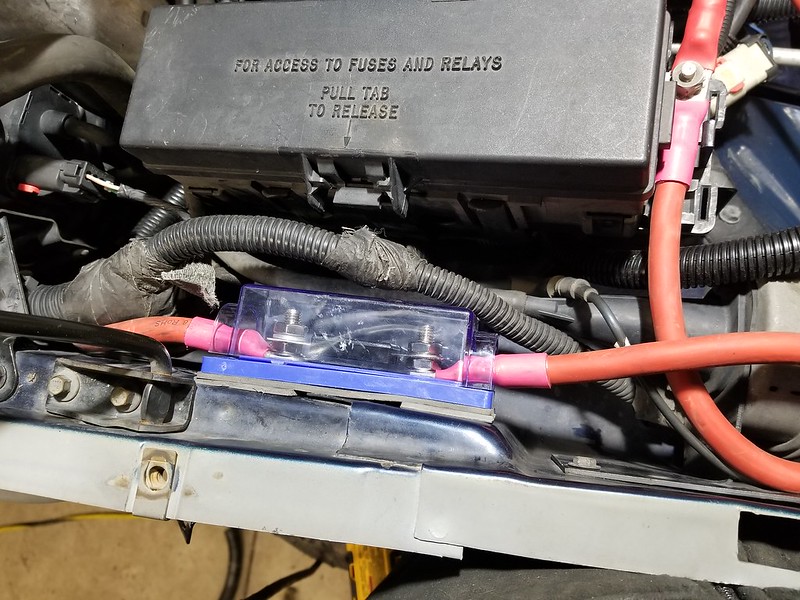
I used some MLV underneath it for a couple reasons:
- The plastic plugs on the bottom of the stud terminals kept falling off, this this will prevent an unwanted grounding of the terminals on the fender.
- As the fender is not fully flat, it allows some cushion and vibration dampening to the fuse holder box.
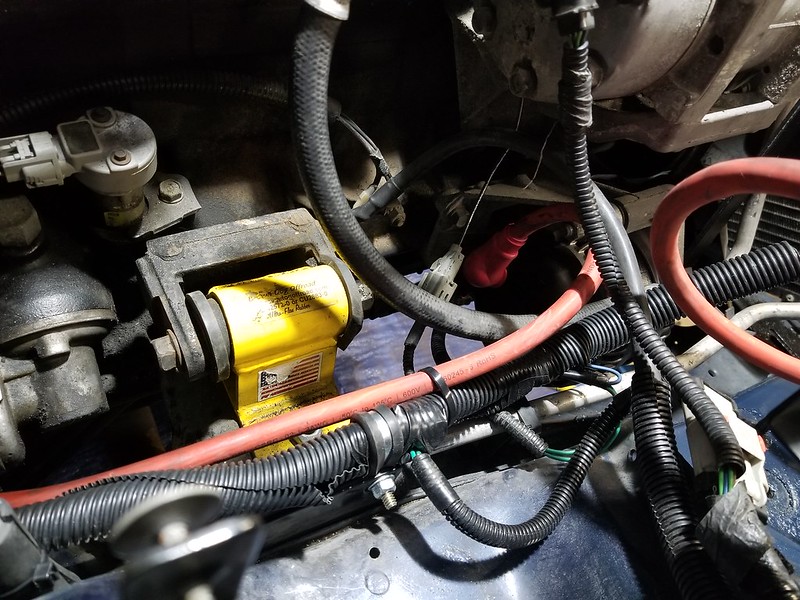
Line to the Alternator (red), and line to the starter (inside wire sheath). I affixed the starter cable inside some new plastic sheathing, and then mounted it with a rubber lined clamp to an existing hole there. I zip tied the alternator cable to that plastic sheathing, as well the the A/C line (with some hose spiced around the A/C line as a barrier/protection from rubbing).

On my buggy, all lines like these were sheathed in Fire Sleeve. I was going to do that on these as well since I a bunch extra, but didn't end up doing it. I might in the future, as electrical and electrical caused fires...are no joke.
Cover trimmed and reinstalled:
Some of the main cable changed I would have made, were cables that went from the battery, to the PDC, and from the Fuse to the PDC. I would have made these much shorter jumpers, as you can see in the last picture they're kind of "twirled".
However, I do realize this added length allows for some flexibility in mounting locations.
I was going to cut the wires and make them shorter, but realized all my lugs were sizes other than 2AWG, and I didn't feel like running to the store to get some.
Also, not pictured is the new block ground, from the engine to the fire wall.
The thicker 2AWG wire definitely makes routing a bit harder, since it doesn't bend as easy, thus tight turns aren't possible.
That being said, it's what I had planned on making, and it's a well built kit.
I bartered some LED stuff with XJWonders (MeanLemons Battery Cables), for a 2AWG set.
It took me a few hours to get it all in place, as I'm a bit attentive to making routing as clean as possible without the cable touching things, firmly secured, etc.
My "review"
Pros:
- Great Crimps
- Great cable
- Comes with everything needed (mostly)
Cons:
- Was shipped two negative battery terminals
- In some areas, I would have made the cable different
- The cable lug end meant for the alternator, didn't fit my stock stud or the new Alternators stud.
I'll add some pictures:
Connected to the alternator, I added a rubber wire boot (I've got a bunch of spare electrical stuff). The stock plastic cover wouldn't fit on the 2AWG. I had to drill out the lug to fit on the alternator stud.
Final routing. Not the "most" ideal as I'd have it laid out, but it will work just fine.
I drilled and mounted the fuse holder along the fenderwell.
I used some MLV underneath it for a couple reasons:
- The plastic plugs on the bottom of the stud terminals kept falling off, this this will prevent an unwanted grounding of the terminals on the fender.
- As the fender is not fully flat, it allows some cushion and vibration dampening to the fuse holder box.
Line to the Alternator (red), and line to the starter (inside wire sheath). I affixed the starter cable inside some new plastic sheathing, and then mounted it with a rubber lined clamp to an existing hole there. I zip tied the alternator cable to that plastic sheathing, as well the the A/C line (with some hose spiced around the A/C line as a barrier/protection from rubbing).
On my buggy, all lines like these were sheathed in Fire Sleeve. I was going to do that on these as well since I a bunch extra, but didn't end up doing it. I might in the future, as electrical and electrical caused fires...are no joke.
Cover trimmed and reinstalled:
Some of the main cable changed I would have made, were cables that went from the battery, to the PDC, and from the Fuse to the PDC. I would have made these much shorter jumpers, as you can see in the last picture they're kind of "twirled".
However, I do realize this added length allows for some flexibility in mounting locations.
I was going to cut the wires and make them shorter, but realized all my lugs were sizes other than 2AWG, and I didn't feel like running to the store to get some.
Also, not pictured is the new block ground, from the engine to the fire wall.
The thicker 2AWG wire definitely makes routing a bit harder, since it doesn't bend as easy, thus tight turns aren't possible.
That being said, it's what I had planned on making, and it's a well built kit.
Looks like your brown dog bushing is coming out? Could just be the way it looks.
02-20-2018, 10:06 AM
#35
Seasoned Member
Thread Starter
Join Date: Nov 2012
Location: Fort Collins, Colorado
Posts: 327
Likes: 0
Received 4 Likes
on
3 Posts
Year: 1998 (buggy), 1998 DD
Model: Cherokee
I was...slightly...inebriated (few days after my ex and I broke up), and I took her into the garage, pointed at the half finished buggy, and said "that's your competition"

She's perfectly fine to go read a book while I'm in the shop or cuddle with the dogs. As long as other stuff around the house is getting done...she's more than fine with it
 02-20-2018, 10:36 AM
#36
Meh, my wife knew what she was getting into...the first night we met.
I was...slightly...inebriated (few days after my ex and I broke up), and I took her into the garage, pointed at the half finished buggy, and said "that's your competition"
She's perfectly fine to go read a book while I'm in the shop or cuddle with the dogs. As long as other stuff around the house is getting done...she's more than fine with it
02-20-2018, 10:36 AM
#37
02-22-2018, 12:50 PM
#38
Seasoned Member
Thread Starter
Join Date: Nov 2012
Location: Fort Collins, Colorado
Posts: 327
Likes: 0
Received 4 Likes
on
3 Posts
Year: 1998 (buggy), 1998 DD
Model: Cherokee
Yeah they sell the bushing.
I'll need to delve into a little more, since it appears the entire mount is off by 1/4", thus causing a gap on one side, and the lip on the other side to be currently crushed.
Hoping its an easy adjustment, and not something that is going to be a pain to fix (as a result of the impact. I'll undo the trans mount and see if it settles some.
02-22-2018, 12:54 PM
#39
Seasoned Member
Thread Starter
Join Date: Nov 2012
Location: Fort Collins, Colorado
Posts: 327
Likes: 0
Received 4 Likes
on
3 Posts
Year: 1998 (buggy), 1998 DD
Model: Cherokee
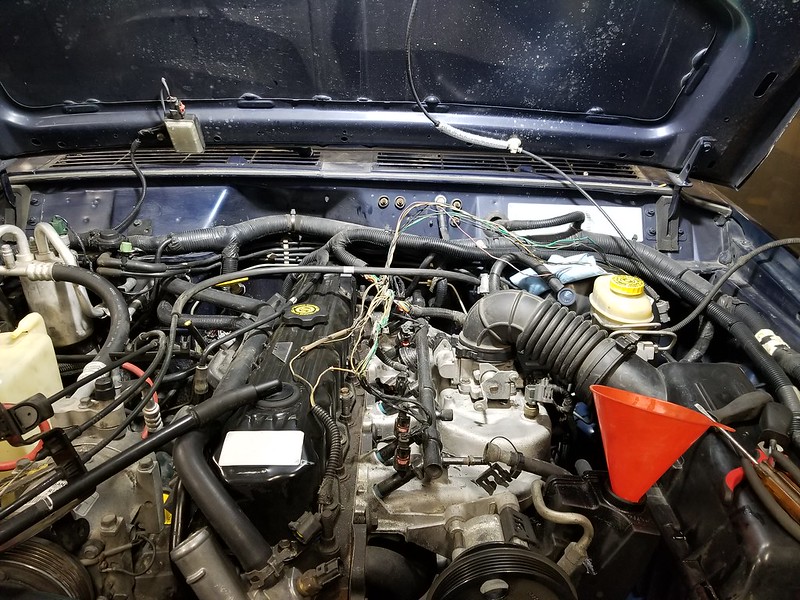
I've about got the engine wrapped up...it's been in the single digits, or below zero lately.
Though I can heat my shop, it also start to hurt the wallet doing it every night.
I noticed my steering pump return line was crimped, so that has been pulled and in the process of replacing. I'll be doing a full flush before connecting the line back up.
I went to try and flush the fuel system since it's been sitting so long. Went to jumper the fuel pump via the relay...nadda.
Did some looking through, and decided to see if the pump was getting power. it was, so it looks like a new pump is in order.
The pump was actually replaces by my friend I got the Jeep from. It had sat long enough that the pump died. Appears to have happened again.
Since I plan on keeping this Jeep, I'll get a full Bosch Assembly and drop it in.
Other than that all I need to do it throw in the radiator, fill it up, and in theory it should be back to running.
Once I know it runs, I'll get the rest of the interior and body slammed back in and on
03-05-2018, 11:54 AM
#40
Seasoned Member
Thread Starter
Join Date: Nov 2012
Location: Fort Collins, Colorado
Posts: 327
Likes: 0
Received 4 Likes
on
3 Posts
Year: 1998 (buggy), 1998 DD
Model: Cherokee
Well,
I've been cranking on this to say the least. Need to get working on the buggy, so this thing needs out!
So, got the power steering flushed through real well. Flush over a gallon through.
I used a combination of the wheels elevated to turn, and a way to turn the PS pump (something I learned from bleeding my full hydro system).
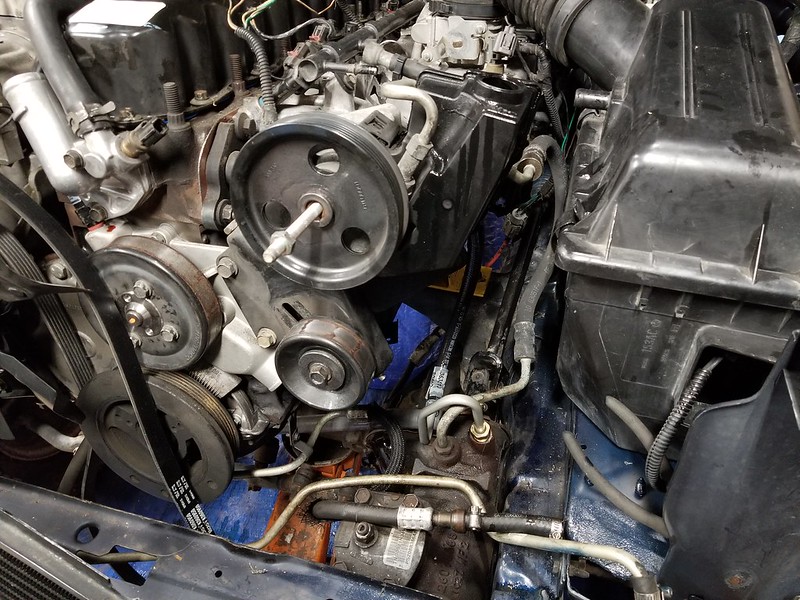
Turn the wheels half a dozen to dozen times, then run the pump (slowly) to flush. Repeat for what seems like eternity :laugh:
Did some wiring harness "unmending" for O2 Sensors.
Pretty well there:
It got loomed and put all back in the rail cover after.
Dirtbound Steering Box Spacer got welded up and painted. Not my finest welding/painting, but it was late, I was tired, and no one's going to see it.
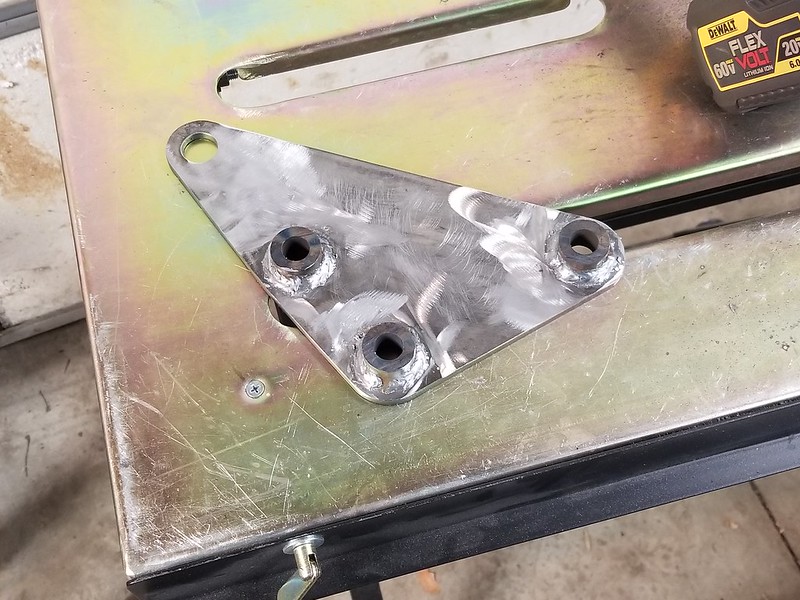
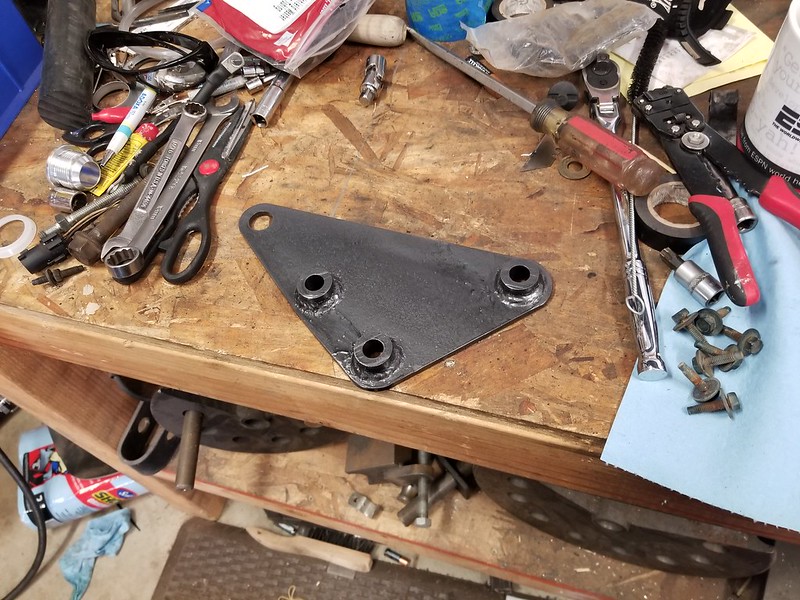
I did have to take some material off the bottom corner, and the front top corner for mine to sit right.
I went to install it, and the bolts were just not going in like they should. Even my 1/2" impact didn't want to make them go. So, since I didn't want to risk snapping a bolt or breaking the box...out came the taps. Retapped and threaded (really just cleaning up the threads) of the steering box and the bolts. Went together like a charm after.
Still a pain though since the steering box isn't the most tap friendly location.
I've been cranking on this to say the least. Need to get working on the buggy, so this thing needs out!
So, got the power steering flushed through real well. Flush over a gallon through.
I used a combination of the wheels elevated to turn, and a way to turn the PS pump (something I learned from bleeding my full hydro system).
Turn the wheels half a dozen to dozen times, then run the pump (slowly) to flush. Repeat for what seems like eternity :laugh:
Did some wiring harness "unmending" for O2 Sensors.
Pretty well there:
It got loomed and put all back in the rail cover after.
Dirtbound Steering Box Spacer got welded up and painted. Not my finest welding/painting, but it was late, I was tired, and no one's going to see it.
I did have to take some material off the bottom corner, and the front top corner for mine to sit right.
I went to install it, and the bolts were just not going in like they should. Even my 1/2" impact didn't want to make them go. So, since I didn't want to risk snapping a bolt or breaking the box...out came the taps. Retapped and threaded (really just cleaning up the threads) of the steering box and the bolts. Went together like a charm after.
Still a pain though since the steering box isn't the most tap friendly location.
03-05-2018, 11:55 AM
#41
Seasoned Member
Thread Starter
Join Date: Nov 2012
Location: Fort Collins, Colorado
Posts: 327
Likes: 0
Received 4 Likes
on
3 Posts
Year: 1998 (buggy), 1998 DD
Model: Cherokee
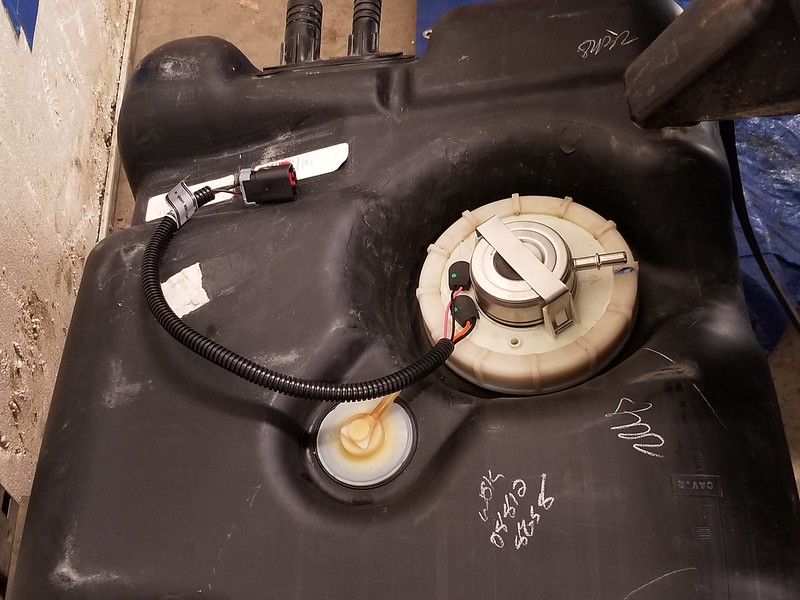
So, then came the fuel pump. Oh man...
Got the tank dropped without too much issue.
Then some goodies arrived:
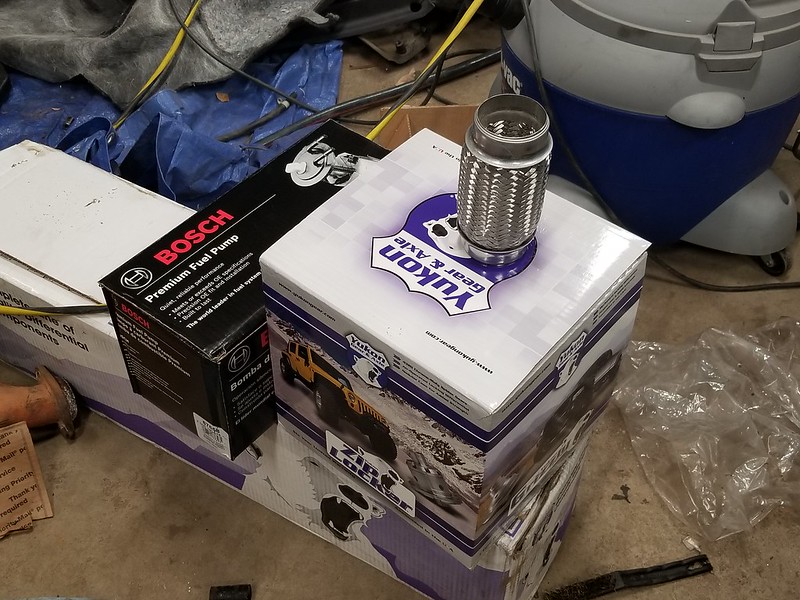
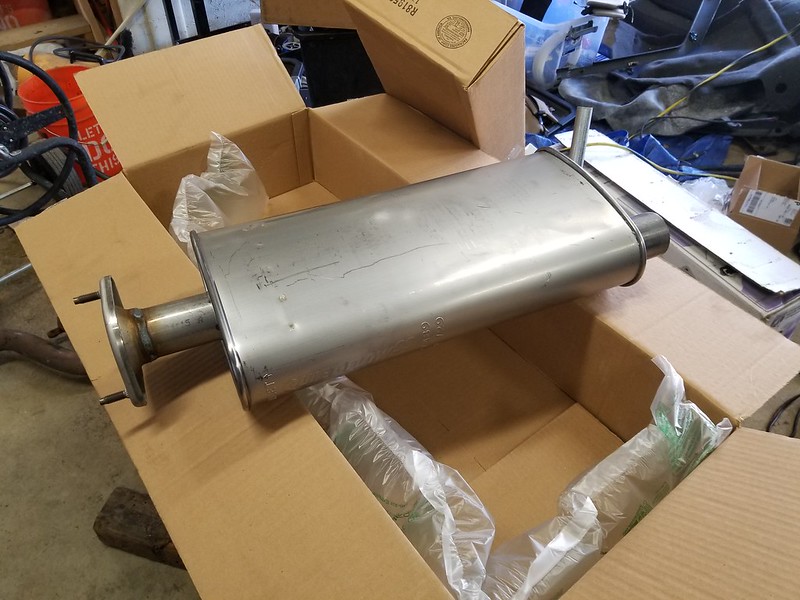
Yukon Zip Locker for the D30, Bosch Fuel Pump, an exhaust Flex Pipe, and a Walker Quietflow SS Muffler.
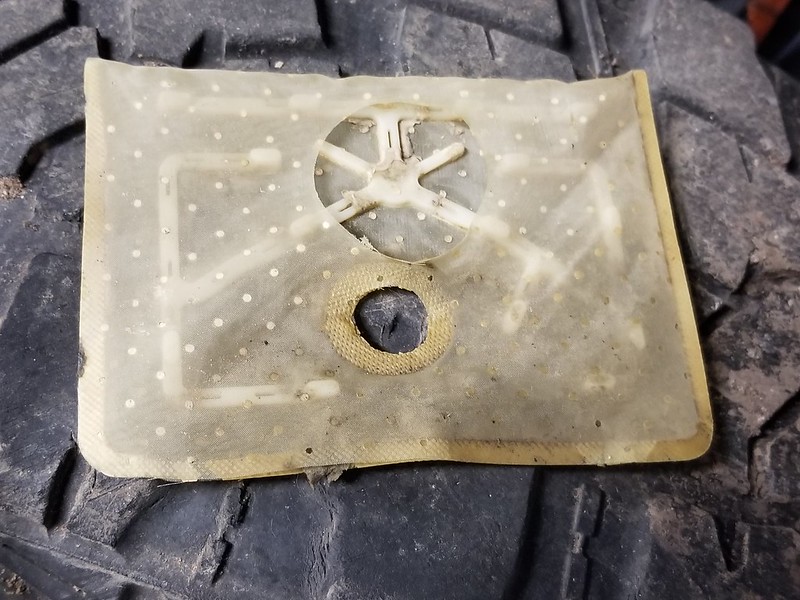
Pulled the fuel pump, and yeah...I'd say it would make sense why it wasn't working:
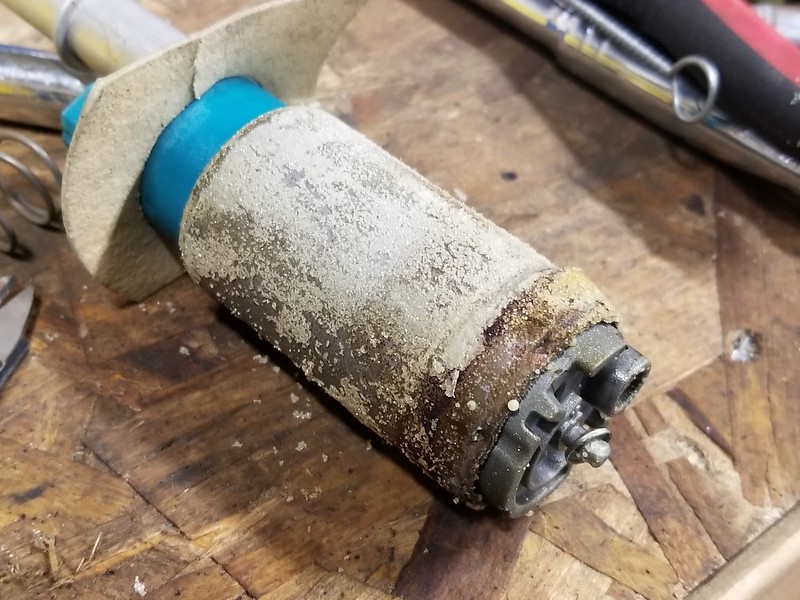
Yummy...
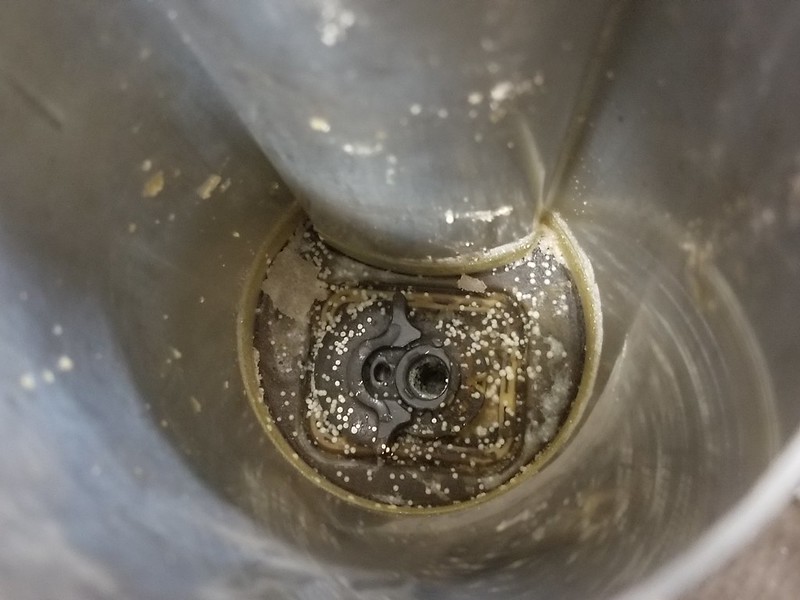
The filter sock was just floating around in there, with some nice green gook in it.
So, I cleaned the tank out really well. There was so much crap floating around in there, it was rather disgusting.
So I got the hose, and flushed it out fully a few times with hot water, until no debris or anything could be seen. Then, I wiped the interior by hand with shop towels. Nice and clean after!
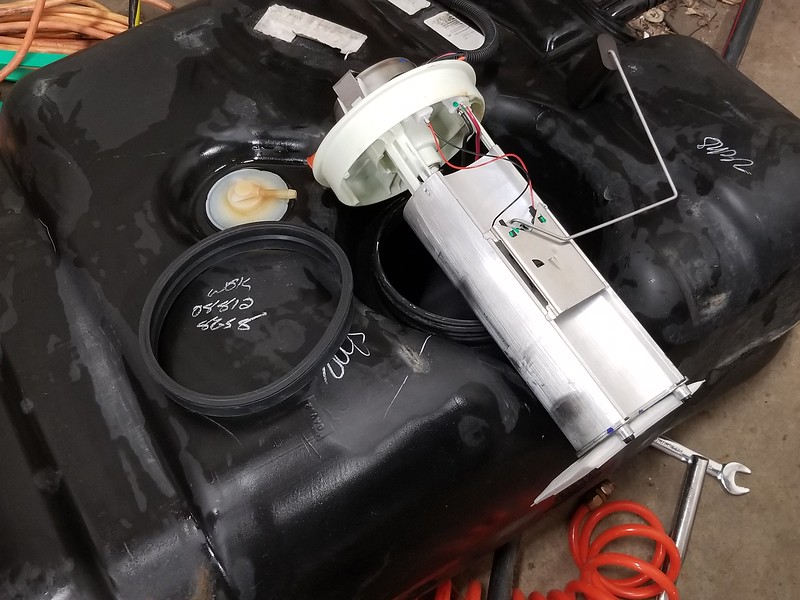
Got the tank itself cleaned up, and the new pump installed. I will say, that damn white rings and the new fuel pump wanted to fight me. Took me 10 minutes to get it installed when it should have taken two :laugh:
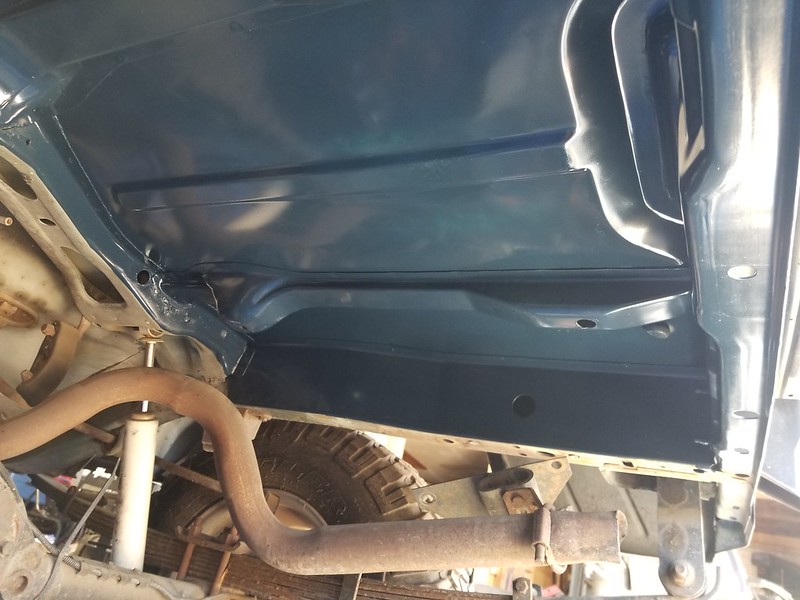
So, then came so work needed. This Jeep overall is really clean, but it is still 17ish years old. So, there's some minor rust to take care of on the underside in spots.
The hole where the vent and filler necks come through was bad:
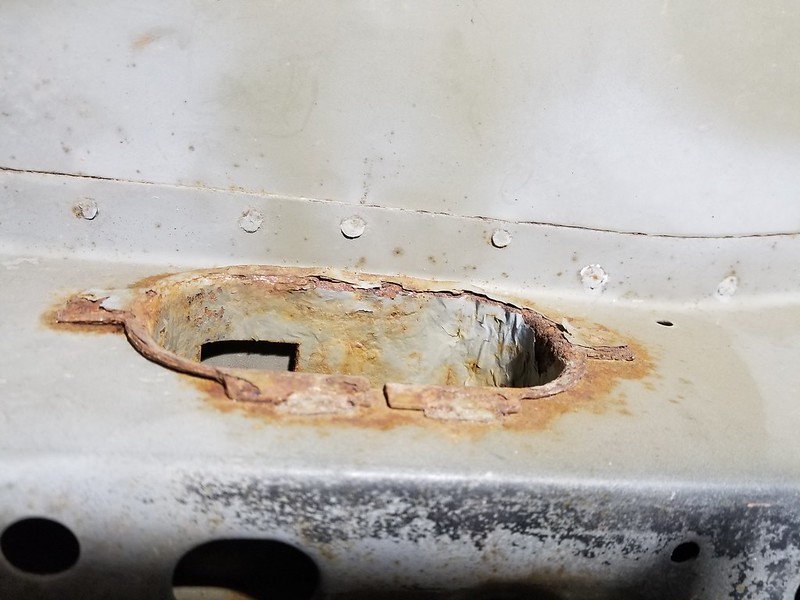
Took a wire wheel on a drill, and went to town. Got it as cleaned up as it was going to get:
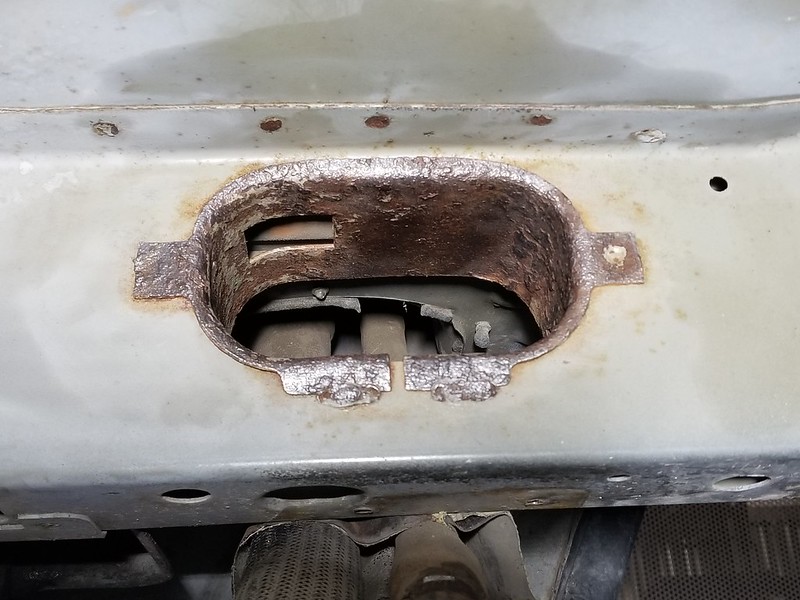
And then, out came the POR-15. There were some other minor areas I hit since I was already there. Figured a little prevention now would save a lot of headache later:

I let it dry for a couple days, wiped it all down with Mineral Spirits, masked it off, and threw a few coats of paint on:
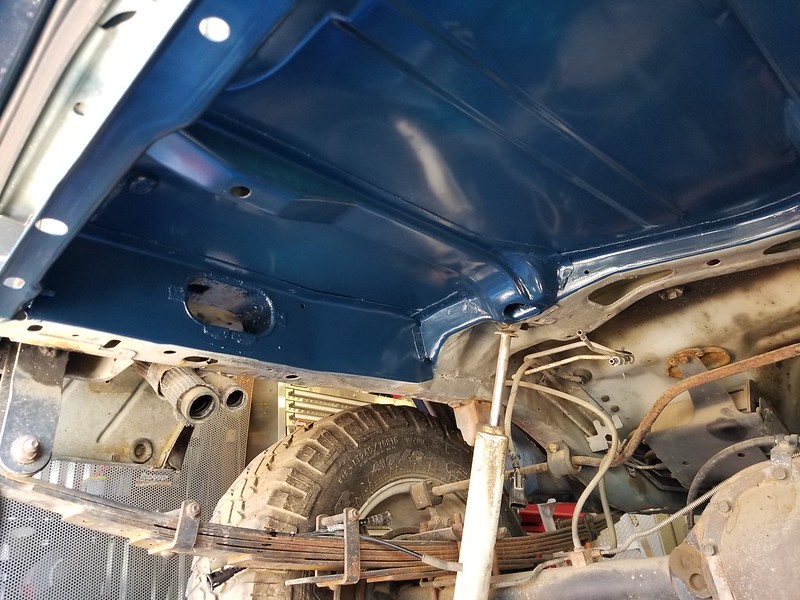
Tank got reinstalled, and works like a charm again.
Got the tank dropped without too much issue.
Then some goodies arrived:
Yukon Zip Locker for the D30, Bosch Fuel Pump, an exhaust Flex Pipe, and a Walker Quietflow SS Muffler.
Pulled the fuel pump, and yeah...I'd say it would make sense why it wasn't working:
Yummy...
The filter sock was just floating around in there, with some nice green gook in it.
So, I cleaned the tank out really well. There was so much crap floating around in there, it was rather disgusting.
So I got the hose, and flushed it out fully a few times with hot water, until no debris or anything could be seen. Then, I wiped the interior by hand with shop towels. Nice and clean after!
Got the tank itself cleaned up, and the new pump installed. I will say, that damn white rings and the new fuel pump wanted to fight me. Took me 10 minutes to get it installed when it should have taken two :laugh:
So, then came so work needed. This Jeep overall is really clean, but it is still 17ish years old. So, there's some minor rust to take care of on the underside in spots.
The hole where the vent and filler necks come through was bad:
Took a wire wheel on a drill, and went to town. Got it as cleaned up as it was going to get:
And then, out came the POR-15. There were some other minor areas I hit since I was already there. Figured a little prevention now would save a lot of headache later:
I let it dry for a couple days, wiped it all down with Mineral Spirits, masked it off, and threw a few coats of paint on:
Tank got reinstalled, and works like a charm again.
03-05-2018, 11:56 AM
#42
Seasoned Member
Thread Starter
Join Date: Nov 2012
Location: Fort Collins, Colorado
Posts: 327
Likes: 0
Received 4 Likes
on
3 Posts
Year: 1998 (buggy), 1998 DD
Model: Cherokee
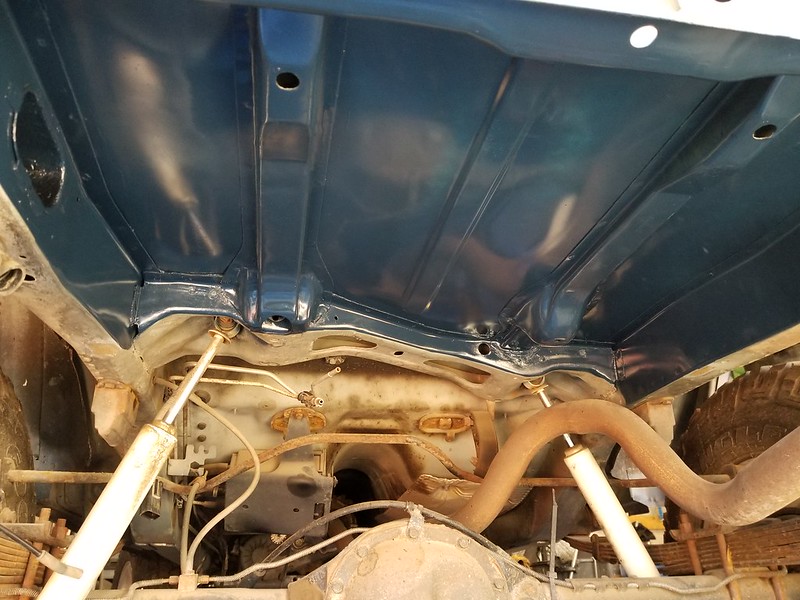
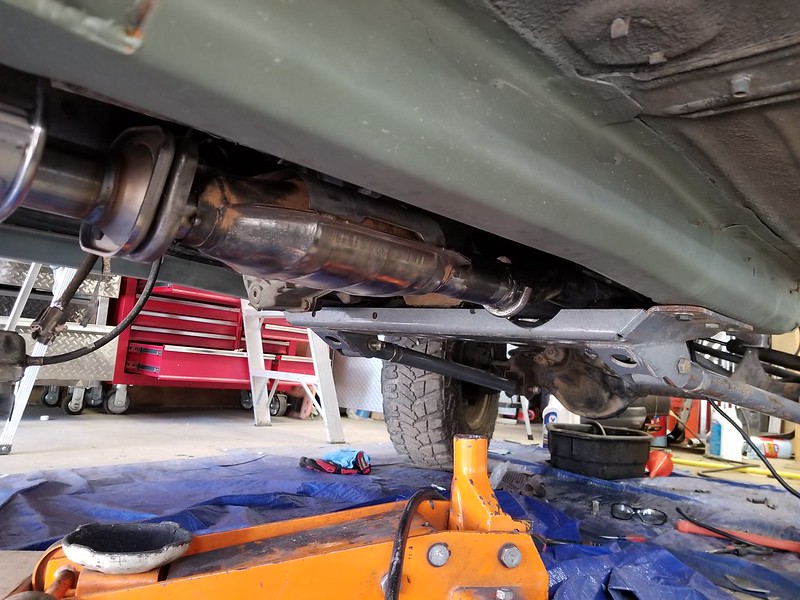
So, now that the engine was pretty well there, and the fuel system was taken care of, time to get on the exhaust.
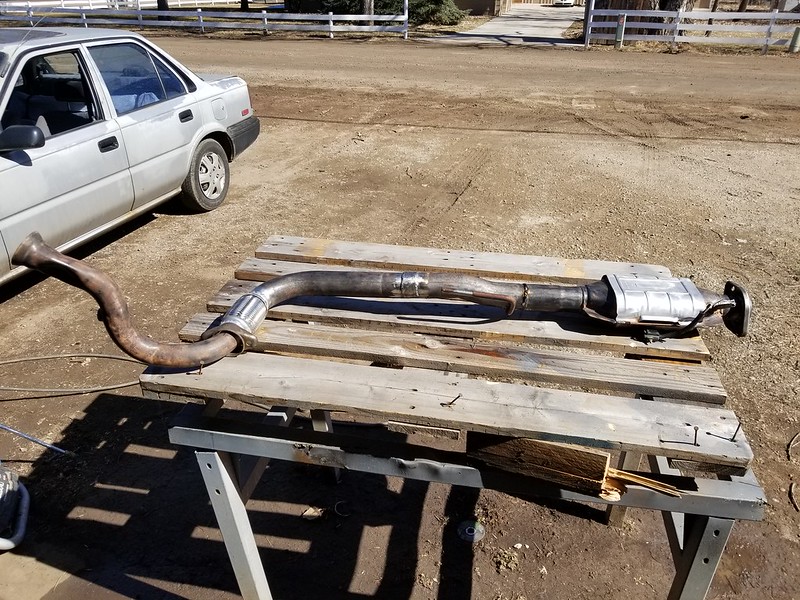
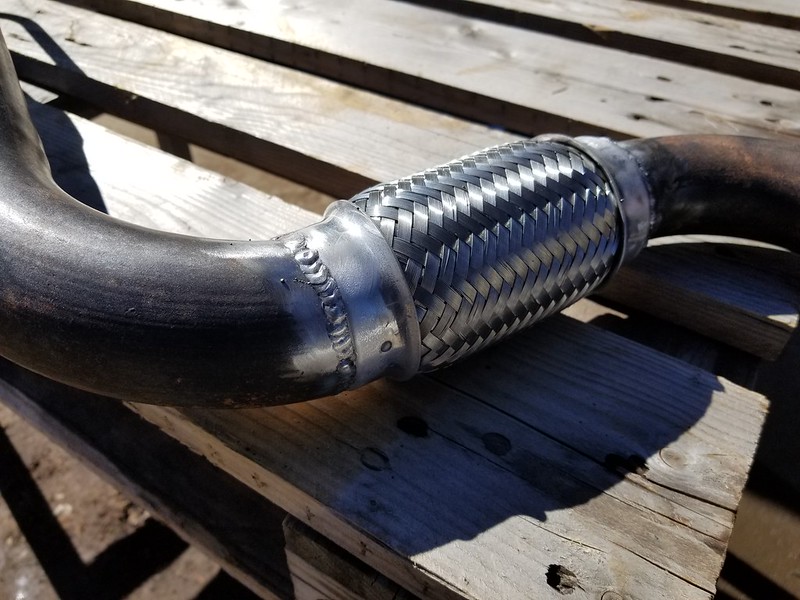
The section from the header to the back of the cat took about half a day. I was in and out a dozen times, getting up and down probably well over 100 times. I added the flex pipe it to help prevent any future cracking of the exhaust manifold. Getting the flex pipe installed, also helps a lot with getting it back in.
I did the following:
- Cut off and reinstall the hanger (which took some of the pipe with it, hence the patch)
- Cut a notch in front of the Cat to get some better clearance
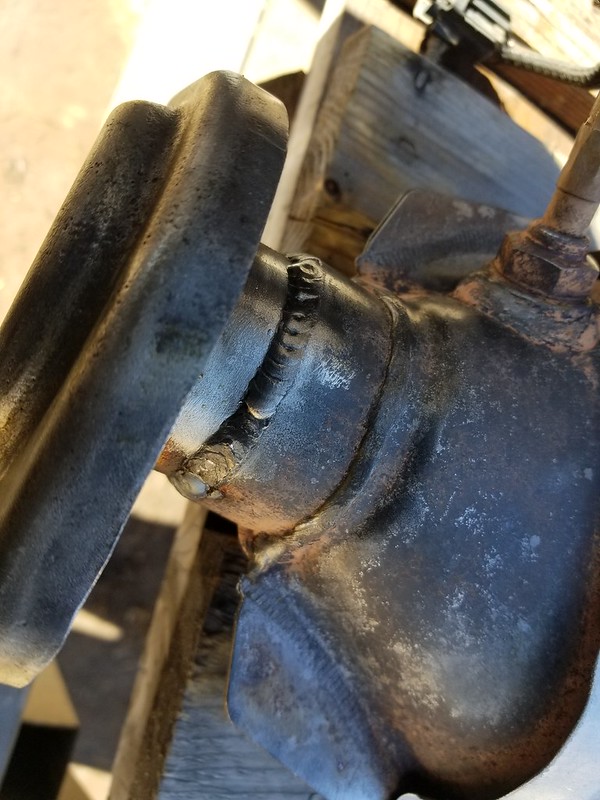
- Cut off, clean up, and weld the old Cat flange to the one going in.
Once everything was in place, the entire thing got wire wheeled, pressure washed, wiped with mineral spirits, and painted in high temp VHT Paint.
Flex Pipe location:
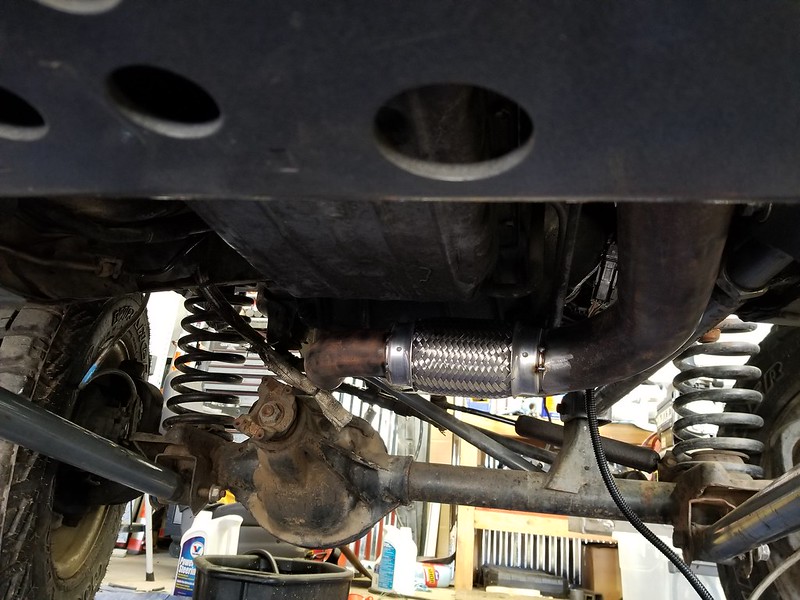
General setup, with a little better clearance than stock:
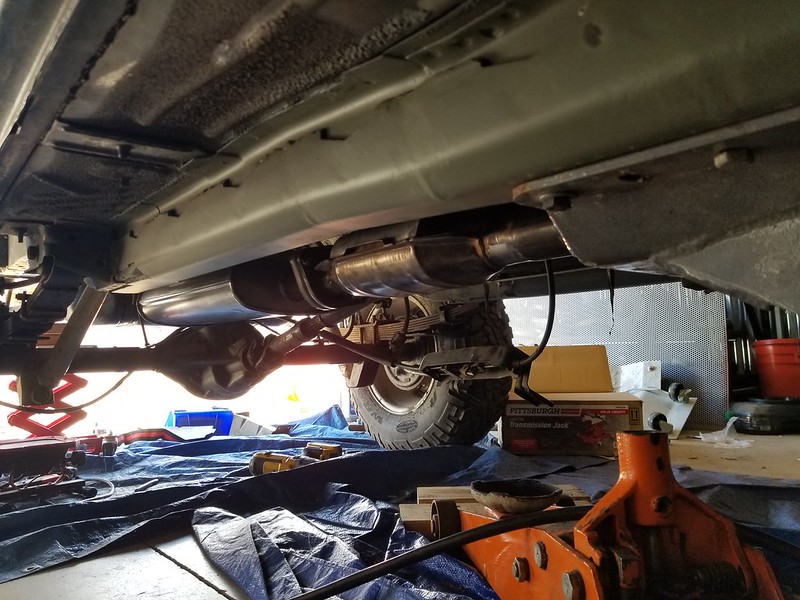
All together:
Weld are all quick tack-tack. Hold just fine, is air tight, and I risk blowing through a lot less. Exhaust and body (thin sheet)...I hate welding:
All painted up:
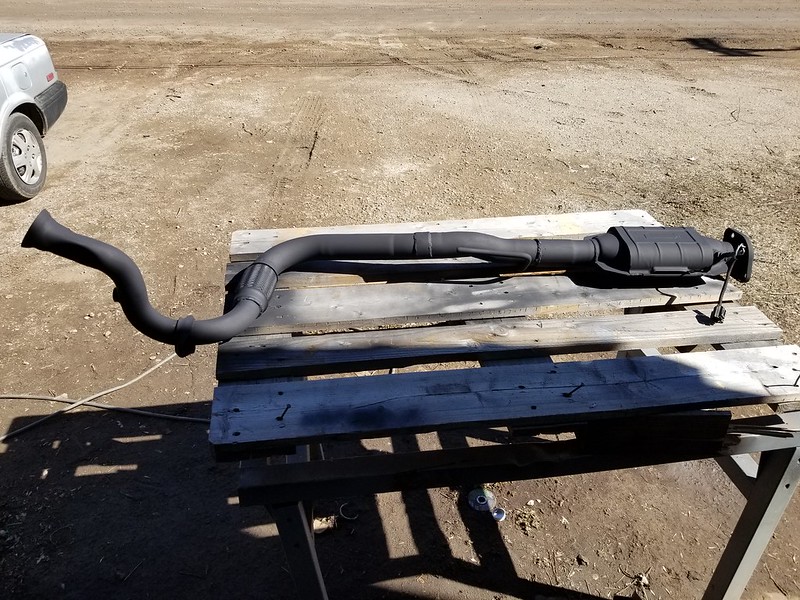
I got it back in for final installation.
The muffler and rear exhaust pipe aren't fully in yet. I need to pull the rear pipe, give it the same cleaning, and get the rear hanger by the shackles taken care of.
The section from the header to the back of the cat took about half a day. I was in and out a dozen times, getting up and down probably well over 100 times. I added the flex pipe it to help prevent any future cracking of the exhaust manifold. Getting the flex pipe installed, also helps a lot with getting it back in.
I did the following:
- Cut off and reinstall the hanger (which took some of the pipe with it, hence the patch)
- Cut a notch in front of the Cat to get some better clearance
- Cut off, clean up, and weld the old Cat flange to the one going in.
Once everything was in place, the entire thing got wire wheeled, pressure washed, wiped with mineral spirits, and painted in high temp VHT Paint.
Flex Pipe location:
General setup, with a little better clearance than stock:
All together:
Weld are all quick tack-tack. Hold just fine, is air tight, and I risk blowing through a lot less. Exhaust and body (thin sheet)...I hate welding:
All painted up:
I got it back in for final installation.
The muffler and rear exhaust pipe aren't fully in yet. I need to pull the rear pipe, give it the same cleaning, and get the rear hanger by the shackles taken care of.
03-05-2018, 11:58 AM
#43
Seasoned Member
Thread Starter
Join Date: Nov 2012
Location: Fort Collins, Colorado
Posts: 327
Likes: 0
Received 4 Likes
on
3 Posts
Year: 1998 (buggy), 1998 DD
Model: Cherokee
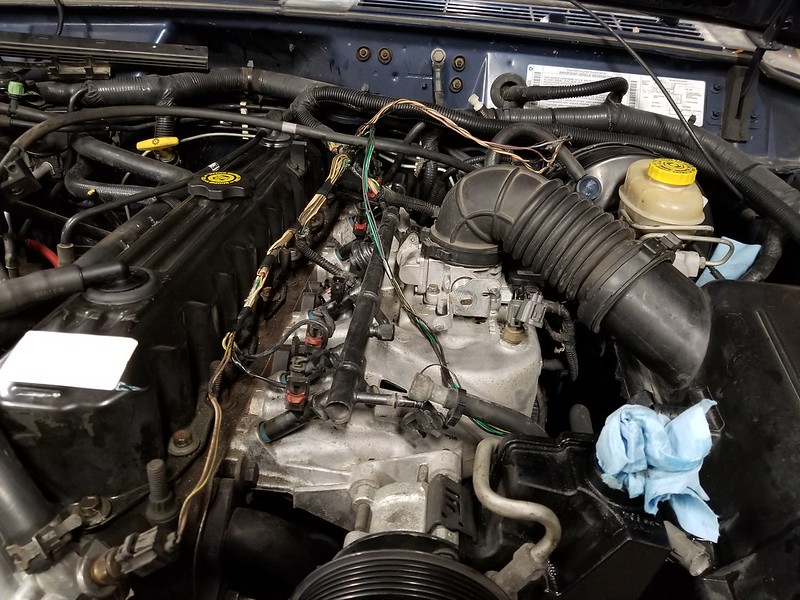
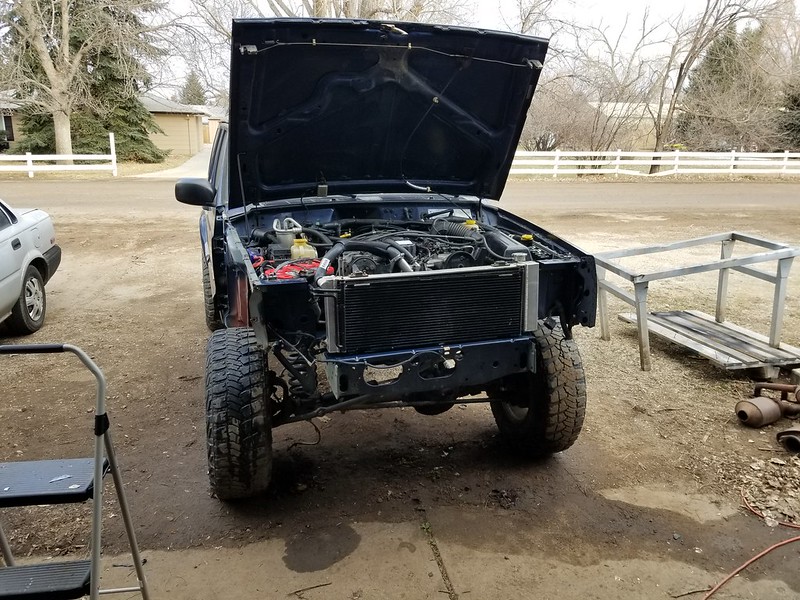
So, not that the exhuast was in enough, to get the O2 sensors plugged back in, I got the radiator remounted, hoses put on, and the system filled.
And, IT RUNS AGAIN!
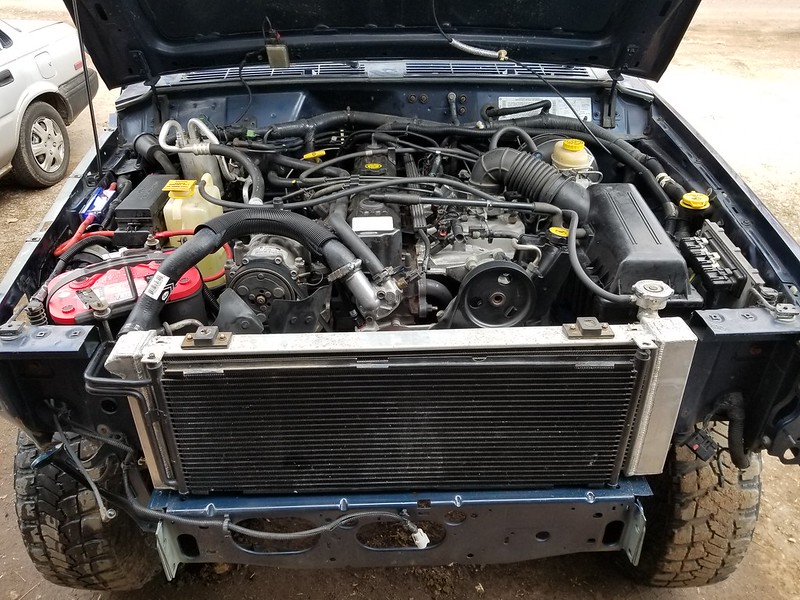
Check engine light cleared after letting it run, shutting it off, letting it cool down, and repeat (mainly to bleed the cooling system).
Seems to run just fine now as far as I can tell.
I still have a bit of stuff to put back together with it, to get it to driving status, but it's only about a weekend's worth of work away from being there.
I'll be in Vegas next weekend for a wedding, and then there's only a couple weeks until EJS.
So, I'll see how much I'm able to work in it between now and then.
Lots of sleepless nights to come!
And, IT RUNS AGAIN!
Check engine light cleared after letting it run, shutting it off, letting it cool down, and repeat (mainly to bleed the cooling system).
Seems to run just fine now as far as I can tell.
I still have a bit of stuff to put back together with it, to get it to driving status, but it's only about a weekend's worth of work away from being there.
I'll be in Vegas next weekend for a wedding, and then there's only a couple weeks until EJS.
So, I'll see how much I'm able to work in it between now and then.
Lots of sleepless nights to come!
03-05-2018, 09:41 PM
#44
So your under fuel tank restoration looks great!! Exhaust as well...
Question your long arm kit what brand? I noticed yours does not have side brackets attaching to side of uni frame like mine do with rough country setup. Wondering if yours is the same kit but just didn't install those? It is similar looking that is why I asked.
Question your long arm kit what brand? I noticed yours does not have side brackets attaching to side of uni frame like mine do with rough country setup. Wondering if yours is the same kit but just didn't install those? It is similar looking that is why I asked.
03-06-2018, 10:07 AM
#45
Seasoned Member
Thread Starter
Join Date: Nov 2012
Location: Fort Collins, Colorado
Posts: 327
Likes: 0
Received 4 Likes
on
3 Posts
Year: 1998 (buggy), 1998 DD
Model: Cherokee
So your under fuel tank restoration looks great!! Exhaust as well...
Question your long arm kit what brand? I noticed yours does not have side brackets attaching to side of uni frame like mine do with rough country setup. Wondering if yours is the same kit but just didn't install those? It is similar looking that is why I asked.
Question your long arm kit what brand? I noticed yours does not have side brackets attaching to side of uni frame like mine do with rough country setup. Wondering if yours is the same kit but just didn't install those? It is similar looking that is why I asked.
The side plates aren't on it yet, just sitting on a shelf.
With the frame stiffeners, they don't really work.
I'll most likely end up bending my own, and working to incorporate my rock rails into them (using the same bolts).
This kit will stay on for the foreseeable future. I might decide to build my own 3-link, with a bit better ground clearance (not that I really need it on this rig).