Project: Keeping It Clean
 11-17-2017, 02:47 PM
#1
Seasoned Member
Thread Starter
Join Date: Nov 2012
Location: Fort Collins, Colorado
Posts: 327
Likes: 0
Received 4 Likes
on
3 Posts
Year: 1998 (buggy), 1998 DD
Model: Cherokee
After having built a buggy, I've been longing for something simple again, to be able to enjoy the light wheeling, going camping (not because I'm wheeling), longer trips out again.
I've been through all the hoops of an XJ, and after building this:
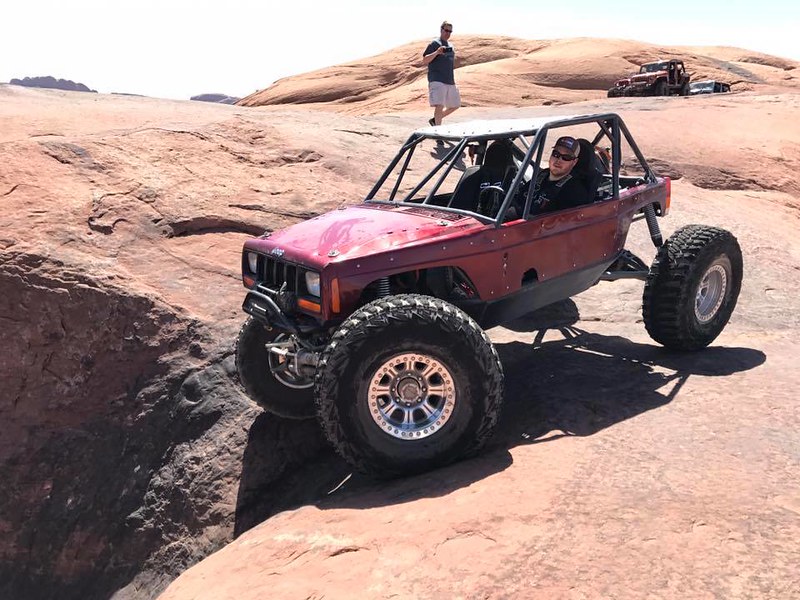
This XJ should be a walk in the park...or so I "thought".
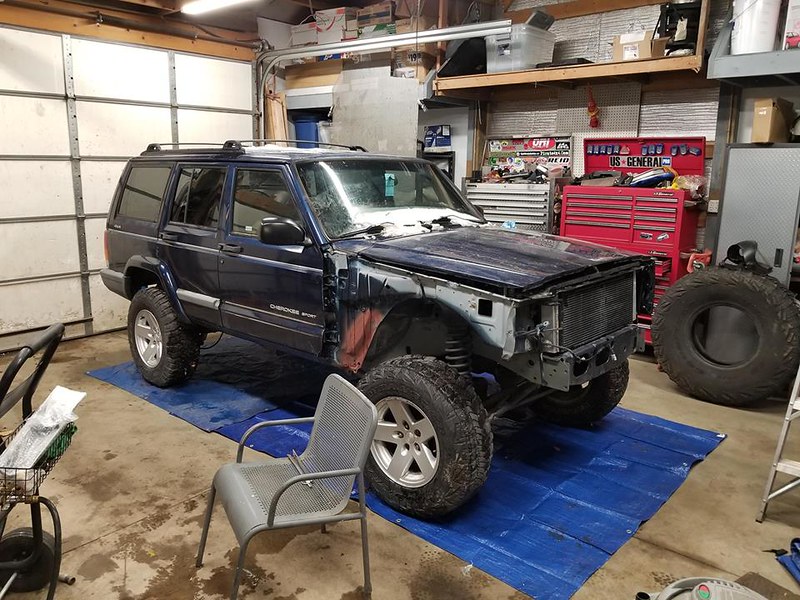
I'd been thinking about something with maybe 4.5" of lift and 32's, keeping it nice and clean. Well, a close friend of mine Sam (zluster on NAXJA), had bought an XJ at auction as a flip (repair and resell). Well, I'd always liked the Jeep (and it was in one of my top 3 colors - Patriot Blue), and had what I was looking for: Low miles, already had a 4.5" Full BDS Lift kit, and more.
So, after selling one XJ that I had for a while, I picked this up from him, since after a few years he hadn't had the time to get it fixed (since he had a real job now).
So enters, the new to me 2001 (and still the newest vehicle I've ever owned).
Specs:
- 2001 XJ - Patriot Blue
- ~105k miles
- Moab 16" wheels
- Brown Dog Motor Mounts
- Newer Aluminum Radiator
- BDS 4.5" Lift Kit
- HP D30 Swapped
Now, from that picture, all looks pretty good? Well, the fact of the matter is there was some pretty good damage to the passenger side. It looks like the previous owner (prior to Sam), had hit something hard enough with the front right tire to shove it up into the wheel well far enough that it cause some frame and floorwell damage, bent the upper arm mount on that side, and killed the LPD30.
So, I fixed the crossmember mount for Sam (before I bought it), he had done some other work, and swapped in a HP D30.
From there, it's all on me.
Since I've had this for a while, I've been able to acquire parts for...a lot less than MSRP mostly. I'll chronical some of it through the build.
As some know, I'm *rather* **** retentive. I don't like shoddy work, and this build won't be any different. I plan on doing some things a little different, with small touches that make a difference. After building the buggy, other than sheetmetal work...this will be a nice relaxation from custom one off everything .
.
Build plans for this rig (as of this post):
Front HP D30:
- Artec Truss - Acquired
- Zip Locker
- 4.10's
- Ten Factory Axle Seals - Acquired
- WJ Steering Setup - Have several parts acquired
- SOLID Diff Cover - Acquired
- New Coil buckets and LCA's (not quite like most setups however)
Rear: Ford 8.8 (Has 4.10's, Discs, and LSD)
- Complete new brakes
- Artec Truss - Acquired
- SOLID Diff Cover - Acquired
- Shock Mounts - Acquired
- TNT U-Bolt Eliminators - Acquired
Tires:
265/75R16 Goodyear Duratracs on 16" Moabs - Acquired
Other:
- 231J w/ SYE - Came with on rig
- Tera 2Low - Need to pull it out of donor case
- Boostwerks Hidden Winch Comp Mount - On my shelf
- Dirtbound Rear DIY Bumper (no cut/fold) - Acquired
- Dirtbound Front DIY Bumper - Acquired
- Smittybilt 8k winch w/ synthetic - Acquired
- Full Interior Sound deadening using three stage system (CLD + CCF + MLV)
- Bilstein 5150's front - Acquired
- Bilstein rears
- Tomken Gas Tank Skid - Acquired
- Offroad Armor Rock Rails - Acquired but will have to see if they'll work
So yeah, I've got a buttload of parts sitting in my upper deck area on the shop, ready to go on and get me some more room finally. I know I'm missing some of what I've got sitting up there, but I'll get around to it...
I've been through all the hoops of an XJ, and after building this:
This XJ should be a walk in the park...or so I "thought".
I'd been thinking about something with maybe 4.5" of lift and 32's, keeping it nice and clean. Well, a close friend of mine Sam (zluster on NAXJA), had bought an XJ at auction as a flip (repair and resell). Well, I'd always liked the Jeep (and it was in one of my top 3 colors - Patriot Blue), and had what I was looking for: Low miles, already had a 4.5" Full BDS Lift kit, and more.
So, after selling one XJ that I had for a while, I picked this up from him, since after a few years he hadn't had the time to get it fixed (since he had a real job now).
So enters, the new to me 2001 (and still the newest vehicle I've ever owned).
Specs:
- 2001 XJ - Patriot Blue
- ~105k miles
- Moab 16" wheels
- Brown Dog Motor Mounts
- Newer Aluminum Radiator
- BDS 4.5" Lift Kit
- HP D30 Swapped
Now, from that picture, all looks pretty good? Well, the fact of the matter is there was some pretty good damage to the passenger side. It looks like the previous owner (prior to Sam), had hit something hard enough with the front right tire to shove it up into the wheel well far enough that it cause some frame and floorwell damage, bent the upper arm mount on that side, and killed the LPD30.
So, I fixed the crossmember mount for Sam (before I bought it), he had done some other work, and swapped in a HP D30.
From there, it's all on me.
Since I've had this for a while, I've been able to acquire parts for...a lot less than MSRP mostly. I'll chronical some of it through the build.
As some know, I'm *rather* **** retentive. I don't like shoddy work, and this build won't be any different. I plan on doing some things a little different, with small touches that make a difference. After building the buggy, other than sheetmetal work...this will be a nice relaxation from custom one off everything
.Build plans for this rig (as of this post):
Front HP D30:
- Artec Truss - Acquired
- Zip Locker
- 4.10's
- Ten Factory Axle Seals - Acquired
- WJ Steering Setup - Have several parts acquired
- SOLID Diff Cover - Acquired
- New Coil buckets and LCA's (not quite like most setups however)
Rear: Ford 8.8 (Has 4.10's, Discs, and LSD)
- Complete new brakes
- Artec Truss - Acquired
- SOLID Diff Cover - Acquired
- Shock Mounts - Acquired
- TNT U-Bolt Eliminators - Acquired
Tires:
265/75R16 Goodyear Duratracs on 16" Moabs - Acquired
Other:
- 231J w/ SYE - Came with on rig
- Tera 2Low - Need to pull it out of donor case
- Boostwerks Hidden Winch Comp Mount - On my shelf
- Dirtbound Rear DIY Bumper (no cut/fold) - Acquired
- Dirtbound Front DIY Bumper - Acquired
- Smittybilt 8k winch w/ synthetic - Acquired
- Full Interior Sound deadening using three stage system (CLD + CCF + MLV)
- Bilstein 5150's front - Acquired
- Bilstein rears
- Tomken Gas Tank Skid - Acquired
- Offroad Armor Rock Rails - Acquired but will have to see if they'll work
So yeah, I've got a buttload of parts sitting in my upper deck area on the shop, ready to go on and get me some more room finally. I know I'm missing some of what I've got sitting up there, but I'll get around to it...
 11-17-2017, 02:47 PM
#2
Seasoned Member
Thread Starter
Join Date: Nov 2012
Location: Fort Collins, Colorado
Posts: 327
Likes: 0
Received 4 Likes
on
3 Posts
Year: 1998 (buggy), 1998 DD
Model: Cherokee
So, a bit went on between the time I acquired the rig, and now.
Bought a house, continued to wheel, work on and build the buggy, and go married.
This was originally to be the wife's rig, but she now has a '96. This will allow us to take both out, the dogs, and get her back into wheeling (since we have two dogs she doesn't come out on buggy trips much at all).
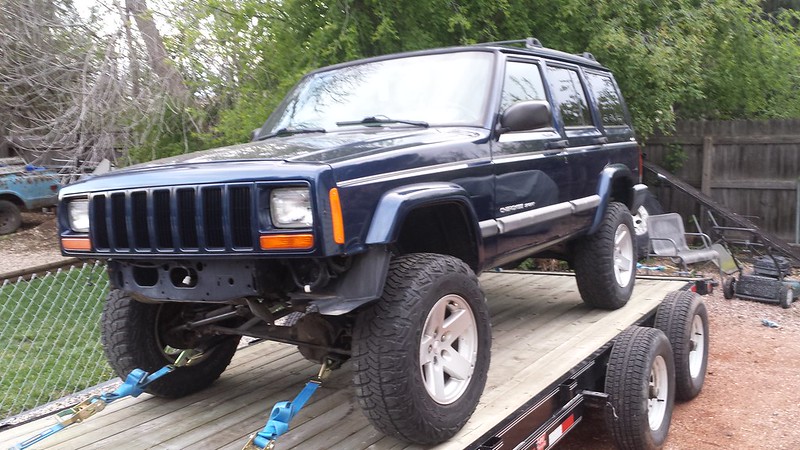
So, from where I started, until today, unfortunately has been the bulk of the work. To make matters worse, this isn't the sexy, step back and go "hell yeah!" work...this has been getting it to square one-ish...bodywork.
So, I'll let pictures do some talking.
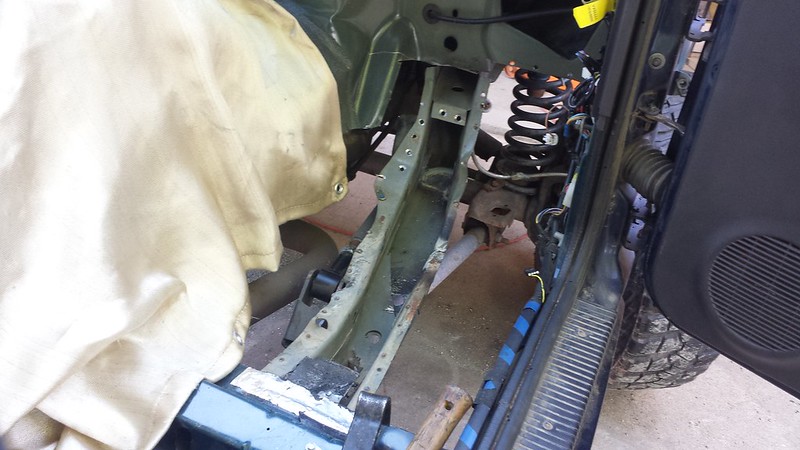
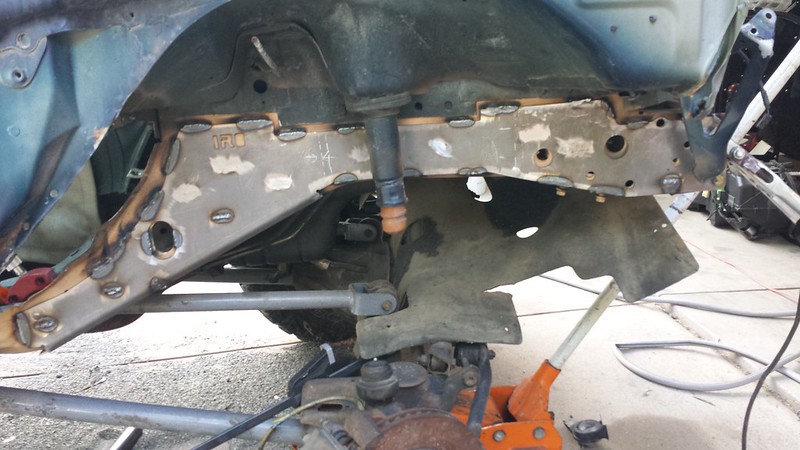
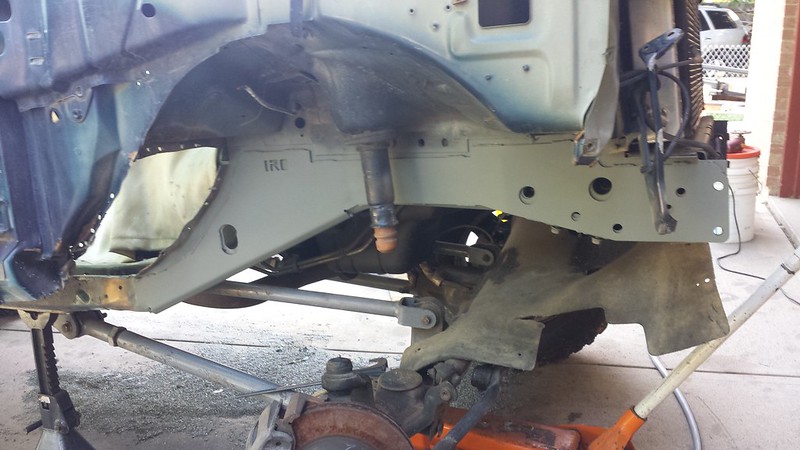
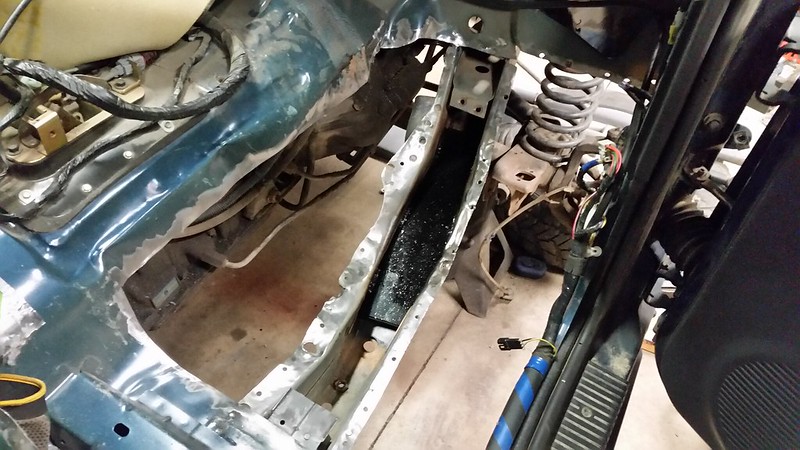
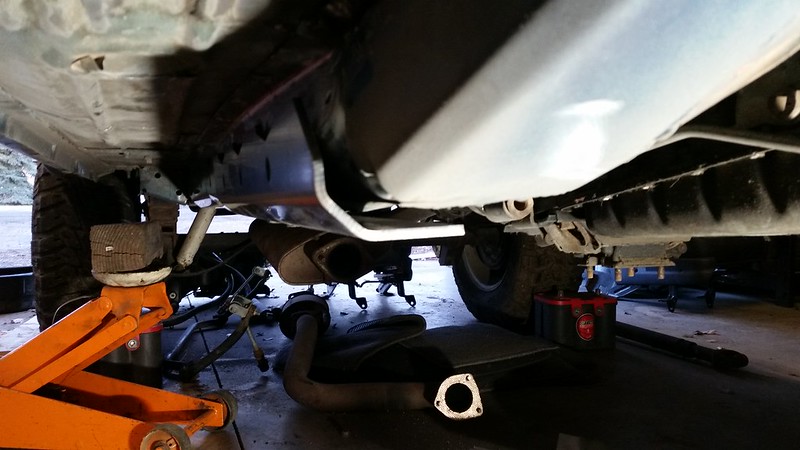
What I started out with. You can see how far that tire got pushed into the wheel well:
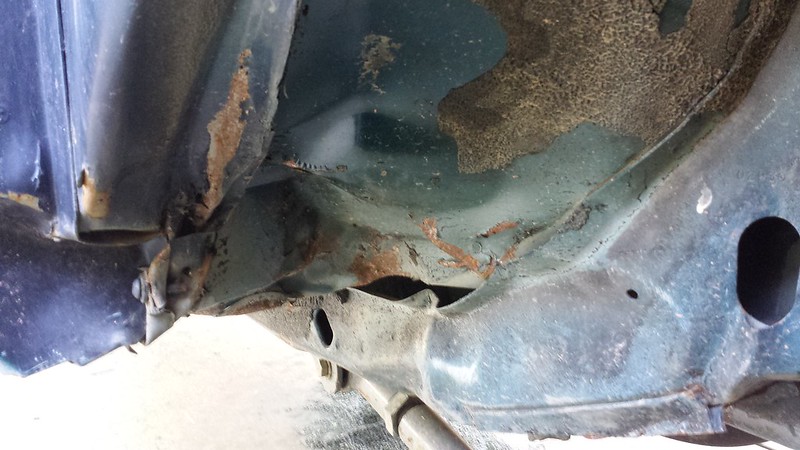
It's hard to tell somewhat from the pictures, but the frame in that area had seen better days. So what were the plans? Cutting, replacing, a bit of massaging, and frame stiffeners.
Mind you, I wanted this to be body shop good, with no body shop skills
I refused to cut corners, and take my time. I won't lie, I've got probably over a hundred hours into this thing already from just bodywork.
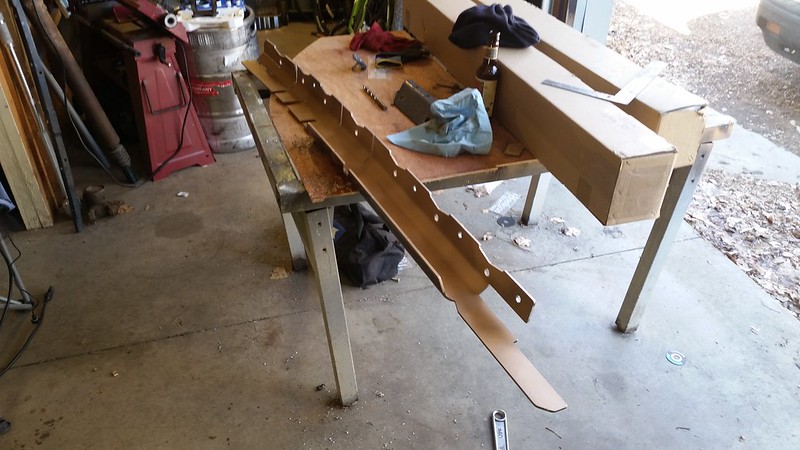
Luckily, Sam had a donor XJ he was keeping at my house for a few, before he got a few more things off it and we took it to scrap. So, I robbed the section of floorboard I needed.
From there, LOTS of cutting, measuring (repeat that about 13454 times), welding, and so on.
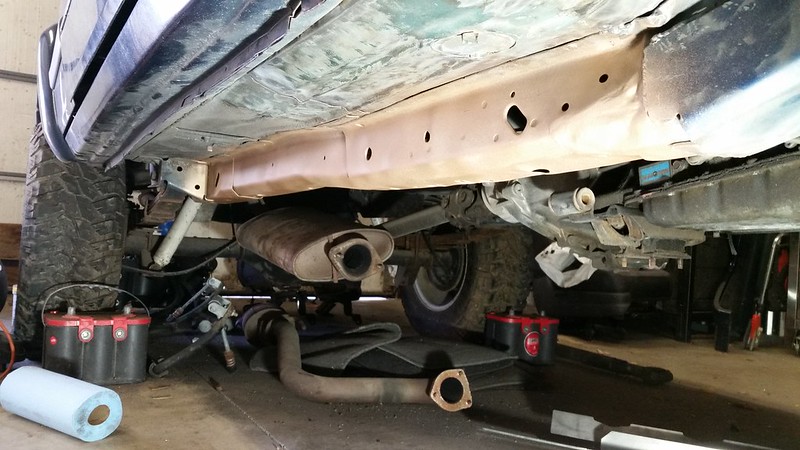
So, first things first was some cutting to get at the root of things:
Removed the LCA brackets with a spot weld bit, and you can kind of see the frame wrinkles in these pictures:
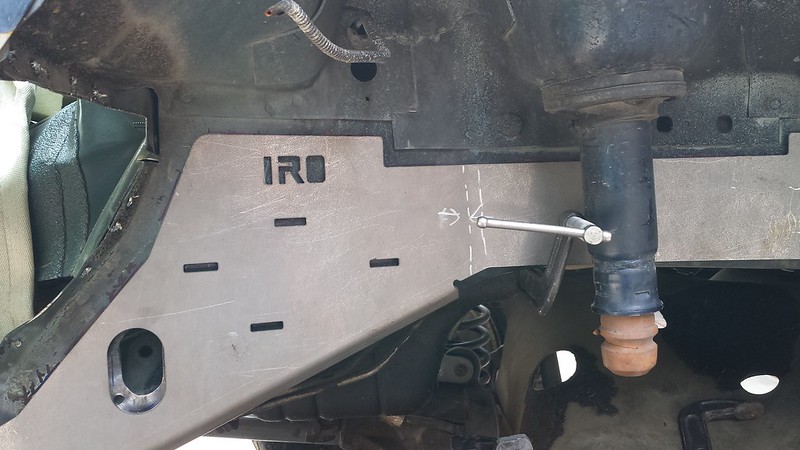
I was able to use my oxy/acetylene torch, some hammers, and some hydraulics to get things pretty well smoothed back out, and looking good. Next was prep for the Passenger side frame stiffener. I used IRO, but had Josh at Hooligan had his released when I bought these, I would have gone with him.
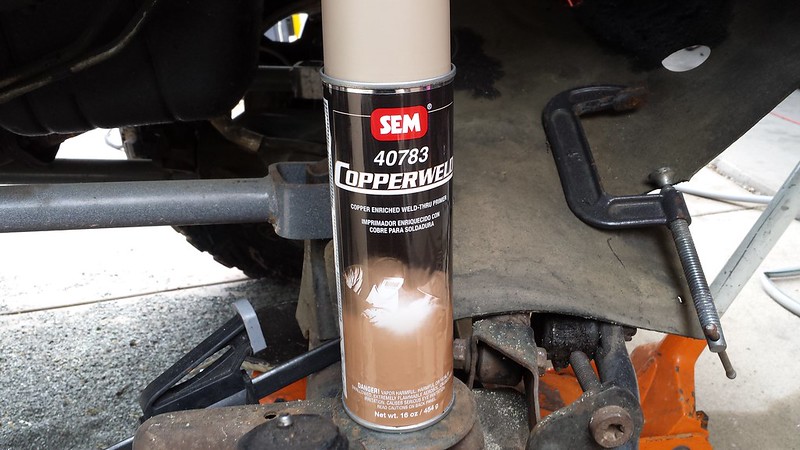
Prep for the frame stiffener. Bright Idea to mark with a paint pen where paint needed to be removed to weld. Well, with my weld on primer that wasn't too bright of an idea.
This stuff is what I'm surprised I don't see more people using. Yeah, it's expensive at $30 a can, but so is replacing stuff because it's rusting from the inside out. Everything I do around this, get a coat of this stuff. Do it right once, and be DONE!
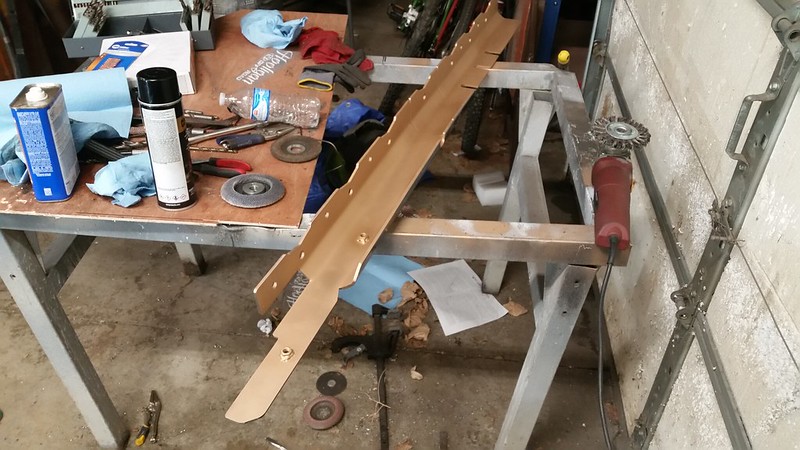
Getting bent up (wish they came bent to match, that's a PITA):
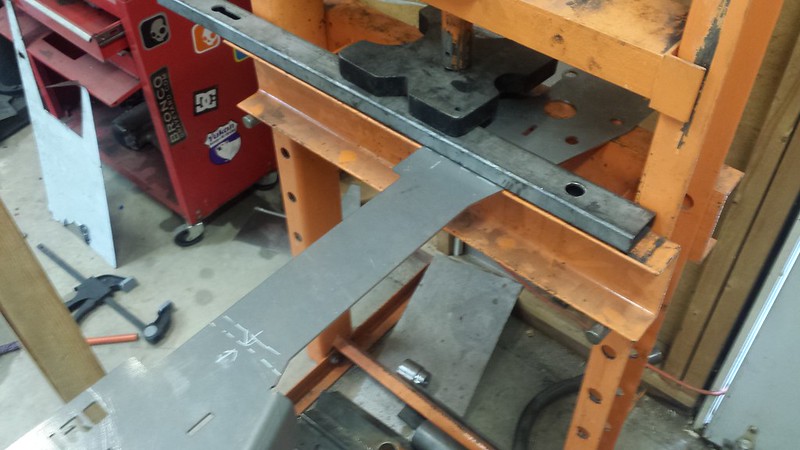
Prepped (Inside Surface):
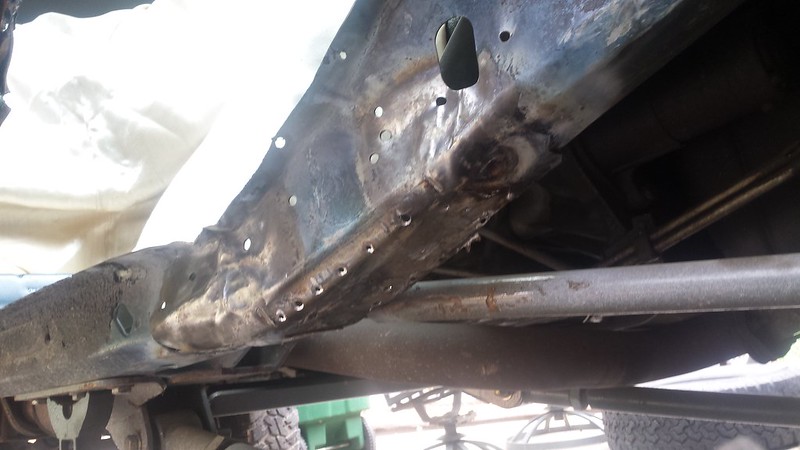
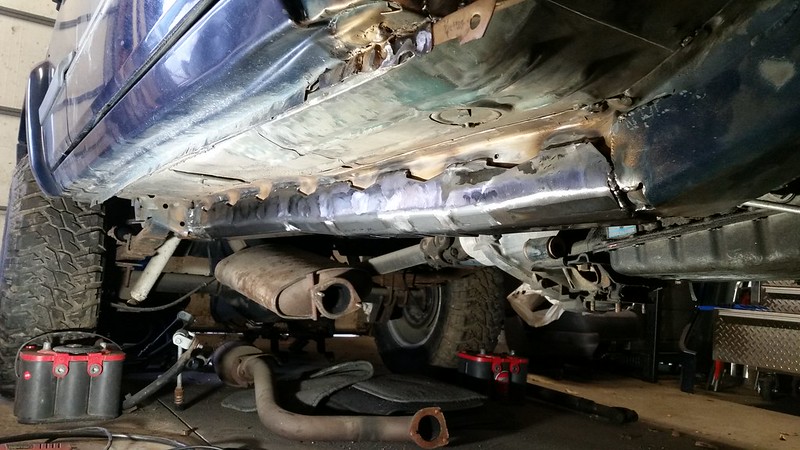
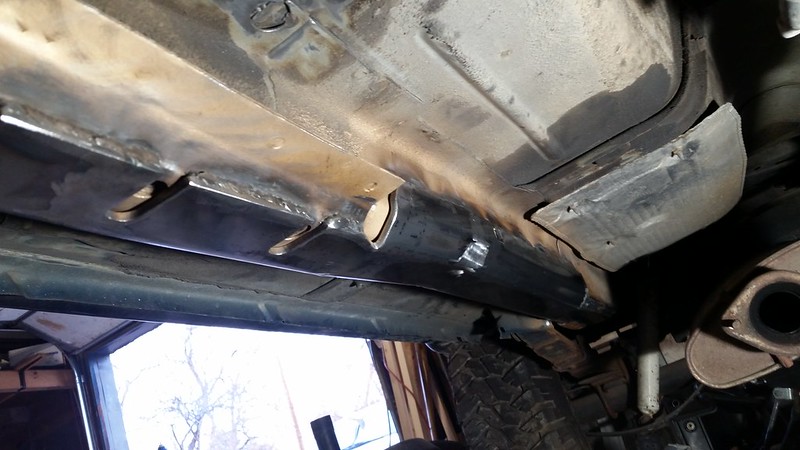
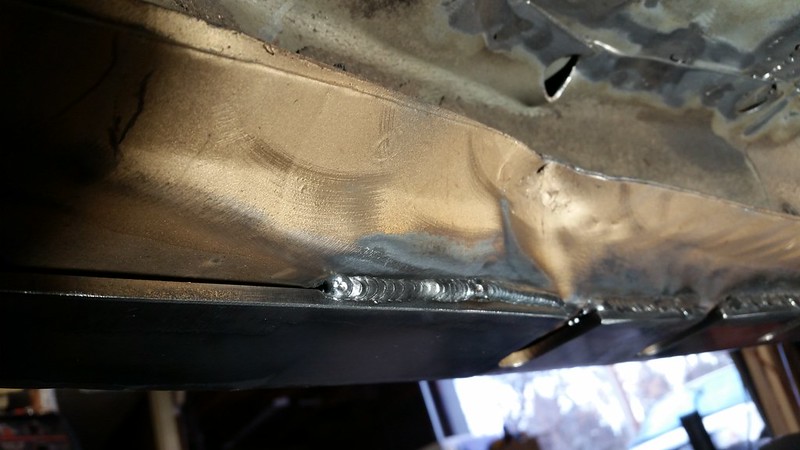
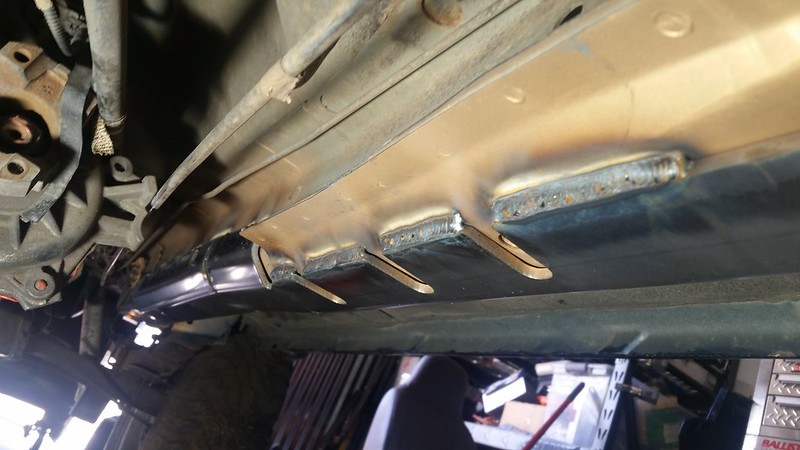
And mounted/welded (it's been a while since I've welded to the unibody, got better as time went on):
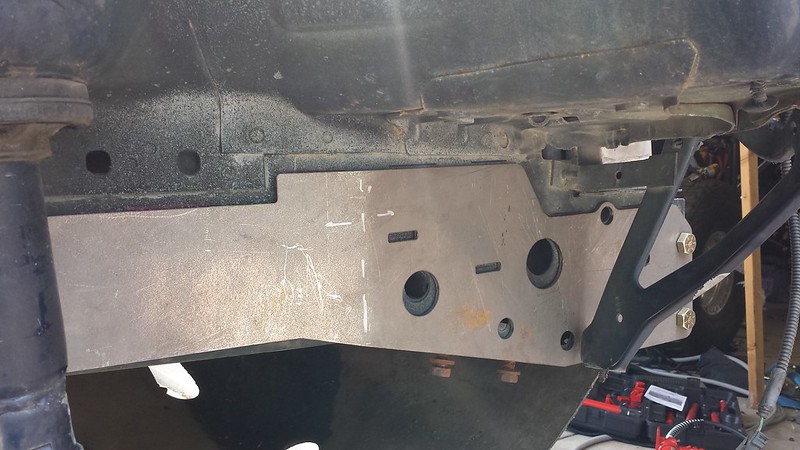
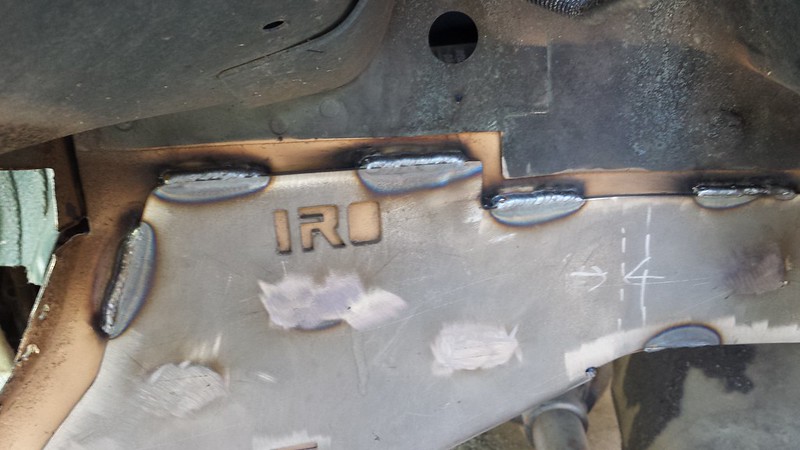
There were some fitment issues that had to be dealt with, some from the frame still, and never going to be, 100%, and then the stiffeners ran a little long in the flat plane on the bottom.
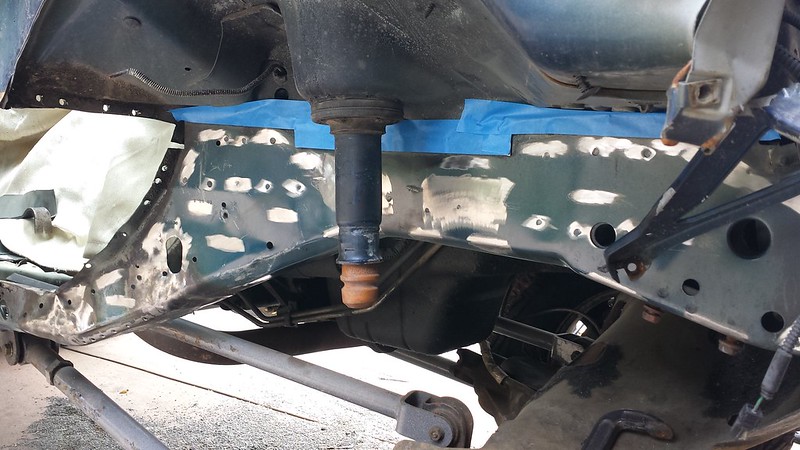
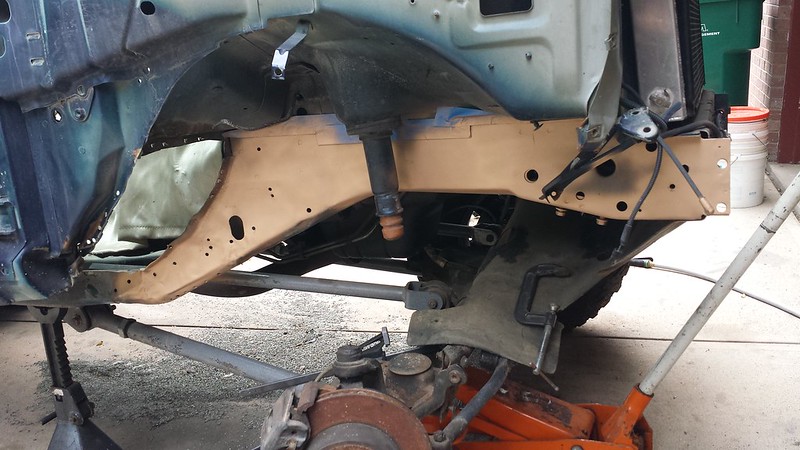
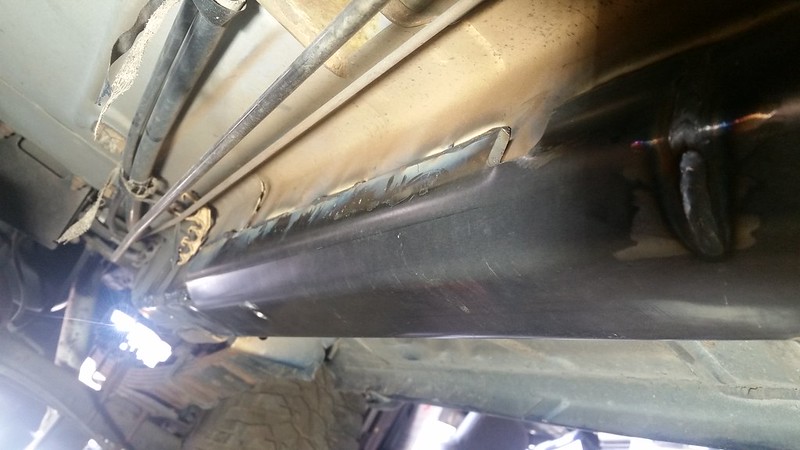
All cleaned up (Flap Disc'd and Self Etching primer)
Threw on some color match paint and called it done, for now.
Bought a house, continued to wheel, work on and build the buggy, and go married.
This was originally to be the wife's rig, but she now has a '96. This will allow us to take both out, the dogs, and get her back into wheeling (since we have two dogs she doesn't come out on buggy trips much at all).
So, from where I started, until today, unfortunately has been the bulk of the work. To make matters worse, this isn't the sexy, step back and go "hell yeah!" work...this has been getting it to square one-ish...bodywork.
So, I'll let pictures do some talking.
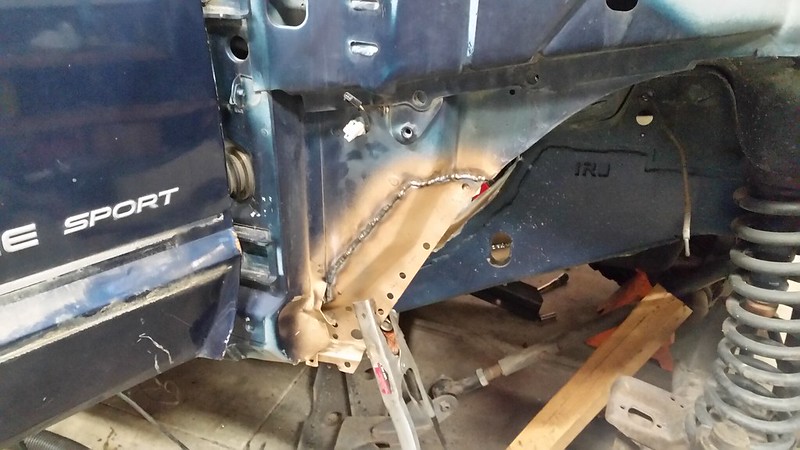
What I started out with. You can see how far that tire got pushed into the wheel well:
It's hard to tell somewhat from the pictures, but the frame in that area had seen better days. So what were the plans? Cutting, replacing, a bit of massaging, and frame stiffeners.
Mind you, I wanted this to be body shop good, with no body shop skills
I refused to cut corners, and take my time. I won't lie, I've got probably over a hundred hours into this thing already from just bodywork.
Luckily, Sam had a donor XJ he was keeping at my house for a few, before he got a few more things off it and we took it to scrap. So, I robbed the section of floorboard I needed.
From there, LOTS of cutting, measuring (repeat that about 13454 times), welding, and so on.
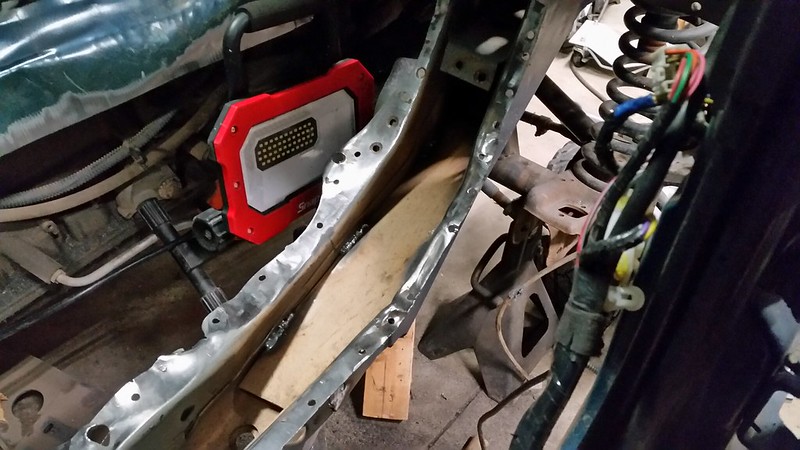
So, first things first was some cutting to get at the root of things:
Removed the LCA brackets with a spot weld bit, and you can kind of see the frame wrinkles in these pictures:
I was able to use my oxy/acetylene torch, some hammers, and some hydraulics to get things pretty well smoothed back out, and looking good. Next was prep for the Passenger side frame stiffener. I used IRO, but had Josh at Hooligan had his released when I bought these, I would have gone with him.
Prep for the frame stiffener. Bright Idea to mark with a paint pen where paint needed to be removed to weld. Well, with my weld on primer that wasn't too bright of an idea.
This stuff is what I'm surprised I don't see more people using. Yeah, it's expensive at $30 a can, but so is replacing stuff because it's rusting from the inside out. Everything I do around this, get a coat of this stuff. Do it right once, and be DONE!
Getting bent up (wish they came bent to match, that's a PITA):
Prepped (Inside Surface):
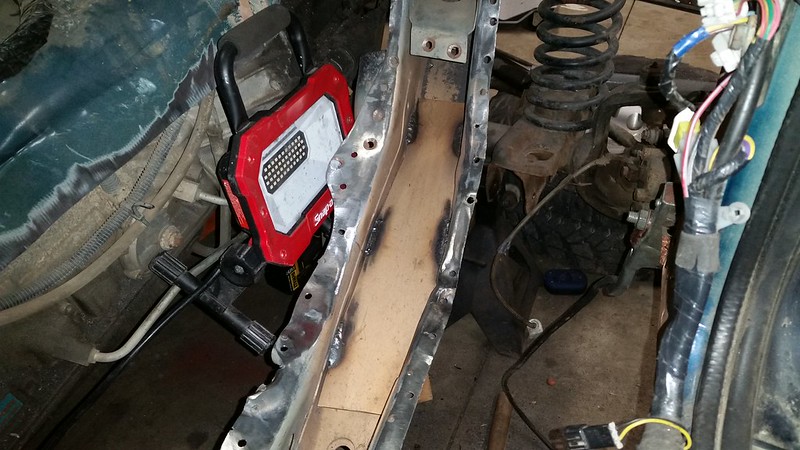
And mounted/welded (it's been a while since I've welded to the unibody, got better as time went on):
There were some fitment issues that had to be dealt with, some from the frame still, and never going to be, 100%, and then the stiffeners ran a little long in the flat plane on the bottom.
All cleaned up (Flap Disc'd and Self Etching primer)
Threw on some color match paint and called it done, for now.
11-17-2017, 02:49 PM
#3
Seasoned Member
Thread Starter
Join Date: Nov 2012
Location: Fort Collins, Colorado
Posts: 327
Likes: 0
Received 4 Likes
on
3 Posts
Year: 1998 (buggy), 1998 DD
Model: Cherokee
While that looked like "quick" work, that was probably several straight days of work to get to that point.
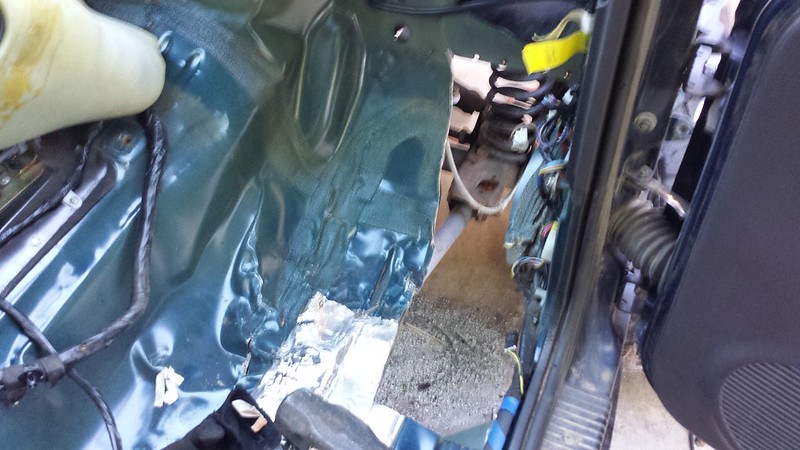
NOW came the time consumer...getting the floorboard and surrounding areas fixed.
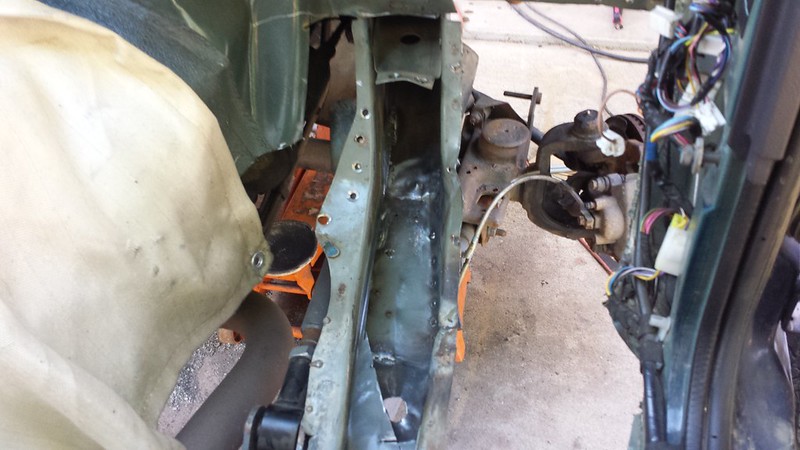
The pinch seam had been pushed in, the trans tunnel had some waves on the passenger side, it was...hell.
Interior brace of the frame rail cut out for massaging:
Redone with a thicker brace, all weld primed:
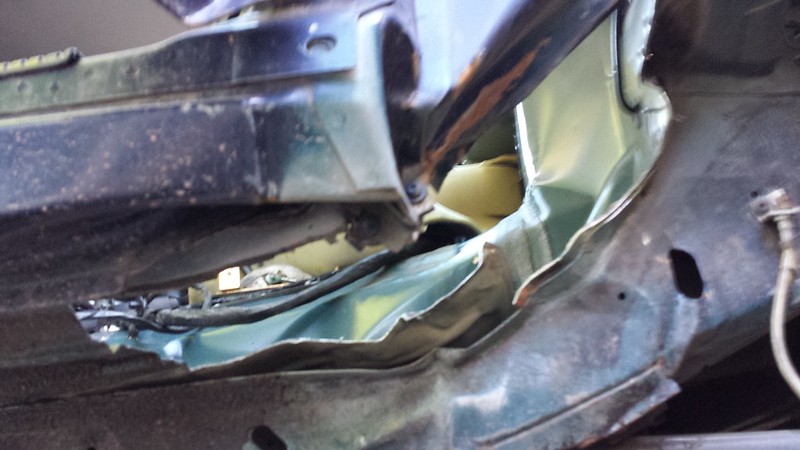
Then came the inner area and pinch seam. originally, I had planned on trying to pull this out and massage it some, since a bit of it would be covered by the fender.
Well, I decided against that and off I went...trying to be a body shop guy since I don't like compromise :laugh:
Old piece cut out and new one beginning to be grafted in:
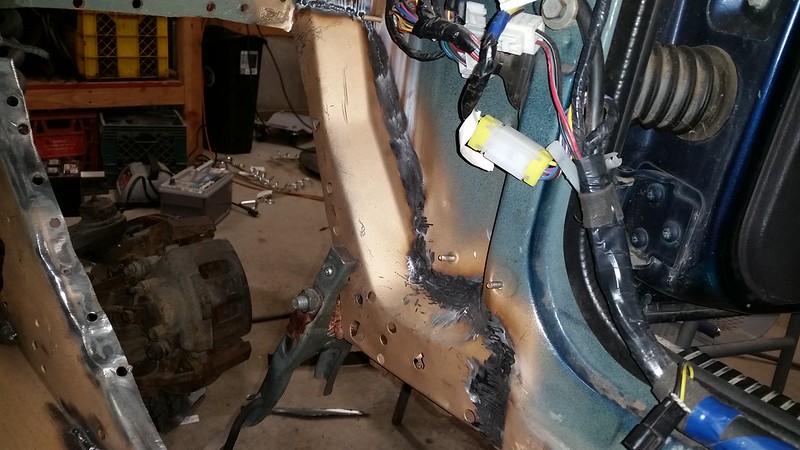
Don't have a good complete pic at the moment it looks like. But that part took a while since I used a flashlight to find any and all pin holes, to make sure the weld seam was 100%.
Next came the floorboard...and what an adventure that was. This took some ingenuity, some bolts to hold things in areas...and more.
Prepped the floor, frame, and surrounding areas (the brace piece got stripped to primer and repainted, since some crap got on it while it was still wet. Yes, though it will never be seen again, I still repainted it).
And then it began. Where I had weld seams, since I don't trust thin sheet metal to thin sheet metal, I also added double ups along the seams (everything weld primed).

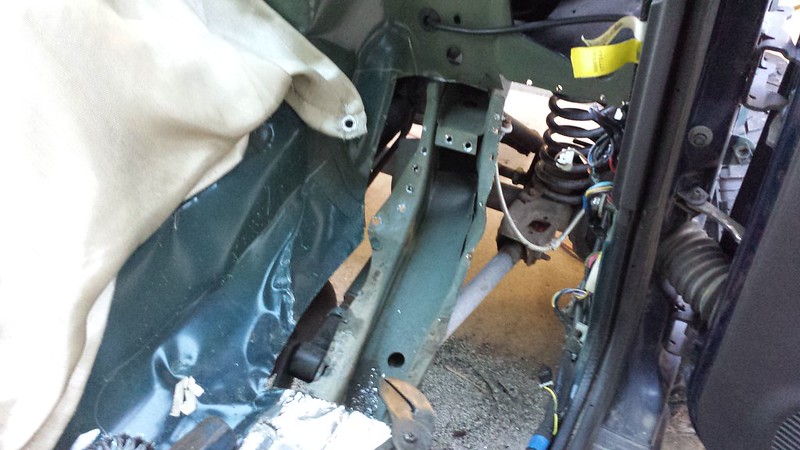
Starting to get cleaned up:
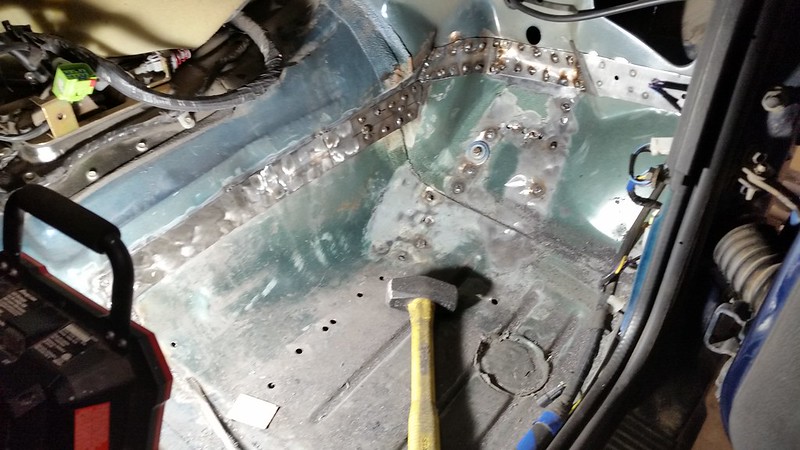
Mostly complete with holes filled and things smoothed out:
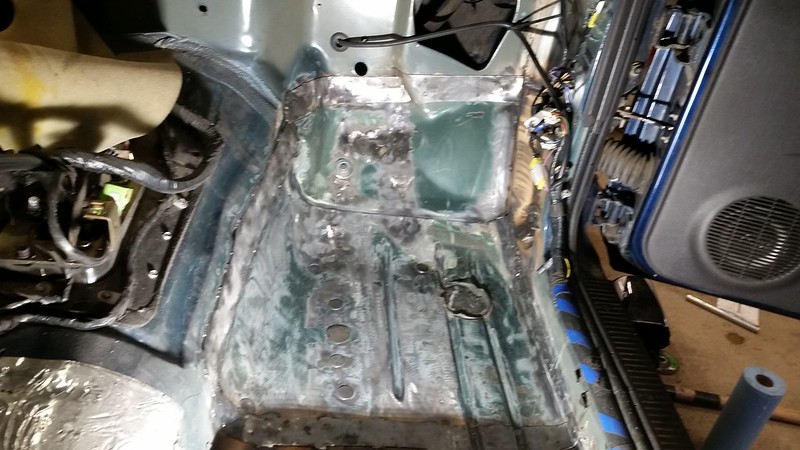
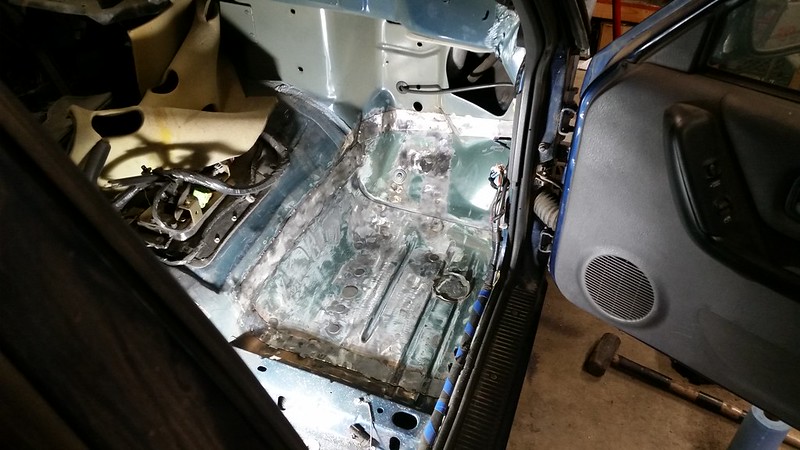
Next came copious amounts of seam sealer (on both sides). The bottom side of the floorboard and frame aren't really pictured, but lots of work on those sides as well.
It then got a coat of color match paint (not pictured).
NOW came the time consumer...getting the floorboard and surrounding areas fixed.
The pinch seam had been pushed in, the trans tunnel had some waves on the passenger side, it was...hell.
Interior brace of the frame rail cut out for massaging:
Redone with a thicker brace, all weld primed:
Then came the inner area and pinch seam. originally, I had planned on trying to pull this out and massage it some, since a bit of it would be covered by the fender.
Well, I decided against that and off I went...trying to be a body shop guy since I don't like compromise :laugh:
Old piece cut out and new one beginning to be grafted in:
Don't have a good complete pic at the moment it looks like. But that part took a while since I used a flashlight to find any and all pin holes, to make sure the weld seam was 100%.
Next came the floorboard...and what an adventure that was. This took some ingenuity, some bolts to hold things in areas...and more.
Prepped the floor, frame, and surrounding areas (the brace piece got stripped to primer and repainted, since some crap got on it while it was still wet. Yes, though it will never be seen again, I still repainted it).
And then it began. Where I had weld seams, since I don't trust thin sheet metal to thin sheet metal, I also added double ups along the seams (everything weld primed).
Starting to get cleaned up:
Mostly complete with holes filled and things smoothed out:
Next came copious amounts of seam sealer (on both sides). The bottom side of the floorboard and frame aren't really pictured, but lots of work on those sides as well.
It then got a coat of color match paint (not pictured
).
11-17-2017, 02:49 PM
#4
Seasoned Member
Thread Starter
Join Date: Nov 2012
Location: Fort Collins, Colorado
Posts: 327
Likes: 0
Received 4 Likes
on
3 Posts
Year: 1998 (buggy), 1998 DD
Model: Cherokee
So now that the floor was done, I could move onto other things.
I decided that since some of the frame damage was between the horizontal and transition to front section, mid-frame stiffeners would be good
Took a drive to see Josh at Hooligan, and headed home with some stiffeners.
The fit on the passenger side was good, not perfect though (not from his stuff, from the frame issues).
The driver's side, fit like a glove.
The entire frame got stripped via flap disks down to bare metal, weld primered, and so on.
Welding the stiffeners is farrrr easier with a flexible weld neck
Everything on the driver's side looks better, since it got done second.
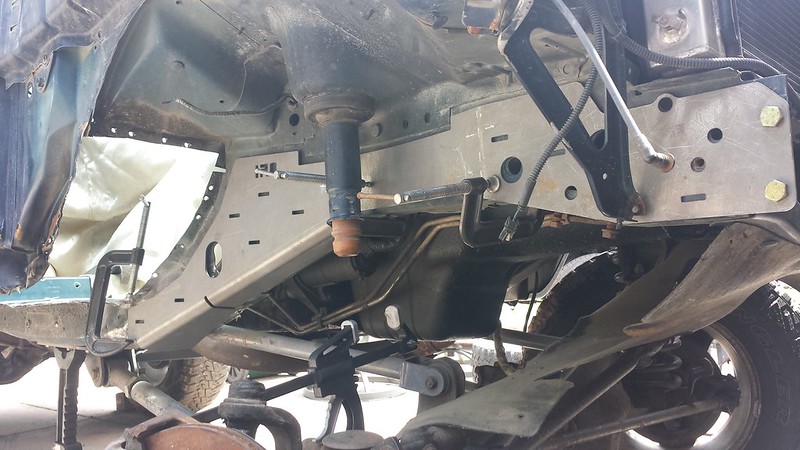
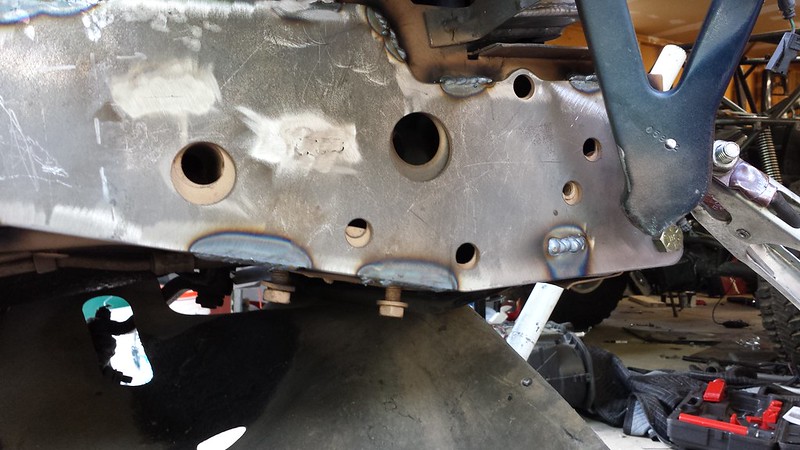
Driver's side front and mid stiffeners, as well as passenger side mid stiffener:
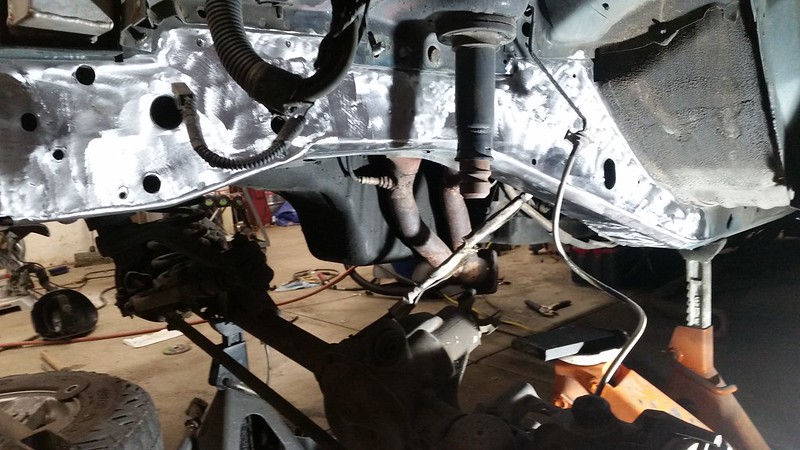
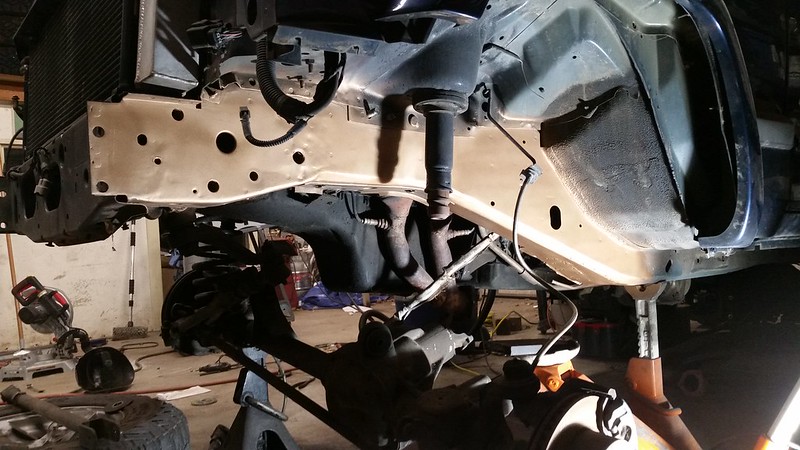
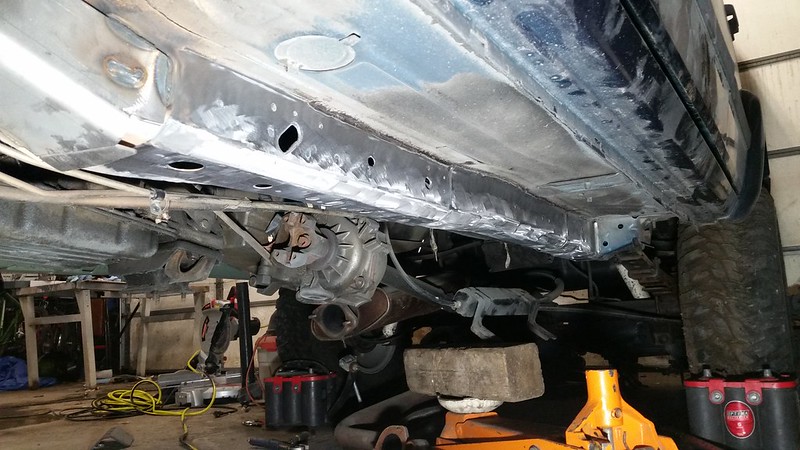

Missing some pictures but the front and mid frame stiffeners got tied together with fish plates, and everything got a coat of self etching primer.
A TON of work, in a small series of photos
I decided that since some of the frame damage was between the horizontal and transition to front section, mid-frame stiffeners would be good
Took a drive to see Josh at Hooligan, and headed home with some stiffeners.
The fit on the passenger side was good, not perfect though (not from his stuff, from the frame issues).
The driver's side, fit like a glove.
The entire frame got stripped via flap disks down to bare metal, weld primered, and so on.
Welding the stiffeners is farrrr easier with a flexible weld neck
Everything on the driver's side looks better, since it got done second.
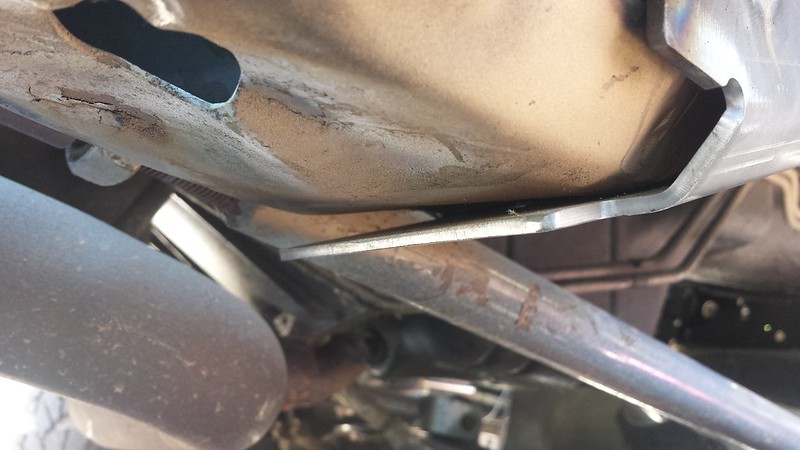
Driver's side front and mid stiffeners, as well as passenger side mid stiffener:
Missing some pictures but the front and mid frame stiffeners got tied together with fish plates, and everything got a coat of self etching primer.
A TON of work, in a small series of photos
11-17-2017, 02:50 PM
#5
Seasoned Member
Thread Starter
Join Date: Nov 2012
Location: Fort Collins, Colorado
Posts: 327
Likes: 0
Received 4 Likes
on
3 Posts
Year: 1998 (buggy), 1998 DD
Model: Cherokee
So, that kinda sorta bring me to now. Those photos were a couple years worth of work time wise. As mentioned, quite a bit going on between those two.
Now, I plan on having this done by Spring, to get it out on the trails and have a 4x4 daily driver again.
It sat outside for a...while...while the buggy got some attention, and since the buggy lives where it's currently parked.
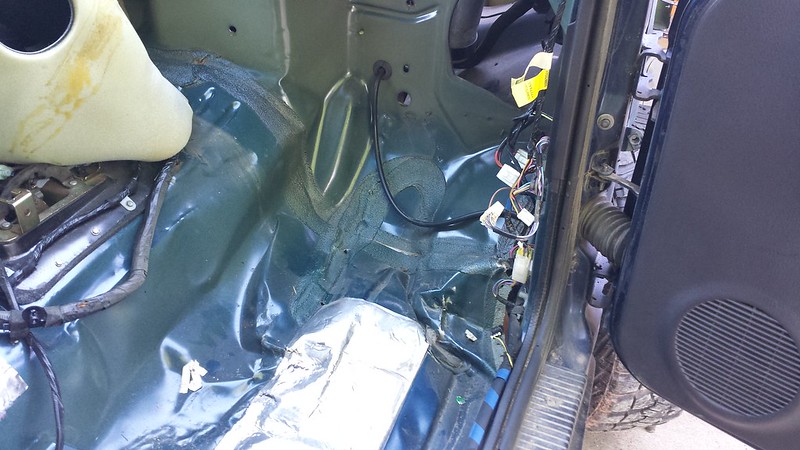
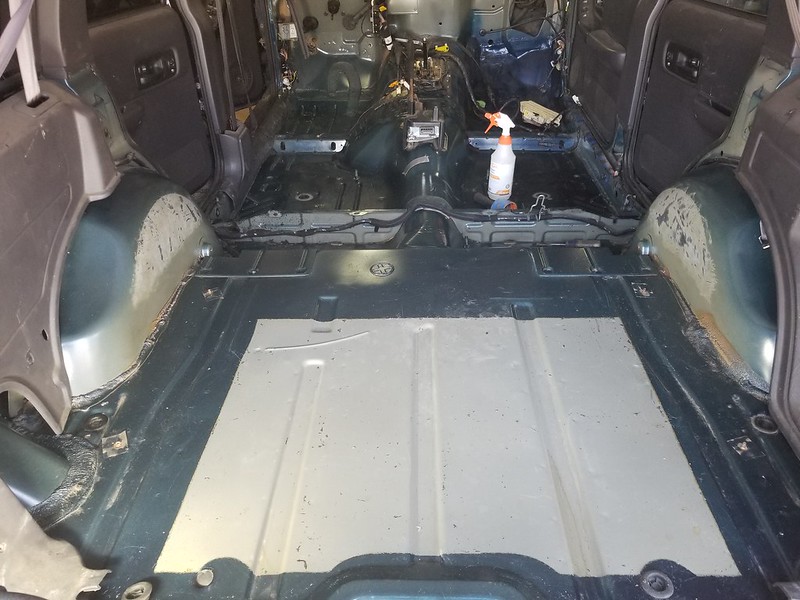
Got it pulled back in, and pulled all the interior out 100% (most of it was just sitting inside the rig disconnected, including the dash).
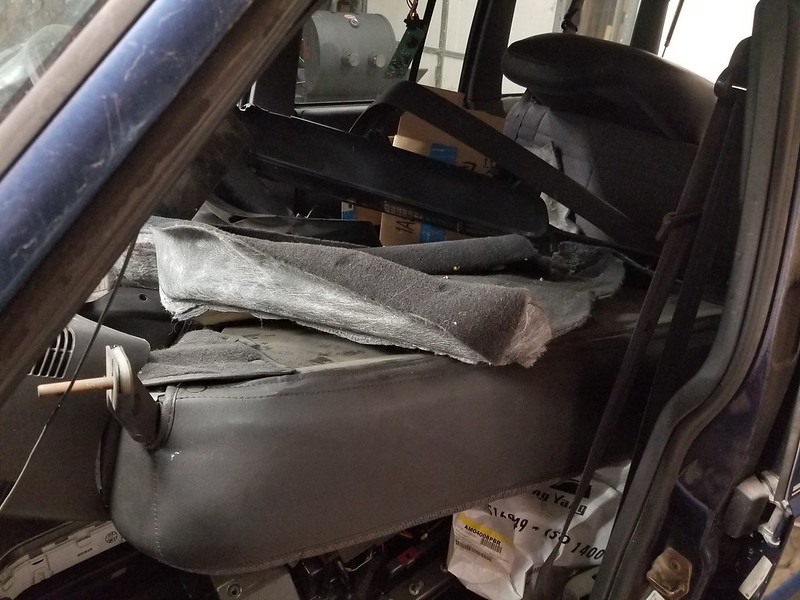
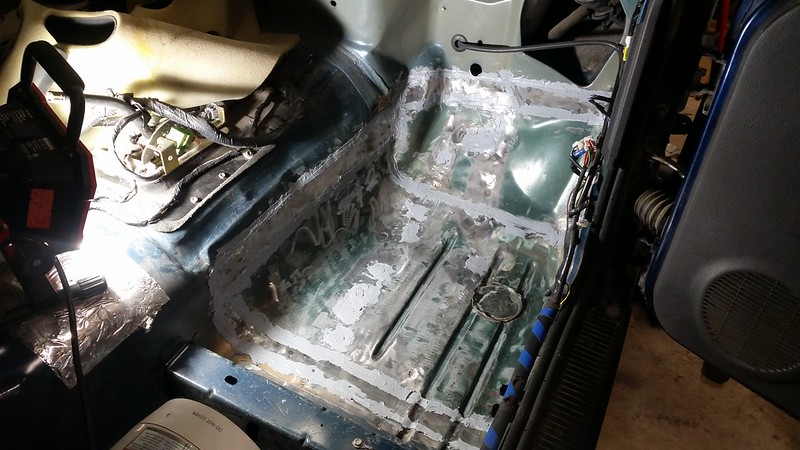
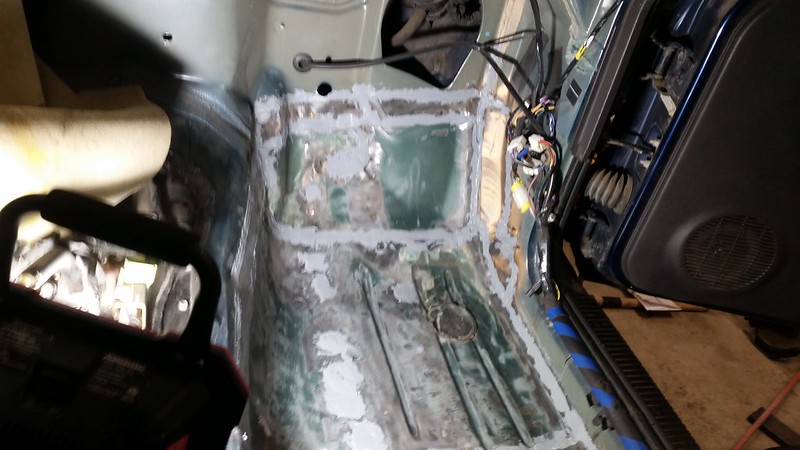
Next steps are removing the sound deadening stuff that was OEM. (the foil backed pieces, as well as the trunk section and small sections over the wheel wells).
I made the mistake of trying this normally, forgot how tar-like this stuff is.
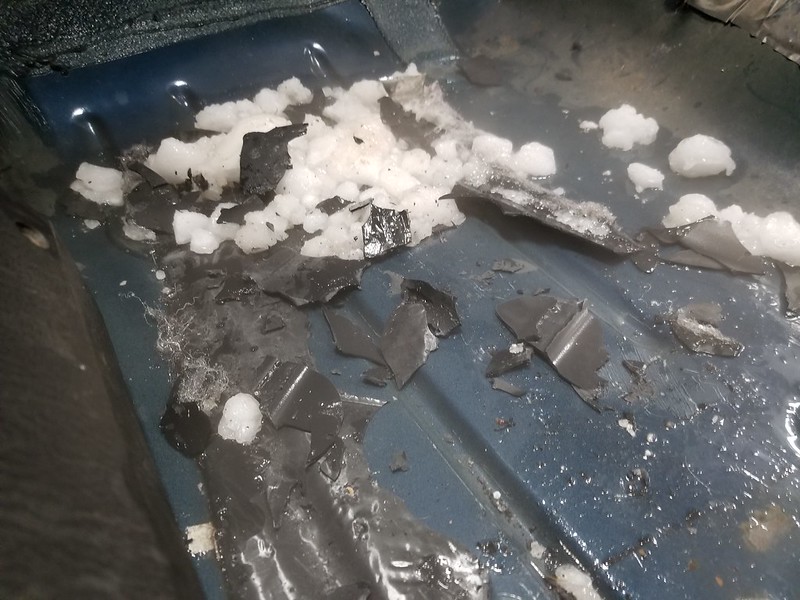
Then, I remember seeing some videos a couple months back...using Dry Ice and Isopropyl alcohol
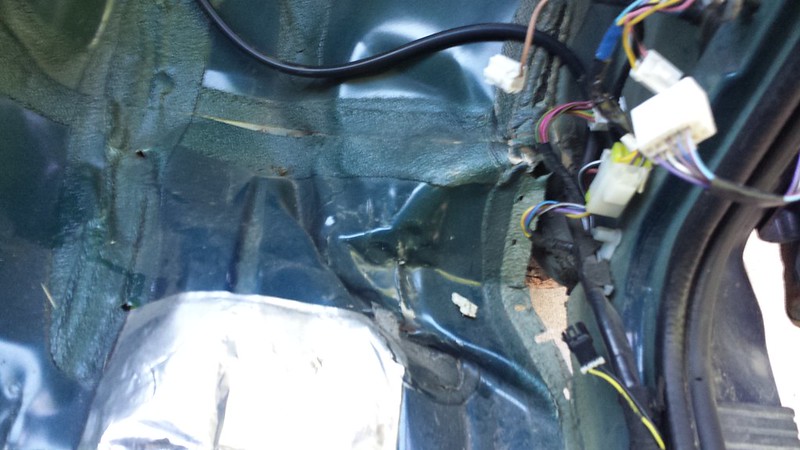
Mix the two, pour it on top, and the stuff chisels right off. The foil backed stuff comes off FAR easier, but is still some work. The stuff in the trunk...the cracking of it is cool to hear, then it comes up in a matter of seconds.
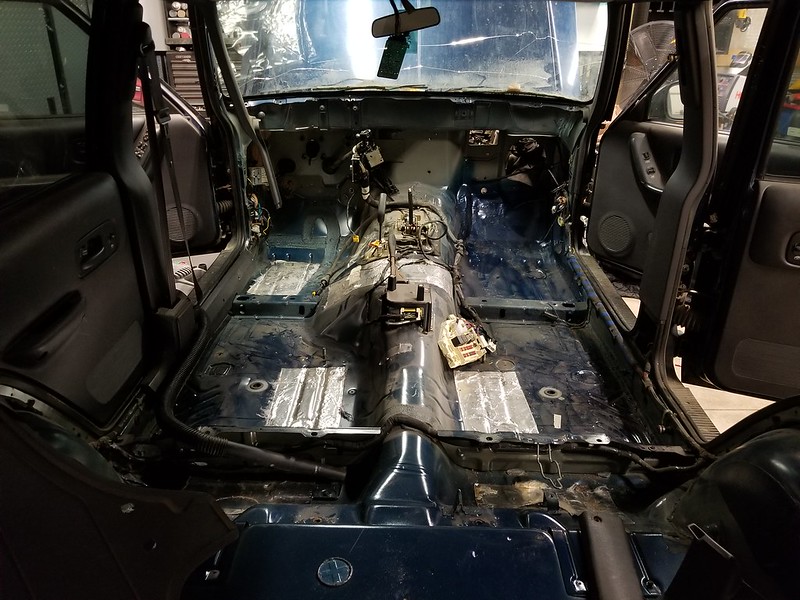
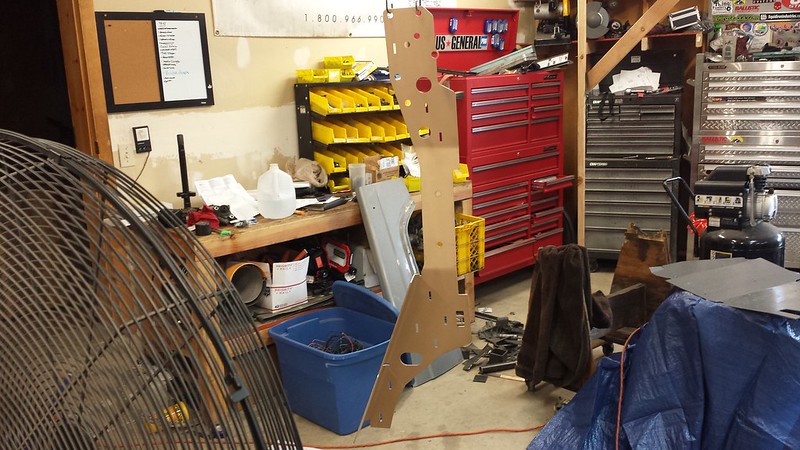
Old, crappy method:
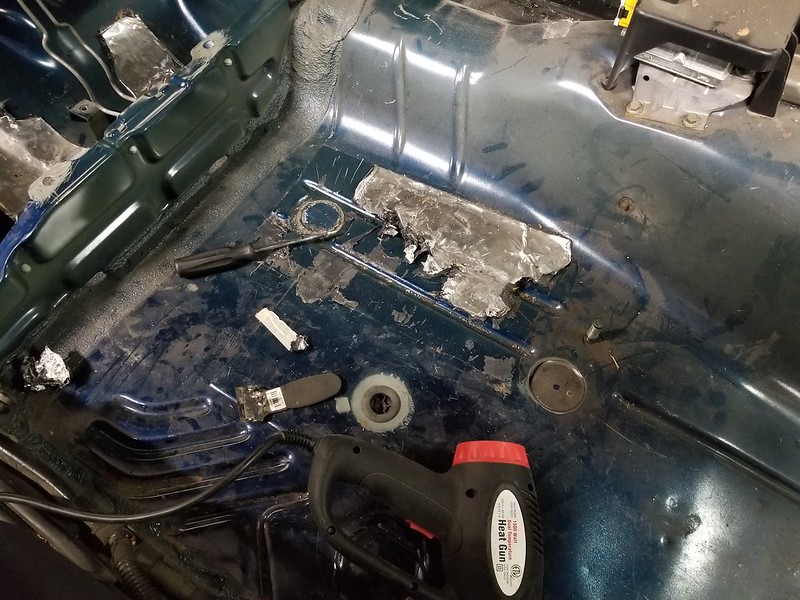
New, much quicker and cleaner method:

So that's where I'm at now. I should have the small amount I have left pulled by the end of this weekend.
From there, it will get a full three stage sound deadening. Note, no matter how you do it (the proper way), its not cheap.
First to go down will be the CLD tiles. From there, closed cell foam and mass loaded vinyl. As well, door and headliner will receive (not right away) treatment including butyl rope and hydrophobic melamine. This will be the guinea pig before I do my tow rig at some point ('99 F-350 Superduty). The sound deadening will cost me in the neighborhood of $600+. I'm not using the generic Dynamat, Fatmat, etc.
Now, I plan on having this done by Spring, to get it out on the trails and have a 4x4 daily driver again.
It sat outside for a...while...while the buggy got some attention, and since the buggy lives where it's currently parked.
Got it pulled back in, and pulled all the interior out 100% (most of it was just sitting inside the rig disconnected, including the dash).
Next steps are removing the sound deadening stuff that was OEM. (the foil backed pieces, as well as the trunk section and small sections over the wheel wells).
I made the mistake of trying this normally, forgot how tar-like this stuff is.
Then, I remember seeing some videos a couple months back...using Dry Ice and Isopropyl alcohol
Mix the two, pour it on top, and the stuff chisels right off. The foil backed stuff comes off FAR easier, but is still some work. The stuff in the trunk...the cracking of it is cool to hear, then it comes up in a matter of seconds.
Old, crappy method:
New, much quicker and cleaner method:
So that's where I'm at now. I should have the small amount I have left pulled by the end of this weekend.
From there, it will get a full three stage sound deadening. Note, no matter how you do it (the proper way), its not cheap.
First to go down will be the CLD tiles. From there, closed cell foam and mass loaded vinyl. As well, door and headliner will receive (not right away) treatment including butyl rope and hydrophobic melamine. This will be the guinea pig before I do my tow rig at some point ('99 F-350 Superduty). The sound deadening will cost me in the neighborhood of $600+. I'm not using the generic Dynamat, Fatmat, etc.
11-18-2017, 11:33 AM
#6
CF Veteran
Join Date: Dec 2011
Location: PA KOTUFU!
Posts: 1,777
Likes: 0
Received 16 Likes
on
15 Posts
Year: 1998
Engine: 4.0L 162,000
Looks great!! and you said you weren't a bodyman.
Very smart doing the frame stiffners and sound deadening. Usually everyone starts with a BIG subwoofer in the back, ha.
Very smart doing the frame stiffners and sound deadening. Usually everyone starts with a BIG subwoofer in the back, ha.
02-05-2018, 01:34 PM
#7
Seasoned Member
Thread Starter
Join Date: Nov 2012
Location: Fort Collins, Colorado
Posts: 327
Likes: 0
Received 4 Likes
on
3 Posts
Year: 1998 (buggy), 1998 DD
Model: Cherokee
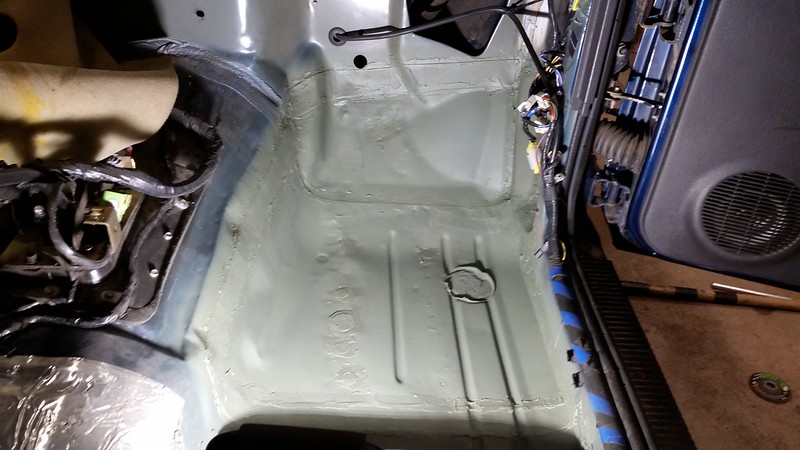
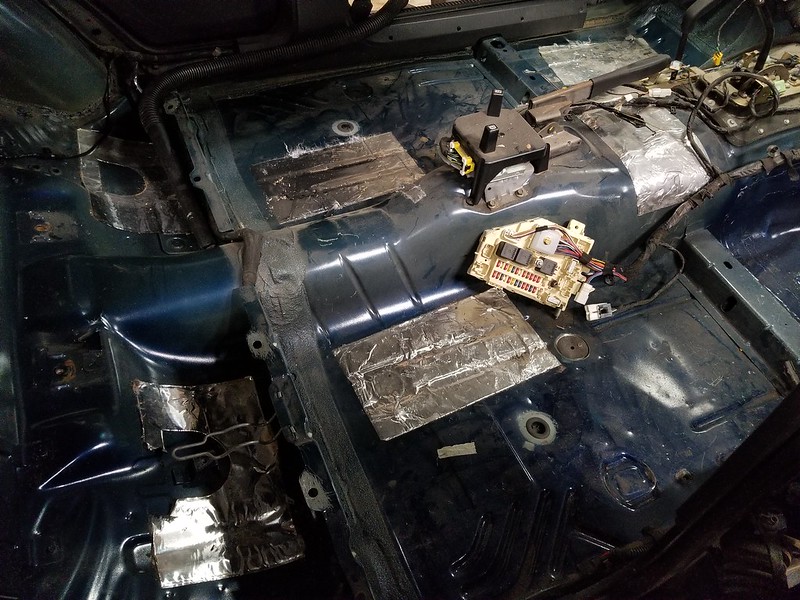
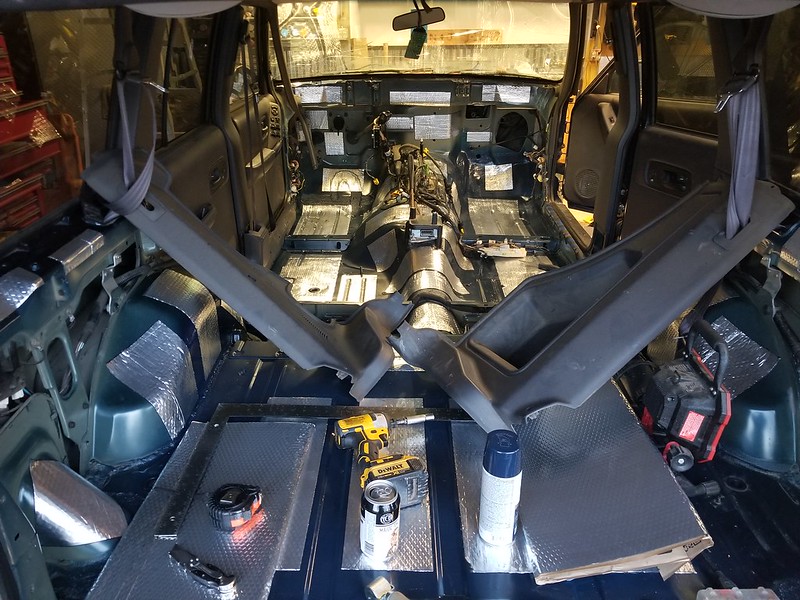
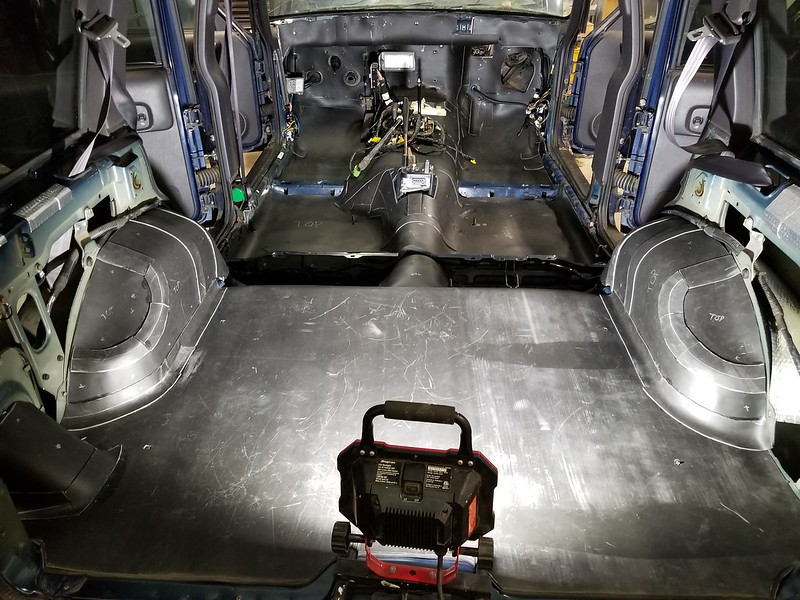
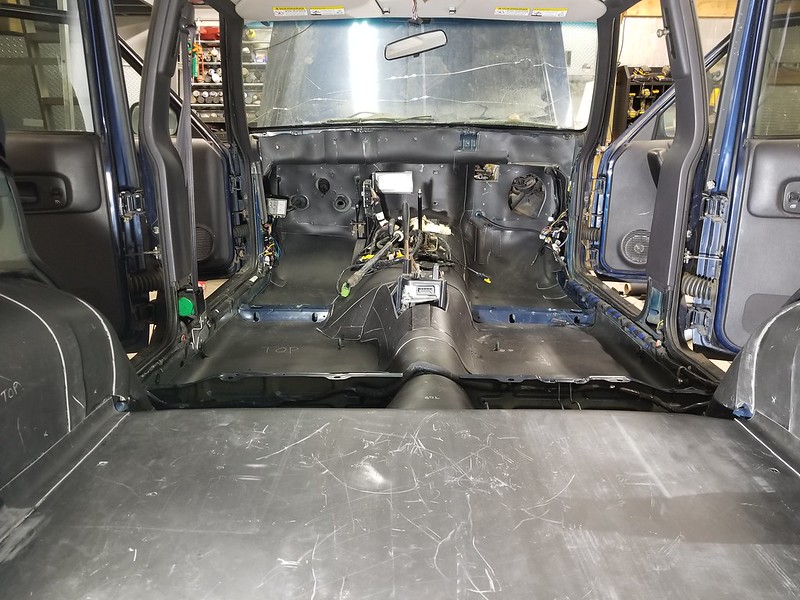
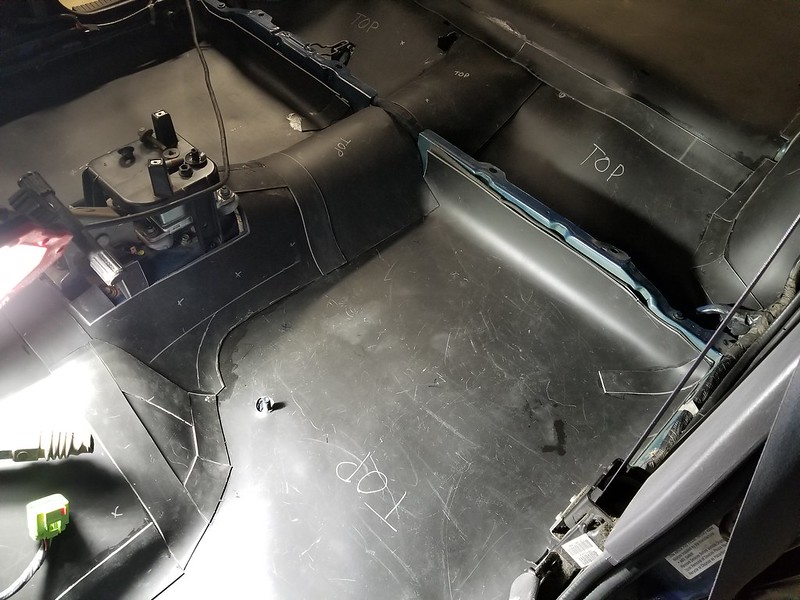
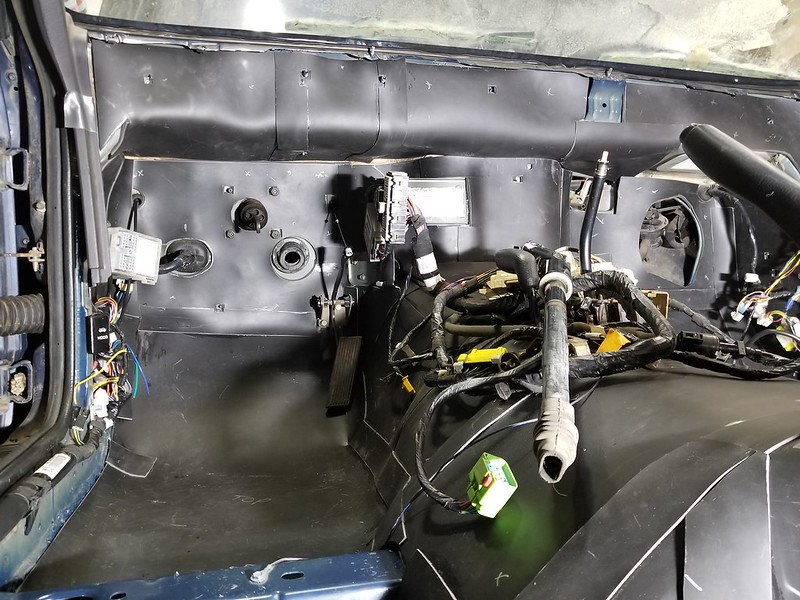
Finally got the interior sound deadening for the floor and firewall complete.
I've got the headliner ready to drop down and get CLD tiles on the roof, and then back the headliner with 3M Thinsulate Acoustic.
The sound deadening wasn't too bad, just tedious and time consuming.
I can go into more detail, and my methods of doing it if anyone is interested.
It's much like the Sound Deadening Showdown method, with a couple tweaks that to me, made install easier and more efficient.
Pics:
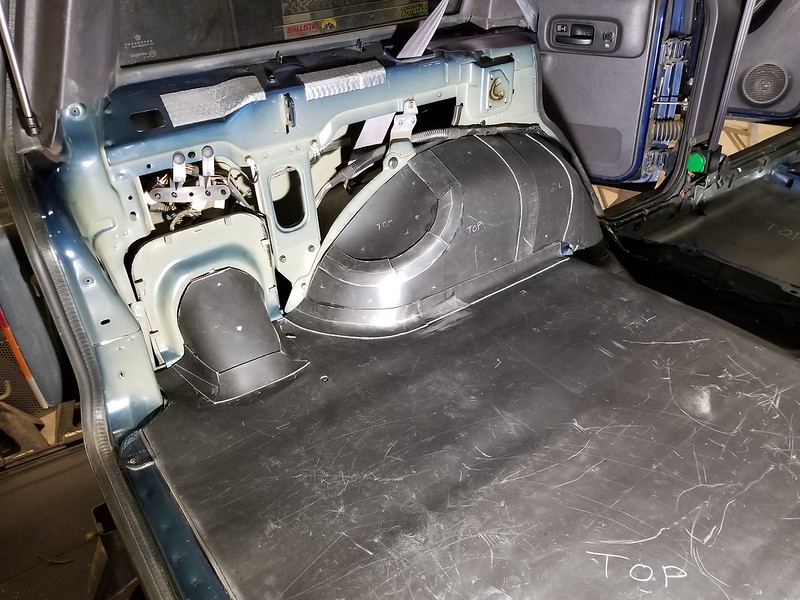
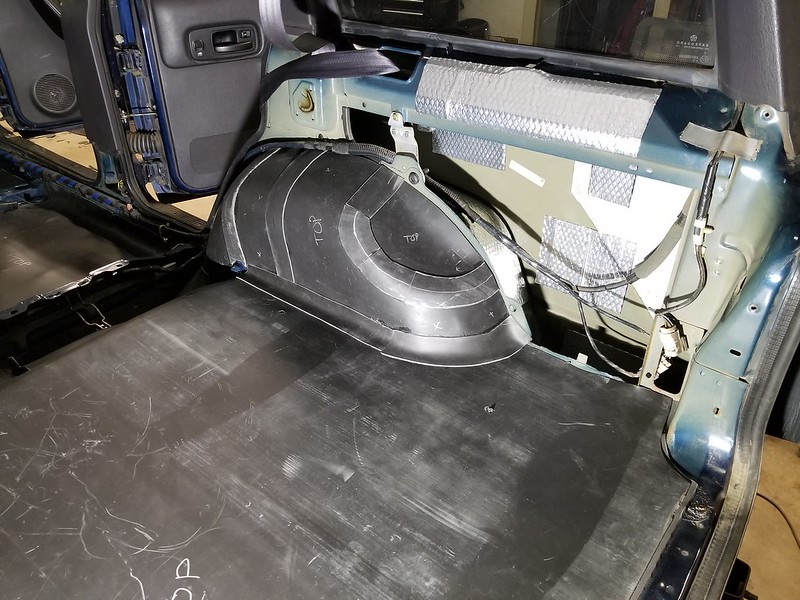
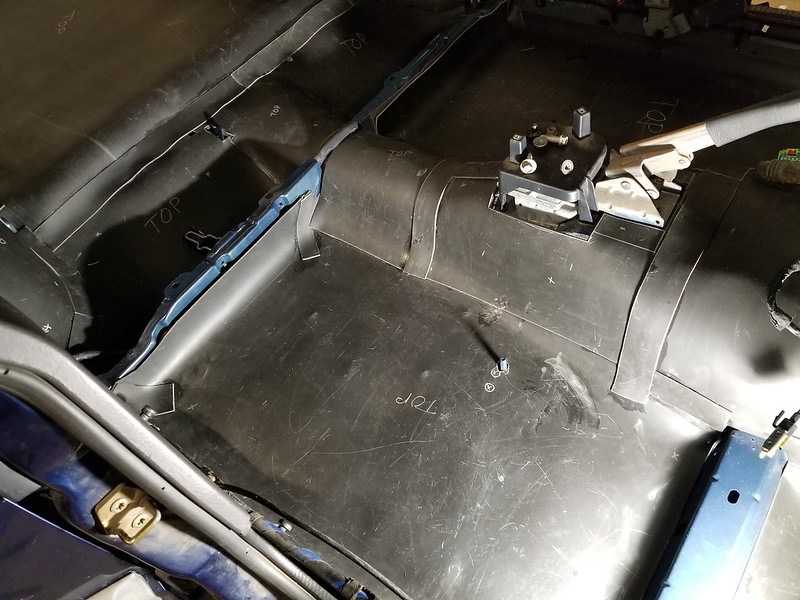
Interior pretty well cleaned up, all OEM deadening and butyl tiles removed:
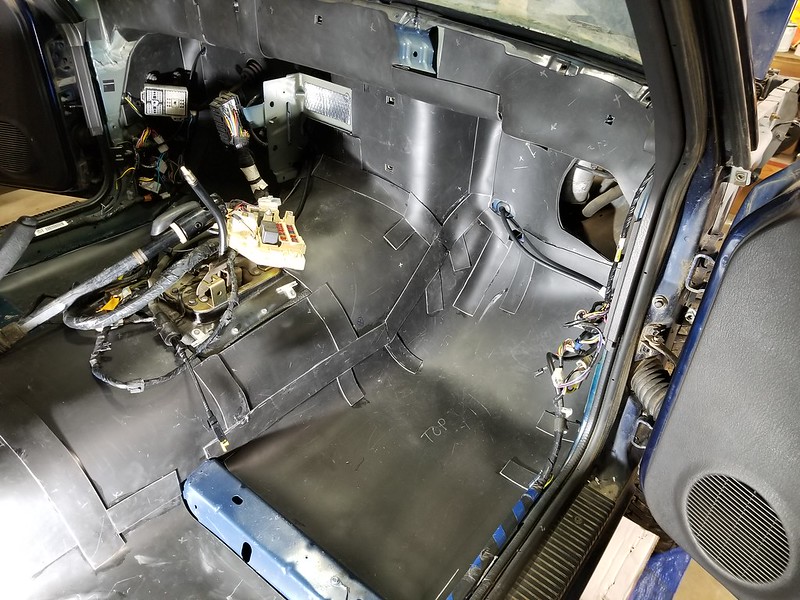
CLD Tiles installed, sorry I realized this is the only picture I got. I wen't a little more overboard then really needed.
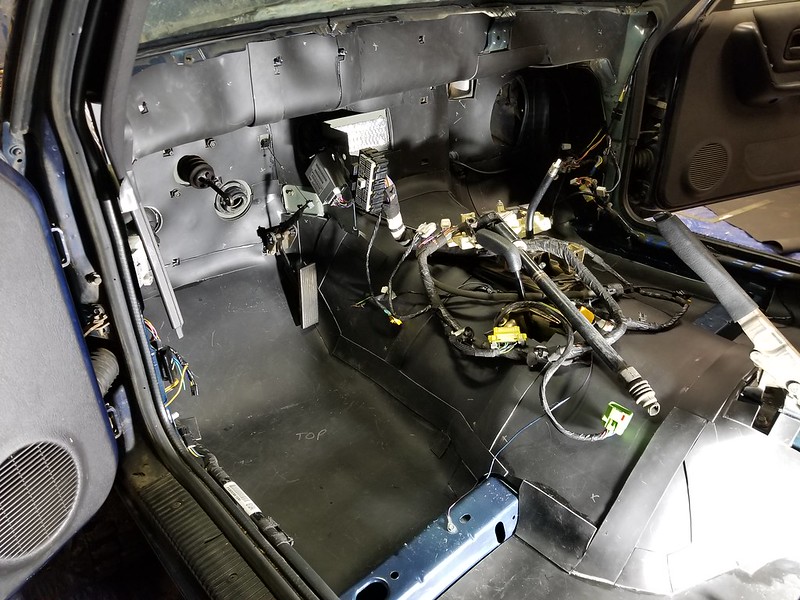
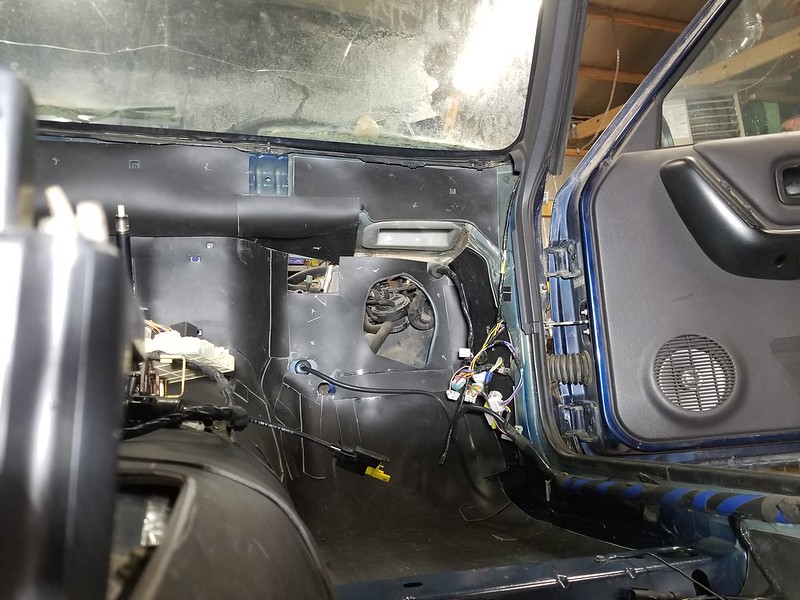
While I'm doing the headliner, I've also got the Heater Box torn apart.
Going to make all new foam seals, and give it a good once over and clean up inside and out. I looked at the heater core, still looks just fine, and isn't clogged. No leaks on it, so it'll go back in. The evaporator looks great as well, so right now no changes to the heater box really needed.
Hoping to get the following done this week:
- Headliner/Roof sound deadening
- Rear Quarter sound deadening
- Heater Box Re-Installed
- All Carpet and Trim back in
- Dash re-installed.
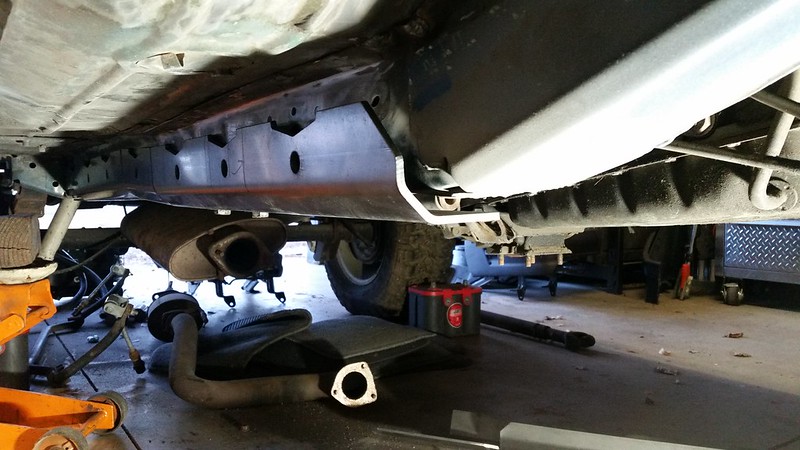
From there, some exhaust stuff and fuel clean out and she should be ready to start up again!
I've got the headliner ready to drop down and get CLD tiles on the roof, and then back the headliner with 3M Thinsulate Acoustic.
The sound deadening wasn't too bad, just tedious and time consuming.
I can go into more detail, and my methods of doing it if anyone is interested.
It's much like the Sound Deadening Showdown method, with a couple tweaks that to me, made install easier and more efficient.
Pics:
Interior pretty well cleaned up, all OEM deadening and butyl tiles removed:
CLD Tiles installed, sorry I realized this is the only picture I got. I wen't a little more overboard then really needed.
While I'm doing the headliner, I've also got the Heater Box torn apart.
Going to make all new foam seals, and give it a good once over and clean up inside and out. I looked at the heater core, still looks just fine, and isn't clogged. No leaks on it, so it'll go back in. The evaporator looks great as well, so right now no changes to the heater box really needed.
Hoping to get the following done this week:
- Headliner/Roof sound deadening
- Rear Quarter sound deadening
- Heater Box Re-Installed
- All Carpet and Trim back in
- Dash re-installed.
From there, some exhaust stuff and fuel clean out and she should be ready to start up again!
Trending Topics
 02-05-2018, 04:22 PM
#10
CF Veteran
That thing has more insulation then most new cars! I like it. Curious to see how it actually works out. Does that stuff have an adhesive backing or do you have to spray something on them to make them stick?
02-05-2018, 05:14 PM
#11
Seasoned Member
Thread Starter
Join Date: Nov 2012
Location: Fort Collins, Colorado
Posts: 327
Likes: 0
Received 4 Likes
on
3 Posts
Year: 1998 (buggy), 1998 DD
Model: Cherokee
Something like that 
Thanks! I'd say it's not really overkill, that would be another layer added on top. I'll be looking to do possibly two layers in my tow rig (7.3L F-350).
It works extremely well (well, at least as far as I've seen). This is the actual way sound deadening is meant to be done, not the stick on dyamat crap.
Nothing has adhesive except the velcro used to "hold" it in place. In many areas (floor) the velcro isn't exactly necessary, but helps it from moving on it's own.
Its Closed Cell Foam (CCF) in between the body and the Mass Loaded Vinyl (MLV). The CLD tiles remove the vibration and resonance, the CCF acts as a barrier for the MLV which acts as the sound block. The CCF is very lightly tacked the the MLV with Vinyl Cement, just enough to hold it in place while installing. Then, where there are seams, you use strips of MLV to help create one solid barrier, without "leaks".
This link gives a pretty good outline, it's what I followed, until I found a way I preferred:
https://www.sounddeadenershowdown.com/
 Nice job.;..where do you find the time...