
Project "Hippo"...black 99 XJ

Thread Starter
CF Veteran
Joined: Jan 2011
Posts: 1,894
Likes: 4
From: Las Vegas
Year: 1999
Model: Cherokee
Engine: 4.0
Just the mounts.
Great mounts (did i mention awesome customer service )!
)!
I may try mount them on again now that the Jeep idle better.
LOTS of pics coming up on my lift installation....stay tuned
Great mounts (did i mention awesome customer service
)!I may try mount them on again now that the Jeep idle better.
LOTS of pics coming up on my lift installation....stay tuned
Last edited by BotakBeng; Mar 29, 2012 at 08:11 AM.

Banned
Joined: Oct 2009
Posts: 2,231
Likes: 1
From: West Springfield, MA
Year: 1999
Model: Cherokee
Engine: 4.0
x2 on the customer service Karol from Brown dog posted in my build thread cause she noticed i had installed the plate wrong and had me call her and we got it ll sorted out...plus its free shipping on everything...
Thread Starter
CF Veteran
Joined: Jan 2011
Posts: 1,894
Likes: 4
From: Las Vegas
Year: 1999
Model: Cherokee
Engine: 4.0
Was surprised when she call me back at 8pm (Las Vegas) shortly after i emailed her.
If you are reading this.....Great customer service/support Karol!!!
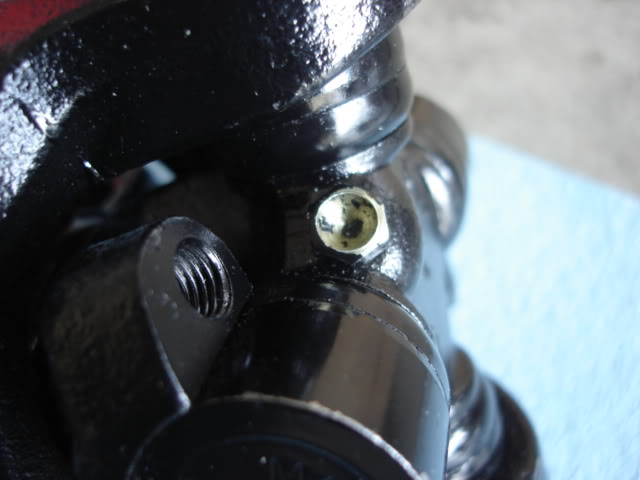
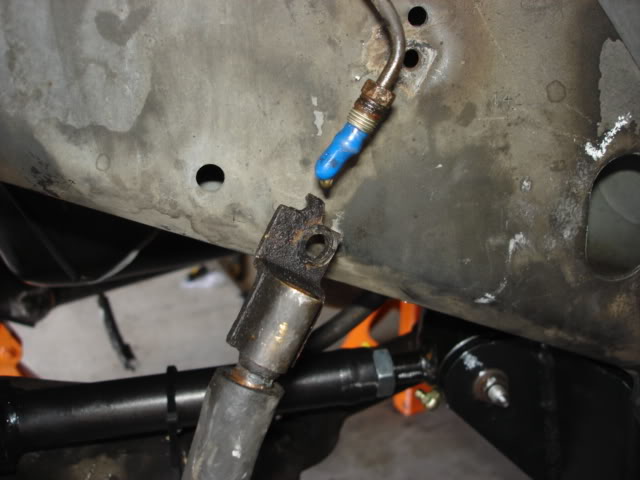
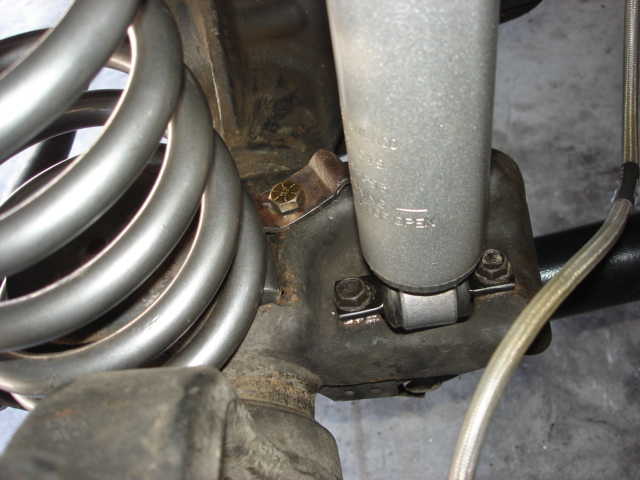
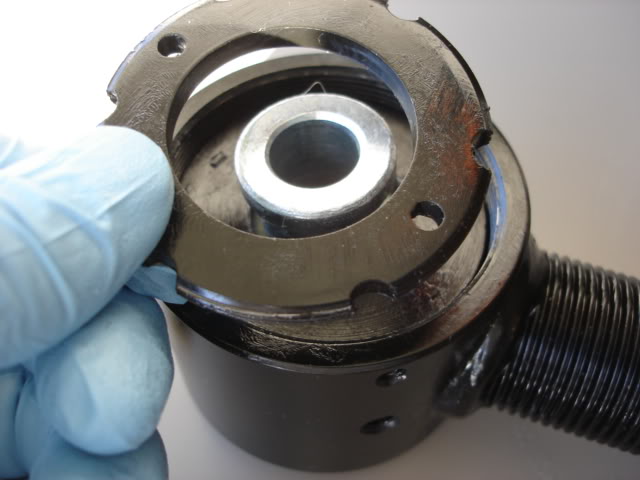
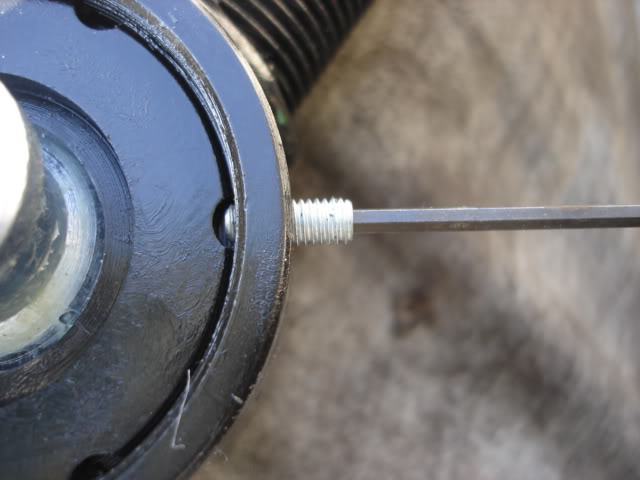
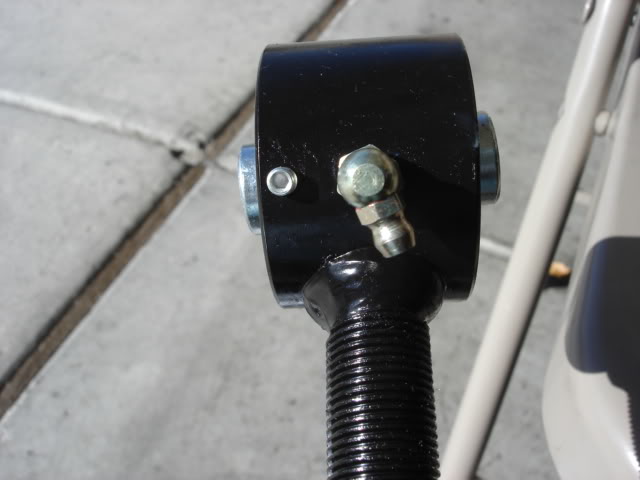
Oh, a question about my new custom DS...
Missing Grease Zerk?

Last edited by BotakBeng; Apr 9, 2012 at 10:13 AM. Reason: Moved pics to post #65

Senior Member
Joined: Jan 2009
Posts: 836
Likes: 3
From: Redford MI
Year: 1999
Model: Grand Cherokee
Engine: 4.0
Good to see the preventive maintainance you do. Makes for a reliable rig. Nice to follow, down trails, when the guy in front of me is like you. Clean 99 too
Thread Starter
CF Veteran
Joined: Jan 2011
Posts: 1,894
Likes: 4
From: Las Vegas
Year: 1999
Model: Cherokee
Engine: 4.0

Thread Starter
CF Veteran
Joined: Jan 2011
Posts: 1,894
Likes: 4
From: Las Vegas
Year: 1999
Model: Cherokee
Engine: 4.0
For those who are interested in this kit.....THINK AGAIN.
There has been a lot of complains about the rear leaf springs being too short....Is True!
Unless you went with Shackle Relocation Bracket, the ride is gonna be very very sift and bumpy because of wrong shackle angle.
Other than that, great deal for the kit.
Parts
>RC 4.5" X-series
>RC Control Arm Drop Bracket
>RC Performance 2.2 Stabilizer
>Daystar Bumpstop
>RE 6* Shims
>Rugged Ridge SYE
>Adam's Custom Driveshaft
>BFGoodrich KM2 (32x11.5)
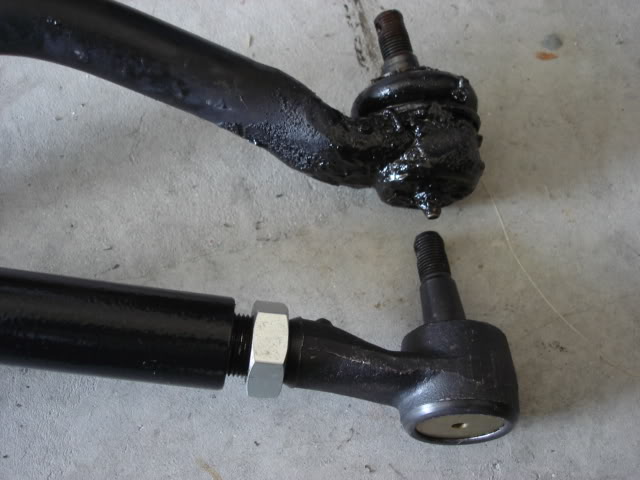
>ZJ Tie Rod/Sleeve/Ends
>Draglink Bushing
>Hockey Pucks
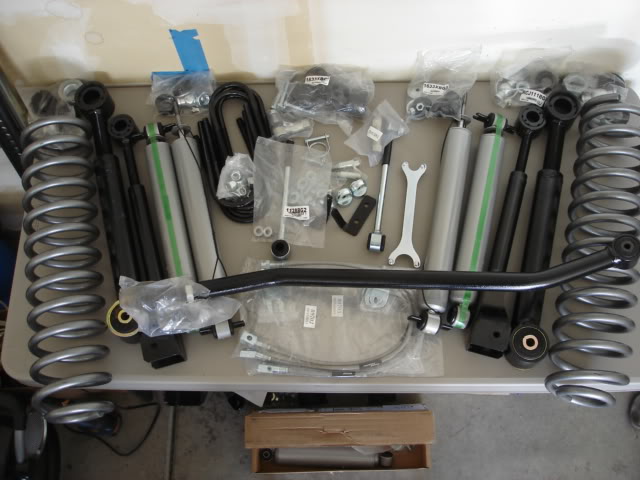
Here are some tools rented from AZ (Coil spring compressor NOT needed, see 7))
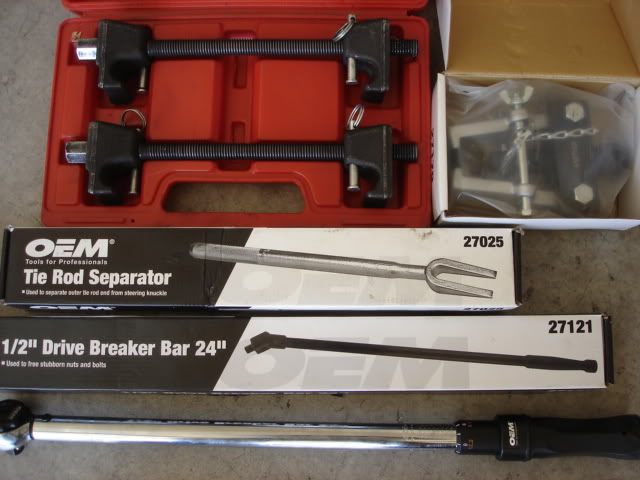
Oh, and a lot of PB Blaster. I used up 6 cans in the process.
Since i'm totally new at this, i followed the instruction religiously.
As per instruction, i started with the front.
1)Remove Shocks
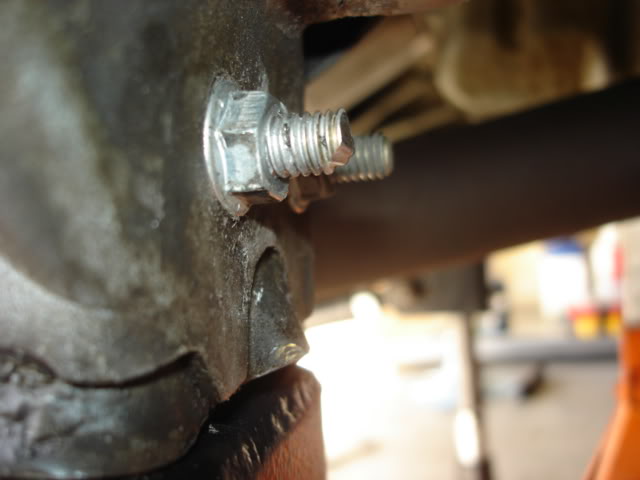
2)Remove Swaybar Link
Here is a very easy way of removing the swaybar mounting bolt i learn (Pic borrowed from sanchezcruz_20, here is his build/write-up, must read for newbie!)
3)Remove Trackbar
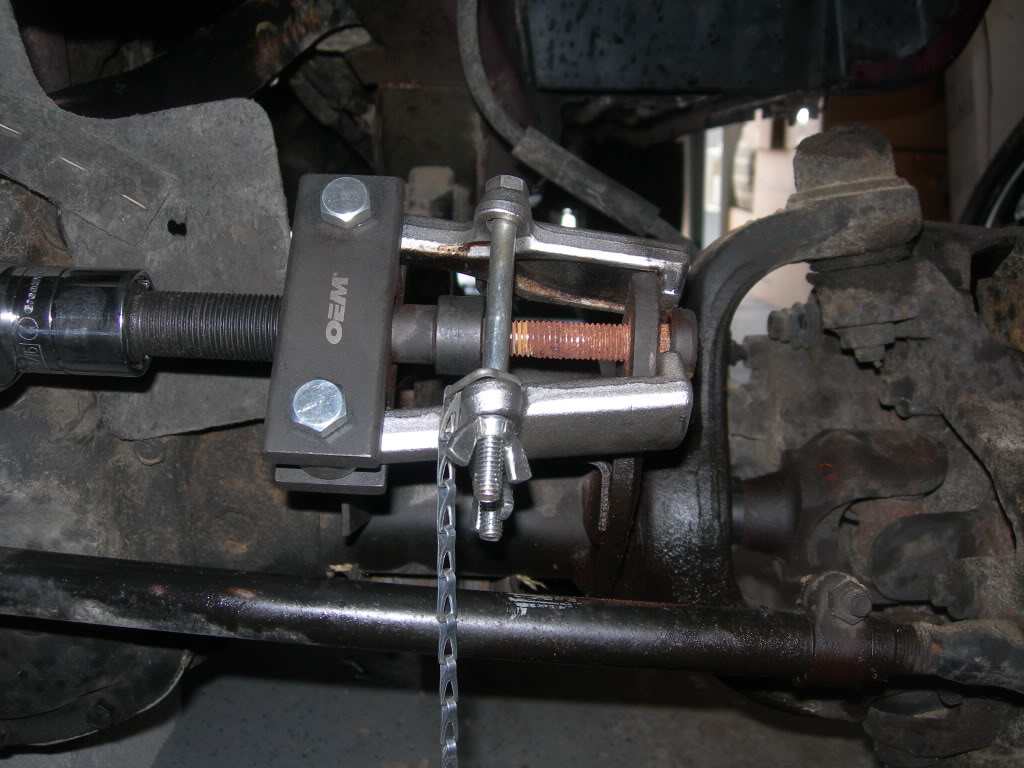
A breaker bar, pickle fork and a bfh should do the job
OEM vs RC Adj Trackbar

4)Remove coil spring retainers
5)Disconnect Brake Line
Do not let the fluid in the master cylinder go too low, otherwise you would required to bench bled the master cylinder (based on what i read).
6)Remove lower control arms
NOTE: Do not remove upper control arms at this time.
7)Remove Coil Springs
This came pretty easy as i already have the jeep on a fairly high jack stands (6 tons) and i was able to let the axle drop a fair bit and simply slide out the springs.
I will be installing some hockey pucks (with liquid nail) so i clean up the coil spring perch.
Note: Trial fit the coil spring retainer bolts making sure threads are not stripped, is easier to tap the threads without the coil springs installed
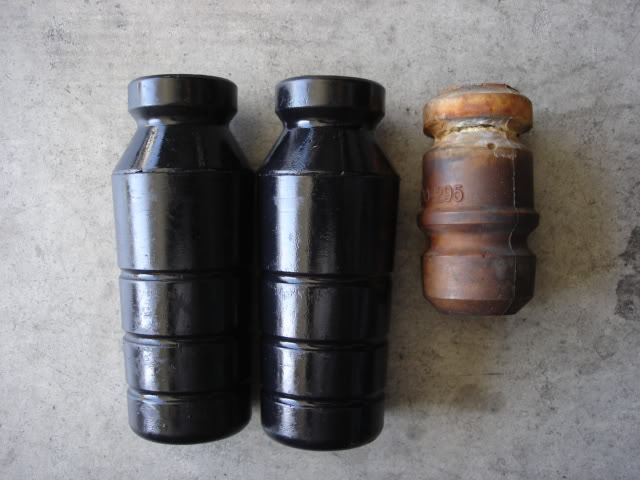
7.1)Install my Extended Bumpstop
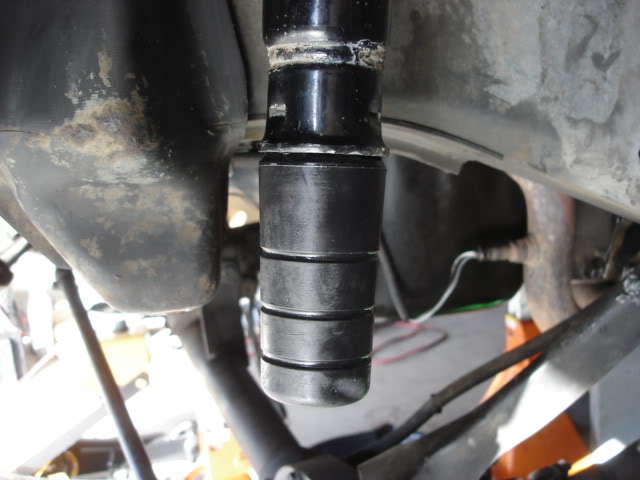
Old vs Extended
8)Install RC coil springs
Make sure the lower spring is seated properly on the cup.
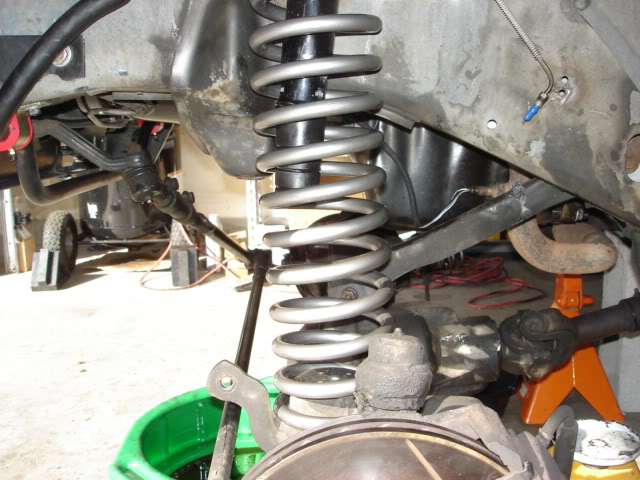
With both springs installed, jacking up the axle should get the spring to seat nicely (this is why the UCA should not be removed in the first place).
Support axle with jack stands.
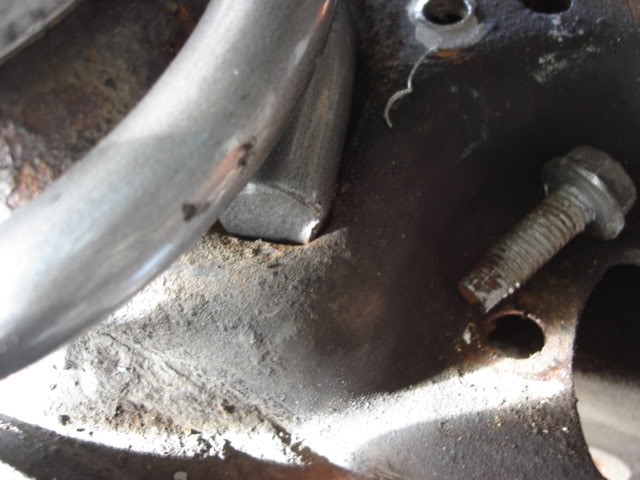
9)Install coil spring retainers
My first obstacle
Time to order some HD coil spring retainers
......
HD coil spring retainers did not work for me...
Self tapping/screwing bolt???
When ahead and took the tapping route.
I removed the coil spring for easier tapping.
Installed (I use loctite blue for safe measure)
10) Install shocks
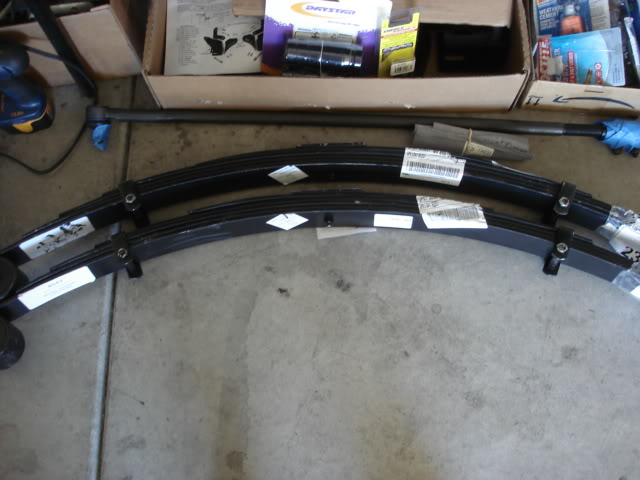
There has been a lot of complains about the rear leaf springs being too short....Is True!
Unless you went with Shackle Relocation Bracket, the ride is gonna be very very sift and bumpy because of wrong shackle angle.
Other than that, great deal for the kit.
Parts
>RC 4.5" X-series
>RC Control Arm Drop Bracket
>RC Performance 2.2 Stabilizer
>Daystar Bumpstop
>RE 6* Shims
>Rugged Ridge SYE
>Adam's Custom Driveshaft
>BFGoodrich KM2 (32x11.5)
>ZJ Tie Rod/Sleeve/Ends
>Draglink Bushing
>Hockey Pucks
Here are some tools rented from AZ (Coil spring compressor NOT needed, see 7))
Oh, and a lot of PB Blaster. I used up 6 cans in the process.
Since i'm totally new at this, i followed the instruction religiously.
As per instruction, i started with the front.
1)Remove Shocks
2)Remove Swaybar Link
Here is a very easy way of removing the swaybar mounting bolt i learn (Pic borrowed from sanchezcruz_20, here is his build/write-up, must read for newbie!)
3)Remove Trackbar
A breaker bar, pickle fork and a bfh should do the job
OEM vs RC Adj Trackbar
4)Remove coil spring retainers
5)Disconnect Brake Line
Do not let the fluid in the master cylinder go too low, otherwise you would required to bench bled the master cylinder (based on what i read).
6)Remove lower control arms
NOTE: Do not remove upper control arms at this time.
7)Remove Coil Springs
This came pretty easy as i already have the jeep on a fairly high jack stands (6 tons) and i was able to let the axle drop a fair bit and simply slide out the springs.
I will be installing some hockey pucks (with liquid nail) so i clean up the coil spring perch.
Note: Trial fit the coil spring retainer bolts making sure threads are not stripped, is easier to tap the threads without the coil springs installed
7.1)Install my Extended Bumpstop
Old vs Extended
8)Install RC coil springs
Make sure the lower spring is seated properly on the cup.
With both springs installed, jacking up the axle should get the spring to seat nicely (this is why the UCA should not be removed in the first place).
Support axle with jack stands.
9)Install coil spring retainers
My first obstacle
Time to order some HD coil spring retainers
......
HD coil spring retainers did not work for me...
Self tapping/screwing bolt???
When ahead and took the tapping route.
I removed the coil spring for easier tapping.
Installed (I use loctite blue for safe measure)
10) Install shocks
Last edited by BotakBeng; May 16, 2012 at 10:15 AM.
Thread Starter
CF Veteran
Joined: Jan 2011
Posts: 1,894
Likes: 4
From: Las Vegas
Year: 1999
Model: Cherokee
Engine: 4.0
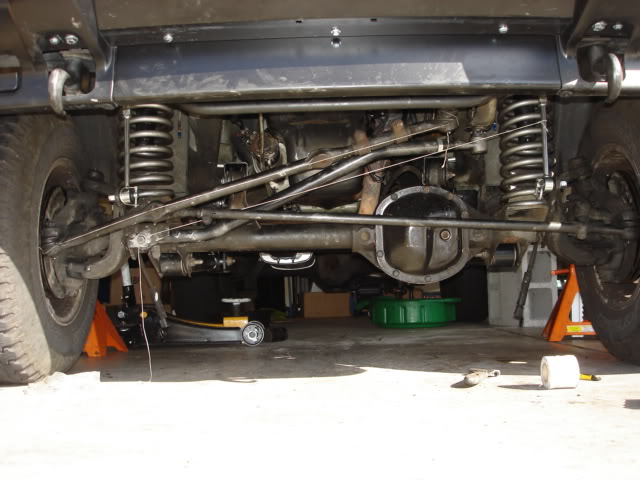
10)Assemble and adjust lower and upper control arms to proper length.
As per instruction, with my 4.5" and RC CAD bracket, LCA was set to 15.75" and UCA to 15".
Here is a good link for those with different lift height or RE CAD bracket.
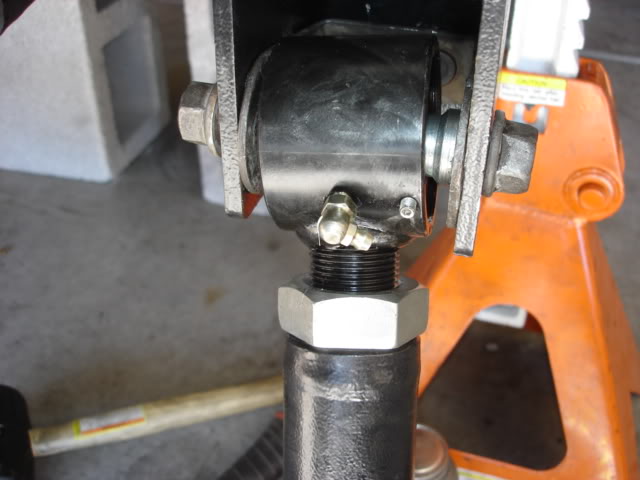
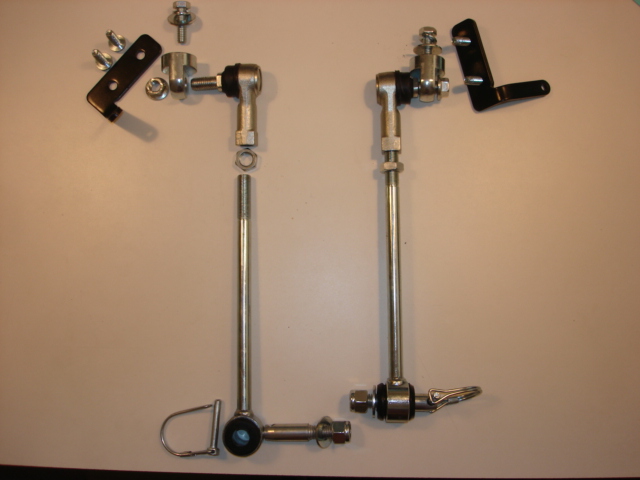
Video of X-Flex Joint Installation.
Here are some pics of the "NEW X-Flex joints"....haven't see an old one (there was some issue with their old bushing....so i read), so i can't compare.
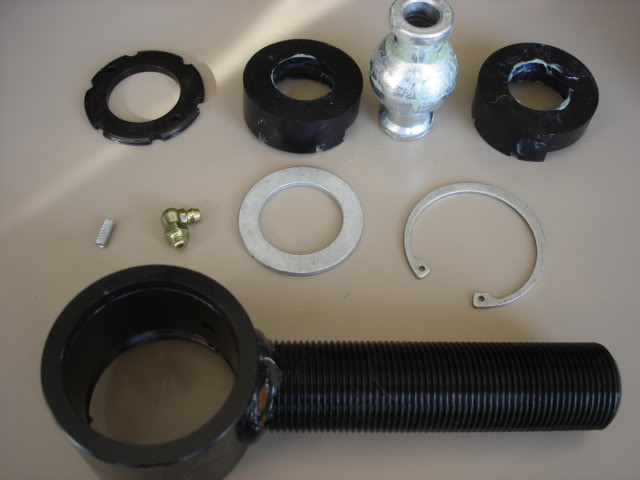
Assembly
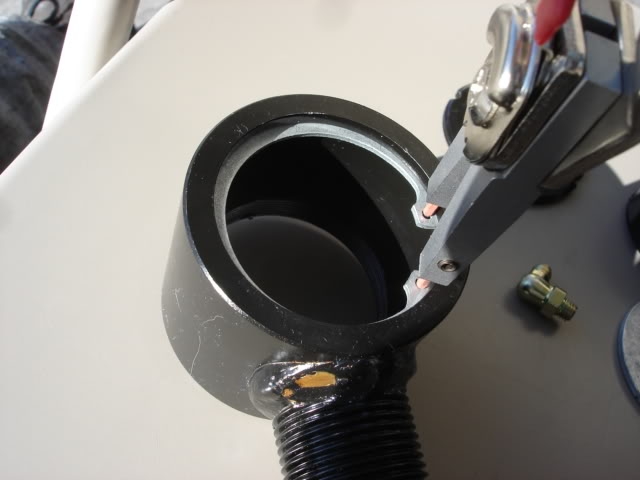
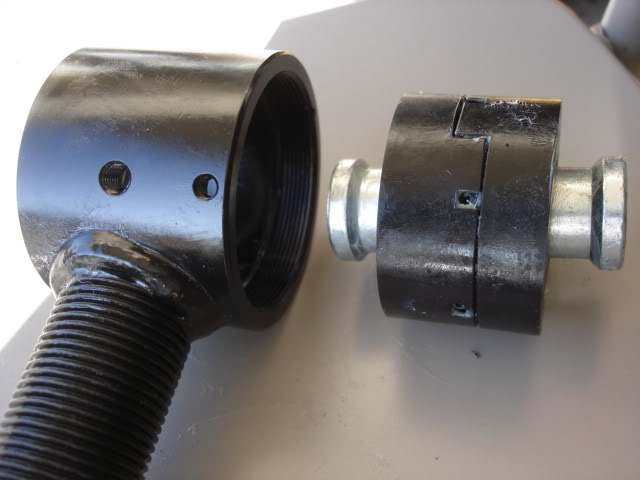
New vs Old
All ready for installation.
.....
As per instruction, with my 4.5" and RC CAD bracket, LCA was set to 15.75" and UCA to 15".
Here is a good link for those with different lift height or RE CAD bracket.
Video of X-Flex Joint Installation.
Here are some pics of the "NEW X-Flex joints"....haven't see an old one (there was some issue with their old bushing....so i read), so i can't compare.
Assembly
New vs Old
All ready for installation
......
Last edited by BotakBeng; Apr 19, 2012 at 11:55 AM.
Thread Starter
CF Veteran
Joined: Jan 2011
Posts: 1,894
Likes: 4
From: Las Vegas
Year: 1999
Model: Cherokee
Engine: 4.0
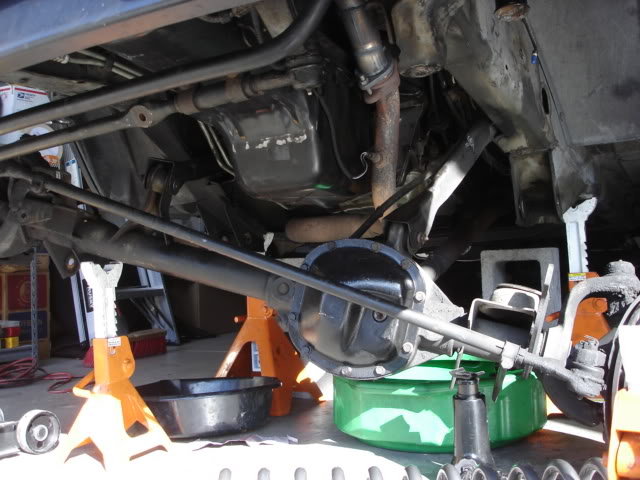
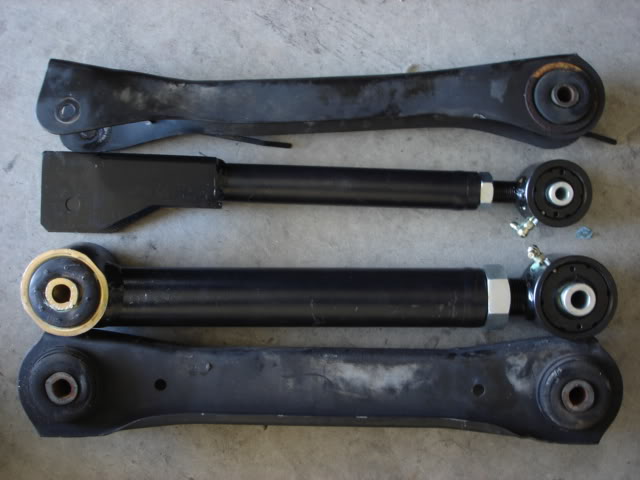
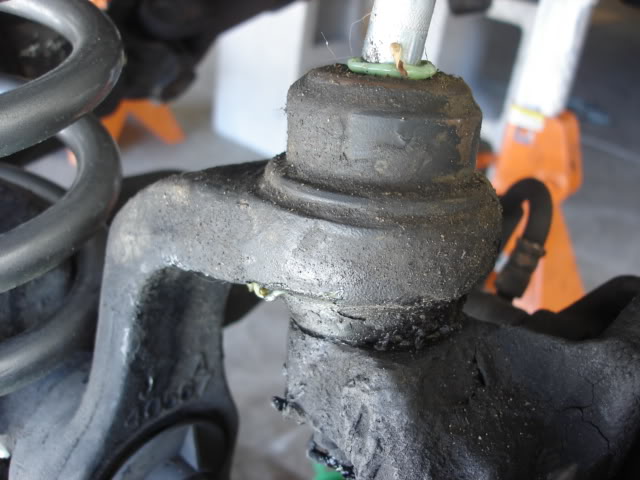
11)Remove Driver's Upper Control Arm
Good time to check upper control arm/axle bushing.
Mine looks fine
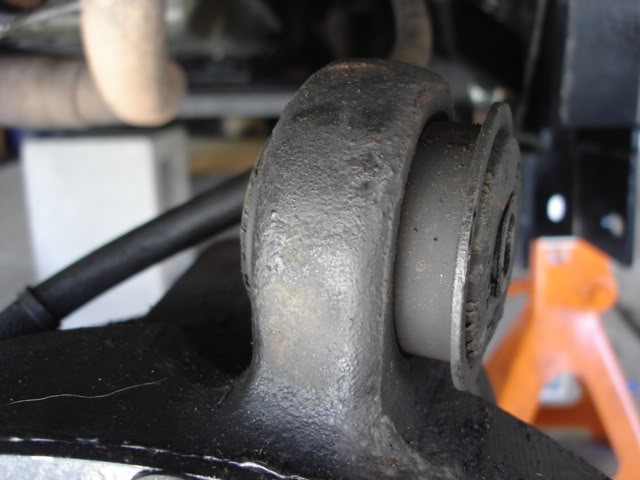
Took some time to check my ball joints and give them a good lube.
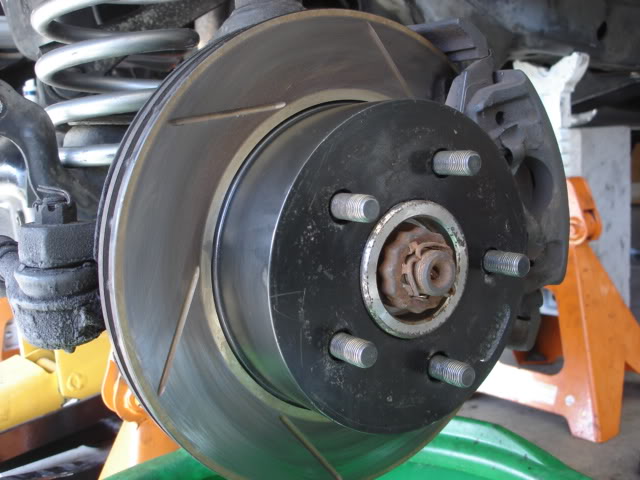
Oh, here is a little show off of my Powerslot Rotor and Hawk Pad which i installed.
CAD brackets next.....
Good time to check upper control arm/axle bushing.
Mine looks fine
Took some time to check my ball joints and give them a good lube.
Oh, here is a little show off of my Powerslot Rotor and Hawk Pad which i installed.
CAD brackets next.....
Thread Starter
CF Veteran
Joined: Jan 2011
Posts: 1,894
Likes: 4
From: Las Vegas
Year: 1999
Model: Cherokee
Engine: 4.0
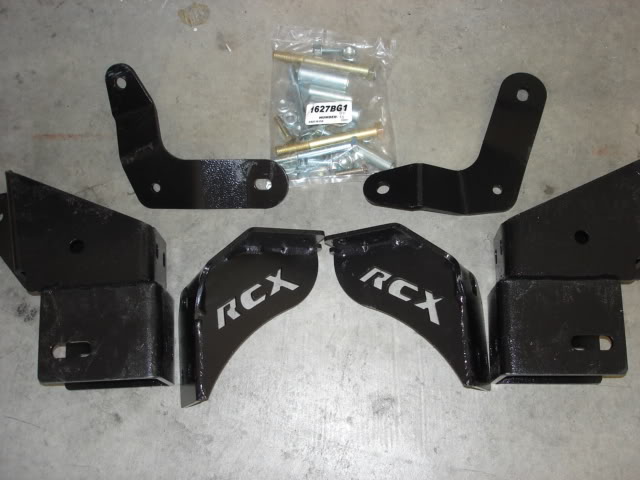
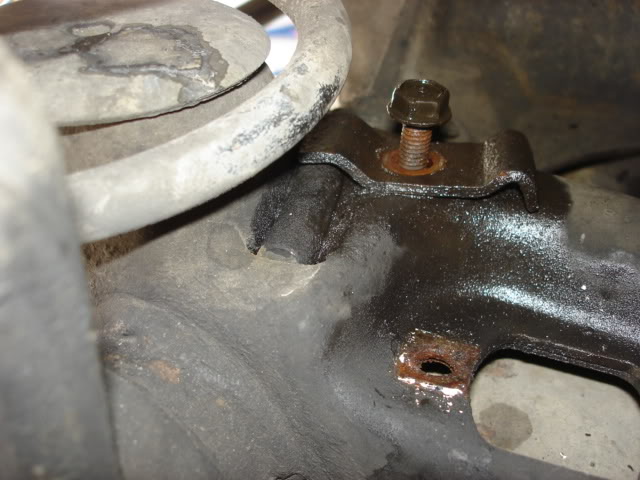
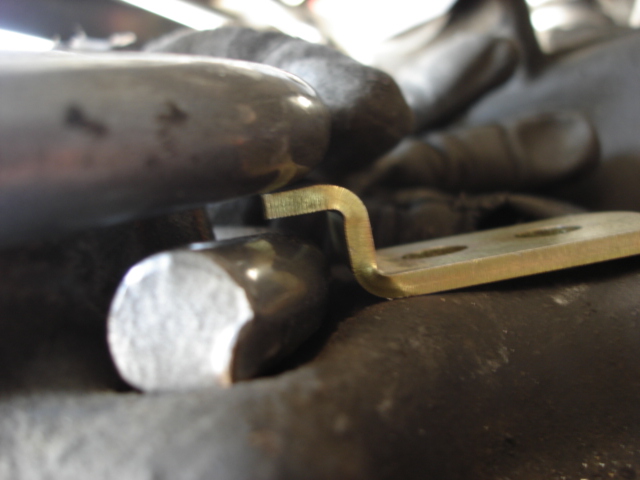
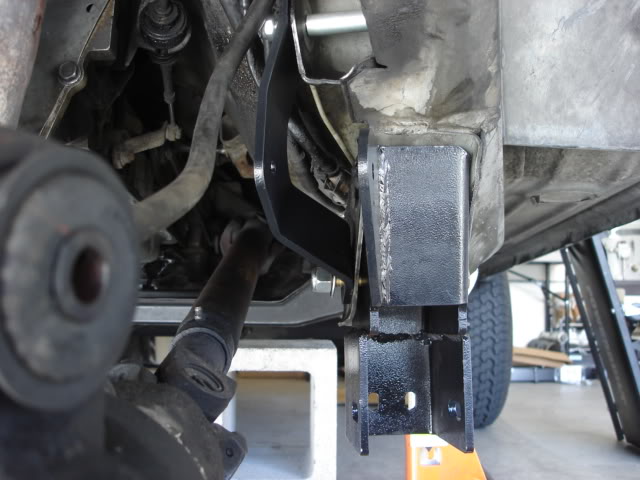
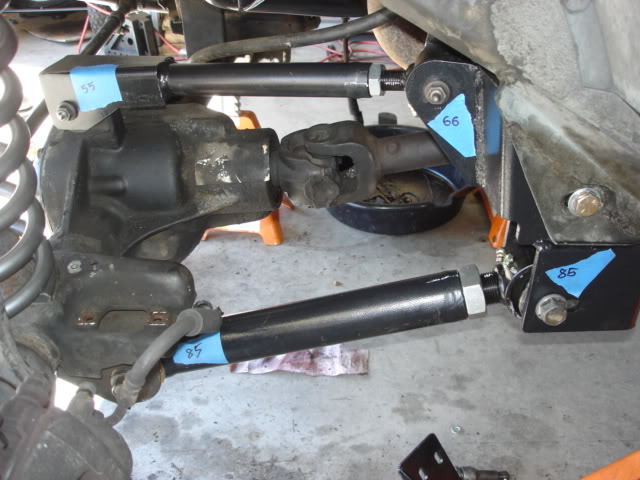
12)Installation of RC Control Arms Drop Brackets
Here is another very detailed write-up on RE CAD Bracket.
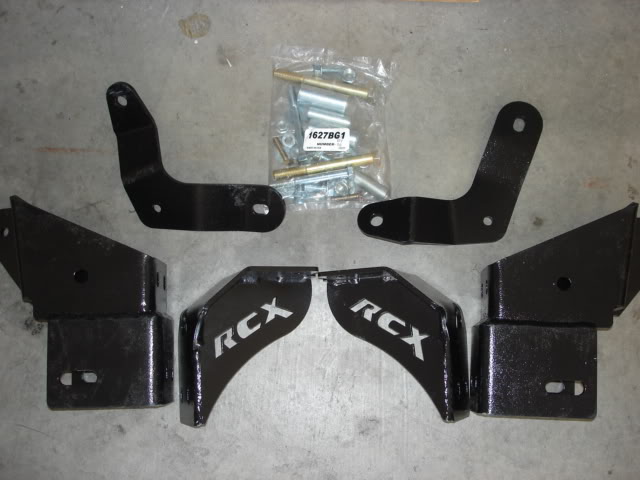
Been looking at this kit for almost a year and I JUST realize that it lowers BOTH control arms (upper and lower)
Is an easy job if you figure out which parts goes with which. Wish RC would label them.
Here is my DRIVER'S side installation
a)Install LCA bracket by using provided hardware (hand tighten) on the alignment shoe holes, this should hold the LCA bracket in place.
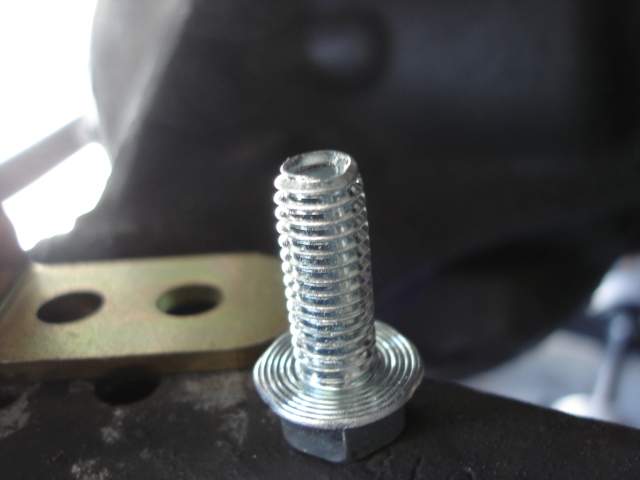
b)Install provided bolt and sleeve thru the factory LCA hole, no nut installed yet as UCA bracket goes onto the bolt
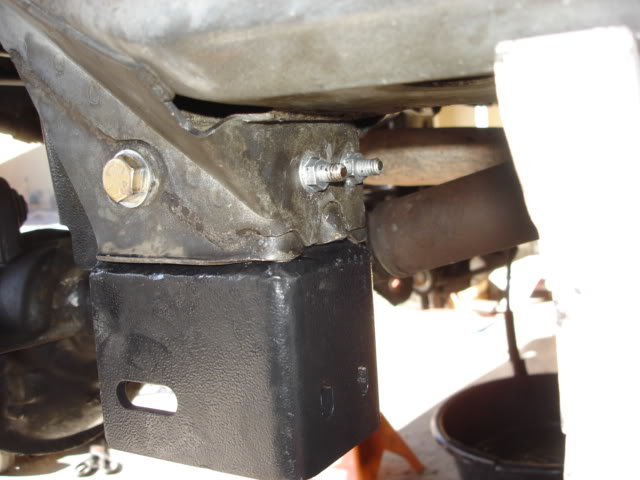
c)Install UCA bracket with provided bolt and sleeve thru the factory UCA hole
d)Hand tighten all bolts and nuts at this time
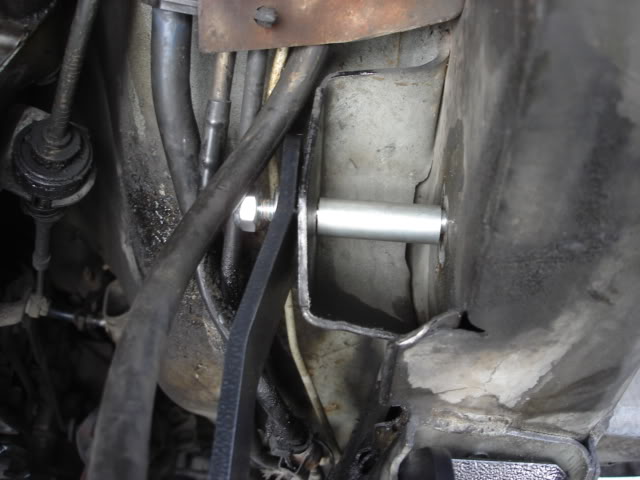
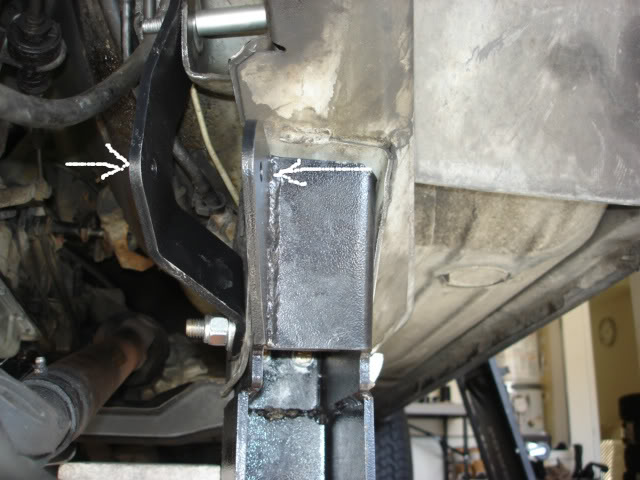
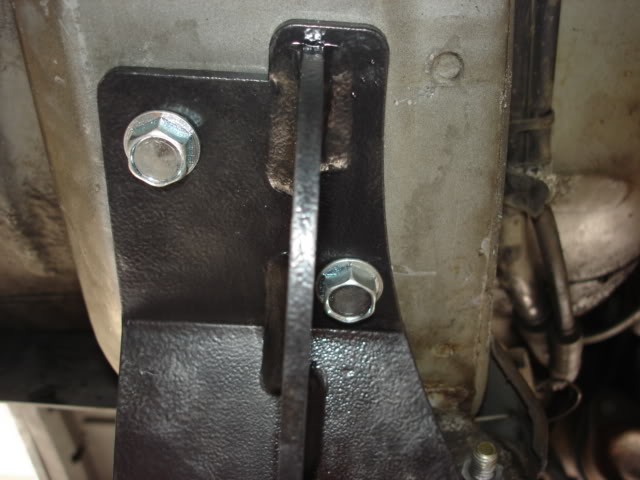
Here are some pics with both the bracket installed
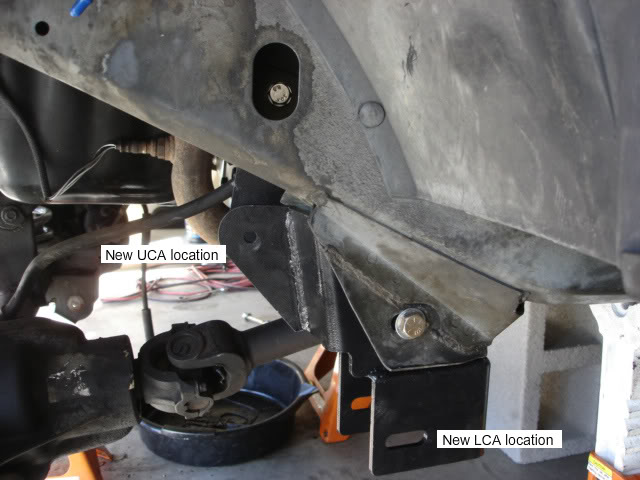
Arrows show New UCA location, if the holes align, you should be good to go.
e)Tighten bolts and nuts on factory alignment holes and leave the rest hand tighten (is easier to get the New control arms in).
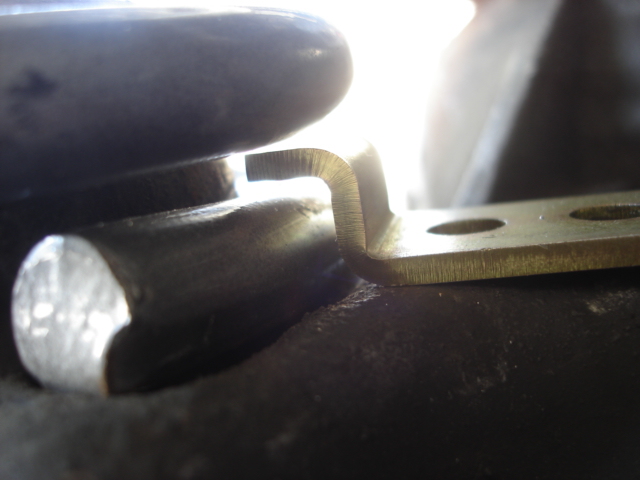
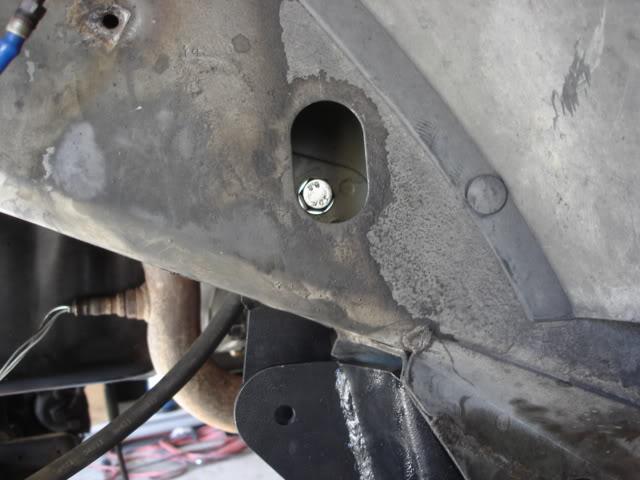
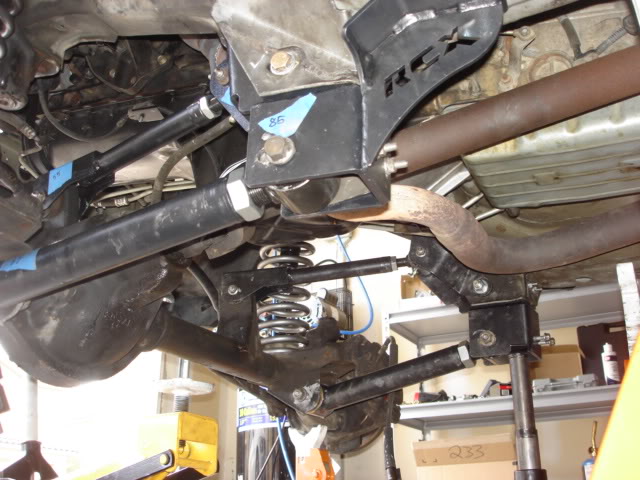
Installation of the brace came together with my LCA installation but since i'm here, i might as well add some info.
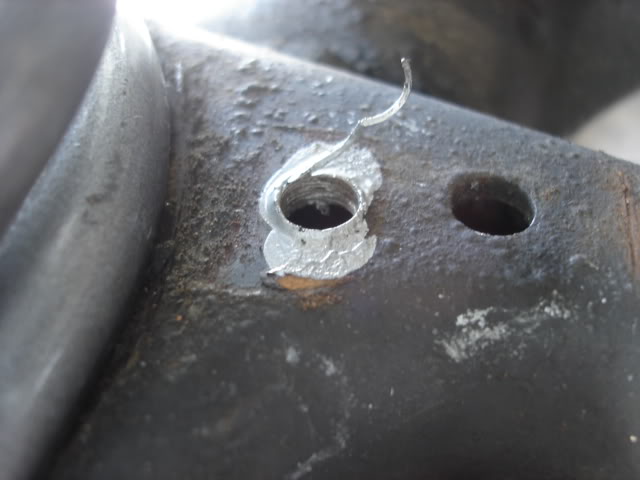
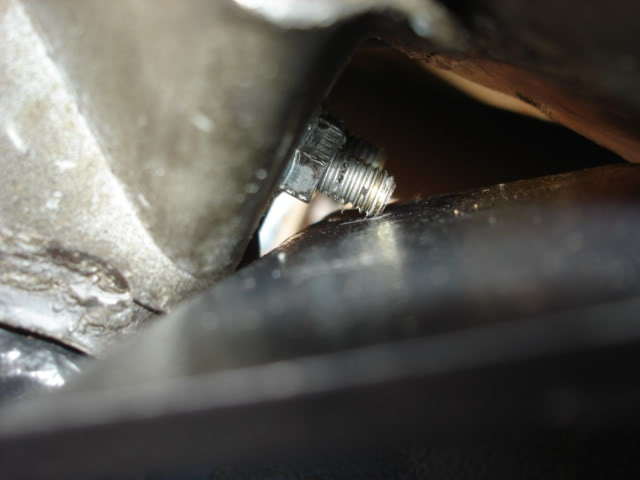
Instruction says to use 11/32" drill for brace/frame holes but since i can't find any in our local store, i used 5/16" instead and it works just fine.
I also have to grind off part of the factory alignment hole bolts as it was obstructing the brace.
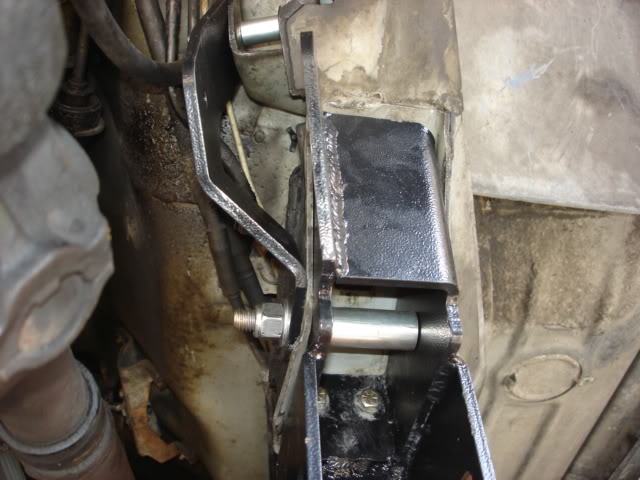
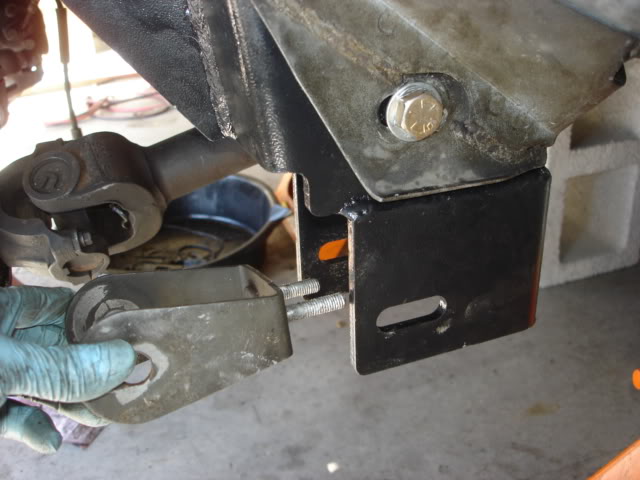
The finished product!
Dont understand the purpose of the brace.....it doesn't look strong enough for anything. Its held on to the frame by a couple of self tapping bolts and 2 nuts to the factory alignment bracket
Anyone care to share???
Here is another very detailed write-up on RE CAD Bracket.
Been looking at this kit for almost a year and I JUST realize that it lowers BOTH control arms (upper and lower)
Is an easy job if you figure out which parts goes with which
. Wish RC would label them.Here is my DRIVER'S side installation
a)Install LCA bracket by using provided hardware (hand tighten) on the alignment shoe holes, this should hold the LCA bracket in place.
b)Install provided bolt and sleeve thru the factory LCA hole, no nut installed yet as UCA bracket goes onto the bolt
c)Install UCA bracket with provided bolt and sleeve thru the factory UCA hole
d)Hand tighten all bolts and nuts at this time
Here are some pics with both the bracket installed
Arrows show New UCA location, if the holes align, you should be good to go.
e)Tighten bolts and nuts on factory alignment holes and leave the rest hand tighten (is easier to get the New control arms in).
Installation of the brace came together with my LCA installation but since i'm here, i might as well add some info.
Instruction says to use 11/32" drill for brace/frame holes but since i can't find any in our local store, i used 5/16" instead and it works just fine.
I also have to grind off part of the factory alignment hole bolts as it was obstructing the brace.
The finished product!
Dont understand the purpose of the brace.....it doesn't look strong enough for anything. Its held on to the frame by a couple of self tapping bolts and 2 nuts to the factory alignment bracket
Anyone care to share???
Last edited by BotakBeng; Apr 14, 2012 at 05:20 PM.
Banned
Joined: Oct 2009
Posts: 2,231
Likes: 1
From: West Springfield, MA
Year: 1999
Model: Cherokee
Engine: 4.0
very well detailed and even though i have installed a couple lift kits its still enjoyable to read and sorry to say this but i have never seen rough country flex joints up close like that...they are tiny...
Thread Starter
CF Veteran
Joined: Jan 2011
Posts: 1,894
Likes: 4
From: Las Vegas
Year: 1999
Model: Cherokee
Engine: 4.0
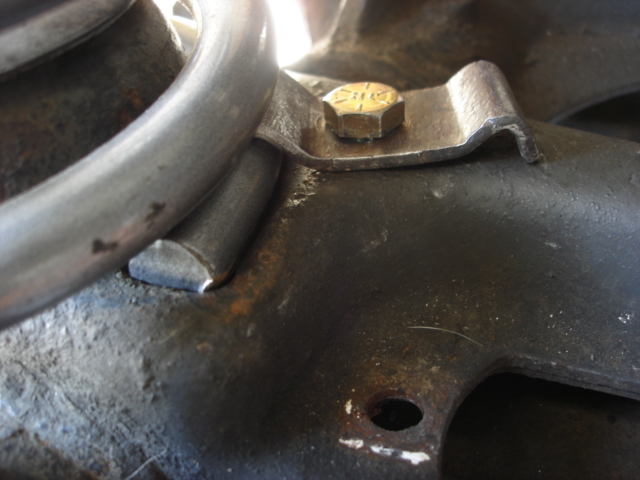
Before i started installing the arms i took some time to re-torque my exhaust manifold and oil pan
Note: Not sure is i'm doing right but i apply grease to any rubber contacts and antiseize to metal contacts
12)Install UCA (hand tighten for now)
It went smoothly since i have my CAD bracket loosely fastened, just need to support the axle with a jack, and i was able to move the axle and align the UCA bolts.
13)Install LCA (hand tighten for now)
a)Install factory alignment shoe (i can't figure out why i need those since i have adj CA but i did it anyway....as per RC instruction)
I push the shoe all the way back to the bracket, no shims required with the adj arm.
b)Install LCA to bracket making sure the grease zerk is facing up
c)Install LCA to axle
14)Torque all bolts to spec (UCA, LCA and CAD bracket)
14)Repeat passenger's side CA installation.
Done!
Thread Starter
CF Veteran
Joined: Jan 2011
Posts: 1,894
Likes: 4
From: Las Vegas
Year: 1999
Model: Cherokee
Engine: 4.0
Since i'm still waiting for my HD coil spring retainer to arrive, i did not install the shocks for now.
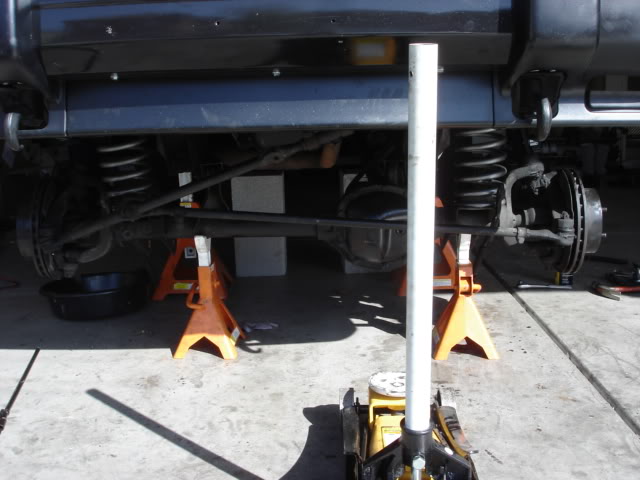
15)Install Adj Track Bar
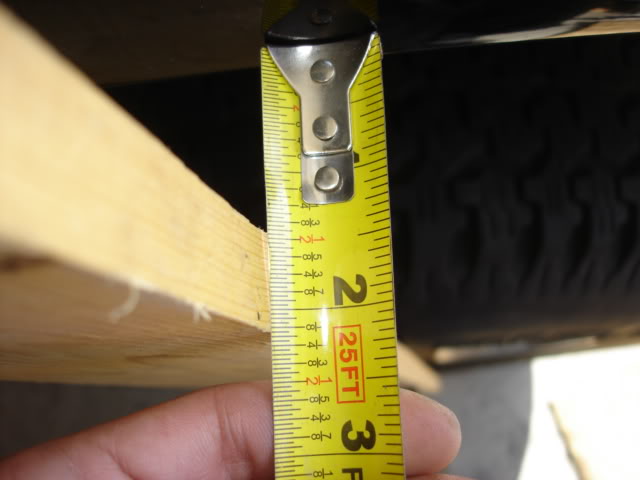
a)Install front wheels
b)Lower Jeep onto ground (making sure the wheels are in a straight forward position)
c)Bounce the front of the jeep a few time and let it settle, making sure the axle is centered.
Pushing a 2x6 against the tires, and measuring the fender fare and wood give me an estimate (pretty close if you ask me).
Driver's side
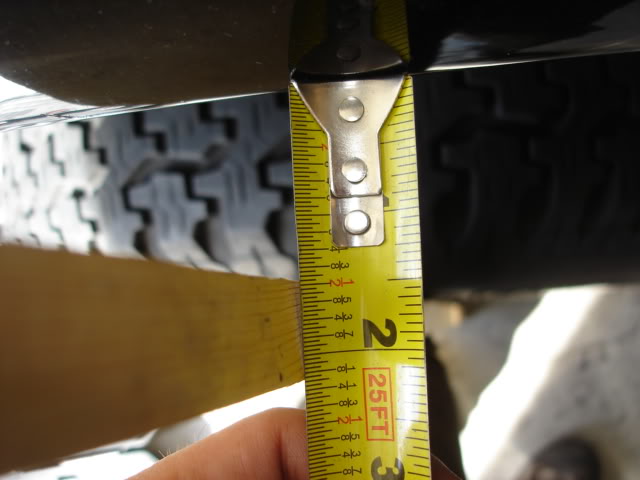
Passenger's side
d)Install trackbar/axle end
e)Adjust trackbar (frame end) until it track bar line up with the factory track bar bracket
f)Torque to spec
16)Adjust Draglink
At this point if you get into the Jeep, you will realize that the steering wheel is probably upside down or off centered.
Here is how i re-center the steering wheel
a)Unlock steering wheel (making sure wheels are in a straight forward position)
b)Loosen draglink sleeve bolts
c)Adjust sleeve until steering wheel is straight (by doing this, you are actually extending the draglink)

d)Tighten sleeve
If Trackbar and draglink adjustment are done right, they should be parallel to each other.
Pretty parallel if you ask me
Done!
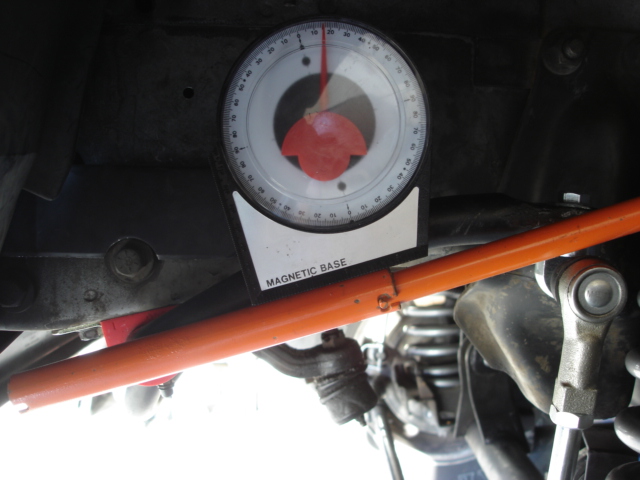
Somehow i missed the swaybar link installation
Anyhow, its pretty straight forward.
Here is the pre-installation pic
Ideal Swaybar Angle ((10*-20*)
15)Install Adj Track Bar
a)Install front wheels
b)Lower Jeep onto ground (making sure the wheels are in a straight forward position)
c)Bounce the front of the jeep a few time and let it settle, making sure the axle is centered.
Pushing a 2x6 against the tires, and measuring the fender fare and wood give me an estimate (pretty close if you ask me).
Driver's side
Passenger's side
d)Install trackbar/axle end
e)Adjust trackbar (frame end) until it track bar line up with the factory track bar bracket
f)Torque to spec
16)Adjust Draglink
At this point if you get into the Jeep, you will realize that the steering wheel is probably upside down or off centered.
Here is how i re-center the steering wheel
a)Unlock steering wheel (making sure wheels are in a straight forward position)
b)Loosen draglink sleeve bolts
c)Adjust sleeve until steering wheel is straight (by doing this, you are actually extending the draglink)
d)Tighten sleeve
If Trackbar and draglink adjustment are done right, they should be parallel to each other.
Pretty parallel if you ask me
Done!
Somehow i missed the swaybar link installation
Anyhow, its pretty straight forward.
Here is the pre-installation pic
Ideal Swaybar Angle ((10*-20*)
Last edited by BotakBeng; Mar 31, 2012 at 12:27 PM.

