
Project: cRUSTy '86 MJ

Thread Starter
Member
Joined: Mar 2012
Posts: 131
Likes: 1
From: Junction City, Kansas
Year: 86/91/92
Model: Comanche
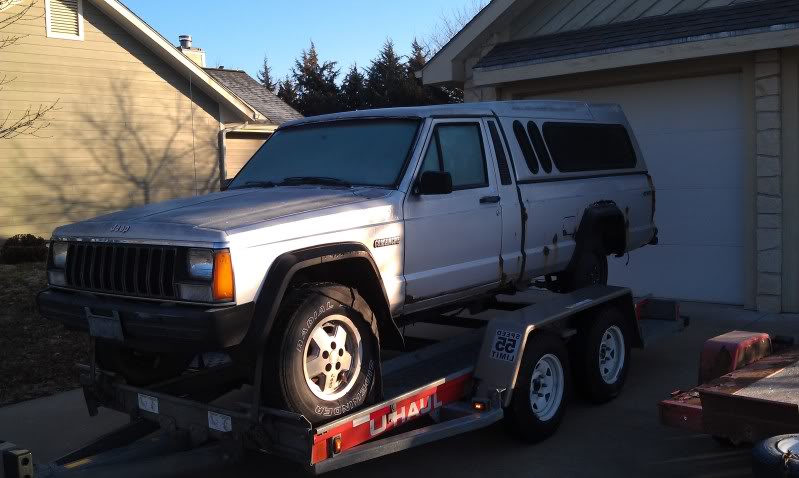
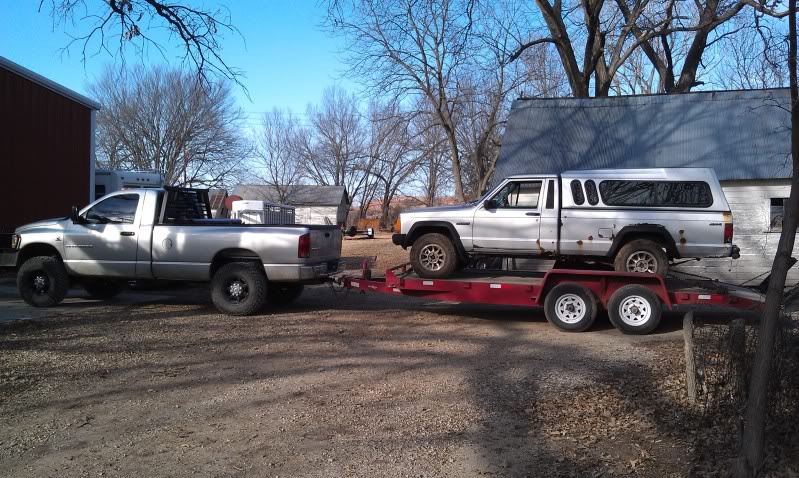
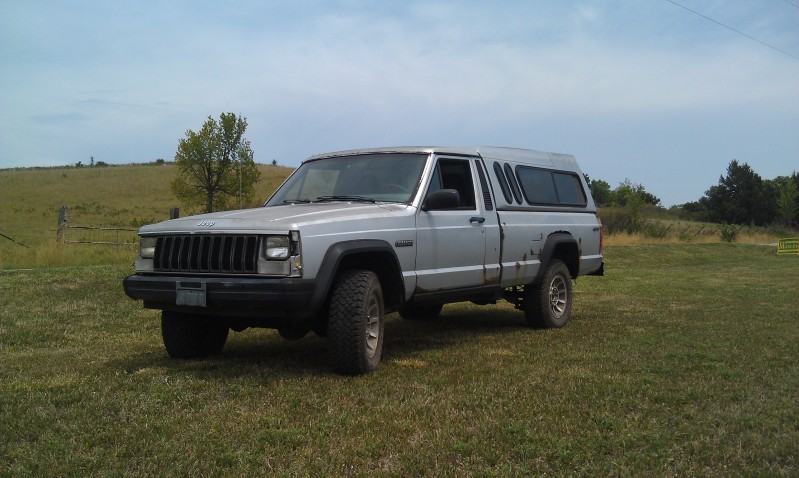
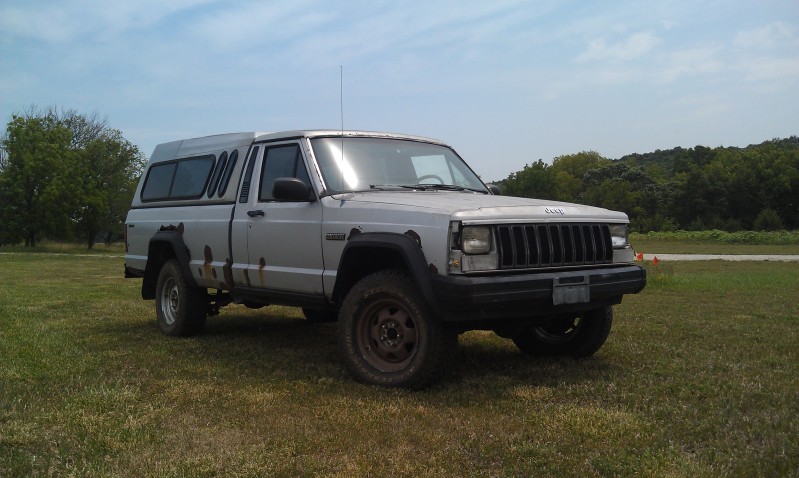
Ever have an impulse buy? I thought I needed another MJ project (well, I DID), drove to Iowa....
.....and ended up dragging this home:

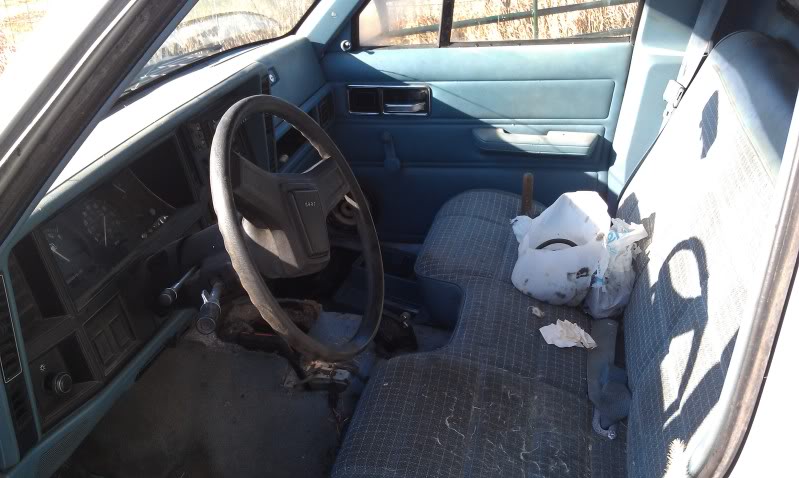
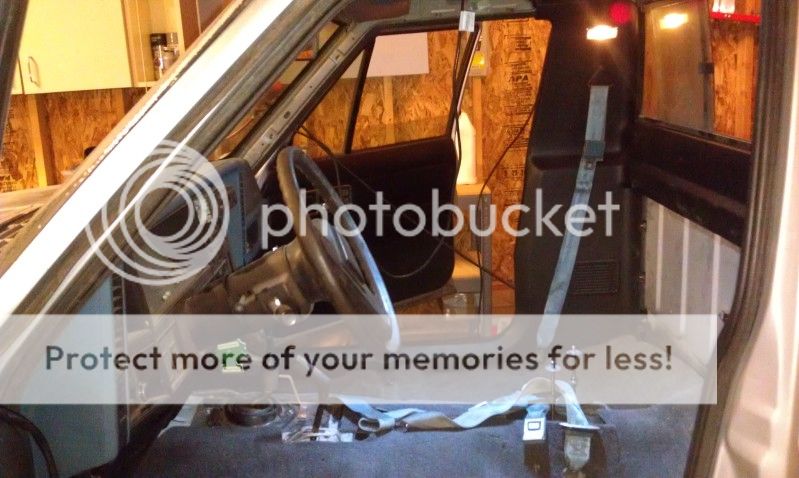
Interior... with 3/4 cluster!
1986 Longbed 2.5L/AX5/207 D30/35
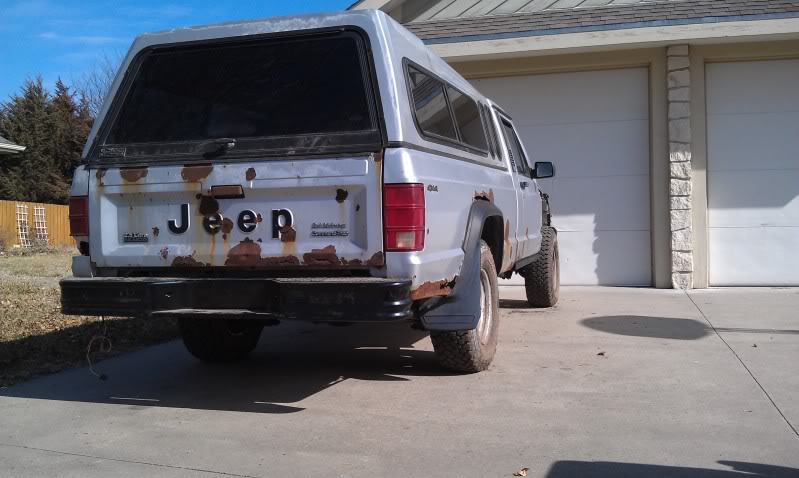
It is rusty, it is crusty, it doesn't run and it probably should have been scrapped.
My goal for this truck is to build a solid, comfortable, daily driver and a work truck. Since it will see a fair amount of salt on winter roads, I wont spend any time trying to 'save' any removable parts from rust.
The plan
- Luk clutch kit from Carolina Clutch (the AX5 that came with the truck is internal slave)
- Install transmission and transfercase
- Replace motor mounts and transmission mount
- Replace control arms/bushings with lightly used TJ arms
- Replace shocks with lightly used Monroes from my '92
- Install buckets and console from my '99 donor
- Pull and replace or clean the carpet
- Patch floor boards
- Repair headliner
- Install 'Fey' rear bumper
- Replace TRE's and Tie-Rod with V8 ZJ
- Upgrade to V8 ZJ Progressive rate front coil springs
- Upgrade trackbar to a used RE1600 with TRE at frame mount
- Upgrade to Hell Creek Metric Ton rear leaf springs
.....and ended up dragging this home:
Interior... with 3/4 cluster!
1986 Longbed 2.5L/AX5/207 D30/35
It is rusty, it is crusty, it doesn't run and it probably should have been scrapped.
My goal for this truck is to build a solid, comfortable, daily driver and a work truck. Since it will see a fair amount of salt on winter roads, I wont spend any time trying to 'save' any removable parts from rust.
The plan
- Luk clutch kit from Carolina Clutch (the AX5 that came with the truck is internal slave)
- Install transmission and transfercase
- Replace motor mounts and transmission mount
- Replace control arms/bushings with lightly used TJ arms
- Replace shocks with lightly used Monroes from my '92
- Install buckets and console from my '99 donor
- Pull and replace or clean the carpet
- Patch floor boards
- Repair headliner
- Install 'Fey' rear bumper
- Replace TRE's and Tie-Rod with V8 ZJ
- Upgrade to V8 ZJ Progressive rate front coil springs
- Upgrade trackbar to a used RE1600 with TRE at frame mount
- Upgrade to Hell Creek Metric Ton rear leaf springs
Last edited by 87Warrior; Jan 14, 2015 at 10:17 PM.
Thread Starter
Member
Joined: Mar 2012
Posts: 131
Likes: 1
From: Junction City, Kansas
Year: 86/91/92
Model: Comanche
Naturally the floor pans are rusted :laugh:
Pulled the moldy, flimsy, wet headliner, well as the bench and wet carpet.
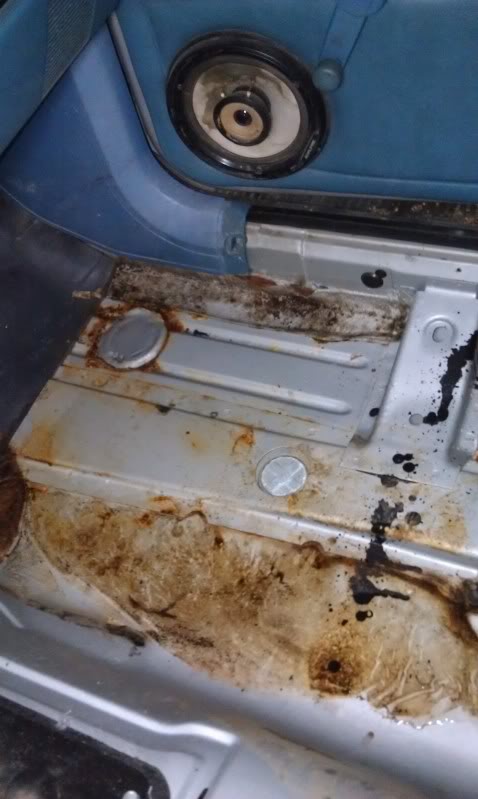
Passenger side isn't bad at all:
Driverside isn't as bad as my 92:
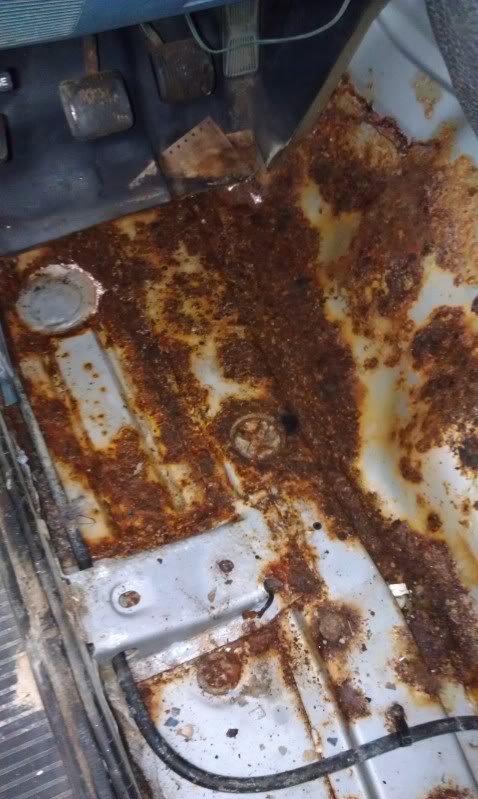
The driver side does have holes in it, primarily around the firewall/floorboard seam and one in the back corner.I will also cut the sheet metal of of the donor and do a 'patch' fix.
A good friend of mine picked up the truck and hauled it to his shop. He will be welding in new floors/patch panels. I am not looking for a pretty repair job, just something sturdy that will keep the dirt and water on the bottom side of the cab. Pulled with his sweet Dodge. Truck didn't even realize the MJ was on the trailer.
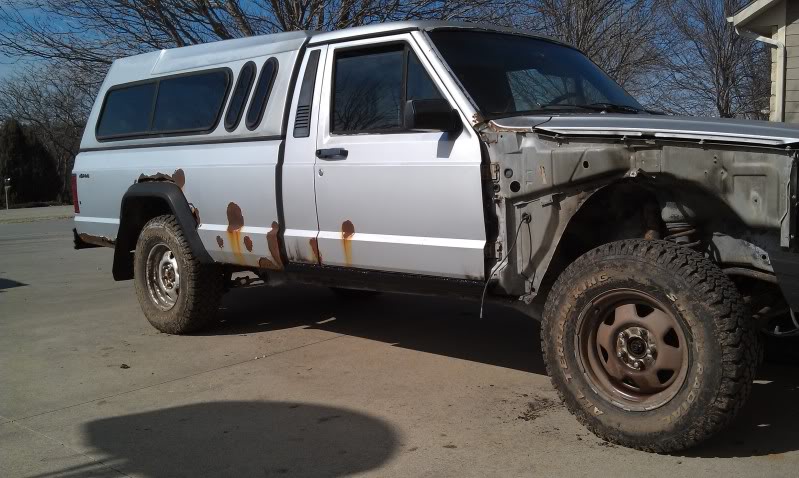
Pulled the fenders:
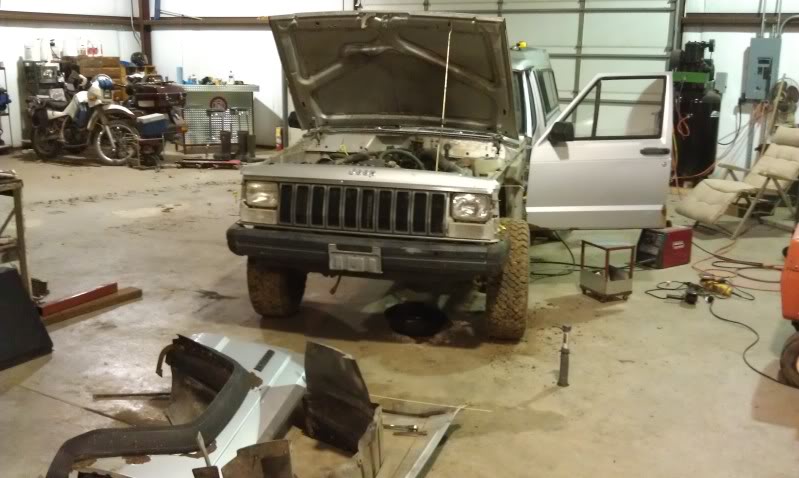
Being an '86 it took me a while to figure out how the fender/header panel mount which is quite different than my '92 or the '99 XJ.
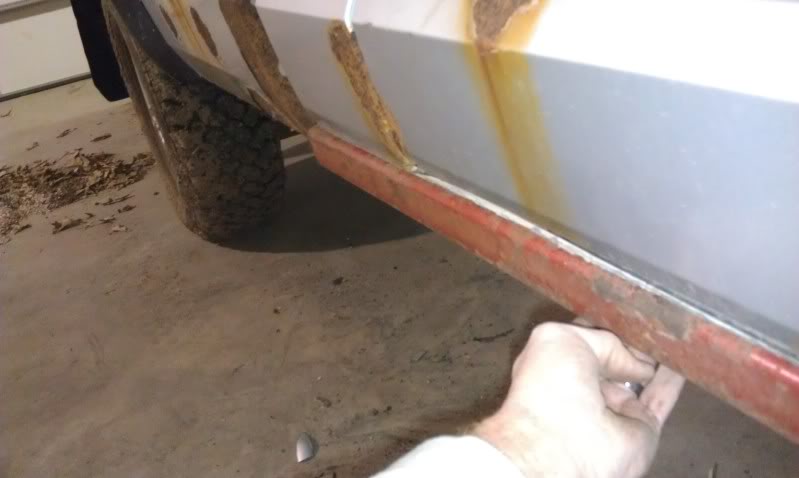
My buddy notified me of some possible scrap material I could use for rockers from an old cultivator in a pasture. 2x4, 1/4" box steel. Perfect! After torching it out and putting out the grass fire which was inevitable, a section was cut down to size for the truck.
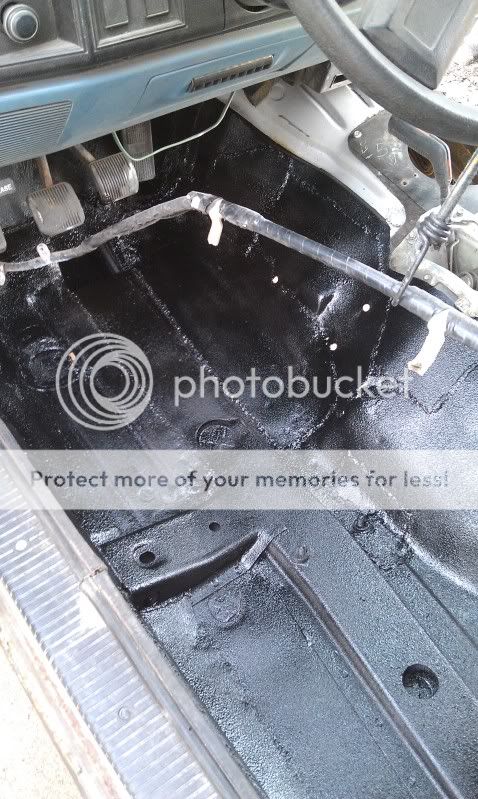
The patch work of repair. I had initially only cut a few pieces out of the donor. Since nothing is ever easy, there was very little solid floor to weld to. I had him leave a small opening into the frame rail so I can treat it with POR15.

Had another snap of warm winter weather so I primed the new floor and sprayed with under coating:

I also mounted the Fey bumper I had bought for the '92 a few years back.
Sprayed the rockers as well:
Pulled the moldy, flimsy, wet headliner, well as the bench and wet carpet.
Passenger side isn't bad at all:
Driverside isn't as bad as my 92:
The driver side does have holes in it, primarily around the firewall/floorboard seam and one in the back corner.I will also cut the sheet metal of of the donor and do a 'patch' fix.
A good friend of mine picked up the truck and hauled it to his shop. He will be welding in new floors/patch panels. I am not looking for a pretty repair job, just something sturdy that will keep the dirt and water on the bottom side of the cab. Pulled with his sweet Dodge. Truck didn't even realize the MJ was on the trailer.
Pulled the fenders:
Being an '86 it took me a while to figure out how the fender/header panel mount which is quite different than my '92 or the '99 XJ.
My buddy notified me of some possible scrap material I could use for rockers from an old cultivator in a pasture. 2x4, 1/4" box steel. Perfect! After torching it out and putting out the grass fire which was inevitable, a section was cut down to size for the truck.
The patch work of repair. I had initially only cut a few pieces out of the donor. Since nothing is ever easy, there was very little solid floor to weld to. I had him leave a small opening into the frame rail so I can treat it with POR15.
Had another snap of warm winter weather so I primed the new floor and sprayed with under coating:
I also mounted the Fey bumper I had bought for the '92 a few years back.
Sprayed the rockers as well:
Thread Starter
Member
Joined: Mar 2012
Posts: 131
Likes: 1
From: Junction City, Kansas
Year: 86/91/92
Model: Comanche
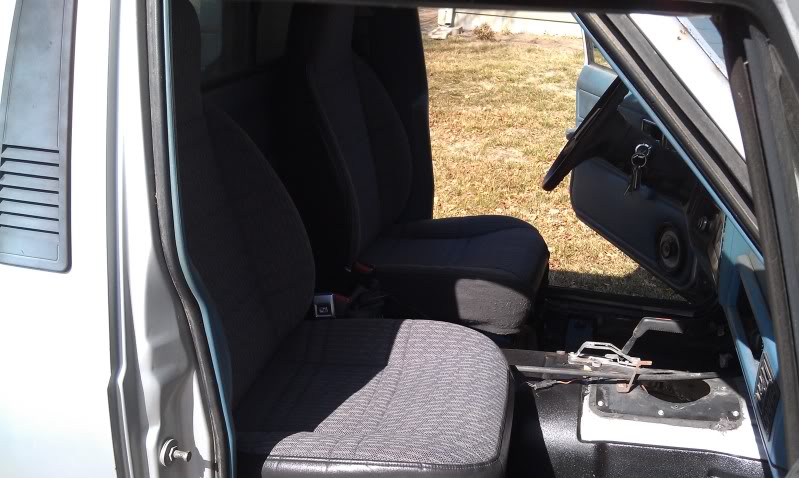
At one point I had deemed the seats out of my 99 donor garbage. They were dirty, grimey and were filled with a stagnant ciggarette stench. I couldn't even get any local folks who were looking for bucket seats to take them!
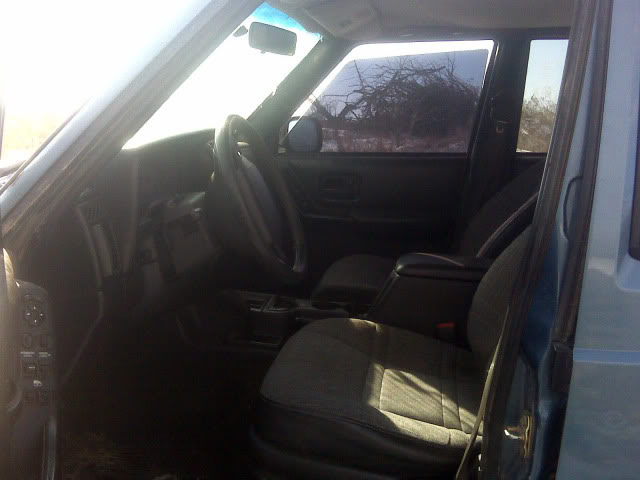
I brought them home from the farm to try and clean them up. First I hosed the seats with a garden hose. Then I mixed a bucket of HOT dish soap and water then scrubbed the seats with the soapy water mix with a small nylon brush. Rinsed with the garden hose and vacuumed. Repeated the process 2-3 times then let them air dry for a week. These seats are better looking that what is in my Rubi and only smell like fabric.
Installed in the truck:
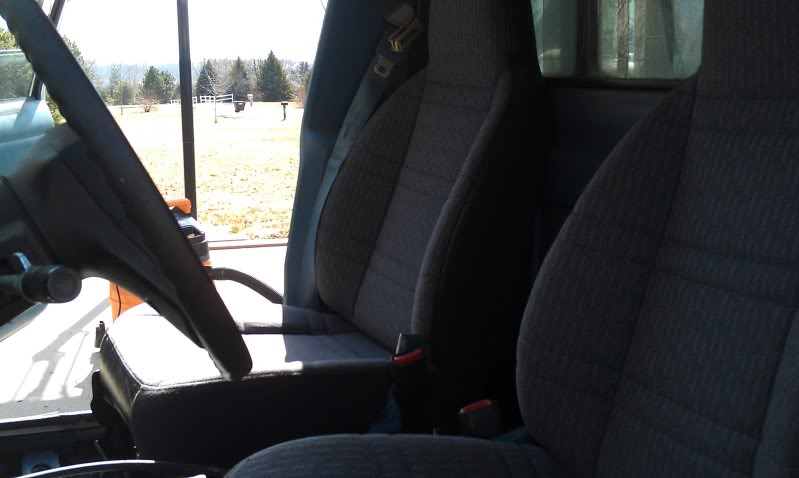
Finished my center console mount and got it installed.
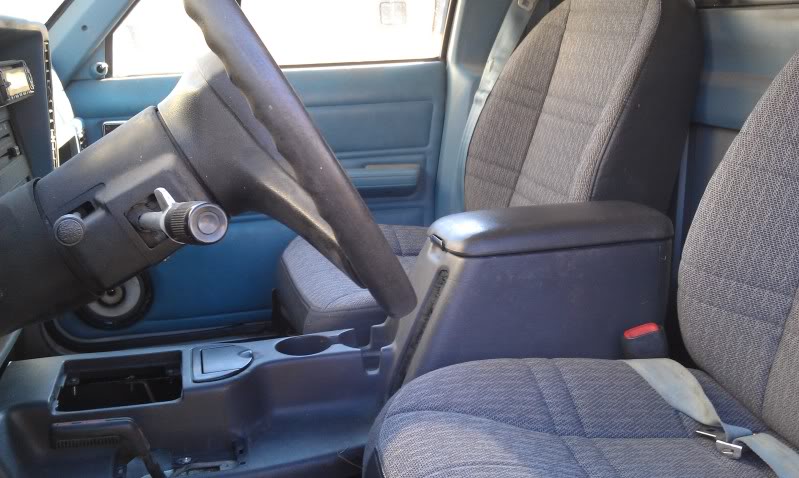
Yay! Cup holders! This truck is going to have a real comfy interior with a sub-par body.
I brought them home from the farm to try and clean them up. First I hosed the seats with a garden hose. Then I mixed a bucket of HOT dish soap and water then scrubbed the seats with the soapy water mix with a small nylon brush. Rinsed with the garden hose and vacuumed. Repeated the process 2-3 times then let them air dry for a week. These seats are better looking that what is in my Rubi and only smell like fabric.
Installed in the truck:
Finished my center console mount and got it installed.
Yay! Cup holders! This truck is going to have a real comfy interior with a sub-par body.
Thread Starter
Member
Joined: Mar 2012
Posts: 131
Likes: 1
From: Junction City, Kansas
Year: 86/91/92
Model: Comanche
I spent some time drilling out the crossmember mount in the frame and on the braces. The extra crossmember braces on the 86 are actually welded to the frame. And wouldn't you know it, all of the bolts were snapped.
My tools of choice
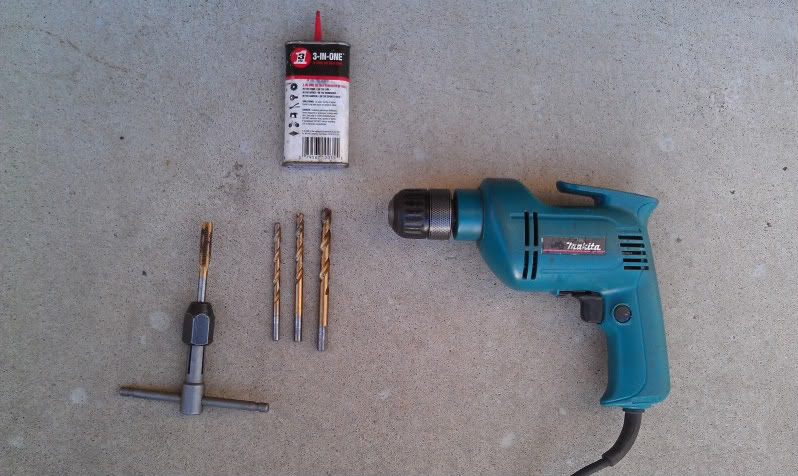
Drill bits
-15/64
-9/32
-11/32
A 10-1.50 plug tap (this is the same tap you need for the rear frame bumper brackets)
And of course, oil
Since the bolts were all snapped, I had to pick up some replacements.
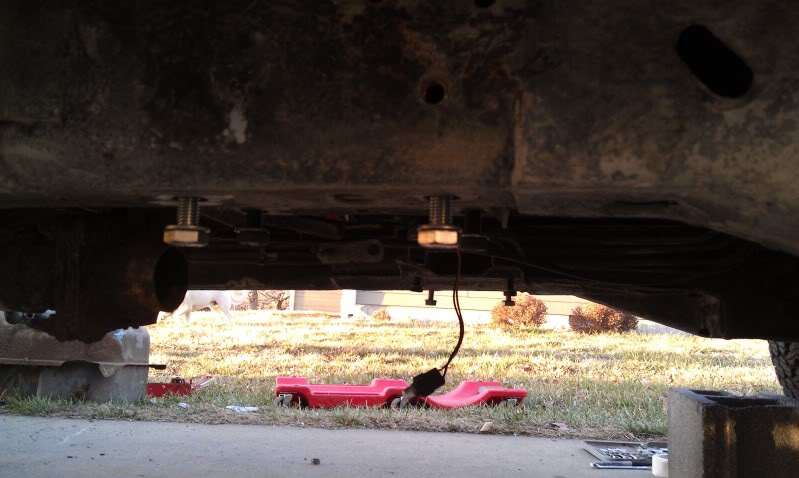
I also dropped the rusty fuel tank. The fuel pump was manufactured in March of 85. I think I will go ahead and get a replacement on the way. I am also going to use the tank from my 92 since it is rust free.
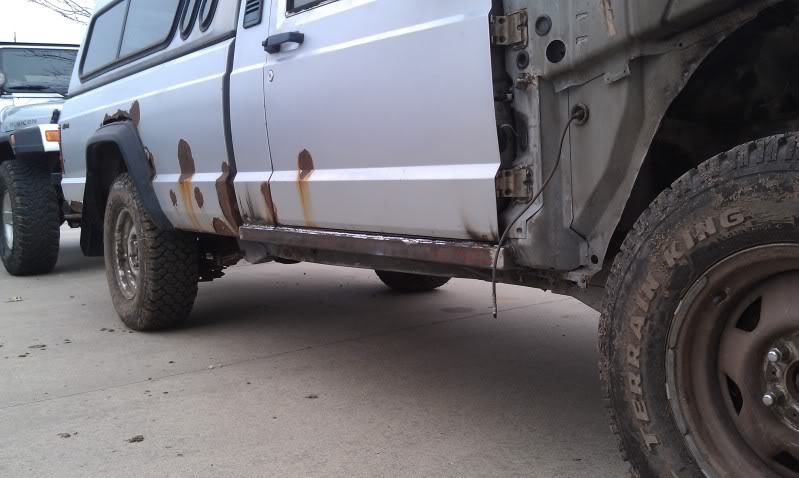
I decided to forgo mounting the 97+ doors on this truck. I did not feel like trying to remove the door hinge bolts and fight with the inevitable rusted bolts....
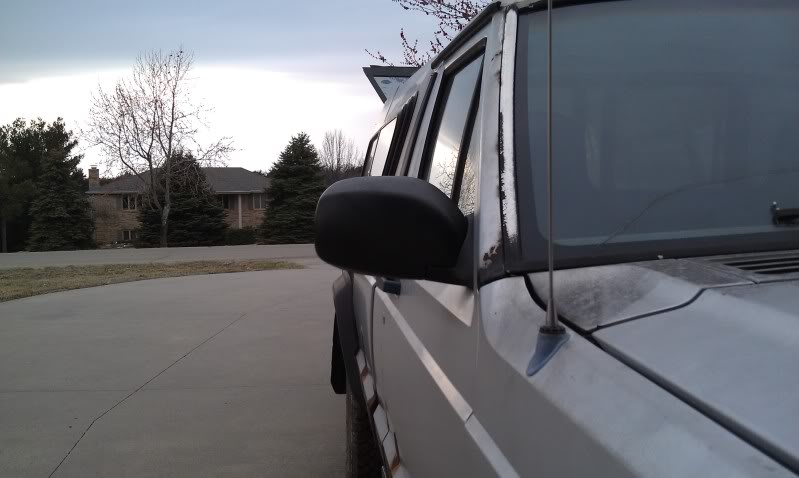
....so, I notched the fenders for the rockers, mounted the fenders and installed the 97+ mirrors on the 86 doors
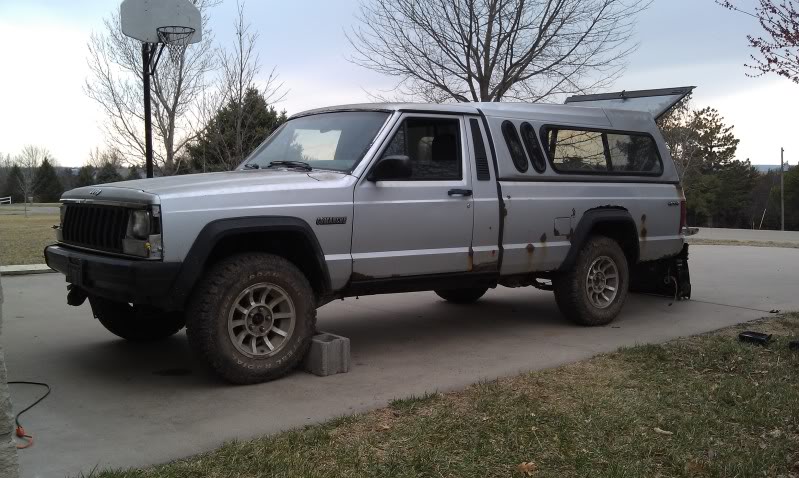
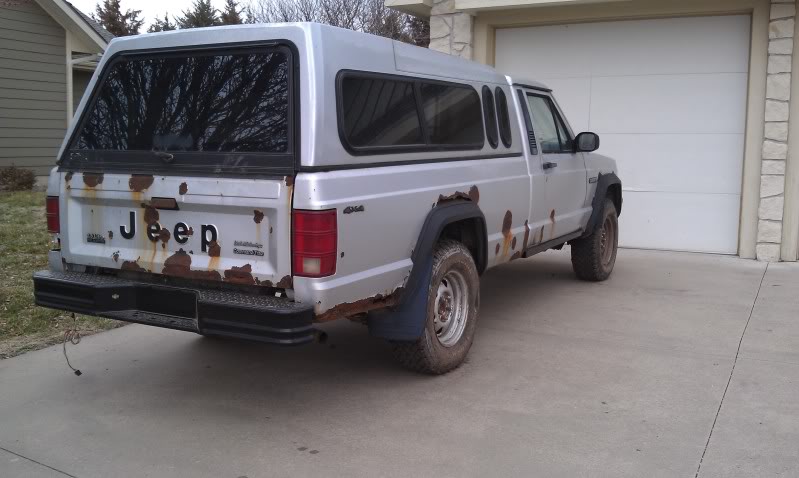
I can't wait to pull the cap!!!! Never been a fan of caps. I will put it in storage, not scrap it. I could see the cap being very useful someday.
While its an oxymoron, I had to touch up my cut marks, would hate for the fenders to rust.......

My tools of choice
Drill bits
-15/64
-9/32
-11/32
A 10-1.50 plug tap (this is the same tap you need for the rear frame bumper brackets)
And of course, oil
Since the bolts were all snapped, I had to pick up some replacements.
I also dropped the rusty fuel tank. The fuel pump was manufactured in March of 85. I think I will go ahead and get a replacement on the way. I am also going to use the tank from my 92 since it is rust free.
I decided to forgo mounting the 97+ doors on this truck. I did not feel like trying to remove the door hinge bolts and fight with the inevitable rusted bolts....
....so, I notched the fenders for the rockers, mounted the fenders and installed the 97+ mirrors on the 86 doors
I can't wait to pull the cap!!!! Never been a fan of caps. I will put it in storage, not scrap it. I could see the cap being very useful someday.
While its an oxymoron, I had to touch up my cut marks, would hate for the fenders to rust.......

Thread Starter
Member
Joined: Mar 2012
Posts: 131
Likes: 1
From: Junction City, Kansas
Year: 86/91/92
Model: Comanche
Not much has happened to this poor truck since the last update. This is primarily due to the fact that my wife and I bought a house and I started a new job.
....but alas, I am back at it with a goal of one month to get it driving. Yep, that is right. This will be a push through June. Now that she sits in a garage, attached to the house, I think it may happen.
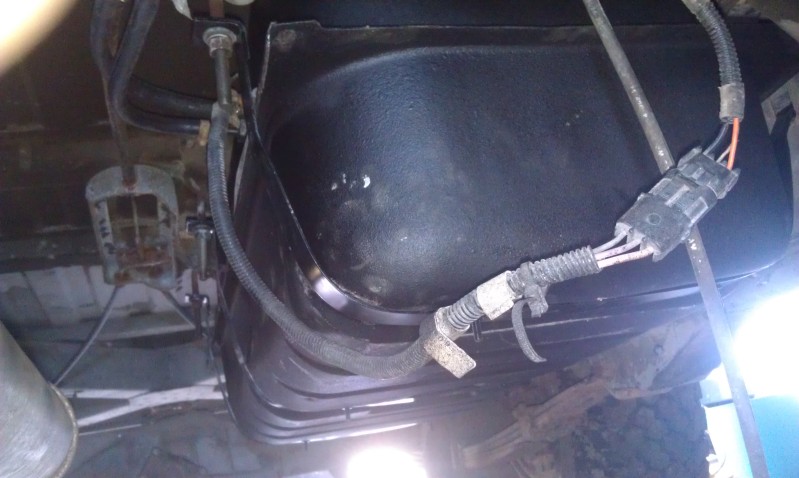
My first order of business was to get the fuel system squared away. So I dropped the tank, replaced the pump and strainer then tested the sender. I also replaced the fuel filter and all rubber hose and bought new fuel tank straps. At this moment I am saving the stock fuel tank. It was rusty, but I did not find any holes. It is 1/2 finished.
Since the truck was somebody else's project (or problem) I keep finding out I obviously did not get all of the nuts and bolts that were removed. It was missing the starter bolts and bell housing bolts. Finding the bolt sizes for these are just about impossible. Here is a reference list of the bolts I purchased.
Starter
- (2) 3/8-16x4"
Bell housing to block
- (2) M12x1.75x45
- (2) M12x1.75x50
- (2) M12x1.75x90
- (2) M 8 (unknown)
I ordered, received and installed a starter from Advance Auto with a lifetime warranty. I also checked and.changed the oil and installed new Champion spark plus. I inspected the piston tops and cylinder walls to the best of my ability.
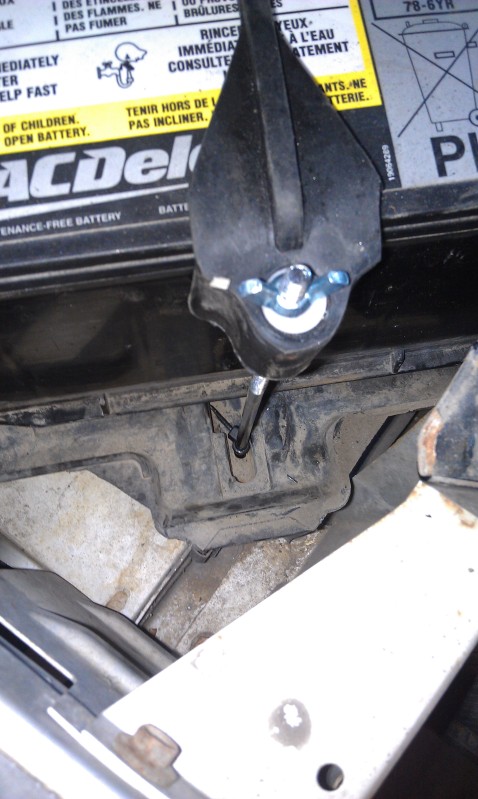
It was then time to address the battery hold down on this truck (and the worn out battery from 2004). A rubber bungee cord is the only thing keeping the lead brick in place. I obtained a good used battery from my father who needlessly replaced the battery in his Silverado.
Used a generic battery hold down I found at the local farm supply store. I think it will work just perfect.

Now with a good battery I could, for the first time, test some of the trucks electronic systems:
Door buzzer - Good and annoying
Radio - Good
Horn - Good
Blinkers - Good
Headlights - Good
Tail lights - Fair, blinker bulb lights up on passenger side when tails are on. Probable ground issue
Gauge
Fuel pump - Good
Sending unit - Good gauge responded to float movement
Then curiosity got the best of me. Even though the fuel system is not finished, I wanted to hear the 2.5 turn over.
https://www.youtube.com/watch?v=lQ4ZRsDPZMg
It was a small achievemet.
I was able to re-finish the stock fuel tank and get it installed with new tank straps. Of course, once I got it installed and dumped 5 gallons of fuel in there it decided to leak. Leak is coming from the bottom half of the tank behind a strap. Guess the rust was too much. At least I didn't buy anything for it. Time to buy a new tank.
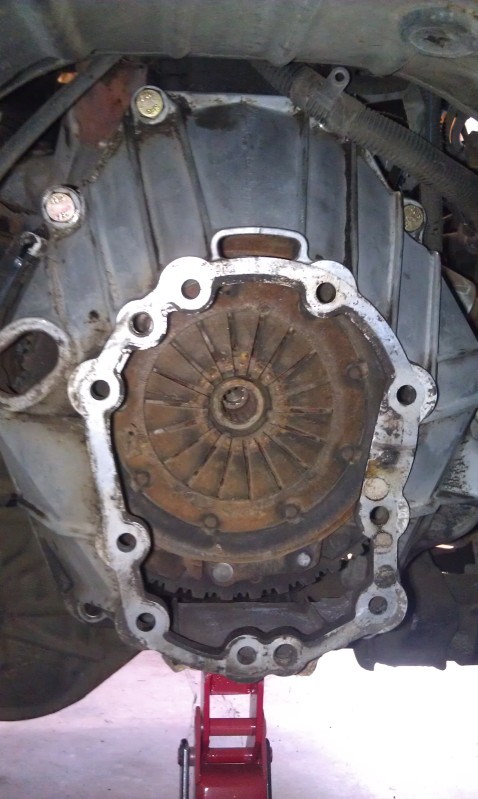
I also got the bell housing test fitted with the bolts I bought. Fit like a glove.
Apparently I need to figure out what size bolts hold the CPS in place as now have two zip-ties holding it in place.
And the good news. I turned the key on and off several times to let the fuel pump get gas to the motor. This little 2.5 hasn't been run since 2004 and I was expecting the worst. Instead, this is what happened:
https://www.youtube.com/watch?v=fMCDbs4I1Tw
Yeah buddy! Even with an open header it was running darned smooth.
....but alas, I am back at it with a goal of one month to get it driving. Yep, that is right. This will be a push through June. Now that she sits in a garage, attached to the house, I think it may happen.
My first order of business was to get the fuel system squared away. So I dropped the tank, replaced the pump and strainer then tested the sender. I also replaced the fuel filter and all rubber hose and bought new fuel tank straps. At this moment I am saving the stock fuel tank. It was rusty, but I did not find any holes. It is 1/2 finished.
Since the truck was somebody else's project (or problem) I keep finding out I obviously did not get all of the nuts and bolts that were removed. It was missing the starter bolts and bell housing bolts. Finding the bolt sizes for these are just about impossible. Here is a reference list of the bolts I purchased.
Starter
- (2) 3/8-16x4"
Bell housing to block
- (2) M12x1.75x45
- (2) M12x1.75x50
- (2) M12x1.75x90
- (2) M 8 (unknown)
I ordered, received and installed a starter from Advance Auto with a lifetime warranty. I also checked and.changed the oil and installed new Champion spark plus. I inspected the piston tops and cylinder walls to the best of my ability.
It was then time to address the battery hold down on this truck (and the worn out battery from 2004). A rubber bungee cord is the only thing keeping the lead brick in place. I obtained a good used battery from my father who needlessly replaced the battery in his Silverado.
Used a generic battery hold down I found at the local farm supply store. I think it will work just perfect.
Now with a good battery I could, for the first time, test some of the trucks electronic systems:
Door buzzer - Good and annoying
Radio - Good
Horn - Good
Blinkers - Good
Headlights - Good
Tail lights - Fair, blinker bulb lights up on passenger side when tails are on. Probable ground issue
Gauge
Fuel pump - Good
Sending unit - Good gauge responded to float movement
Then curiosity got the best of me. Even though the fuel system is not finished, I wanted to hear the 2.5 turn over.
https://www.youtube.com/watch?v=lQ4ZRsDPZMg
It was a small achievemet.
I was able to re-finish the stock fuel tank and get it installed with new tank straps. Of course, once I got it installed and dumped 5 gallons of fuel in there it decided to leak. Leak is coming from the bottom half of the tank behind a strap. Guess the rust was too much. At least I didn't buy anything for it. Time to buy a new tank.
I also got the bell housing test fitted with the bolts I bought. Fit like a glove.
Apparently I need to figure out what size bolts hold the CPS in place as now have two zip-ties holding it in place.
And the good news. I turned the key on and off several times to let the fuel pump get gas to the motor. This little 2.5 hasn't been run since 2004 and I was expecting the worst. Instead, this is what happened:
https://www.youtube.com/watch?v=fMCDbs4I1Tw
Yeah buddy! Even with an open header it was running darned smooth.
Trending Topics
Moderator of Jeeps
Joined: Jul 2011
Posts: 21,029
Likes: 3
From: Frederick, MD from Cleveland, OH
Year: 1993 YJ Wrangler
Engine: 4.0 I6
Now with a good battery I could, for the first time, test some of the trucks electronic systems:
Door buzzer - Good and annoying
Radio - Good
Horn - Good
Blinkers - Good
Headlights - Good
Tail lights - Fair, blinker bulb lights up on passenger side when tails are on. Probable ground issue
Gauge
Fuel pump - Good
Sending unit - Good gauge responded to float movement
Door buzzer - Good and annoying
Radio - Good
Horn - Good
Blinkers - Good
Headlights - Good
Tail lights - Fair, blinker bulb lights up on passenger side when tails are on. Probable ground issue
Gauge
Fuel pump - Good
Sending unit - Good gauge responded to float movement
(Subscribed)
Thread Starter
Member
Joined: Mar 2012
Posts: 131
Likes: 1
From: Junction City, Kansas
Year: 86/91/92
Model: Comanche
NewKind - The light issue I have with this truck is the bulb in the housing lights up with the other. Plan to start diagnosing it this week.
And I got it running. She is smooth to 55mph......
With no seatbelts and spongy brakes, I didn't try for any more.
Now its time to tackle the long list of small stuff to be done.
First order of business:

And I got it running. She is smooth to 55mph......
With no seatbelts and spongy brakes, I didn't try for any more.
Now its time to tackle the long list of small stuff to be done.
First order of business:
 im subscribed man, cant wait to see what else is in store.
Moderator of Jeeps
Joined: Jul 2011
Posts: 21,029
Likes: 3
From: Frederick, MD from Cleveland, OH
Year: 1993 YJ Wrangler
Engine: 4.0 I6

87Warrior, it looks great without the cap. That was the first thing I did to mine, too. And it's nice to see another longbed. If you plan on using it to haul anything, I strongly recommend Line-X. I paid $650 for the truck and $500 for the Line-X, but it's definitely the best thing I've done to it so far.
Last edited by NewKindOfClown; Jul 9, 2012 at 05:39 AM.
CF Veteran
Joined: Feb 2011
Posts: 1,115
Likes: 0
From: Goose Creek, SC
Year: 1996
Model: Cherokee
Engine: 4.0 HO
Great looking MJ. I'd love to find one in semi-decent shape to build up. I think the closest I will get is chopping up my 4 door and making the whole rear area a bed.
Thread Starter
Member
Joined: Mar 2012
Posts: 131
Likes: 1
From: Junction City, Kansas
Year: 86/91/92
Model: Comanche
NewKind - I probably wont be spending any cash to protect this rusted and crusted bed. On top of the rusted holes at the fenders and tailgate, when I pulled the cap I noticed a hole rusted through on top of the bed rail. I have never seen the inside of an MJ bed rot away, but I haven't pulled the plastic liner that is currently in there to see what is in store for me underneath. Maybe there will be a stack of $100 bills.
Cowboy - When I first started looking for MJs 4 years ago, I would have ran far, far, away from this one. Now I see beauty behind all of that rust and rot. Wait, that's not beauty I see behind the body rot, that's the garage wall These trucks are gaining popularity pretty fast, so pick one up ASAP before everybody thinks they are worth their weight in gold!
I fought with the agate carpet from the 99 XJ donor and got it shoved into position.
Cowboy - When I first started looking for MJs 4 years ago, I would have ran far, far, away from this one. Now I see beauty behind all of that rust and rot. Wait, that's not beauty I see behind the body rot, that's the garage wall
These trucks are gaining popularity pretty fast, so pick one up ASAP before everybody thinks they are worth their weight in gold!I fought with the agate carpet from the 99 XJ donor and got it shoved into position.
Last edited by 87Warrior; Jul 11, 2012 at 10:52 PM.