
My 94 XJ build "Project Junk"

Thread Starter
Member
Joined: Jun 2009
Posts: 105
Likes: 0
From: West Jordan Utah
Year: 1994
Model: Cherokee
Engine: 4.0
(Here is my build that I already have started, I thought I would post it here as well.)
I called it Project Junk because the guy I bought it from was ready to junk it.
Here is my build on what I have already done so far and any new progress as time and money allows.
My plans for this build are:
-4.88 gears, Lockers, axle shafts
-RE LA kit
-JCR sliders, bumpers, & gas tank skid, Steering
-Roof Rack
-XRC Comp10 Winch with a warn demountable cradle
-G2 Dana 44 front axle with Detroit locker
-Eventually down the road will be a stroker build 4.6-4.7
-Interior Cage
There is more but this is most the big stuff.
A little bit if history I bought my 94 XJ Sport off Craigslist in April 09 for $800. It did not have any unibody damage and it had a folder full of maintenance records so I decided to buy it.
Here is what it looked like the day I bought it.

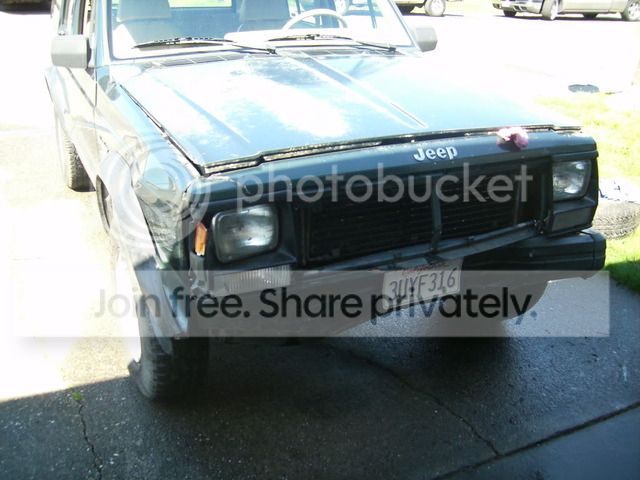
I bought some new/used JY parts and a header panel and grill from ebay along with some clear turns and markers. Around 07/09


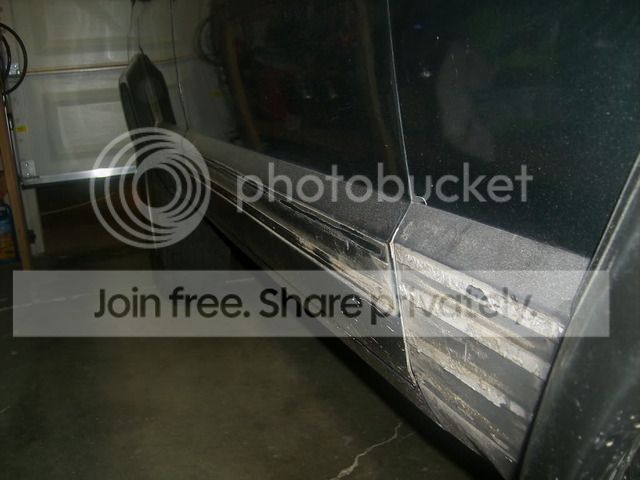
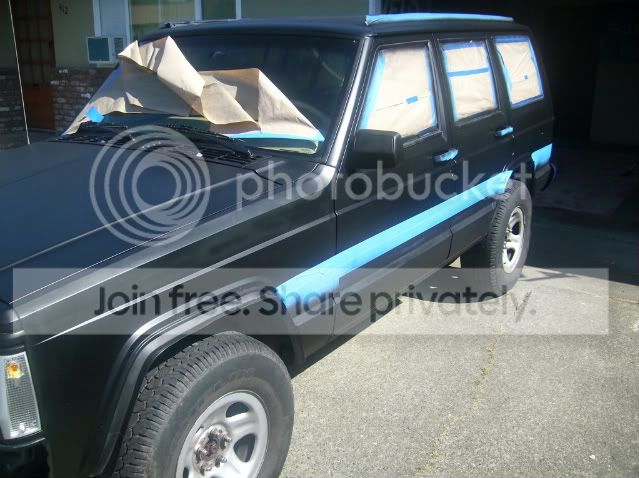
Next was time do do something about the paint, I liked the color but could not stand the clear coat flaking off like it was. So I sanded all the clear off smooth.

Also got rid of the trim.
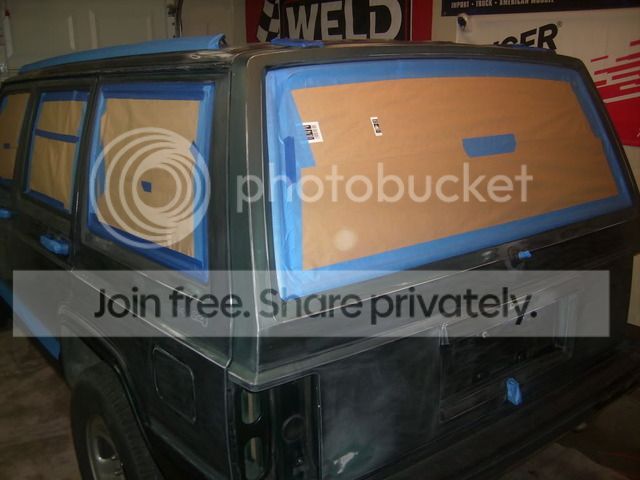
Masked it.
I called it Project Junk because the guy I bought it from was ready to junk it.
Here is my build on what I have already done so far and any new progress as time and money allows.
My plans for this build are:
-4.88 gears, Lockers, axle shafts
-RE LA kit
-JCR sliders, bumpers, & gas tank skid, Steering
-Roof Rack
-XRC Comp10 Winch with a warn demountable cradle
-G2 Dana 44 front axle with Detroit locker
-Eventually down the road will be a stroker build 4.6-4.7
-Interior Cage
There is more but this is most the big stuff.
A little bit if history I bought my 94 XJ Sport off Craigslist in April 09 for $800. It did not have any unibody damage and it had a folder full of maintenance records so I decided to buy it.
Here is what it looked like the day I bought it.
I bought some new/used JY parts and a header panel and grill from ebay along with some clear turns and markers. Around 07/09
Next was time do do something about the paint, I liked the color but could not stand the clear coat flaking off like it was. So I sanded all the clear off smooth.
Also got rid of the trim.
Masked it.
Last edited by jrw7072009; Dec 5, 2010 at 12:53 PM.
Thread Starter
Member
Joined: Jun 2009
Posts: 105
Likes: 0
From: West Jordan Utah
Year: 1994
Model: Cherokee
Engine: 4.0
After a few cans of Rustoleum Satin Black spray paint.
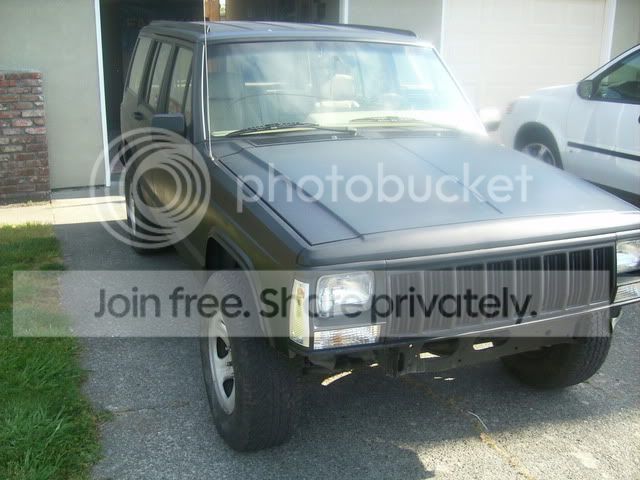
Then I threw on a front bumper from the JY. Installed a 1 3/4 budget boost, some Rubicon wheels, and trimmed the fenders.

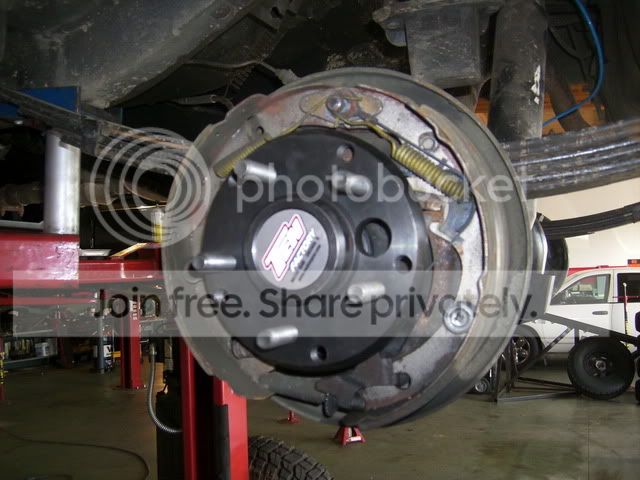
Next was time to get rid of the D35 and get something better. I went to my local JY in search of a 8.8, and I happen to find a 87 XJ with a D44 so I said why not its almost as strong and it bolts right in. I gave it some new drums, wheel cylinders, and shoes the old ones where shot.


Then I threw on a front bumper from the JY. Installed a 1 3/4 budget boost, some Rubicon wheels, and trimmed the fenders.
Next was time to get rid of the D35 and get something better. I went to my local JY in search of a 8.8, and I happen to find a 87 XJ with a D44 so I said why not its almost as strong and it bolts right in. I gave it some new drums, wheel cylinders, and shoes the old ones where shot.
Thread Starter
Member
Joined: Jun 2009
Posts: 105
Likes: 0
From: West Jordan Utah
Year: 1994
Model: Cherokee
Engine: 4.0
Next I rounded up some other parts like:
RE 7.5" coils
Dodge UCAs for my lowers
Pro Junk shocks
2" RC shackles
Pro Junk full size AAL
JK UCAs cut, shortened, and re welded
Stock JK sway bar end links
Some used 315/75/16 M/Ts
Some 04 Rubicon Wheels
And I got this. Done around 09/09
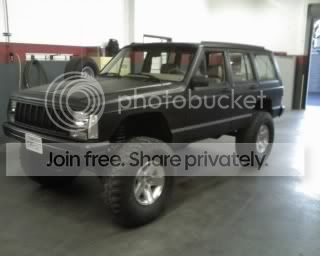
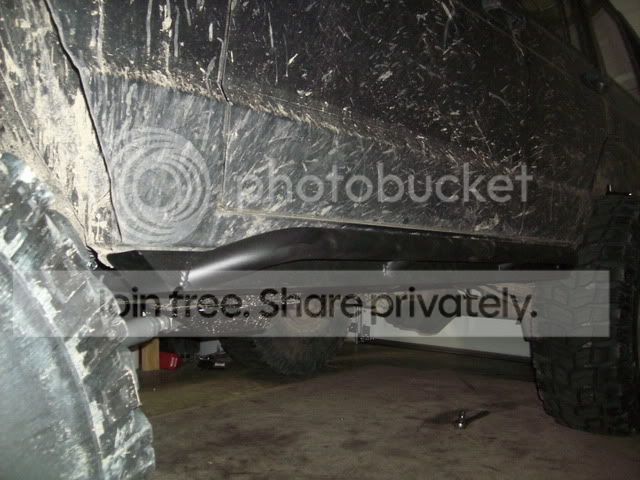
I don't have many pics of the my budget lift install cause (it sucked) I am planning to upgrade with 63" Chevy leaf springs and LA upgrade. So I will get detailed pics of those installs after I do them. I didnt have a SYE yet cause D44 pinion is longer so my D line angles where pretty good with a 3/4" T case drop.
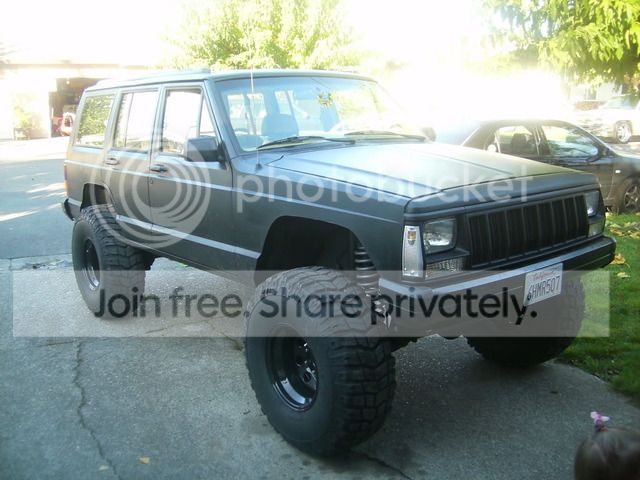
Here is after the new 15x10 Pro Comp Steelies and 35" Xterrains

I do have some pics of my rear fender patch job and my bump stops. I will get some pics of those up soon.
Like most of us here my list of things to do to the XJ are never ending but here are the plans for what I want to do next when funds and time allow.
These should be done over the next few weeks...
Long Arm upgrade
JCR OTK steering
Adjustable track bar
Sliders JCR stage 3
SYE
CV drive line
These will be next on the list (in random order)
JCR front bumper with 2" receiver
XRC 10 Comp winch
Warn Demountable winch cradle
63" Chevy Leaf springs
Gas tank skid
Rear bumper
Roll cage
For the rear axle:
locker
4.88 Gears
Chromoly axle shafts
The front axle will be getting gears when I do the rear but that's it, I am looking to do the G2 D44 front with some Reid racing knuckles and possibly the ARB. Then some 36 or 37" tires.
My goal for all this to be done is spring time 2011
RE 7.5" coils
Dodge UCAs for my lowers
Pro Junk shocks
2" RC shackles
Pro Junk full size AAL
JK UCAs cut, shortened, and re welded
Stock JK sway bar end links
Some used 315/75/16 M/Ts
Some 04 Rubicon Wheels
And I got this. Done around 09/09
I don't have many pics of the my budget lift install cause (it sucked) I am planning to upgrade with 63" Chevy leaf springs and LA upgrade. So I will get detailed pics of those installs after I do them. I didnt have a SYE yet cause D44 pinion is longer so my D line angles where pretty good with a 3/4" T case drop.
Here is after the new 15x10 Pro Comp Steelies and 35" Xterrains
I do have some pics of my rear fender patch job and my bump stops. I will get some pics of those up soon.
Like most of us here my list of things to do to the XJ are never ending but here are the plans for what I want to do next when funds and time allow.
These should be done over the next few weeks...
Long Arm upgrade
JCR OTK steering
Adjustable track bar
Sliders JCR stage 3
SYE
CV drive line
These will be next on the list (in random order)
JCR front bumper with 2" receiver
XRC 10 Comp winch
Warn Demountable winch cradle
63" Chevy Leaf springs
Gas tank skid
Rear bumper
Roll cage
For the rear axle:
locker
4.88 Gears
Chromoly axle shafts
The front axle will be getting gears when I do the rear but that's it, I am looking to do the G2 D44 front with some Reid racing knuckles and possibly the ARB. Then some 36 or 37" tires.
My goal for all this to be done is spring time 2011
Thread Starter
Member
Joined: Jun 2009
Posts: 105
Likes: 0
From: West Jordan Utah
Year: 1994
Model: Cherokee
Engine: 4.0
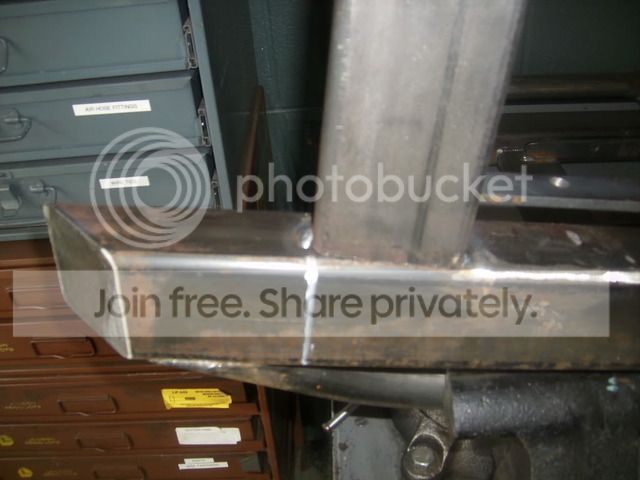
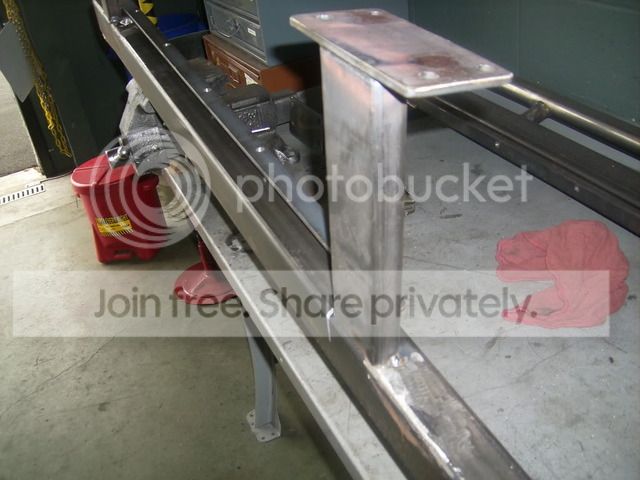
Here is my Ghetto Fab work on my rear fenders and my super ghetto bump stops.
I did the bump stops out of metal I had laying around the shop and some old full size truck bump stops. I plan to make some more sooner or later.
I started with a mess of metal. Done around 11/09

I chose these over the stock XJ just cause there thicker and stronger.

Cut and drill 4 stips of metal and welded them on a square tube.


And bolted the bump stops on and bolted them to the Jeep.
I made them offset a little to clear the shocks, I plan to make a better set one day. These work for now.
I did the bump stops out of metal I had laying around the shop and some old full size truck bump stops. I plan to make some more sooner or later.
I started with a mess of metal. Done around 11/09
I chose these over the stock XJ just cause there thicker and stronger.
Cut and drill 4 stips of metal and welded them on a square tube.
And bolted the bump stops on and bolted them to the Jeep.
I made them offset a little to clear the shocks, I plan to make a better set one day. These work for now.
Thread Starter
Member
Joined: Jun 2009
Posts: 105
Likes: 0
From: West Jordan Utah
Year: 1994
Model: Cherokee
Engine: 4.0
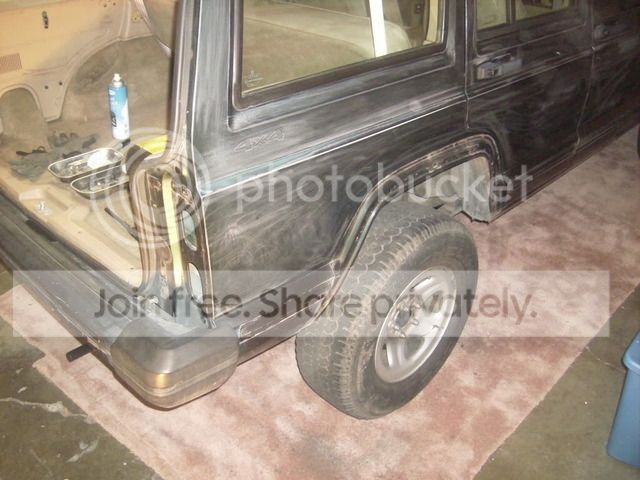
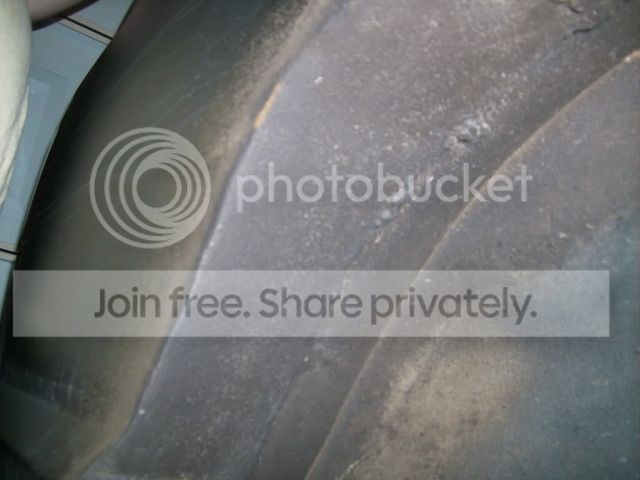
I cut the rear fenders and water was getting up in the back and soaking the rear carpet. So I had to make a quick fix so here is my patch job I did last week.
I used 20g steel and a 220 Miller welder, trying to weld to the XJ body was a real test to my welding skills. If I held the trigger to long it would burn right through the XJ body.
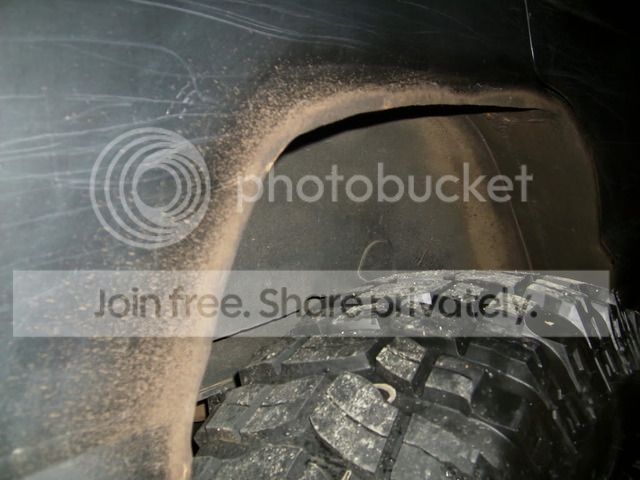
I cut the inner fender or wheel well back a little till it flattened out and took the 20g x 4" x 4' piece of steel and put a self tapper screw in to hold it. Then tacked it in a couple places.


Then I used a body hammer and a ball peen hammer to bend and shape the metal closer to the body, and tack it all up.

Then when I got it all in place I started to stitch weld it in small sections.

It was a PITA but I got it done and I shot it with some under coat that apparently does not dry fast at all. Here it is after some grinding I still need to clean it up on the insides but grinding sucks and I ran out of time.
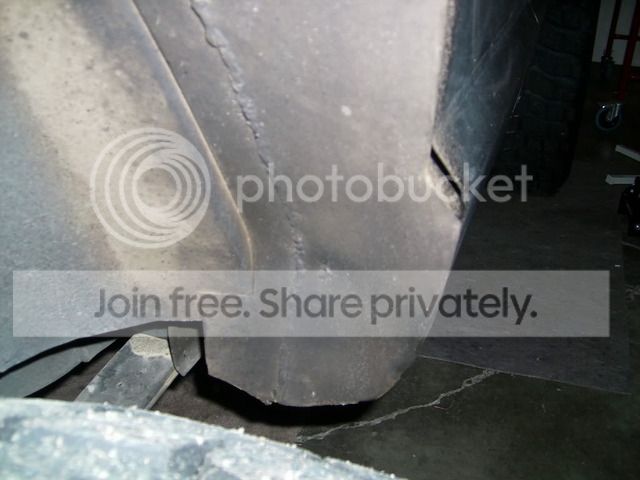
I am going to strip the cheesy under coat off and smooth it all out with a flap disc and prime and paint it but for now it stops the water and mud from soaking my rear carpet.
I used 20g steel and a 220 Miller welder, trying to weld to the XJ body was a real test to my welding skills. If I held the trigger to long it would burn right through the XJ body.
I cut the inner fender or wheel well back a little till it flattened out and took the 20g x 4" x 4' piece of steel and put a self tapper screw in to hold it. Then tacked it in a couple places.
Then I used a body hammer and a ball peen hammer to bend and shape the metal closer to the body, and tack it all up.
Then when I got it all in place I started to stitch weld it in small sections.
It was a PITA but I got it done and I shot it with some under coat that apparently does not dry fast at all. Here it is after some grinding I still need to clean it up on the insides but grinding sucks and I ran out of time.
I am going to strip the cheesy under coat off and smooth it all out with a flap disc and prime and paint it but for now it stops the water and mud from soaking my rear carpet.
Thread Starter
Member
Joined: Jun 2009
Posts: 105
Likes: 0
From: West Jordan Utah
Year: 1994
Model: Cherokee
Engine: 4.0
Next his showed up in the mail!

Here is my half *** install/pic post.
RE long arm upgrade
Pro Comp track bar
Rugged Ridge SYE
04 TJ front drive line cut down
ES 9000 Pro Comp shocks with stem conversion
RE SS brake lines
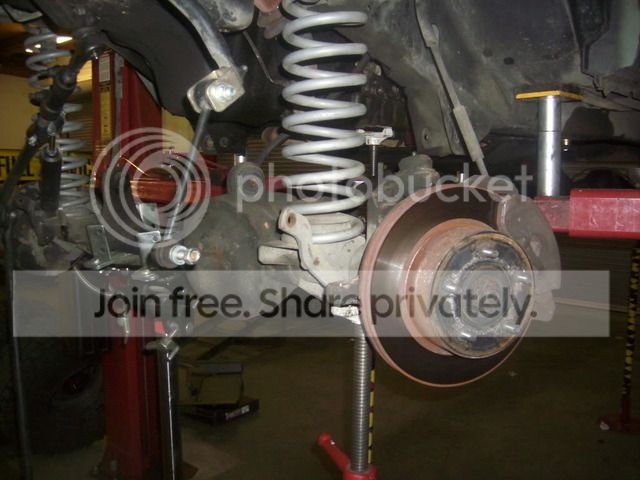
Here is what I started with. JK UCAs cut down and re welded and Dodge UCAs for my lower CAs with 7.5 RE coils.

Done around 02/10
I took off the steering, control arms, and shocks and held the axle up with a tranny jack and a pole jack.

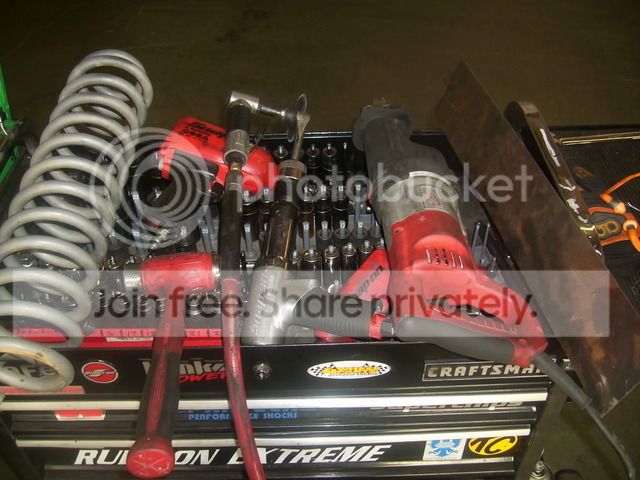
Some of the tools I used.
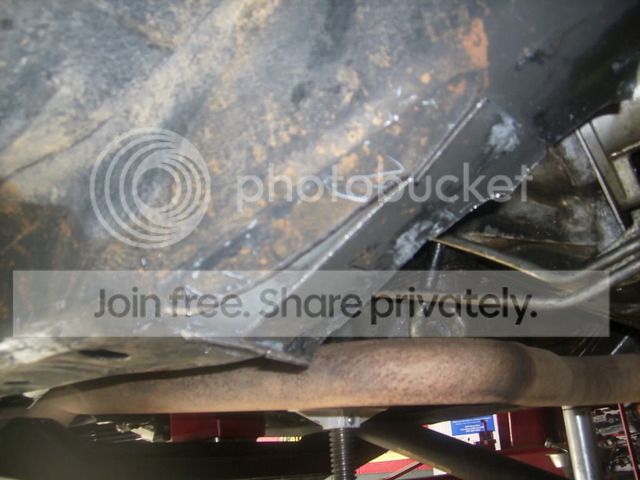
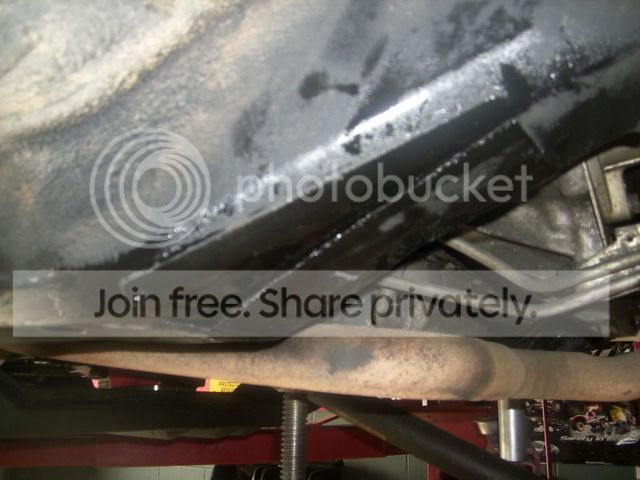
Then I cut the old CA mounts off with a sawzall, and used a grinder to try and smooth it out. (I cut my finger here pretty good here so I did not totally finish grinding it all off I will later)
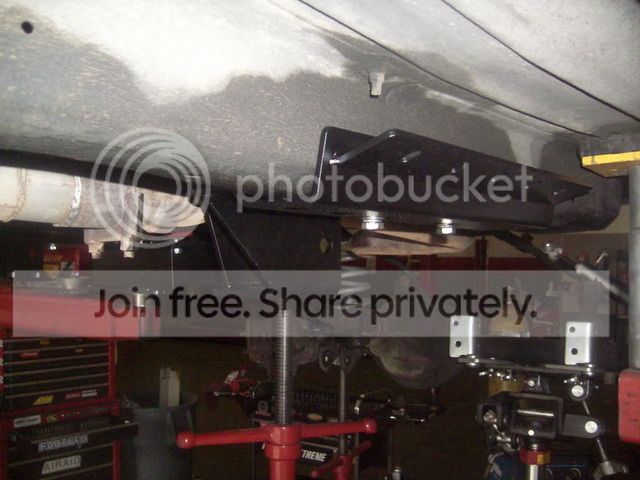
I used another pole jack to hold the tranny and T case up and took off the old cross member, and then I mocked the RE skid and tranny mount up in place.
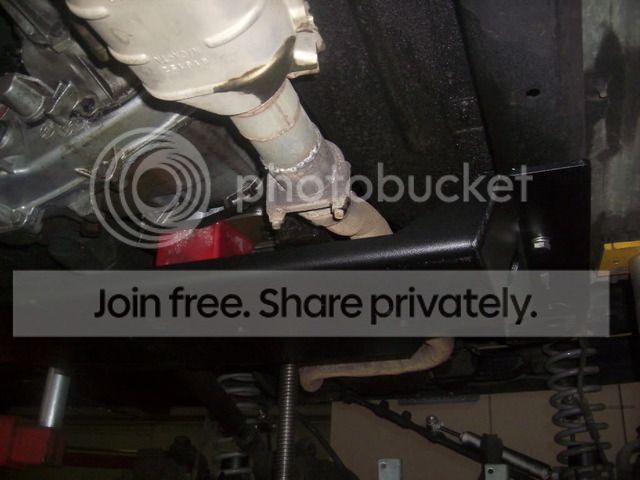
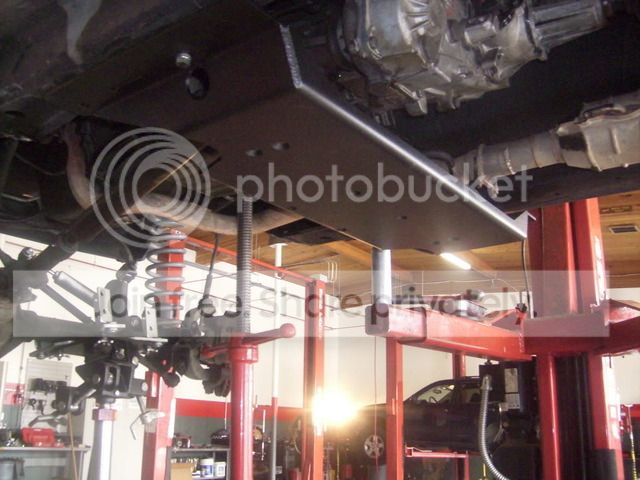
Then I placed the CA mounts up and marked them to drill all the holes. There are five on each pinch weld and five just on the inside of each uni frame.
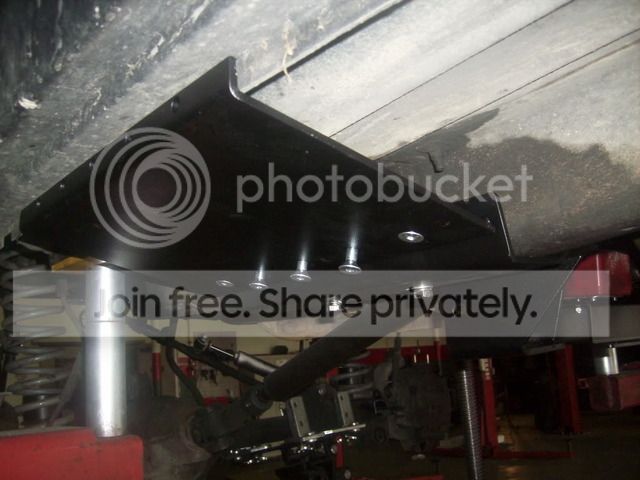
Then snugged all the bolts.

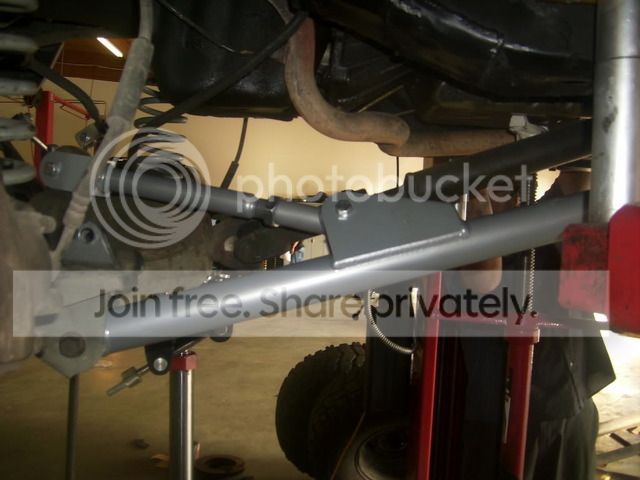
Next I installed the CAs.

A couple more holes drilled in the uniframe.

All tightened up all of the bolts and tied up the loose ends and put it all back together. (damn there are a lot of holes to drill)
Here is my half *** install/pic post.
RE long arm upgrade
Pro Comp track bar
Rugged Ridge SYE
04 TJ front drive line cut down
ES 9000 Pro Comp shocks with stem conversion
RE SS brake lines
Here is what I started with. JK UCAs cut down and re welded and Dodge UCAs for my lower CAs with 7.5 RE coils.
Done around 02/10
I took off the steering, control arms, and shocks and held the axle up with a tranny jack and a pole jack.
Some of the tools I used.
Then I cut the old CA mounts off with a sawzall, and used a grinder to try and smooth it out. (I cut my finger here pretty good here so I did not totally finish grinding it all off I will later)
I used another pole jack to hold the tranny and T case up and took off the old cross member, and then I mocked the RE skid and tranny mount up in place.
Then I placed the CA mounts up and marked them to drill all the holes. There are five on each pinch weld and five just on the inside of each uni frame.
Then snugged all the bolts.
Next I installed the CAs.
A couple more holes drilled in the uniframe.
All tightened up all of the bolts and tied up the loose ends and put it all back together. (damn there are a lot of holes to drill)
Thread Starter
Member
Joined: Jun 2009
Posts: 105
Likes: 0
From: West Jordan Utah
Year: 1994
Model: Cherokee
Engine: 4.0
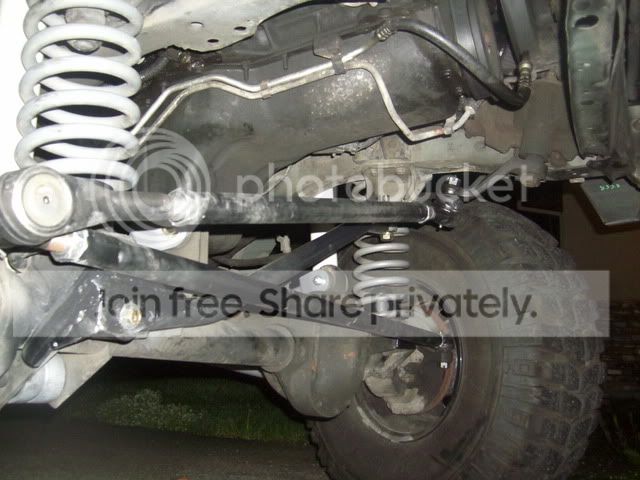
Here are a few pics of before and after on the RTI ramp at work. All pics are just before my rear tire left the ground.
Edit: Before the LA upgrade...
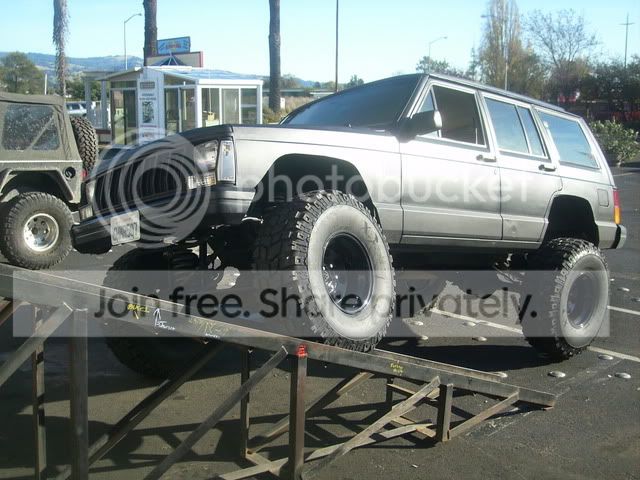
After.....
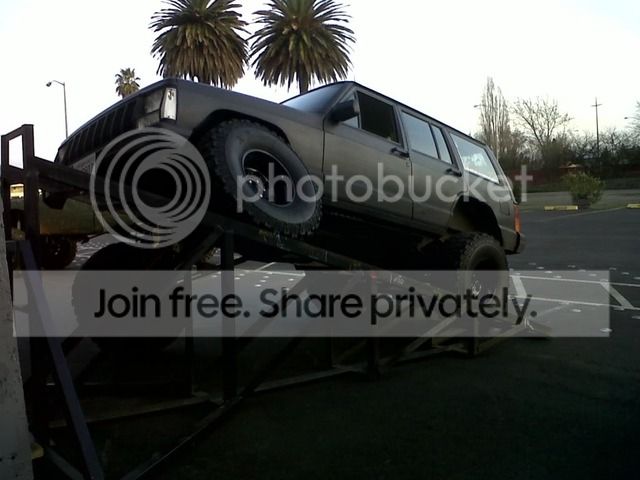
Before....

After...

Edit: Before the LA upgrade...
After.....
Before....
After...
Trending Topics
Thread Starter
Member
Joined: Jun 2009
Posts: 105
Likes: 0
From: West Jordan Utah
Year: 1994
Model: Cherokee
Engine: 4.0
I installed some Bar Pin eliminators and my steering showed up in the mail. I hope to install them along with my sliders within the next few days.


Here is what came in the mail today I got the reamer from Snap-On.


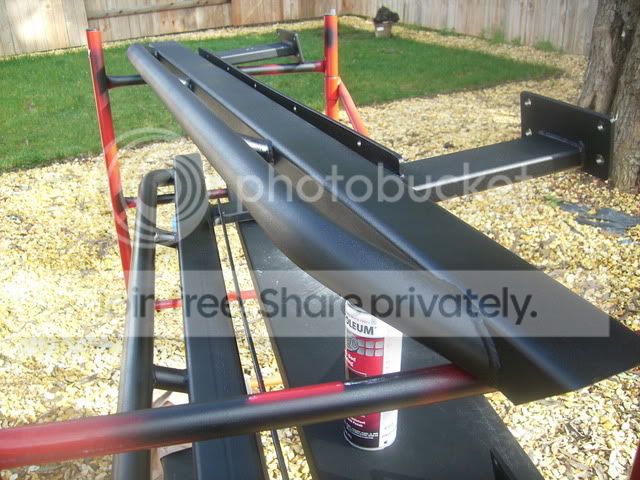
Here are my sliders, I need to cut off the "arms" from the rail and move them down about 3" to clear the RE skid plate this what JCR told me to do.


I will get posts up pics when I get done installing the steering and sliders.
Here is what came in the mail today I got the reamer from Snap-On.
Here are my sliders, I need to cut off the "arms" from the rail and move them down about 3" to clear the RE skid plate this what JCR told me to do.
I will get posts up pics when I get done installing the steering and sliders.
Thread Starter
Member
Joined: Jun 2009
Posts: 105
Likes: 0
From: West Jordan Utah
Year: 1994
Model: Cherokee
Engine: 4.0
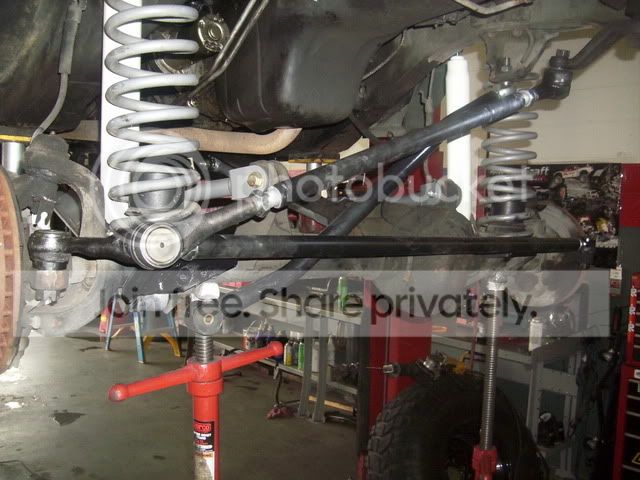
Well I got the steering on today it took me a bit longer then I thought it would. I really like the way it turned out, JCR makes some nice stuff.
Done around 02/10
Here is what I did, first I took the old steering off. Then I paint marked the steering stabilizer, and the sway bar end link mounts to cut them, I also took a little off the front of the coil buckets.


Then I cut all of it off with a sawzall and a cut off wheel.
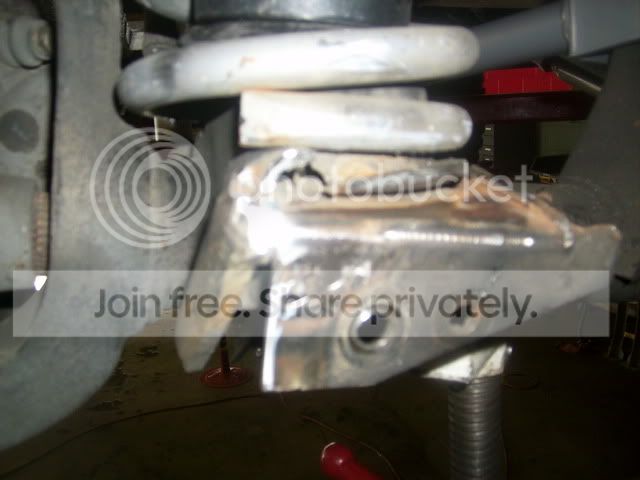
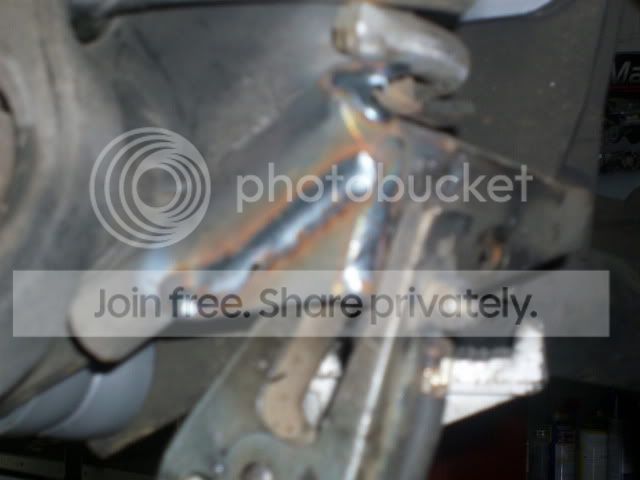
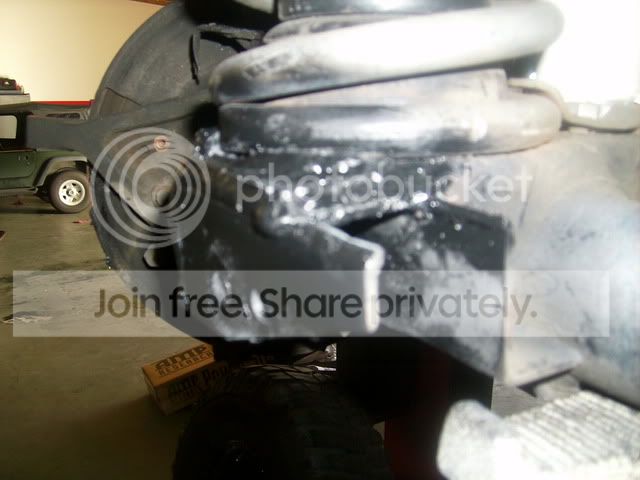
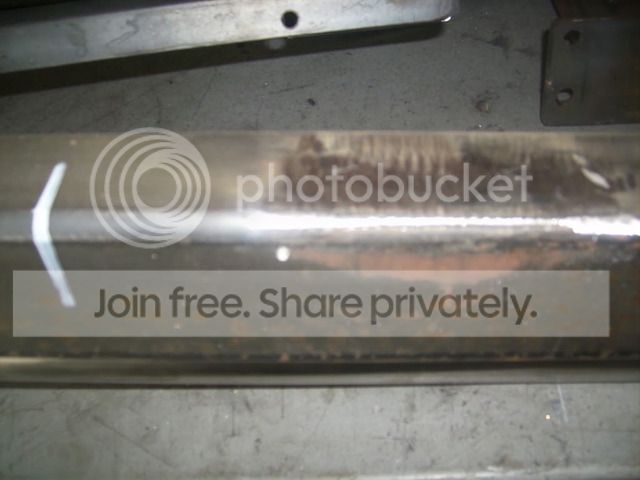
Then I cut some steel and welded it to reenforced the TB bracket and coil bucket. (sorry for the crappy pics) I welded a peice on the side and on the top and welded both the coil bucket and the TB mount together. The pics dont do it justice.
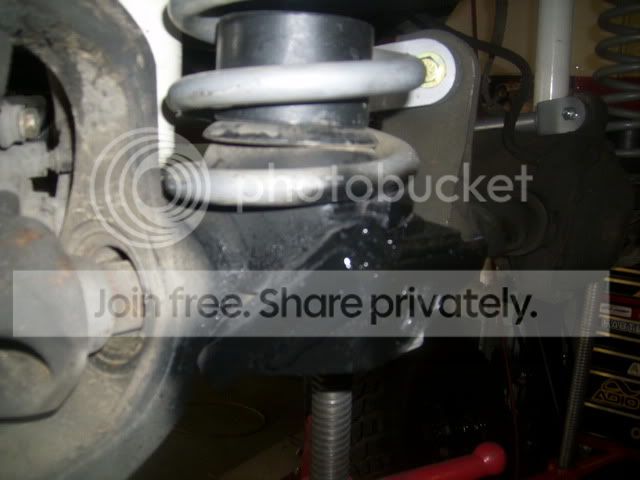
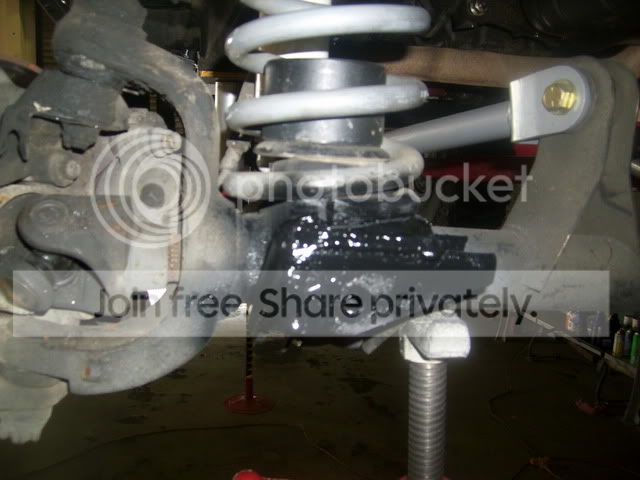
The driver side was simple.

Done around 02/10
Here is what I did, first I took the old steering off. Then I paint marked the steering stabilizer, and the sway bar end link mounts to cut them, I also took a little off the front of the coil buckets.
Then I cut all of it off with a sawzall and a cut off wheel.
Then I cut some steel and welded it to reenforced the TB bracket and coil bucket. (sorry for the crappy pics) I welded a peice on the side and on the top and welded both the coil bucket and the TB mount together. The pics dont do it justice.
The driver side was simple.
Thread Starter
Member
Joined: Jun 2009
Posts: 105
Likes: 0
From: West Jordan Utah
Year: 1994
Model: Cherokee
Engine: 4.0
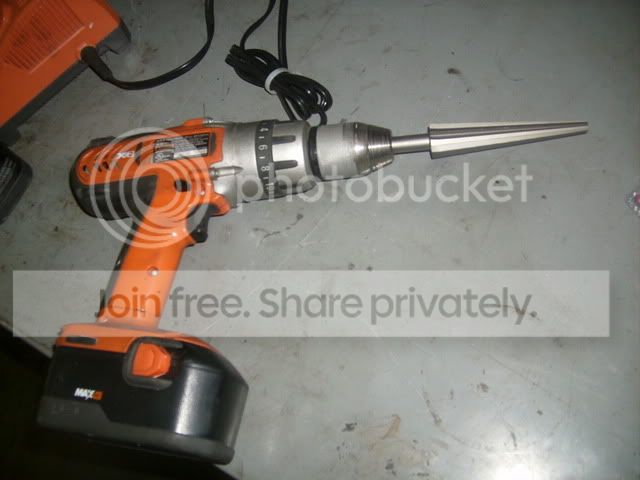
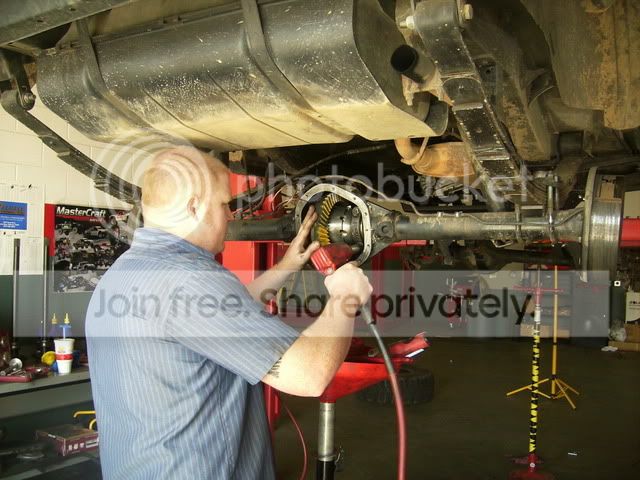
Then came the time to drill and ream the knuckles and the pitman are . I hate drilling, I used a 5/8" drill bit first then used the reamer and reamed them out till the rod ends fit nice (as per instructions).
Tool of choice was one of my cordless drills, my air drill is way to fast. I wanted to go slow, to not burn up my reamer.
Sorry no pics of the drilling part . Here is it installed, I still need to align it tomorrow I did a quick alignment with my tape and it drives pretty good.
. I hate drilling, I used a 5/8" drill bit first then used the reamer and reamed them out till the rod ends fit nice (as per instructions). Tool of choice was one of my cordless drills, my air drill is way to fast. I wanted to go slow, to not burn up my reamer.
Sorry no pics of the drilling part
. Here is it installed, I still need to align it tomorrow I did a quick alignment with my tape and it drives pretty good.
Thread Starter
Member
Joined: Jun 2009
Posts: 105
Likes: 0
From: West Jordan Utah
Year: 1994
Model: Cherokee
Engine: 4.0
After putting it off for long enough I finally installed my sliders.
JCR sent me there standard sliders instead of the RE LA compatible ones.
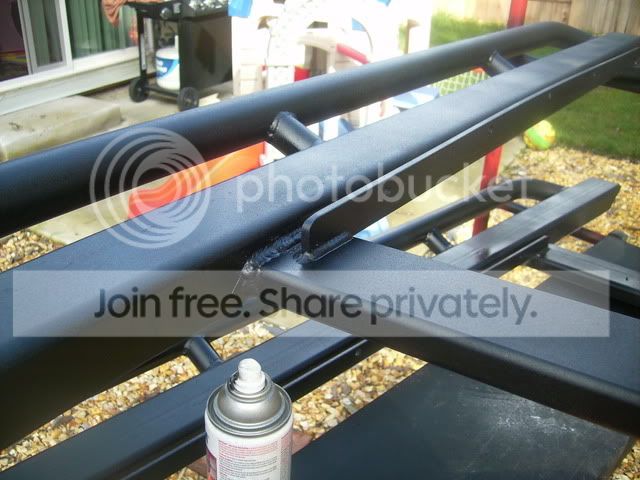
First I had to cut the arms from the rails and move them forward about 3" this is what JCR does different on there RE LA compatible sliders. I line is where I am moving them to.
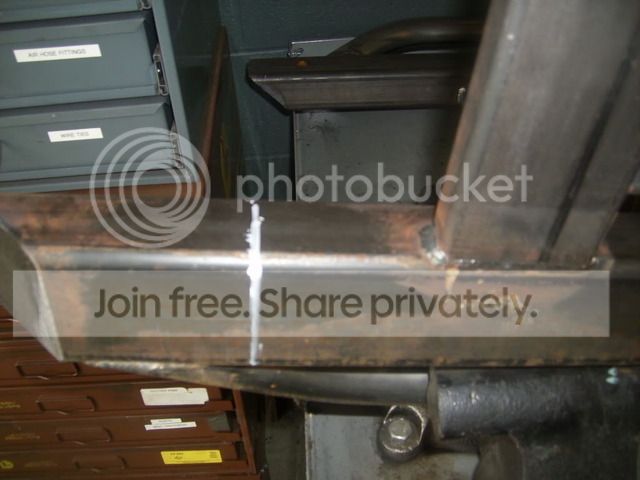
Ground down the welds.
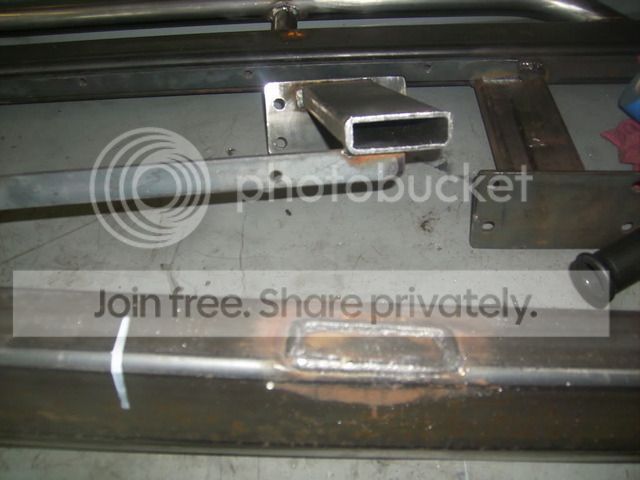
Tack welded them in place and double checked to see it they sill fit right.
Welded them back up.
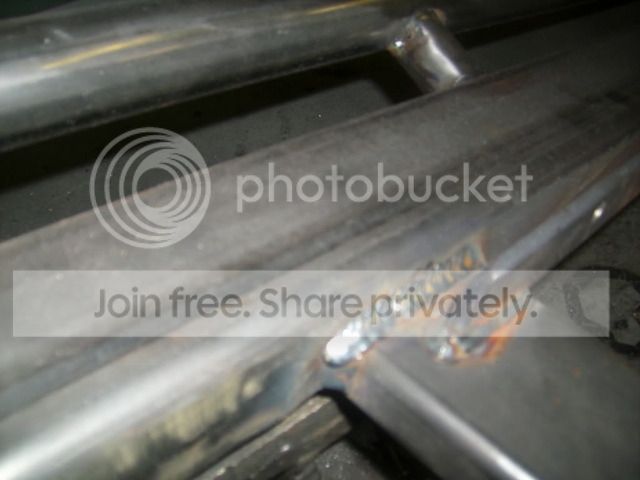

and did the same to the other one it was really pretty simple.
JCR sent me there standard sliders instead of the RE LA compatible ones.
First I had to cut the arms from the rails and move them forward about 3" this is what JCR does different on there RE LA compatible sliders. I line is where I am moving them to.
Ground down the welds.
Tack welded them in place and double checked to see it they sill fit right.
Welded them back up.
and did the same to the other one it was really pretty simple.
Thread Starter
Member
Joined: Jun 2009
Posts: 105
Likes: 0
From: West Jordan Utah
Year: 1994
Model: Cherokee
Engine: 4.0
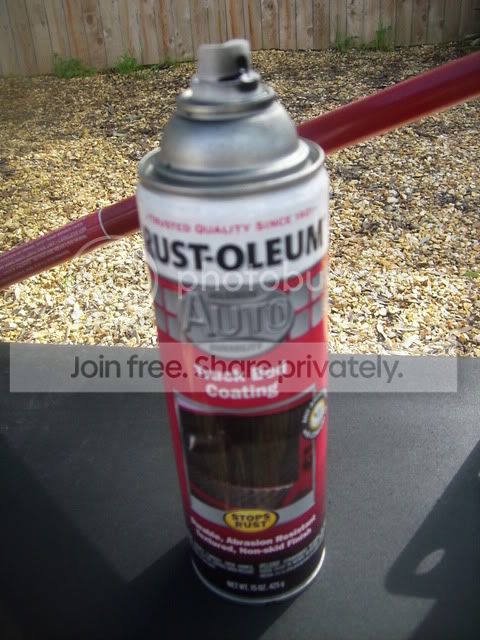
Then I took them home and primed and painted them, I used Rustoleum truck liner spray paint. Its really just a rough sand paper like finish.
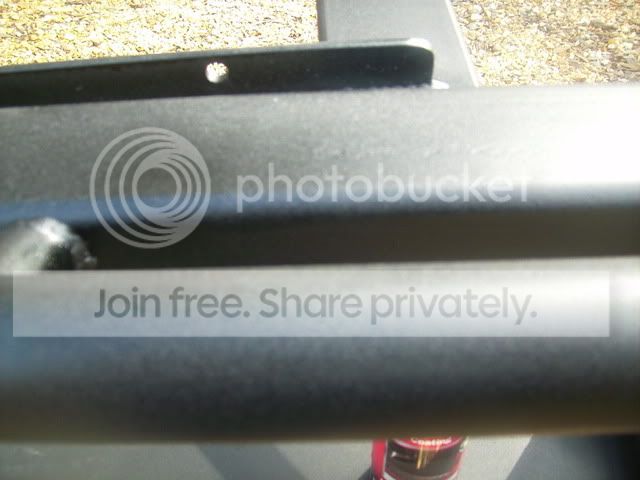
Then I drilled a bunch of holes and bolted them on.


I am pretty happy with them they are super strong and look good.
Then I drilled a bunch of holes and bolted them on.
I am pretty happy with them they are super strong and look good.
Thread Starter
Member
Joined: Jun 2009
Posts: 105
Likes: 0
From: West Jordan Utah
Year: 1994
Model: Cherokee
Engine: 4.0
Next a few small things, I installed a Yellow top, moved my rear axle shock mounts up and finally got my tranny cooler in yesterday. The cooler was free its a little rough but it works nicely.

Then after a little bit of confusion with the gears I wanted 33 spline shafts and a Detroit and I ended up with 35 spline shafts and a ARB with 4.88s front and rear.
Well I got my gears all done, and I am pretty happy with the result. I was getting about 9 mpg my last wheelin trip (about 63 miles away) and this time I got 15.75 mpg so that alone was well worth the gear swap.
Old 3.55s and open carrier

A shot after getting the pattern correct.
All done with the rear

:d
Also the ARB and 35 spline shafts in the rear are a nice peace of mind. Here are a few pictures, I did not get the install of the ARB I was concentrating on getting it all done.
The front was a breeze and I got a great pattern the first try so it went pretty fast.
I also got some new stuff from Ballistic fab today for my track bar I will post that up asap.
Then after a little bit of confusion with the gears I wanted 33 spline shafts and a Detroit and I ended up with 35 spline shafts and a ARB with 4.88s front and rear.
Well I got my gears all done, and I am pretty happy with the result. I was getting about 9 mpg my last wheelin trip (about 63 miles away) and this time I got 15.75 mpg so that alone was well worth the gear swap.
Old 3.55s and open carrier
A shot after getting the pattern correct.
All done with the rear
:d
Also the ARB and 35 spline shafts in the rear are a nice peace of mind. Here are a few pictures, I did not get the install of the ARB I was concentrating on getting it all done.
The front was a breeze and I got a great pattern the first try so it went pretty fast.
I also got some new stuff from Ballistic fab today for my track bar I will post that up asap.

Newbie
Joined: Dec 2010
Posts: 9
Likes: 0
From: Biloxi, MS Armpit of the south
Year: 1995
Model: Cherokee
Engine: Inline 6 cylinder 4.0 SL
Wow!!!! My Jeep is the exact same color and everything in the beginning. Only difference is that mines a sport. Makes me look forward to mine being finished. Mine even has front end damage like yours. It's hella weird.
Thread Starter
Member
Joined: Jun 2009
Posts: 105
Likes: 0
From: West Jordan Utah
Year: 1994
Model: Cherokee
Engine: 4.0
A view of my rear........
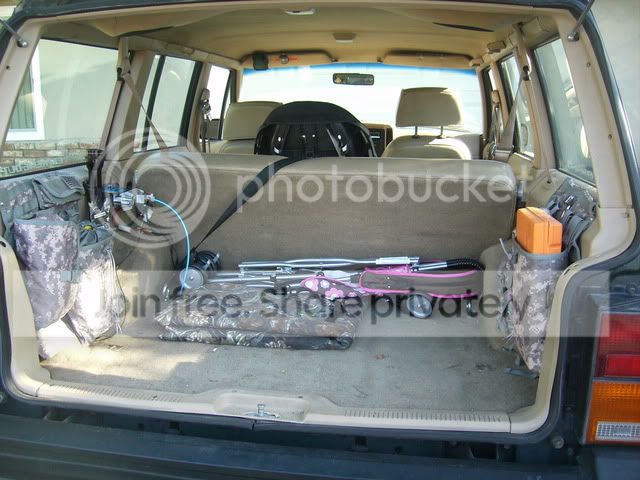
My ARB pump installed.
They are These that I modified and screwed them to the side. I did not like them behind the seat they took up a lot of room. I have my plug kit, tow strap, air down and up tools, extra jacket, along with a few other small things in the pockets.
My ARB pump installed.
They are These that I modified and screwed them to the side. I did not like them behind the seat they took up a lot of room. I have my plug kit, tow strap, air down and up tools, extra jacket, along with a few other small things in the pockets.