
BT's 1998 Build Thread

Thread Starter
Member

Joined: Jul 2011
Posts: 192
Likes: 17
From: AZ
Year: 1998
Model: Cherokee (XJ)
Engine: 4.0
Seasoned Member
Joined: May 2015
Posts: 313
Likes: 2
From: ROCKFORD IL
Year: 2001
Model: Cherokee
Engine: I6


CF Veteran
Joined: Dec 2011
Posts: 1,080
Likes: 8
From: IE (SoCal)
Year: 1994 SE
Model: Cherokee
Engine: 4.0
Thread Starter
Member
Joined: Jul 2011
Posts: 192
Likes: 17
From: AZ
Year: 1998
Model: Cherokee (XJ)
Engine: 4.0
I was finally able to message back and forth with one of their fab guys through Facebook and he sent me some pictures. There were no real instructions though and it did take some cutting and measuring to get it all together. It's more of a "universal" kit than a simple assemble and weld type deal. I'm happy with the finished product.
Thread Starter
Member
Joined: Jul 2011
Posts: 192
Likes: 17
From: AZ
Year: 1998
Model: Cherokee (XJ)
Engine: 4.0
http://omcoffroad.webs.com/apps/webs...s/show/4085102
Thread Starter
Member
Joined: Jul 2011
Posts: 192
Likes: 17
From: AZ
Year: 1998
Model: Cherokee (XJ)
Engine: 4.0
::CF Moderator::


Joined: Sep 2009
Posts: 3,495
Likes: 482
From: Glen Burnie, MD
Year: 2001
Model: Cherokee (XJ)
Engine: 4.0l
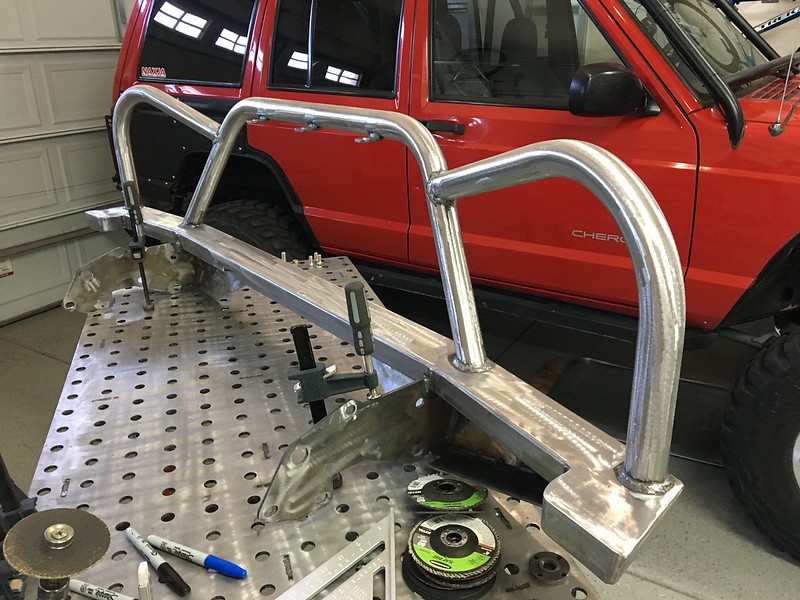
Loving the work on this jeep, Specially love that cage.
Last edited by Veeb0rg; Jan 16, 2016 at 03:43 AM.
Thread Starter
Member
Joined: Jul 2011
Posts: 192
Likes: 17
From: AZ
Year: 1998
Model: Cherokee (XJ)
Engine: 4.0
Yeah, I have a soft spot in my heart for the Foxes too. I had the '91 GT, a '93 Cobra and a '79 Fairmont over the years. I'll probably end up with another Fox Chassis of some sort someday.
Thread Starter
Member
Joined: Jul 2011
Posts: 192
Likes: 17
From: AZ
Year: 1998
Model: Cherokee (XJ)
Engine: 4.0
So, it's been a long while since I posted here. Still have the XJ and have slowly made some upgrades. Since the last update, I've gone to a BoostWerks hidden winch mount, built my own front bumper, cut out the rockers and replaced with 2x6 tube. Also went to no lift shackle relocators and built a tablet mount so I can GPS track my runs. I work slowly as time allows. Thinking of going 3 link front and 4 link rear suspension at some point. Honestly, I'll probably keep this rig until I'm too old to drive it. It gives me something to do. Here's a few pics.
How it looks now.

Bumper build.

How it looks now.
Bumper build.
Seasoned Member
Joined: Jan 2018
Posts: 313
Likes: 19
From: Soddy Daisy
Year: 01
Model: Cherokee(XJ)
Engine: 4.0
My cage will be something similar to yours. I'm 6'4" tall and need all the room I can get.
Also was going to do same color as my interior also. Nice to solidify my thoughts on how it would look.
Great minds think alike!
Also saw your post on the Facebook group. Rig is looking tough. I love that rear bumper. Thinking I will add it to the list.
Thanks for coming back in and sharing.
Also was going to do same color as my interior also. Nice to solidify my thoughts on how it would look.
Great minds think alike!
Also saw your post on the Facebook group. Rig is looking tough. I love that rear bumper. Thinking I will add it to the list.
Thanks for coming back in and sharing.
Thread Starter
Member
Joined: Jul 2011
Posts: 192
Likes: 17
From: AZ
Year: 1998
Model: Cherokee (XJ)
Engine: 4.0
My cage will be something similar to yours. I'm 6'4" tall and need all the room I can get.
Also was going to do same color as my interior also. Nice to solidify my thoughts on how it would look.
Great minds think alike!
Also saw your post on the Facebook group. Rig is looking tough. I love that rear bumper. Thinking I will add it to the list.
Thanks for coming back in and sharing.
Also was going to do same color as my interior also. Nice to solidify my thoughts on how it would look.
Great minds think alike!
Also saw your post on the Facebook group. Rig is looking tough. I love that rear bumper. Thinking I will add it to the list.
Thanks for coming back in and sharing.
Last edited by Brent T; Jun 27, 2019 at 08:27 AM.
Thread Starter
Member
Joined: Jul 2011
Posts: 192
Likes: 17
From: AZ
Year: 1998
Model: Cherokee (XJ)
Engine: 4.0
Here's my latest update. I got weary of the spare tire on the rear bumper. It was nice for inside storage, but when we'd run the hard stuff, I'd always catch it on something and either unlatch it, bend something or tear it completely off. I decided to move the spare inside. I was hoping to just lay it flat on the floor. That was a no go with at 35. I thought I could move the rear seat latches forward and make it work, but it still wasn't going to fit. I considered mounting it on the floor at an angle (would look cool), but then I'd lose all my rear storage. Finally decided to mount it upright behind the rear seat. I lost some storage, but still have room for plenty of stuff and the rear seat is still functional. It's a compromise like everything else on a DD rig, but overall I'm happy. Here are some pics.
Here's just the spare sitting behind the rear seat. Later I decided to mount it as far to the driver's side as possible for more storage space and visibility when driving.

This was my start. Lots of measuring and cut some steel. I used angle for the ends so I could bolt through the floor and inner fenderwell.

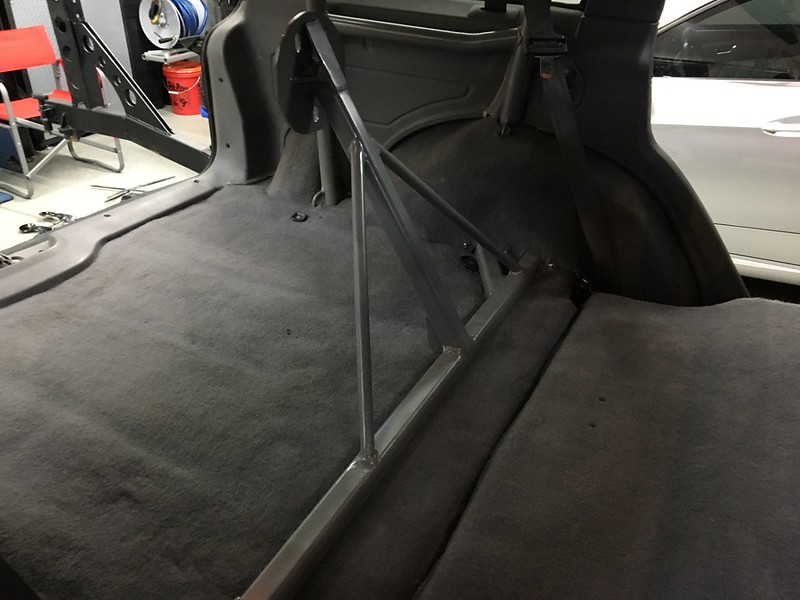
Here's phase 1. After some head scratching, realized it needed additional support. A 100 lb spare getting bounced around while wheeling, not to mention if I got in a wreck, I didn't want it breaking loose and killing me.

Added some additional support.


Painted, installed and cut out the carpet to make it look nice.


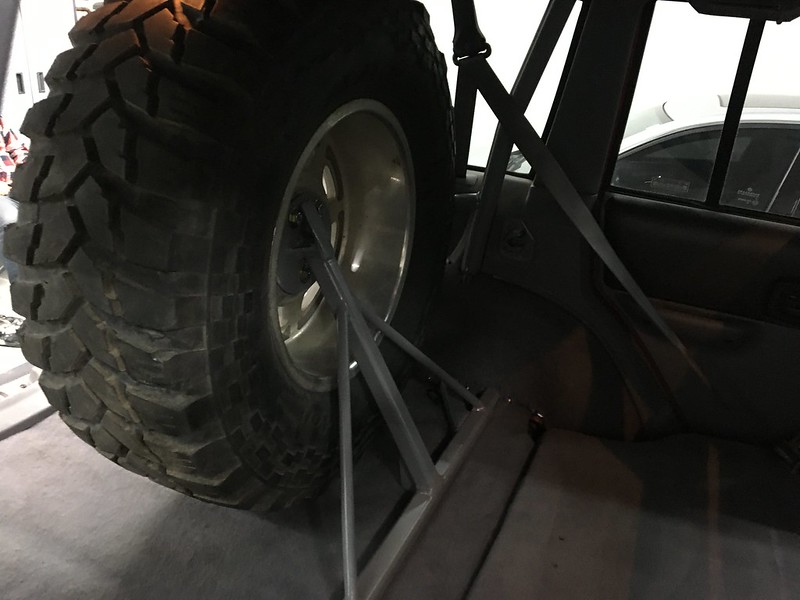

I took the rig out today on some rough dirt roads and overall I'm very happy with it. I have just as much visibility now as with the spare on the bumper. It's nice to be able to open the rear hatch without swinging the spare out of the way. COG is about the same as before and now it's not hanging off the back bumper. The tire sits about an inch lower than on the old tire carrier. It's about 36" further forward than on the bumper, almost square over the rear axle. Will be interesting to see how it feels on the "tippy stuff" next time I go out crawling.
Here's just the spare sitting behind the rear seat. Later I decided to mount it as far to the driver's side as possible for more storage space and visibility when driving.
This was my start. Lots of measuring and cut some steel. I used angle for the ends so I could bolt through the floor and inner fenderwell.
Here's phase 1. After some head scratching, realized it needed additional support. A 100 lb spare getting bounced around while wheeling, not to mention if I got in a wreck, I didn't want it breaking loose and killing me.
Added some additional support.
Painted, installed and cut out the carpet to make it look nice.
I took the rig out today on some rough dirt roads and overall I'm very happy with it. I have just as much visibility now as with the spare on the bumper. It's nice to be able to open the rear hatch without swinging the spare out of the way. COG is about the same as before and now it's not hanging off the back bumper. The tire sits about an inch lower than on the old tire carrier. It's about 36" further forward than on the bumper, almost square over the rear axle. Will be interesting to see how it feels on the "tippy stuff" next time I go out crawling.