
ArmyGuy's 96 cherokee build


Newbie
Joined: May 2012
Posts: 13
Likes: 0
From: Up State NY
Model: Cherokee
Engine: 4.0
Nice Work! I have a 96 2door and my pans are as bad! Chaisse saver is good stuff i ordered my front pans from rock auto 90 bucks per side one peice all the way back to the rear seats that may help you if you hadnt all ready ordered yours

Thread Starter
Member
Joined: Jul 2012
Posts: 145
Likes: 0
From: Farmington, MN
Year: 1996
Model: Cherokee
Engine: 4.0
Well a little more progress being made. My 2nd child was born, so things have been a little hectic around the house lately. Working a few hours a night at it though, I am making slow headway.
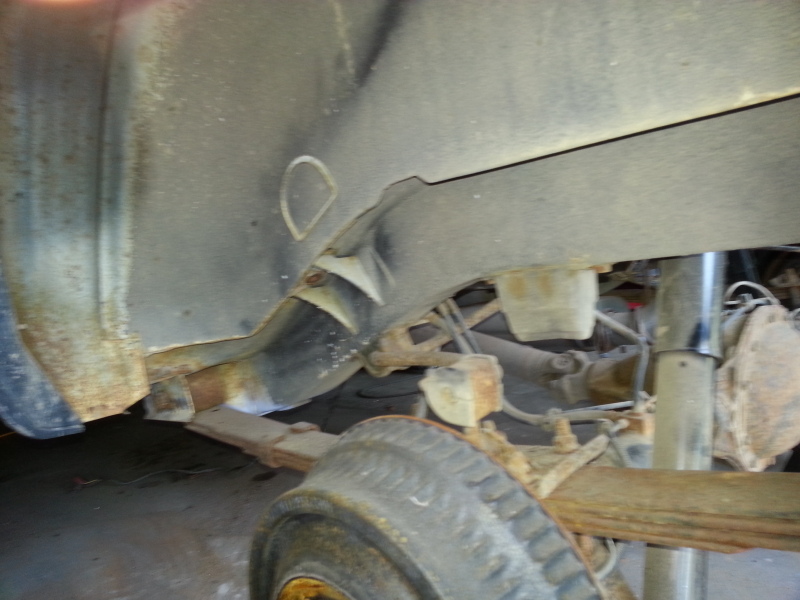
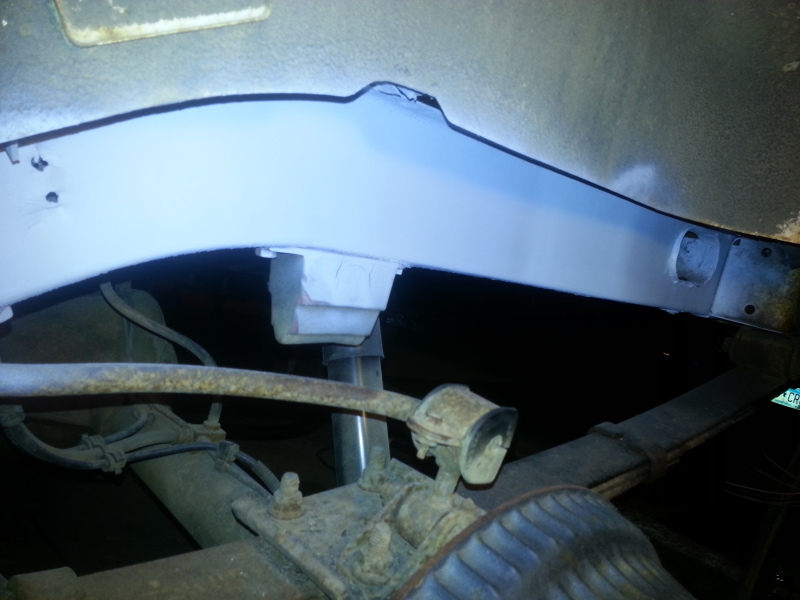
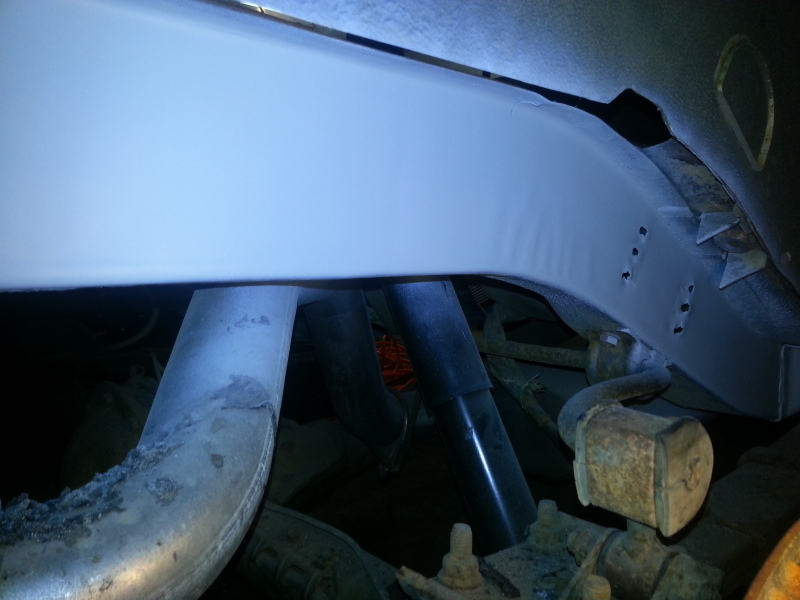
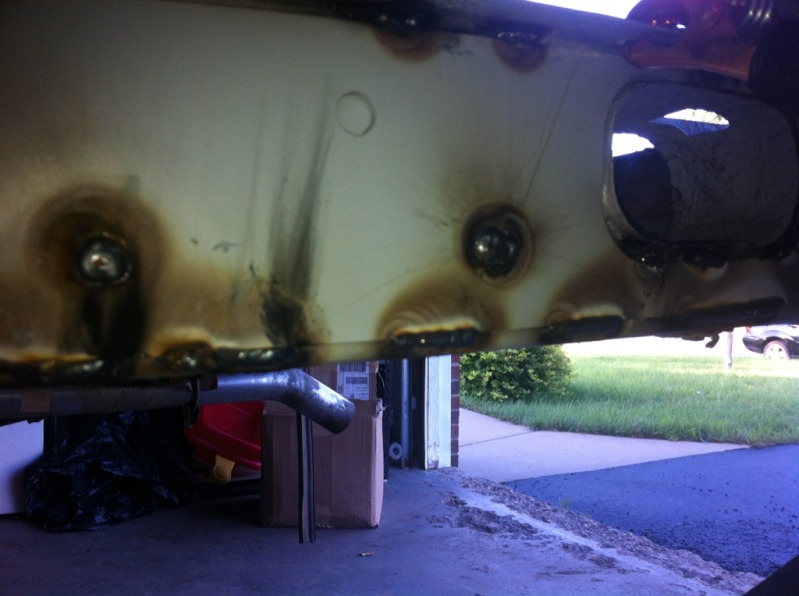
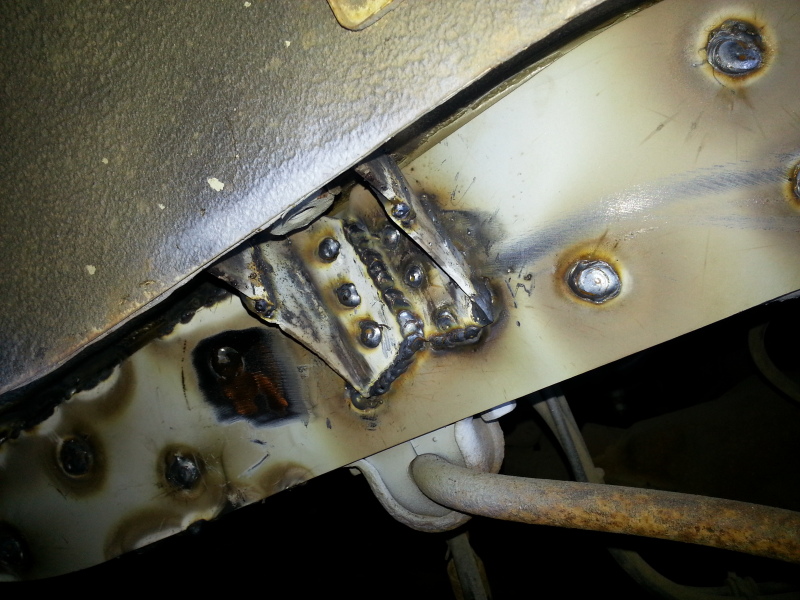
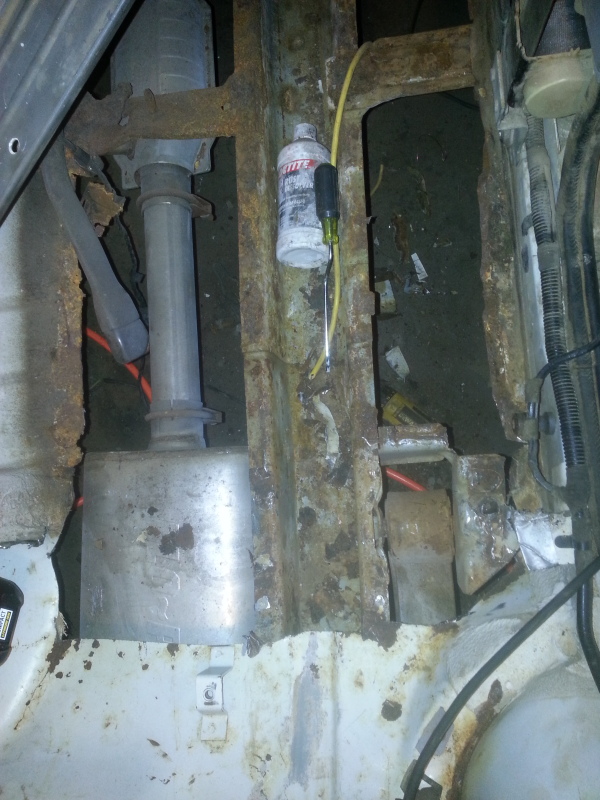
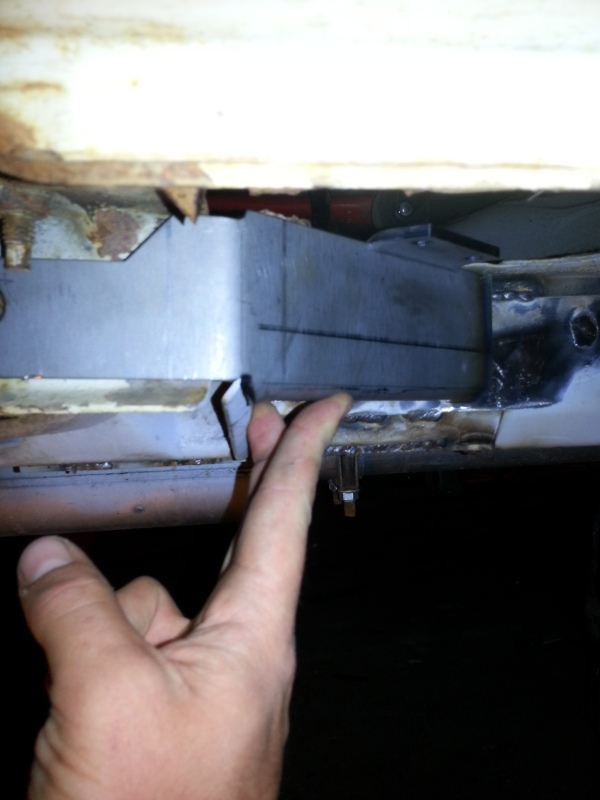
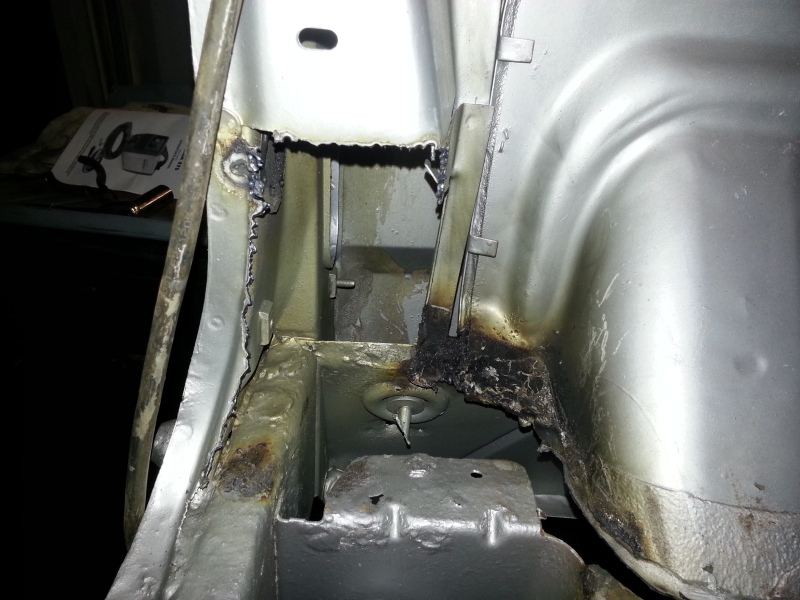
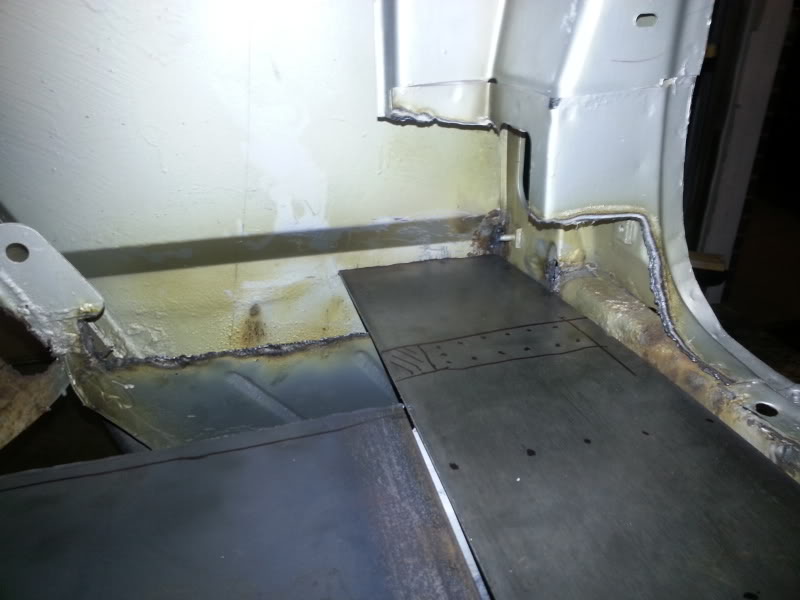
The rear stiffeners need to be welded up before the floors go in, so I don't burn the chassis saver off that I want to put inside the framerail. The rear stiffeners are a little harder in my opinion to prep. You have less room, and you have a bracket that runs of the frame that connects to the rear seat in the body. You can see the bracket on the left hand corner of the picture.
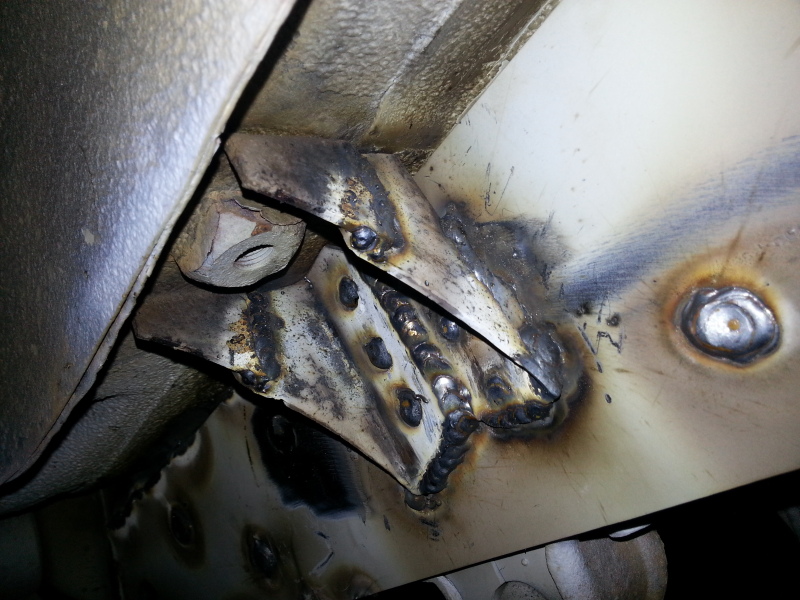
A closer look....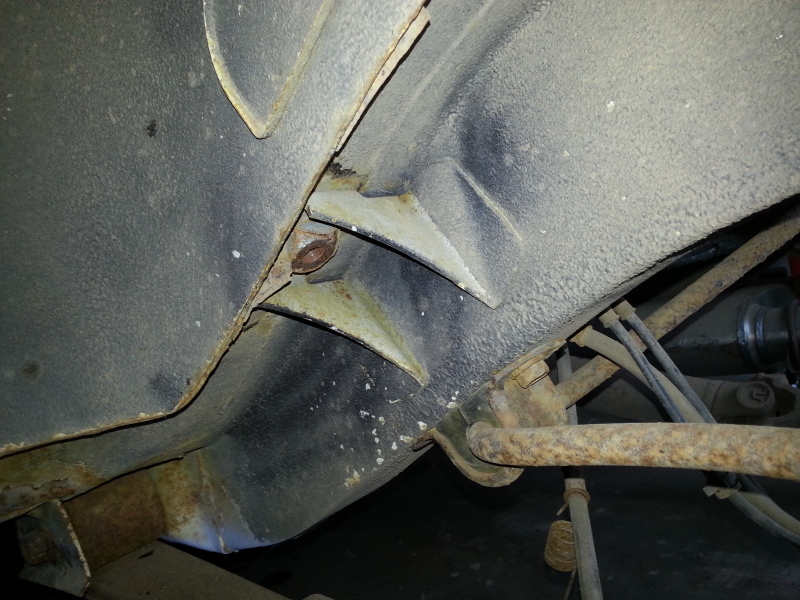
I emailed HDOFFROAD and they replied within a few hours. I asked them what how most people handle this problem. You can either notch the stiffner or notch out the bracket and re-weld. I chose the latter.
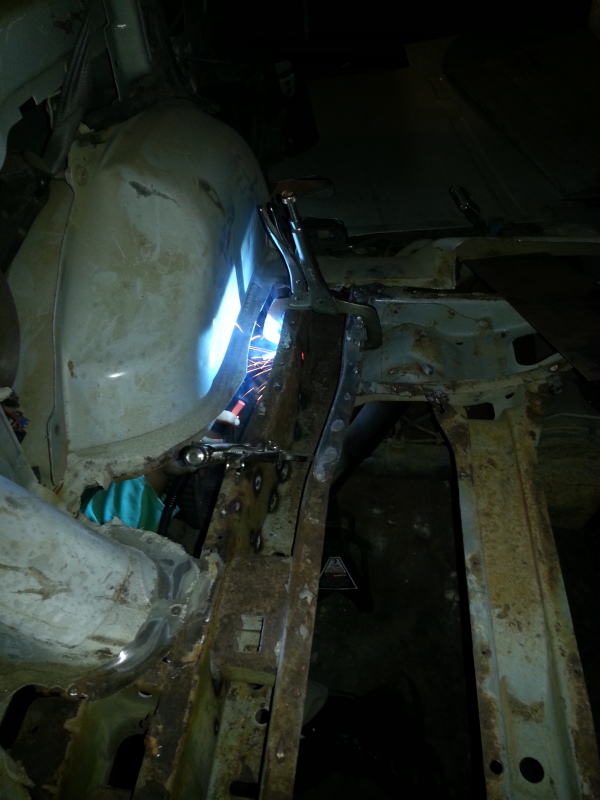
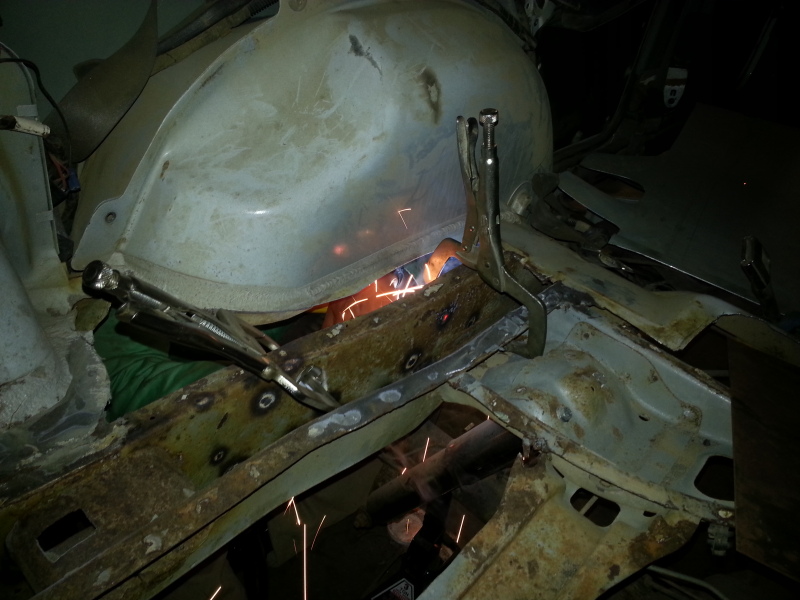
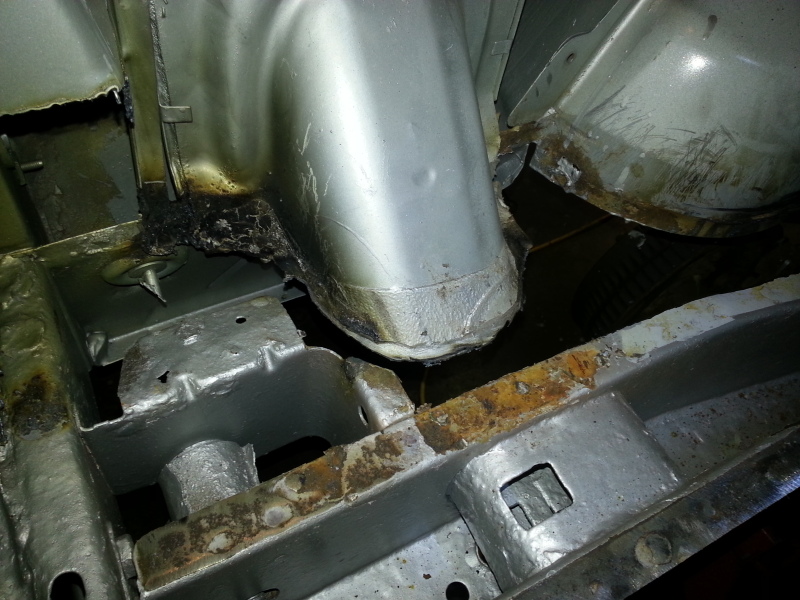
Now, learn from my mistake if you ever choose to do this. That bracket is held on with three large spot welds on each side. I didn't realize how strong they would be. I butchered it getting it out.
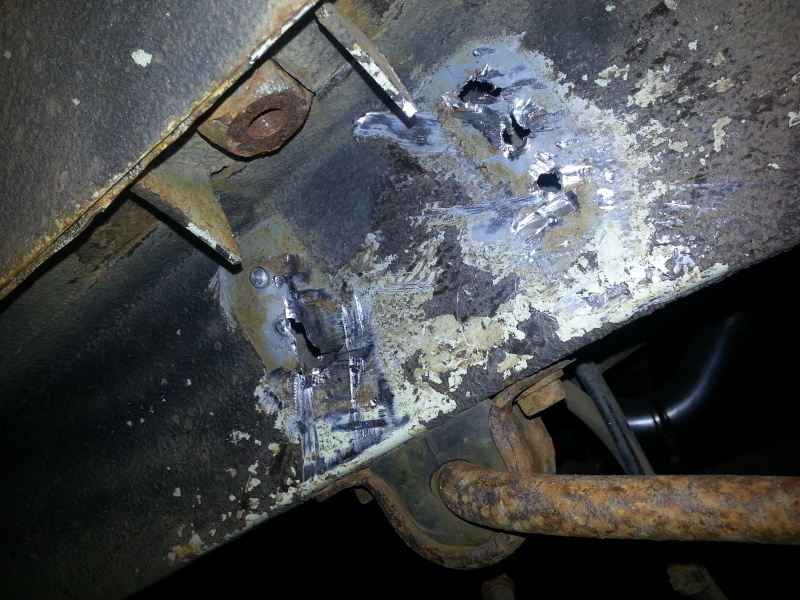
I was in a hurry. My buddy will fill it in with weld, but don't take the brute force air hammer approach. I tired drilling it out halfway in, but my bit was too small to really do anything. I will show you what I did later on the other side.
The undercoating is very tough to get off, so I tried a different approach to removing it for the otherside. The steps I used for the passenger side literally cut the time in half, and everything turned out nicer.
I read some threads about guys using aircraft stripper to remove undercoating. I couldn't find any, but had some of this laying around the garage.
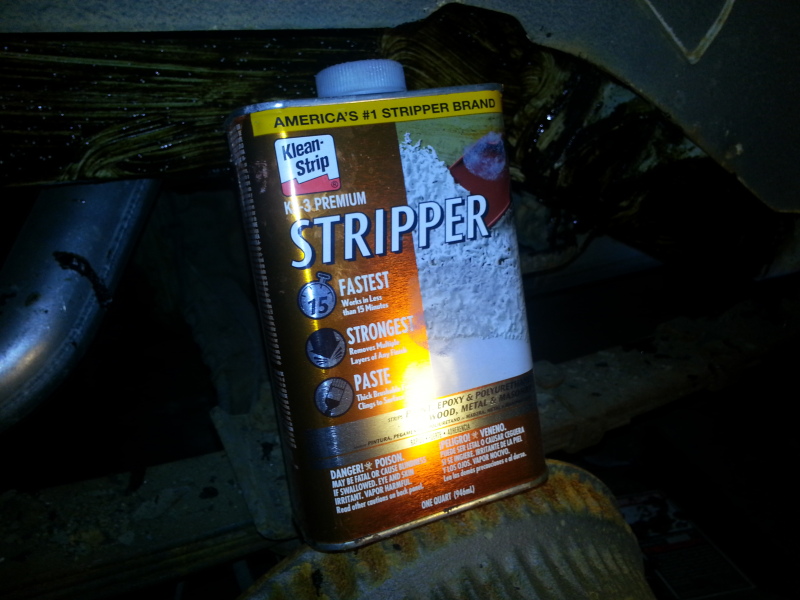
It is jelly like, so you brush it on, it sticks and attacks the paint and undercoating. Looked like this after 5 or 10 minutes.
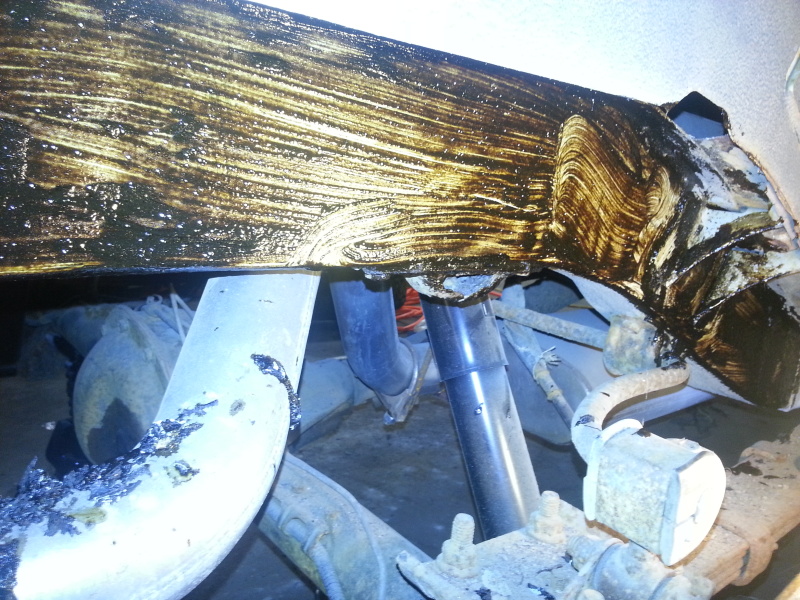
Scraped it off with a scraper and hit it with the roloc and some 60 grit by hand, way easier.
There was really no undercoating on before I weld through primered by the way. I used a scraper, 60 grit and elbow grease to ensure I didn't have any around to contaminate my welds. I really didn't take any pictures of my final clean product, so take your time and really get in there and get that crap off.

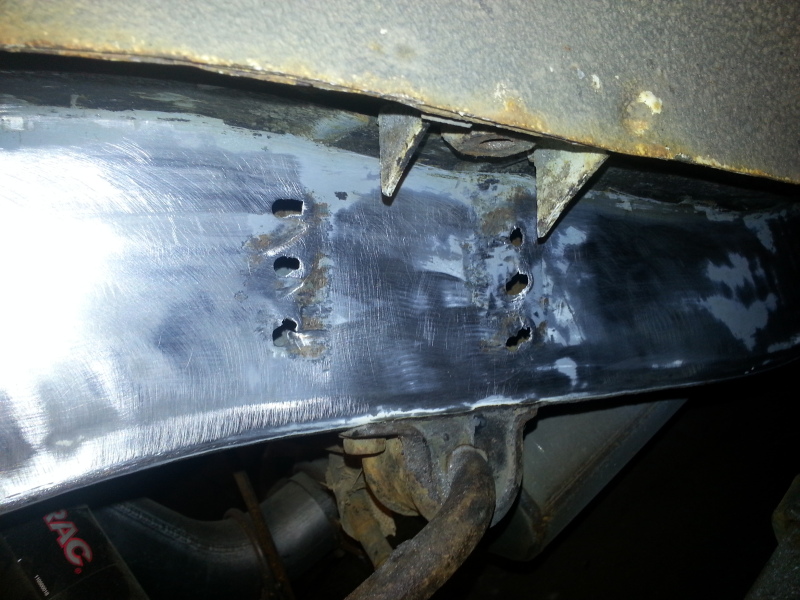
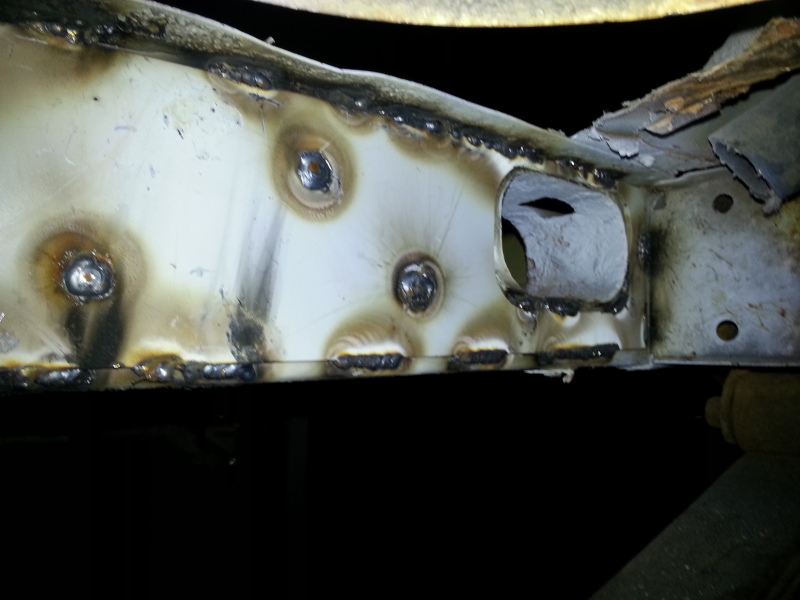
So back to the bracket. after the nightmare on the drivers side , I got a bigger drill bit for metal and drilled out the spot welds on the other side. Nice clean circles are easier to fill then a tear.
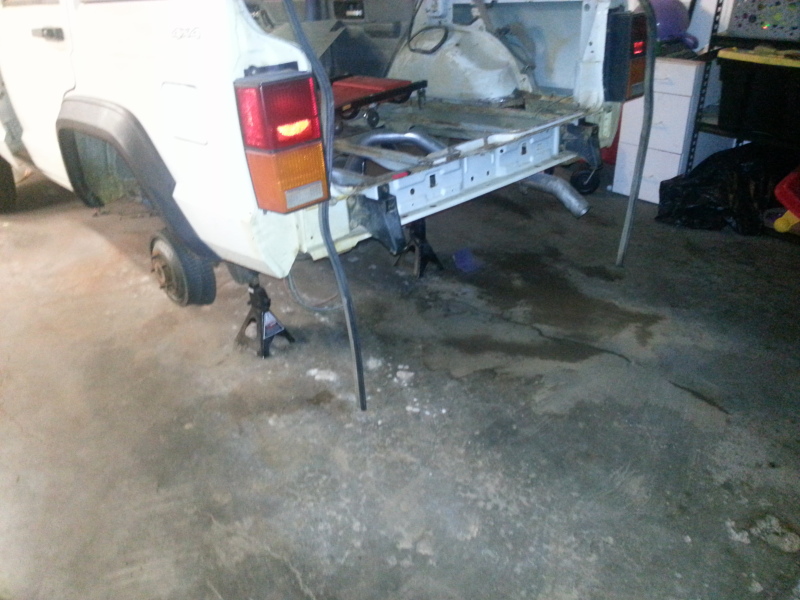
Took the bumper off too, getting ready for chassis saver and I want a swing away anyways.
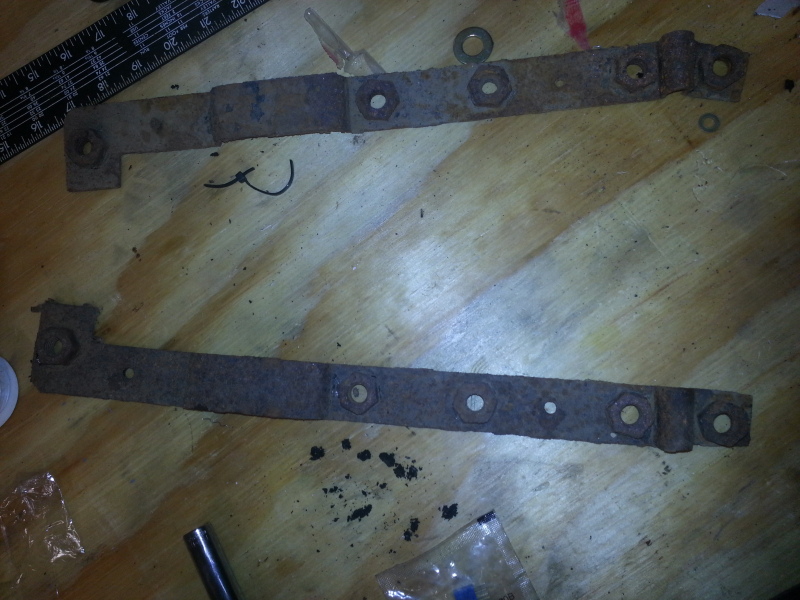
My factory nutstrips were rusty, so I ordered some from JCR. Here are the old crap ones.
I probably could have done a better job getting the brackets off, but o well. Some welding should get done today and over the weekend. Getting close to putting in the floors.
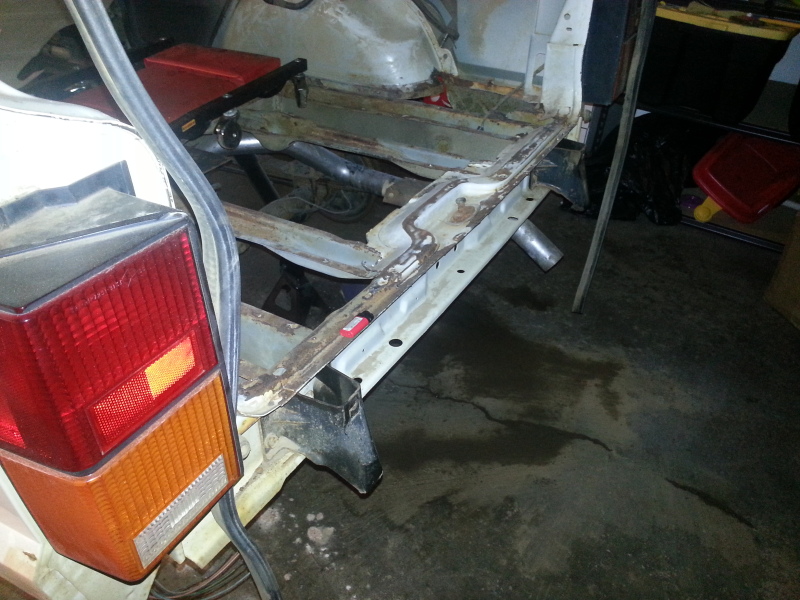
Driver's side rear stiffener.....more pics of the job when I get done.
The rear stiffeners need to be welded up before the floors go in, so I don't burn the chassis saver off that I want to put inside the framerail. The rear stiffeners are a little harder in my opinion to prep. You have less room, and you have a bracket that runs of the frame that connects to the rear seat in the body. You can see the bracket on the left hand corner of the picture.
A closer look....
I emailed HDOFFROAD and they replied within a few hours. I asked them what how most people handle this problem. You can either notch the stiffner or notch out the bracket and re-weld. I chose the latter.
Now, learn from my mistake if you ever choose to do this. That bracket is held on with three large spot welds on each side. I didn't realize how strong they would be. I butchered it getting it out.
I was in a hurry. My buddy will fill it in with weld, but don't take the brute force air hammer approach. I tired drilling it out halfway in, but my bit was too small to really do anything. I will show you what I did later on the other side.
The undercoating is very tough to get off, so I tried a different approach to removing it for the otherside. The steps I used for the passenger side literally cut the time in half, and everything turned out nicer.
I read some threads about guys using aircraft stripper to remove undercoating. I couldn't find any, but had some of this laying around the garage.
It is jelly like, so you brush it on, it sticks and attacks the paint and undercoating. Looked like this after 5 or 10 minutes.
Scraped it off with a scraper and hit it with the roloc and some 60 grit by hand, way easier.
There was really no undercoating on before I weld through primered by the way. I used a scraper, 60 grit and elbow grease to ensure I didn't have any around to contaminate my welds. I really didn't take any pictures of my final clean product, so take your time and really get in there and get that crap off.
So back to the bracket. after the nightmare on the drivers side , I got a bigger drill bit for metal and drilled out the spot welds on the other side. Nice clean circles are easier to fill then a tear.
Took the bumper off too, getting ready for chassis saver and I want a swing away anyways.
My factory nutstrips were rusty, so I ordered some from JCR. Here are the old crap ones.
I probably could have done a better job getting the brackets off, but o well. Some welding should get done today and over the weekend. Getting close to putting in the floors.
Driver's side rear stiffener.....more pics of the job when I get done.
Last edited by ArmyGuy; Aug 10, 2012 at 07:44 PM.
Thread Starter
Member
Joined: Jul 2012
Posts: 145
Likes: 0
From: Farmington, MN
Year: 1996
Model: Cherokee
Engine: 4.0
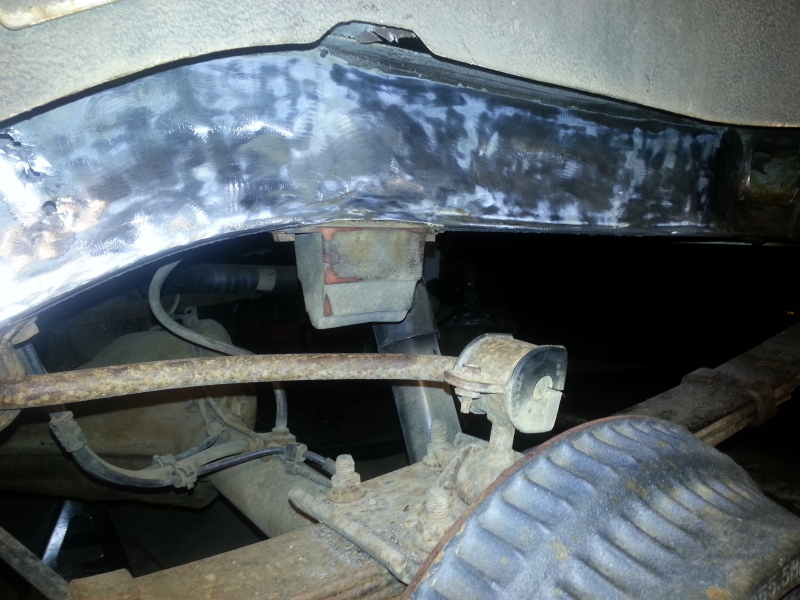
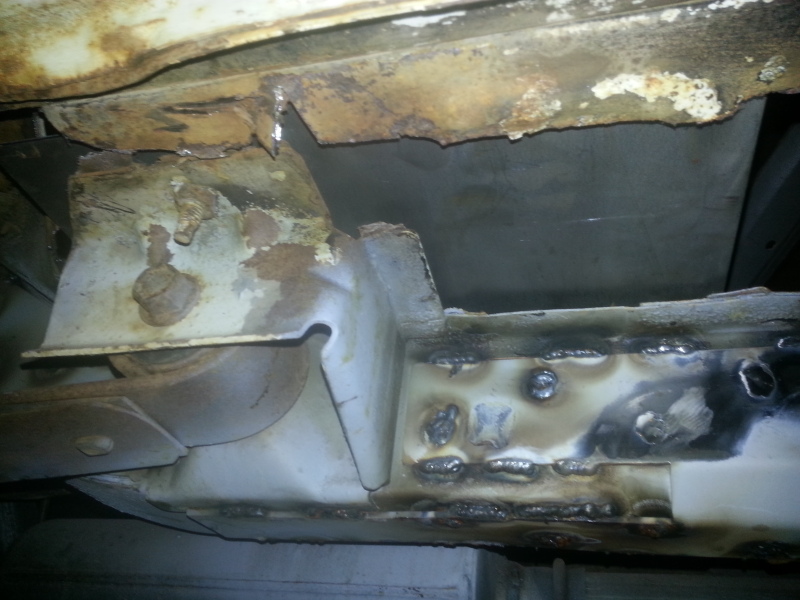
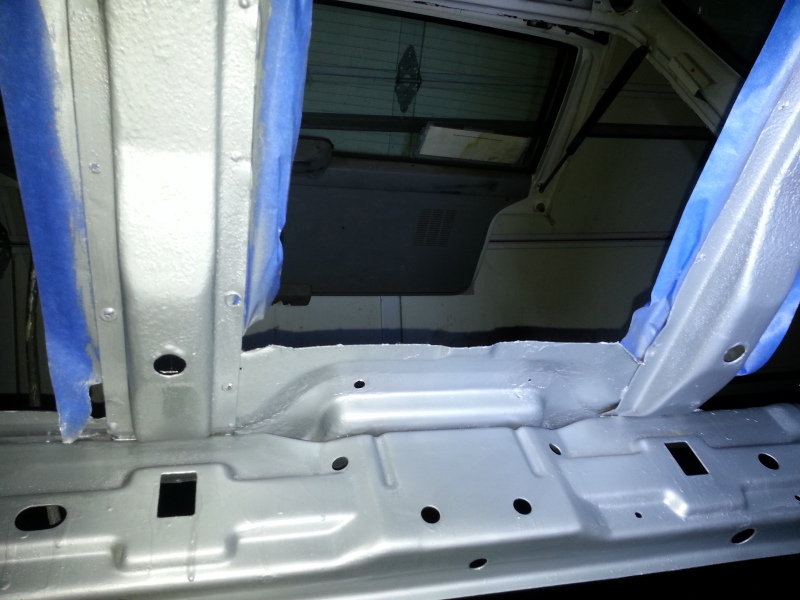
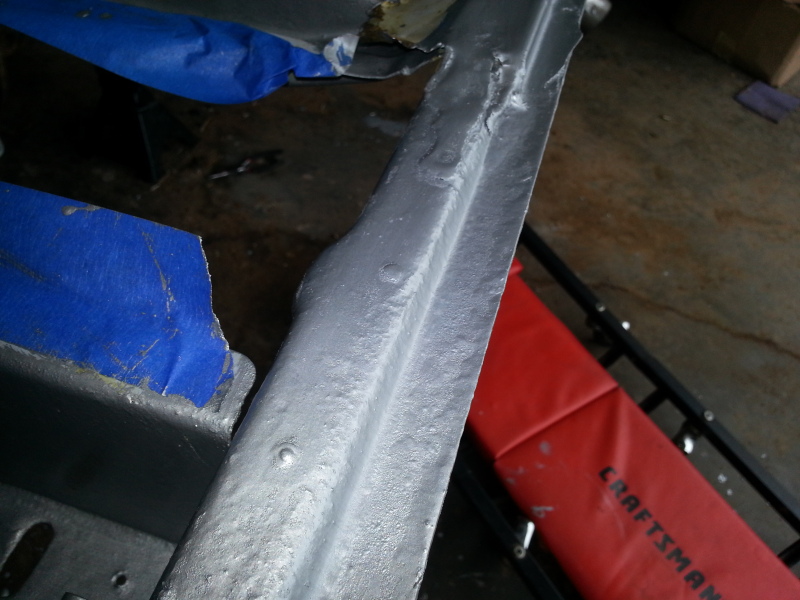
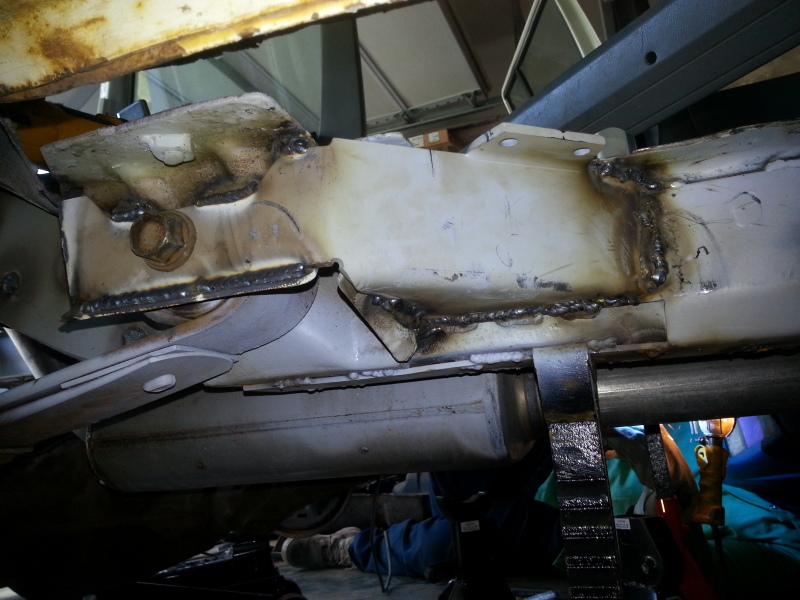
Both mid section stiffeners are now complete, as well as the rear driver's side. Ran out of wire at about 930,glad home depot had some Lincoln MIG wire. Haven't ground down any welds yet, tomorrow the frame gets chassis saved
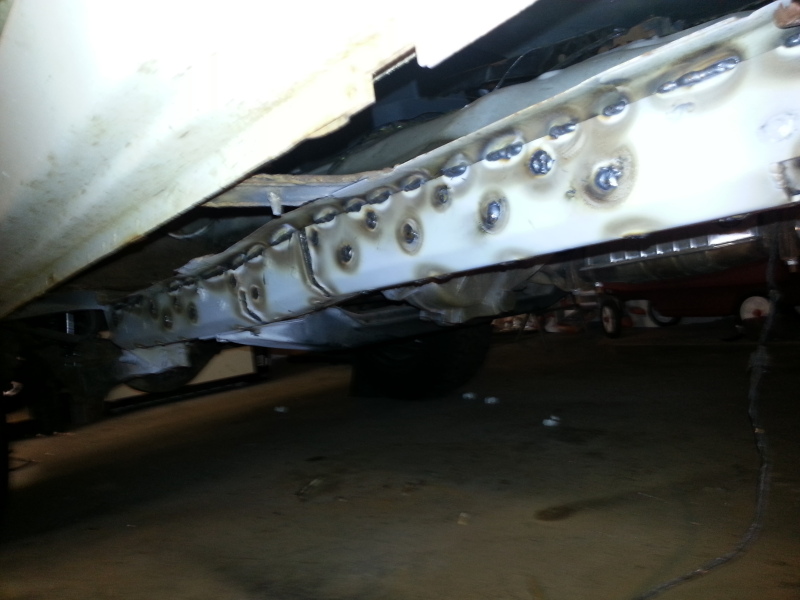
For the bracket, I just sanded them, weld through primer, then we slid them next to the portion I cut off, and welded the CRAP out of them. They aren't going anywhere.

For the bracket, I just sanded them, weld through primer, then we slid them next to the portion I cut off, and welded the CRAP out of them. They aren't going anywhere.
Thread Starter
Member
Joined: Jul 2012
Posts: 145
Likes: 0
From: Farmington, MN
Year: 1996
Model: Cherokee
Engine: 4.0
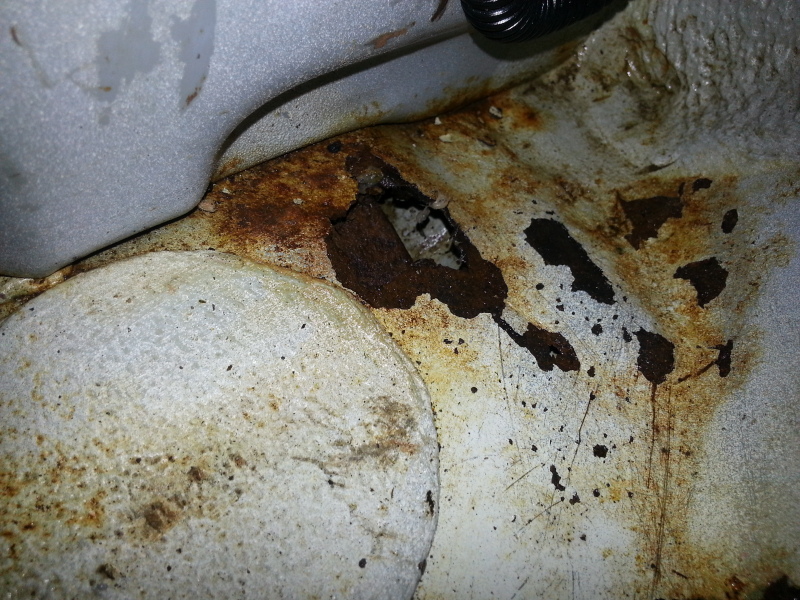
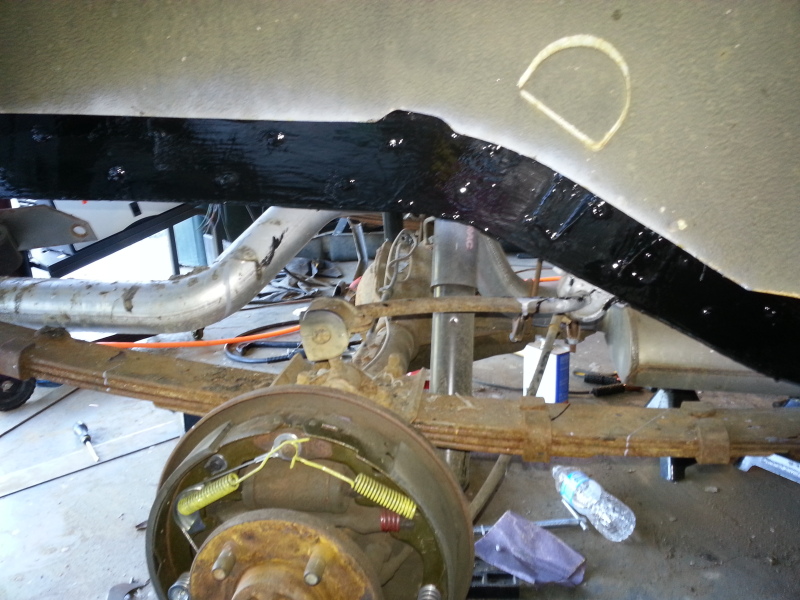
Well I spent the last few hours grinding down the lip of the frame rail and weld through priming it preparing it for the floors. I also scrubbed, wire brushed, simple green and flushed tons of crap out of the rusty spots on the body preparing it for chassis saver. As I started hitting up the area around the forward leaf spring, I saw a small hole. The area is mostly solid, but I am not coming back to do this again in 3 or 4 years, so I am at a standstill until I address this problem. The floor above the hanger as you all know, supports the leaf spring. So I ordered this tonight.
http://www.rustysoffroad.com/wordpre...-parts-009.jpg
I will have to bring it to a shop to have them trim off material since I have frame stiffeners on now and don't have my plasma (soon) but I am going to weld the crap out of it since I have a good anchor point now. I will cut the floor out around this area, and need to run to the steel shop for some 3/16 plate. Might as well beef it up right. I am eyeballing HDoffroad Shackle relocation for the rear too, and plan on welding those in. To tired to post more pics. Wish me luck.

Seasoned Member
Joined: May 2012
Posts: 275
Likes: 0
From: Ft Myer, Va
Year: 2001
Model: Cherokee
Engine: 4.0
Dang brotha! Nice project you have going there!  Love the attention to detail and not compromising as you go!
Side note... You ever get on the MilitaryJeepers site? Bet they'd love to see this too!
Love the attention to detail and not compromising as you go!Side note... You ever get on the MilitaryJeepers site? Bet they'd love to see this too!
Thread Starter
Member
Joined: Jul 2012
Posts: 145
Likes: 0
From: Farmington, MN
Year: 1996
Model: Cherokee
Engine: 4.0
Figured out what I am going to do. I am going to combine this.... http://img.photobucket.com/albums/v7...DSC01044-1.jpg
With Rusty's bracket reinforcement. I will get a plate big enough to mount both the spring mount and the reinforcement to it on the top side, and weld the rusty's bracket to the stiffeners as well. Ran down to the steel yard to see what they had and they had tons of scrap that will work, just have to wait to get the brackets in the mail for final measurements. Picked up some 1/8 flat to cover the rear spring hangers and tie the rear uni-frame together too. The final stiffener gets welded on, got lots of chassis saver in today too. Coming along.
With Rusty's bracket reinforcement. I will get a plate big enough to mount both the spring mount and the reinforcement to it on the top side, and weld the rusty's bracket to the stiffeners as well. Ran down to the steel yard to see what they had and they had tons of scrap that will work, just have to wait to get the brackets in the mail for final measurements. Picked up some 1/8 flat to cover the rear spring hangers and tie the rear uni-frame together too. The final stiffener gets welded on, got lots of chassis saver in today too. Coming along.
Thread Starter
Member
Joined: Jul 2012
Posts: 145
Likes: 0
From: Farmington, MN
Year: 1996
Model: Cherokee
Engine: 4.0
Ok. Got the last stiffener in (front not done until bumper time). I started addressing the problem of the floor rotting out above the forward leaf spring brackets.
I saw a few guys who welded plate in and welded that to the frame rail and the hanger. I am going to do this and combine this with Rusty's hanger reinforcement bracket, which will be welded to the frame stiffener, spring hanger and the steel plate.
Cut out the floor. Still some trimming but the bulk is done.
Went to the steel yard and got 35 bucks of miscellaneous steel that I thought I will need elsewhere. I got around 50 lbs out of the scrap bin. The pics you see next are mocked up with a 1/8 plate. I think I will use 3/16. The 1/8 seems plenty strong, but I don't mind dropping 30 bucks a plate for cut stuff in 3/16. Open to suggestions there.
The plate would be welded to the rocker, frame rail and the hanger with plug welds (or rosettes if that is what they are called). It would also tie into the Rusty's reinforcement bracket, which will be cut to fit my frame stiffeners. I think the setup will be much stronger than stock, and will do a good job of spreading out the forces in multiple locations.
Top view of plate thrown in..
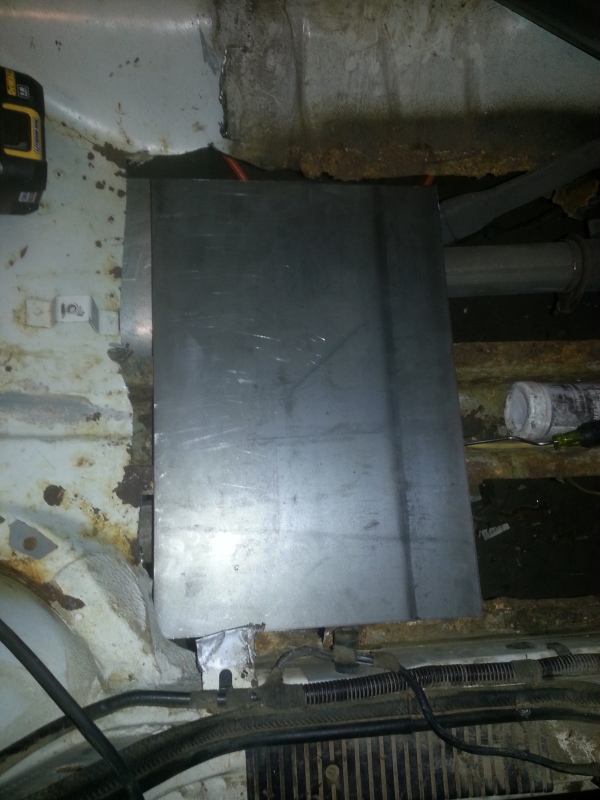
This is just a mockup, as I will get perfect fitment steel once I know how big rusty's brackets are, which will mount forward of the spring hanger.
I did get some chassis saver though, spent most of the other night scrubbing, flushing, scrubbing and scraping, but it is great if you spend the hours of prep.

Overall getting there. I have to wait until the wife and kids are asleep to do anything, as my old lady is recovering from her C-section. Moving along though. Let me hear what you guys think about using 1/8 versus 3/16 for that plate.
I saw a few guys who welded plate in and welded that to the frame rail and the hanger. I am going to do this and combine this with Rusty's hanger reinforcement bracket, which will be welded to the frame stiffener, spring hanger and the steel plate.
Cut out the floor. Still some trimming but the bulk is done.
Went to the steel yard and got 35 bucks of miscellaneous steel that I thought I will need elsewhere. I got around 50 lbs out of the scrap bin. The pics you see next are mocked up with a 1/8 plate. I think I will use 3/16. The 1/8 seems plenty strong, but I don't mind dropping 30 bucks a plate for cut stuff in 3/16. Open to suggestions there.
The plate would be welded to the rocker, frame rail and the hanger with plug welds (or rosettes if that is what they are called). It would also tie into the Rusty's reinforcement bracket, which will be cut to fit my frame stiffeners. I think the setup will be much stronger than stock, and will do a good job of spreading out the forces in multiple locations.
Top view of plate thrown in..
This is just a mockup, as I will get perfect fitment steel once I know how big rusty's brackets are, which will mount forward of the spring hanger.
I did get some chassis saver though, spent most of the other night scrubbing, flushing, scrubbing and scraping, but it is great if you spend the hours of prep.
Overall getting there. I have to wait until the wife and kids are asleep to do anything, as my old lady is recovering from her C-section. Moving along though. Let me hear what you guys think about using 1/8 versus 3/16 for that plate.
Last edited by ArmyGuy; Aug 13, 2012 at 11:24 PM.
Member
Joined: Nov 2011
Posts: 128
Likes: 0
From: Honolulu
Year: 1999
Model: Cherokee
Engine: 4.0L I-6
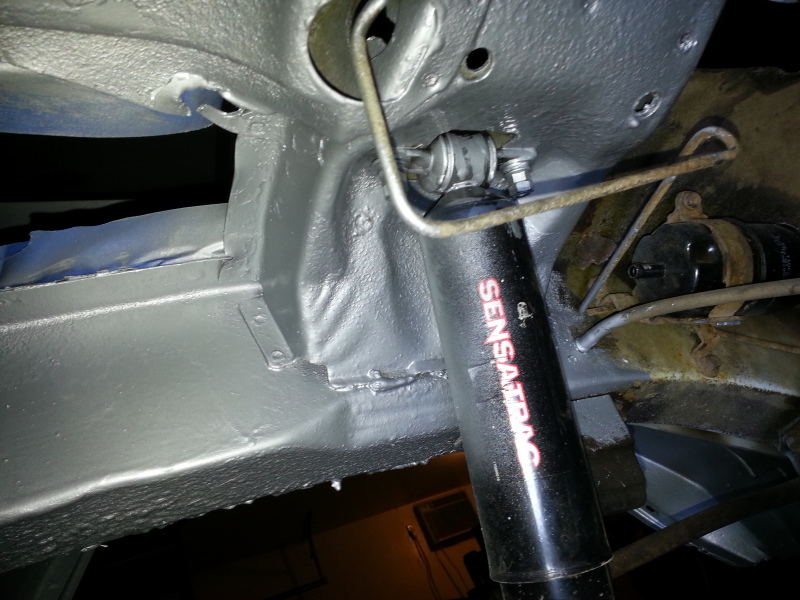
Wow bud, looking good! It looks like your rear shocks have been swapped out recently by the bolts. But in the slight chance Im wrong you should unbolt your upper shocks, the bolts tend to snap from the rust seizing it. AND by the looks of it you got plenty of rust...haha
Thread Starter
Member
Joined: Jul 2012
Posts: 145
Likes: 0
From: Farmington, MN
Year: 1996
Model: Cherokee
Engine: 4.0
Wow bud, looking good! It looks like your rear shocks have been swapped out recently by the bolts. But in the slight chance Im wrong you should unbolt your upper shocks, the bolts tend to snap from the rust seizing it. AND by the looks of it you got plenty of rust...haha
Good call! I got all brand new bolts for the shock mounts, so everything is good to go there! I will be ordering the rocker replacement sliders from HUDFAB around sept 1st. For the price, you can't beat it. They look super tough, and I will be welding them into the frame stiffeners and around the rocker. Probably use some 1/8 plate to gusset them against the A-pillar.
Thread Starter
Member
Joined: Jul 2012
Posts: 145
Likes: 0
From: Farmington, MN
Year: 1996
Model: Cherokee
Engine: 4.0
Well getting the bolts out of the leaf spring was a bear, but some heat and a breaker bar made it come out with out much issue. I had Rusty's bracket machined, took off 10 gauges worth of steel on the sides that connect to my stiffeners, they mounted up well. Got them welded in good too.
Thread Starter
Member
Joined: Jul 2012
Posts: 145
Likes: 0
From: Farmington, MN
Year: 1996
Model: Cherokee
Engine: 4.0
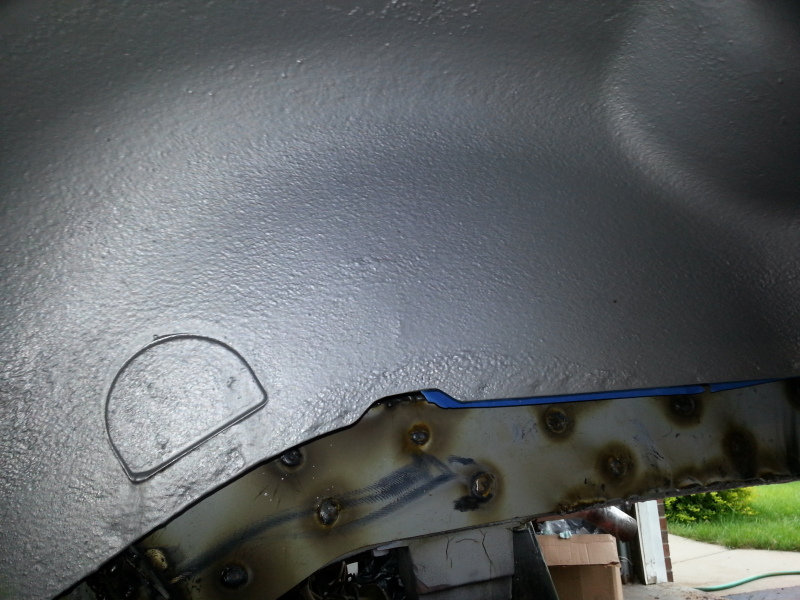
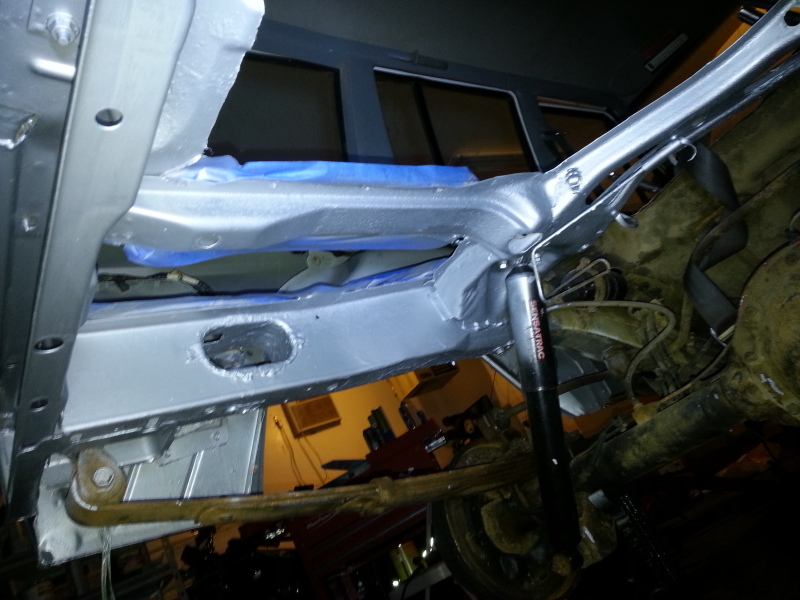
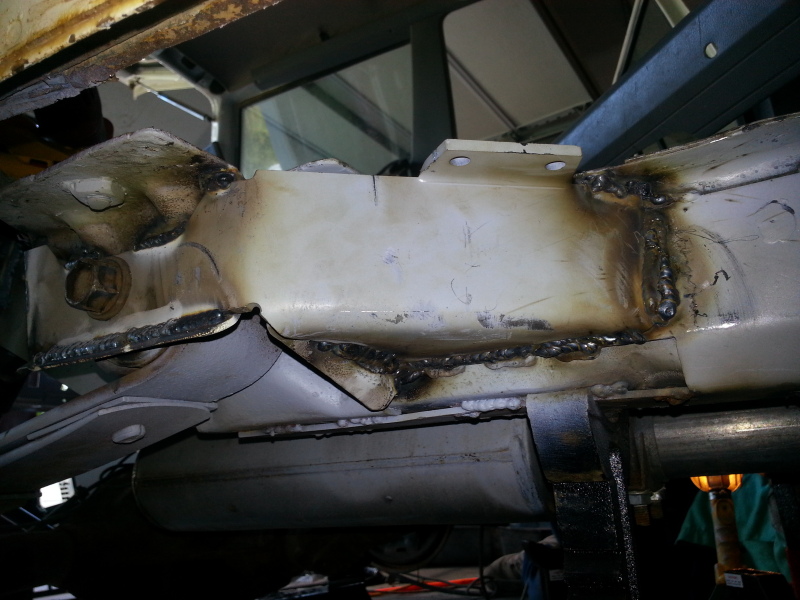
Got the frame stiffeners coated with 2 coats of chassis saver (finished the quart) and a coat of masterseries 2 part gloss black. It dried as hard as a rock. I seam sealed everything before I did this of course. There aren't any gaps on top, and looks great. Should help keep the Minnesota road salt from accumulating inside. The entire underside of the jeep will be done like this. I highly recommend Masterseries products, and the price is good too.
I have decided not to use the floors I bought from C2C, the pans would work ok, but I have too much rot, which will require me to fabricate them to work. I am just going to go down to the steel yard and buy some 12 or 14 gauge steel floor plate and use my plasma (coming this friday) to cut perfect sized replacements. I will pick up some thin stuff to shape what I cut out of the trans tunnel. I am sort of using Blacksmith's ideas for those who have seen his build.
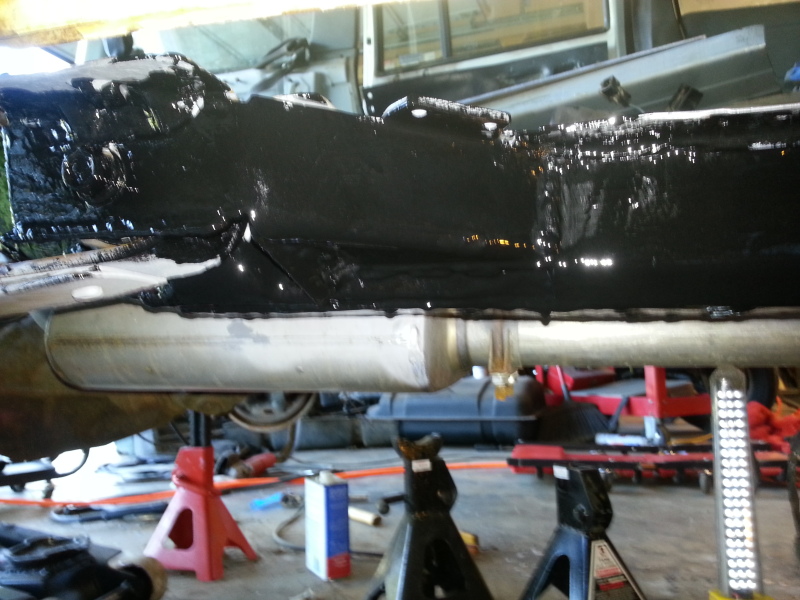
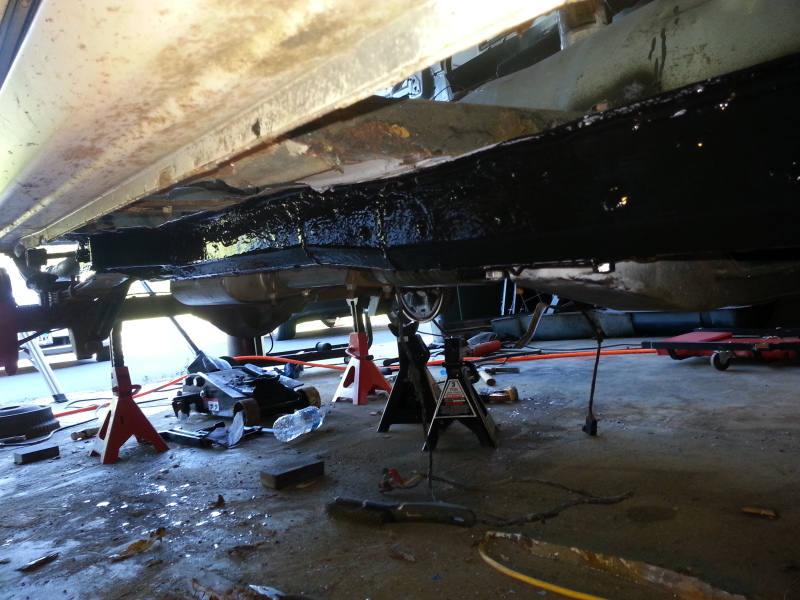

This was after the first coat, put another one on after.
Found two florescent light assemblies in my attic yesterday from the previous owner, so I put those up over the jeep. Still need to wire them, just using ext cords now. It was dark in that corner!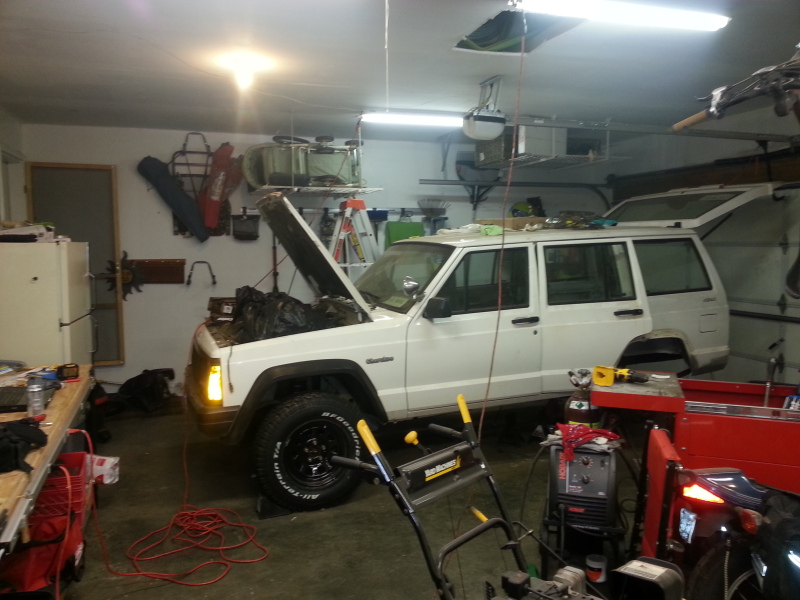
So off to the steel yard it is. Expect lots of pics after the weekend of the floors.
I have decided not to use the floors I bought from C2C, the pans would work ok, but I have too much rot, which will require me to fabricate them to work. I am just going to go down to the steel yard and buy some 12 or 14 gauge steel floor plate and use my plasma (coming this friday) to cut perfect sized replacements. I will pick up some thin stuff to shape what I cut out of the trans tunnel. I am sort of using Blacksmith's ideas for those who have seen his build.
This was after the first coat, put another one on after.
Found two florescent light assemblies in my attic yesterday from the previous owner, so I put those up over the jeep. Still need to wire them, just using ext cords now. It was dark in that corner!
So off to the steel yard it is. Expect lots of pics after the weekend of the floors.
Last edited by ArmyGuy; Aug 22, 2012 at 02:34 PM.
Thread Starter
Member
Joined: Jul 2012
Posts: 145
Likes: 0
From: Farmington, MN
Year: 1996
Model: Cherokee
Engine: 4.0
Well today was a fun day. Spent most of the day trying to adapt my new plasma cutter and extension cord to the dryer outlet until I get a 2nd 220v wired up in my garage next month. Had to do some compressor maintenance, get a water filter for the plasma. Then my sister in law got in a car accident, so I only played with the new plasma for a bit, but this thing is going to make my life much easier.
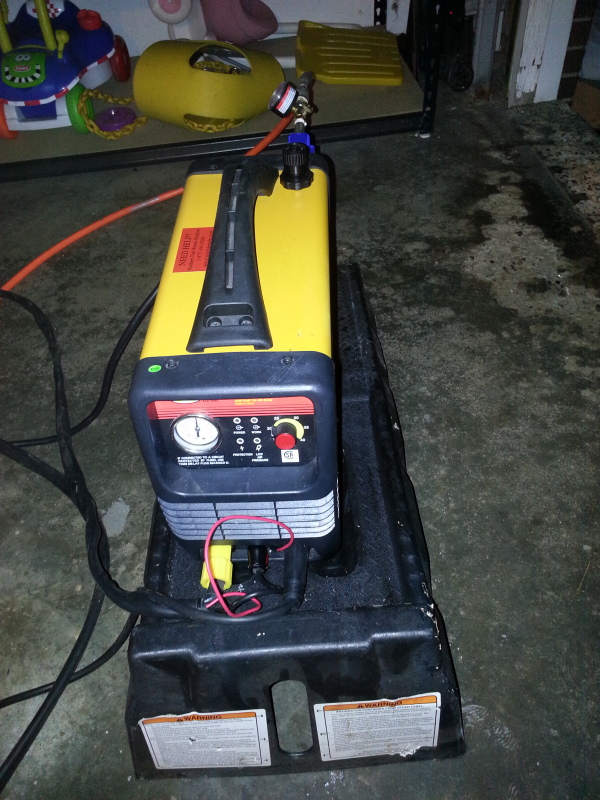
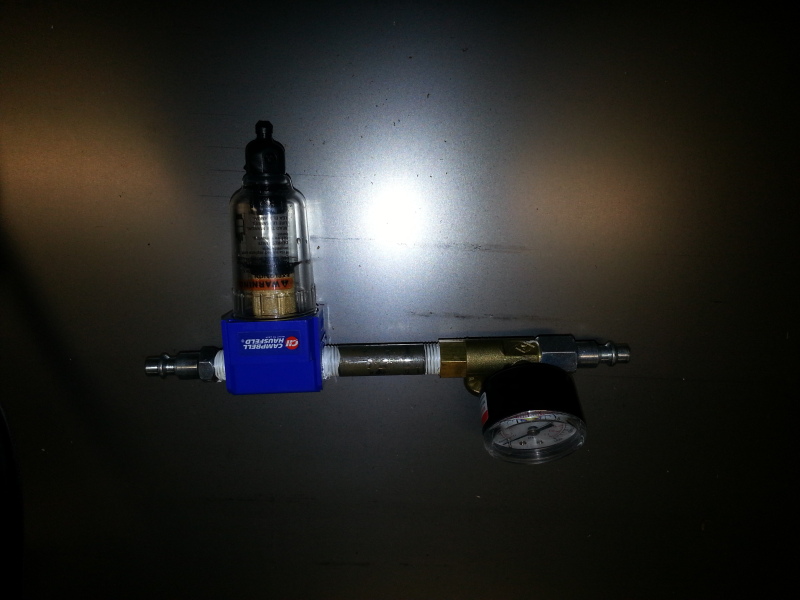
Dyer/regulator setup for the plasma with quick connects on both ends.
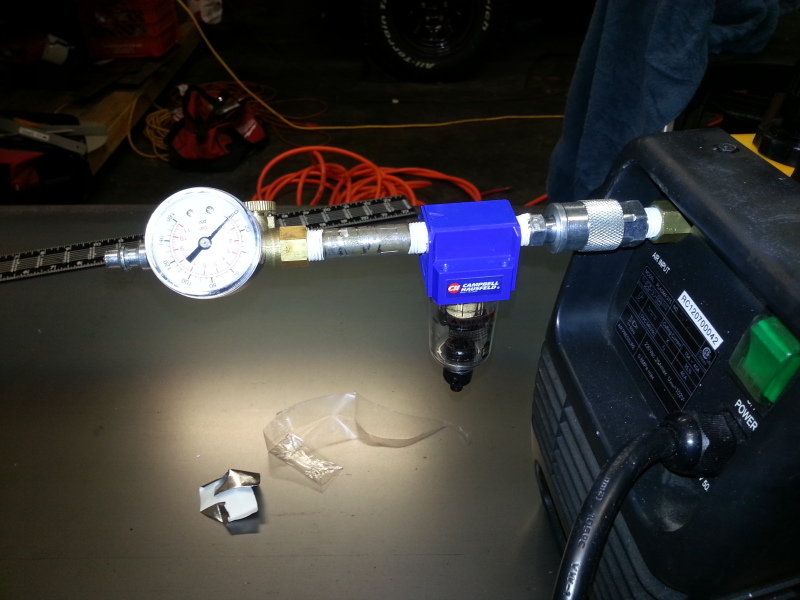
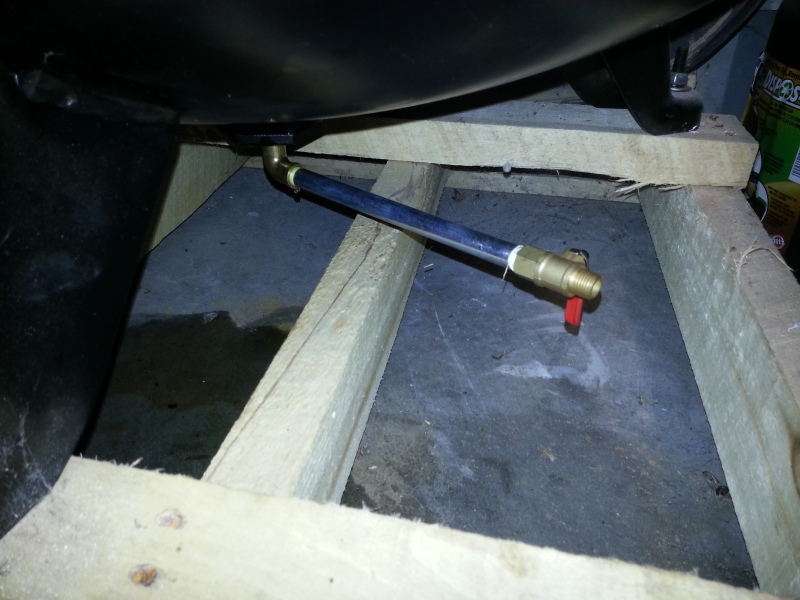
Was getting a lot of water in the compressor, now I can vent it easy.
cut out some crap that needed it....
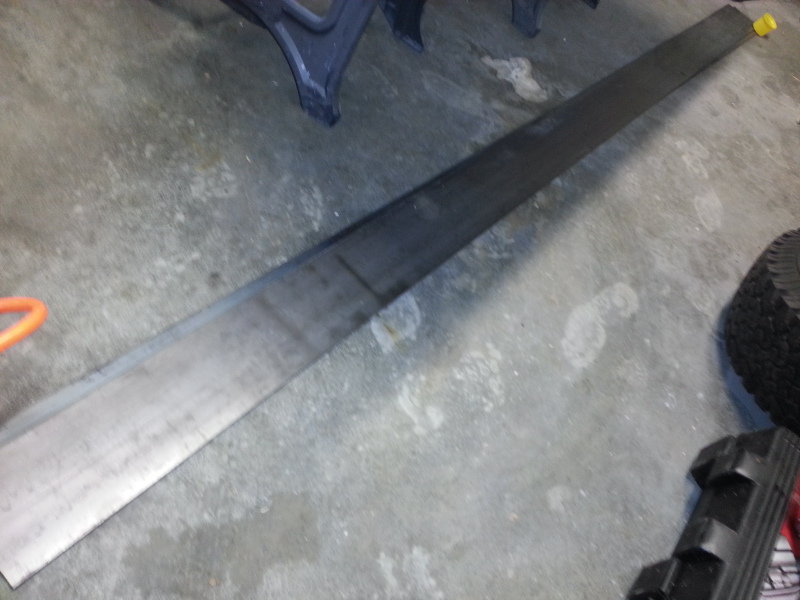
Replacement metal....14 gauge, that is two sheets
20 feet of 1/8, 6 inch wide flat, (two 10 footers) I will use this for seat brackets and random reinforcement stuff.
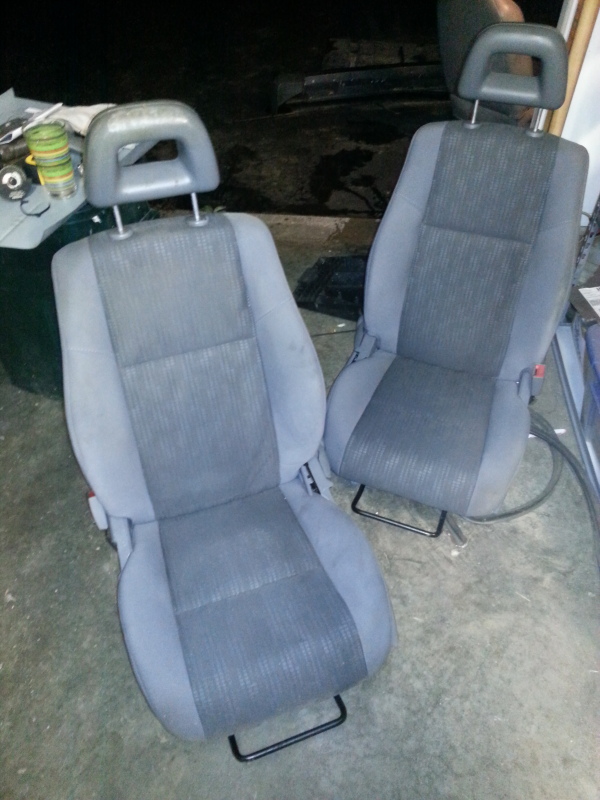
Got two seats today. 2008 dodge caliber seats. The seats are nearly identical to the cherokee in size, the brackets are flat (which I need because I eliminated the factory "hump") I will have to bring one of the sliders on the drivers over to fit the trans hump, but no biggie. Scored the pair for 45 bucks.
This plasma is going to make my life much easier, I wish I would have had it when I was cutting the bad stuff out! It cuts like a champ. Got a reconditioned one from northern for 200 off almost, then just got the 1 year no questions asked warranty for 60 bucks. My buddy was very impressed with it, so far I recommend them.
And if you are wondering why the tops of my frame rails have rust....I didn't chassis save that, I have to grind those clean and weld through still.....tomorrow.
Dyer/regulator setup for the plasma with quick connects on both ends.
Was getting a lot of water in the compressor, now I can vent it easy.
cut out some crap that needed it....
Replacement metal....14 gauge, that is two sheets
20 feet of 1/8, 6 inch wide flat, (two 10 footers) I will use this for seat brackets and random reinforcement stuff.
Got two seats today. 2008 dodge caliber seats. The seats are nearly identical to the cherokee in size, the brackets are flat (which I need because I eliminated the factory "hump") I will have to bring one of the sliders on the drivers over to fit the trans hump, but no biggie. Scored the pair for 45 bucks.
This plasma is going to make my life much easier, I wish I would have had it when I was cutting the bad stuff out! It cuts like a champ. Got a reconditioned one from northern for 200 off almost, then just got the 1 year no questions asked warranty for 60 bucks. My buddy was very impressed with it, so far I recommend them.
And if you are wondering why the tops of my frame rails have rust....I didn't chassis save that, I have to grind those clean and weld through still.....tomorrow.
Last edited by ArmyGuy; Aug 25, 2012 at 10:14 PM.
Thread Starter
Member
Joined: Jul 2012
Posts: 145
Likes: 0
From: Farmington, MN
Year: 1996
Model: Cherokee
Engine: 4.0
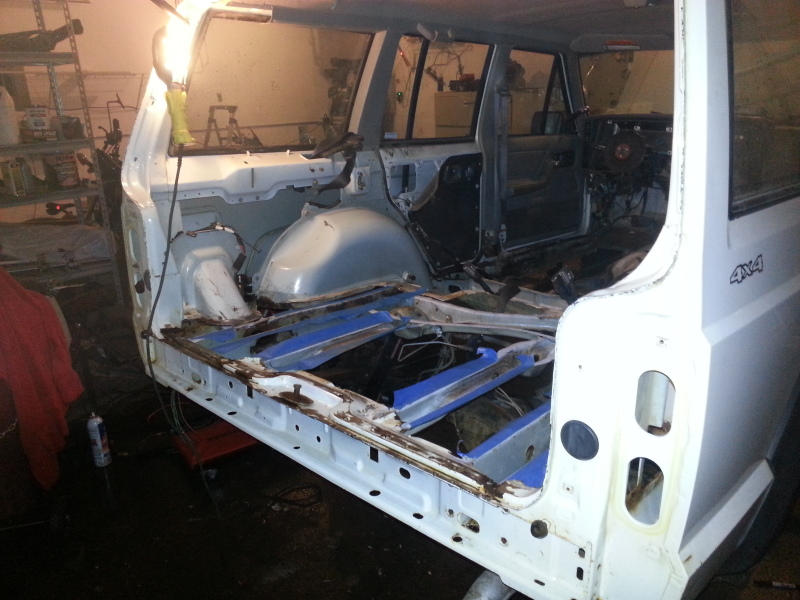
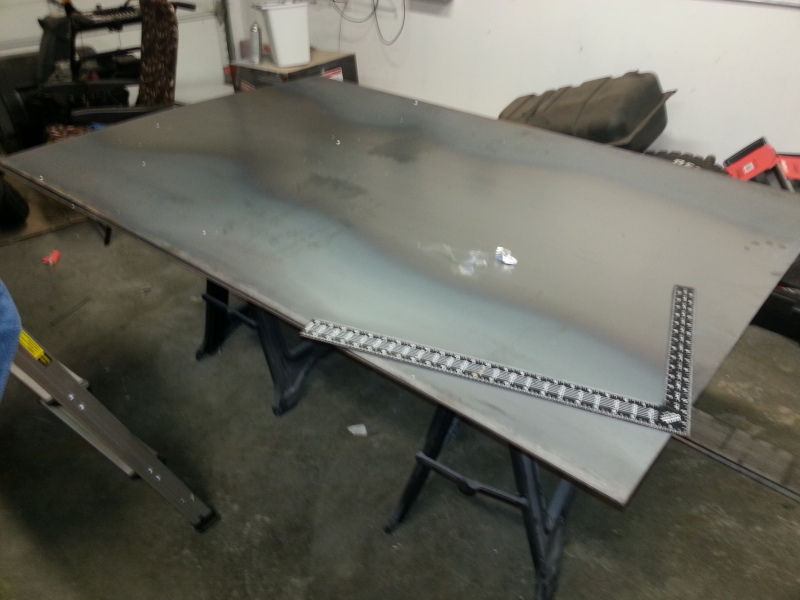
Cut out more of the corners to allow the floor to stretch all the way over and out to the fenders (instead of the cut and fold). Won't make the final cuts to the fenders until the JCR bumper gets in. The rear is 1/8 plate, 6 inches wide. we notched it to allow it to fit as close as possible to the back. I will of course fill the gap with thinner stuff I can pound out. The other square is 14 gauge. I will continue to work my way forward, basically cutting pieces to fit like a giant puzzle.
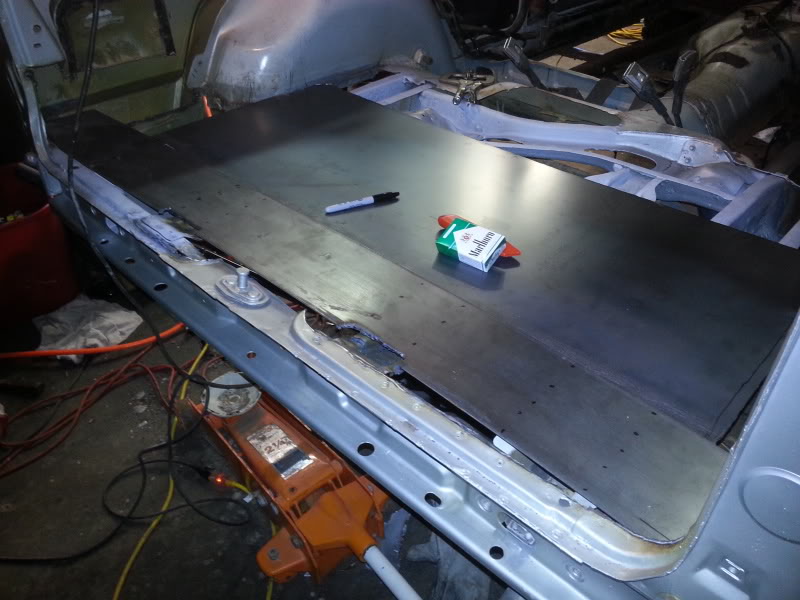
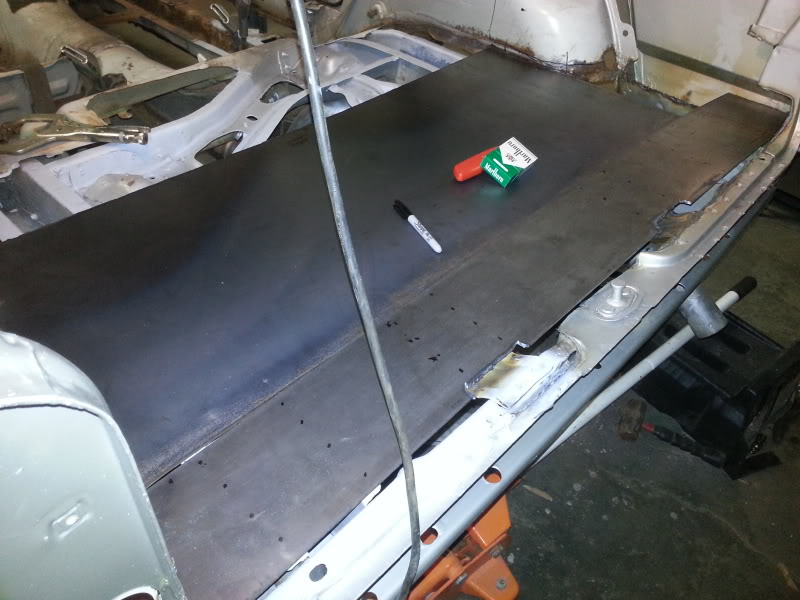
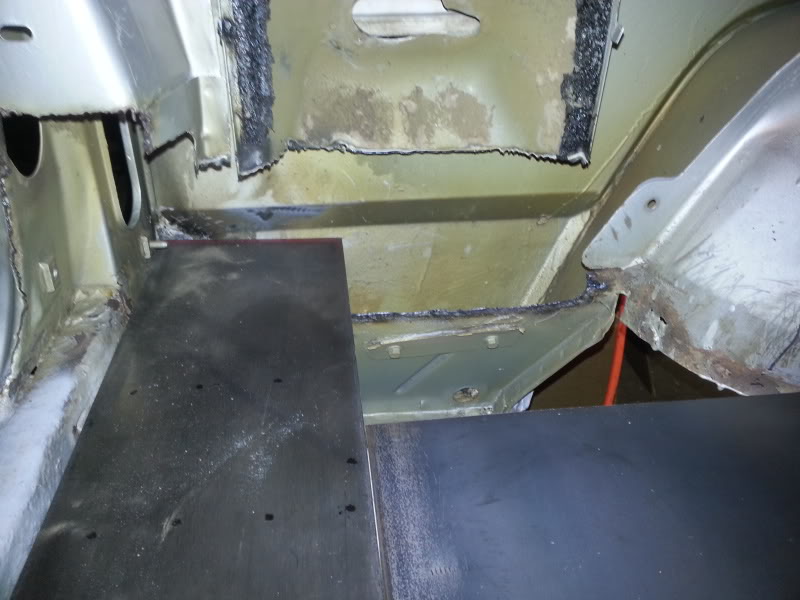
It sits square and flush, but it bows a bit because it is a tight fit, so there are some gaps when I don't press it down. It isn't tacked yet in the pictures. The plate completely covers the spring hangers. So they will be welded to the plate, and that plate ties in to all 4 frame sections in the rear. Should beef it up quite a bit.
It sits square and flush, but it bows a bit because it is a tight fit, so there are some gaps when I don't press it down. It isn't tacked yet in the pictures. The plate completely covers the spring hangers. So they will be welded to the plate, and that plate ties in to all 4 frame sections in the rear. Should beef it up quite a bit.