
ArmyGuy's 96 cherokee build


Thread Starter
Member
Joined: Jul 2012
Posts: 145
Likes: 0
From: Farmington, MN
Year: 1996
Model: Cherokee
Engine: 4.0
Hey everybody! I have been lurking the forums for over six months now. My buddy picked me up an old 96 cherokee, that was an ex forest service and eventually a postal truck. He bought it for me while I was on my 5th deployment, and got all the mechanical stuff squared away (the list is really long). What remained for me to tackle was the body, which was in great shape on the outside, but rusty as hell on the inside floors. After finally getting my garage squared away and ready for the job, I started the project.
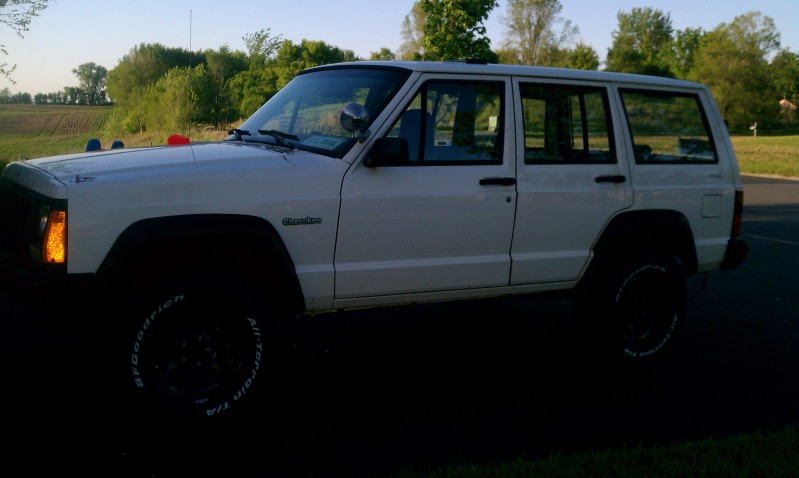
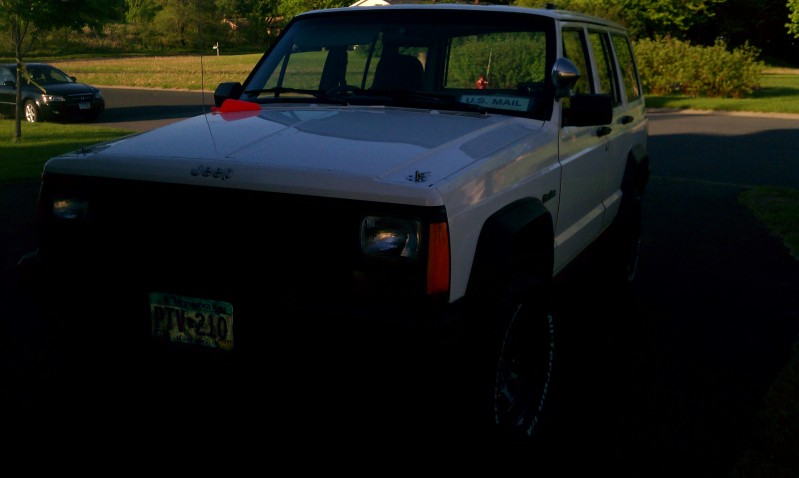
Being a postal truck.....I had to get rid of the right hand drive conversion, it was really weird driving it like this!
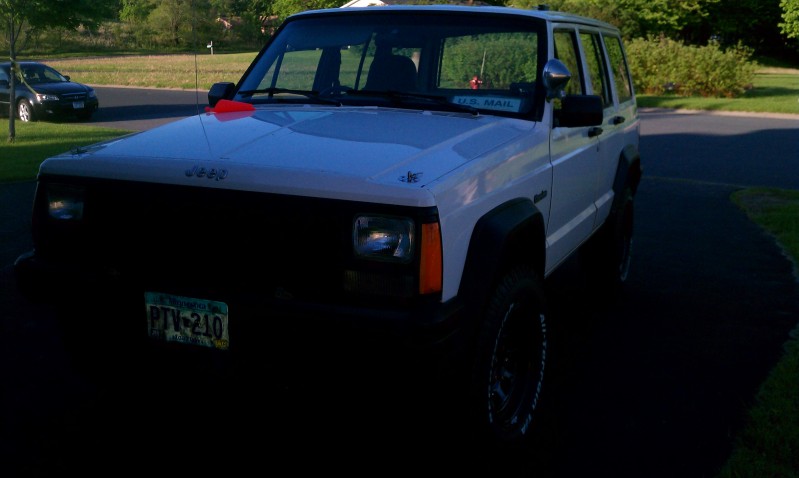
This is after the mechanical stuff was fixed, new black wagon wheels and 235/75/15 BFGs, "UpCountry Rear springs and Napa HD coils up front, with sensatrack shocks.
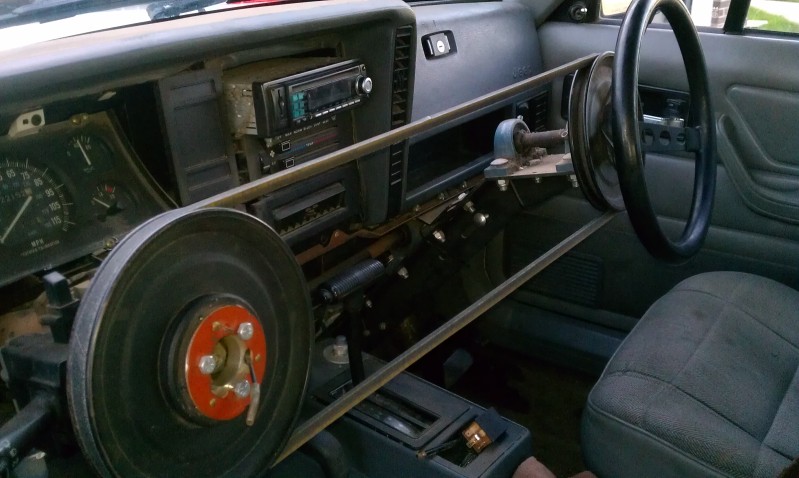
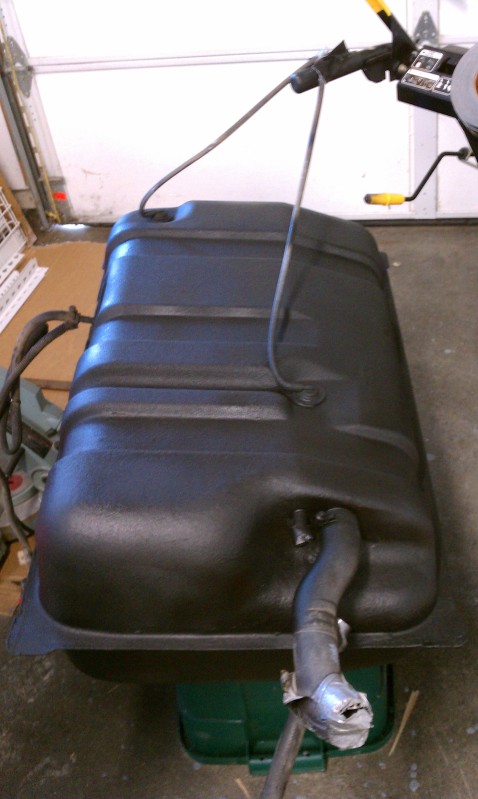
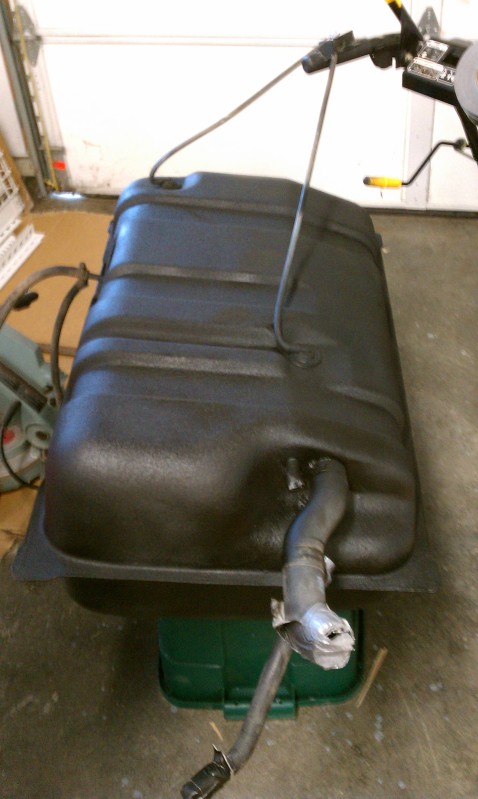
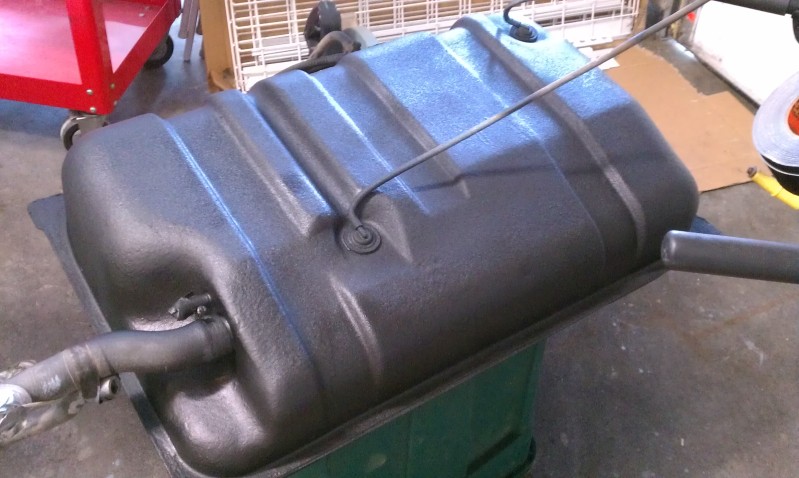
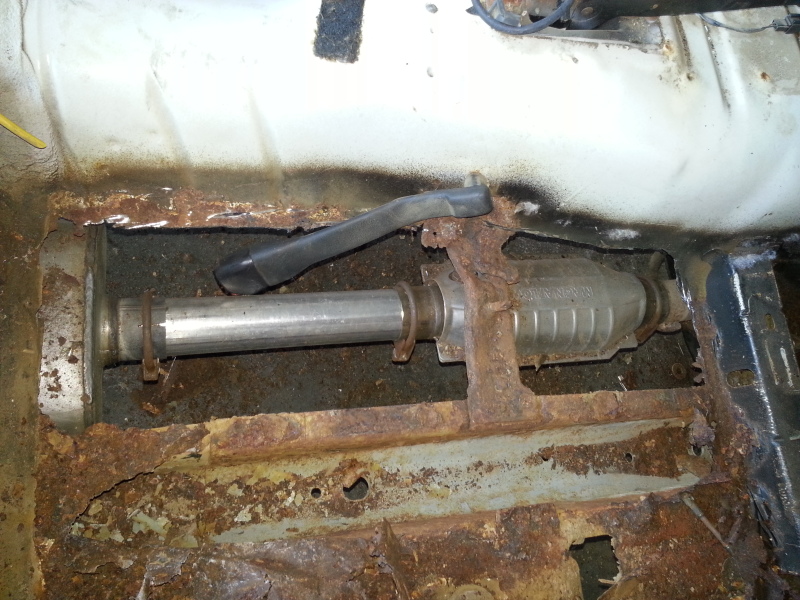
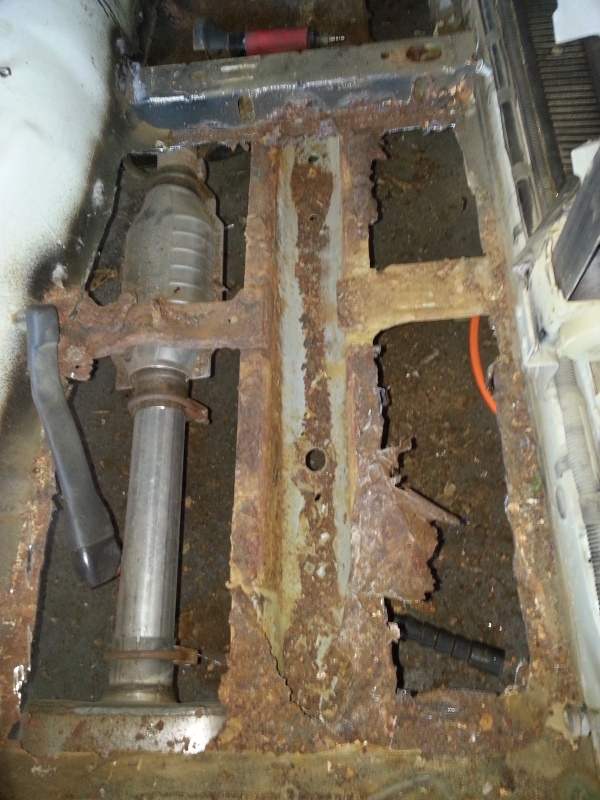
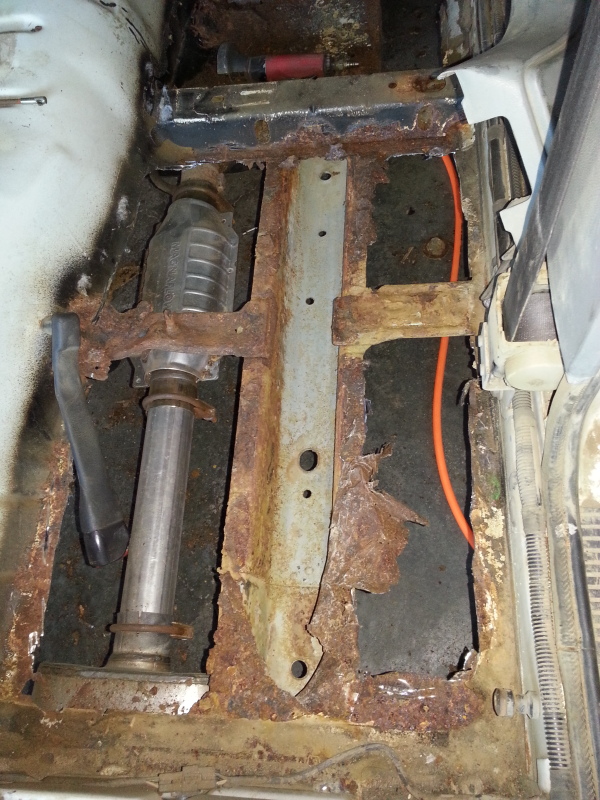
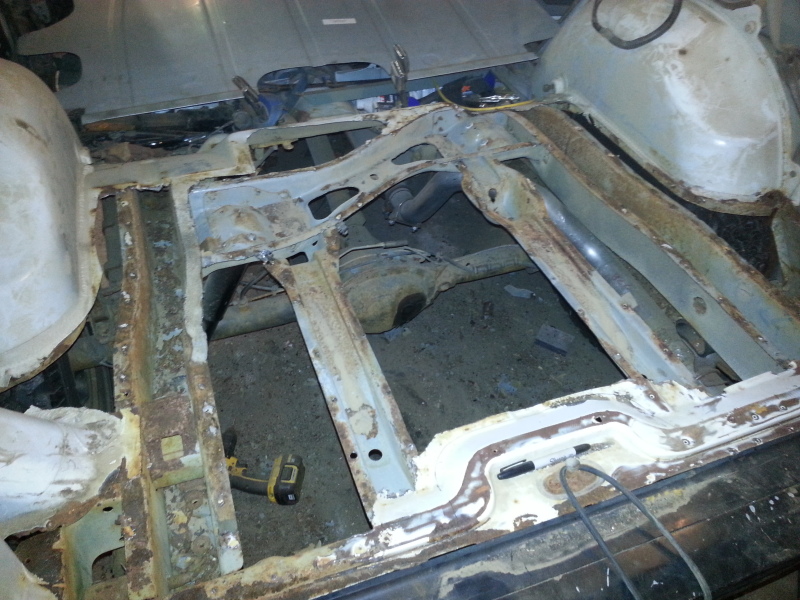
The first step was to remove the gas tank, all the floors had to go, and I didn't want it in my way. I just cut the rusted straps out with the cutoff, and it was out in minutes.
The tank had some surface rust on it, and I am rustproofing the crap out of this jeep, so I started with the tank. Cleaned it up, hit it with some self etching primer on the still clean parts, and gave it a coat of Zero-Rust I had laying around the garage, after that, I gave it a few coats of spray on bed liner.
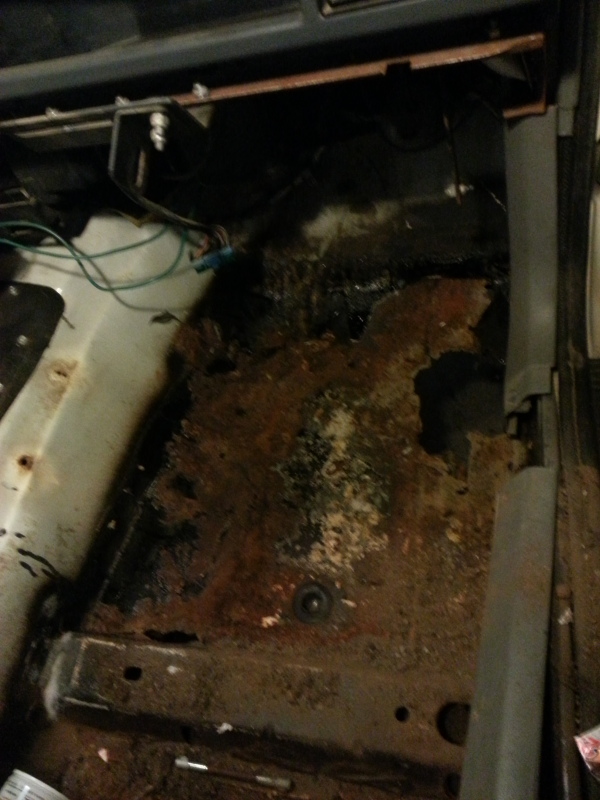
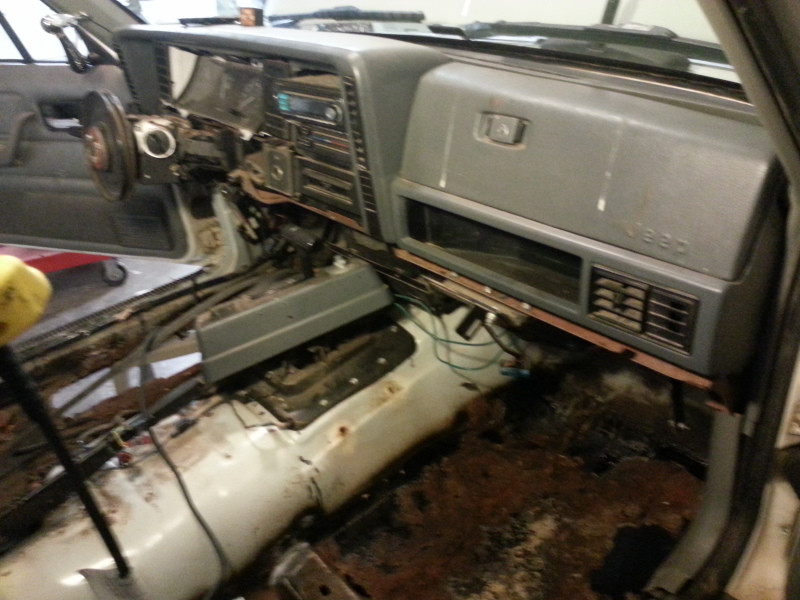
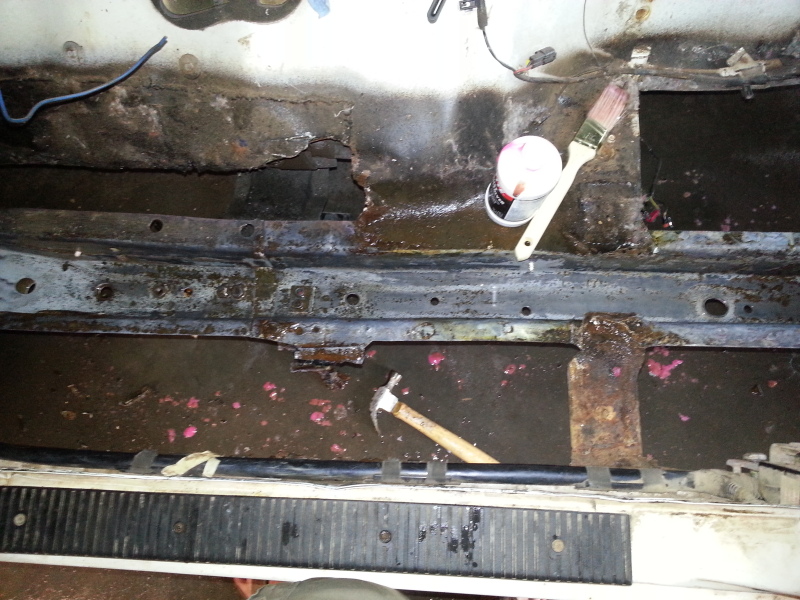
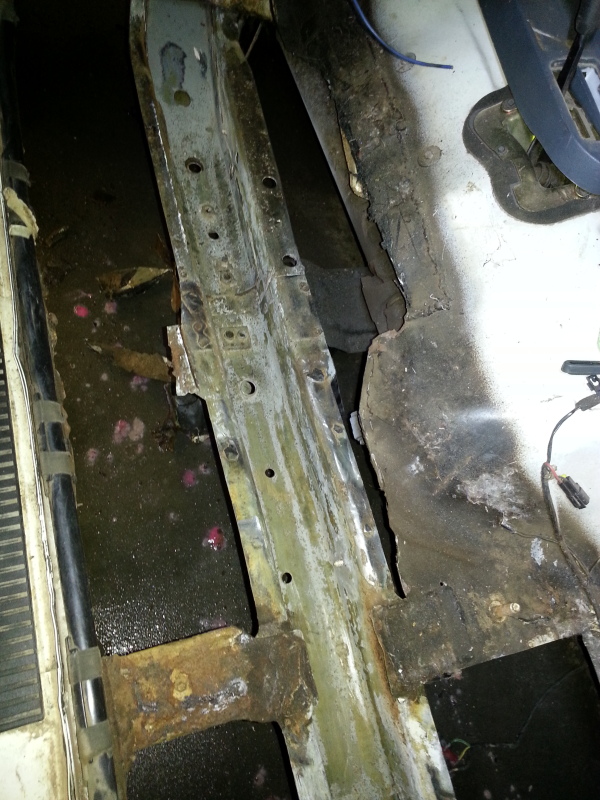
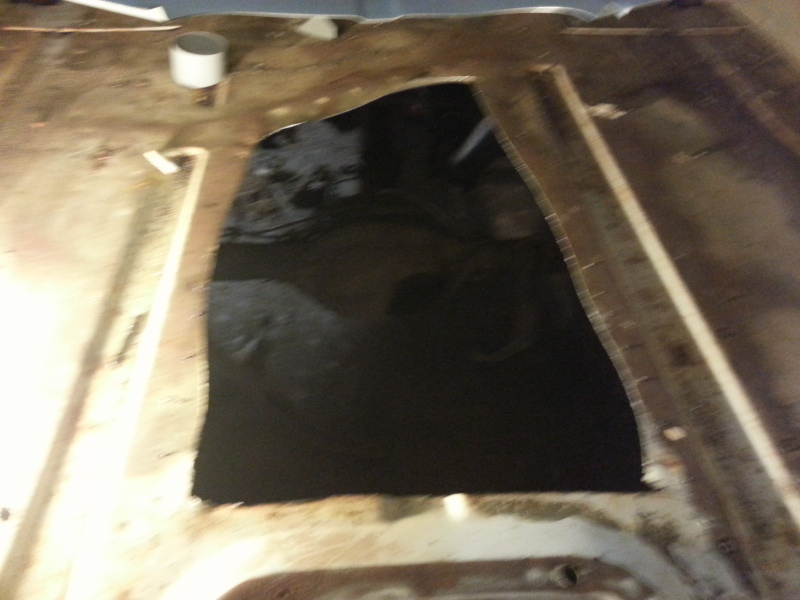
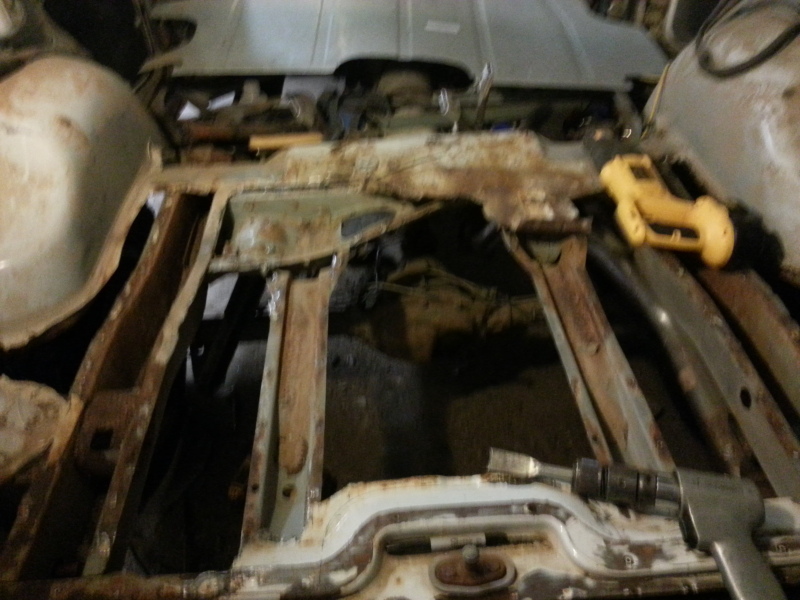
With the gas tank out, it was time to start on the floors. They were in pretty bad shape. Somebody had made a few repairs before, and they did a horrible job.
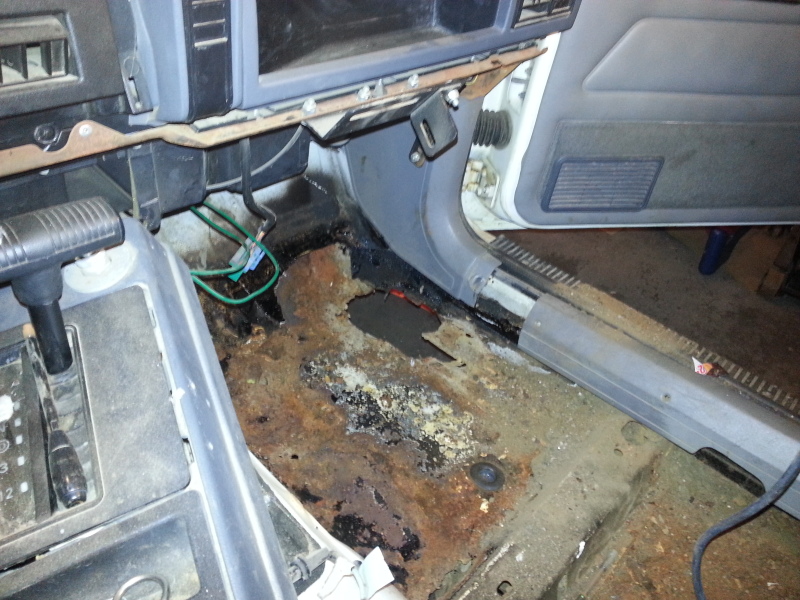
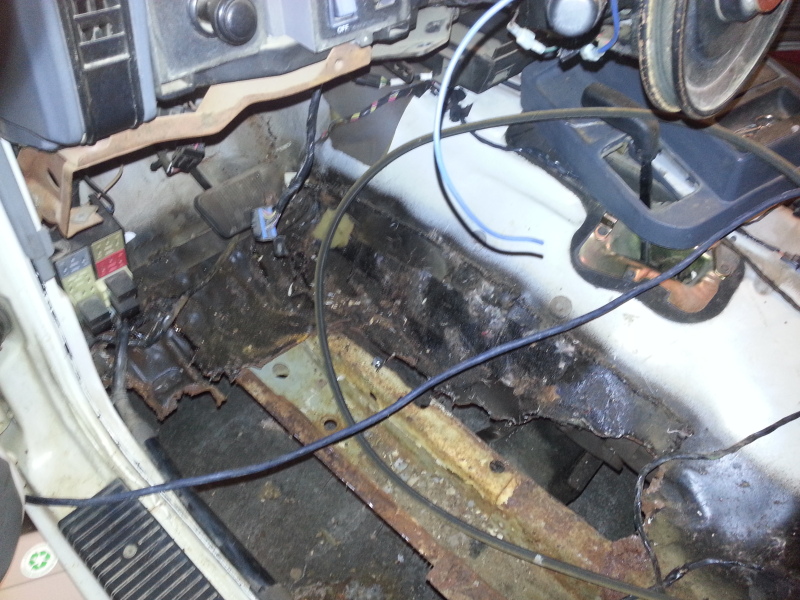
I started cutting the floors out with a cutoff wheel, which works, but takes forever. So I used a sawzall with a metal cutting blade. I drilled some guide holes out from underneath so I knew where the frame rails where, then cut it out with the sawzall. If you have a small one hander, you could do it right from the bottom. It worked great.
I still have some obvious cleaning up to do, but the heat wave we have had really sucks, so I dedicated a Saturday to deal with that....
Still piecing together the tools, I bought the house right before I left, so I have only been living it it for 3 months. Got some spot wield attachments for the air chisel and some blare bits to get the stuff still attached to the frame rail off. Ordered the HD Offroad frame stiffeners, which will be going in before the floor goes in. My hope is to finish cleaning up the floors and be ready to put everything in over this weekend. I will keep posting pics as she comes along.
The eventual goal is to chassis save it from the topside and the bottom, with a coat of monstaliner on the inside floor. I am going to repaint it too, but keeping it white with bedliner on the rockers down.
Being a postal truck.....I had to get rid of the right hand drive conversion, it was really weird driving it like this!
This is after the mechanical stuff was fixed, new black wagon wheels and 235/75/15 BFGs, "UpCountry Rear springs and Napa HD coils up front, with sensatrack shocks.
The first step was to remove the gas tank, all the floors had to go, and I didn't want it in my way. I just cut the rusted straps out with the cutoff, and it was out in minutes.
The tank had some surface rust on it, and I am rustproofing the crap out of this jeep, so I started with the tank. Cleaned it up, hit it with some self etching primer on the still clean parts, and gave it a coat of Zero-Rust I had laying around the garage, after that, I gave it a few coats of spray on bed liner.
With the gas tank out, it was time to start on the floors. They were in pretty bad shape. Somebody had made a few repairs before, and they did a horrible job.
I started cutting the floors out with a cutoff wheel, which works, but takes forever. So I used a sawzall with a metal cutting blade. I drilled some guide holes out from underneath so I knew where the frame rails where, then cut it out with the sawzall. If you have a small one hander, you could do it right from the bottom. It worked great.
I still have some obvious cleaning up to do, but the heat wave we have had really sucks, so I dedicated a Saturday to deal with that....
Still piecing together the tools, I bought the house right before I left, so I have only been living it it for 3 months. Got some spot wield attachments for the air chisel and some blare bits to get the stuff still attached to the frame rail off. Ordered the HD Offroad frame stiffeners, which will be going in before the floor goes in. My hope is to finish cleaning up the floors and be ready to put everything in over this weekend. I will keep posting pics as she comes along.
The eventual goal is to chassis save it from the topside and the bottom, with a coat of monstaliner on the inside floor. I am going to repaint it too, but keeping it white with bedliner on the rockers down.
Thread Starter
Member
Joined: Jul 2012
Posts: 145
Likes: 0
From: Farmington, MN
Year: 1996
Model: Cherokee
Engine: 4.0
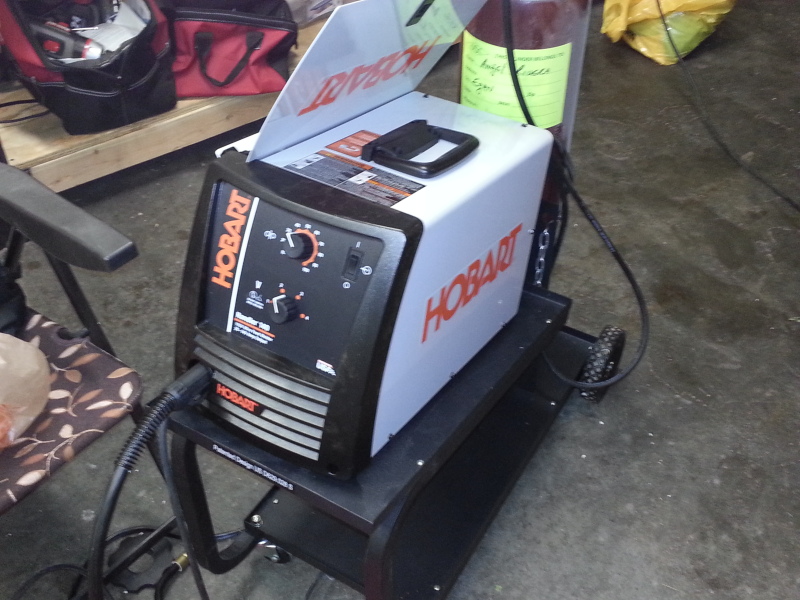
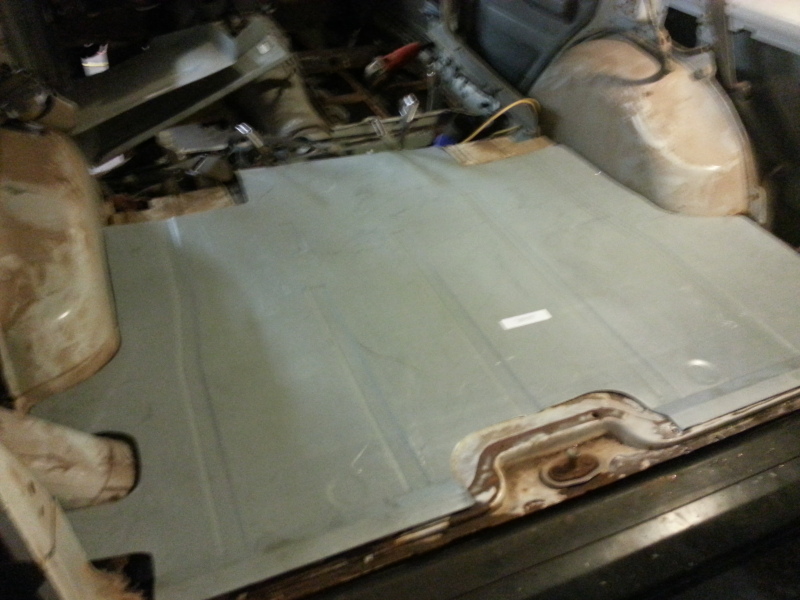
Yep, I got all new floor pans from C2C Fabrications off of ebay. I will need to patch in a few squares here and there along the trans tunnel, but no biggie. The wife got me a hobart 140 for my birthday, and I just picked up the tank for it last night.
Thread Starter
Member
Joined: Jul 2012
Posts: 145
Likes: 0
From: Farmington, MN
Year: 1996
Model: Cherokee
Engine: 4.0
Yeah. I hear Rustoleum is better, but I put the duplicolor on before doing my homework. Rolling on some hercliner would probably turn out way better. I bought a bunch of desert tan color Rustoleum Bedliner in cans, was thinking about using that on the interior trim pieces. I have Monstaliner Desert Sand for the floors, with about a gallon and a quart of Chassis saver, and a quart of Rustoleum Bedliner (black) for the headliner. I hate rust, and living in Minnesota requires me to rustproof like crazy, especially since I will mainly be driving this in the winter.
Thread Starter
Member
Joined: Jul 2012
Posts: 145
Likes: 0
From: Farmington, MN
Year: 1996
Model: Cherokee
Engine: 4.0
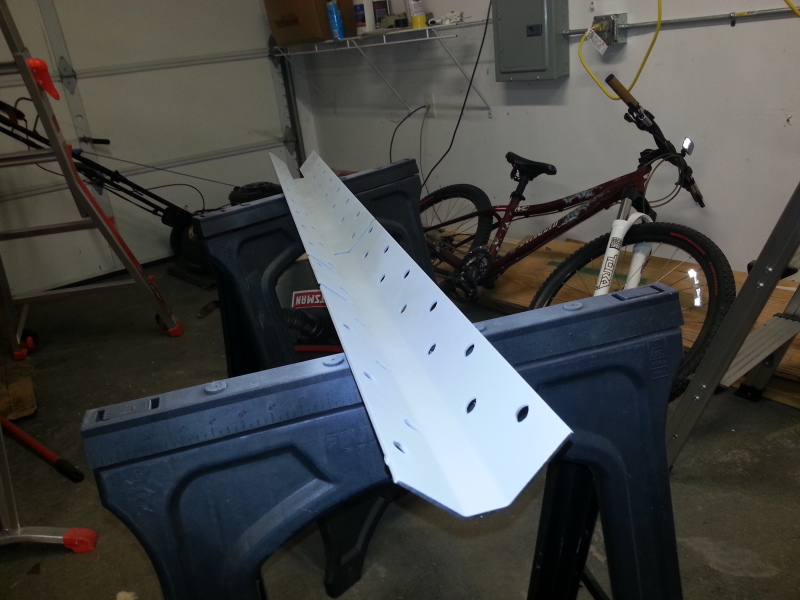
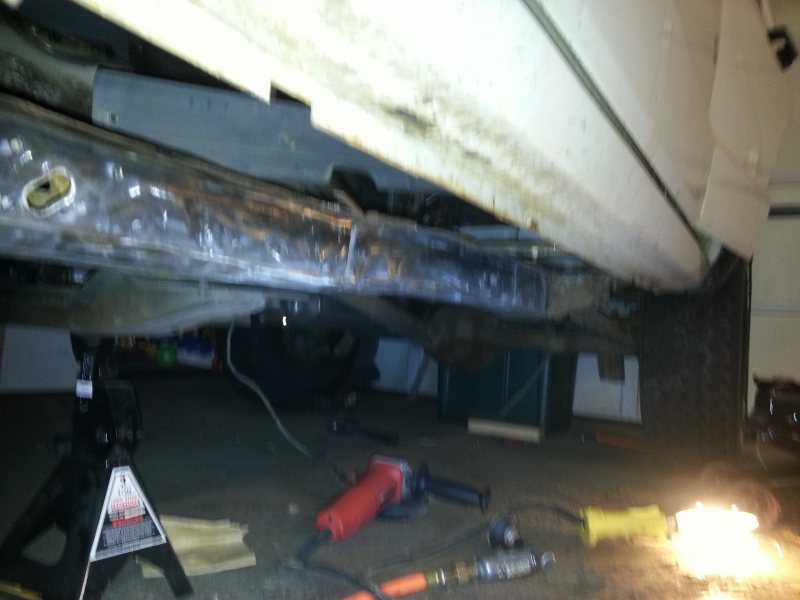
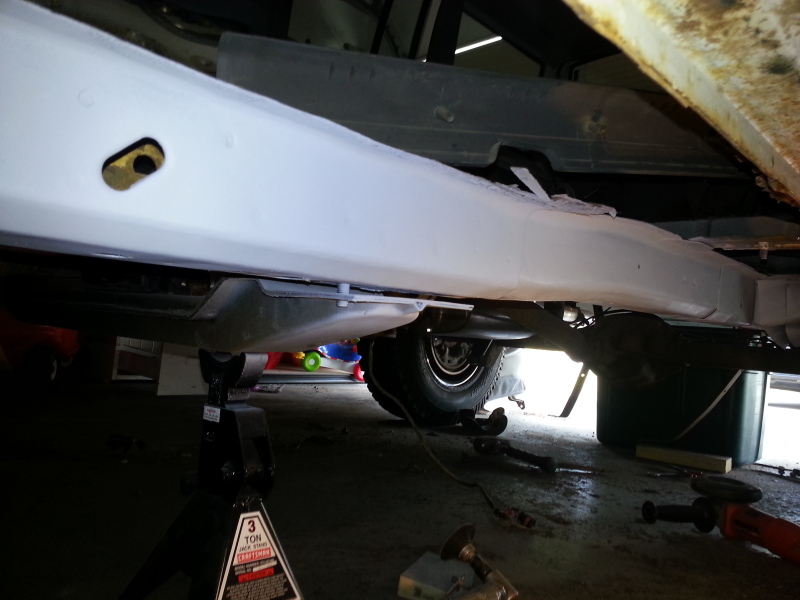
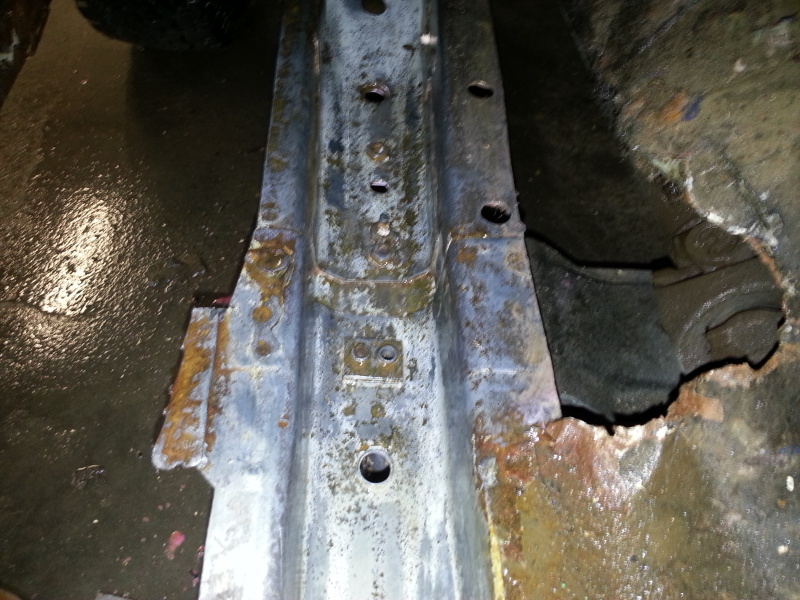
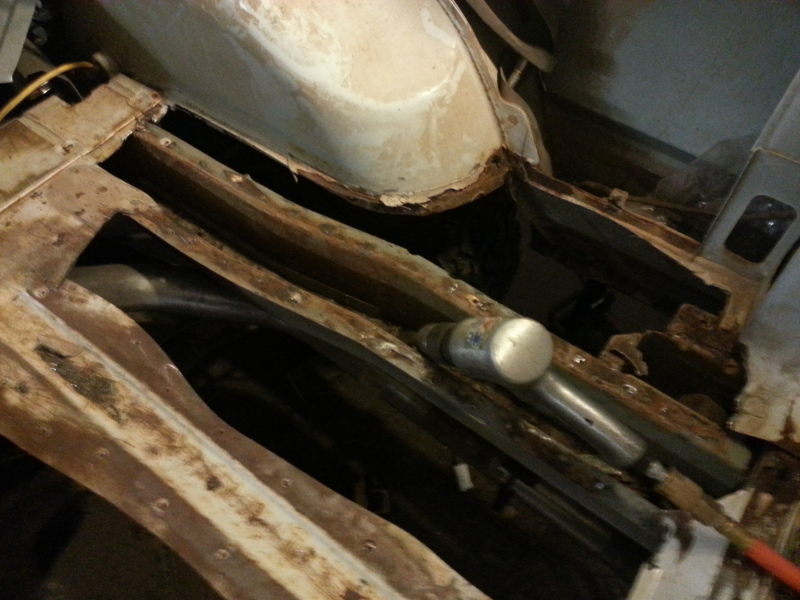
Well I used the air chisel to seperate most of the remaining floor pan that was spot welded to the frame, what a great tool. Today I wanted to focus on the stiffeners, as I want to use chassis saver inside the frame rail before I put my floors in. Since I don't want the chassis saver to burn up from the stiffeners, they need to go in first.
Stiffeners.....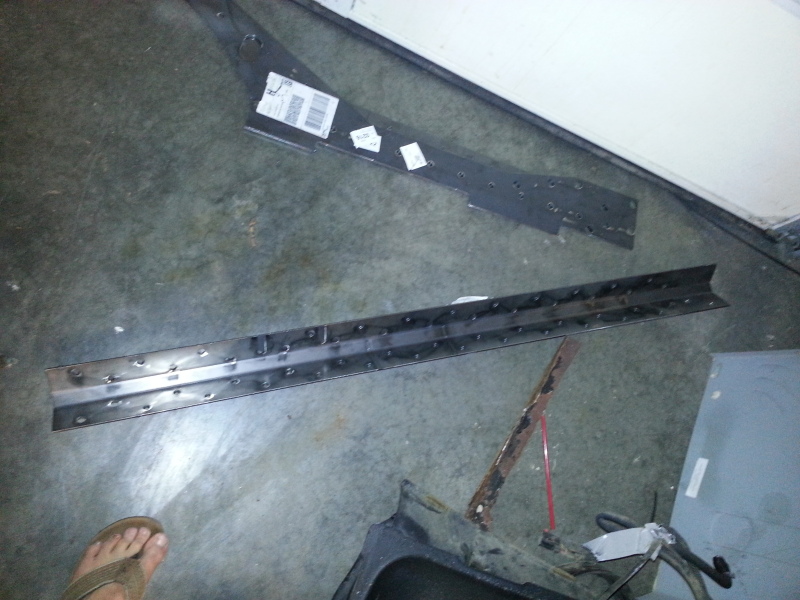
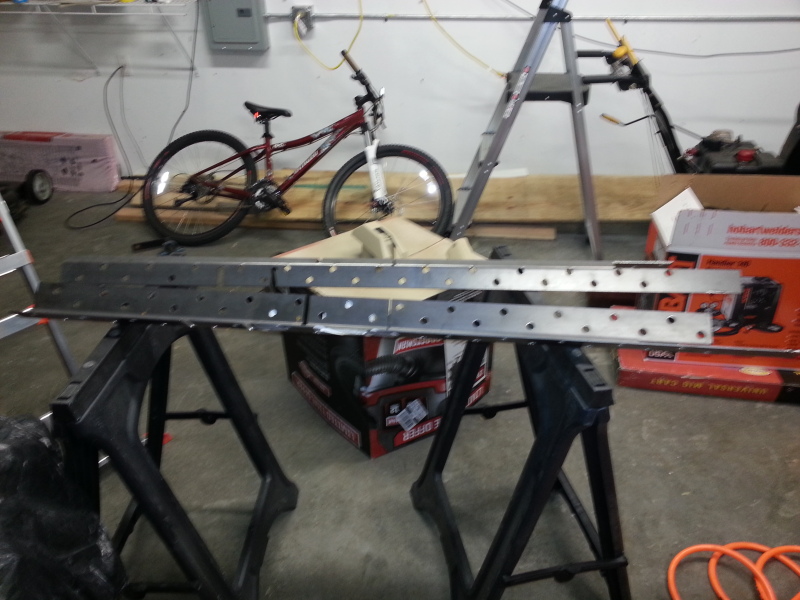
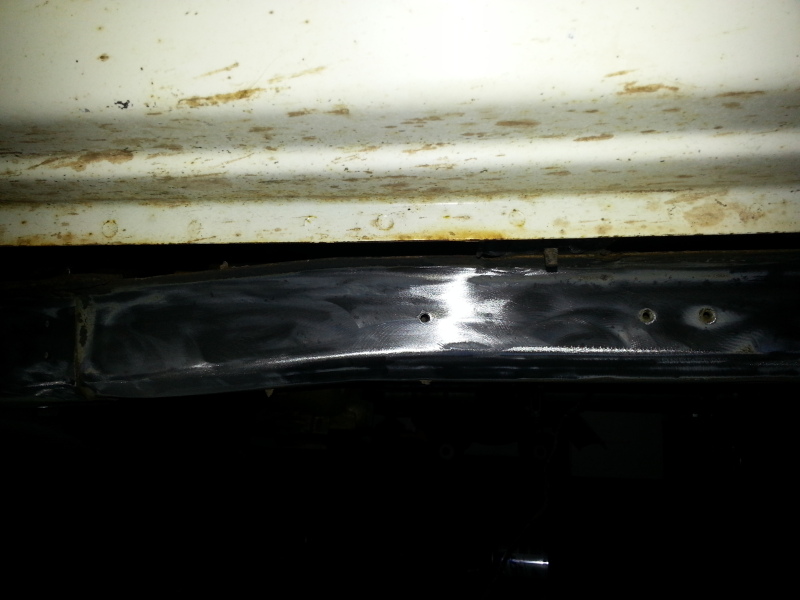
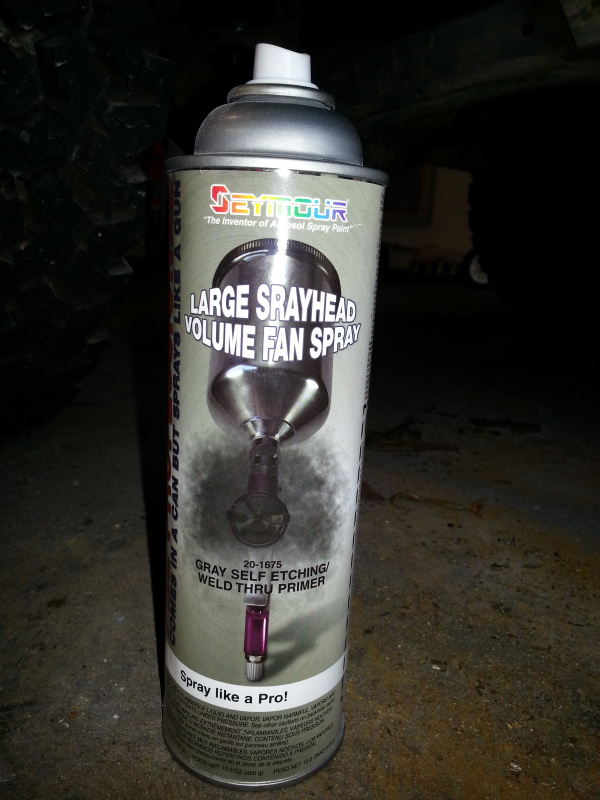
I used the angle grinder to smooth out the tack welds that held them together, and to grind off the UPS tape that was all over them. After a wipe down with some MEK, I got ready to prime them.
Weld through primered
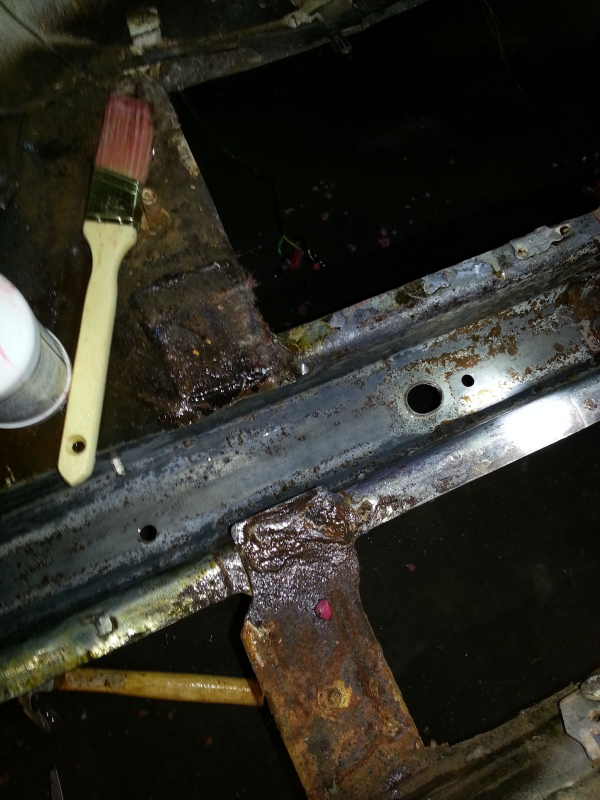
Cleaning up the frame rail. A 40 grit flap disk made really quick work of it, I tried the wire wheel, but it was taking forever and wasn't penetrating the paint very well. I used some sandpaper and got the little stuff by hand afterwards. I wanted it as clean as possible.
It took about an hour to get it perfect. My frame rails aren't bent or anything, so that really helped. I mocked up the stiffener a few times to figure out how far back I need to grind on the bottom and the top. Eventually it will all get chassis saved, but I wanted the surfaces clean, since it would be bare metal to metal.
The HD Stiffeners have a cutout to go around the bolts for the cross member. To get it in, you have to drop the cross member a bit. I supported it with a jack, then put a jack stand underneath. Use a jackstand for obvious reasons, and you will need the jack later to press the stiffener to the frame.
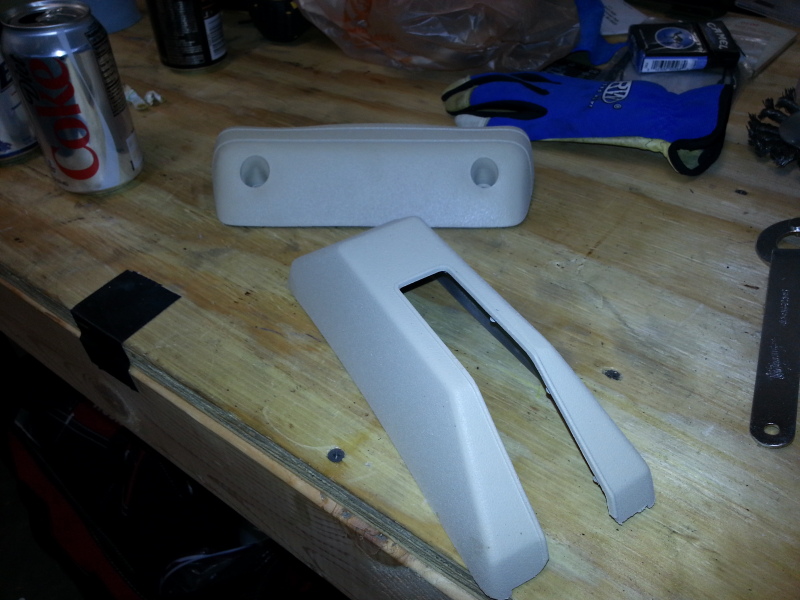
I am using Rustoleum Spray on Tan bedliner for the interior, I did a test with the trans shifter (hard plastic) and the rear seat interior door handle. It actually turned out really well, and holds when I flex it around. Washed and scuffed up the pieces with Scotchbrite pads before I bedlined them.
Passengers side
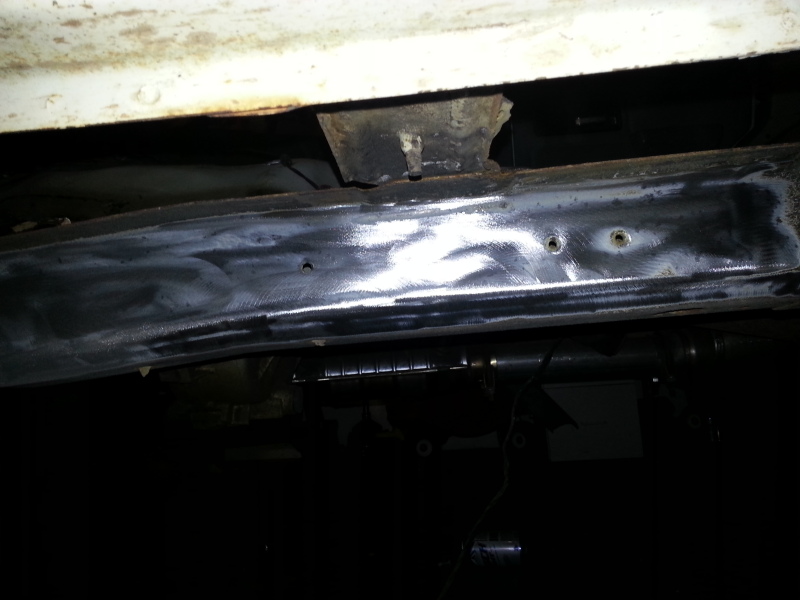
Both stiffeners done with the primer.
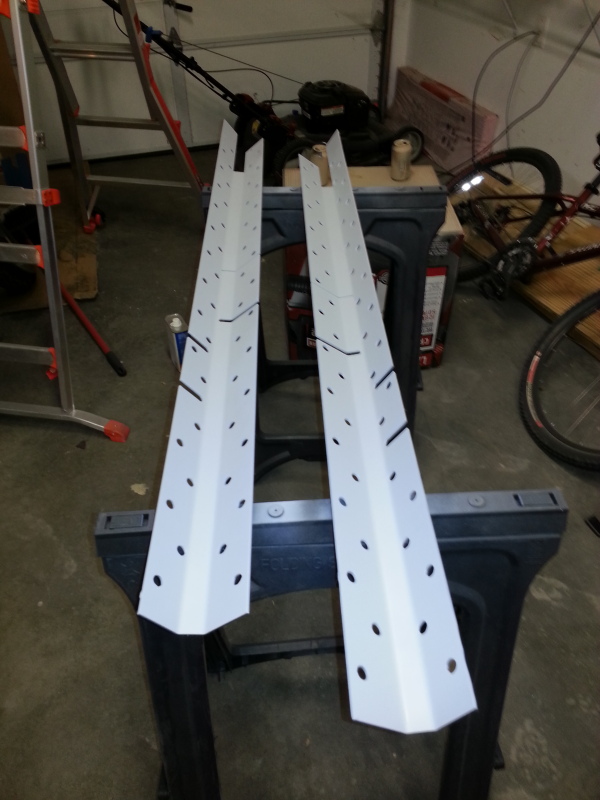
Some tips.... use a flap wheel and a small grinder, have some sand paper or a small drill or rotozip to sand the hard to reach spots, wear a mask, wear eye protection. Drop the Crossmember a little first, so you can mock everything up before you prime. Then you can figure out exactly how far you need to go with the primer. After the frame rails are done, then prime the stiffeners. Don't be in a hurry.
The next step is letting this stuff cure, then weld them up. I will am not comfortable welding this, so I have a few buddies that are going to help me get it done. I will continue this write up as things happen!
Stiffeners.....
I used the angle grinder to smooth out the tack welds that held them together, and to grind off the UPS tape that was all over them. After a wipe down with some MEK, I got ready to prime them.
Weld through primered
Cleaning up the frame rail. A 40 grit flap disk made really quick work of it, I tried the wire wheel, but it was taking forever and wasn't penetrating the paint very well. I used some sandpaper and got the little stuff by hand afterwards. I wanted it as clean as possible.
It took about an hour to get it perfect. My frame rails aren't bent or anything, so that really helped. I mocked up the stiffener a few times to figure out how far back I need to grind on the bottom and the top. Eventually it will all get chassis saved, but I wanted the surfaces clean, since it would be bare metal to metal.
The HD Stiffeners have a cutout to go around the bolts for the cross member. To get it in, you have to drop the cross member a bit. I supported it with a jack, then put a jack stand underneath. Use a jackstand for obvious reasons, and you will need the jack later to press the stiffener to the frame.
I am using Rustoleum Spray on Tan bedliner for the interior, I did a test with the trans shifter (hard plastic) and the rear seat interior door handle. It actually turned out really well, and holds when I flex it around. Washed and scuffed up the pieces with Scotchbrite pads before I bedlined them.
Passengers side
Both stiffeners done with the primer.
Some tips.... use a flap wheel and a small grinder, have some sand paper or a small drill or rotozip to sand the hard to reach spots, wear a mask, wear eye protection. Drop the Crossmember a little first, so you can mock everything up before you prime. Then you can figure out exactly how far you need to go with the primer. After the frame rails are done, then prime the stiffeners. Don't be in a hurry.
The next step is letting this stuff cure, then weld them up. I will am not comfortable welding this, so I have a few buddies that are going to help me get it done. I will continue this write up as things happen!
Last edited by ArmyGuy; Jul 14, 2012 at 04:11 PM.
Trending Topics
Thread Starter
Member
Joined: Jul 2012
Posts: 145
Likes: 0
From: Farmington, MN
Year: 1996
Model: Cherokee
Engine: 4.0
Well I didn't get the stiffeners welded up. Helped my buddy Angel who is doing the welding with some landscaping and some stuff around the house. He just had a kid and I feel his pain there! I also had some stuff my wife needed me to do, but we did make some progress.
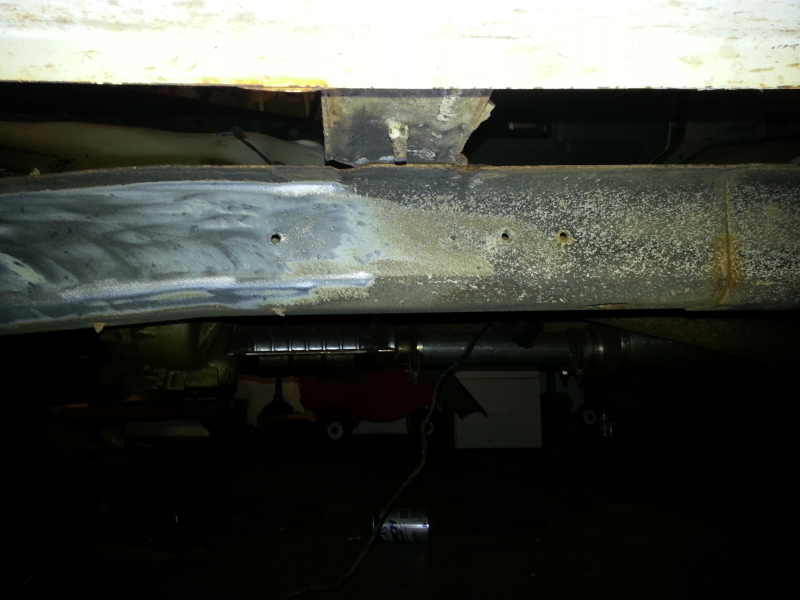
Angel came buy and didn't want to weld until the inside of the frame rail was as rust free as possible. He was concerned with the rust contaminating the welds for the stiffeners. So I started cleaning them out as best I could.
It is about impossible to get a grinder in there, so I used a flap wheel on the end of a drill to get the bulk, then hand sanded, then used some steel brushes and rust dissolving jelly to get it is clean as possible. It was nasty, painstaking work. I got one side done, took about 3 hours. It is as good as it will get. Some pitting, but the nasty stuff is gone. It wasn't that bad, just hard to get at since the space is so confined.
So I spent the better part of 4 hours on the one frame rail and cut out a little more of the floor.
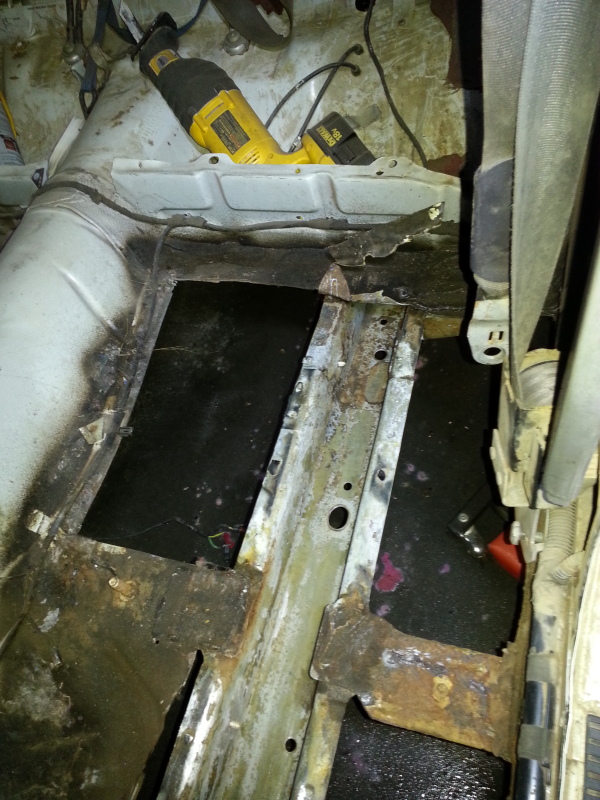
I figured take my time and do it right, I won't have access to these again once the floors are in. Once the stiffeners get welded, it is getting a nice coat of chassis saver inside the rail to prevent this from happening again.
Here is the Hobart all hooked up...
Angel came buy and didn't want to weld until the inside of the frame rail was as rust free as possible. He was concerned with the rust contaminating the welds for the stiffeners. So I started cleaning them out as best I could.
It is about impossible to get a grinder in there, so I used a flap wheel on the end of a drill to get the bulk, then hand sanded, then used some steel brushes and rust dissolving jelly to get it is clean as possible. It was nasty, painstaking work. I got one side done, took about 3 hours. It is as good as it will get. Some pitting, but the nasty stuff is gone. It wasn't that bad, just hard to get at since the space is so confined.
So I spent the better part of 4 hours on the one frame rail and cut out a little more of the floor.
I figured take my time and do it right, I won't have access to these again once the floors are in. Once the stiffeners get welded, it is getting a nice coat of chassis saver inside the rail to prevent this from happening again.
Here is the Hobart all hooked up...
Thread Starter
Member
Joined: Jul 2012
Posts: 145
Likes: 0
From: Farmington, MN
Year: 1996
Model: Cherokee
Engine: 4.0
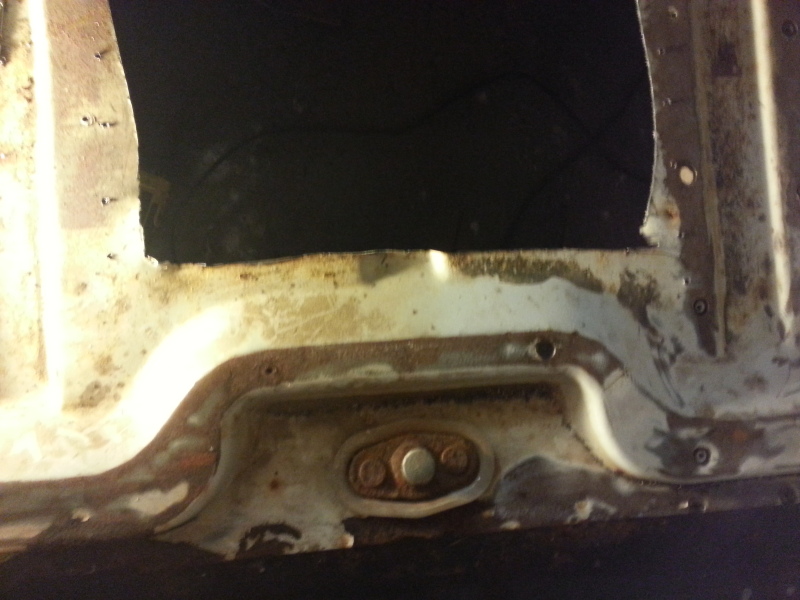
Thanks! I just have to resist the urge to rush things and do it right. I think it will take me a couple of months to really get it done. My old man used to build hot rods back in the 80's, and he told me "Take your time, do it right". Since the floors are out, I am trying to take this opportunity to make a good foundation for future mods. I don't know if anybody on the forum has used these, but I was thinking about using them to beef up the spring hangers. The last thing I need is the stock ones breaking and popping up through my floor (when it gets done).
http://www.polyperformance.com/shop/...t-p-20685.html
Would these work with my HD OFFROAD stiffeners?
http://www.polyperformance.com/shop/...t-p-20685.html
Would these work with my HD OFFROAD stiffeners?
CF Veteran
Joined: Feb 2011
Posts: 1,115
Likes: 0
From: Goose Creek, SC
Year: 1996
Model: Cherokee
Engine: 4.0 HO
Looks likw my floors haha. But I feel you on the do it right the first time. I've been trying to make sure I do that on mine as well. Good luck with the rest of the build, I'll be watching this one.
Thread Starter
Member
Joined: Jul 2012
Posts: 145
Likes: 0
From: Farmington, MN
Year: 1996
Model: Cherokee
Engine: 4.0
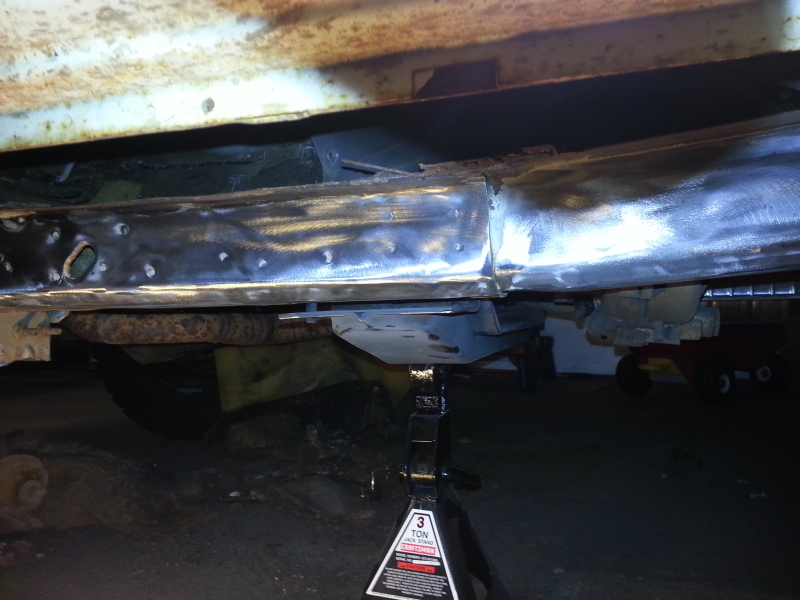
Well my buddy called me this morning and said he was coming over to for an hour or two before he had to get back to the baby. Placing the stiffeners in is much easier with two people and he wanted to get it pressed and tacked in while we were both available. We started at the front end of the vehicle, using the cross member bolts as a guide.
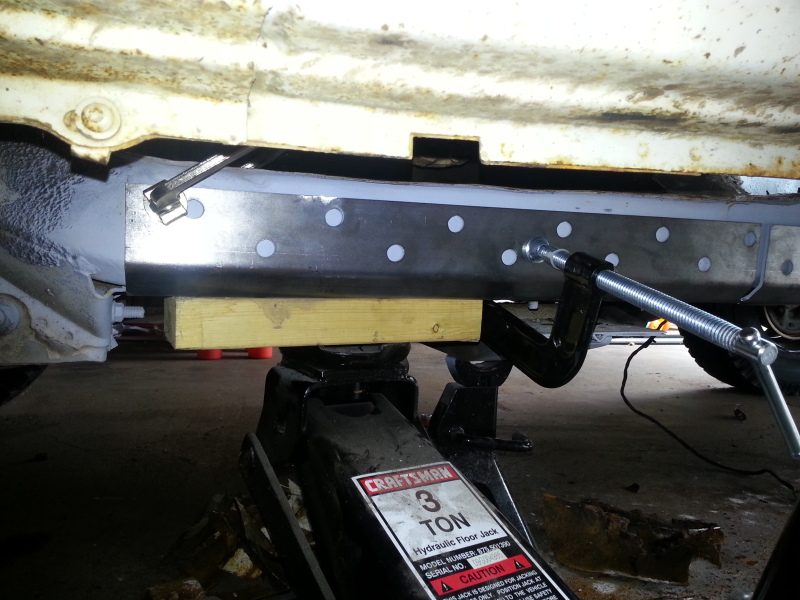
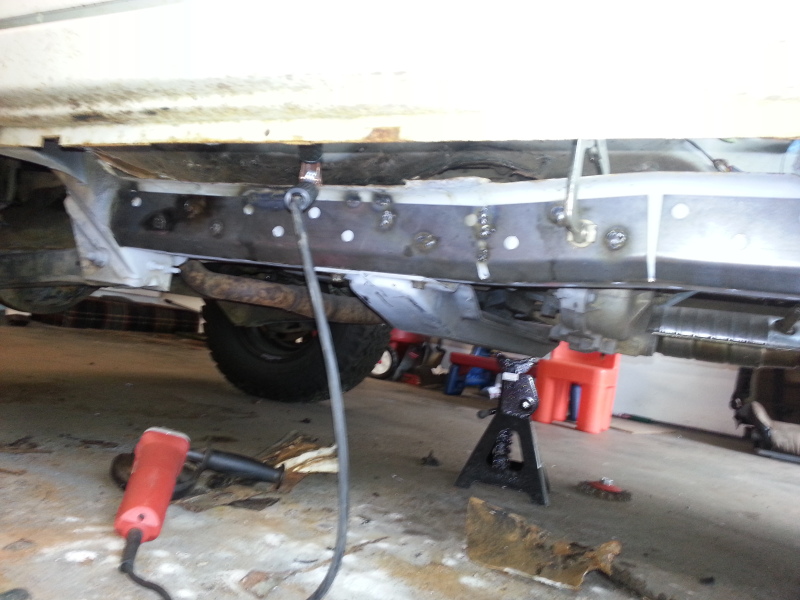
Not having the floors in made it easier to use c clamps and welder clamps to ensure a good fit. We made a few stitch welds and plug welds, then moved the jack and clamps down, made some more welds, and kept repeating this process as we moved our way to the back. Use the cross member to your advantage and bolt it in, then you know you are lined up right, and it helps secure it tight to the frame. The bends were easy to make, just used a jack to press it in.
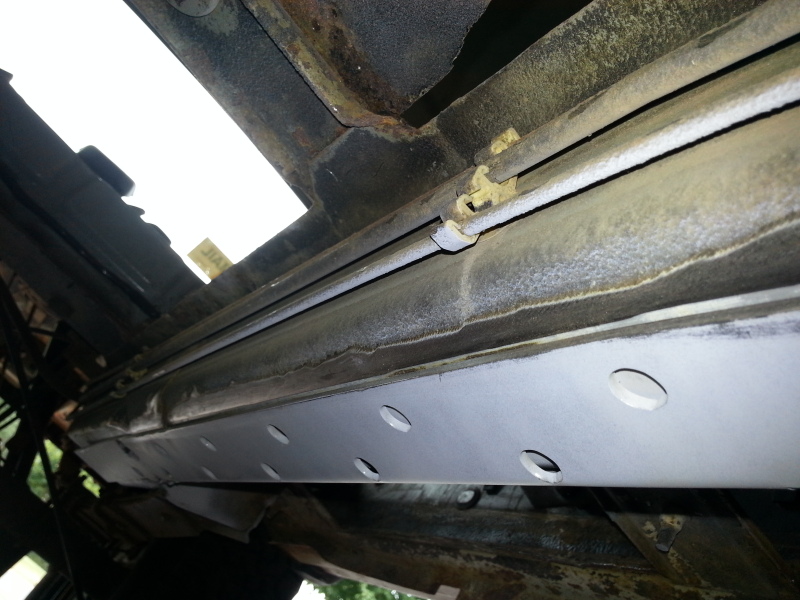
i initially didn't weld through primer the outside of the stiffener, but a few welds were a little splattered (probably from the galvanization on the unibody) but we hit up a few plugs with some weld through primer,
and it made a much nicer weld. Now that it is in place, my buddy can go over all the welds as we have time. Now for a ton of plug and stitch welds.....
Here is the weld through we used
Not having the floors in made it easier to use c clamps and welder clamps to ensure a good fit. We made a few stitch welds and plug welds, then moved the jack and clamps down, made some more welds, and kept repeating this process as we moved our way to the back. Use the cross member to your advantage and bolt it in, then you know you are lined up right, and it helps secure it tight to the frame. The bends were easy to make, just used a jack to press it in.
i initially didn't weld through primer the outside of the stiffener, but a few welds were a little splattered (probably from the galvanization on the unibody) but we hit up a few plugs with some weld through primer,
and it made a much nicer weld. Now that it is in place, my buddy can go over all the welds as we have time. Now for a ton of plug and stitch welds.....
Here is the weld through we used
Last edited by ArmyGuy; Jul 18, 2012 at 01:29 PM.
Thread Starter
Member
Joined: Jul 2012
Posts: 145
Likes: 0
From: Farmington, MN
Year: 1996
Model: Cherokee
Engine: 4.0
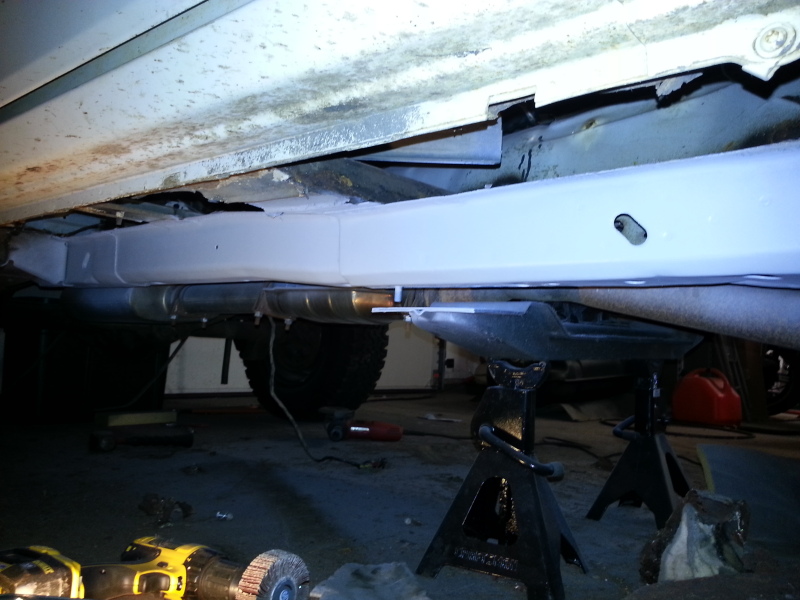
Well we got most of the other stiffener in. While my buddy welds that in little by little, I started on the rear floor pan. My tools of the trade were a sawzall, cutoff wheel, drill, and an air chisel.
Having the gas tank removed made this 100 % easier, so glad it wasn't under there.
Having the gas tank removed made this 100 % easier, so glad it wasn't under there.

