
'92 XJ " The Legacy" (Warning, HUGE pics)

Thread Starter
Member

Joined: May 2010
Posts: 196
Likes: 0
From: Newport News,VA
Year: 1992
Model: Cherokee (XJ)
Engine: 4.0L I6 H.O.
So after helping my mpg a little, and adding a little pep. I decided to tackle my wobble/shimmy after going over a curb and having the worse shimmy ever 100miles to and from my ladies farm.
My first screaming rampage into it was to replace my upper control arm bushings, since I've had them for about 7 months sitting on my desk. That was a lot of fun... Here's the steps to it:
-Buy torx sockets
-Buy new nuts and bolts, because torx sucks.
-Pick a side and do that one first
-Remove bolt, move upper control arm out of the way.
-Hand thy self a drill, and drill all that decaying rubber, till you can finger it out and the sleeve.
-Hand thy self the sawzall, and saw the bushing sleeve, and hammer that ***** out
-Rent balljoint/bushing remover/installer And have fun.
-Try to position axle back to where you can insert control arm and bolt.
-Torque and stuff
- Repeat for other side.
Once you get the hang of it, it isn't that bad. First one took 6 hours, second took barely a hour. Keep in mind I was screwing around and didn't want to rent the tool.
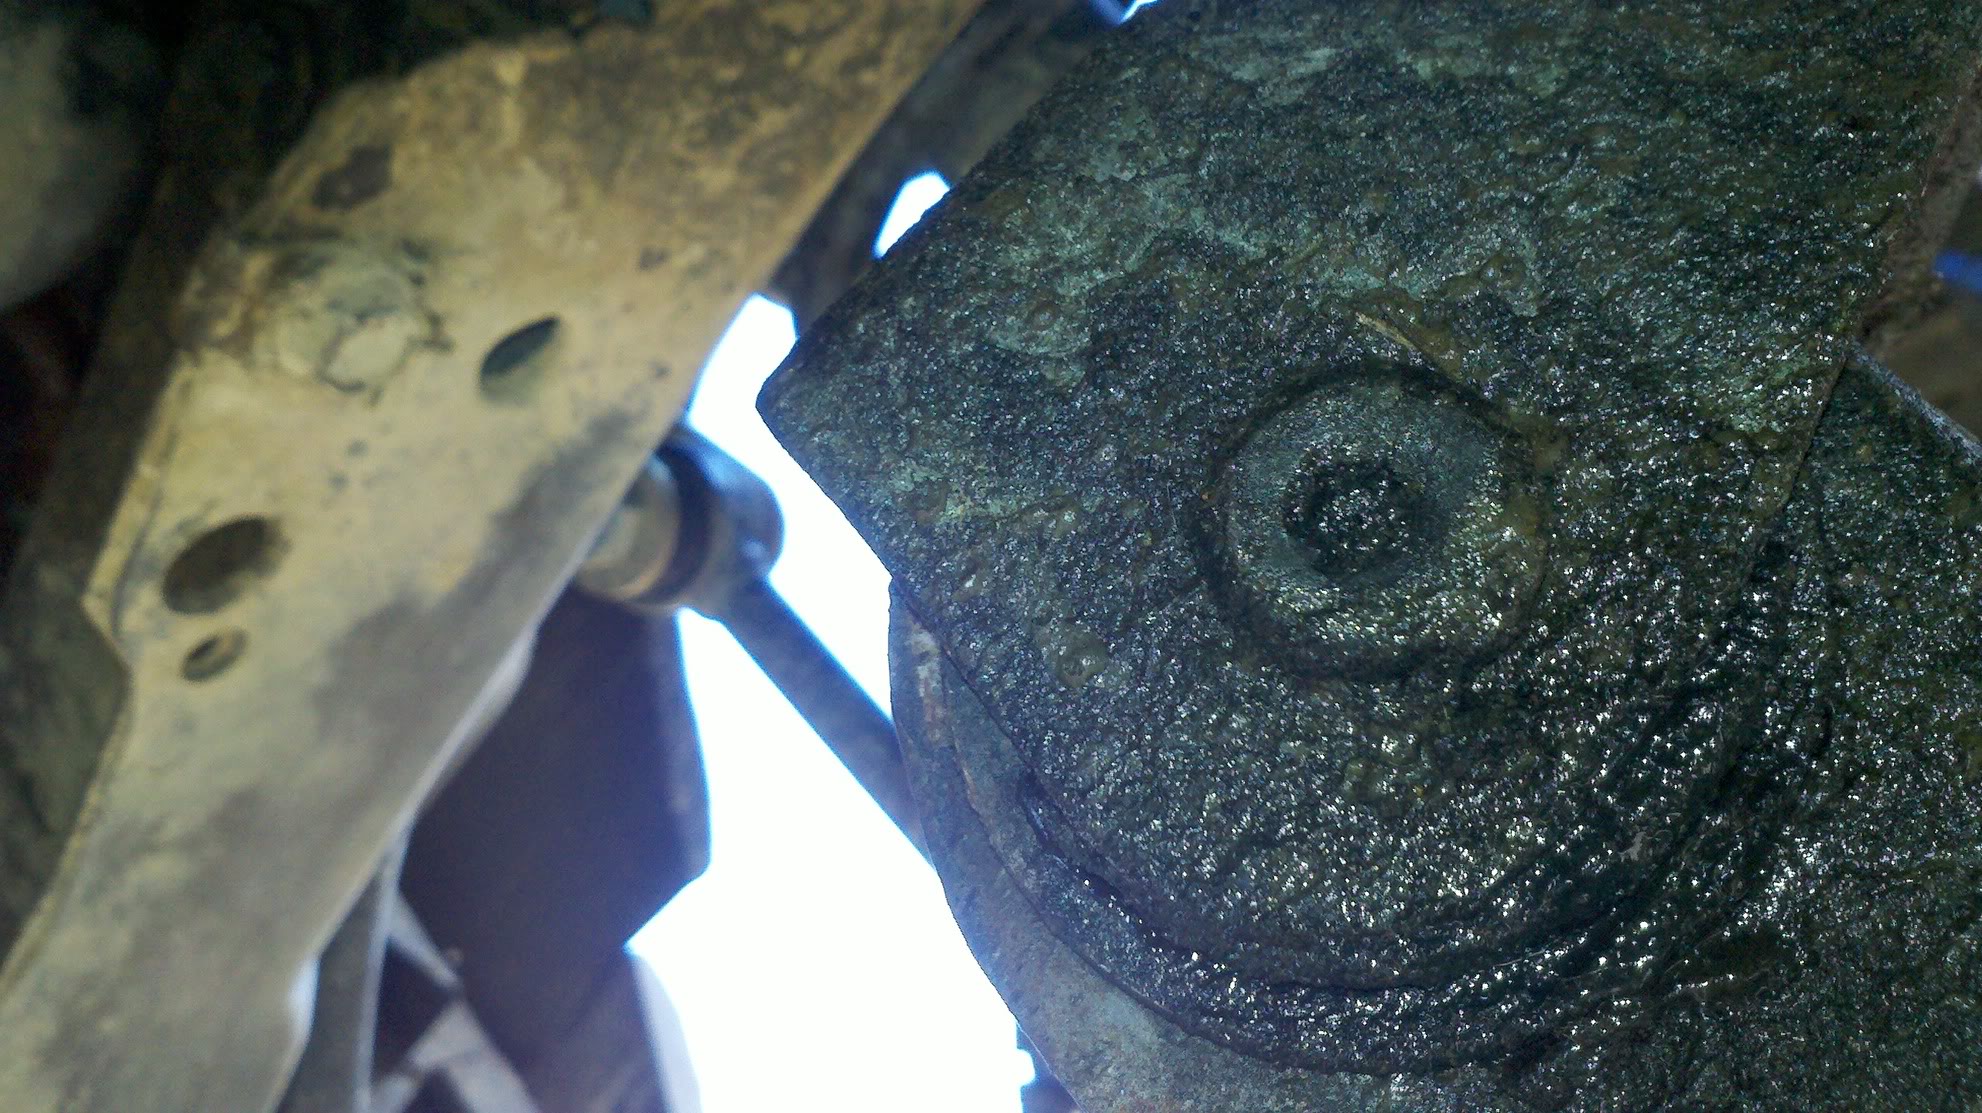
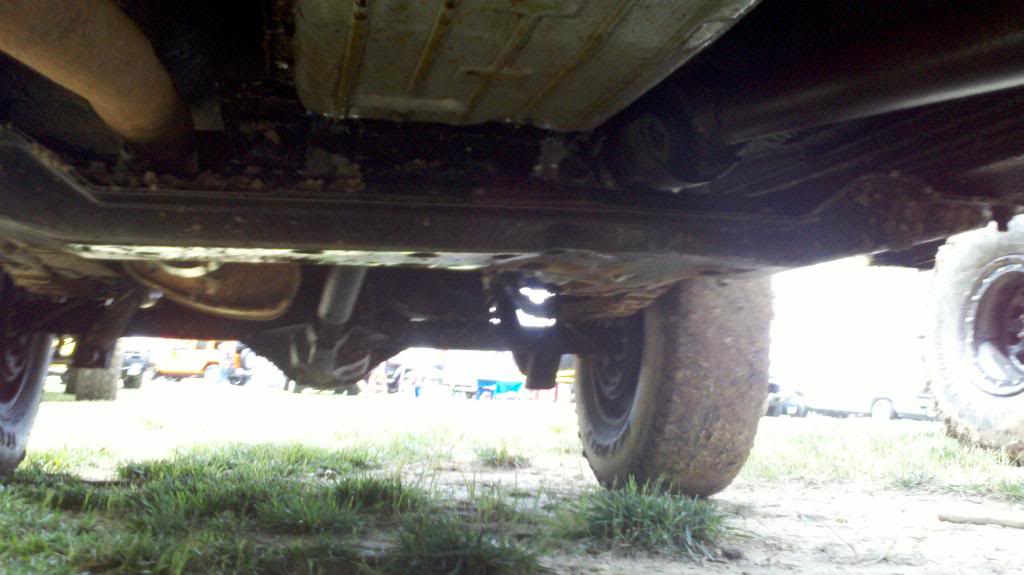
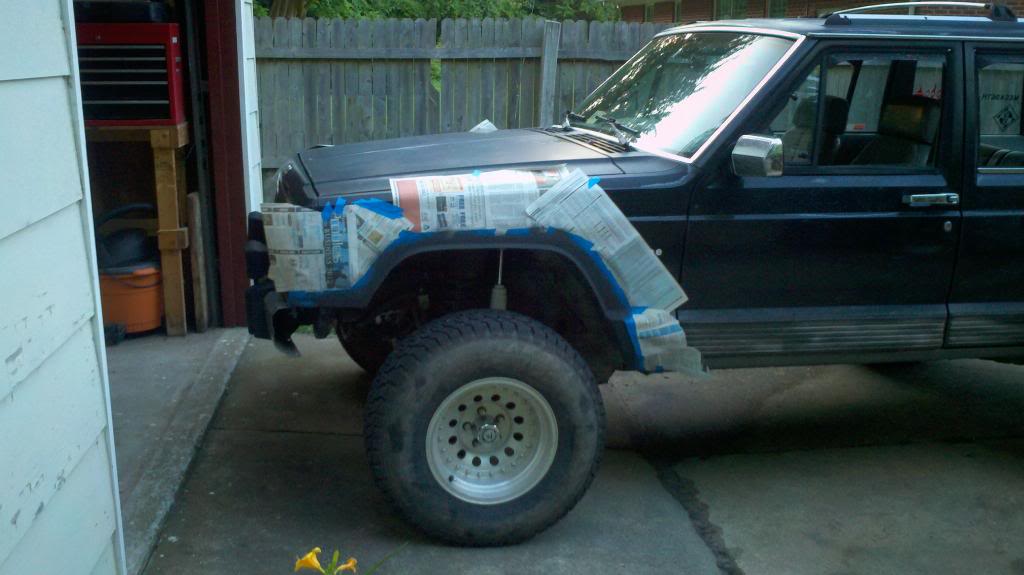
The bushings were indeed shot, but they barely helped. So I said screw it and bought the ZJ tie rod, and a new xj draglink with tierod ends, all MOOG. I suggest using amazon to save some money.
THIS CURED IT. My toe is still a little off, so I get a very slight vibes at only 55mph (when I used to get huge amounts 50-55mph). I've had shimmys/wobbles since I first lifted my jeep, so this is a huge thing for me.
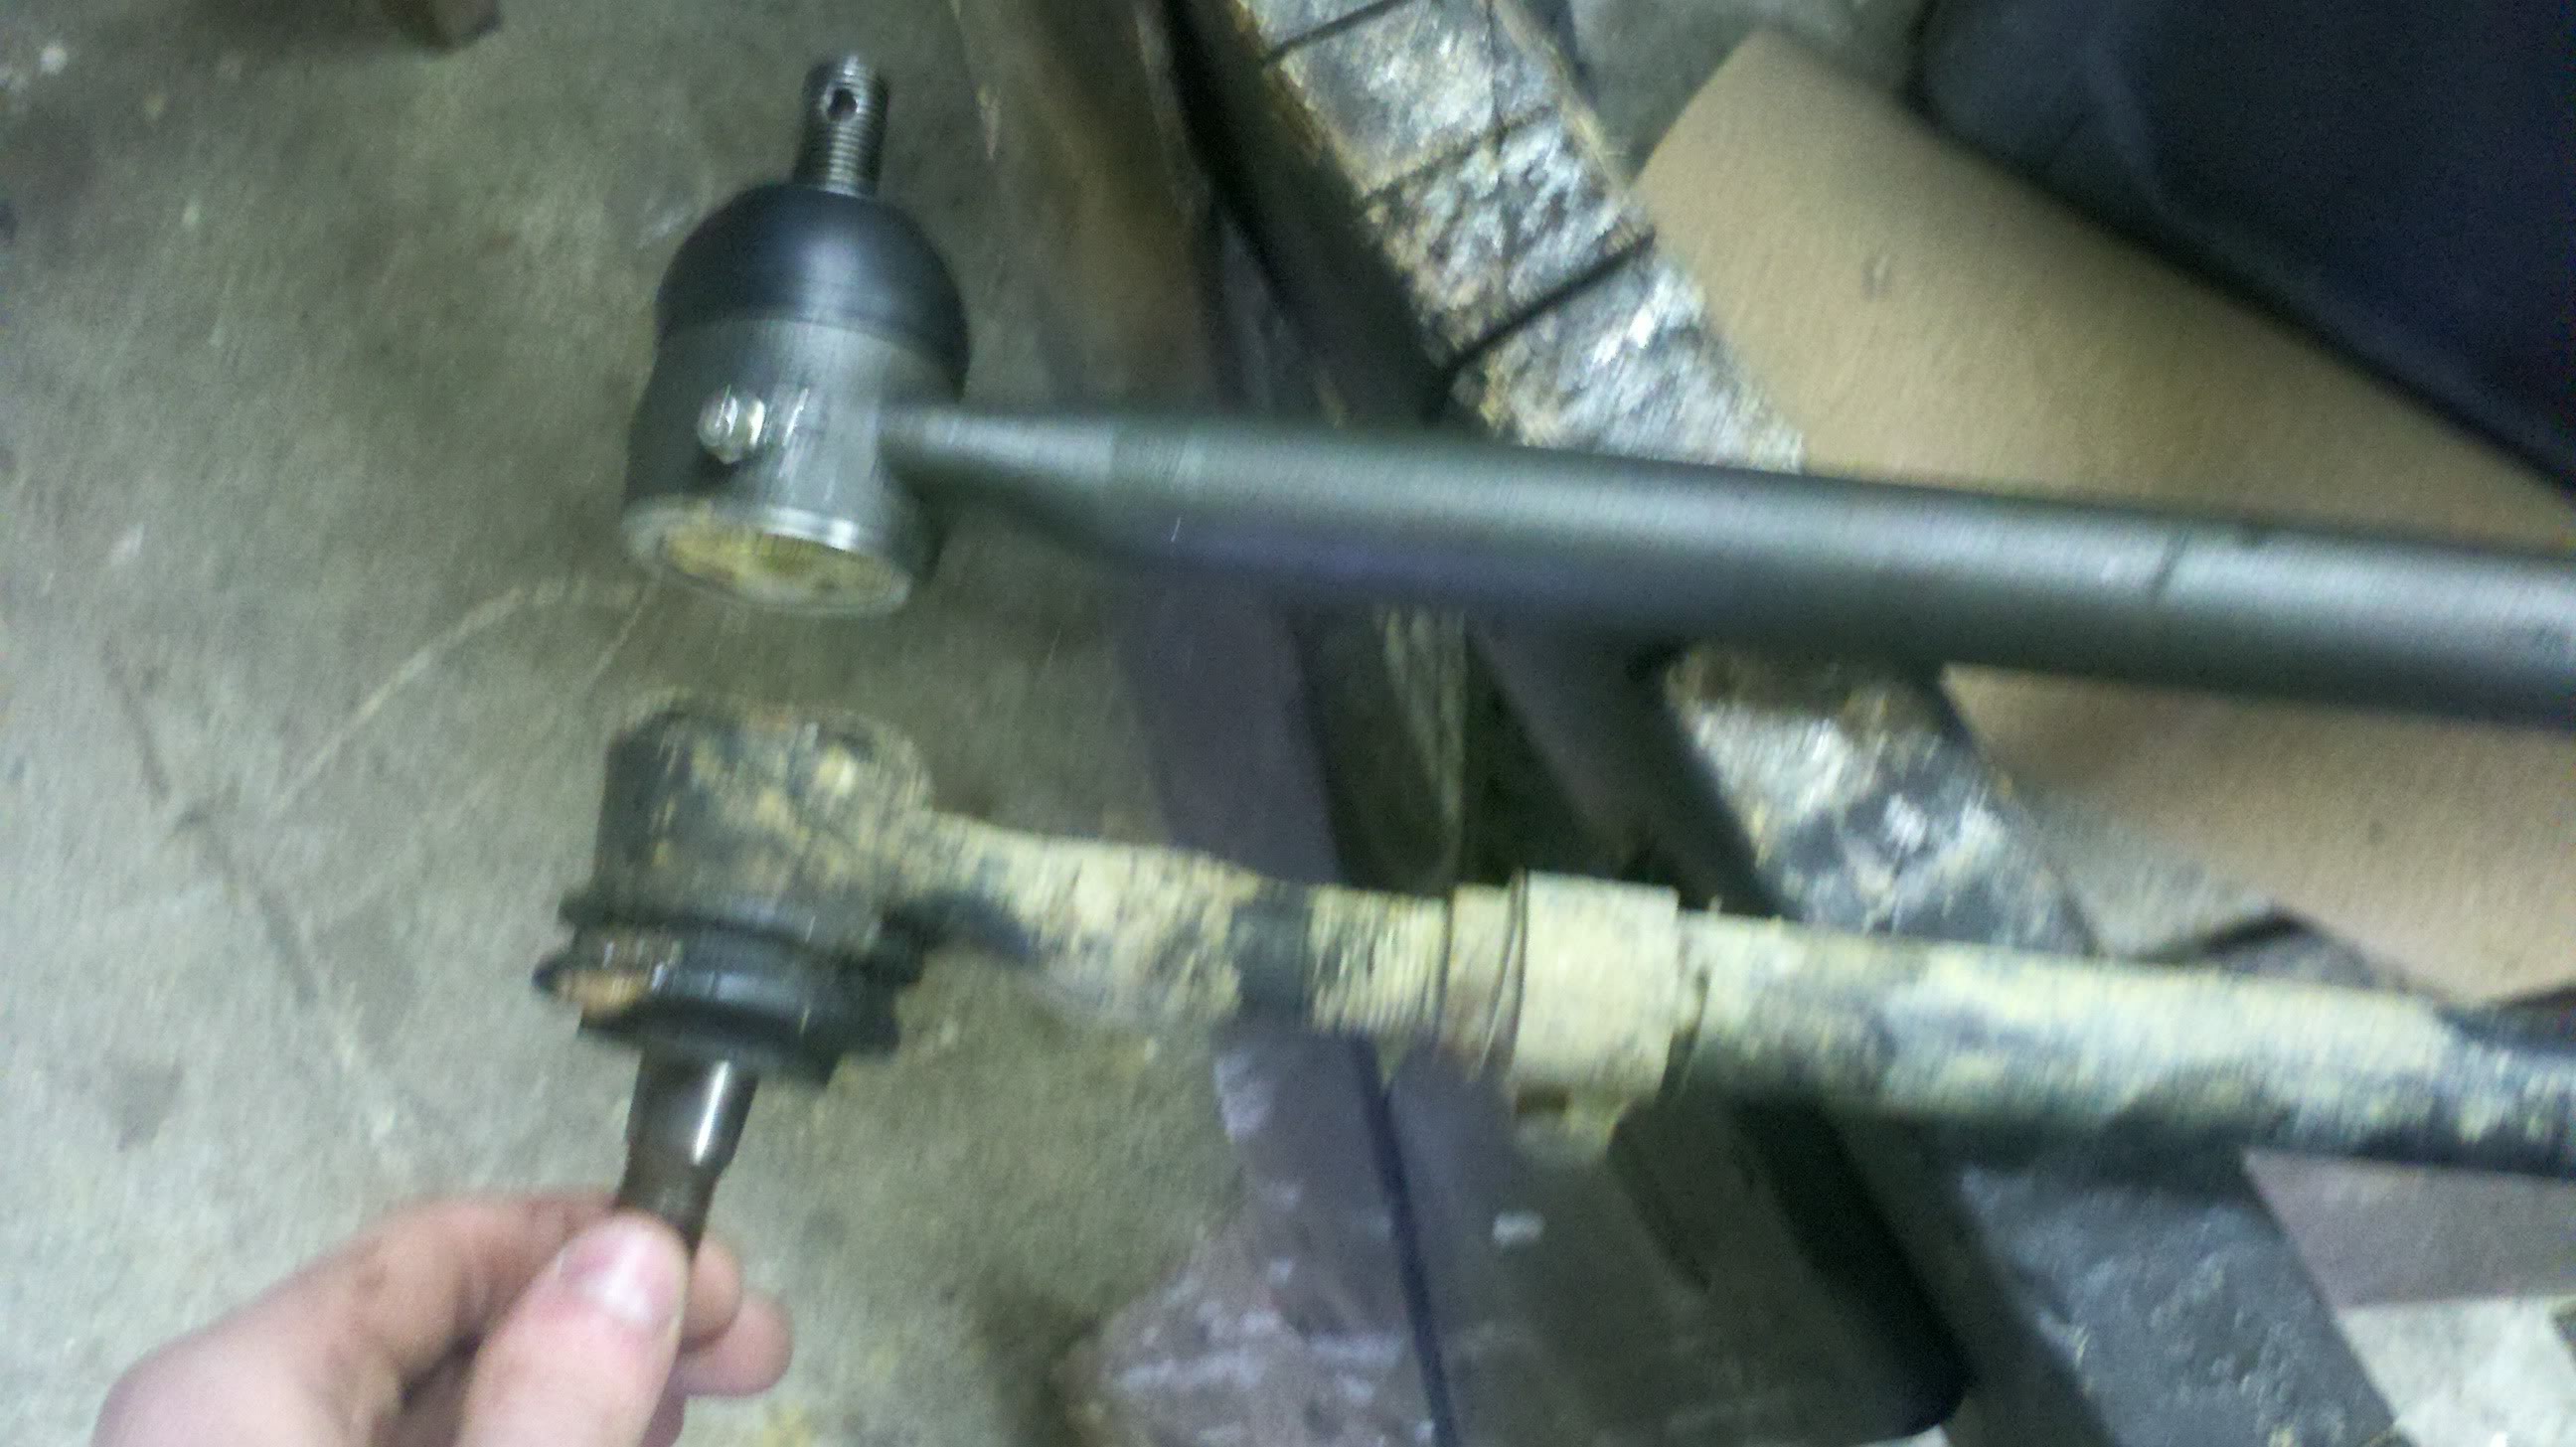
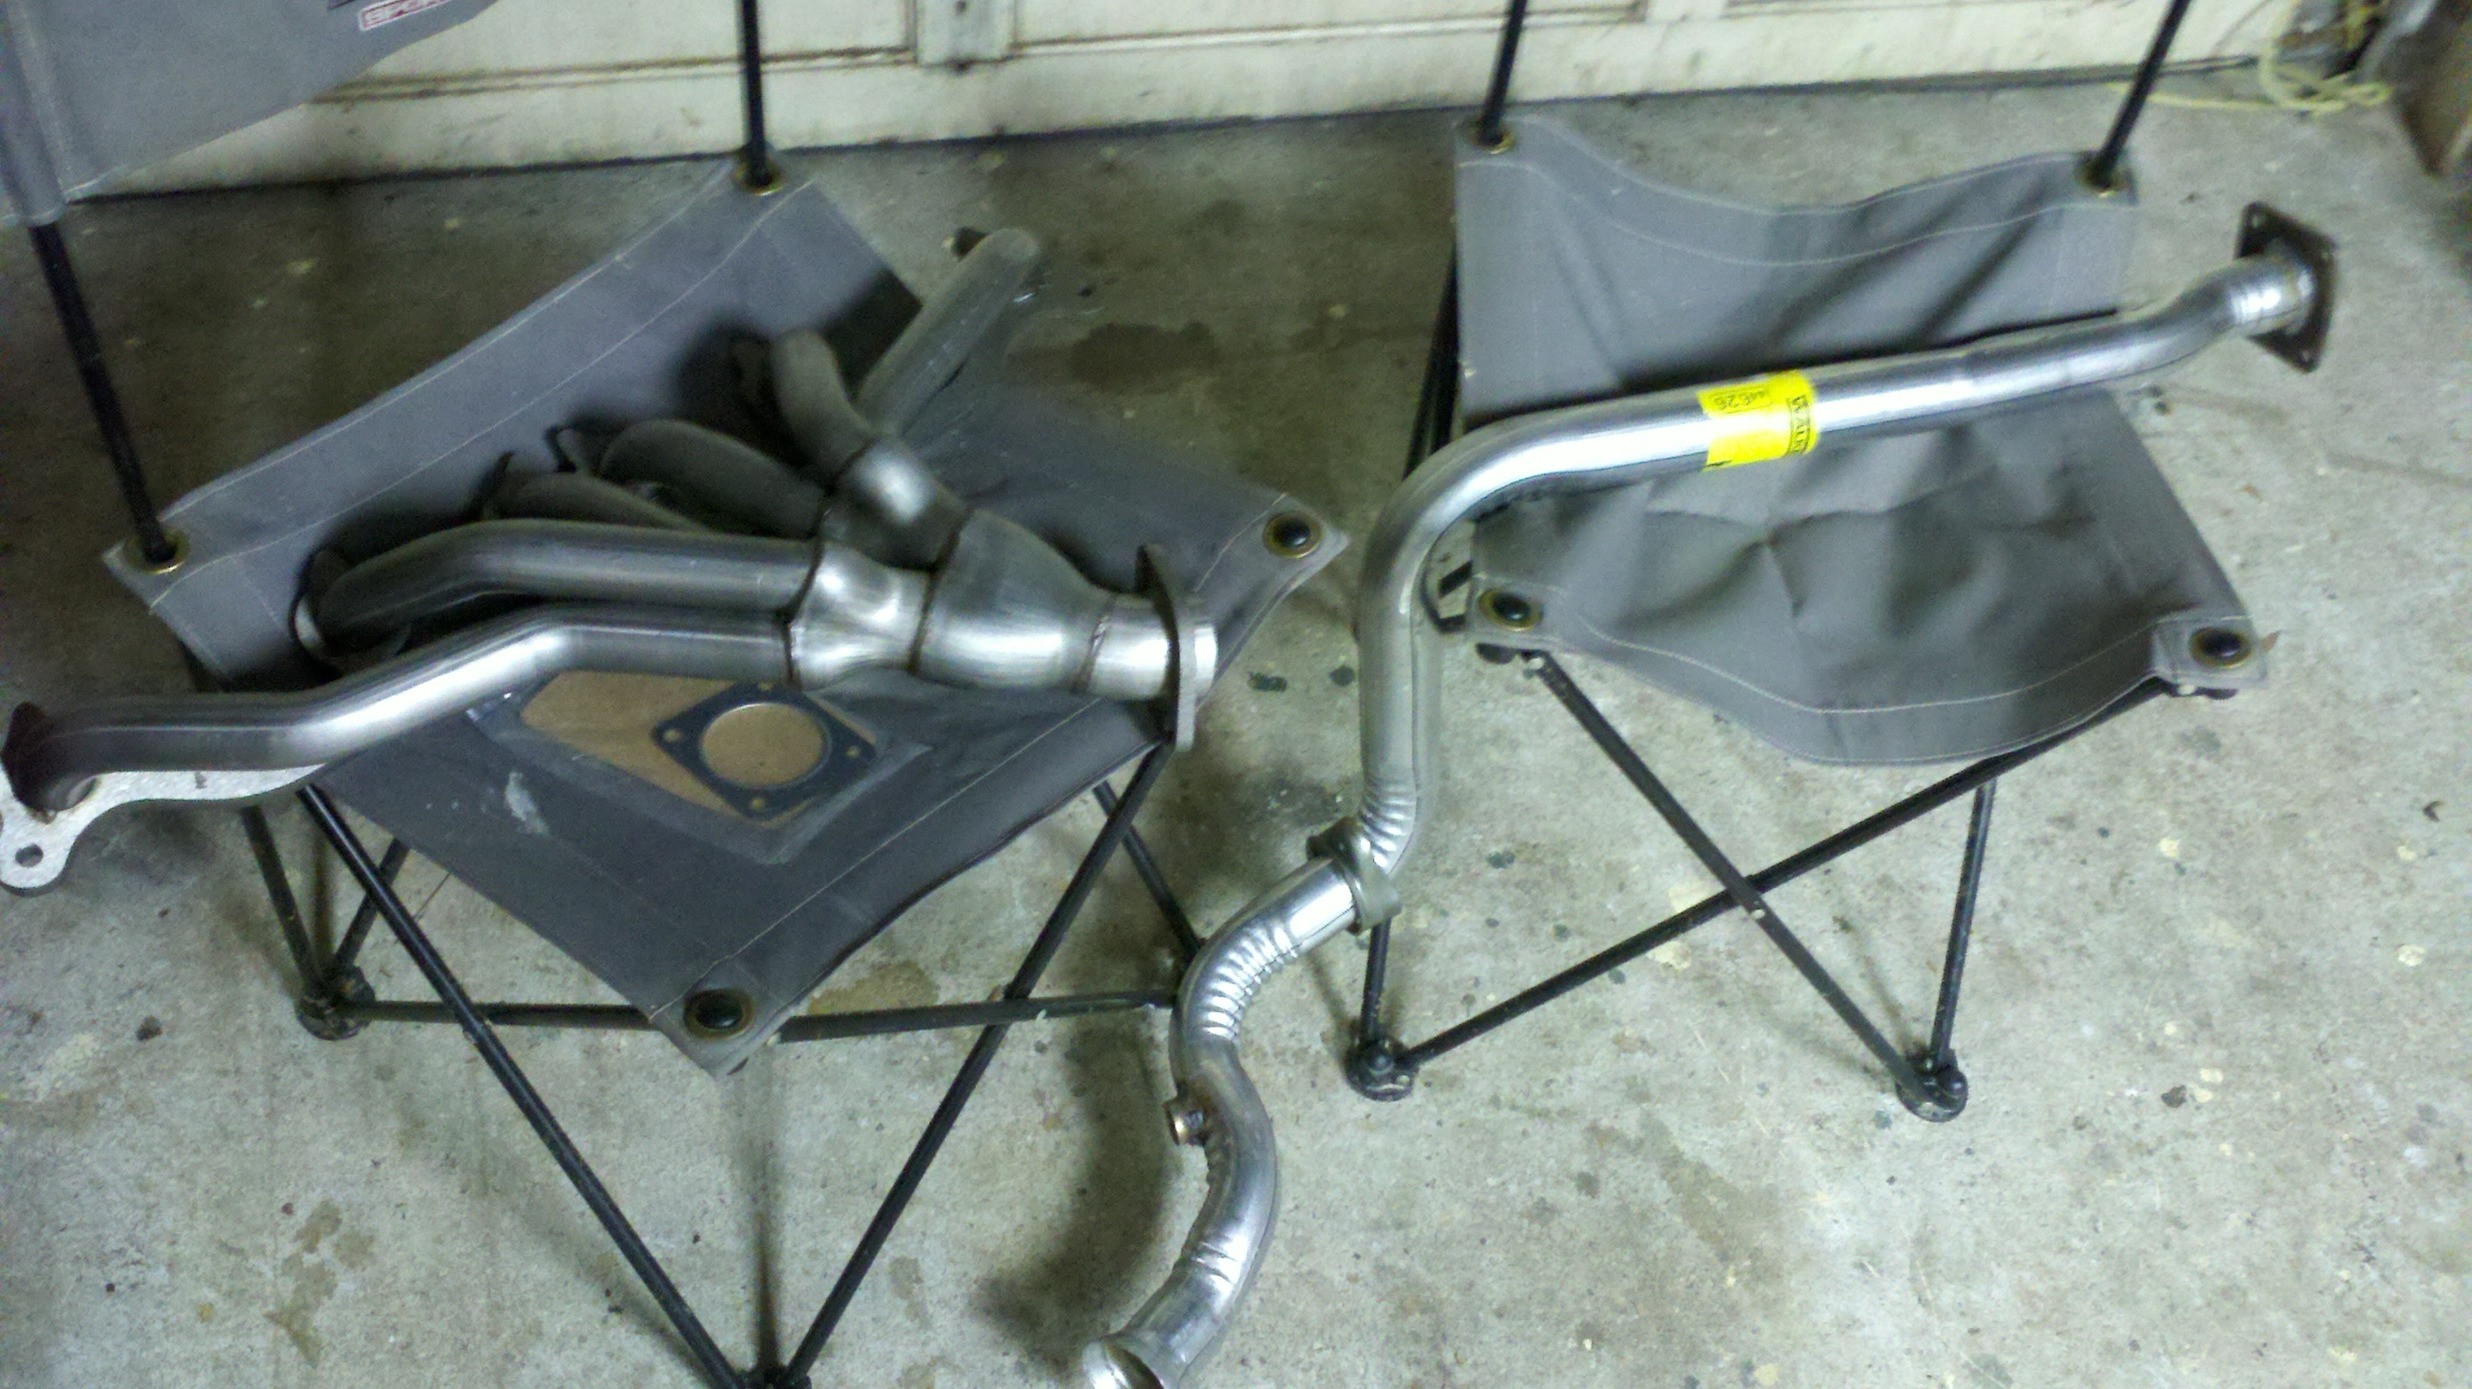
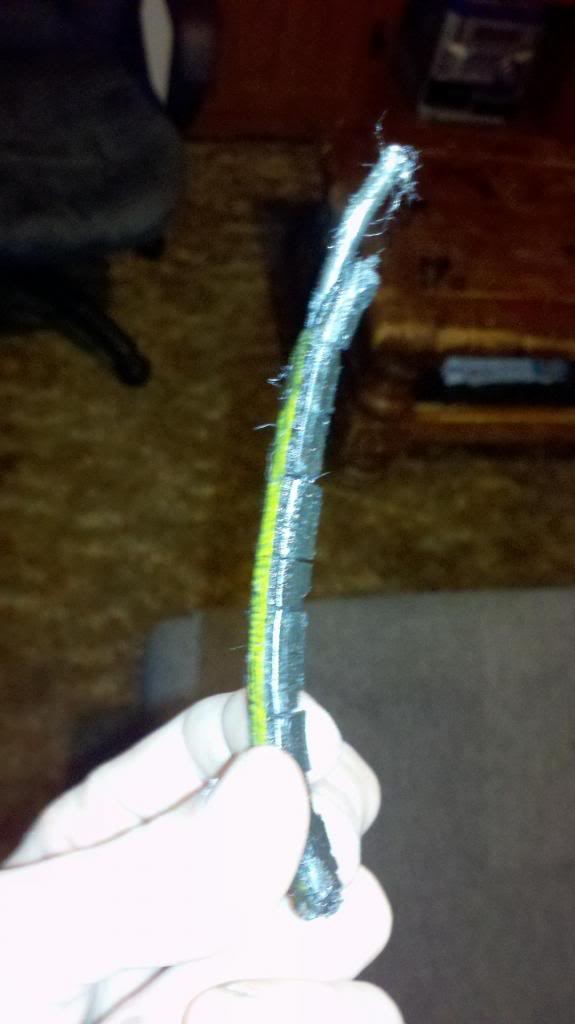
Here's what the old tierods looked like, mind you, I could wiggle them all with my fingers. While the new moog ones, I have to but ***** into to move them with my arm.
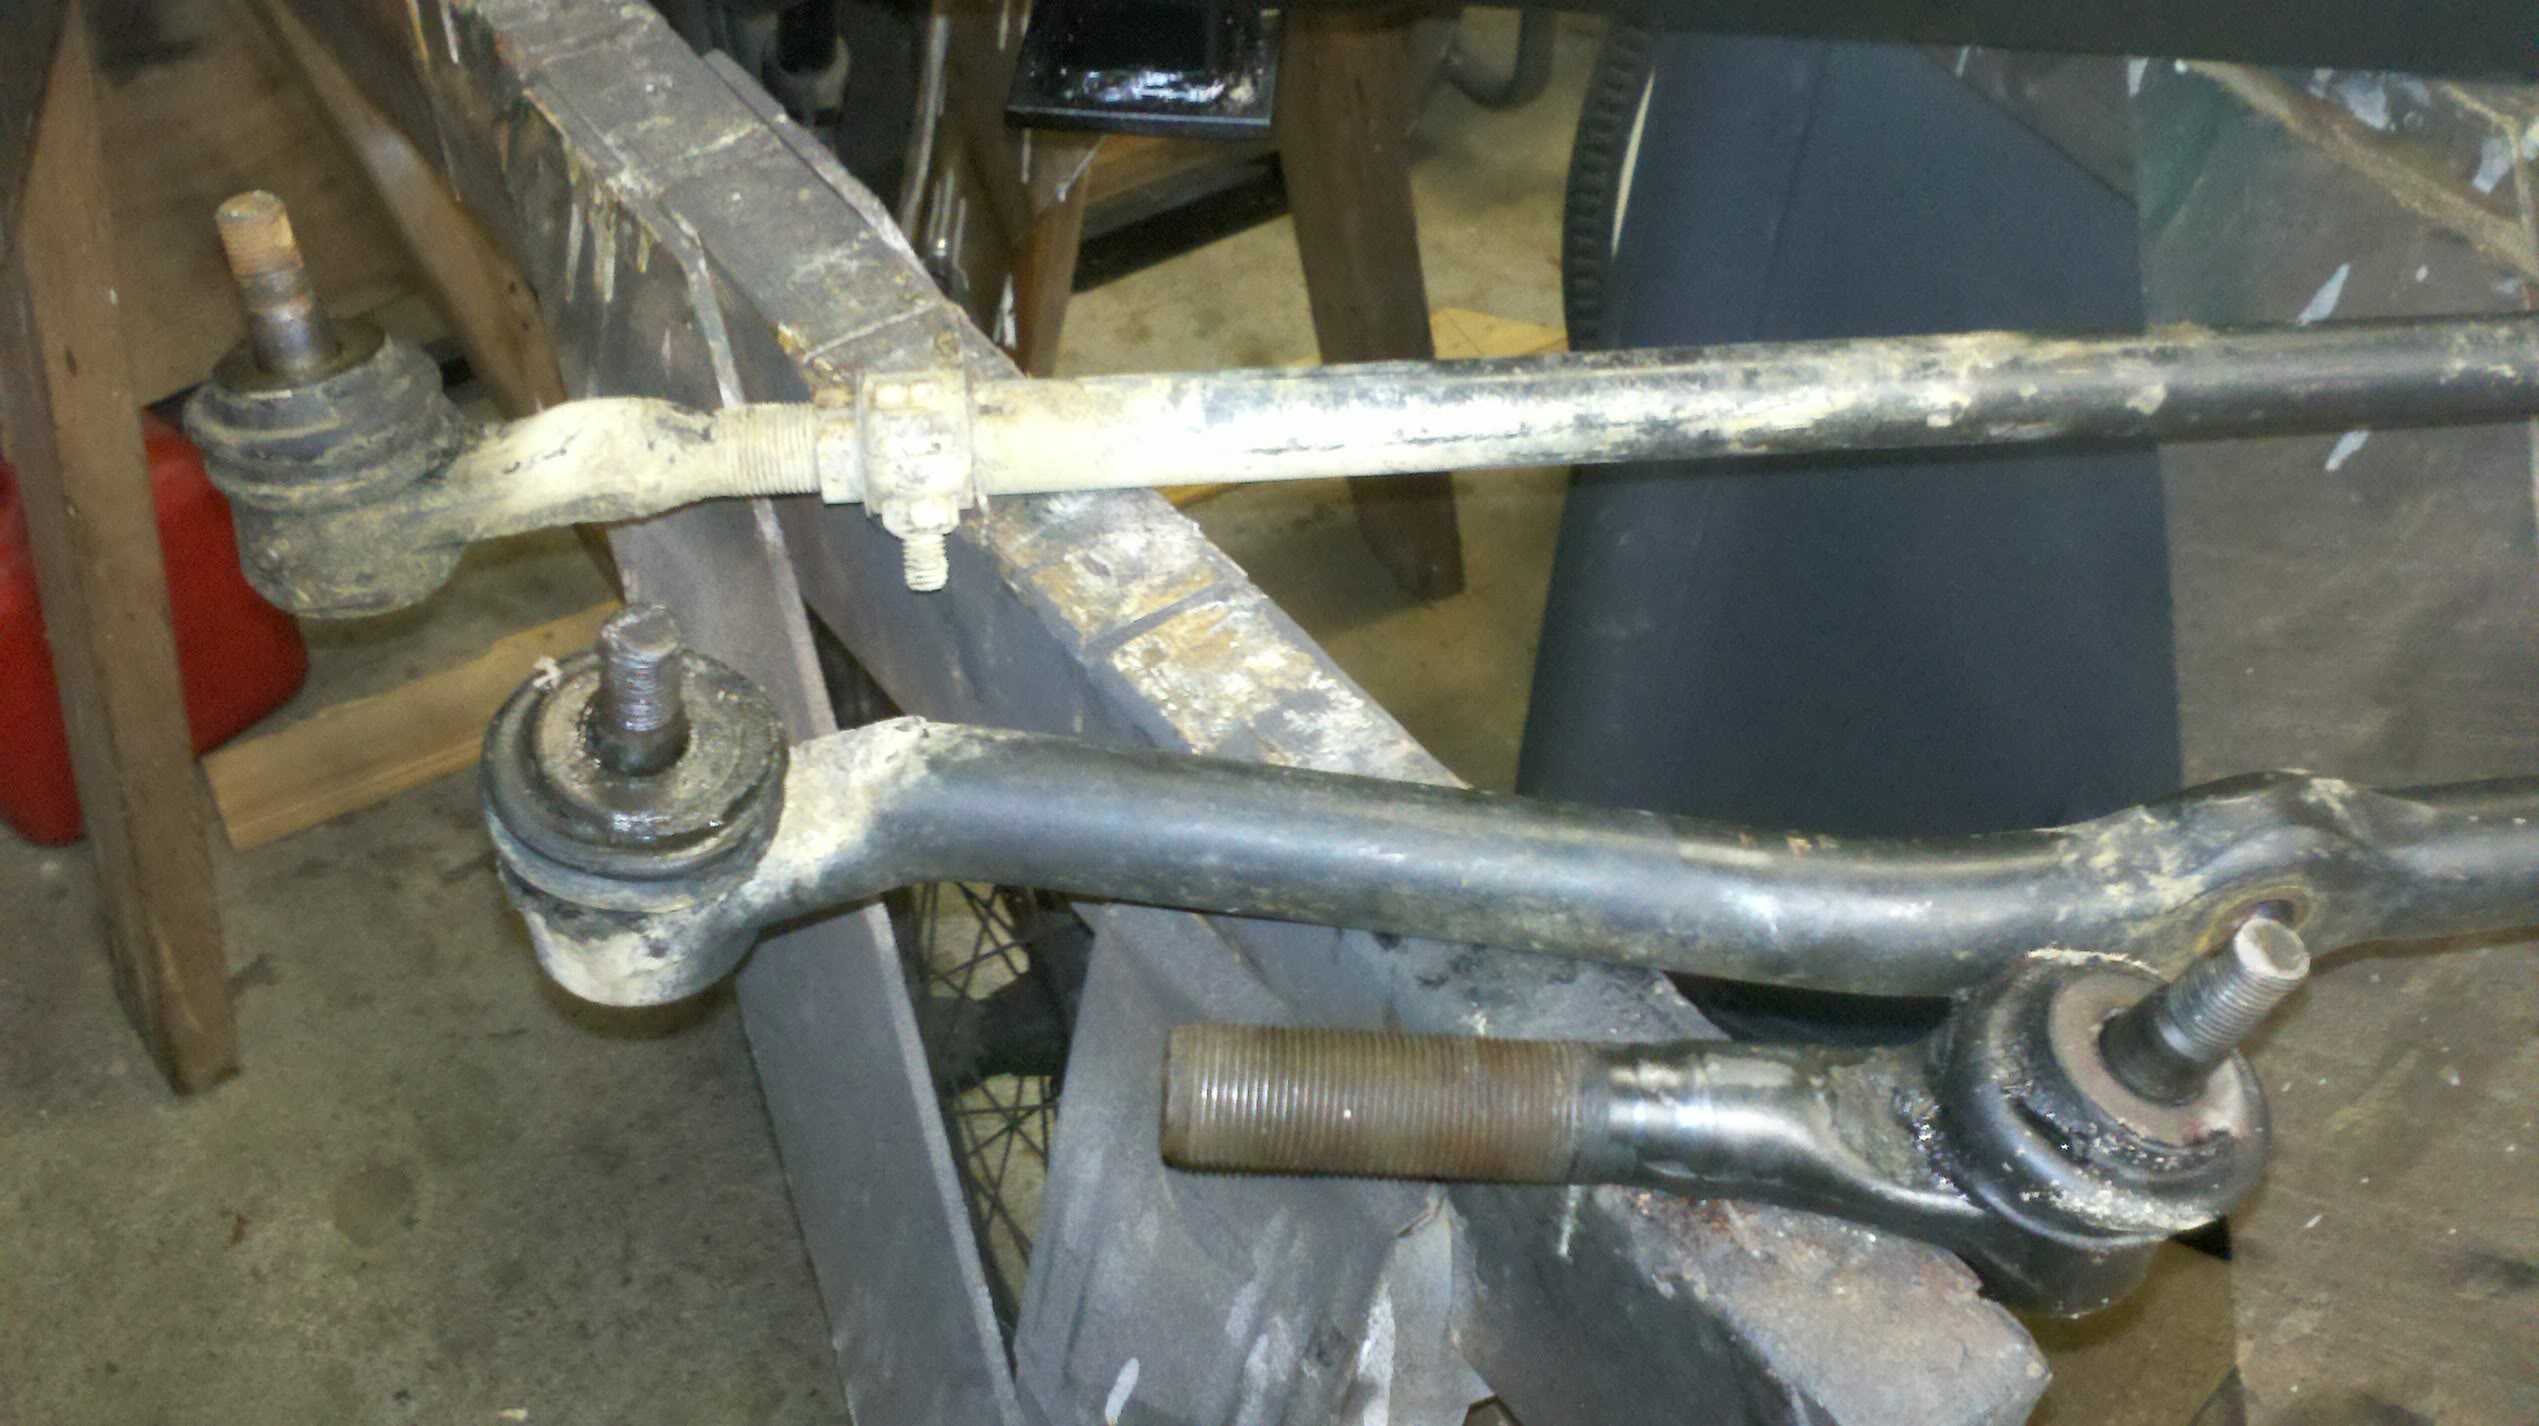
The difference between the ZJ tierod and old XJ one.
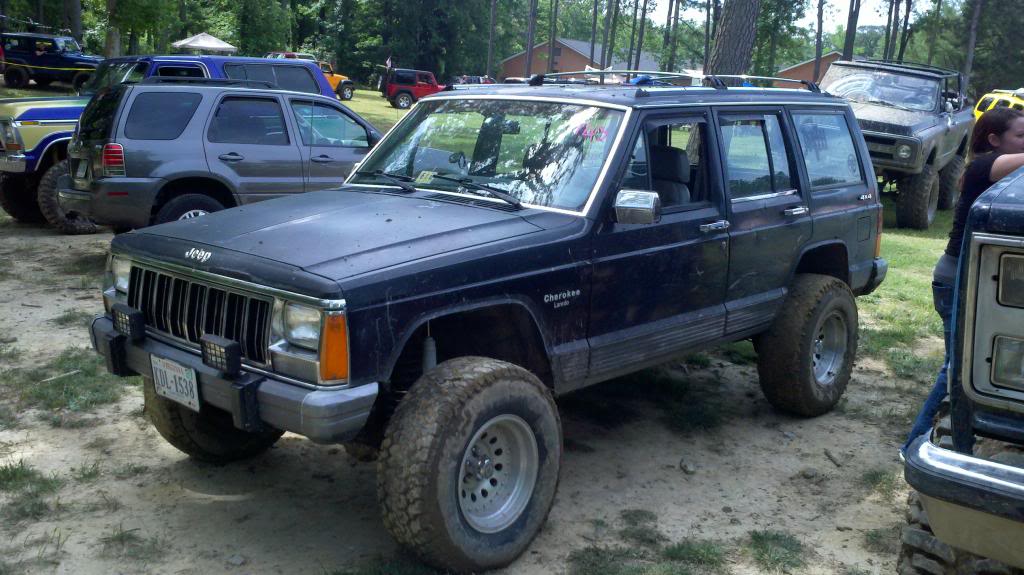
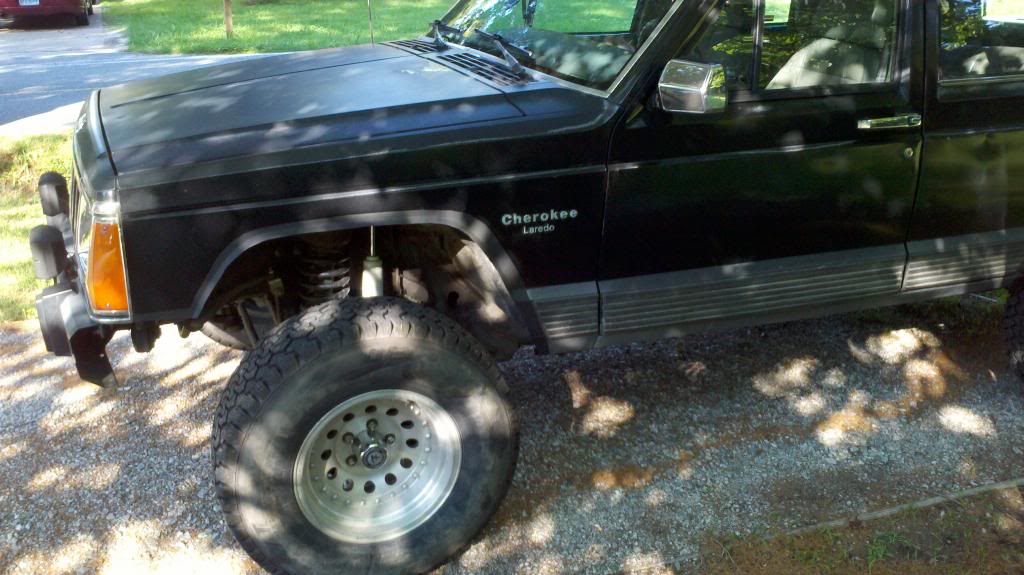
How she looks now ... Ignore the missing nut.

My first screaming rampage into it was to replace my upper control arm bushings, since I've had them for about 7 months sitting on my desk. That was a lot of fun... Here's the steps to it:
-Buy torx sockets
-Buy new nuts and bolts, because torx sucks.
-Pick a side and do that one first
-Remove bolt, move upper control arm out of the way.
-Hand thy self a drill, and drill all that decaying rubber, till you can finger it out and the sleeve.
-Hand thy self the sawzall, and saw the bushing sleeve, and hammer that ***** out
-Rent balljoint/bushing remover/installer And have fun.
-Try to position axle back to where you can insert control arm and bolt.
-Torque and stuff
- Repeat for other side.
Once you get the hang of it, it isn't that bad. First one took 6 hours, second took barely a hour. Keep in mind I was screwing around and didn't want to rent the tool.
The bushings were indeed shot, but they barely helped. So I said screw it and bought the ZJ tie rod, and a new xj draglink with tierod ends, all MOOG. I suggest using amazon to save some money.
THIS CURED IT. My toe is still a little off, so I get a very slight vibes at only 55mph (when I used to get huge amounts 50-55mph). I've had shimmys/wobbles since I first lifted my jeep, so this is a huge thing for me.
Here's what the old tierods looked like, mind you, I could wiggle them all with my fingers. While the new moog ones, I have to but ***** into to move them with my arm.
The difference between the ZJ tierod and old XJ one.
How she looks now
... Ignore the missing nut.
Thread Starter
Member
Joined: May 2010
Posts: 196
Likes: 0
From: Newport News,VA
Year: 1992
Model: Cherokee (XJ)
Engine: 4.0L I6 H.O.
Once again, it's been awhile hah.
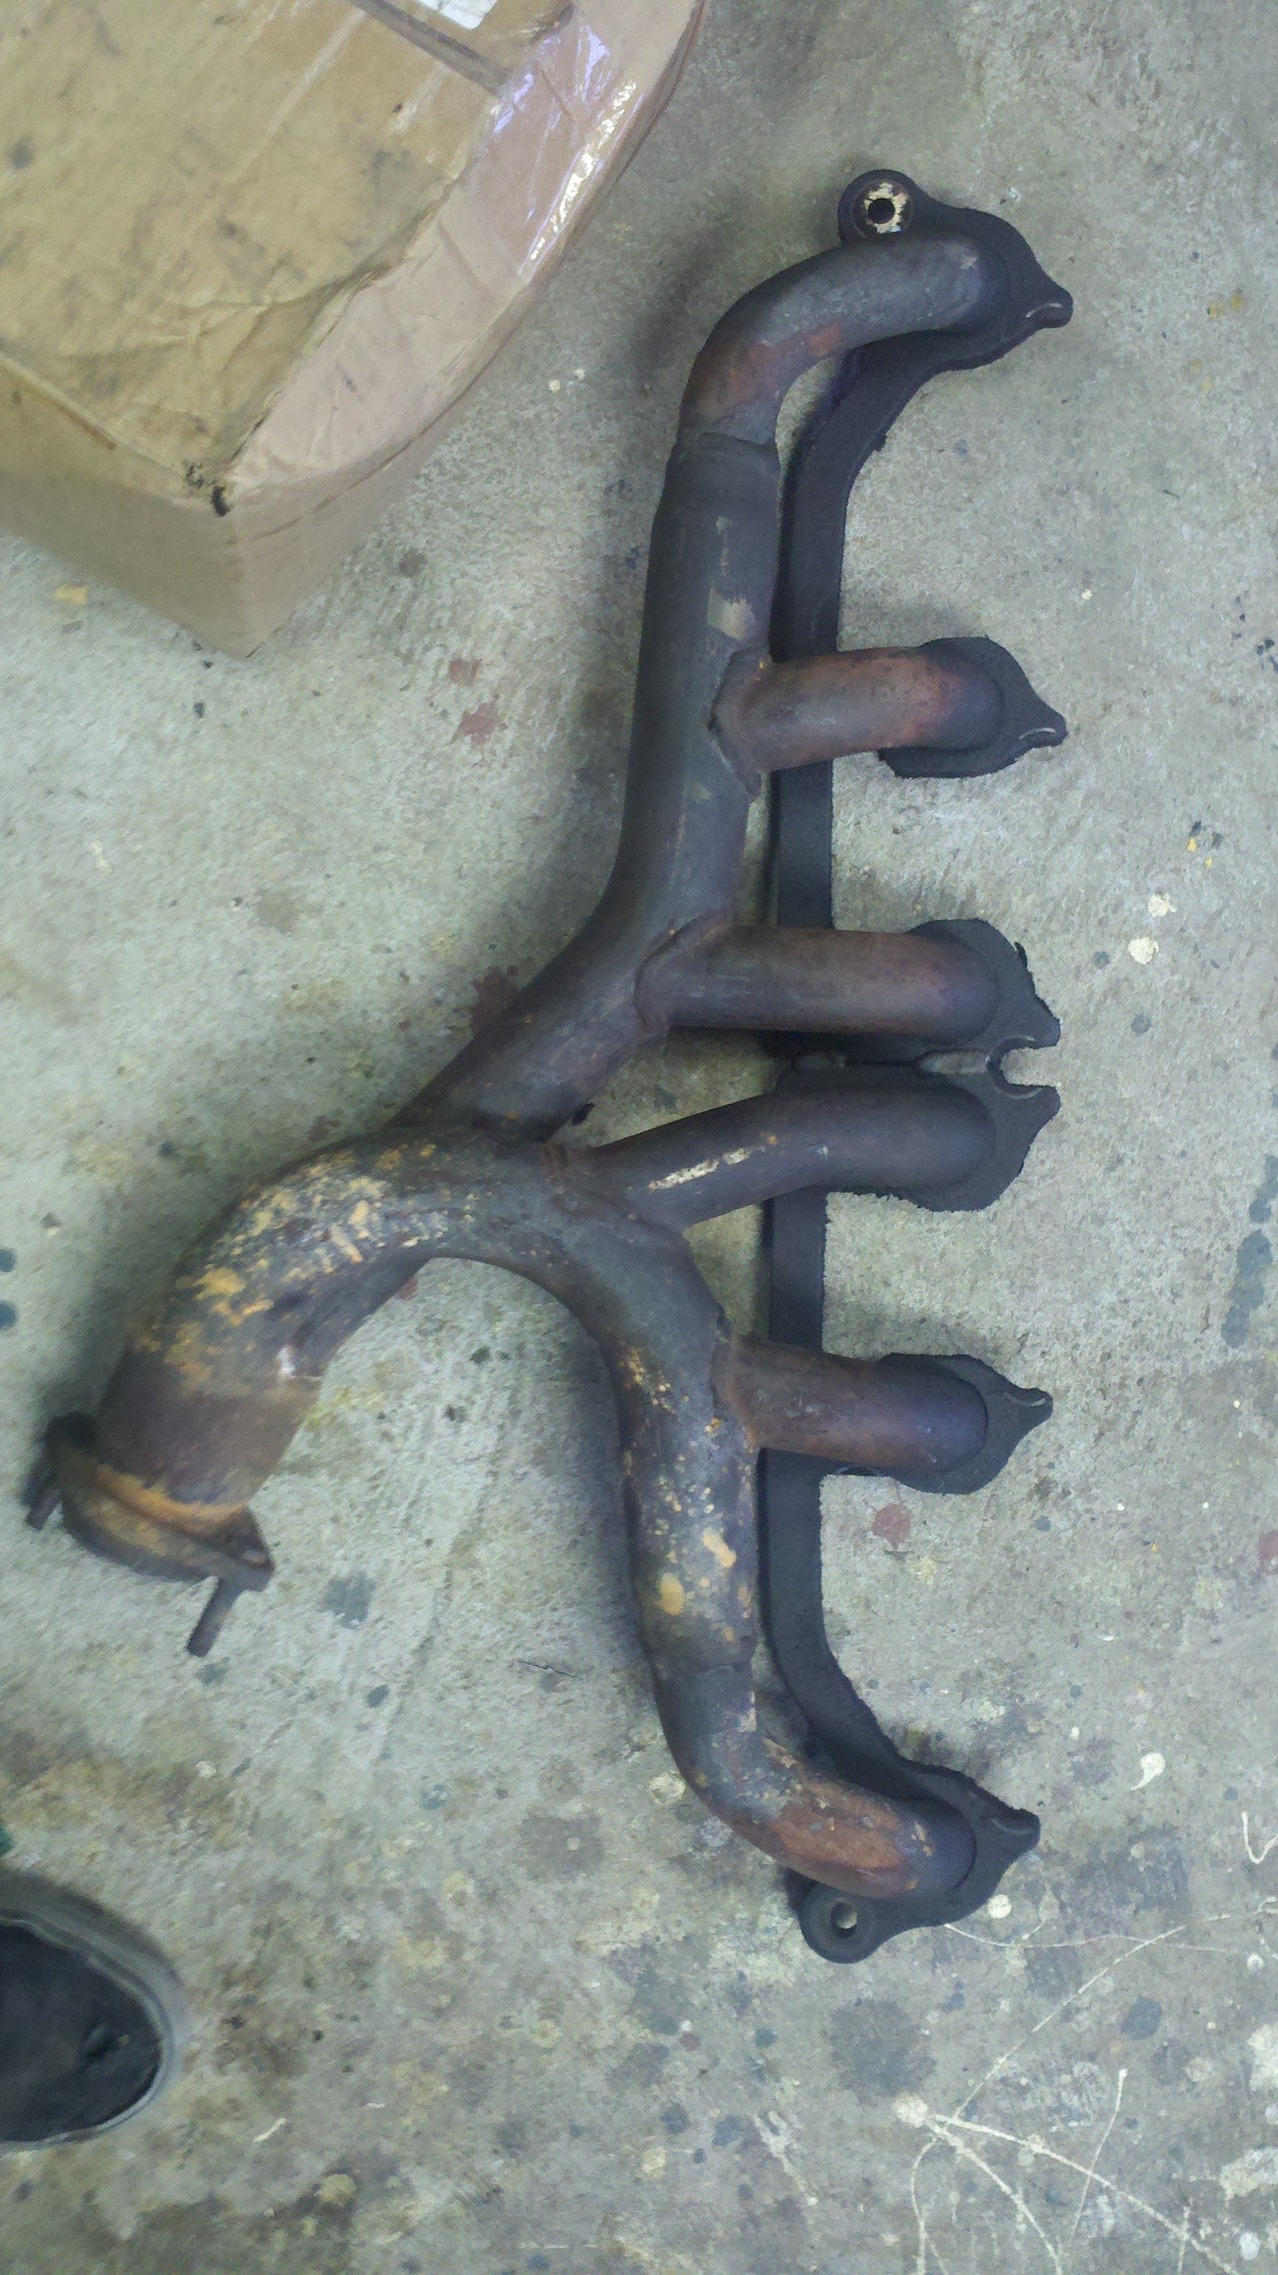
So on my quest for MPGs and bolt ons, I finally got to the point of Headers. And since my exhaust manifold has been cracked, say since I've had it, it's time to be replaced. I didn't take enough pictures to do a good write up, but I have some, so here we go.
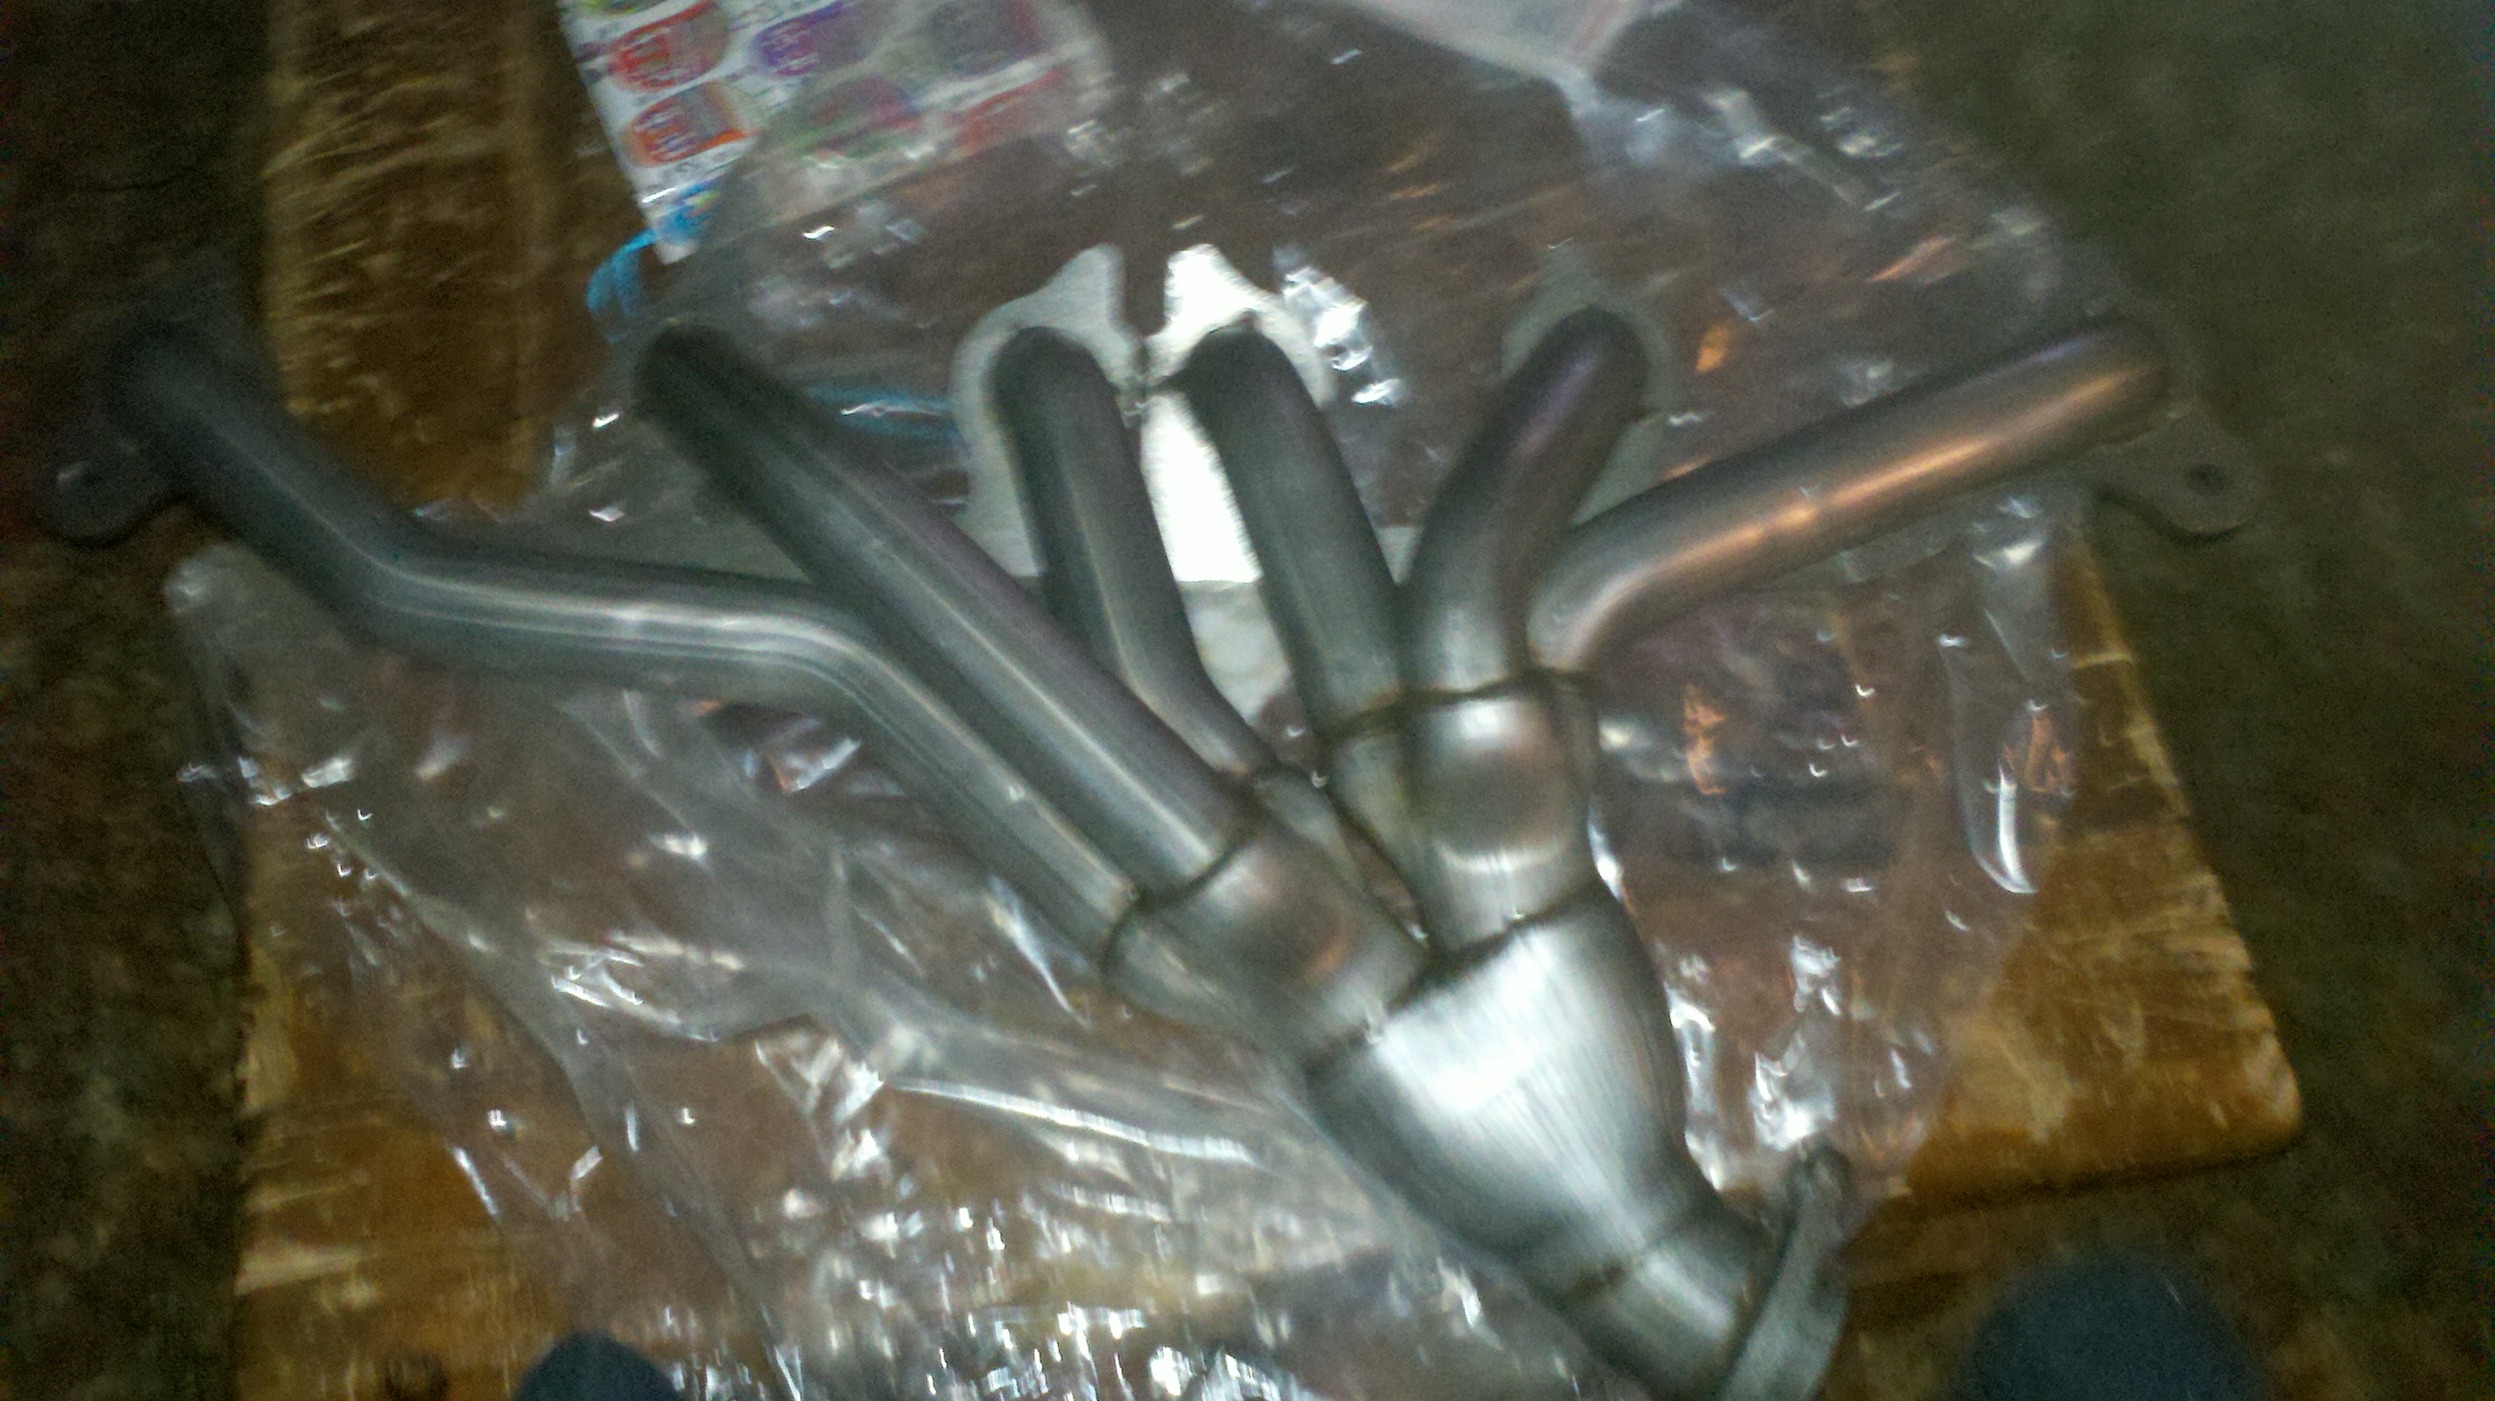
First off these arrived in the mail:
APN Header + Walker Front pipe (which at the time of this post, is still in my garage, not installed, ****ing seized bolts)
Well with the parts in my grips, means I must install, so lets start with some pictures of the taking apart process.
Power Steering: This was really easy
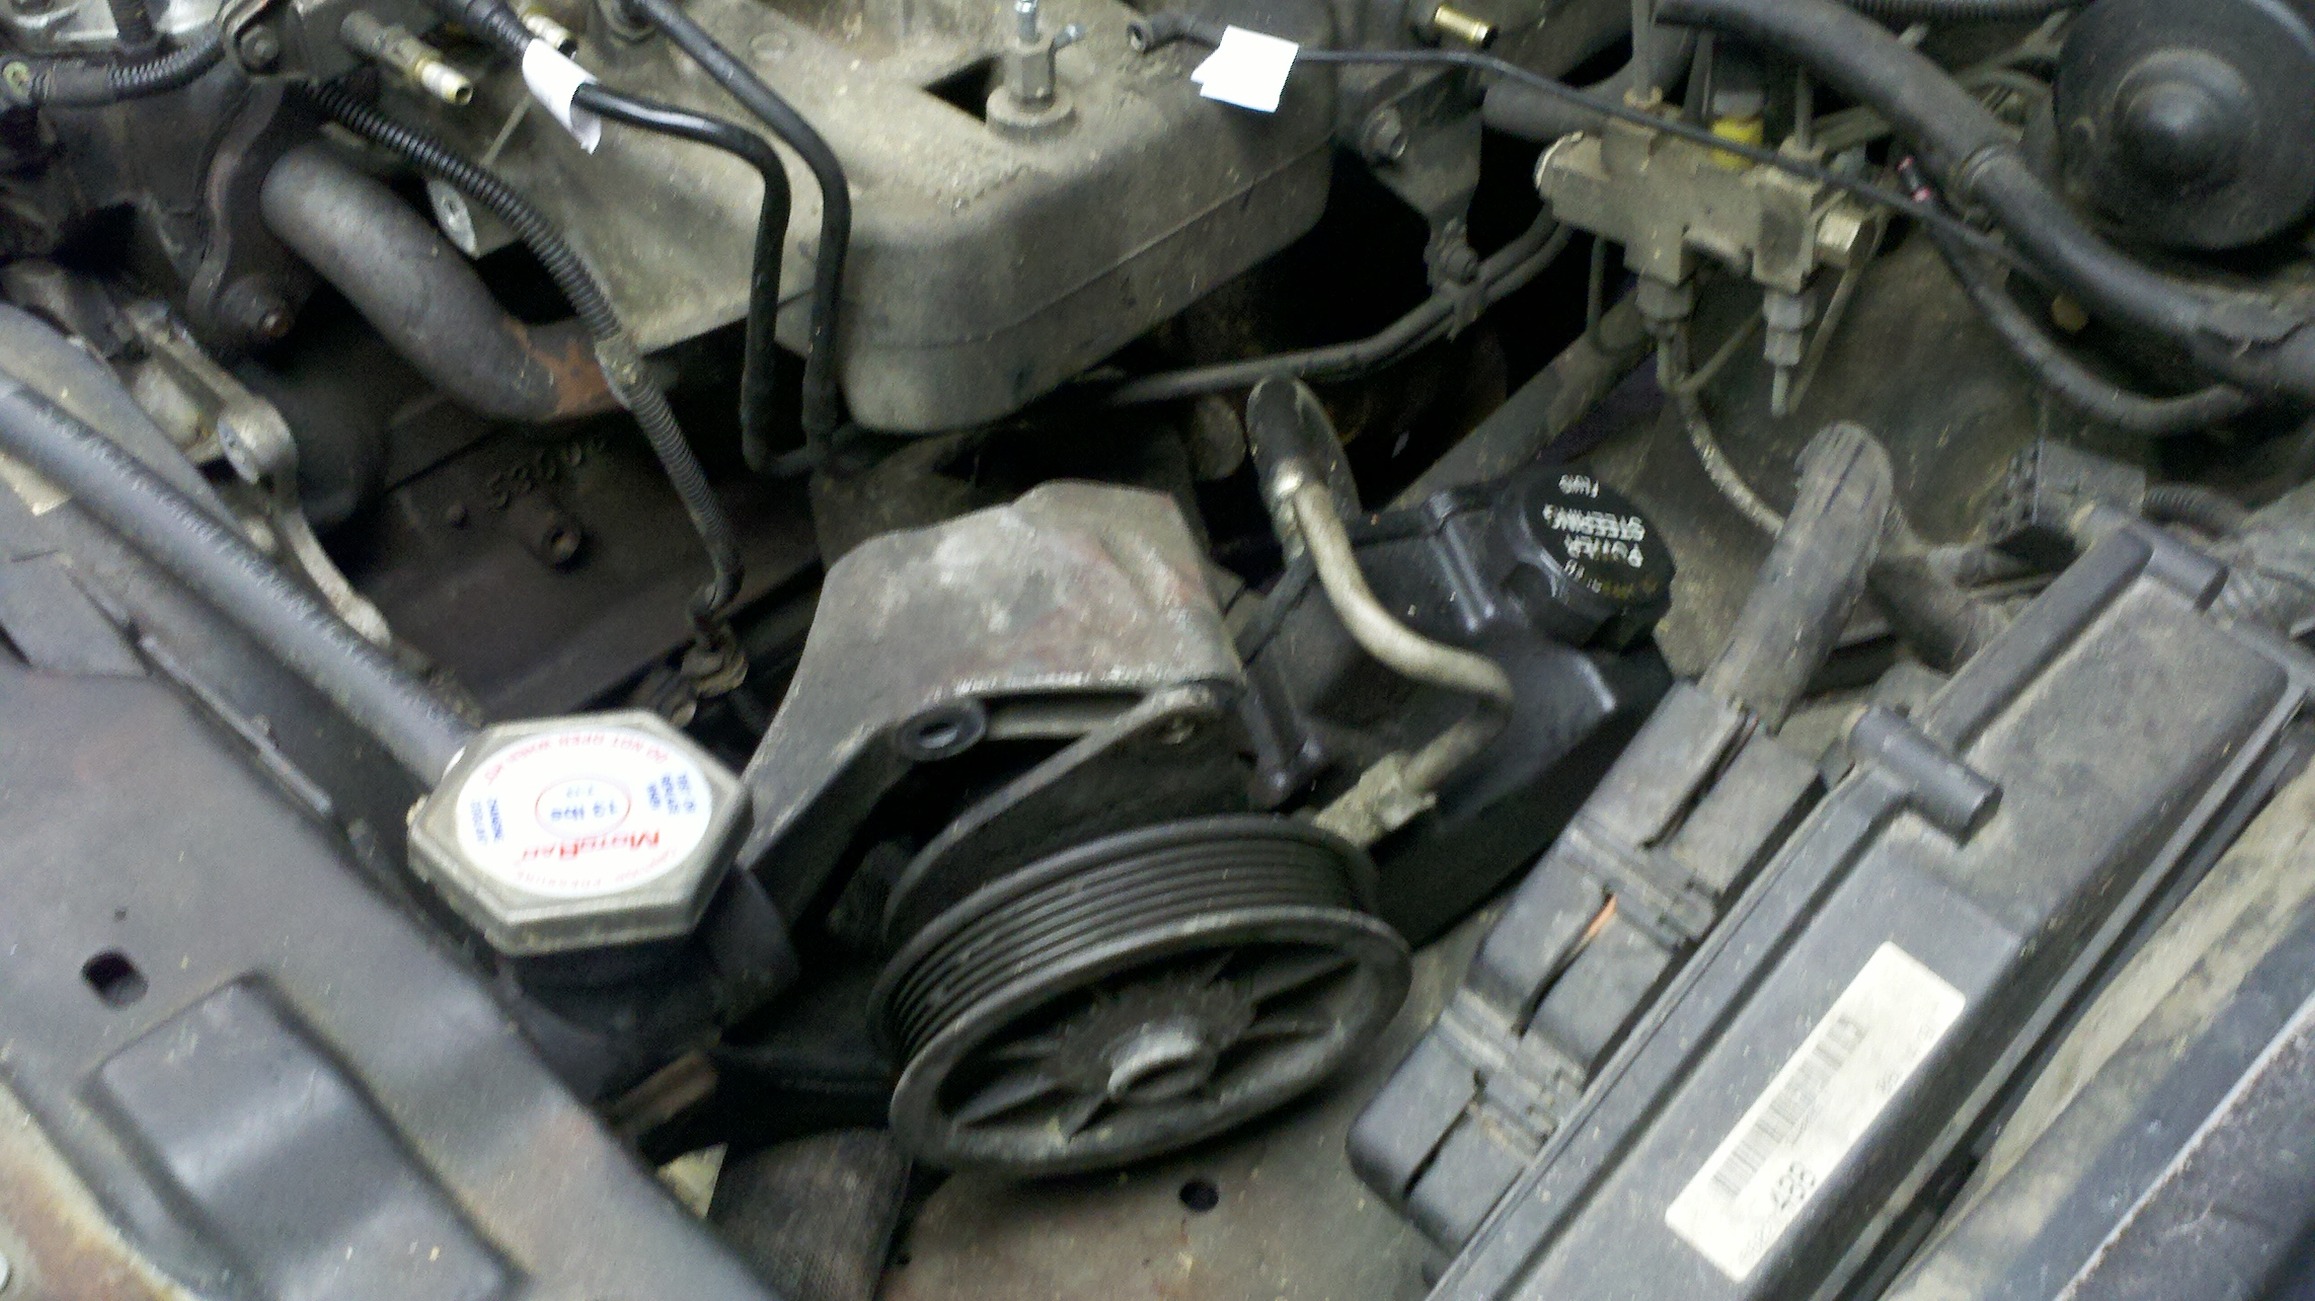
Label god damn everything, even though, I memorized my engines already. jaja
Take all that junk off, plug the ports, and clean the mating surface for that sweet mating action later.
OLD Manifold:
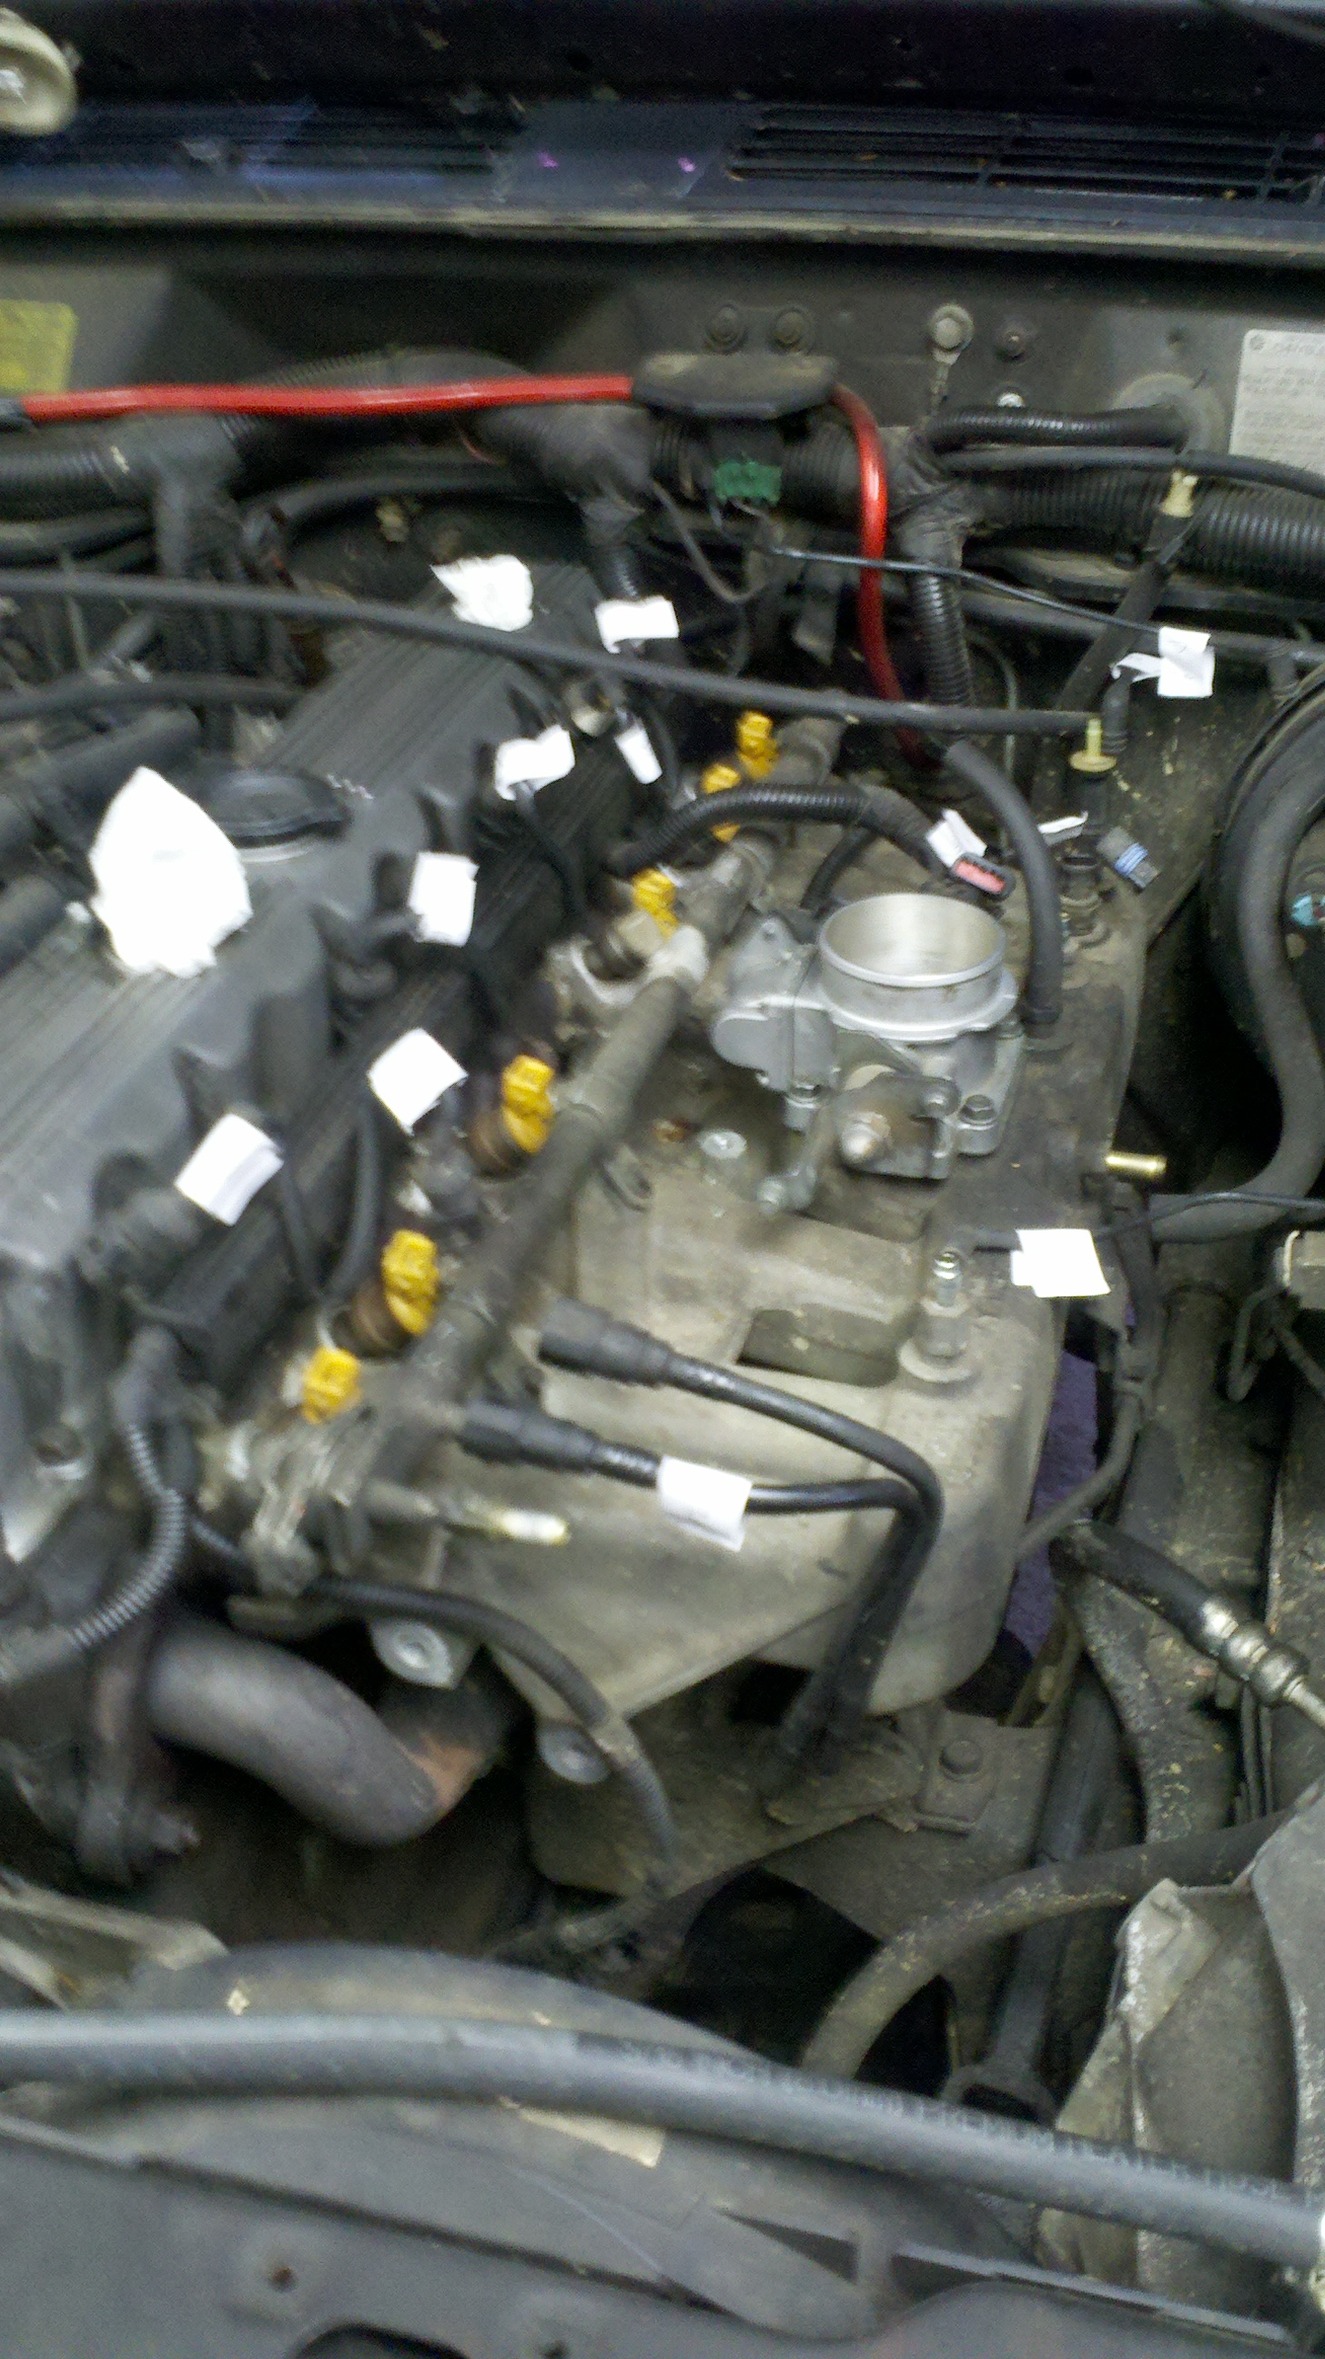
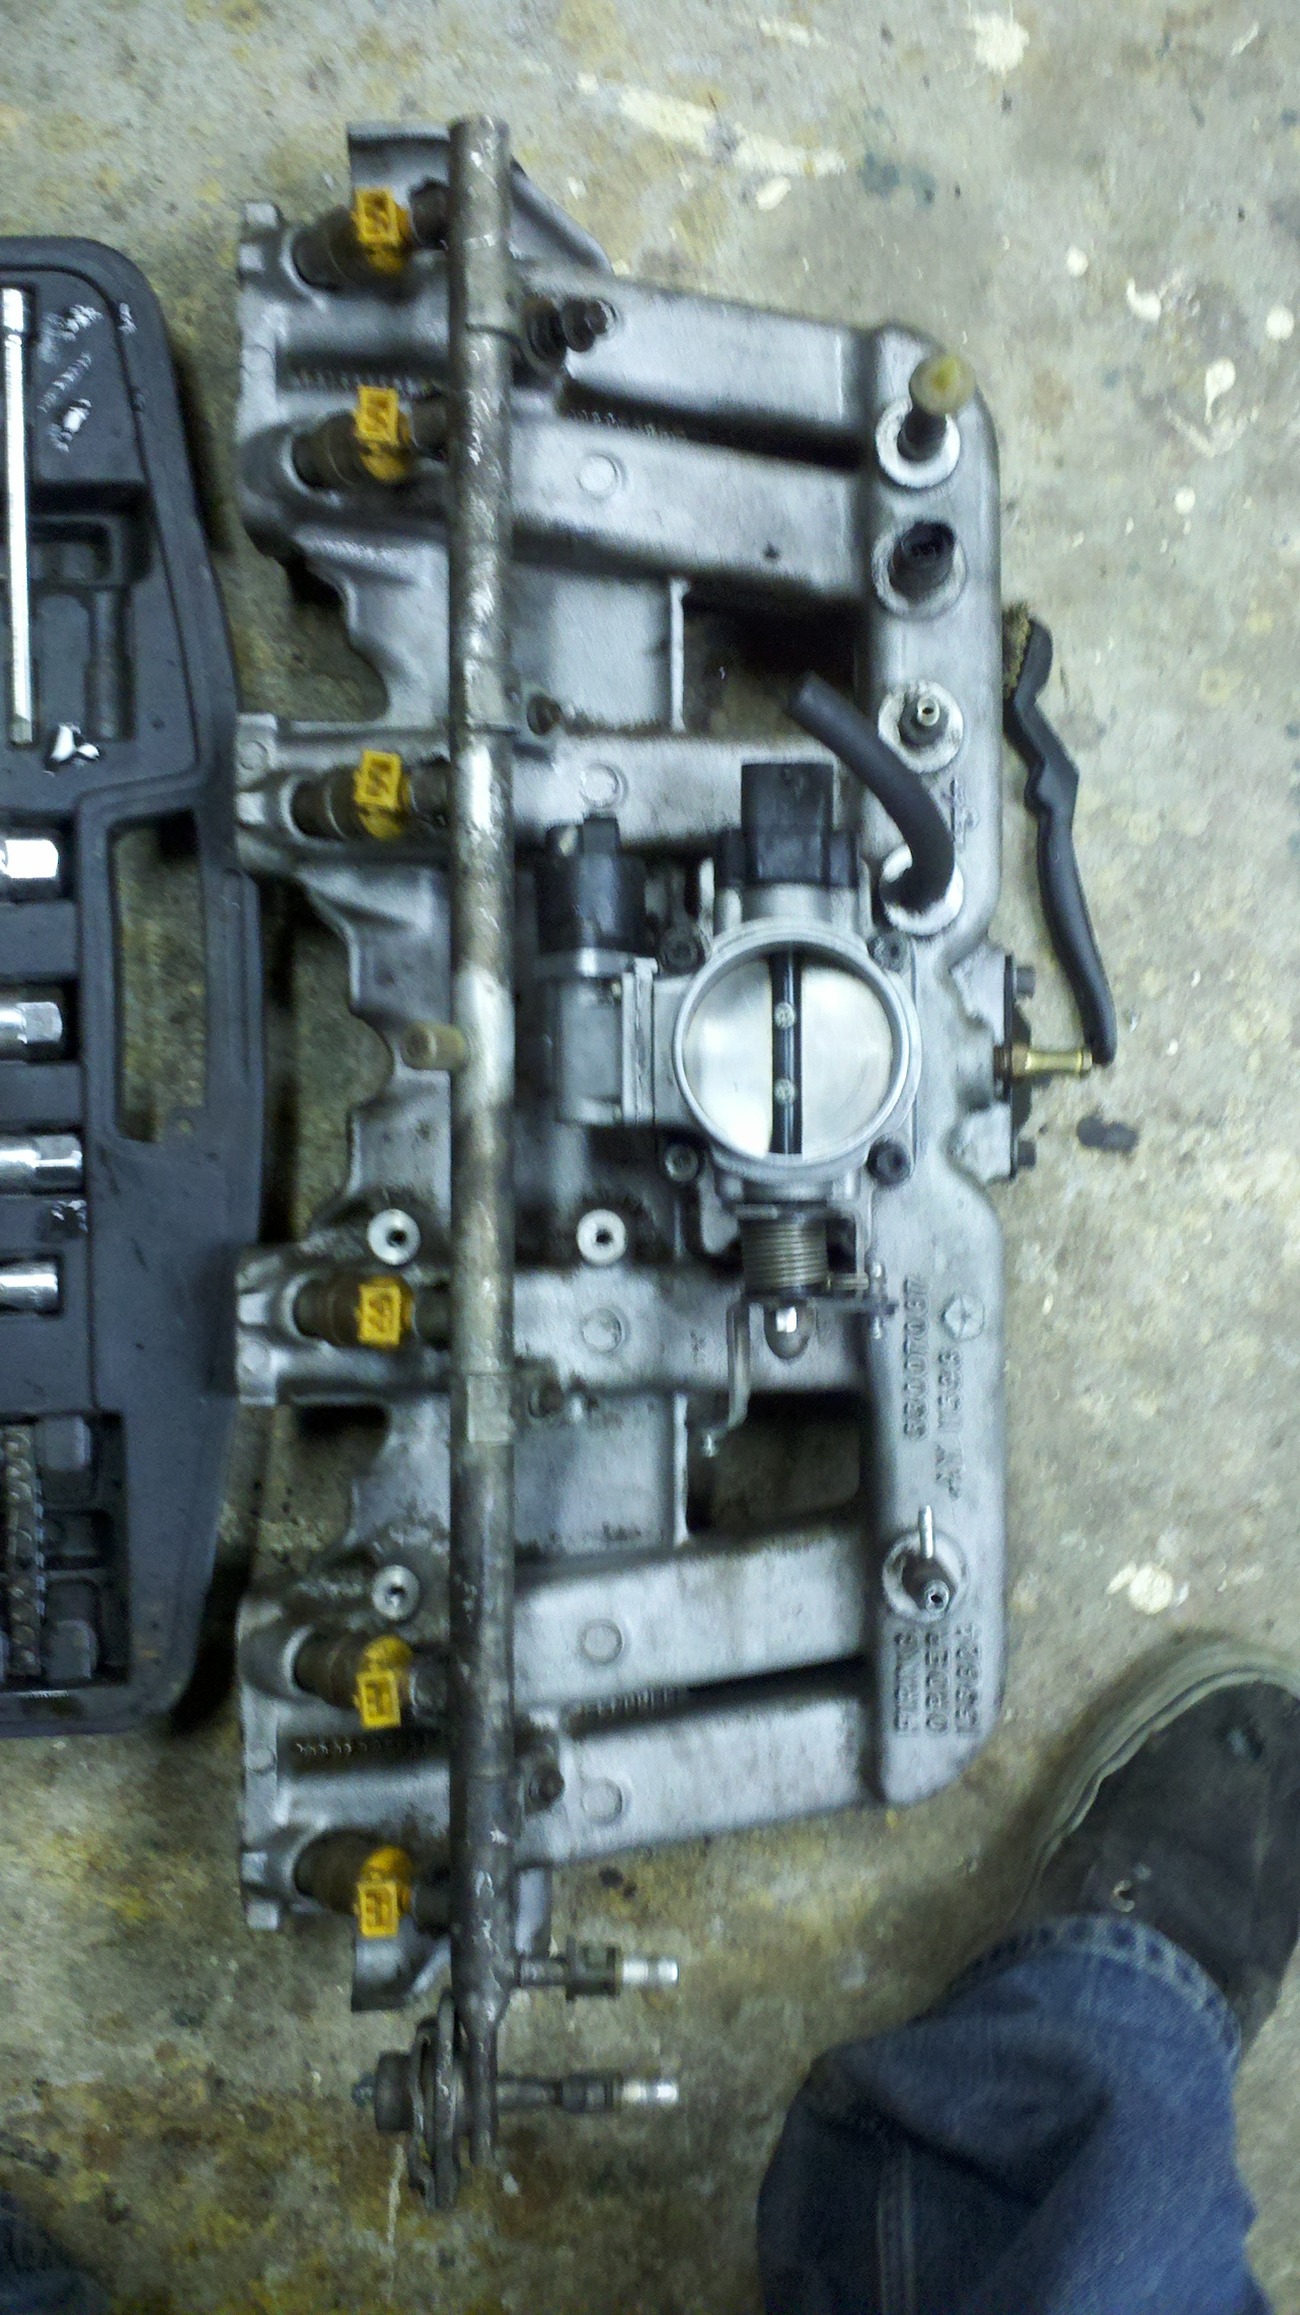
Old Intake, cleaned up all semi nice and pretty (GUMOUT's carb cleaner is a god btw):
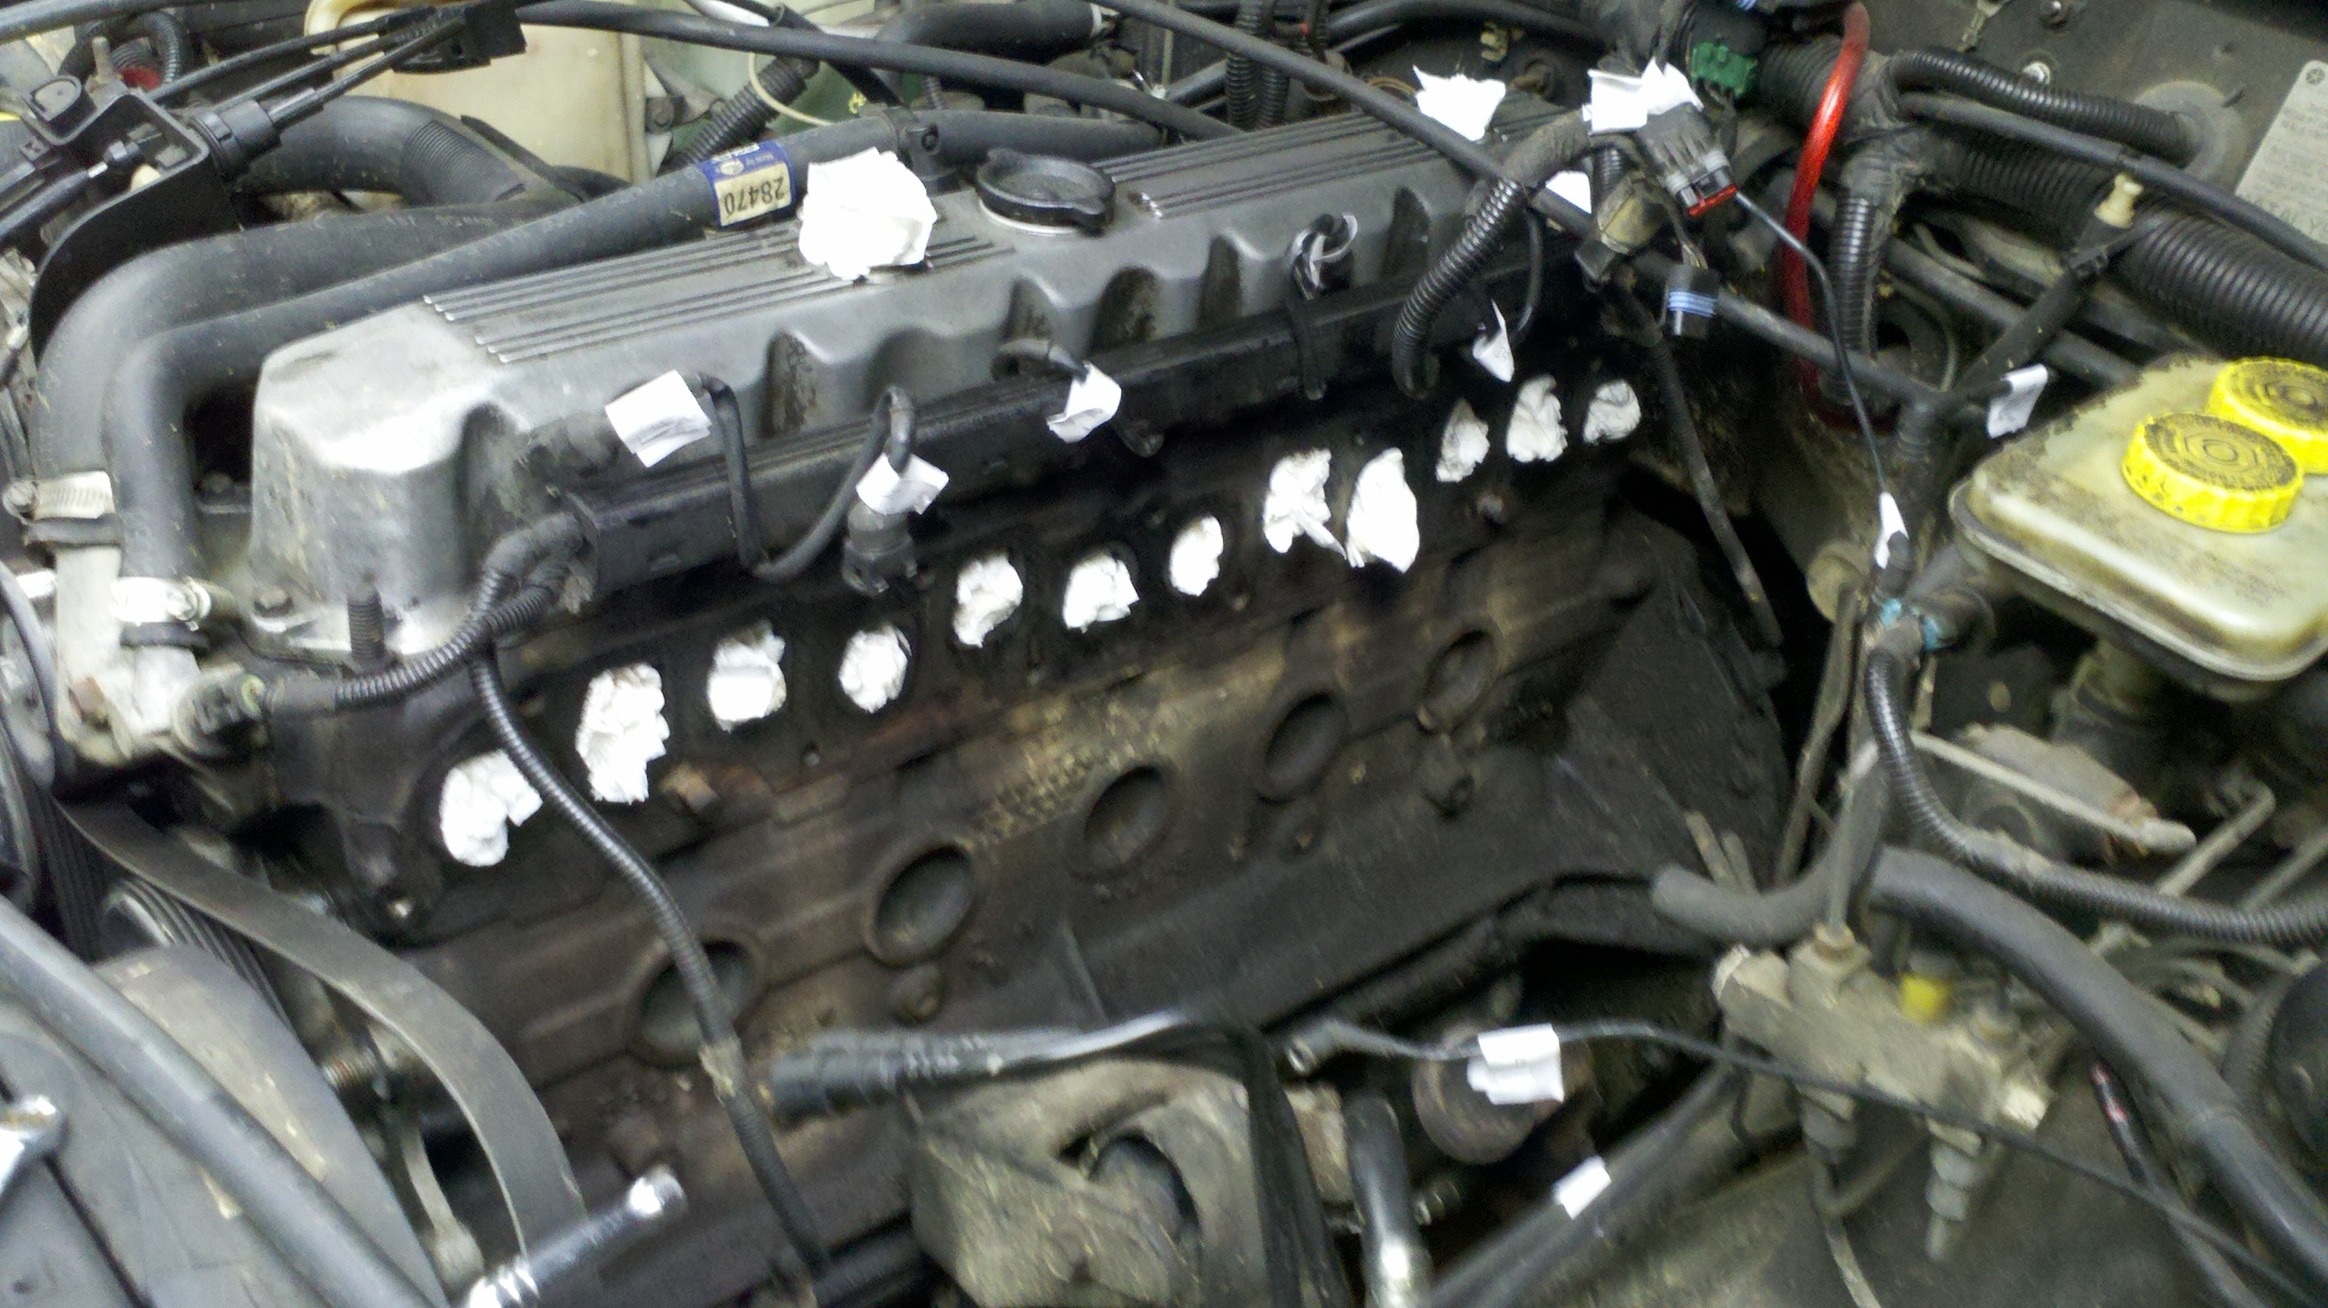
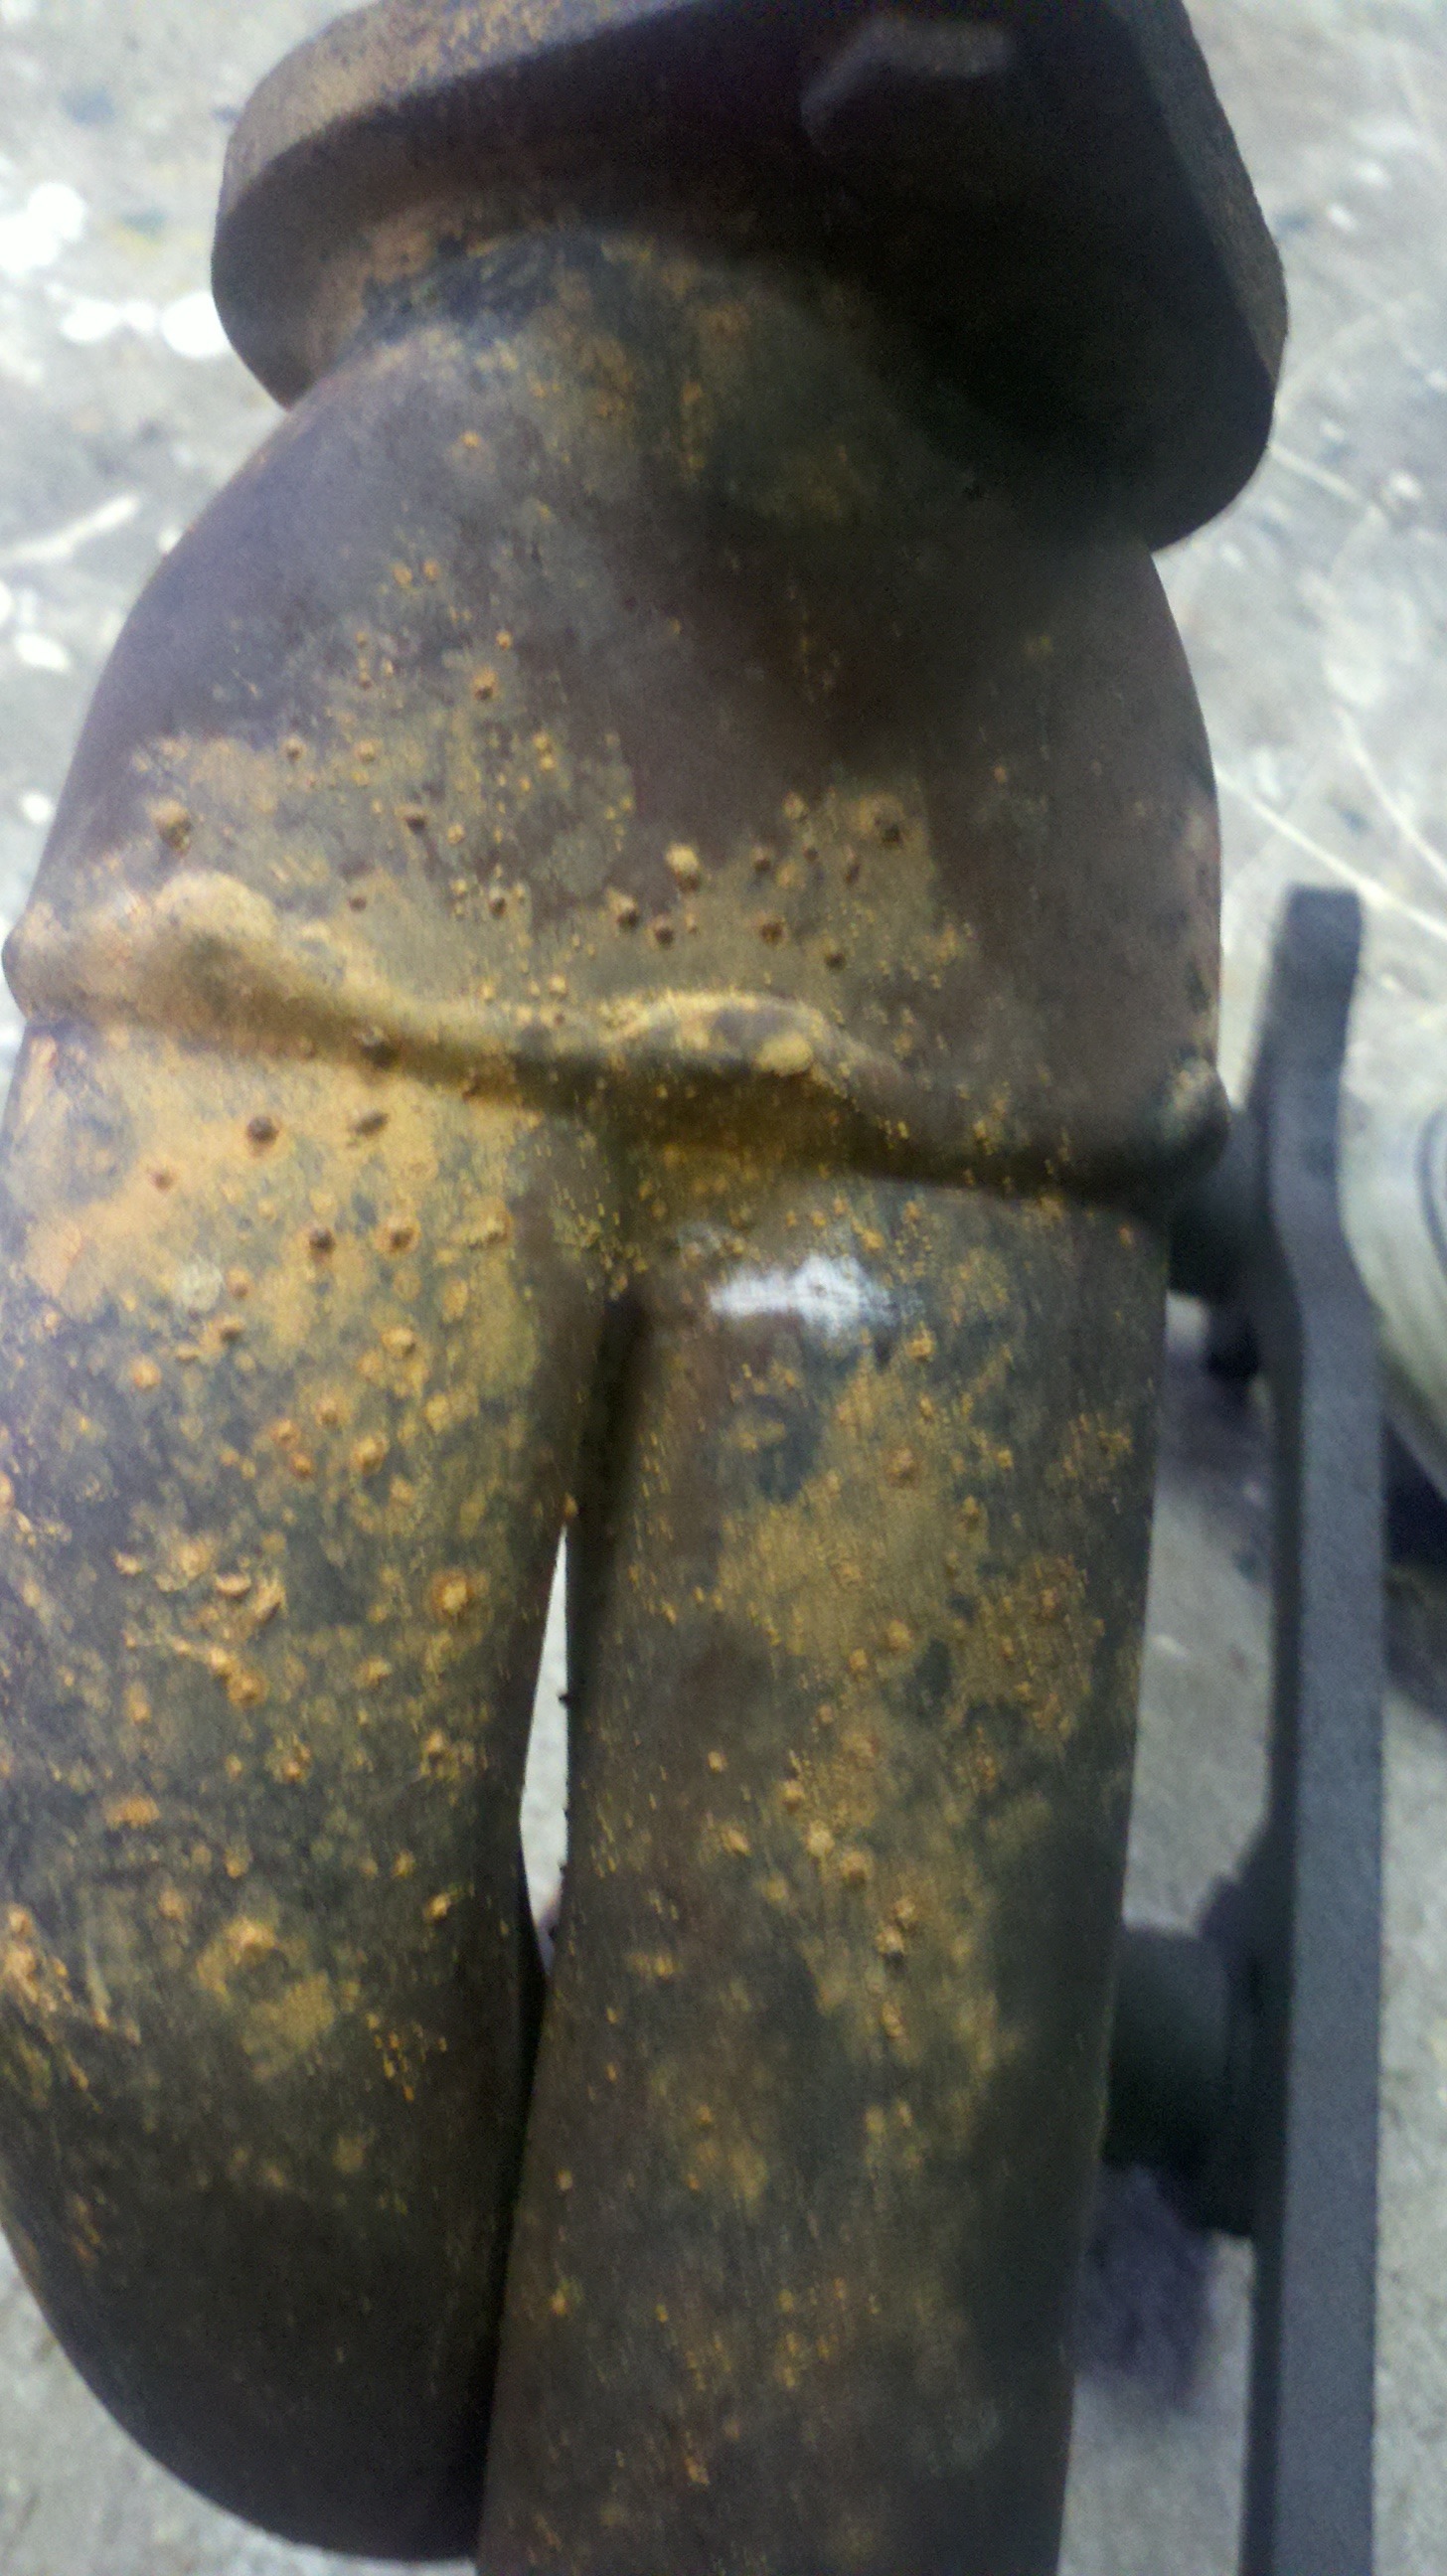
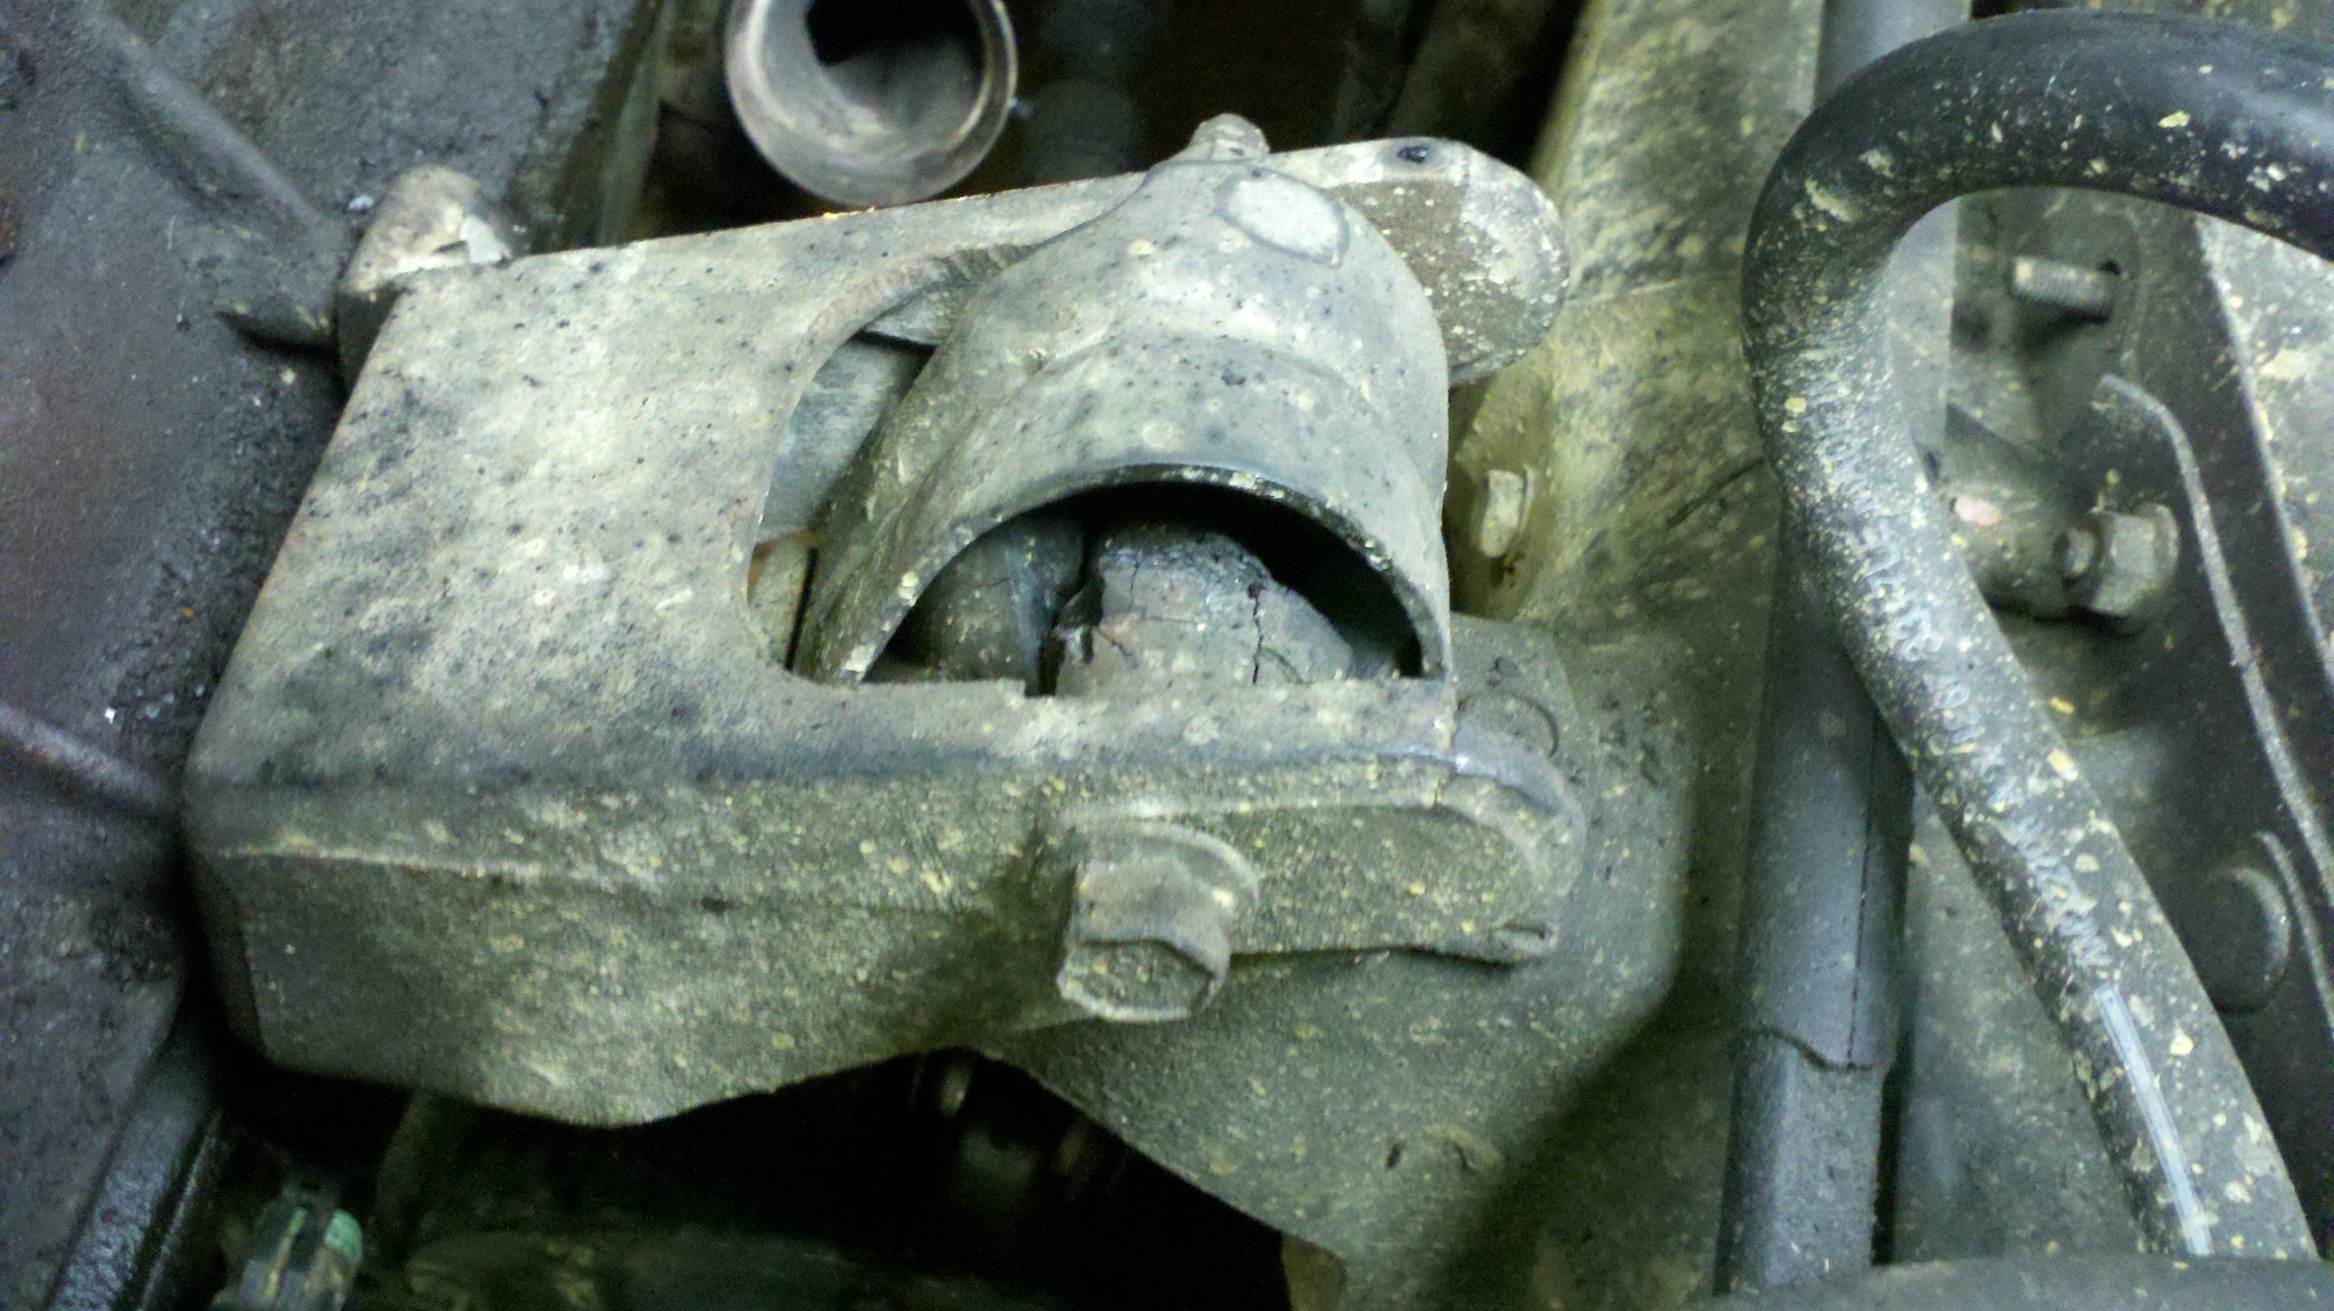
Close ups of why I had a leak, and why my O2 sensor kept reading wrong, giving me awkward idle, bad mpg, and sometimes stalling.
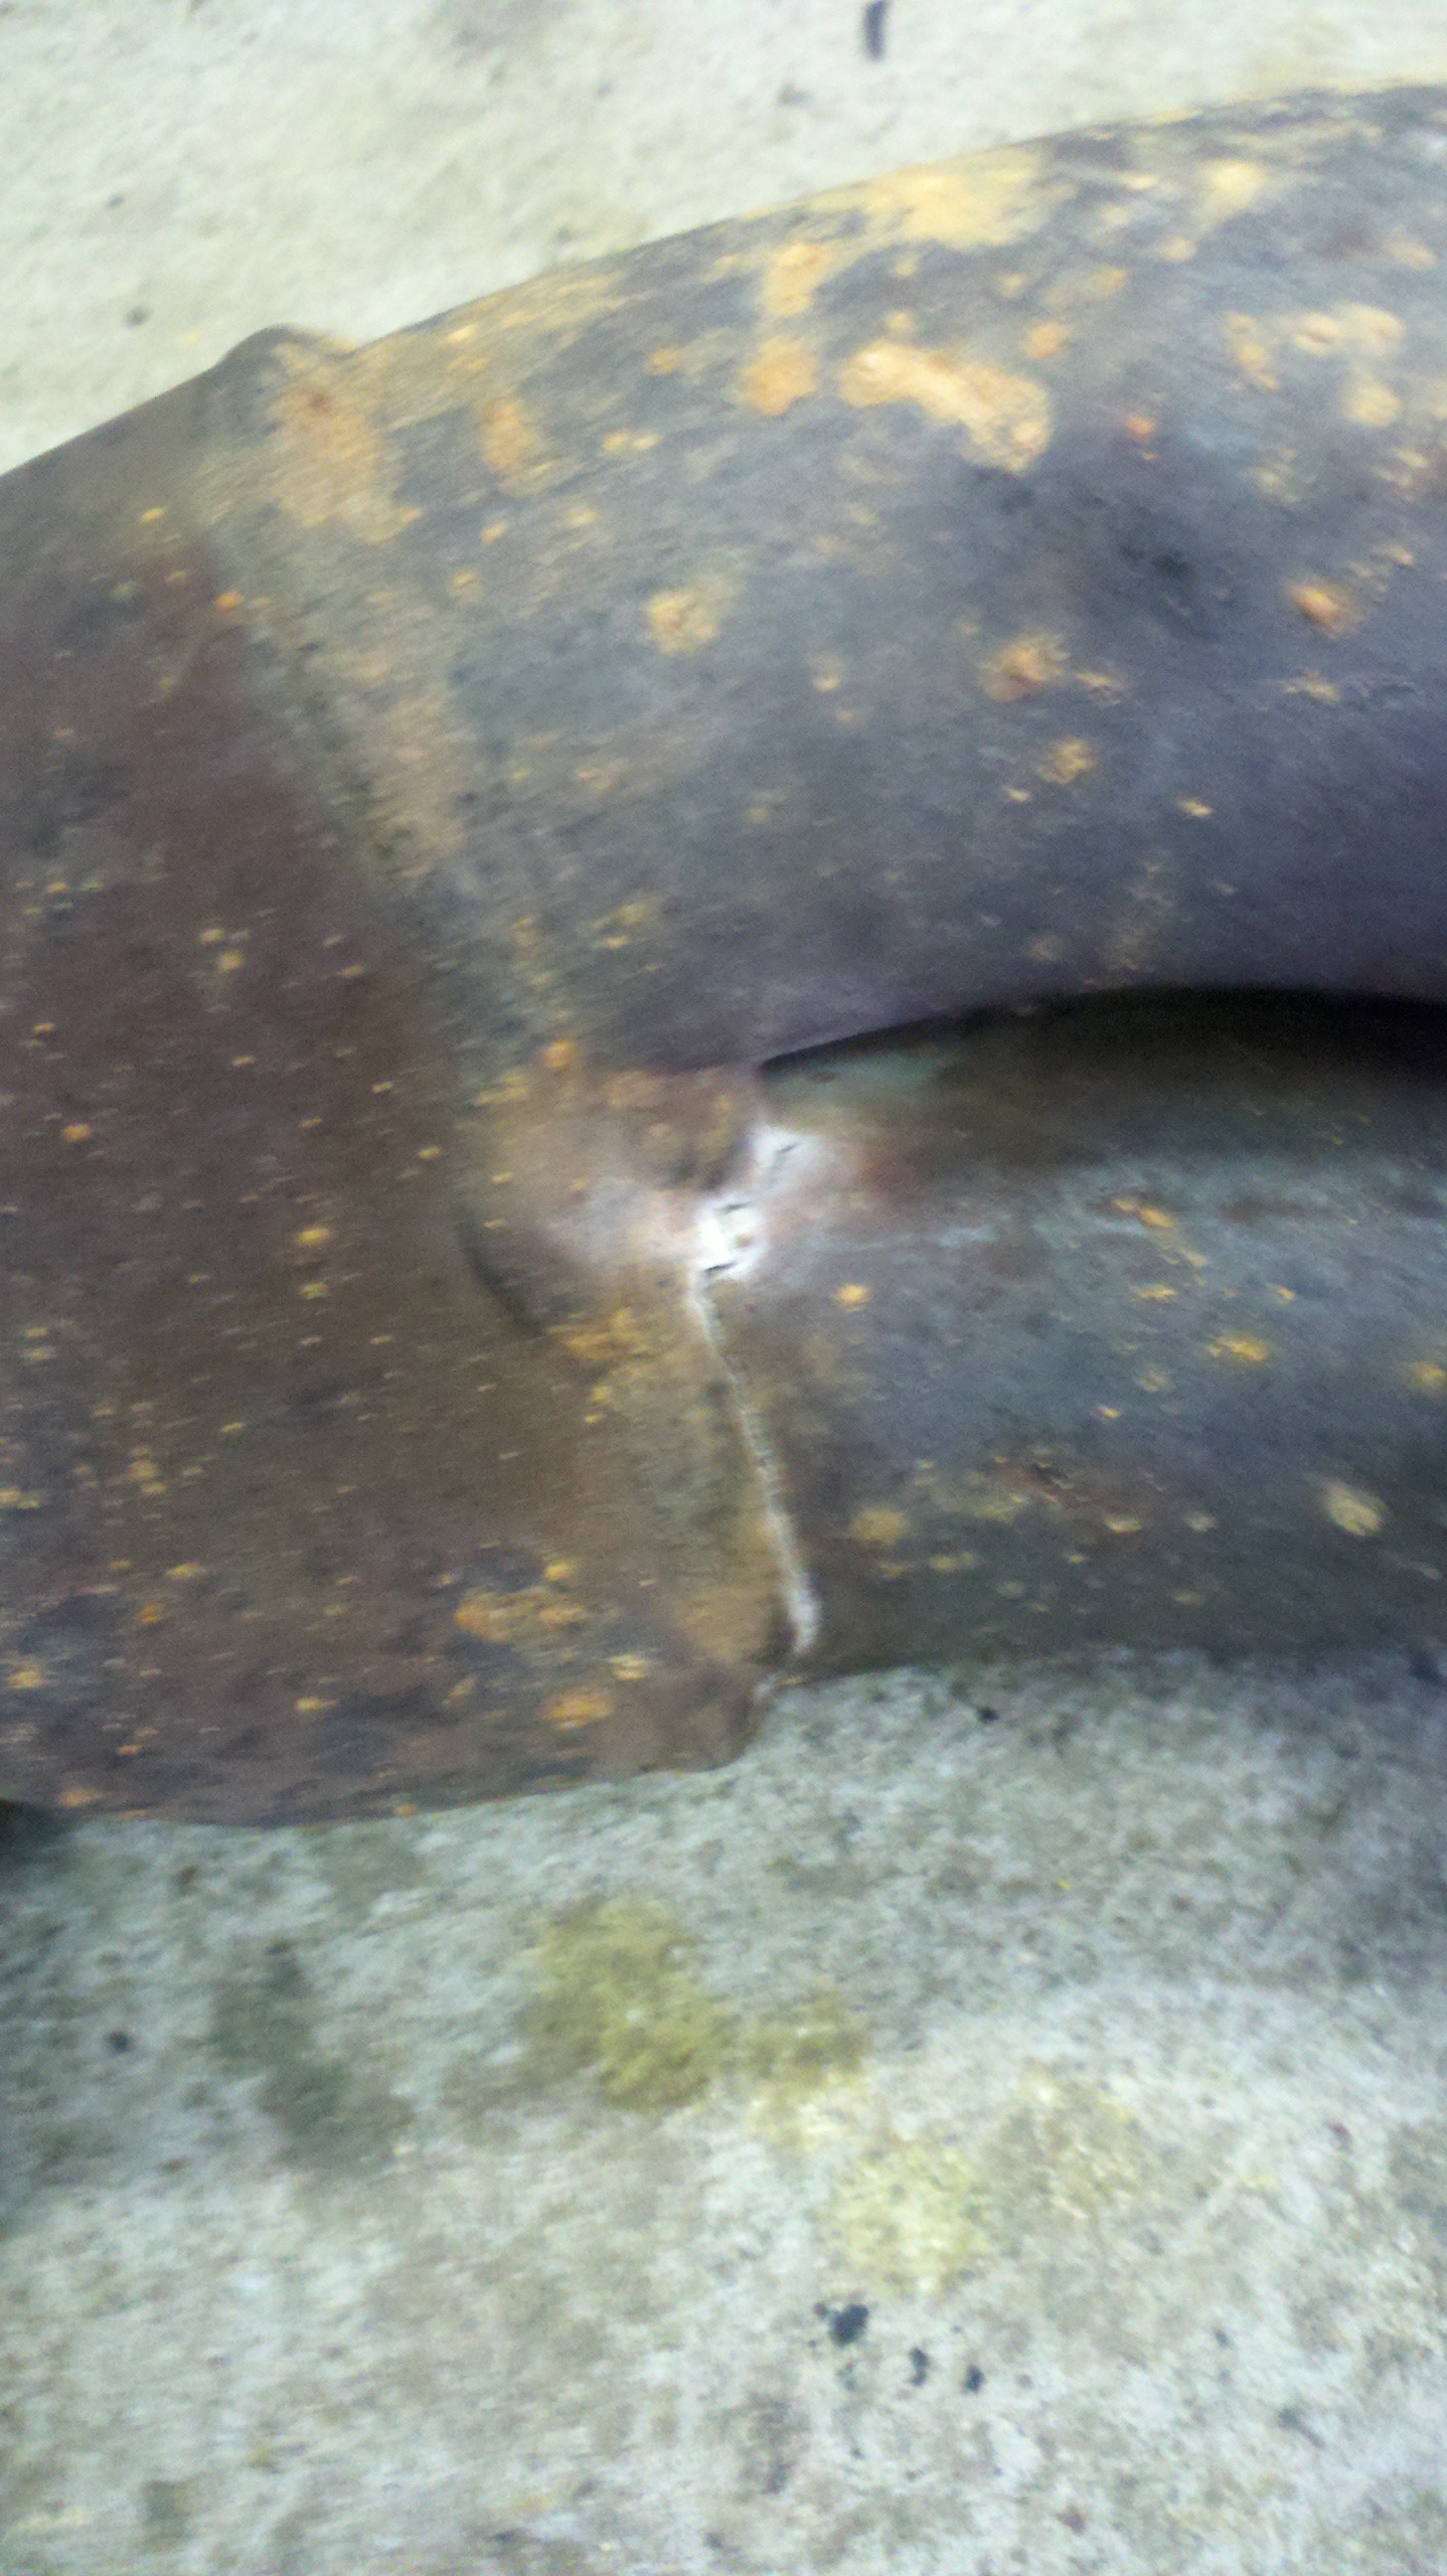
And why it cracked in the first place, which I never saw before and kind of pissed me off. I ordered new BrownDog Ultra-Flex Rubber Motor Mounts as soon as I saw this. Also babied the **** out of her after header installation, DD's
I totally forgot to take pictures of installation (read: Excitement) But it went in very easily, I used a Fel-pro gasket instead of the supplied one. It was only 8$ for a bit more insurance, so **** it. I sprayed Copper spray gasket on both sides before installing, and I like that stuff I ended up buying the suggested Flex Ratcheting Wrenches which made installing about 500x easier. And of course all the bolts were metric, so the SAE normal ratcheting wrenches were pointless. After reconnecting everything, fired her up. Oh man, the smoke from the grease on the header jaja. The Legacy runs beautifully now, and sounds a bit more grunty. But being my mounts were ****ed, I babied her till.....
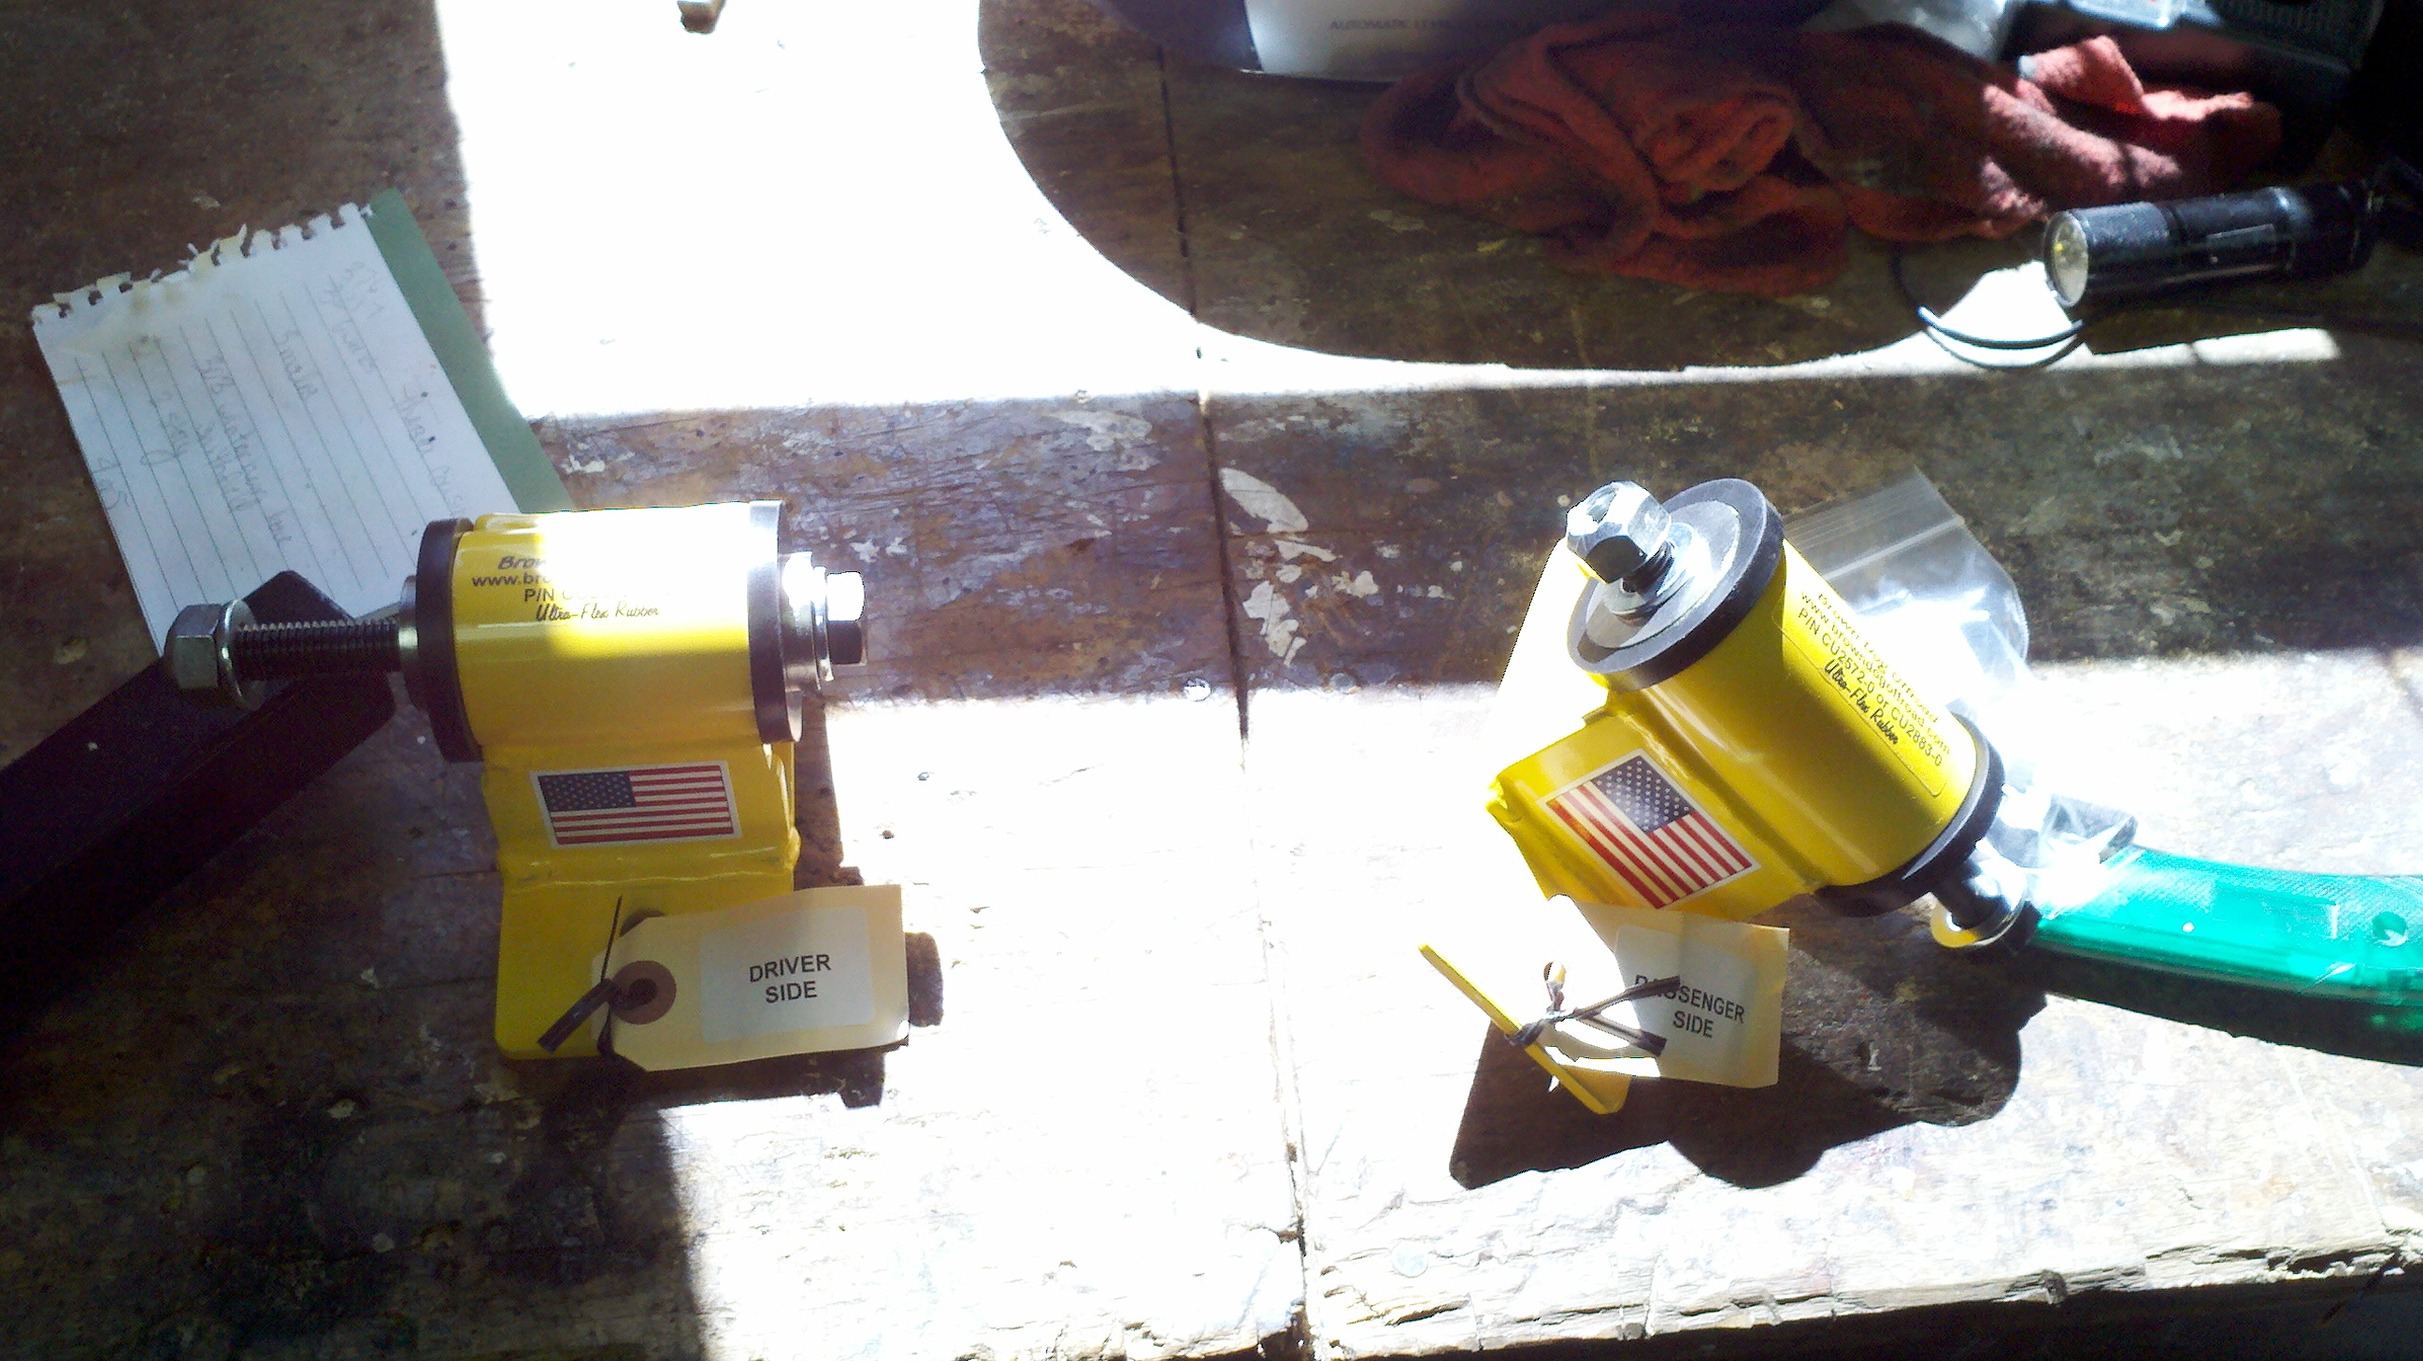
These sexy bastards came in the mail, they took a while, but for the price quality, and the knowledge they were loaded with orders and working weekends, I'd suggest them to everyone.
BrownDog Ultra-Flex Rubber Motor Mounts:
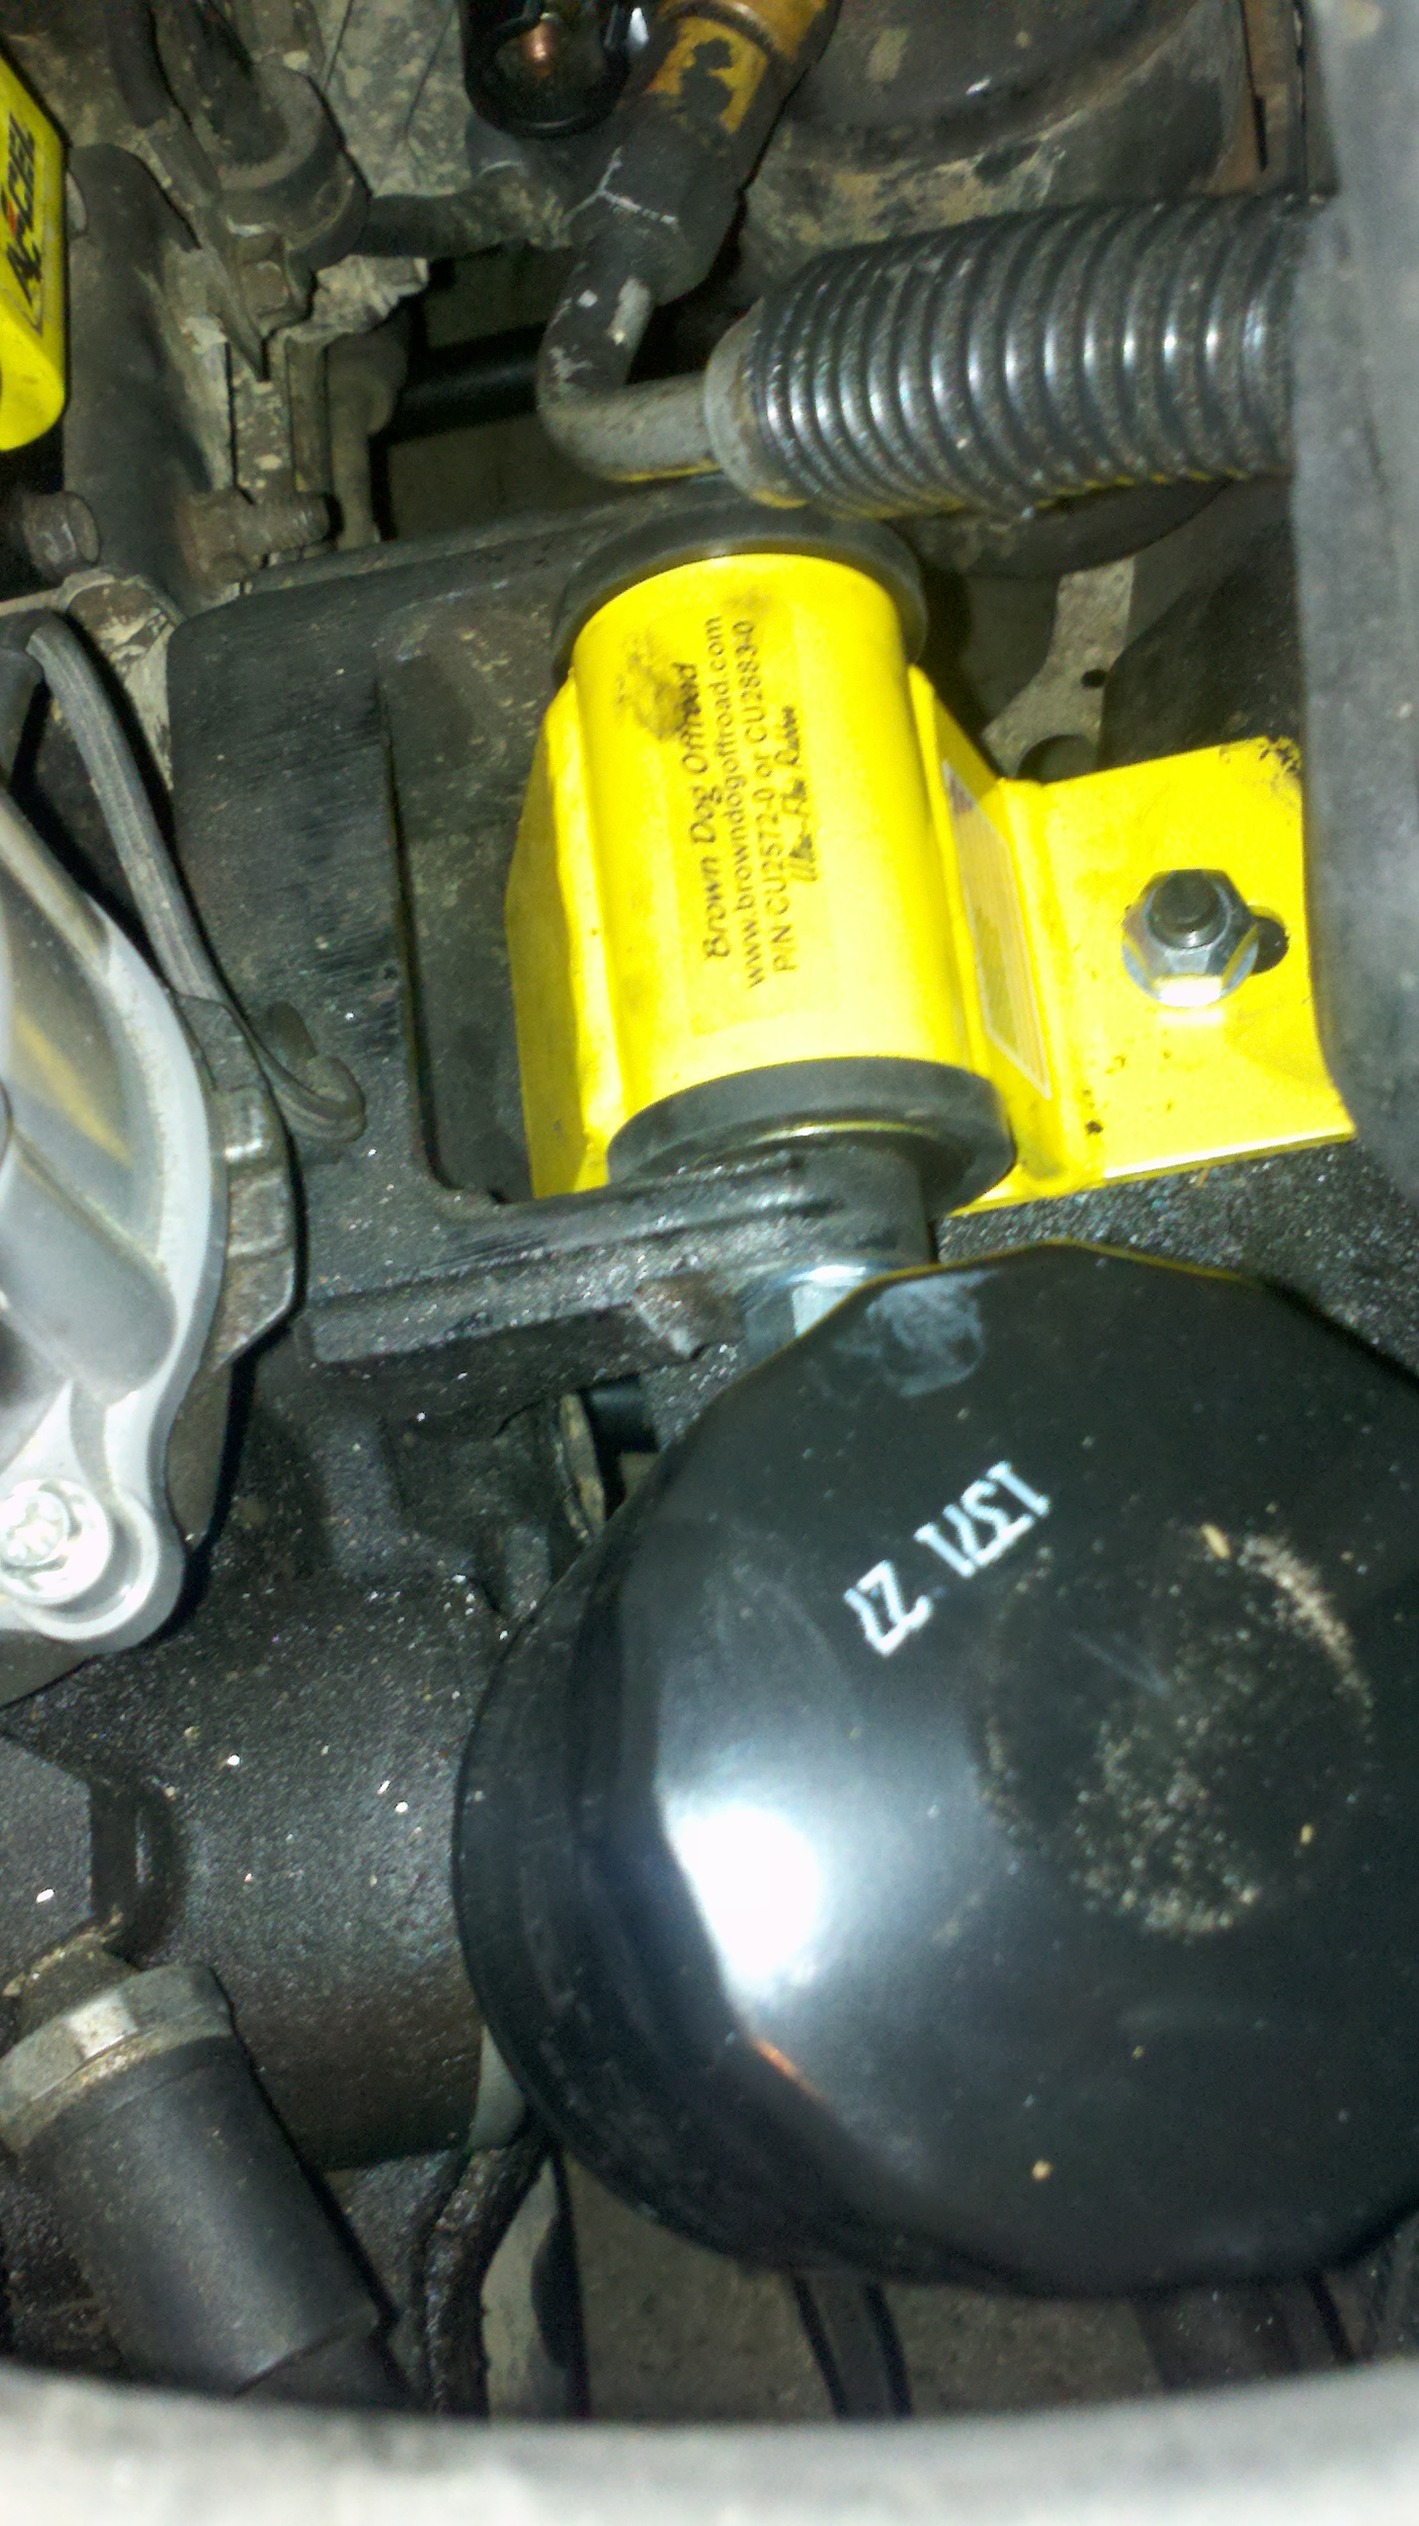
Partly installed, Driver:

Installed Passenger, which was the pain in the *** one. They suggest removing the motor bracket for easier removal and installation, but JAJAJA Torx bit bolt in a bad spot did not want to move, so that wasn't happening. I had to cut the bolt, remove oil filter, and wiggle my heart out.
Old MM's:
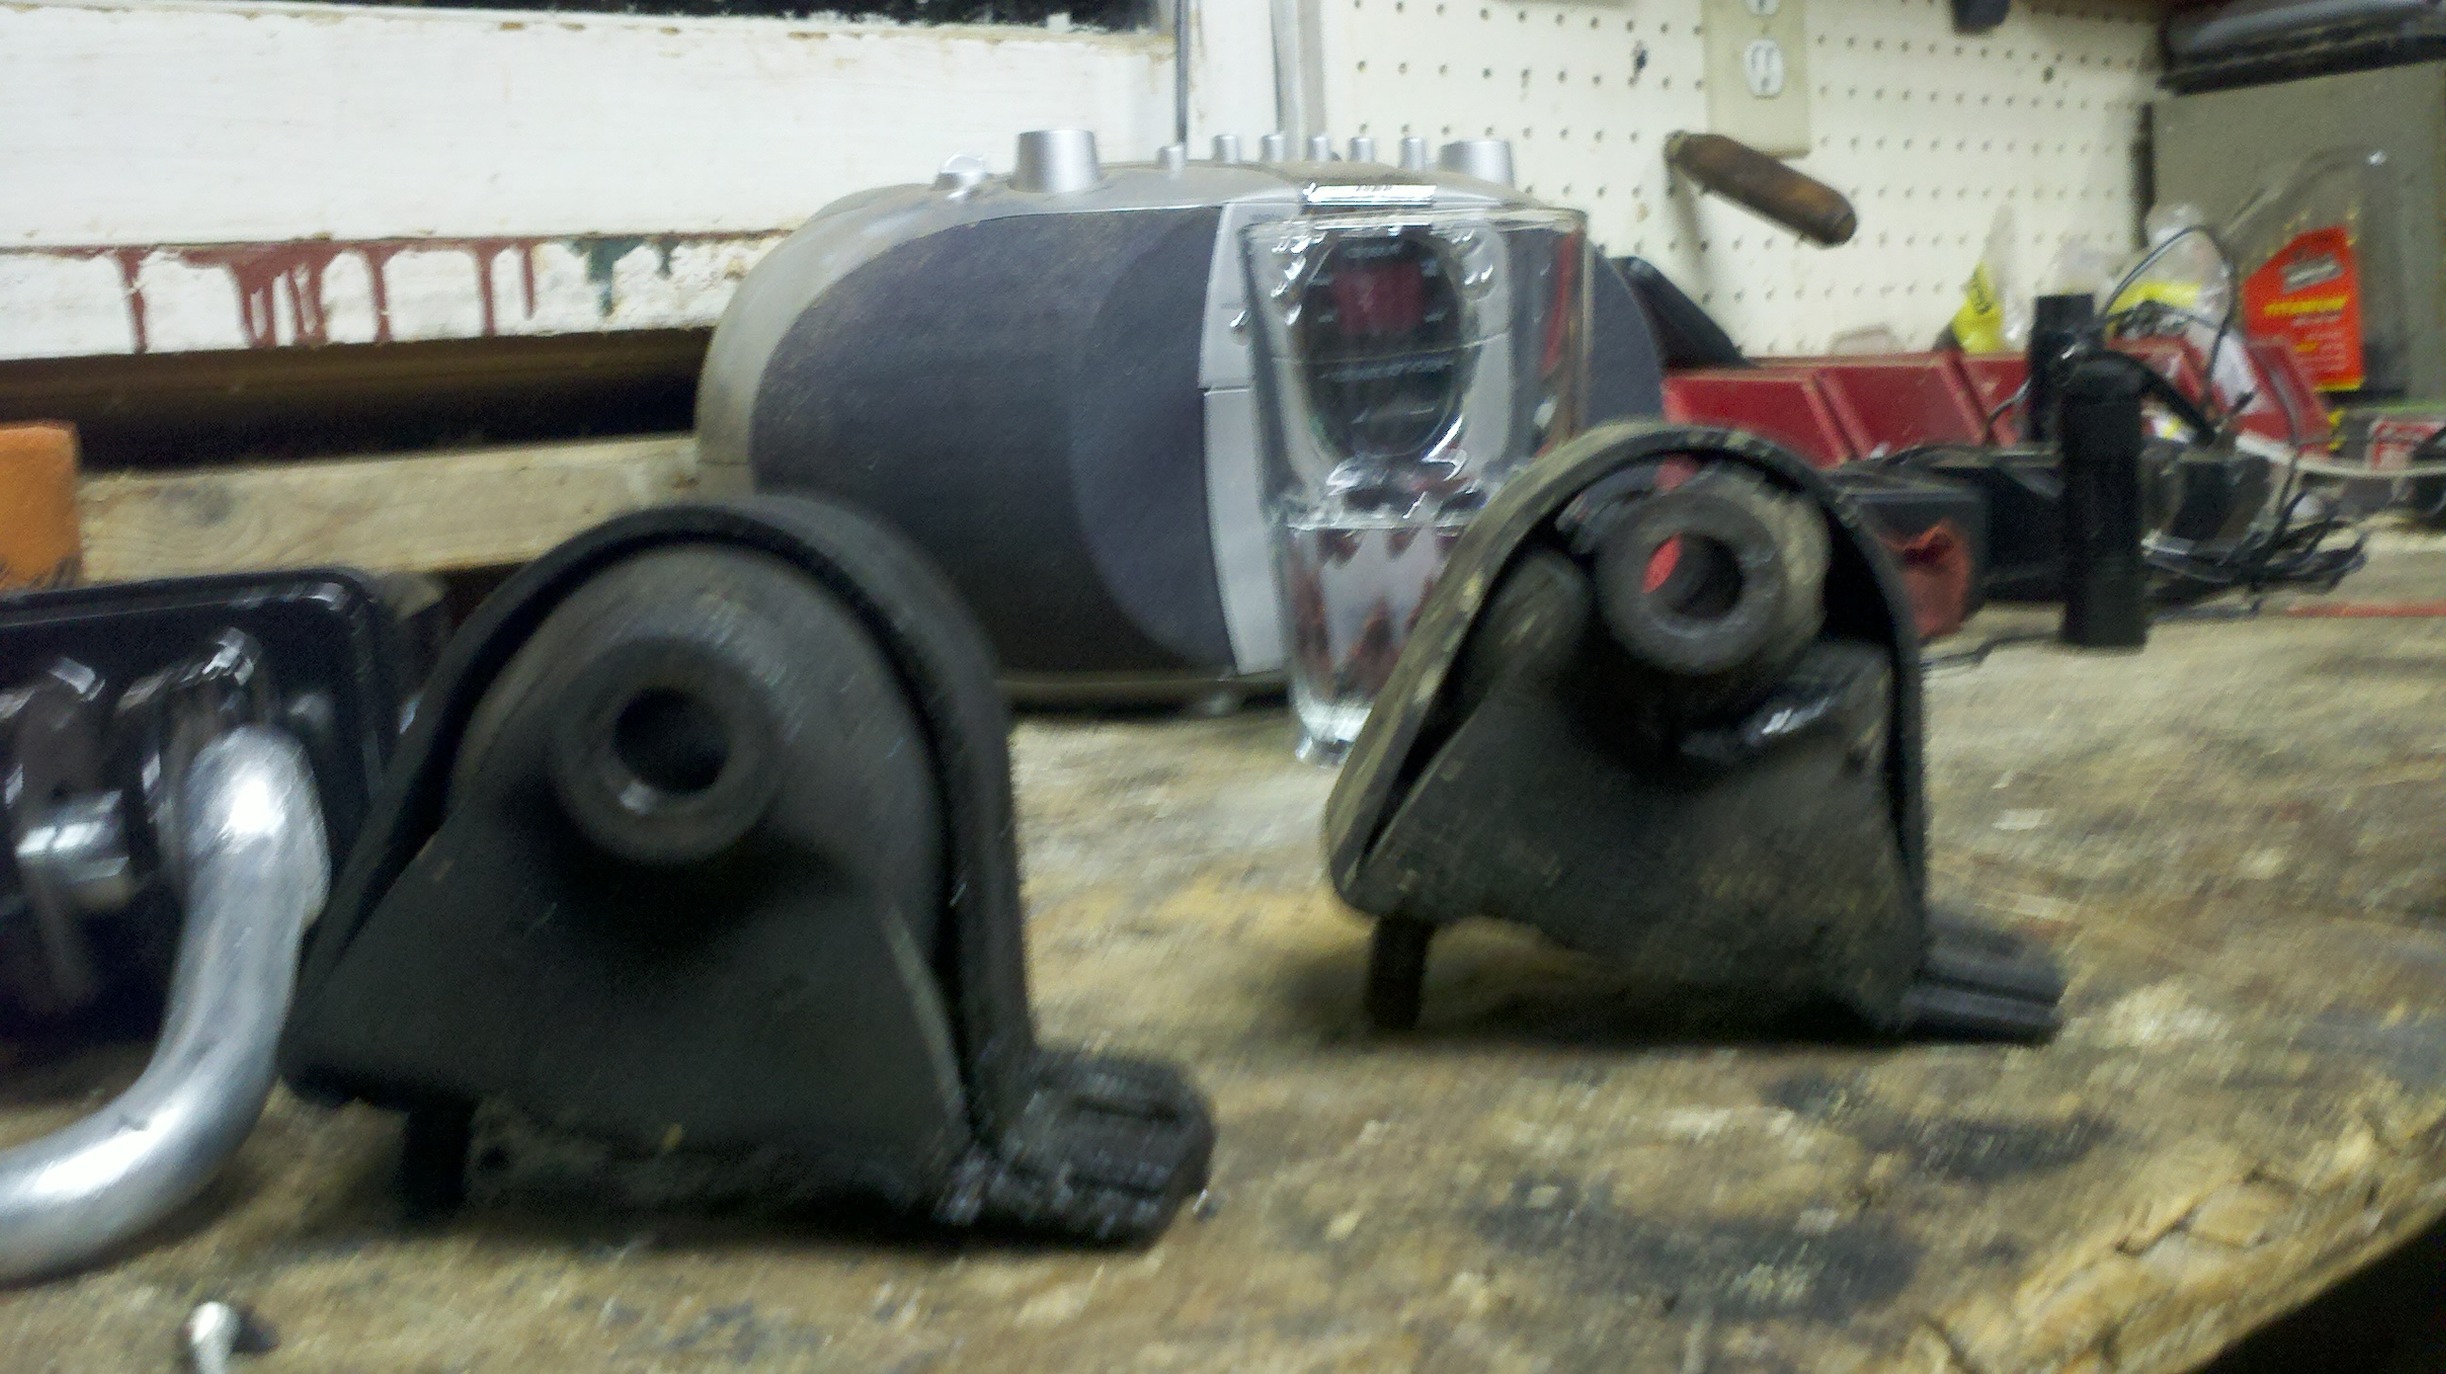
Yeh, the sleeve on the driver side mount came out with a pinky push, Very safe stuff. And I went offroading with this.
After installing the MM's I went driving, hard. And between all my bolt on's actually registering with the 02 sensor the torque actually transferring the wheels, and a bit of dark magic, the jeep goes. I am extremely impressed with the difference between everything. It feels better than stock (mind the 31's on stock gearing). I can only imagine what she'll feel like with 4.10s.
Current Bolts ons:
Ebay 4-hole injectors
APN Header
High Flow 2.25" Spun cat
Thrush Turbo Muffler 2.25"
62mm Bored TB
Accel Ignition coil
8mm wires
K&N drop in air filter
Coupled with general maintenance, The Legacy is feeling pretty good. I don't know what's next on my list, but if I find a set of axles from a 4cyl xj with 4.10gearing and a c8.25 29spline, I'm jumping on that ****. Any fancy ideas are warmly welcomed.
Also: Trailer hitch Class II JY oh well.
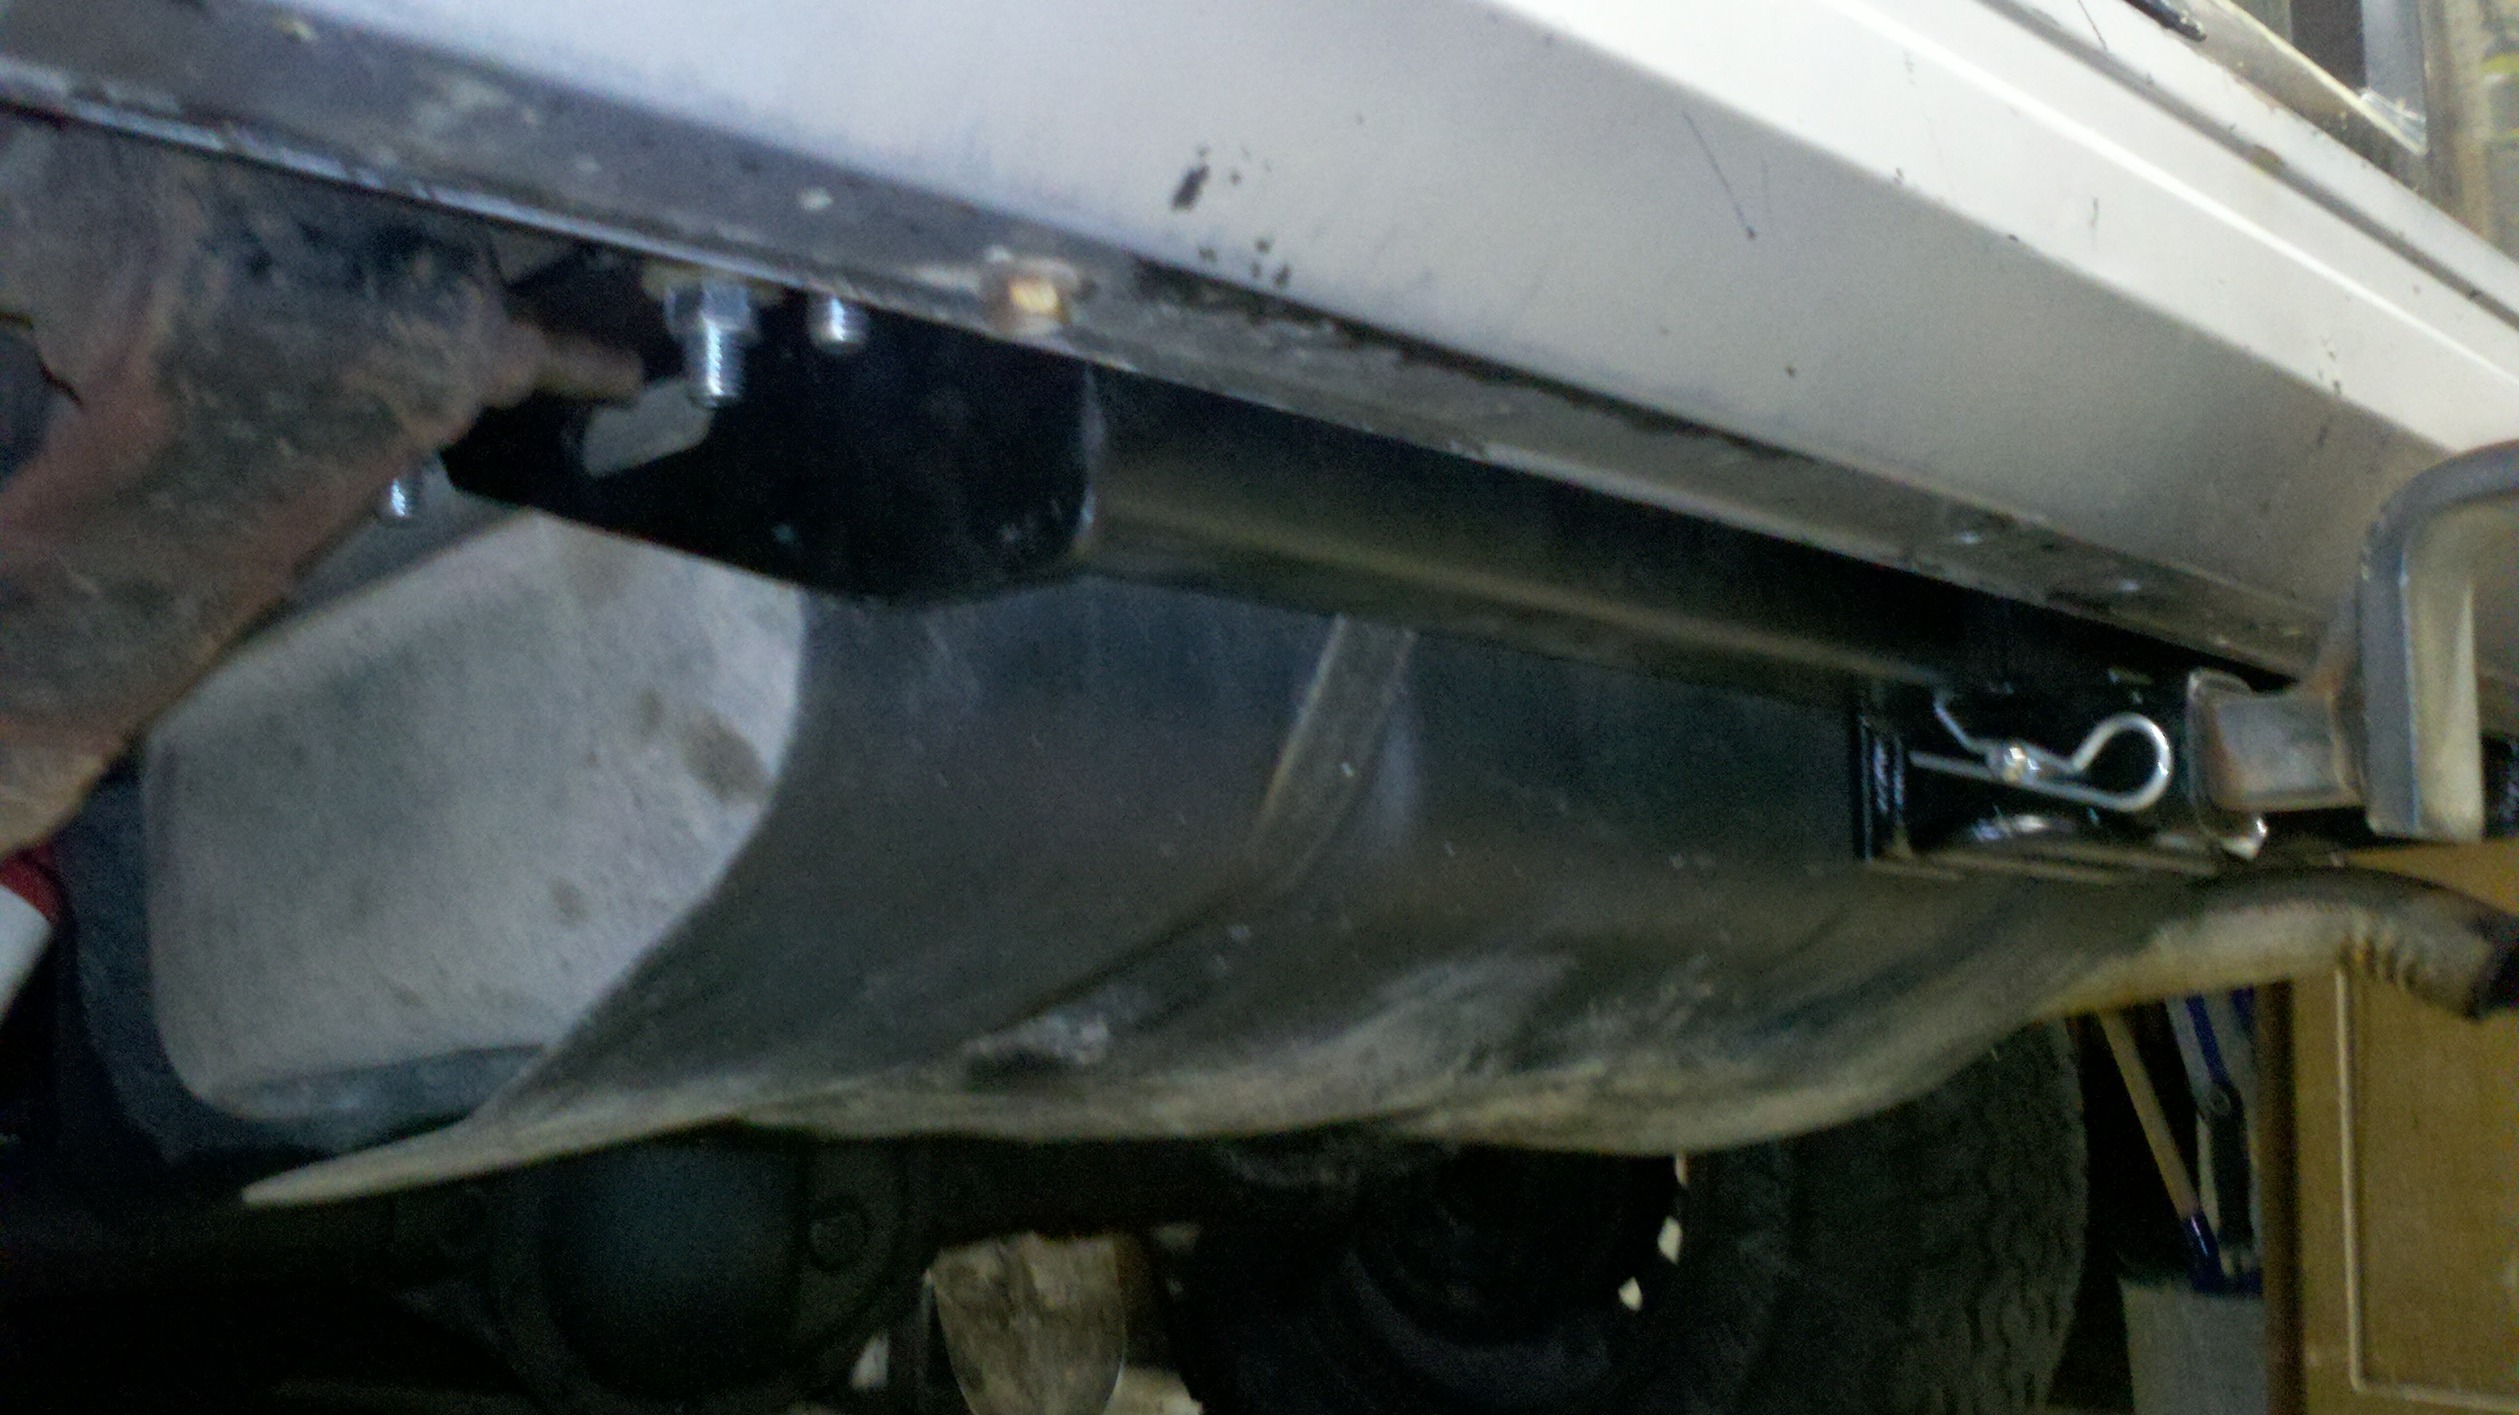
Just have to get that damn seized ball mount OFF.
When I get a period of clear skies I'll take some pictures of the Header and stuff.
So on my quest for MPGs and bolt ons, I finally got to the point of Headers. And since my exhaust manifold has been cracked, say since I've had it, it's time to be replaced. I didn't take enough pictures to do a good write up, but I have some, so here we go.
First off these arrived in the mail:
APN Header + Walker Front pipe (which at the time of this post, is still in my garage, not installed, ****ing seized bolts)
Well with the parts in my grips, means I must install, so lets start with some pictures of the taking apart process.
Power Steering: This was really easy
Label god damn everything, even though, I memorized my engines already. jaja
Take all that junk off, plug the ports, and clean the mating surface for that sweet mating action later.
OLD Manifold:
Old Intake, cleaned up all semi nice and pretty (GUMOUT's carb cleaner is a god btw):
Close ups of why I had a leak, and why my O2 sensor kept reading wrong, giving me awkward idle, bad mpg, and sometimes stalling.
And why it cracked in the first place, which I never saw before and kind of pissed me off. I ordered new BrownDog Ultra-Flex Rubber Motor Mounts as soon as I saw this. Also babied the **** out of her after header installation, DD's
I totally forgot to take pictures of installation (read: Excitement) But it went in very easily, I used a Fel-pro gasket instead of the supplied one. It was only 8$ for a bit more insurance, so **** it. I sprayed Copper spray gasket on both sides before installing, and I like that stuff
I ended up buying the suggested Flex Ratcheting Wrenches which made installing about 500x easier. And of course all the bolts were metric, so the SAE normal ratcheting wrenches were pointless. After reconnecting everything, fired her up. Oh man, the smoke from the grease on the header jaja. The Legacy runs beautifully now, and sounds a bit more grunty. But being my mounts were ****ed, I babied her till.....These sexy bastards came in the mail, they took a while, but for the price quality, and the knowledge they were loaded with orders and working weekends, I'd suggest them to everyone.
BrownDog Ultra-Flex Rubber Motor Mounts:
Partly installed, Driver:
Installed Passenger, which was the pain in the *** one. They suggest removing the motor bracket for easier removal and installation, but JAJAJA Torx bit bolt in a bad spot did not want to move, so that wasn't happening. I had to cut the bolt, remove oil filter, and wiggle my heart out.
Old MM's:
Yeh, the sleeve on the driver side mount came out with a pinky push, Very safe stuff. And I went offroading with this.
After installing the MM's I went driving, hard. And between all my bolt on's actually registering with the 02 sensor the torque actually transferring the wheels, and a bit of dark magic, the jeep goes. I am extremely impressed with the difference between everything. It feels better than stock (mind the 31's on stock gearing). I can only imagine what she'll feel like with 4.10s.
Current Bolts ons:
Ebay 4-hole injectors
APN Header
High Flow 2.25" Spun cat
Thrush Turbo Muffler 2.25"
62mm Bored TB
Accel Ignition coil
8mm wires
K&N drop in air filter
Coupled with general maintenance, The Legacy is feeling pretty good. I don't know what's next on my list, but if I find a set of axles from a 4cyl xj with 4.10gearing and a c8.25 29spline, I'm jumping on that ****. Any fancy ideas are warmly welcomed.
Also: Trailer hitch Class II
Just have to get that damn seized ball mount OFF.
When I get a period of clear skies I'll take some pictures of the Header and stuff.
Thread Starter
Member
Joined: May 2010
Posts: 196
Likes: 0
From: Newport News,VA
Year: 1992
Model: Cherokee (XJ)
Engine: 4.0L I6 H.O.
Well, It's been a while since I last updated in this thread! I'll go slow, and not make a huge wtf post.
One of the first things I did after my motor mounts, hitch, and header was notice that the damn ball mount was stuck in the hitch, and that my past valve cover job was botched.
SO, in order to never have to do it again. Fel-pro Gasket and blue locktite all around!
I choose to do that again partially just to use my new discount that I have due to my new job, as a GS at Kramer Tire.
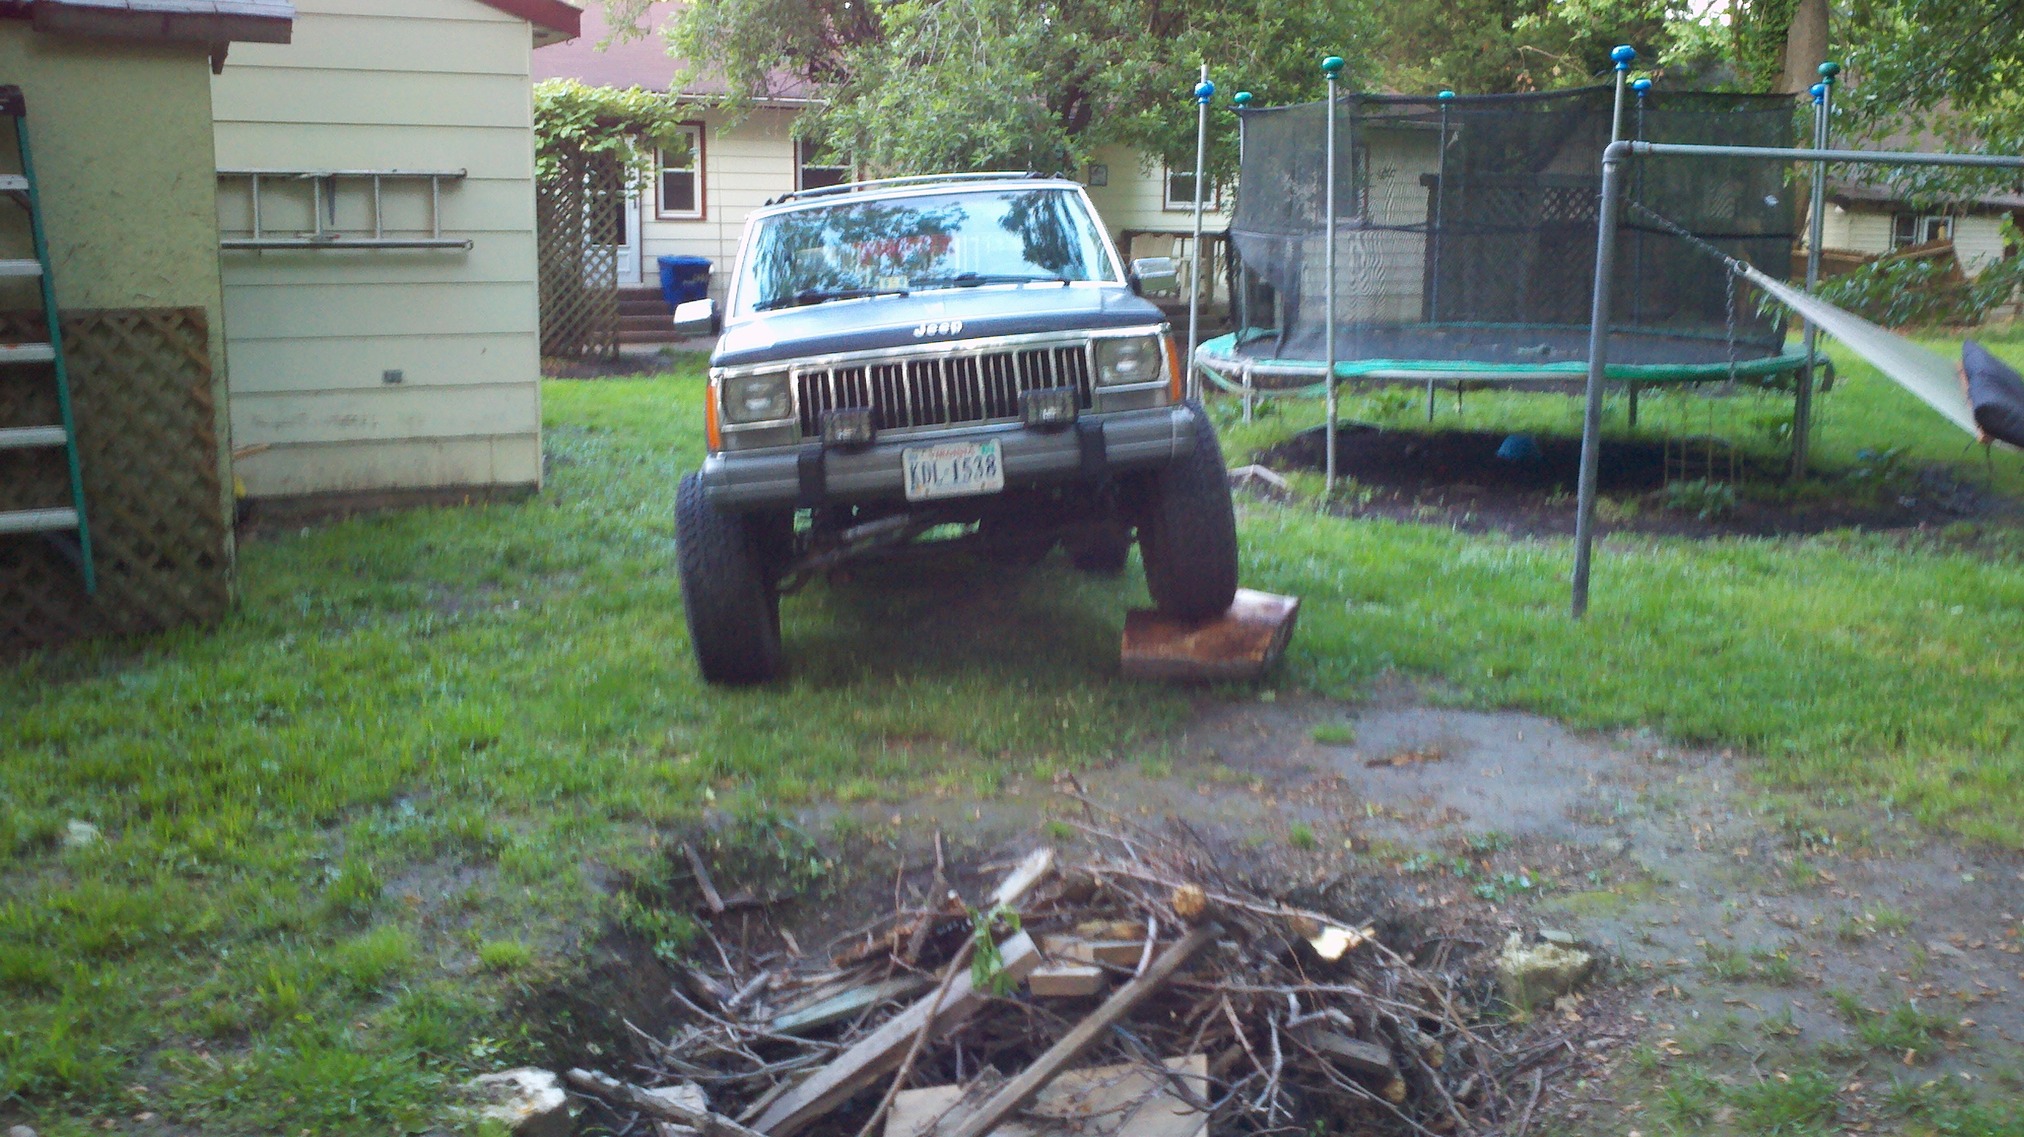
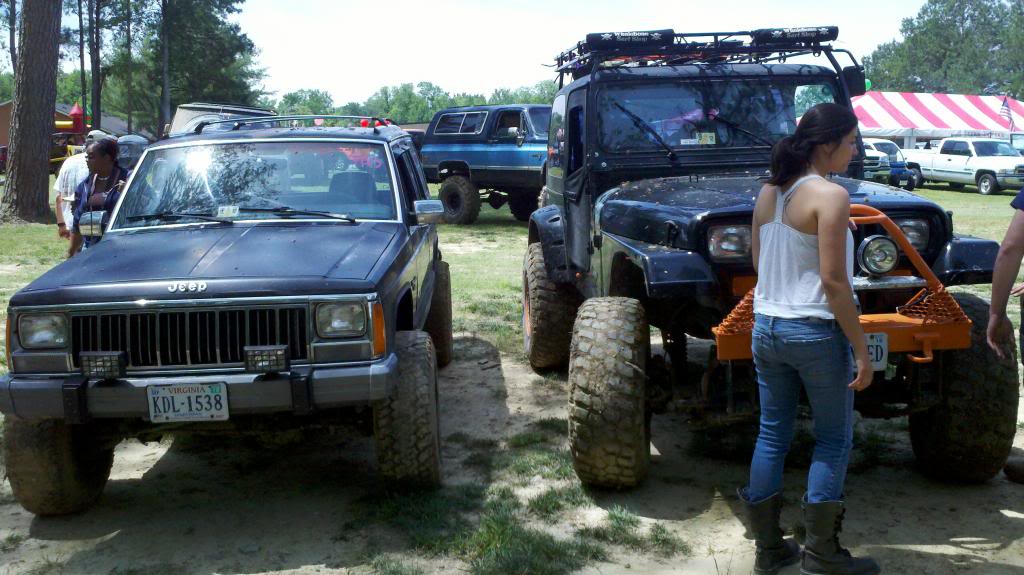
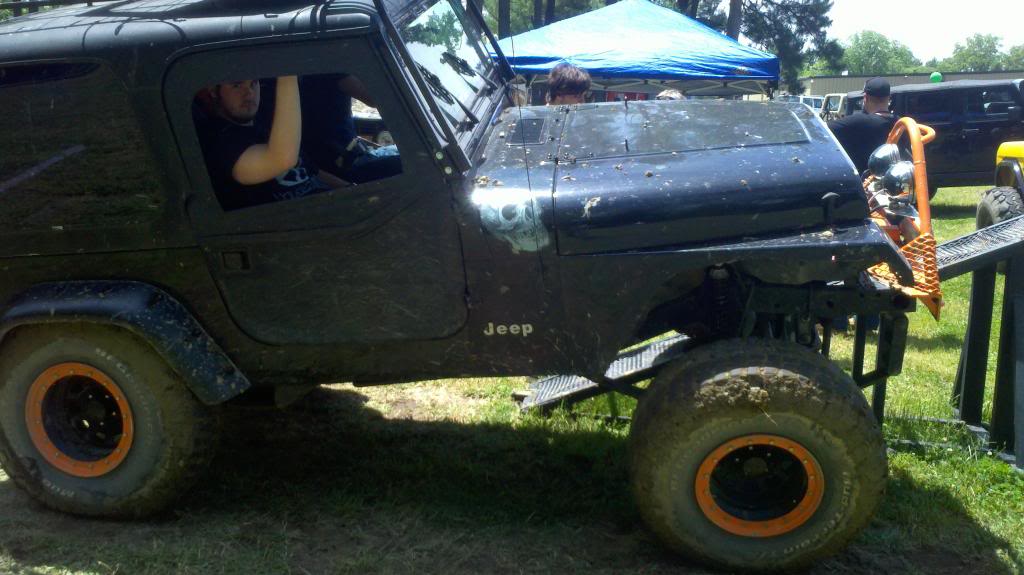
Here's a a little poser photo shoot on a log in my back yard, sway bars on btw.

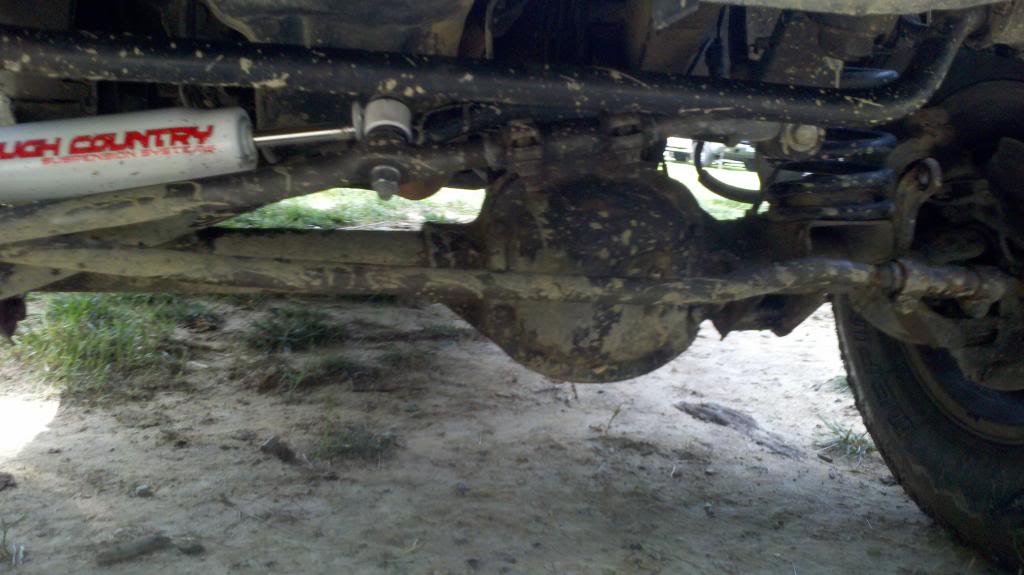
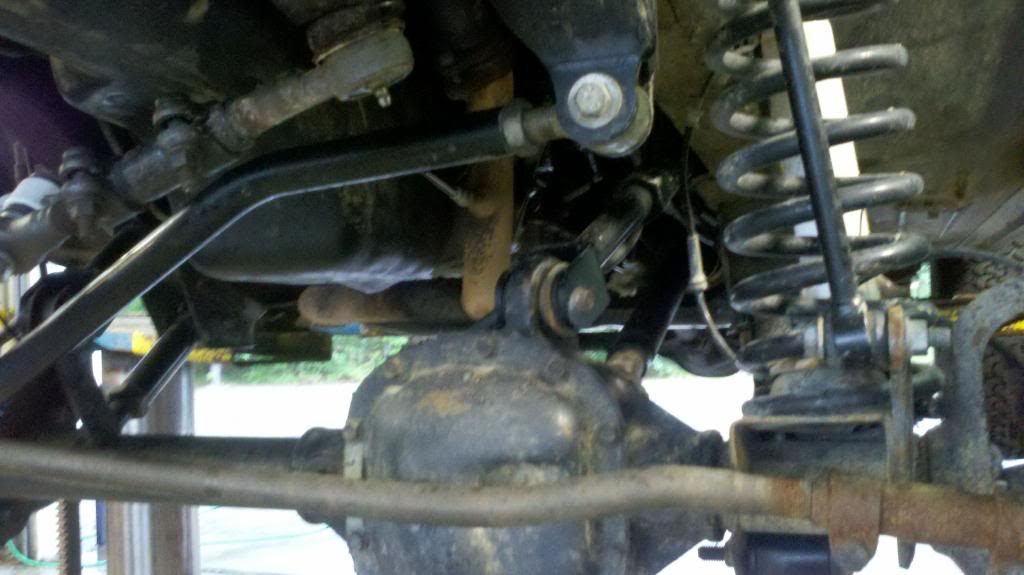
About the time all this was going down, IronMan 4x4 was having a sale on their control arms. Finally, biting the bullet, I went ahead and bought the CA's I've been eyeing for almost 2 years.
Lets just say, they slept next to me that night, my girlfriend was not amused.
I had enough time to get the lowers installed while at work (slow day), had to have two coworkers use huge *** pry bars to tilt the axle into accepting the control arm bolts, but they are in! I decided to do the uppers another time due to time and knowing they will be the same length, eh. I aligned her on the alignment rack, and OH MAN, NO MORE SHIMMYS. FINALLY.
Next post: Starr Motors Offroad Day May 2012, and Control arm installed pictures!
One of the first things I did after my motor mounts, hitch, and header was notice that the damn ball mount was stuck in the hitch, and that my past valve cover job was botched.
SO, in order to never have to do it again. Fel-pro Gasket and blue locktite all around!
I choose to do that again partially just to use my new discount that I have due to my new job, as a GS at Kramer Tire.
Here's a a little poser photo shoot on a log in my back yard, sway bars on btw.
About the time all this was going down, IronMan 4x4 was having a sale on their control arms. Finally, biting the bullet, I went ahead and bought the CA's I've been eyeing for almost 2 years.
Lets just say, they slept next to me that night, my girlfriend was not amused.
I had enough time to get the lowers installed while at work (slow day), had to have two coworkers use huge *** pry bars to tilt the axle into accepting the control arm bolts, but they are in! I decided to do the uppers another time due to time and knowing they will be the same length, eh. I aligned her on the alignment rack, and OH MAN, NO MORE SHIMMYS. FINALLY.
Next post: Starr Motors Offroad Day May 2012, and Control arm installed pictures!
Thread Starter
Member
Joined: May 2010
Posts: 196
Likes: 0
From: Newport News,VA
Year: 1992
Model: Cherokee (XJ)
Engine: 4.0L I6 H.O.
Thanks man. I never really looked at it like that till lately. Feels good knowing I'm bringing this jeep back up to her old glory and above it.
Next update possibly today, currently at work.
Next update possibly today, currently at work.

Thread Starter
Member
Joined: May 2010
Posts: 196
Likes: 0
From: Newport News,VA
Year: 1992
Model: Cherokee (XJ)
Engine: 4.0L I6 H.O.
Took me way too damn long to update this, but here we go.
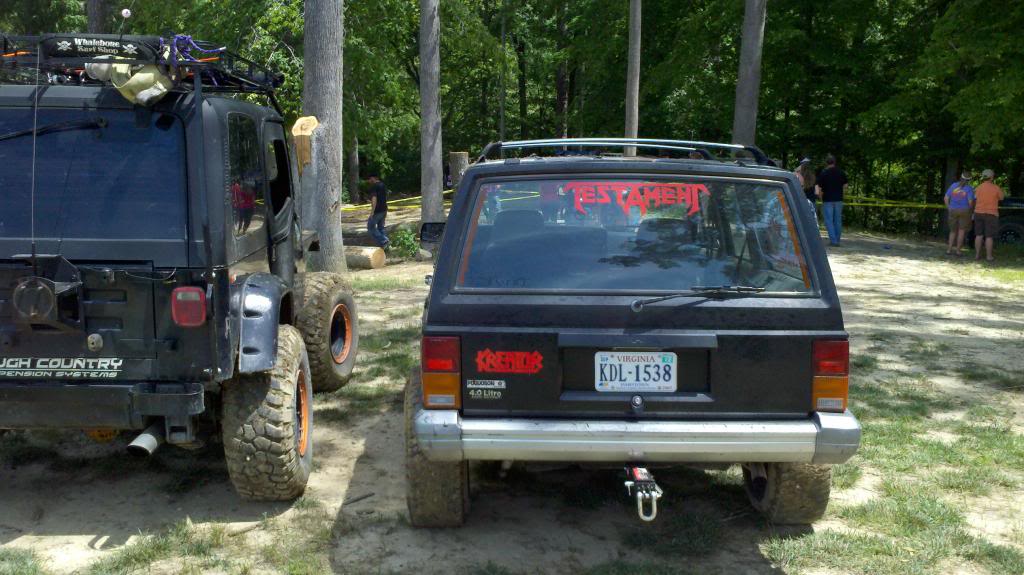
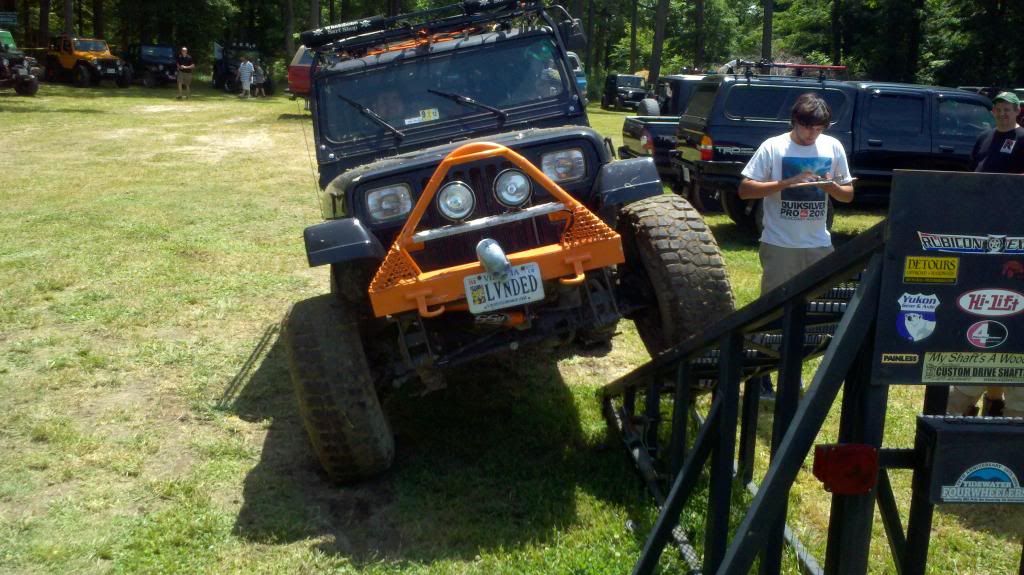
Here are some pictures from the Starr Motors Offroad Day last May 2012.
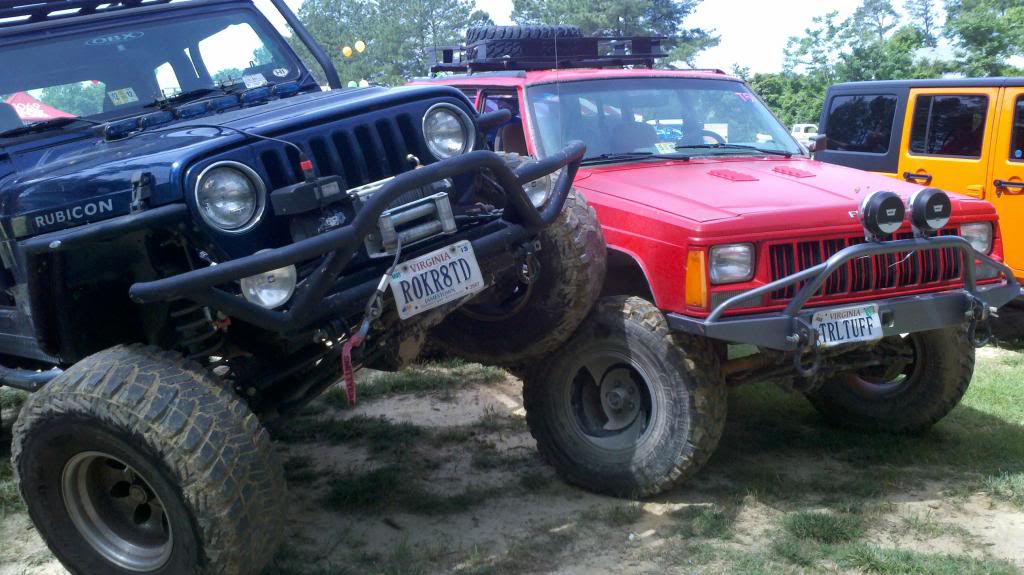
Just had to snag this shot
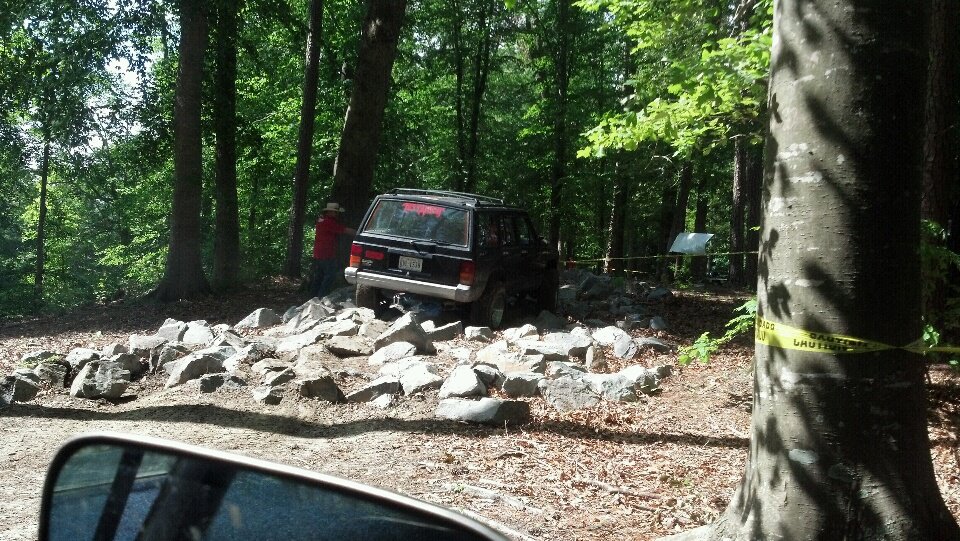
This is where I snagged a rock while doing the rock garden, not bad at all.
My xj next to my friend's YJ. He has 4.88gearing with a teralow reduction box on 35s. He's also open diff, and attempted the rock wall, almost got all the way up, except he stalled and slid back enough to ruin his good hold.
What's not pictured is me on the RTI ramp, or me doing anything haha. Unluckily for me, I did stuff without a camera trained on me. But I did get a 618 on the RTI ramp. My shocks are holding me back
I attempted the Frame Twister which was rated 3 out of 4 diamonds. Due to me waiting till after some bigger rigs tore it up, I struggled getting over the last log, and an official stopped me from taking a different approach due to smoking (thanks a lot RMS leak).
Fixing that leak was on my list once again.
Here are some pictures from the Starr Motors Offroad Day last May 2012.
Just had to snag this shot
This is where I snagged a rock while doing the rock garden, not bad at all.
My xj next to my friend's YJ. He has 4.88gearing with a teralow reduction box on 35s. He's also open diff, and attempted the rock wall, almost got all the way up, except he stalled and slid back enough to ruin his good hold.
What's not pictured is me on the RTI ramp, or me doing anything haha. Unluckily for me, I did stuff without a camera trained on me. But I did get a 618 on the RTI ramp. My shocks are holding me back
I attempted the Frame Twister which was rated 3 out of 4 diamonds. Due to me waiting till after some bigger rigs tore it up, I struggled getting over the last log, and an official stopped me from taking a different approach due to smoking (thanks a lot RMS leak).
Fixing that leak was on my list once again.
Last edited by AbsoluteAggressor; Feb 4, 2013 at 11:31 AM.
Thread Starter
Member
Joined: May 2010
Posts: 196
Likes: 0
From: Newport News,VA
Year: 1992
Model: Cherokee (XJ)
Engine: 4.0L I6 H.O.
After having fun, I went back to work on my XJ. One of the things that were bothering me was my paint job on my front fenders, decided to give her a better coat.
I think it turned out well, also ripped off the corner caps. Personally I like it, I ruined the stock look a while ago.
Nice *** shot
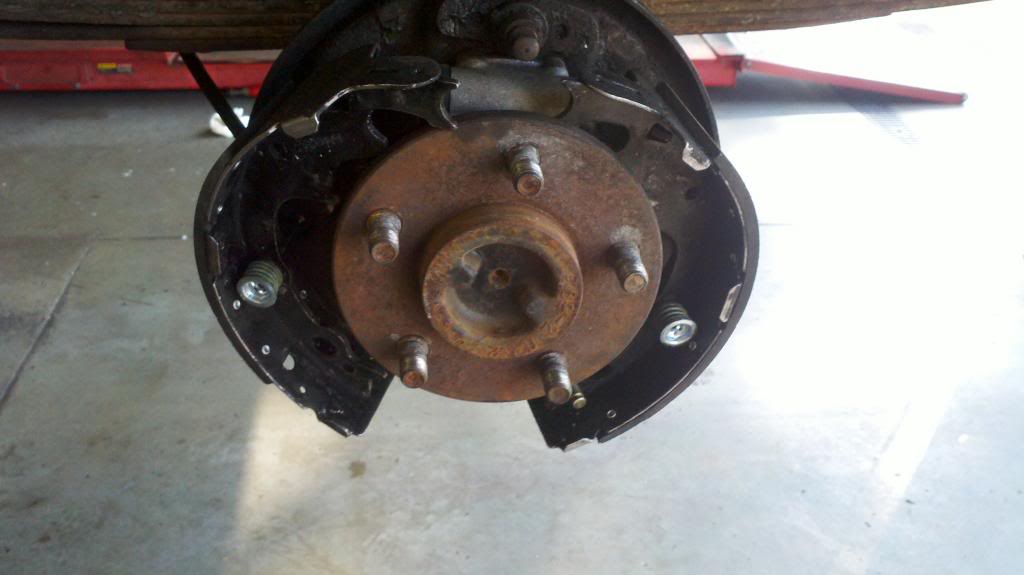
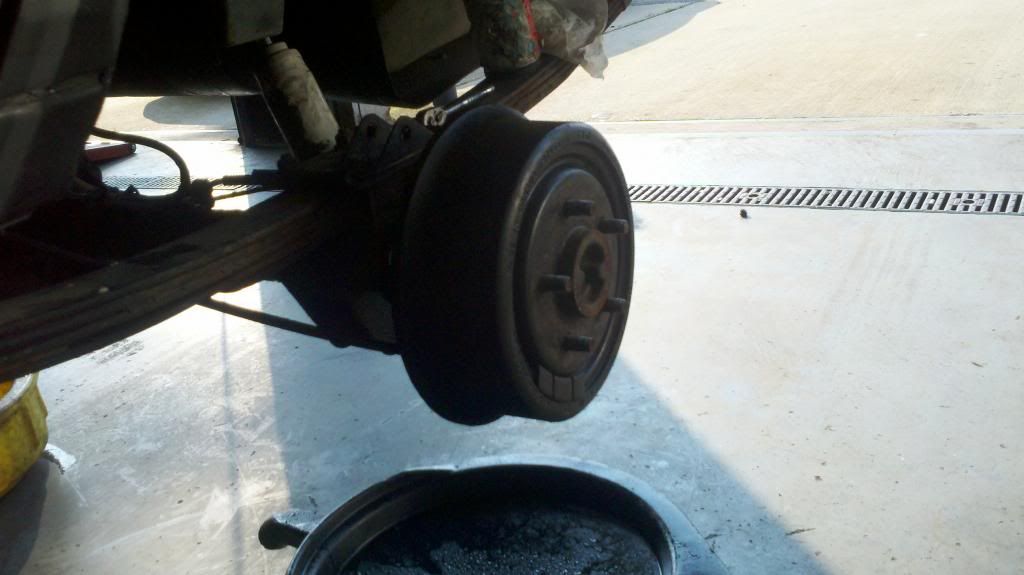
After that I decided to finally do my read drum brakes. I replaced the hardware and shoes, didn't **** with the E-brake hardware though. The only problem I ran into (other than the stupid bull**** drums brakes are) is that one of the new wheel cylinders I bought would not bleed, so I had to deal with that.
Oh wait, I forgot, this actually turned into a pain in the ***. Because I broke both brake lines trying to free them from the old wheel cylinders, so I had to buy about 7ft of brake line and bend them to fit. Not a nice thing to have to do when it's your DD. But yay new shoes.
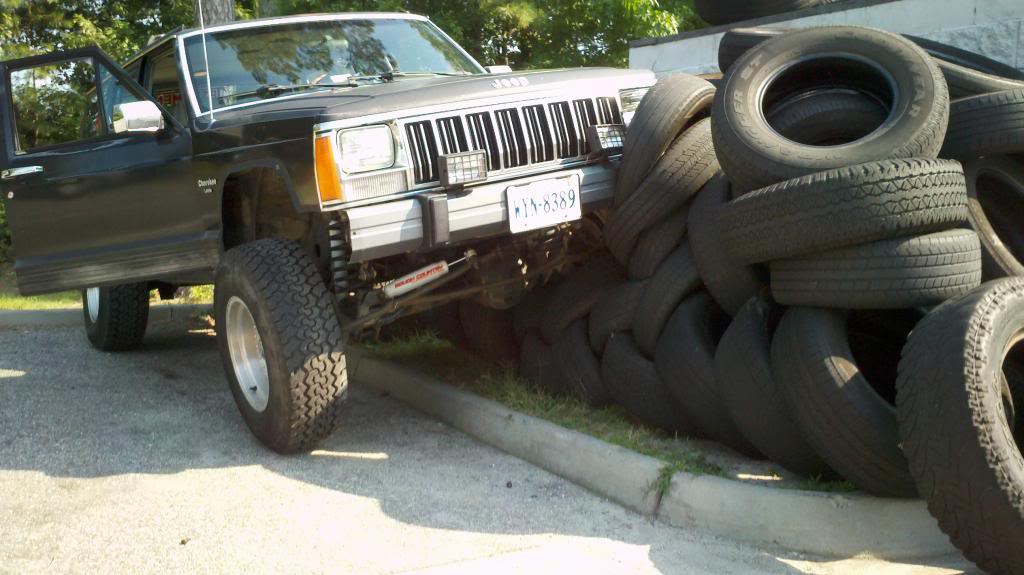
Back to the fun, I work at a Tire shop. So sometimes we end up overloaded with used tires, me and my friend (the YJ owner) decided to make a wall out of them to both be constructive and to climb up it of course. Too bad we didn't stack them right for good climbing jaja

I think it turned out well, also ripped off the corner caps. Personally I like it, I ruined the stock look a while ago.
Nice *** shot
After that I decided to finally do my read drum brakes. I replaced the hardware and shoes, didn't **** with the E-brake hardware though. The only problem I ran into (other than the stupid bull**** drums brakes are) is that one of the new wheel cylinders I bought would not bleed, so I had to deal with that.
Oh wait, I forgot, this actually turned into a pain in the ***. Because I broke both brake lines trying to free them from the old wheel cylinders, so I had to buy about 7ft of brake line and bend them to fit. Not a nice thing to have to do when it's your DD. But yay new shoes.
Back to the fun, I work at a Tire shop. So sometimes we end up overloaded with used tires, me and my friend (the YJ owner) decided to make a wall out of them to both be constructive and to climb up it of course. Too bad we didn't stack them right for good climbing jaja
Thread Starter
Member
Joined: May 2010
Posts: 196
Likes: 0
From: Newport News,VA
Year: 1992
Model: Cherokee (XJ)
Engine: 4.0L I6 H.O.
Oh boy I havn't updated this in a while. A lot of things of gone on, both Jeep related and not! But back to the jeep related stuff, keeping within sections since it'll get stupid.
After StarrMotors '12. I ended up finally saying **** it and fixing my RMS for the second time. I had a lot more time to fix it, and was very determined to replace the whole thing.
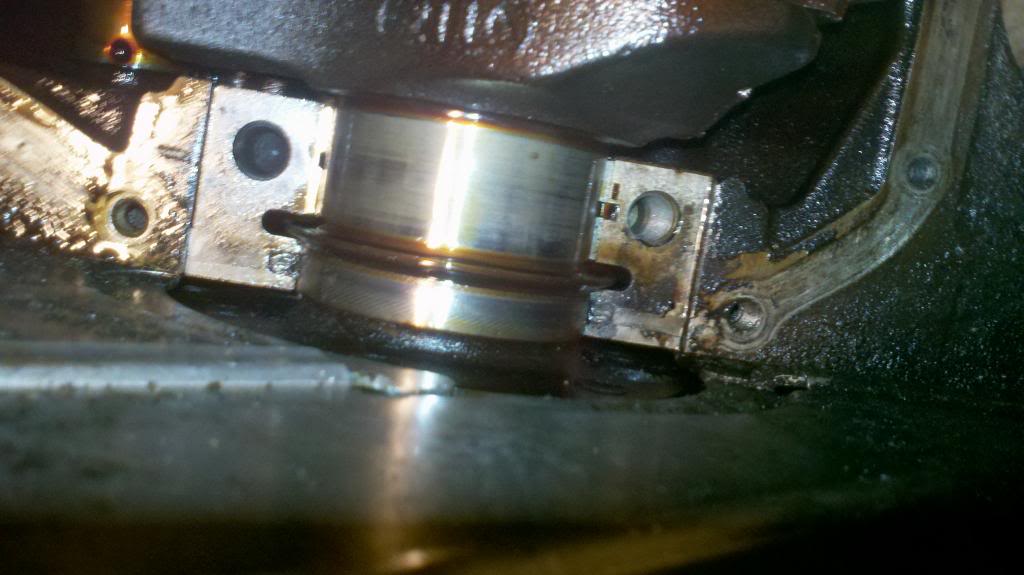
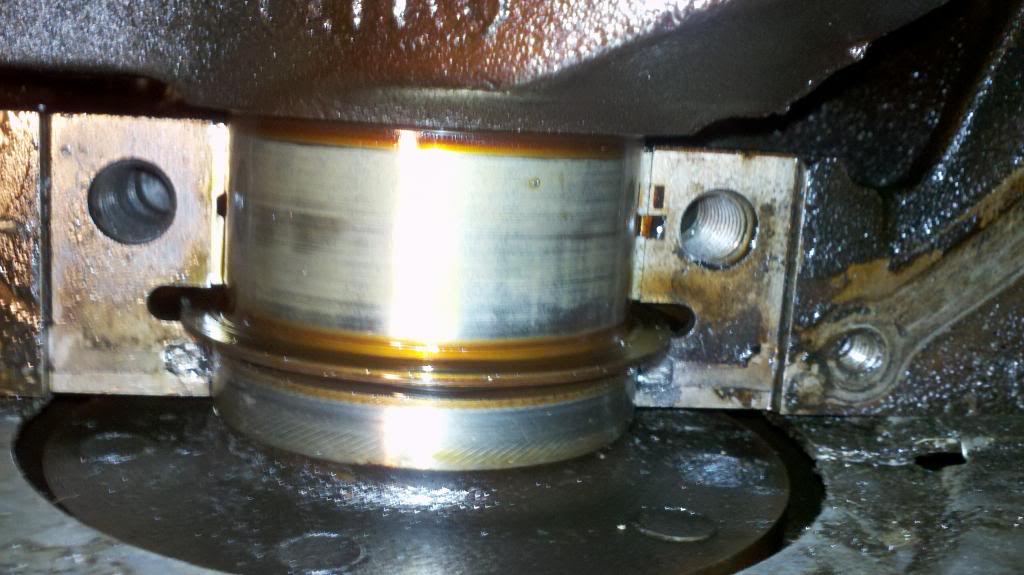
While putting the new top portion of the seal in, lubed up with soap, I ended up ripping it a little, luckily for me I bought two seals just in case
For a while I noticed no leaks, started using SynPower 10w30 oil and was very happy. In the future I found that oil was slowly dripping on the same spot (A LOT SLOWER), and after investigation I found that it is part of the my Head Gasket that is leaking oil. However it's only leaking oil to the outside, my coolant and oil are both uncontaminated.
Of course one good fix it up project deserves another shortly after my XJ decided to shut down while driving to work! I didn't notice it at first, till I realized my steering wheel was a tad difficult, looked at my dash, hmmm no rpms. Put her in neutral and coasted to a side road to investigate. After trying to start the engine I noted it would crank all day, but no starting the 'controlled' explosions. Called my work (Tread Quarters), and asked for the best towing company for the mile worth of travel to work (yeh haha).
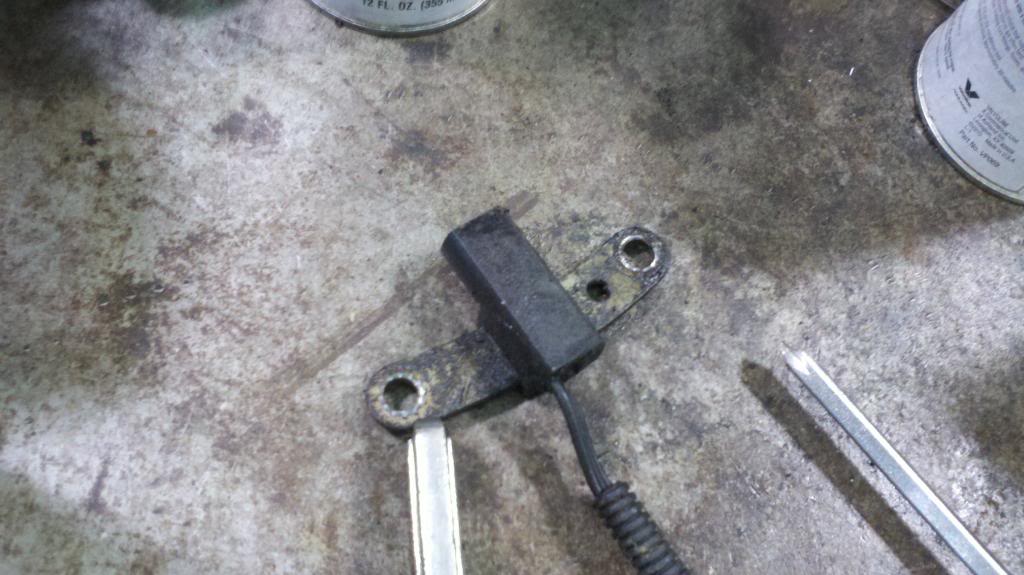
George The Master of Labor Hours Mechanic and I took a few looks: Fuel, yep, spark nope, compression should be. Seems to be the Crank Position Sensor, oh noes.

After installation I set her back on all 4 wheels and gave her a crank. No starting. George said that I have fuel now (which, I did before, but whatever, SQUIRT SQUIRT), and now it must be my ****ty Accel Ignition Coil, seems logical, they have been known to fail. Turns out it wasn't the coil, however I did let my YJ buddy have it since I went and bough a new OEM coil. The Accel coil died on him a year later.
But back to my XJ. FOUND THE PROBLEM BUBBA:
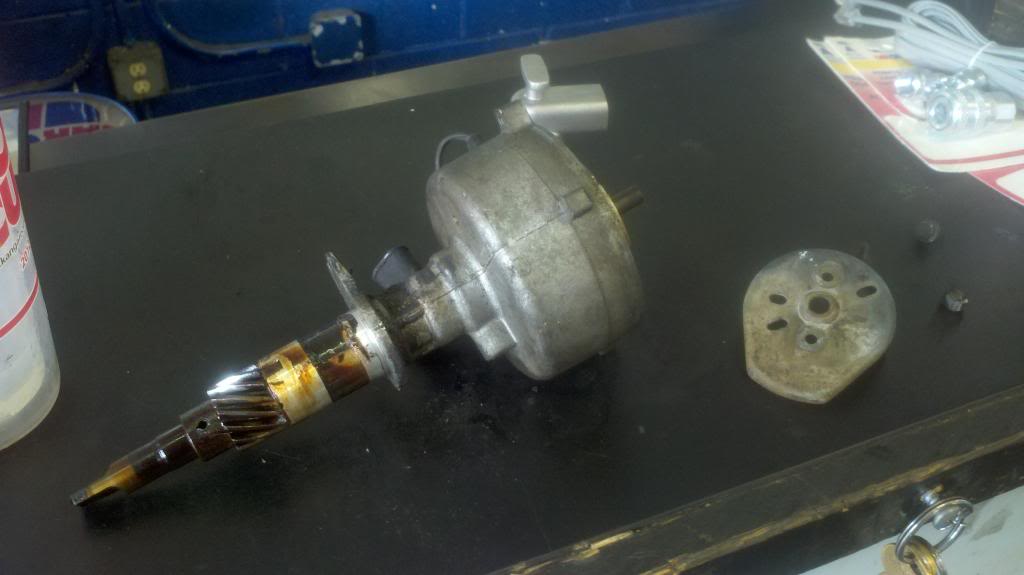
Ended up buying a new CPS, Ignition Coil, and Refurb Distributor for my XJ in the span of 2days. All because a damn magnet that is part of the Hall Effort Sensor that detects the position of the Cam decided to fling out. You could tell where it was rubbing on the spinning disc (don't know the real name) though. Pretty bizarre and full of grenades.
After StarrMotors '12. I ended up finally saying **** it and fixing my RMS for the second time. I had a lot more time to fix it, and was very determined to replace the whole thing.
Got to here:
This is where I got frustrated last time and gave up. Can't do that this time! After loosening two caps, lots of cussing, and finally saying **** it and switching hammers I was using to punch BAM it finally came out.
AfterMath of my rage:
AfterMath of my rage:
While putting the new top portion of the seal in, lubed up with soap, I ended up ripping it a little, luckily for me I bought two seals just in case
For a while I noticed no leaks, started using SynPower 10w30 oil and was very happy. In the future I found that oil was slowly dripping on the same spot (A LOT SLOWER), and after investigation I found that it is part of the my Head Gasket that is leaking oil. However it's only leaking oil to the outside, my coolant and oil are both uncontaminated.
After tackling a stupid fix that should have been fixed a while ago. I decided it's time to be able to wash my rear window and retrieve a new to me pcv valve.
Of course one good fix it up project deserves another shortly after my XJ decided to shut down while driving to work! I didn't notice it at first, till I realized my steering wheel was a tad difficult, looked at my dash, hmmm no rpms. Put her in neutral and coasted to a side road to investigate. After trying to start the engine I noted it would crank all day, but no starting the 'controlled' explosions. Called my work (Tread Quarters), and asked for the best towing company for the mile worth of travel to work (yeh haha).
George The Master of Labor Hours Mechanic and I took a few looks: Fuel, yep, spark nope, compression should be. Seems to be the Crank Position Sensor, oh noes.
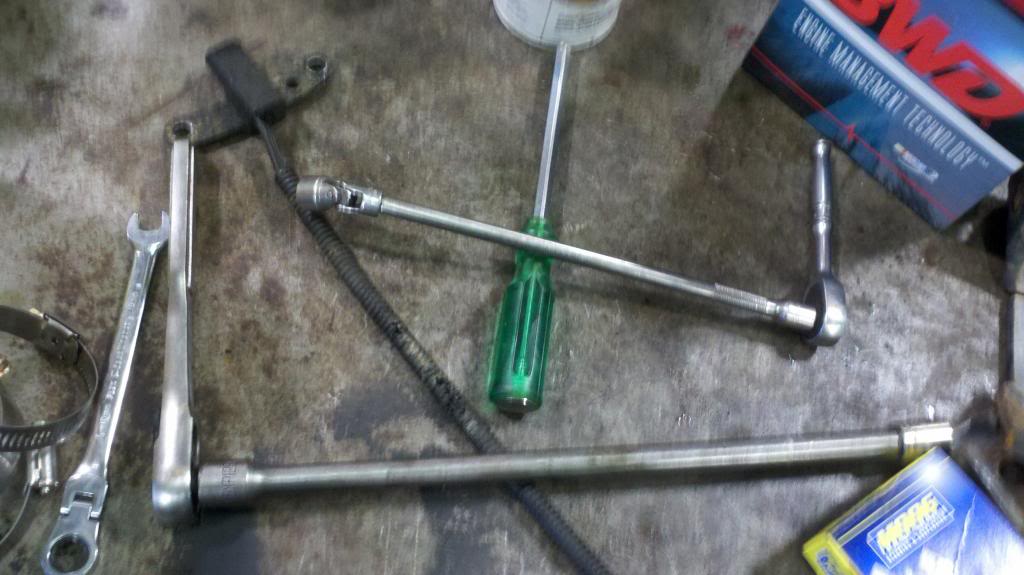
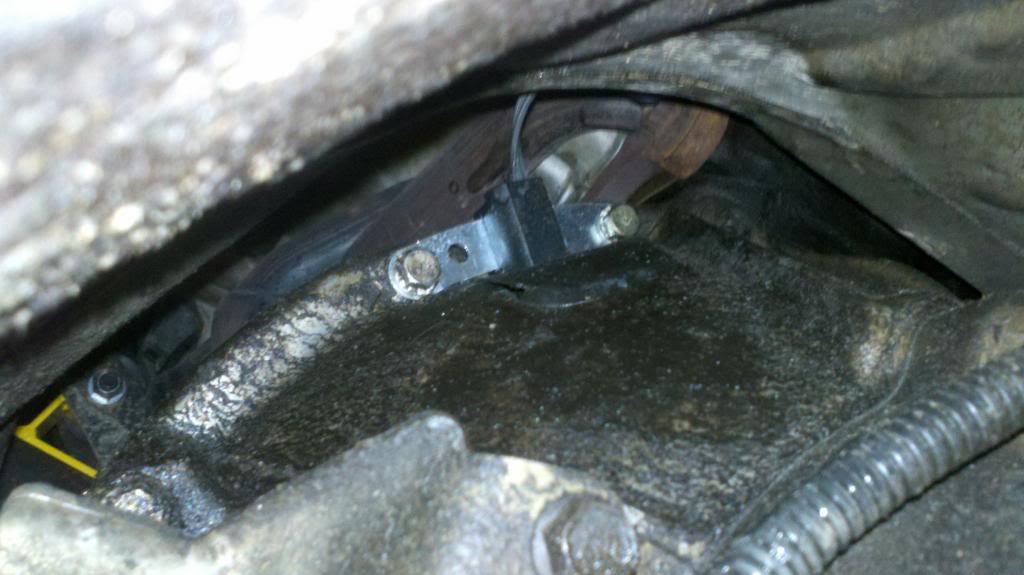
My assembly of tools to wrestle this thing out even under a car lift:
New CPS in it's fancy home:
After installation I set her back on all 4 wheels and gave her a crank. No starting. George said that I have fuel now (which, I did before, but whatever, SQUIRT SQUIRT), and now it must be my ****ty Accel Ignition Coil, seems logical, they have been known to fail. Turns out it wasn't the coil, however I did let my YJ buddy have it since I went and bough a new OEM coil. The Accel coil died on him a year later.
But back to my XJ. FOUND THE PROBLEM BUBBA:
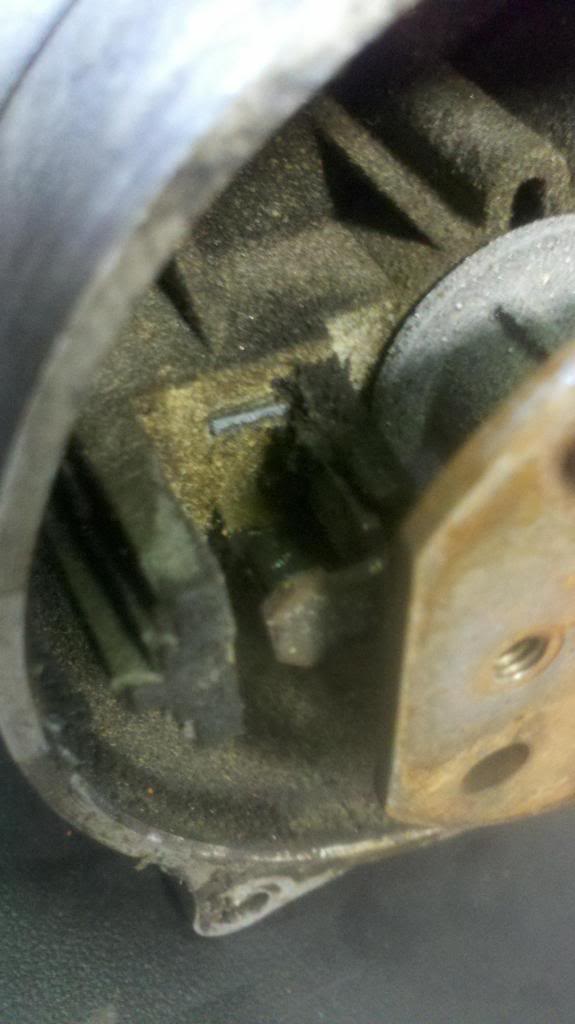
Only one sensor left to check besides wire hell.
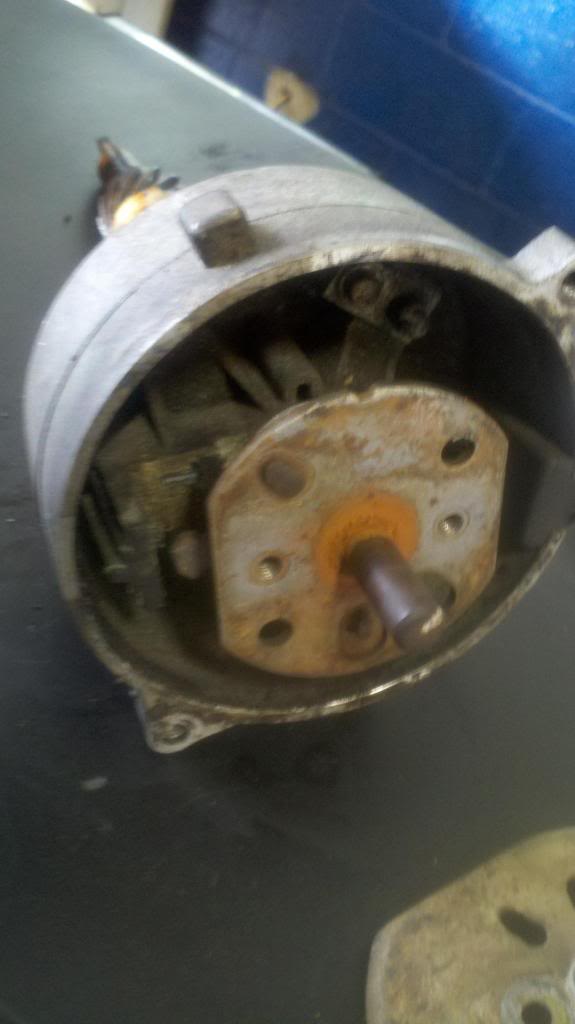
JAJA, oh wow something is missing:
Yep, Something is diffidently missing from this:
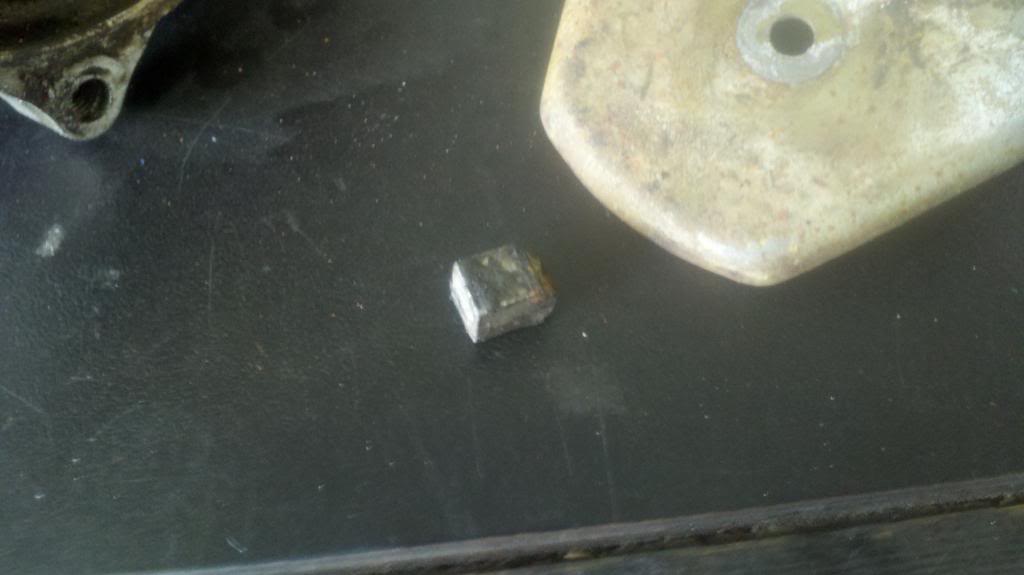
FOUND IT, wonder if hot glue will work! Pro-tip, didn't bother to try 
Ended up buying a new CPS, Ignition Coil, and Refurb Distributor for my XJ in the span of 2days. All because a damn magnet that is part of the Hall Effort Sensor that detects the position of the Cam decided to fling out. You could tell where it was rubbing on the spinning disc (don't know the real name) though. Pretty bizarre and full of grenades.
Thread Starter
Member
Joined: May 2010
Posts: 196
Likes: 0
From: Newport News,VA
Year: 1992
Model: Cherokee (XJ)
Engine: 4.0L I6 H.O.
Gotta dig the ditch out at work somehow.
Back to the improvements and fixing leaks. This time it's coolant from the weep hole in the Water Pump, lovely. I ****ing hate dealing with coolant now, and this is the beginning of my hatred.
Old T-stat housing and Water Pump:
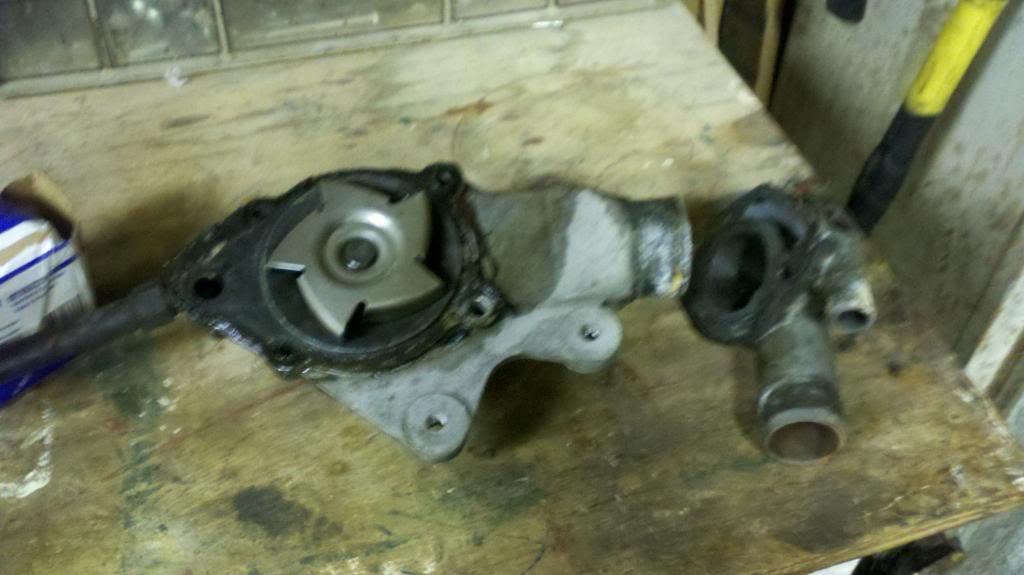
Partially put together, I ditched the pipe that came off the water pump that lead to the heater core. I instead installed a hose barb and a longer hose. Someone posted the mod on the forums and I decided why not. Also painted!
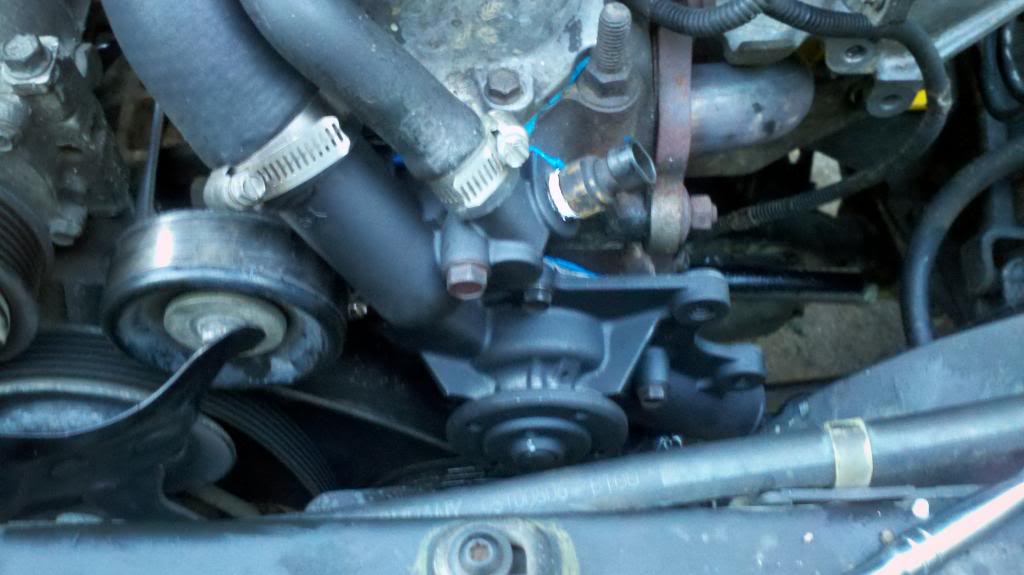
Installed fully and running:
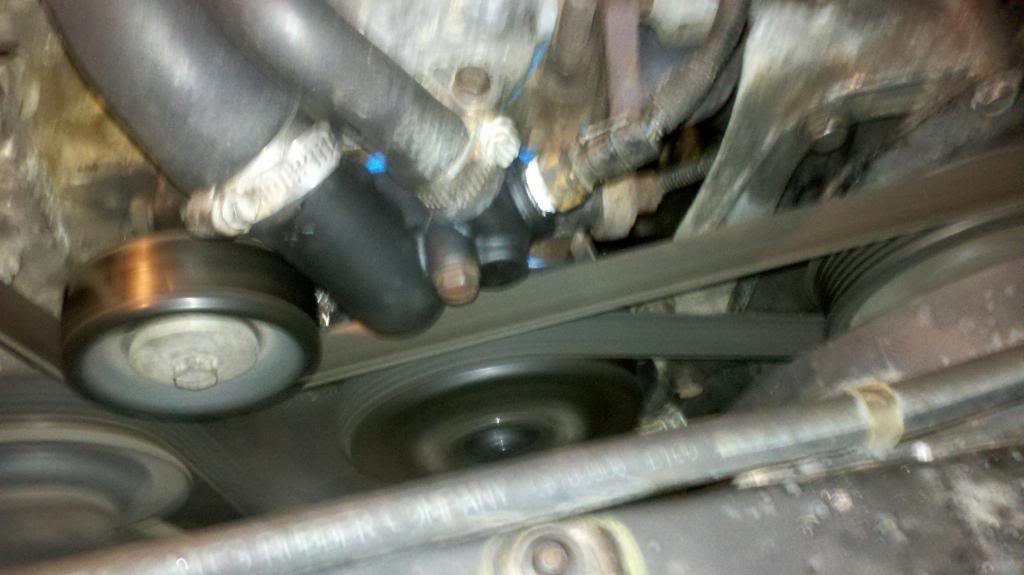
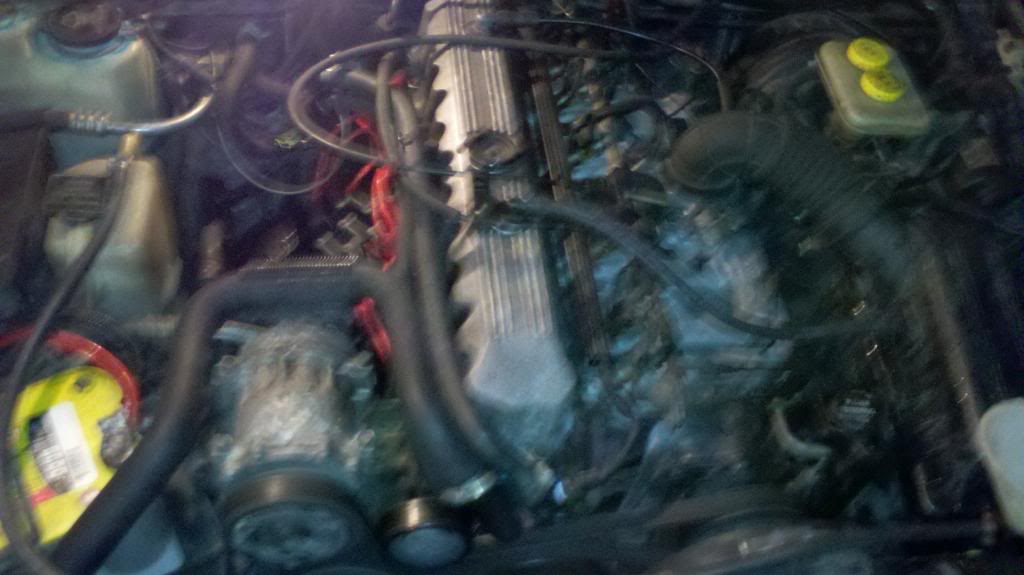
The much needed current at the time, blurry, Engine bay picture:
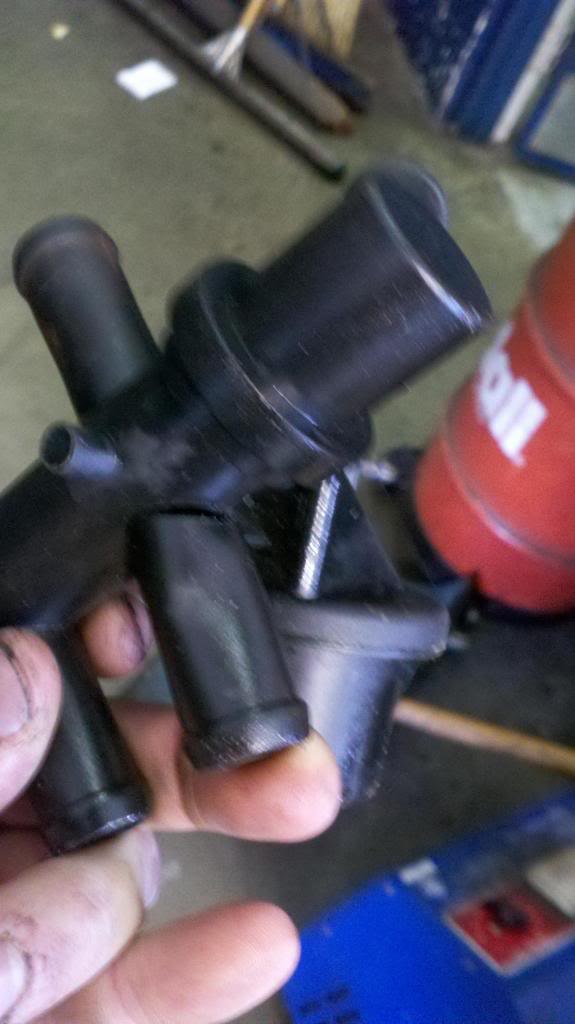
Now this is where my true trouble began. First things first, while driving to school, saw a little steam. Turned out my upper hose needed to be tightened, ok that's fine and easy! Then my hose to the heater core control valve was leaking, urgh ok. I tightened that one at school, and then pisssssssssssssssssss coolant. I shattered the valve. I managed a "trail fix" and looped from water pump to T-stat housing to skip the valve for now. Ended up having to stop at a really fancy bank to get water from the water fountain to fill up my radiator haha.Later at work I ordered a new valve, which btw lasted 6 months.
Did I mention my T-stat housing started to leak later too? Yeh, had to do a new gasket. Noticed that the bottom bolt didn't have a washer. IN the present era, I have discovered that it's the wrong bolt, don't know how that happened, grabbed a bolt off a wrecked xj later with a washer and was longer, oh look better sealing action!

Thread
Thread Starter
Forum
Replies
Last Post
bradleyheathhays
Stock XJ Cherokee Tech. All XJ Non-modified/stock questions go here
9
Oct 21, 2024 09:27 AM
Currently Active Users Viewing This Thread: 1 (0 members and 1 guests)